この記事の対象読者
このチュートリアルは、以下のような人に向けたものです。
- Webアプリを作ってみたい初学者
- Node.jsを使ってみたい人
- Next.jsを使ってみたい人
- Dockerあんまりわかんない人
この記事のゴール
Next.js(フロントエンド)+ Express.js(バックエンド)+ MySQL(データベース)+ Docker(開発環境) を使って、超シンプルな Web アプリを作ります!
前提条件
- ホストOS: MacOS
- Dockerインストール済み
- エディタ:Cursor
- プログラミングの基礎はわかる
- データベースも少しわかる
Dockerについて学びたい人は以下の無料の書籍がおすすめです。
今回の背景
Webアプリエンジニアとして半年が経ち、何かアウトプットを残したいと思い記事を書きました。今回は、AIコードエディタ Cursor を試してみたかったので、アプリのコードとデザインを AI に実装してもらいました。さらに、Node.js をローカルにインストールしなくても、Docker さえあれば Web アプリを作れる環境 を整えました。
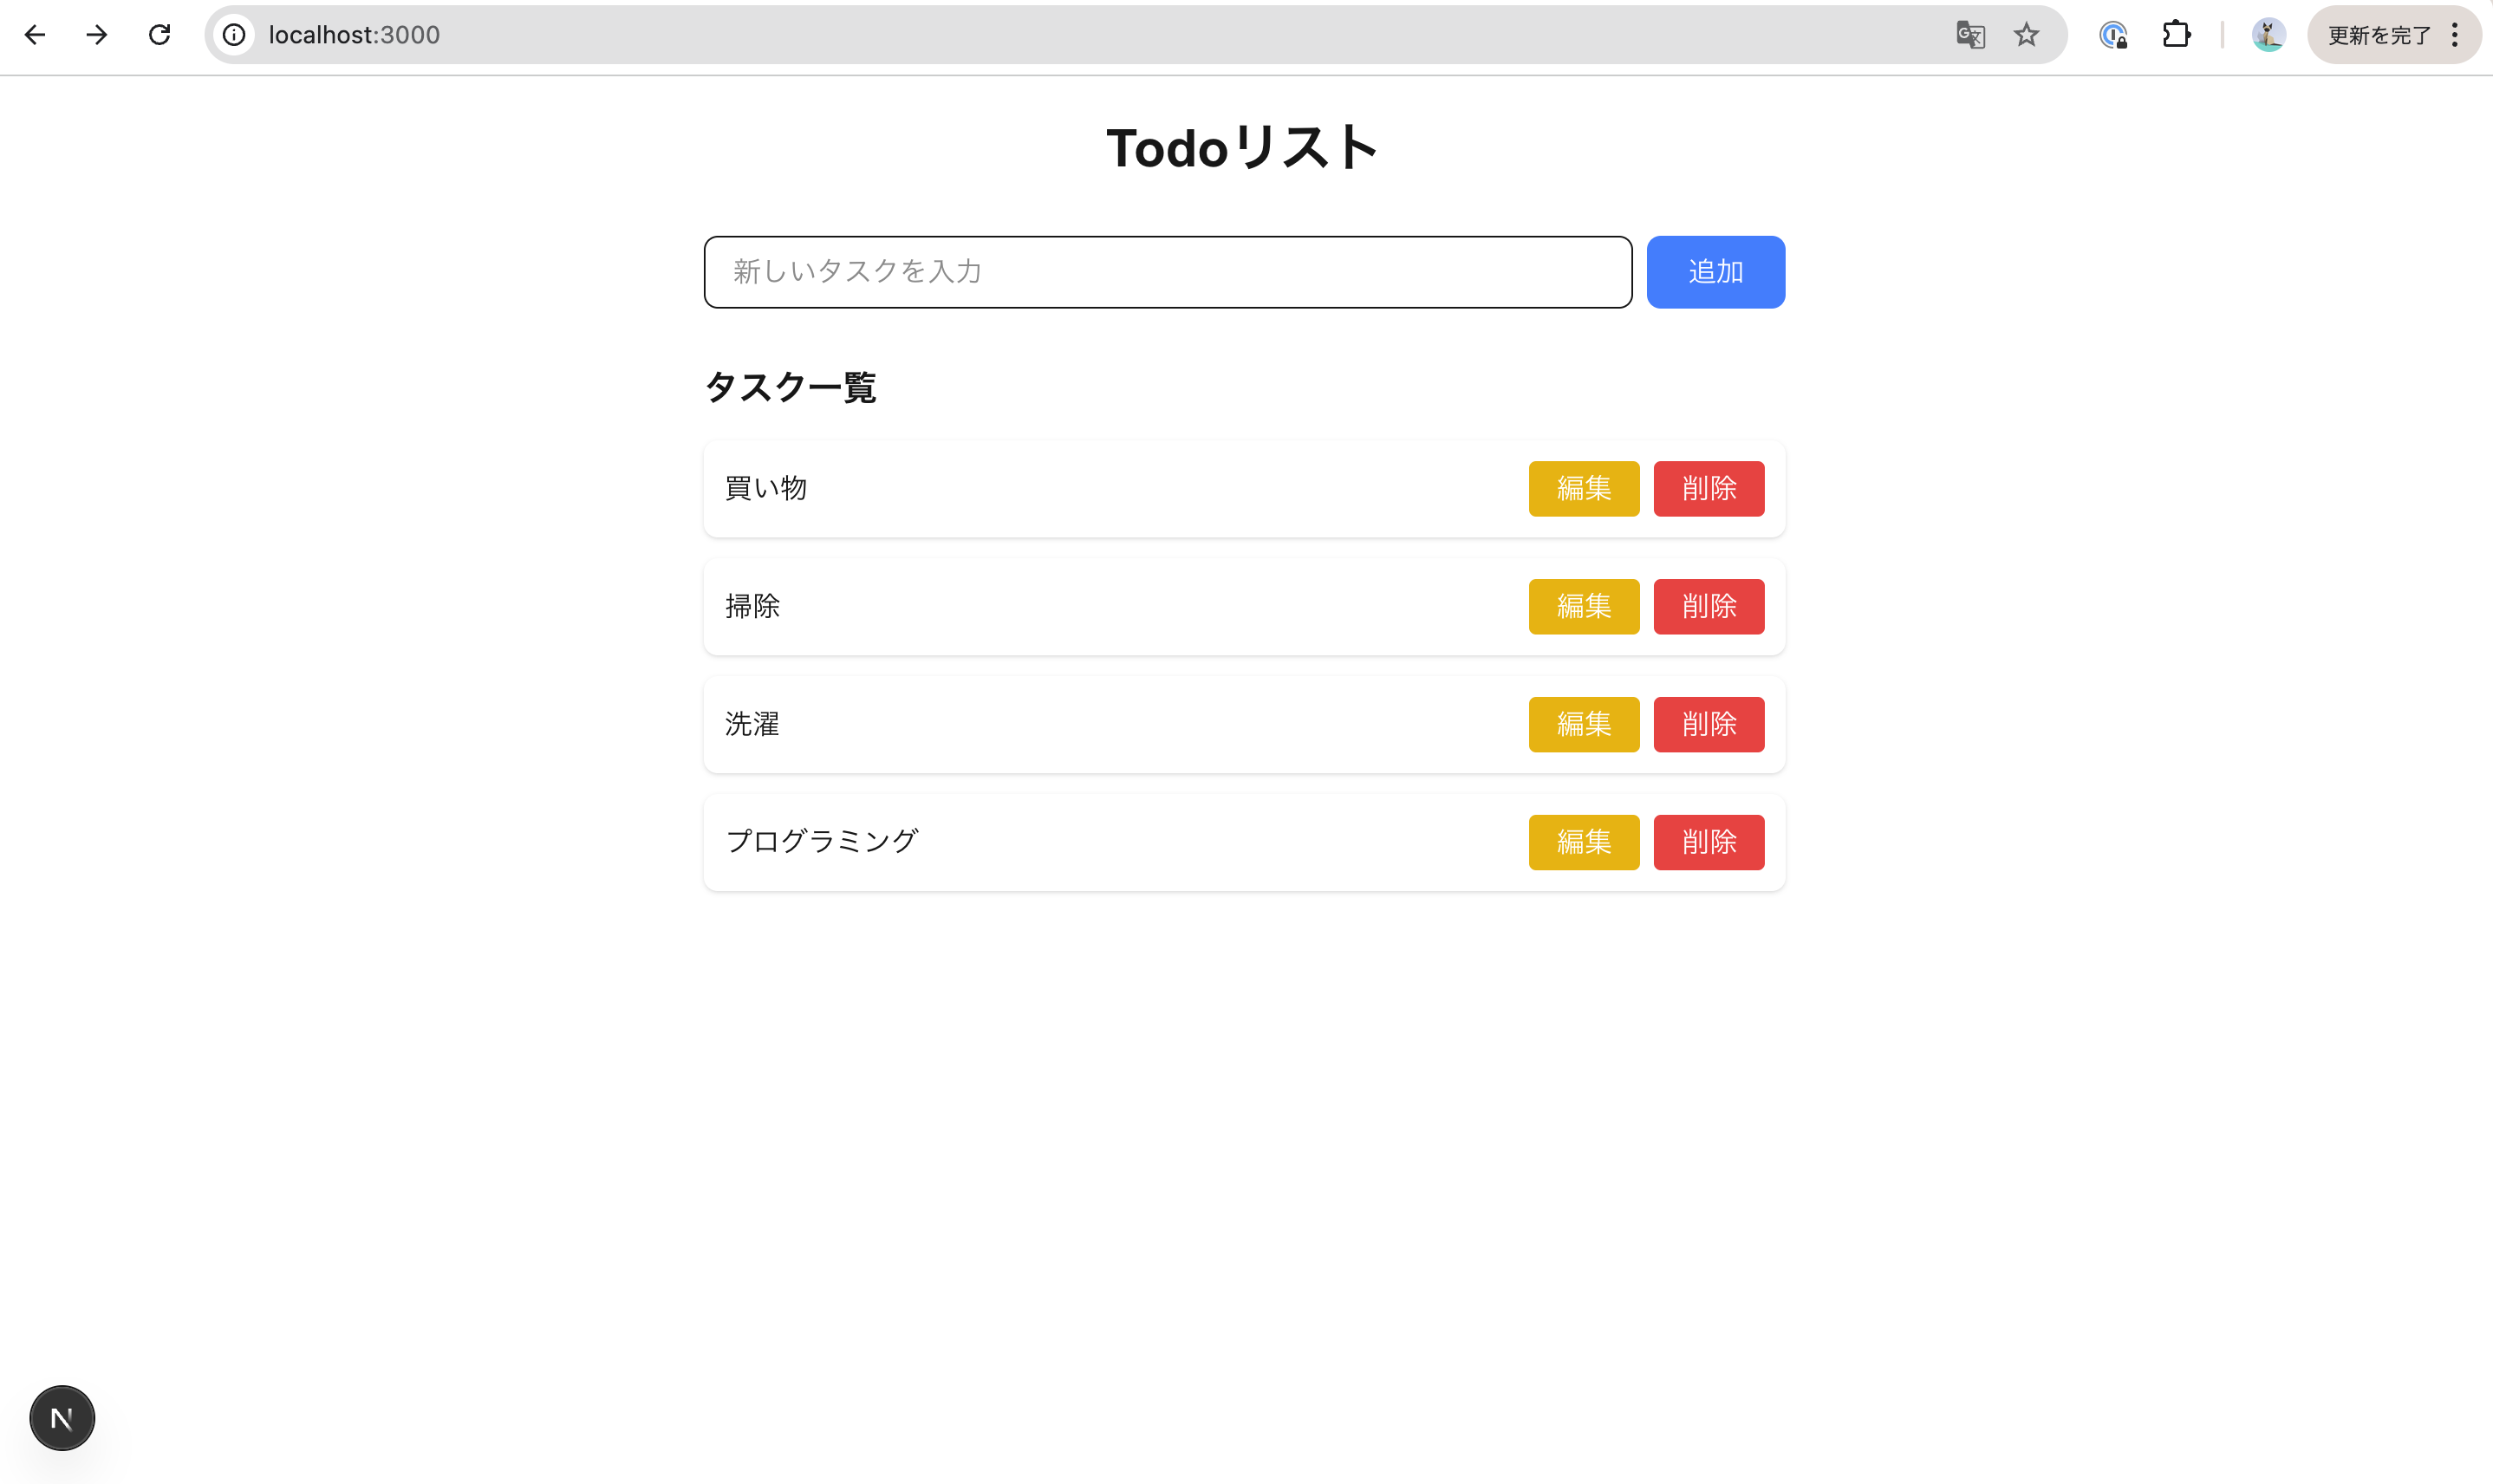
今回の成果物
1.必要ファイルの用意
まず、プロジェクトのディレクトリ構成を作成します。
my-app/
├── api/          # Express (バックエンド)
│
├── web/         # Next (フロントエンド)
│
├── Dockerfile
│
├── docker-compose.yml
│
└──.env
Dockerfileの作成
最小限の Dockerfile を作成し、コンテナ内で Node.js を動かせるようにします。
FROM node:jod-slim

WORKDIR /home

RUN apt-get update && apt-get install -y bash

COPY . .
-
FROM node:jod-slim→ 軽量な Node.js の公式 Docker イメージを使用 -
WORKDIR /home→/homeディレクトリを作業ディレクトリに設定 -
RUN apt-get update && apt-get install -y bash→ 必要なパッケージをインストール
docker-compose.yml の作成
コンテナの構成を管理する docker-compose.yml を作成します。
services:
  db:
    image: mysql:9.2.0
    ports:
      - ${MYSQL_PORT}:${MYSQL_PORT}
    environment:
      MYSQL_ROOT_PASSWORD: ${MYSQL_ROOT_PASSWORD}" #rootユーザーのパスワード
      MYSQL_DATABASE: "${MYSQL_DATABASE}" #自動作成されるDB
      MYSQL_USER: "${MYSQL_USER}" #自動作成される一般ユーザー
      MYSQL_PASSWORD: "${MYSQL_PASSWORD}" #ユーザーのパスワード
    volumes:
      - db-data:/var/lib/mysql
  api:
    build: .
    ports:
      - ${API_PORT}:${API_PORT}
    environment:
      NODE_ENV: "${NODE_ENV}"
    volumes:
      - ./api:/home/api
    depends_on:
      - db
  web:
    build: .
    ports:
      - ${WEB_PORT}:${WEB_PORT}
    volumes:
      - ./web:/home/web
    depends_on:
      - api

volumes:
  db-data:
-
db→ MySQL のコンテナ -
api→ Express のコンテナ(バックエンド) -
web→ Next.js のコンテナ(フロントエンド)
環境変数の設定(.env)
環境変数を .env にまとめ、設定の変更を簡単にします。
DB_HOST=db
MYSQL_ROOT_PASSWORD=password
MYSQL_DATABASE=mydatabase
MYSQL_USER=user
MYSQL_PASSWORD=passw0rd
MYSQL_PORT=3306
NODE_ENV=development
API_PORT=8000
WEB_PORT=3000
⚠️ .env は公開しないように注意!(.gitignore に追加)
2.必要パッケージのインストール
API コンテナ(Express)
コンテナを起動して Express の必要なパッケージをインストールします。
準備完了したので以下のコマンドを実行してapiコンテナを実行
docker compose run -it api /bin/bash
コンテナ内で以下を実行:
cd api
npm init -y
npm install express
npm install - D nodemon
npm install mysql2
npm install typescript
npm install dotenv
npm install cors
npm install ts-node @types/node @types/express @types/cors
npx tsc --init
exit
WEB コンテナ(Next.js)
docker compose run -it web /bin/bash
Next.jsは今回はTypeSciptで書きます。
cd web
npx create-next-app@latest .
3.アプリを立ち上げる
フォルダの整理
project-root/
├── api/
│    ├── Dockerfile     #追加
│    ├── index.ts       #追加
│    └── package.json   #変更
│
├── web/
│    └── Dockerfile     #追加
│
├── Dockerfile         #削除
│
├── docker-compose.yml  #変更
│
└──.env
API の Dockerfile
FROM node:jod-slim

WORKDIR /home/api

RUN apt-get update && apt-get install -y \
  bash \
  curl \
  vim

COPY . .

RUN npm install

CMD ["npm", "run", "dev"]

EXPOSE 8000
Express アプリの作成
import express, { Request, Response } from 'express';

const app = express();
const port = 8000;

app.get('/', (req: Request, res: Response) => {
  res.send('Hello TypeScript + Express!');
});

app.listen(port, () => {
  console.log(`Server running at port:${port}`);
});
APIの package.json
{
  "name": "api",
  "version": "1.0.0",
  "main": "index.js",
  "scripts": {
    "dev": "nodemon --exec ts-node index.ts",
    "test": "echo \"Error: no test specified\" && exit 1"
  },
  "author": "",
  "license": "ISC",
  "description": "",
  "dependencies": {
    "@types/cors": "^2.8.17",
    "@types/express": "^5.0.1",
    "@types/node": "^22.13.14",
    "cors": "^2.8.5",
    "dotenv": "^16.4.7",
    "express": "^4.21.2",
    "mysql2": "^3.14.0",
    "ts-node": "^10.9.2",
    "typescript": "^5.8.2"
  },
  "devDependencies": {
    "nodemon": "^3.1.9"
  },
  "nodemonConfig": {
    "exec": "ts-node ./index.ts",
    "ext": "ts",
    "delay": 1
  }
}
Webの Dockerfile
FROM node:jod-slim

WORKDIR /home/web

RUN apt-get update && apt-get install -y \
  bash \
  curl \
  vim

COPY . .

RUN npm install

CMD ["npm", "run", "dev"]

EXPOSE 3000
docker-compose.yml ファイル
services:
  db:
    image: mysql:9.2.0
    ports:
      - ${MYSQL_PORT}:${MYSQL_PORT}
    environment:
      MYSQL_ROOT_PASSWORD: ${MYSQL_ROOT_PASSWORD}" #rootユーザーのパスワード
      MYSQL_DATABASE: "${MYSQL_DATABASE}" #自動作成されるDB
      MYSQL_USER: "${MYSQL_USER}" #自動作成される一般ユーザー
      MYSQL_PASSWORD: "${MYSQL_PASSWORD}" #ユーザーのパスワード
    volumes:
      - db-data:/var/lib/mysql
  api:
    build: ./api
    ports:
      - ${API_PORT}:${API_PORT}
    env_file:
      - .env
    volumes:
      - ./api:/home/api
    depends_on:
      - db
  web:
    build: ./web
    ports:
      - ${WEB_PORT}:${WEB_PORT}
    volumes:
      - ./web:/home/web
    depends_on:
      - api

volumes:
  db-data:
アプリの起動
docker compose up --build
-
localhost:3000→ Next.js の初期画面 -
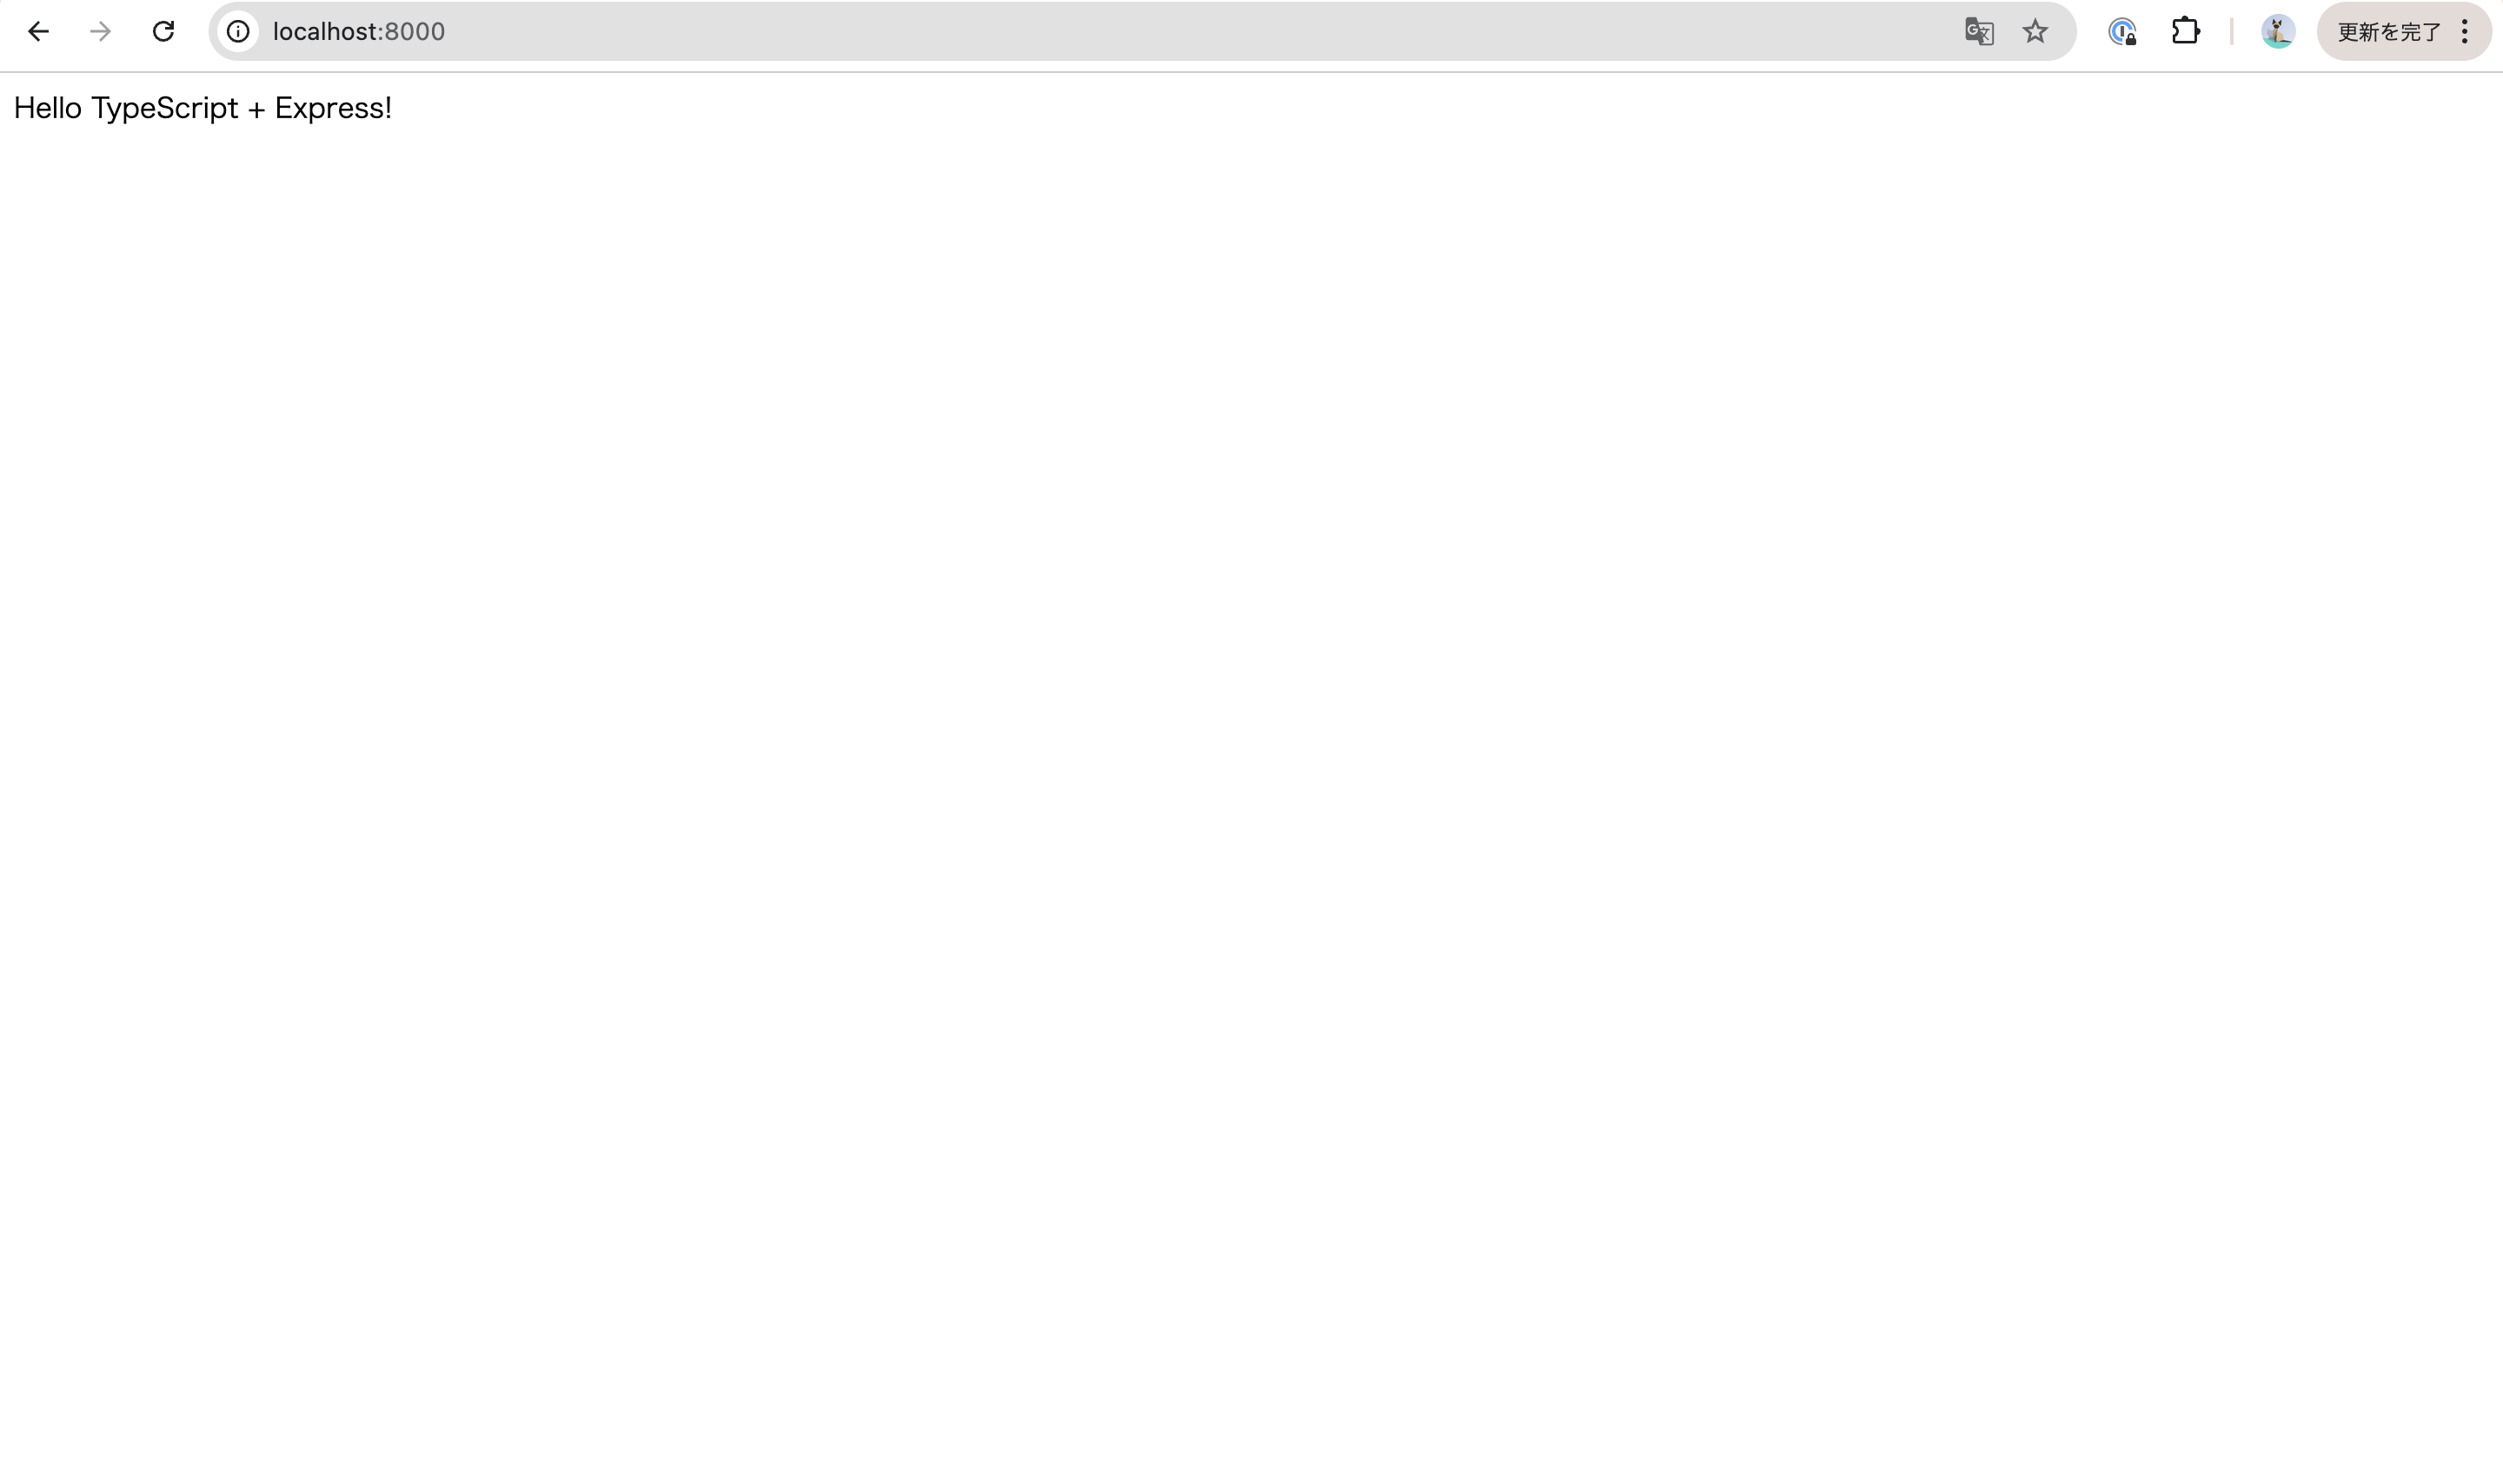
localhost:8000→ Express のHello TypeScript + Express!
4.MySQLと接続する
MySQL コンテナに入る
コンテナを立ち上げた状態で別のターミナルを立ち上げ以下を実行する
docker compose exec db /bin/bash
MySQL に接続:
mysql -D mydatabase -u user -p
パスワードを入力(.env の MYSQL_PASSWORD)。
テーブルを作成
CREATE TABLE Test (
  id int AUTO_INCREMENT PRIMARY KEY,
  item VARCHAR(10)
);
5. CRUD API の作成
api/index.ts に CRUD 処理を実装します。
今回はCursorにお願いして書いてもらいました。
import express, { Request, Response } from 'express';
import mysql, { PoolOptions } from 'mysql2/promise';
import 'dotenv/config';
import cors from 'cors';


const app = express();
const port = 8000;

// CORSの設定
app.use(cors({
  origin: 'http://localhost:3000', // Next.jsのフロントエンドのURL
  methods: ['GET', 'POST', 'PUT', 'DELETE'],
  credentials: true
}));

app.use(express.json()); // JSON ミドルウェア追加

const access: PoolOptions = {
  host: process.env.DB_HOST || 'db',
  user: process.env.MYSQL_USER,
  password: process.env.MYSQL_PASSWORD,
  database: process.env.MYSQL_DATABASE,
  waitForConnections: true,
  connectionLimit: 10,
  maxIdle: 10,
  idleTimeout: 60000,
  queueLimit: 0,
  enableKeepAlive: true,
  keepAliveInitialDelay: 0,
};
console.log(access)

// グローバルでコネクションプールを作成
const pool = mysql.createPool(access);

app.get('/', (req: Request, res: Response) => {
  res.send('Hello TypeScript + Express!');
});

// データを取得
app.get('/get-items', async (req: Request, res: Response) => {
  try {
    const [items] = await pool.execute(`SELECT * FROM Test`);
    res.json(items);
  } catch (err) {
    console.error(err);
    res.status(500).json({ error: 'データの取得に失敗しました' });
  }
});

// データを追加
app.post('/create', async (req: Request, res: Response) => {
  try {
    const { item } = req.body;

    if (typeof item === 'string' && item.trim() !== '') {
      await pool.execute(`INSERT INTO Test (item) VALUES (?)`, [item]);
      res.json({ message: 'データが追加されました' });
    } else {
      res.status(400).json({ error: '有効な文字列を入力してください' });
    }
  } catch (err) {
    console.error(err);
    res.status(500).json({ error: 'データの追加に失敗しました' });
  }
});

app.post('/update', async (req: Request, res: Response) => {
  try {
    const { id, item } = req.body;
    await pool.execute(`UPDATE Test SET item = ? WHERE id = ?`, [item, id]);
    res.json({ message: 'データが更新されました' });
  } catch (err) {
    console.error(err);
    res.status(500).json({ error: 'データの更新に失敗しました' });
  }
});

app.post('/delete', async (req: Request, res: Response) => {
  try {
    const { id } = req.body;
    await pool.execute(`DELETE FROM Test WHERE id = ?`, [id]);
    res.json({ message: 'データが削除されました' });
  } catch (err) {
    console.error(err);
    res.status(500).json({ error: 'データの削除に失敗しました' });
  }
});

app.listen(port, () => {
  console.log(`Server running at port:${port}`);
});
6. フロントエンドの実装
Next.js で CRUD を実装します。
フロントエンドもCursorに書いてもらいます。AIすごい。
'use client';

import { useEffect, useState } from 'react';

interface Item {
  id: number;
  item: string;
}

export default function Home() {
  const [items, setItems] = useState<Item[]>([]);
  const [editingId, setEditingId] = useState<number | null>(null);
  const [editText, setEditText] = useState('');

  useEffect(() => {
    const fetchItems = async () => {
      try {
        const response = await fetch('http://localhost:8000/get-items');
        const data = await response.json();
        setItems(data);
      } catch (error) {
        console.error('アイテムの取得に失敗しました:', error);
      }
    };

    fetchItems();
  }, [items]);

  const handleSubmit = async (e: React.FormEvent<HTMLFormElement>) => {
    e.preventDefault();
    const form = e.target as HTMLFormElement;
    const formData = new FormData(form);
    const item = formData.get('item') as string;

    try {
      if (item === '') {
        throw new Error('文字を入力してください');
      } else {
        const response = await fetch('http://localhost:8000/create', {
          method: 'POST',
          headers: {
            'Content-Type': 'application/json',
          },
          body: JSON.stringify({ item }),
        });

        if (!response.ok) {
          throw new Error('データの追加に失敗しました');
        }

        const fetchResponse = await fetch('http://localhost:8000/get-items');
        const updatedItems = await fetchResponse.json();
        setItems(updatedItems);
        form.reset();
      }
    } catch (error) {
      console.error('エラー:', error);
    }
  }

  const handleDelete = async (id: number) => {
    try {
      const response = await fetch('http://localhost:8000/delete', {
        method: 'POST',
        headers: {
          'Content-Type': 'application/json',
        },
        body: JSON.stringify({ id }),
      });

      if (!response.ok) {
        throw new Error('データの削除に失敗しました');
      }

      setItems(items.filter((item) => item.id !== id));
    } catch (error) {
      console.error('エラー:', error);
    }
  }

  const handleEdit = (item: Item) => {
    setEditingId(item.id);
    setEditText(item.item);
  };

  const handleUpdate = async (id: number) => {
    try {
      const response = await fetch('http://localhost:8000/update', {
        method: 'POST',
        headers: {
          'Content-Type': 'application/json',
        },
        body: JSON.stringify({ id, item: editText }),
      });

      if (!response.ok) {
        throw new Error('データの更新に失敗しました');
      }

      setItems(items.map(item =>
        item.id === id ? { ...item, item: editText } : item
      ));
      setEditingId(null);
    } catch (error) {
      console.error('エラー:', error);
    }
  };

  return (
    <div className="max-w-2xl mx-auto p-6">
      <h1 className="text-3xl font-bold mb-8 text-center">Todoリスト</h1>

      <form onSubmit={handleSubmit} className="mb-8">
        <div className="flex gap-2">
          <input
            type="text"
            name="item"
            className="flex-1 px-4 py-2 border rounded-lg focus:outline-none focus:ring-2 focus:ring-blue-500"
            placeholder="新しいタスクを入力"
          />
          <button
            type="submit"
            className="px-6 py-2 bg-blue-500 text-white rounded-lg hover:bg-blue-600 transition-colors"
          >
            追加
          </button>
        </div>
      </form>

      <div>
        <h2 className="text-xl font-semibold mb-4">タスク一覧</h2>
        <ul className="space-y-3">
          {items.map((item) => (
            <li
              key={item.id}
              className="flex items-center gap-2 p-3 bg-white rounded-lg shadow-sm hover:shadow-md transition-shadow"
            >
              {editingId === item.id ? (
                <>
                  <input
                    type="text"
                    value={editText}
                    onChange={(e) => setEditText(e.target.value)}
                    className="flex-1 px-3 py-1 border rounded focus:outline-none focus:ring-2 focus:ring-blue-500"
                  />
                  <button
                    onClick={() => handleUpdate(item.id)}
                    className="px-4 py-1 bg-green-500 text-white rounded hover:bg-green-600 transition-colors"
                  >
                    保存
                  </button>
                  <button
                    onClick={() => setEditingId(null)}
                    className="px-4 py-1 bg-gray-500 text-white rounded hover:bg-gray-600 transition-colors"
                  >
                    キャンセル
                  </button>
                </>
              ) : (
                <>
                  <span className="flex-1">{item.item}</span>
                  <button
                    onClick={() => handleEdit(item)}
                    className="px-4 py-1 bg-yellow-500 text-white rounded hover:bg-yellow-600 transition-colors"
                  >
                    編集
                  </button>
                </>
              )}
              <button
                onClick={() => handleDelete(item.id)}
                className="px-4 py-1 bg-red-500 text-white rounded hover:bg-red-600 transition-colors"
              >
                削除
              </button>
            </li>
          ))}
        </ul>
      </div>
    </div>
  )
}
まとめ
-
Next.js(フロントエンド)+ Express(バックエンド)+ MySQL + Docker で Web アプリを構築
-
API とデータベースを Docker で管理
-
AI(Cursor)を活用して開発を高速化
簡単に Web アプリを作れるので、ぜひ試してみてください! 🚀


