これは Reason ML Advent Calendar の7日目です。17日目に登録してたのですが少し遡ります。
OCaml 側から ReasonML に興味を持ってみたけど Web だの JS だの全くわからんぴょんで、ReasonML にたどり着くまでに一悶着あったので記録しておきます。
※ だいたい webpack の話です。この辺知ってる人はつまらないと思うので他の記事へ… ![]()
今回の目的
ReasonML いじるだけなら実は webpack だのなんだの要らなくて
$ npm install -g bs-platform # BuckleScript platform を入れる
$ bsb -init my-first-app -theme basic-reason # `my-first-app` という BuckleScript に必要な環境を入れたディレクトリを作成してくれる
$ npm run build # OCaml を JS にコンパイル
これだけでOK。
ReasonML QuickStart に書いてある通りですね。
※ bsb -init で作成された README.md には
# Build + Watch

npm run watch
と書いてるのですが npm run でコマンド一覧を出すと
Lifecycle scripts included in my-first-app:
  start
    bsb -make-world -w

available via `npm run-script`:
  build
    bsb -make-world
  clean
    bsb -clean-world
しかないので watch したいときは上記のドキュメント通り npm run start しましょう。
BuckleScript 最初のハマりどころです ![]()
![]()
初期状態で入っている ReasonML ファイルをみると
Js.log("Hello, BuckleScript and Reason!!!!");
と書いてあり、これをビルドすると同じディレクトリ内に
// Generated by BUCKLESCRIPT VERSION 2.1.0, PLEASE EDIT WITH CARE
'use strict';


console.log("Hello, BuckleScript and Reason!!!!");

/*  Not a pure module */
が生成されます。 やったね! ![]()
![]() というサンプルです。
というサンプルです。
これだけだと発展がないので、 localhost になんか描画してみよう、というのが今回の目的です。
環境とか
ちょっと前に AWS Lambda をいじっていた名残で nodebrew とか npm とかは入ってたので、今回はそれらをアップグレードして使います。ウェッブ慣れてきたら yarn とか使ってみるかもです ![]()
nodebrew 0.9.3
npm 5.6.0
node 9.2.1
※ 元々入っていた npm が古すぎて ReasonML のために必要な backlescript をインストールできなかったのでバージョン上げました。
webpack
だいたい webpack ってなんやねんというところからだったのですが、ドキュメント に
At its core, webpack is a static module bundler for modern JavaScript applications.
とあるように、JS のパッケージの依存、互換性などをいい感じにしてくれるやつ (= バンドラー) という理解をしました。他にもいろいろあるようだったのですが、今回参考にした mizchi さんの ReasonML のボイラープレート には webpack が使われていたので倣うことにしました。
webpack のドキュメント がとんでもなく親切で、この QuickStart チュートリアルをやるとだいたいの仕組みが分かるのでとりあえずやるとよいです ![]()
![]()
![]()
$ webpack-demo > npm init -y # package.json が作成される
$ webpack-demo > npm install --save-dev webpack # local に webpack を入れる
$ webpack-demo > ls
 node_modules/           package-lock.json       package.json
初期状態の package.json はこんなんでした
{
   "name": "webpack-demo",
   "version": "1.0.0",
   "description": "",
   "main": "index.js",
   "scripts": {
     "test": "echo \"Error: no test specified\" && exit 1"
   },
   "keywords": [],
   "author": "",
   "license": "ISC"
 }
このあと index.html と "main" のところにある index.js を作っていきます。
<html>
  <head>
    <title>Getting Started</title>
    <script src="https://unpkg.com/lodash@4.16.6"></script>
  </head>
  <body>
    <script src="./src/index.js"></script>
  </body>
</html>
function component() {
  var element = document.createElement('div');

  // Lodash, currently included via a script, is required for this line to work
  element.innerHTML = _.join(['Hello', 'webpack'], ' ');

  return element;
}

document.body.appendChild(component());
ファイルの置き方ですが、ドキュメントによると root の下に /src と /dist を作り、自分がいじるのは /src 以下のもの、その結果を /dist 以下のファイルに出力されるようにする、という分け方をするのがよいらしいです ![]()
First we'll tweak our directory structure slightly, separating the "source" code (/src) from our "distribution" code (/dist). The "source" code is the code that we'll write and edit. The "distribution" code is the minimized and optimized output of our build process that will eventually be loaded in the browser:
index.js は src に、index.html は dist に置くようにしました。
webpack-demo/
 |- package.json
 |- package-lock.json
 |- node_modules/
 |- src/ # 自分がいじるファイルを置く
    |-index.js
 |- dist/ # 出力されるファイルを置く
    |-index.html
bundle.js
あらゆる JS ファイルを import なども全部展開して1つにがつっとまとめたファイルを作り、それを index.html に入れ込む、ということをします。
(別文脈ですが、Lodash の import についてはドキュメント読んでください)
<html>
   <head>
     <title>Getting Started</title>
    <!-- ここにあった script は index.js 側に import することで消えた -->
   </head>
   <body>
     <script src="bundle.js"></script> <!-- "./src/index.js" から変更 -->
   </body>
 </html>
import _ from 'lodash'; // `npm install --save lodash` でローカルに入れる

  function component() {
    var element = document.createElement('div');

    // Lodash, currently included via a script, is required for this line to work
    element.innerHTML = _.join(['Hello', 'webpack'], ' ');

    return element;
  }

  document.body.appendChild(component());
以下のコマンドで bundle.js を作成します。
$ webpack-demo > npx webpack src/index.js dist/bundle.js # webpack ライブラリを実行してるだけ
$ webpack-demo > ls dist  # bundle.js が作成された (めっちゃ長い)
 bundle.js       index.html
$ open dist/index.html # `Hello webpack` が表示される
※ npx はローカルの npm パッケージを実行してくれる便利コマンド ![]()
![]()
webpack.config.js
npx webpack entry output っていちいち打つの面倒なので config file 作っておくと便利です。
const path = require('path');

 module.exports = {
   entry: './src/index.js',
   output: {
     filename: 'bundle.js',
     path: path.resolve(__dirname, 'dist')
   }
 };
これで
$ npx webpack --config webpack.config.js でビルドできる
※ 実は config file 名を webpack.config.js という名前にしておくと、webpack は勝手にそれを config file として認識してくれるみたいです。なので以下のコマンドだけ打てばよい。
$ npx webpack
If a webpack.config.js is present, the webpack command picks it up by default. We use the --config option here only to show that you can pass a config of any name. This will be useful for more complex configurations that need to be split into multiple files.
(--config オプションを付けることで webpack.config.js という名前でないファイルでも config ファイルと認識してくれる)
package.json
$ npx webpack --config webpack.config.js も面倒なので package.json にコマンド定義しておきます ![]()
{
 ...,
 "scripts": {
     "build": "webpack" // `npm run build` で `npx webpack` と同じことができるようになる
   },
 ...
 }
※ package.json 内の sciprts は npx コマンド同様、ローカルのライブラリもビルドしてくれるから便利便利 ![]()
![]()
![]()
Note that within scripts we can reference locally installed npm packages by name the same way we did with npx.
mizchi さんのボイラープレート
webpack QuickStart をやったあとで前述のボイラープレートを見てみる。ちょこちょこ違う ![]()
![]()
![]()
ということで、便利ツールをあと2つ見てみます。
webpack-dev-server
The webpack-dev-server is a little Node.js Express server, which uses the webpack-dev-middleware to serve a webpack bundle. It also has a little runtime which is connected to the server via Sock.js.
webpack 実行してローカルでサーバ立ち上げてくれるんだろうなという理解をしました。
ここで重要だったのが以下の部分。
This modified bundle is served from memory at the relative path specified in publicPath (see API). It will not be written to your configured output directory. Where a bundle already exists at the same URL path, the bundle in memory takes precedence (by default).
実際に bundle.js を実ファイルとして作成するのではなく、webpack-dev-server のメモリ上に webpack.config.js の output に指定している内容を吐き出すらしいです ![]()
なのでたしかに $ npx webpack-dev-server しても dist/bundle.js が作成されることはなかったです。
$ webpack-demo > npm install webpack-dev-server # インストール
$ webpack-demo > npx webpack-dev-server --content-base dist/ # 実行
これで localhost:8080 いくと Hello, webpack とかなんとか表示されてるはずです。
--content-base は webpack 由来ではないソースがどこに存在しているかを教えてあげるオプションで、今回のように dist/ みたいなディレクトリを作ったりすると $ npx webpack-dev-server だけでは dist/index.html までたどり着けませんでした。
ドキュメントだと以下の部分で説明されています。
The webpack-dev-server will serve the files in the current directory, unless you configure a specific content base.
$ webpack-dev-server --content-base build/
Using this configuration, webpack-dev-server will serve the static files in your build folder. It’ll watch your source files, and recompile the bundle whenever they are changed.
Using the configuration above, the bundle is available at localhost:8080/assets/bundle.js.
To load your bundled files, you will need to create an index.html file in the build folder from which static files are served (--content-base option)
実は webpack-dev-server の設定も webpack.config.js に書き込めます ![]()
const path = require('path');

 module.exports = {
   entry: './src/index.js',
   output: {
     filename: 'bundle.js',
     path: path.resolve(__dirname, 'dist')
   },
   devServer: { // webpack-dev-server の設定
     port: 4000, // port も設定できた
     contentBase: 'dist' // `--content-base` option に対応
   }
 };
HtmlWebpackPlugin
The HtmlWebpackPlugin simplifies creation of HTML files to serve your webpack bundles.
HTML ファイルを生成してくれる便利ツールっぽいです。今回は index.html だけですが。
$ npm install --save-dev html-webpack-plugin # インストール
をして以下の内容で webpack.config.js を用意します。
var HtmlWebpackPlugin = require('html-webpack-plugin');
var path = require('path');

var webpackConfig = {
   entry: 'index.js',
   output: {
     path: path.resolve(__dirname, './dist'),
     filename: 'index_bundle.js'
   },
   plugins: [new HtmlWebpackPlugin()]
 };
この状態で npm run build を実行すると以下のような html ファイルが dist/ に生成されます。
<!DOCTYPE html>
 <html>
   <head>
     <meta charset="UTF-8">
     <title>webpack App</title>
   </head>
   <body>
     <script src="index_bundle.js"></script>
   </body>
 </html>
さらに、new HtmlWebpackPlugin() にファイル名を指定することもできます。
 {
   entry: 'index.js',
   output: {
     path: __dirname + '/dist',
     filename: 'index_bundle.js'
   },
   plugins: [
     new HtmlWebpackPlugin({
       title: 'My App',
       filename: 'assets/admin.html' // script タグを入れ込んだファイルをこの名前で作成してくれる
     })
   ]
 }
どんなことが書けるのかは https://github.com/jantimon/html-webpack-plugin#configuration を見てください。
テンプレート
上記の内容で結果として得られたファイルを置きました ![]()
![]()
![]()
https://github.com/yuzumikan15/webpack-demo
BuckleScript
ここまで長かったですがとにかくやっと BuckleScript まできました ![]()
![]()
![]()
BuckleScript については他の方も説明していますが、OCaml を JS に変換してくれるコンパイラです ![]()
![]()
![]()
ドキュメント
QuickStart としてはこの記事の最初に紹介した ReasonML のドキュメント にもあるように
$ npm install -g bs-platform
$ bsb -init my-first-app -theme basic-reason # `bsb` は BuckleScript のコマンド
これだけです。これで、my-first-app というディレクトリが作られ、中に BuckleScript でのコンパイルに必要なファイルがごっそり入っています。
reason-of-webpack > ls
README.md       node_modules/   src/
bsconfig.json   package.json    tasks.json
ここに webpack やなんやかんやを入れていきましょう ![]()
$ npm install --save-dev webpack
$ npm install --save-dev webpack-dev-server
$ npm install --save-dev html-webpack-plugin
ここまでで package.json はこんなんでした
{
  "name": "reason-of-webpack",
  "version": "0.1.0",
  "scripts": {
    "build": "bsb -make-world", // BuckleScript のビルドコマンド
    "start": "bsb -make-world -w", // watch mode
    "clean": "bsb -clean-world"
  },
  "keywords": [
    "BuckleScript"
  ],
  "author": "yuzuco",
  "license": "MIT",
  "devDependencies": {
    "bs-platform": "^2.1.0",
    "html-webpack-plugin": "^2.30.1",
    "webpack": "^3.10.0",
    "webpack-dev-server": "^2.9.7"
  }
}
webpack.config.js を書いていきます。
const HtmlWebpackPlugin = require('html-webpack-plugin');
const path = require('path');

module.exports = {
  entry: './src/Main.bs.js',
  output: {
    filename: 'bundle.js',
    path: path.resolve(__dirname, 'dist')
  },
  devServer: {
    port: 8080,
    contentBase: 'dist'
  },
  resolve: {
    extensions: ['.bs.js', '.js', '.json']
  },
  plugins: [
    new HtmlWebpackPlugin({
      template: 'dist/index.html'
    })
  ]
};
index.html テンプレートを書きます。
<!DOCTYPE html>
<html>
  <head>
    <meta charset="UTF-8">
    <title>Reason of webpack</title>
  </head>
  <body></body>
</html>
あとはこれだけ。
$ bsb -make-world # .re ファイルをコンパイルして .bs.js を生成
ninja: Entering directory `lib/bs'
[3/3] Building src/Main.mlast.d
[1/1] Building src/Main-ReasonOfWebpack.cmj

$ ls src # .bs.js が生成されている
Main.bs.js      Main.re

$ npx webpack-dev-server
Project is running at http://localhost:8080/
webpack output is served from /
Content not from webpack is served from dist
...
開発者ツールで見た index.html
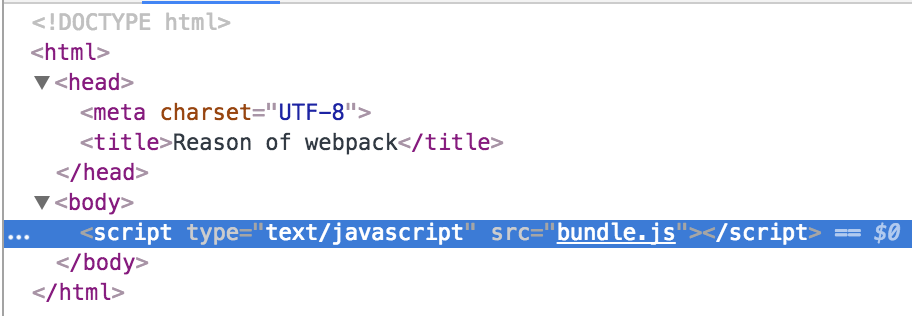
console

めでたい ![]()
![]()
なんか描画する
console.log だけしてても面白くないのでなんか描画してみます ![]()
ドキュメント
↑ これの Settling down and getting disciplined about things からやりました。
JS の関数をそのまま呼びたいときは
external
で関数を定義します。
But what if we actually need to call a function that's in JavaScript? It's needed for interacting with the DOM, or using node modules. In BuckleScript, you use an
externaldeclaration
例えば
type canvas;

let myCanvas: canvas = [%bs.raw {| document.getElementById("mycanvas") |}];
は document.getElementById(...) という JS をそのまま書いていますが、
type context;

[@bs.send] external getMyContext : (canvas, string) => context = "getContext";
let ctx = getContext(myCanvas, "2d");
とすると getMyContext は JS の getContext に相当する関数となります。
ちなみに
[@bs.send] external getContext : (canvas, string) => context = "";
と書いた場合は定義した関数名と同じものが "" の部分に入ります。
(実際に JS 側に存在するメソッド名でないときっと怒られるんだと思う…)
記法がややこしいのですが、
[@bs.send]
と書くと、定義した関数 (getMyContext) はその第一引数 (canvas) のメソッドとして適用されます。つまり、上の例の場合は
getContext(myCanvas, "2d");
↓
↓ BuckleScript でコンパイル ![]()
![]()
![]()
↓
myCanvas.getContext("2d")
となります。
サンプル
type canvas;
type context;

Js.log("Hello, BuckleScript and Reason!");

/* we're leaving these types abstract, because we won't
 * be using them directly anywhere */
[@bs.send] external getContext : (canvas, string) => context = "";
[@bs.send] external fillRect : (context, float, float, float, float) => unit = "";

let myCanvas: canvas = [%bs.raw {| document.getElementById("mycanvas") |}];

let ctx = getContext(myCanvas, "2d");

fillRect(ctx, 0.0, 0.0, 100.0, 100.0);
<!DOCTYPE html>
<html>
  <head>
    <meta charset="UTF-8">
    <title>Reason of webpack</title>
  </head>
  <body>
    <!-- `getElementById` できるように canvas を追加した -->
    <canvas id="mycanvas" width="300" height="300"></canvas>
</html>
を書いて以下を実行
$ bsb -make-world
$ npx webpack-dev-server
Project is running at http://localhost:8080/
webpack output is served from /
Content not from webpack is served from dist
...

大変めでたい ![]()
![]()
![]()
ここにソースコード置きました。PR とかたくさん欲しいです ![]()
https://github.com/yuzumikan15/reason-of-webpack
次回
render は reason-react で書きたい、という気持ちがしてきたのでその入門でも書きます。