はじめに
前回のラズパイSSH接続編の記事はこちらから![]()
今回はサンプルコード実行編です。
LEDの操作、ボタンの操作、スピーチ(発話)、マイクの機能を試していきたいと思います。
サンプルコードでできること
サンプルコードは公式サイトに記述してあります。
また、今回はこちらのサイトも併せて参考にさせていただきました。
サンプルコードでは、以下の機能を確認することができます。
- LEDの操作
- LEDのオン・オフ
- LEDの点滅
- LEDの明るさ調整
- LEDの点滅形式
- LEDをカラフルに点灯
- LEDを好きな色で点灯
- LEDを好きなパターンで点滅
- ボタンの操作
- ボタンの押しっぱなしを検出
- ボタンを押した時・離した時を検出
- スピーチ(発話)
- テキストを発話
- マイク
- 録音・再生
- 音声認識(Cloud Speech)
- Speech to Text(書き取り)
- Googleアシスタント
- Goolge Home
LEDのオン・オフを実施してみる
ディレクトリとPythonファイルの作成
①以下のコマンドを入力し、作業用の「work」ディレクトリを作成します。
mkdir work
②以下のコマンドを入力し、workディレクトリに移動します。
cd work
③テキストエディタ「vi」(Raspberry Piに標準でインストールされています)を起動し、workディレクトリに「led_onoff.py」というファイルを作成します。(「.py」はPythonのファイルを意味しています)
sudo vi led_onoff.py
④viエディタが起動します。
viエディタはコマンドモードになっているため、キーボードをタイプしても何も入力できないようになっています。
そのため、キーボードの[i]を押し、コマンドモードから入力モードに変更します。
コードの記述
⑤以下のコードを入力します。
# !/usr/bin/env python3
import time
from aiy.board import Board, Led

print('LEDを点灯・消灯するサンプルです')
with Board() as board:
    print('点灯します')
    board.led.state = Led.ON
    time.sleep(3)
    print('消灯します')
    board.led.state = Led.OFF
    time.sleep(3)
⑥コードを入力したら、ファイルを保存します。
この時、テキストを入力するモード(入力モード)になっているため、コマンドモードに戻します。
戻すためには、[esc]キーを押します。
⑦コマンドモードになったら、以下のコマンドを入力します。
:wq!
⑧[Enter]を押下し、作成したPythonのプログラムファイルを保存します。
プログラムの実行
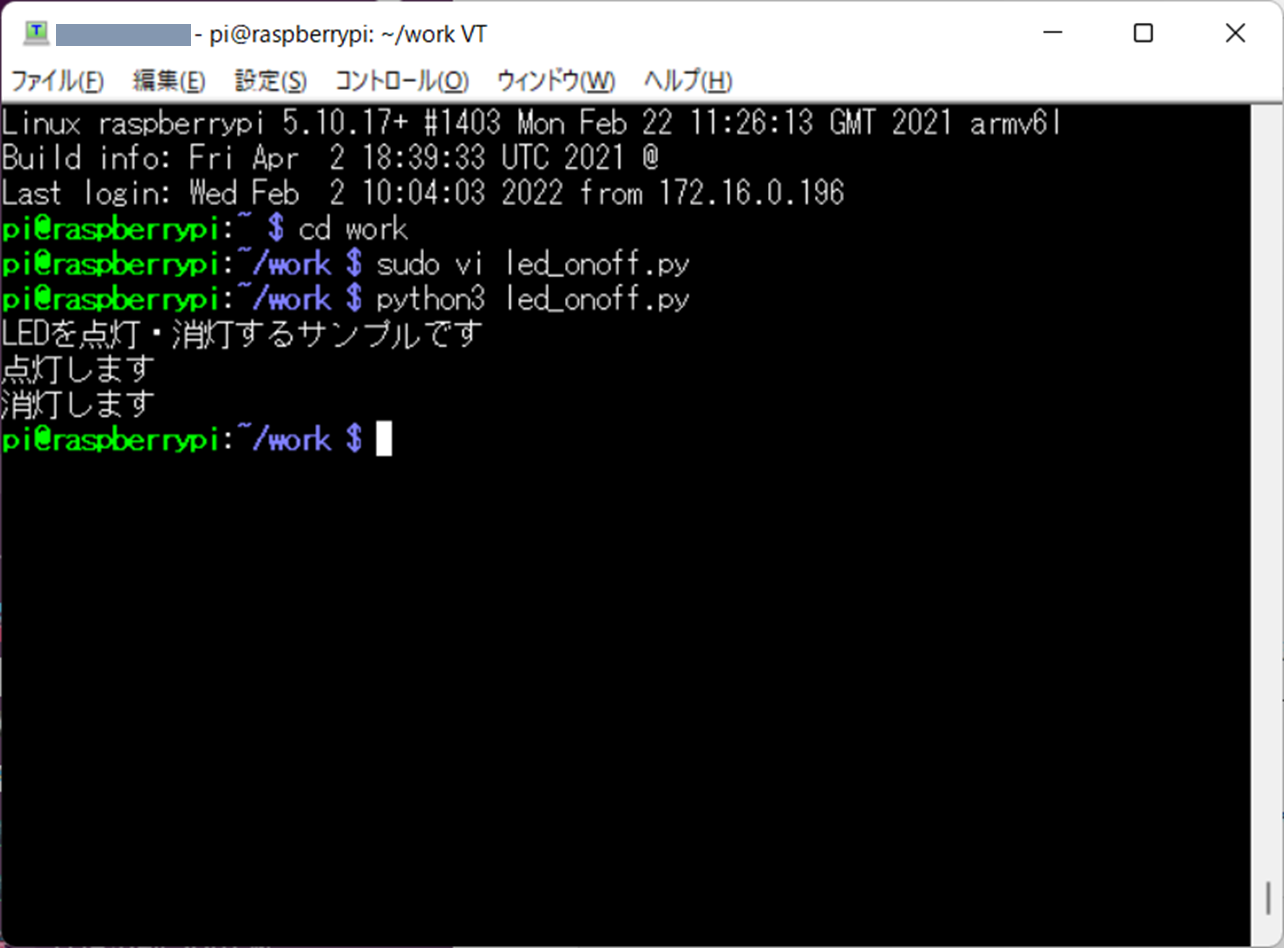
⑨以下のコマンドを入力し、先程作成した「led_onoff.py」を実行します。
python3 led_onoff.py
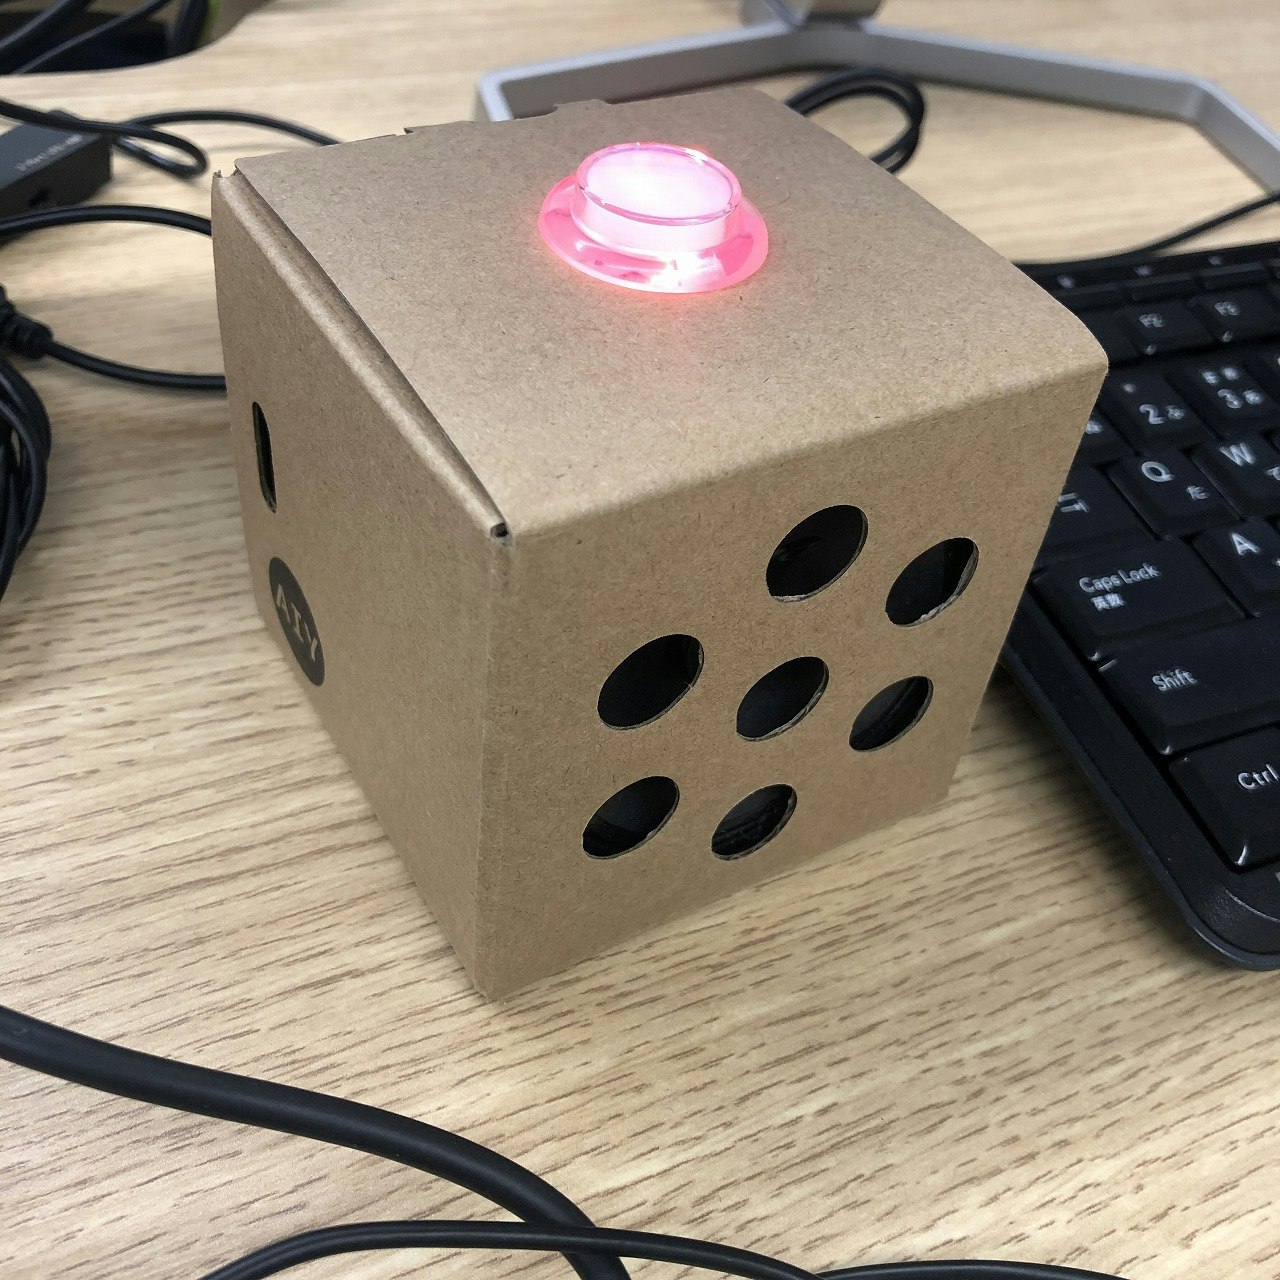
実行結果
サンプルコード一覧
サンプルコードでできることで紹介したサンプルコードを以下にまとめました。
LEDの操作
# !/usr/bin/env python3
import time
from aiy.board import Board, Led

print('LEDを点灯・消灯するサンプルです')
with Board() as board:
    print('点灯します')
    board.led.state = Led.ON
    time.sleep(3)
    print('消灯します')
    board.led.state = Led.OFF
    time.sleep(3)
# !/usr/bin/env python3
import time
from aiy.board import Board, Led

print('LEDを点滅させるサンプルです')
with Board() as board:
    board.led.state = Led.BLINK
    time.sleep(3)
# !/usr/bin/env python3
import time
from aiy.board import Board, Led

print('LEDの明るさを変更させるサンプルです')
with Board() as board:
    print('まずは暗く')
    board.led.brightness = 0.1
    board.led.state = Led.ON
    time.sleep(3)
    board.led.state = Led.OFF
    print('次は明るく')
    board.led.brightness = 1.0
    board.led.state = Led.ON
    time.sleep(3)
# !/usr/bin/env python3
import time
from aiy.board import Board, Led

print('LEDを色んな感じで点滅させます')
with Board() as board:
    print('BLINK_3')
    board.led.state = Led.BLINK_3
    time.sleep(5)
    board.led.state = Led.OFF
    time.sleep(3)

    print('BEACON')
    board.led.state = Led.BEACON
    time.sleep(5)
    board.led.state = Led.OFF
    time.sleep(3)

    print('BEACON_DARK')
    board.led.state = Led.BEACON_DARK
    time.sleep(5)
    board.led.state = Led.OFF
    time.sleep(3)

    print('DECAY')
    board.led.state = Led.DECAY
    time.sleep(5)
    board.led.state = Led.OFF
    time.sleep(3)

    print('PULSE_SLOW')
    board.led.state = Led.PULSE_SLOW
    time.sleep(5)
    board.led.state = Led.OFF
    time.sleep(3)

    print('PULSE_QUICK')
    board.led.state = Led.PULSE_QUICK
    time.sleep(5)
# !/usr/bin/env python3
import time
from aiy.leds import Leds, Color

print('LEDをカラフルに点灯させるサンプルです')

COLORS = (
    Color.BLACK,
    Color.BLUE,
    Color.CYAN,
    Color.GREEN,
    Color.PURPLE,
    Color.RED,
    Color.WHITE,
    Color.YELLOW,
)

with Leds() as leds:
    for color in COLORS:
        for _ in range(2):
            leds.update(Leds.rgb_on(color))
            time.sleep(1)
            leds.update(Leds.rgb_off())
            time.sleep(1)
# !/usr/bin/env python3
import time
from aiy.leds import Leds, Color

print('LEDを好きな色に点灯させるサンプルです')

with Leds() as leds:
    # オレンジっぽい色
    leds.update(Leds.rgb_on(Color.blend(Color.RED, Color.YELLOW, 0.9)))
    time.sleep(3)
# !/usr/bin/env python3
import time
from aiy.leds import Leds, Color, Pattern

print('LEDを好きなパターンで点滅させるサンプルです')

with Leds() as leds:
    print('チカチカと点滅 blink500')
    leds.pattern = Pattern.blink(400)
    leds.update(Leds.rgb_pattern(Color.BLUE))
    time.sleep(5)
    print('ブォーンブォーンと点滅 breathe500')
    leds.pattern = Pattern.breathe(800)
    leds.update(Leds.rgb_pattern(Color.RED))
    time.sleep(5)
ボタンの操作
# !/usr/bin/env python3
from aiy.board import Board, Led

print('ボタンの押しっ放しを検出するサンプルです(CTRL+Cで終了)')

with Board() as board:
    while True:
        print('ボタンを押しっ放しにしてください...')
        board.button.wait_for_press()
        print('オン! 今度は離してみて!')
        board.led.state = Led.ON
        board.button.wait_for_release()
        print('オフ!')
        board.led.state = Led.OFF
スピーチ(発話)
# !/usr/bin/env python3
import aiy.voice.tts

print('Text−To-Speech(発話)のサンプルです(英語)')

# 普通に
aiy.voice.tts.say("Hello, I'm yoshiko.")
# 気取って
aiy.voice.tts.say("What have you got for me tonight?", lang='en-GB')
# 大声で
aiy.voice.tts.say("Put a sock in it!", volume=100)
# 1オクターブ上
aiy.voice.tts.say("Lovely weather today.", pitch=200)
# 早口で
aiy.voice.tts.say("The quick brown fox jumped over the lazy dog.", speed=150)
マイク
# !/usr/bin/env python3
import time
import threading

from aiy.board import Board, Led
from aiy.voice.audio import AudioFormat, play_wav, record_file

with Board() as board:
    print('ボタンを押して録音開始')
    board.led.state = Led.ON
    board.button.wait_for_press()
    board.led.state = Led.OFF

    done = threading.Event()
    board.button.when_pressed = done.set

    def wait():
        start = time.monotonic()
        while not done.is_set():
            duration = time.monotonic() - start
            print('録音中: %.02f 秒 [ボタンを押してストップ]' % duration)
            time.sleep(0.5)

    record_file(AudioFormat.CD, filename='audio_record.wav', wait=wait, filetype='wav')
    print('ボタンを押して再生')
    board.led.state = Led.ON
    board.button.wait_for_press()
    board.led.state = Led.OFF

    print('再生中...')
    play_wav('audio_record.wav')
    print('終了')
音声認識(Cloud Speech-to-Text API)
Googleの「Cloud Speech-to-Text」というAPI(音声をテキストに変換する)を使用します。
「Speech-to-Text」を使用するためには、事前にGoogle Cloud PlatformでAPIを有効化し、秘密鍵(JSON)をホームディレクトリに配置しておく必要があります。
詳細な手順は別の記事で紹介予定です。
# !/usr/bin/env python3
import datetime
from aiy.board import Board
from aiy.cloudspeech import CloudSpeechClient

print('Speech To Text(書き取り)のサンプルです("終了"と言うと終了します)')
client = CloudSpeechClient()
with Board() as board:
    while True:
        print('聴き取り中・・・')
        text = client.recognize(language_code='ja-JP',
                                hint_phrases=('今何時', '今日の天気は', '終了'))
        if text is None:
            print('何かしゃべってよ')
            continue

        print('「{}」と言いましたね!'.format(text))

        if '今何時' in text:
            now = datetime.datetime.now()
            print(now)
        if '今日の天気は' in text:
            print('たぶん晴れじゃないかなあ')
        elif '終了' in text:
            print('え?もう行っちゃうの・・・?')
            break
Googleアシスタント
「Google Assistant API」(Google Homeのようなアシスタント機能を提供する)を使用します。
こちらも事前にAPIを有効化し、サービスアカウントキーを取得する必要があります。
詳細な手順は別の記事で紹介予定です。
# !/usr/bin/env python3
from aiy.assistant.grpc import AssistantServiceClientWithLed
from aiy.board import Board
print('Google Homeもどきのサンプルです(CTRL+Cで終了)')

with Board() as board:
    assistant = AssistantServiceClientWithLed(board=board,
                                              volume_percentage=50,
                                              language_code='ja-JP')
    while True:
        print('ボタンを押して会話を始めましょう')
        board.button.wait_for_press()
        print('スタート!')
        assistant.conversation()

