まえがき
nest.jsでgraphqlをこれからやってみよう、とりあえずどんなものかやってみたいという方向けに、脳死で全てコピペをしていくだけでクエリが叩けてしまう!というものを書きました。
自分が進めたときのメモの延長ではあるので、その点はあしからずです。
環境
$ node -v
v16.11.0
プロジェクト作成
$ nest new nestjs-graphql-sample
今回はyarnを選択してすすめることに。
下記コマンドで起動したときに、キャプチャのような表示になれば成功!
yarn startでも起動はできますが、コードを編集したときに再起動しないと変更が反映されない、ということになります。
yarn start:devのコマンドで起動し、再起動しなくても自動で反映されるようにするのがベターかと。
$ yarn start:dev
package install
nestjsでgraphqlを使えるようにするためにpackageのインストールを行いましょう。
$ yarn add @nestjs/graphql graphql@^15 apollo-server-express
Graphql setting
  imports: [
    GraphQLModule.forRoot({
      typePaths: ['./src/**/*.graphql'],
      definitions: {
        path: join(process.cwd(), 'src/graphql.schema.ts'),
      },
    }),
  ],
読み込むschemaのファイルパス、形式を指定して、読み込んだものをschemaとして出力するかの定義を行います。
graphql.schema.tsのファイルは、エラーがなければ自動生成、自動更新されます。
もし、エラーがあれば、先にそちらを解決しましょう。
ts-morphエラー
このタイミングで、私が実際に作成しているときに下記エラーが発生したのでその解決方法を記載しておきます。
エラー内容
(node:55119) UnhandledPromiseRejectionWarning: Error: Cannot find module 'ts-morph'
解決方法
$ yarn add ts-morph @apollo/gateway
参考:https://github.com/nestjs/graphql/issues/1621
Authors.resolverの作成
こちらで指定したauthors_queryをauthor_queryを作成していきます。
type Query {
  authors: [Author]
  author(id: ID!): Author
}

type Author {
  id: Int
  firstName: String
  lastName: String
}
上記のgraphqlを指定することで下記のschemaが出力されます。
/*
 * -------------------------------------------------------
 * THIS FILE WAS AUTOMATICALLY GENERATED (DO NOT MODIFY)
 * -------------------------------------------------------
 */

/* tslint:disable */
/* eslint-disable */
export interface IQuery {
    authors(): Nullable<Nullable<Author>[]> | Promise<Nullable<Nullable<Author>[]>>;
    author(id: string): Nullable<Author> | Promise<Nullable<Author>>;
}

export interface Author {
    id?: Nullable<number>;
    firstName?: Nullable<string>;
    lastName?: Nullable<string>;
}

type Nullable<T> = T | null;
後は、authorsとauthorを返すロジックを書いていきます。
serviceを作成して、findAllとfindOneByIdのロジックを記述。
今回は、DB等を使わずベタで書いてます。
$ nest g s authors
import { Injectable } from '@nestjs/common';
import { Author } from '../graphql.schema';

@Injectable()
export class AuthorsService {
  private readonly authors: Array<Author> = [
    { id: 1, firstName: 'first_1', lastName: 'last_1' },
    { id: 2, firstName: 'first_2', lastName: 'last_2' },
  ];
  findAll(): Author[] {
    return this.authors;
  }

  findOneById(id: number): Author {
    return this.authors.find((author) => author.id == id);
  }
}
specファイルも生成されますが、一旦今回はスルーします。
続いて、resolverにそれぞれのロジックを書きます。
import { Args, Resolver, Query } from '@nestjs/graphql';
import { AuthorsService } from './authors.service';

@Resolver('Author')
export class AuthorsResolver {
  constructor(
    private authorsService: AuthorsService, // private postsService: PostsService,
  ) {}

  @Query('authors')
  async getAuthors() {
    return this.authorsService.findAll();
  }

  @Query('author')
  async author(@Args('id') id: number) {
    return this.authorsService.findOneById(id);
  }
}
最後に、authors.moduleを定義し、app.moduleでimportします。
import { Module } from '@nestjs/common';
import { AuthorsResolver } from './authors.resolver';
import { AuthorsService } from './authors.service';

@Module({
  imports: [],
  providers: [AuthorsService, AuthorsResolver],
})
export class AuthorsModule {}
import { AuthorsService } from './authors/authors.service';
import { AuthorsModule } from './authors/authors.module';

@Module({
  imports: [
    AuthorsModule, // import Authors Module
    GraphQLModule.forRoot({
      typePaths: ['./src/**/*.graphql'],
      definitions: {
        path: join(process.cwd(), 'src/graphql.schema.ts'),
      },
    }),
  ],
  controllers: [AppController],
  providers: [AppService, AuthorsService], // import AuthorsService
})
export class AppModule {}
(一部省略)
Graphql PlayGroundでの確認
お疲れさまでした!!
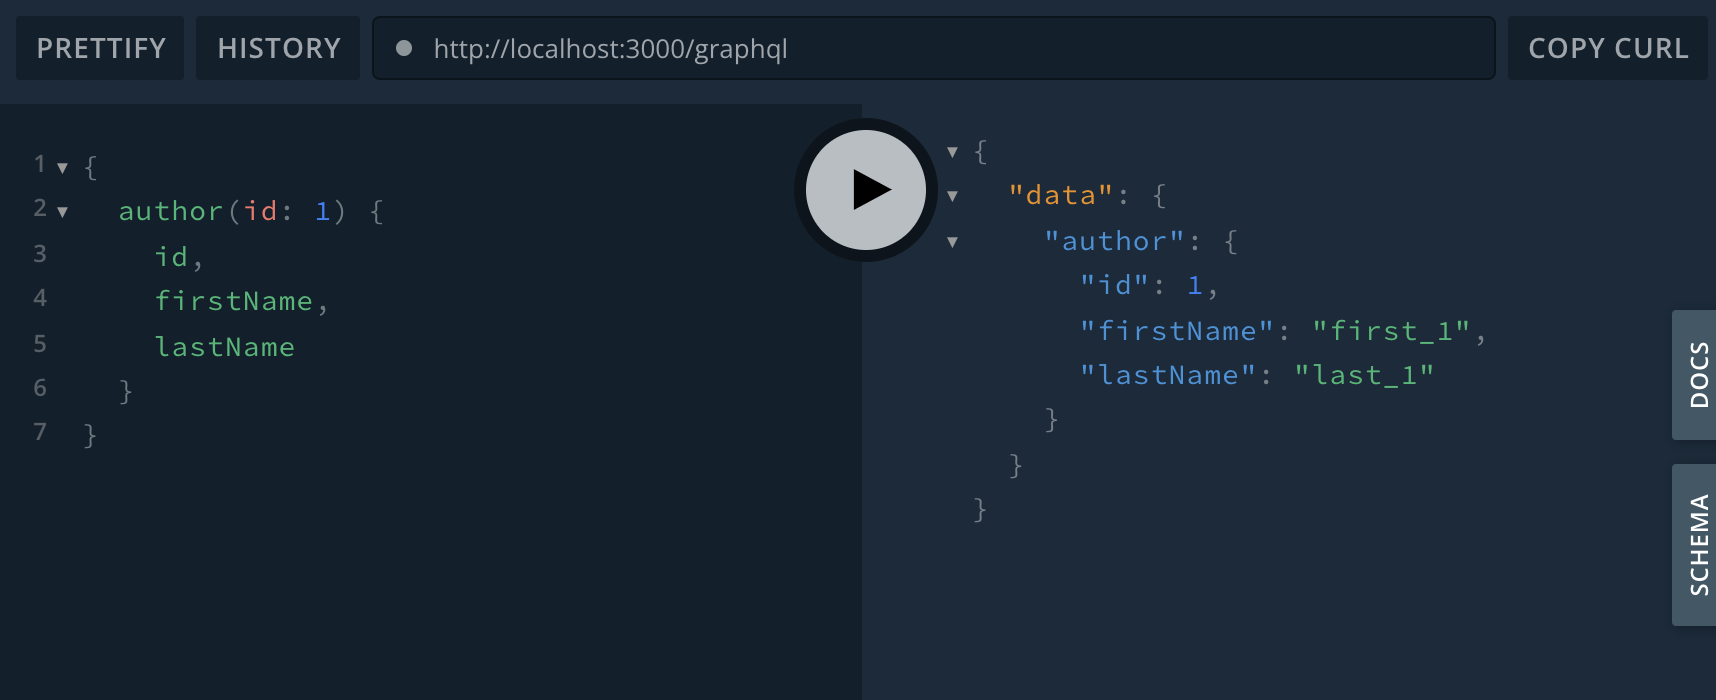
ここまで来ると、Graphql PlayGroundで確認できるはずです!
こちらはgraphqlのリクエスト、レスポンスをお手軽に確認できるものです。
http://localhost:3000/graphql
にアクセスをすると、下記のようにauthors,authorが返ってくることがわかると思います!
github
今回のコードは全て上記にありますので、適宜参考にしてください。
あとがき
nestjsでgraphqlを叩く超基本、導入の部分を書かせて頂きました。
一度やってしまえば、なんてことはないですが、最初の一回って苦労しますよね、、。
そのお手伝いや少し参考になれば幸いです。
もちろん、今回は超基礎なので次もどんどん書いていけるといいなと思ってます。
ご指摘やコメント等はもちろん大歓迎です。
参考
https://docs.nestjs.com/graphql/quick-start
https://docs.nestjs.com/graphql/resolvers


