今回、Herokuのリリースでerror: failed to push some refs to ~のエラーが
出たのですが、うまくまとまっている記事がなかったので、まとめました!
(何か誤りがあれば、コメントください🙌)
error: failed to push some refs to ~の種類
1. pushするブランチ名の誤り
こちらは至極簡単で、コマンドを変更するだけで良いです!
# デフォルト(git branch -M mainなどしていない場合)
% git push heroku master

# デフォルトのブランチ名がmainの場合(git branch -M mainしている場合)
% git push heroku main

# 現在のブランチ名がデフォルト以外の場合, 今回のブランチ名はdev
% git push heroku dev:master
2. config/database.yml中に記述ミス
この場合は、エラーをよく見ると以下のような記述があります。
remote:  !     Could not detect rake tasks
remote:  !     ensure you can run `$ bundle exec rake -P` against your app
remote:  !     and using the production group of your Gemfile.
remote:  !     rake aborted!
remote:  !     ActiveRecord::DatabaseConfigurations::InvalidConfigurationError: ~~~略
よくあるミスは、ymlファイルのインデントが半角スペース2個でないミスです。
ymlではインデントが文法の意味を持つため、半角スペース2つを必ず守りましょう!
修正後、add→commit→pushを実行しておきましょう。
コマンドの実行例
% git add -A
% git commit -m "fix: ymlファイルのSyntaxerror"
% git push heroku master
3. HerokuのサポートするRubyのバージョン違い
このエラーがなかなかえぐいです😇
しっかり読めばわからなくはないのですが、Heroku公式を漁りに行く必要があるので
上2つのエラーより大変です。。。
実際のエラーはこちら↓
remote:  !     The Ruby version you are trying to install does not exist on this stack.
remote:  !
remote:  !     You are trying to install ruby-3.0.4 on heroku-22.
remote:  !
remote:  !     Ruby ruby-3.0.4 is present on the following stacks:
remote:  !
remote:  !     - heroku-18
remote:  !     - heroku-20
remote:  !
remote:  !     Heroku recommends you use the latest supported Ruby version listed here:
remote:  !     https://devcenter.heroku.com/articles/ruby-support#supported-runtimes
remote:  !
remote:  !     For more information on syntax for declaring a Ruby version see:
remote:  !     https://devcenter.heroku.com/articles/ruby-versions
このエラーは、HerokuのサポートするRubyのバージョンによって起きるエラーで
最新のheroku22というサポートを利用するためには公式ページにて
必要なバージョン(heroku22は3.1.0以上)を確認する必要があります。
解決策
上記を踏まえると、今回の解決策は2つです。
1. Rubyのバージョンを更新して、Stackが最新のHerokuを利用
この場合、以下の手順を踏みます。
- 現在のRubyをアンインストール
- バージョンが3.1.0以上のRubyをインストール
- Rails関連の操作
- gitコマンド打ちまくる
1. 現在のRubyをアンインストール
Windowsの方は、設定を開き、アプリケーションをアンインストールしましょう。
Macの方は、スルーでOKです
2. バージョンが3.1.0以上のRubyをインストール
Windowsの方
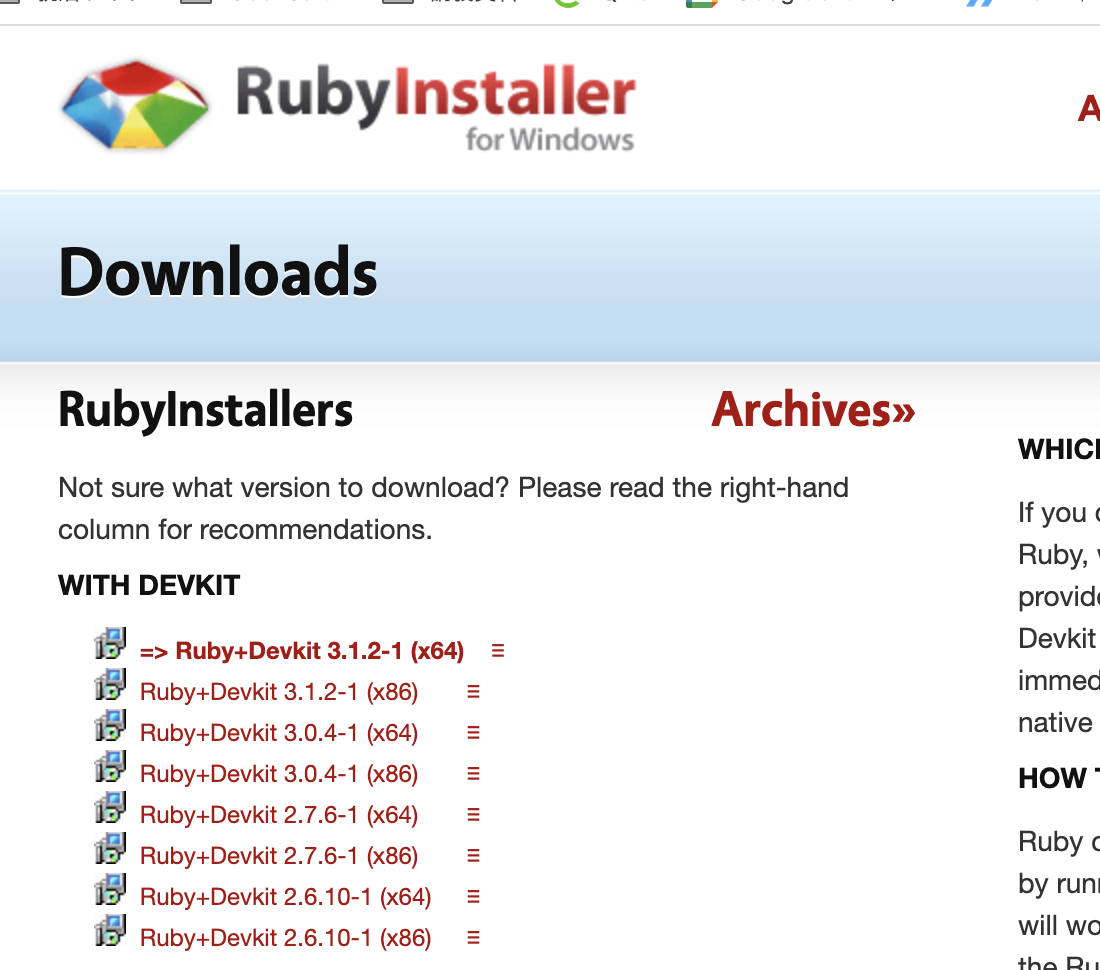
Windowsの方は、Rubyの公式に飛んで、
WITH DEVKITの=>がついているバージョンのインストーラをインストールします。

後は、ダウンロードフォルダに入っているインストーラの通りに進めましょう。
Macの方
以下のコマンドを実行しましょう。
% rbenv install 3.1.2
これでインストール完了です!
3. Rails関連の操作
Windowsの方のみ
コマンドプロンプトを開いて、railsの導入から行います。
# railsの導入
% gem install -v バージョン名 rails
Windows, Mac共通
次に、アプリケーションをIDE(開発用のエディタ)を開いて、Rubyのバージョンを
変更します。
source 'https://rubygems.org'
git_source(:github) { |repo| "https://github.com/#{repo}.git" }

# この行を変更
# ruby '3.0.3'
ruby '3.1.2'

# Bundle edge Rails instead: gem 'rails', github: 'rails/rails', branch: 'main'
gem 'rails', '~> 6.1.5'
.ruby-versionというファイルも変更します。
# 今回の最新は3.1.2
ruby-3.1.2
gemを再インストールします。
% bundle install
これでrails関連の操作は終わりです🙌
3. gitコマンド打ちまくる
% git add -A
% git commit -m "fix: ruby-version変更"
% git push heroku master
これで終わりです!
(少し道のり長かったですね、、、😅)
2. Rubyのバージョンを更新せずに、異なるStackのHerokuを利用
こちらの手順は↑よりは楽です!
(Herokuのサポート期間が短い点だけ面倒)
- Herokuのアプリケーションを作り直す
- GitのPush先を変更する
- Gitコマンド連打
1. Herokuのアプリケーションを作り直す
まず、Stackを切り替える必要があるので、現行のアプリ名でHerokuに登録したい場合は
Herokuのダッシュボードからアプリケーションを削除しておきましょう。
(切り替えなくて良い人はスルーで!)
次に、以下のコマンドでHerokuのアプリケーションを作成します。
% heroku create 好きなアプリの名前 --stack heroku-20
Heroku20はRubyのバージョンが2.5.9~3.1.0未満に対応しています。
これでアプリは作成できました!
作成時に出てくるURLを保存しましょう。
https://git.heroku.com/アプリ名.gitの形式です。
2. GitのPush先を変更する
push先を変更するには、以下のコマンドを打ちましょう
% git remote set-url heroku https://git.heroku.com/アプリ名.git
これでOKです!
3. Gitコマンド連打
後は、いつもの変更処理ですね〜
% git add -A
% git commit -m "fix: herokuのStack変更"
% git push heroku master
これで終わりです!
リリースは大変ですし、なんならHerokuは後少しで有償化も
来るかもですが、お疲れ様でした✨