今回の記事で実装できるもの
SwiftUIでNavigationViewを使えば本当に簡単に以下の様なものが作れます。
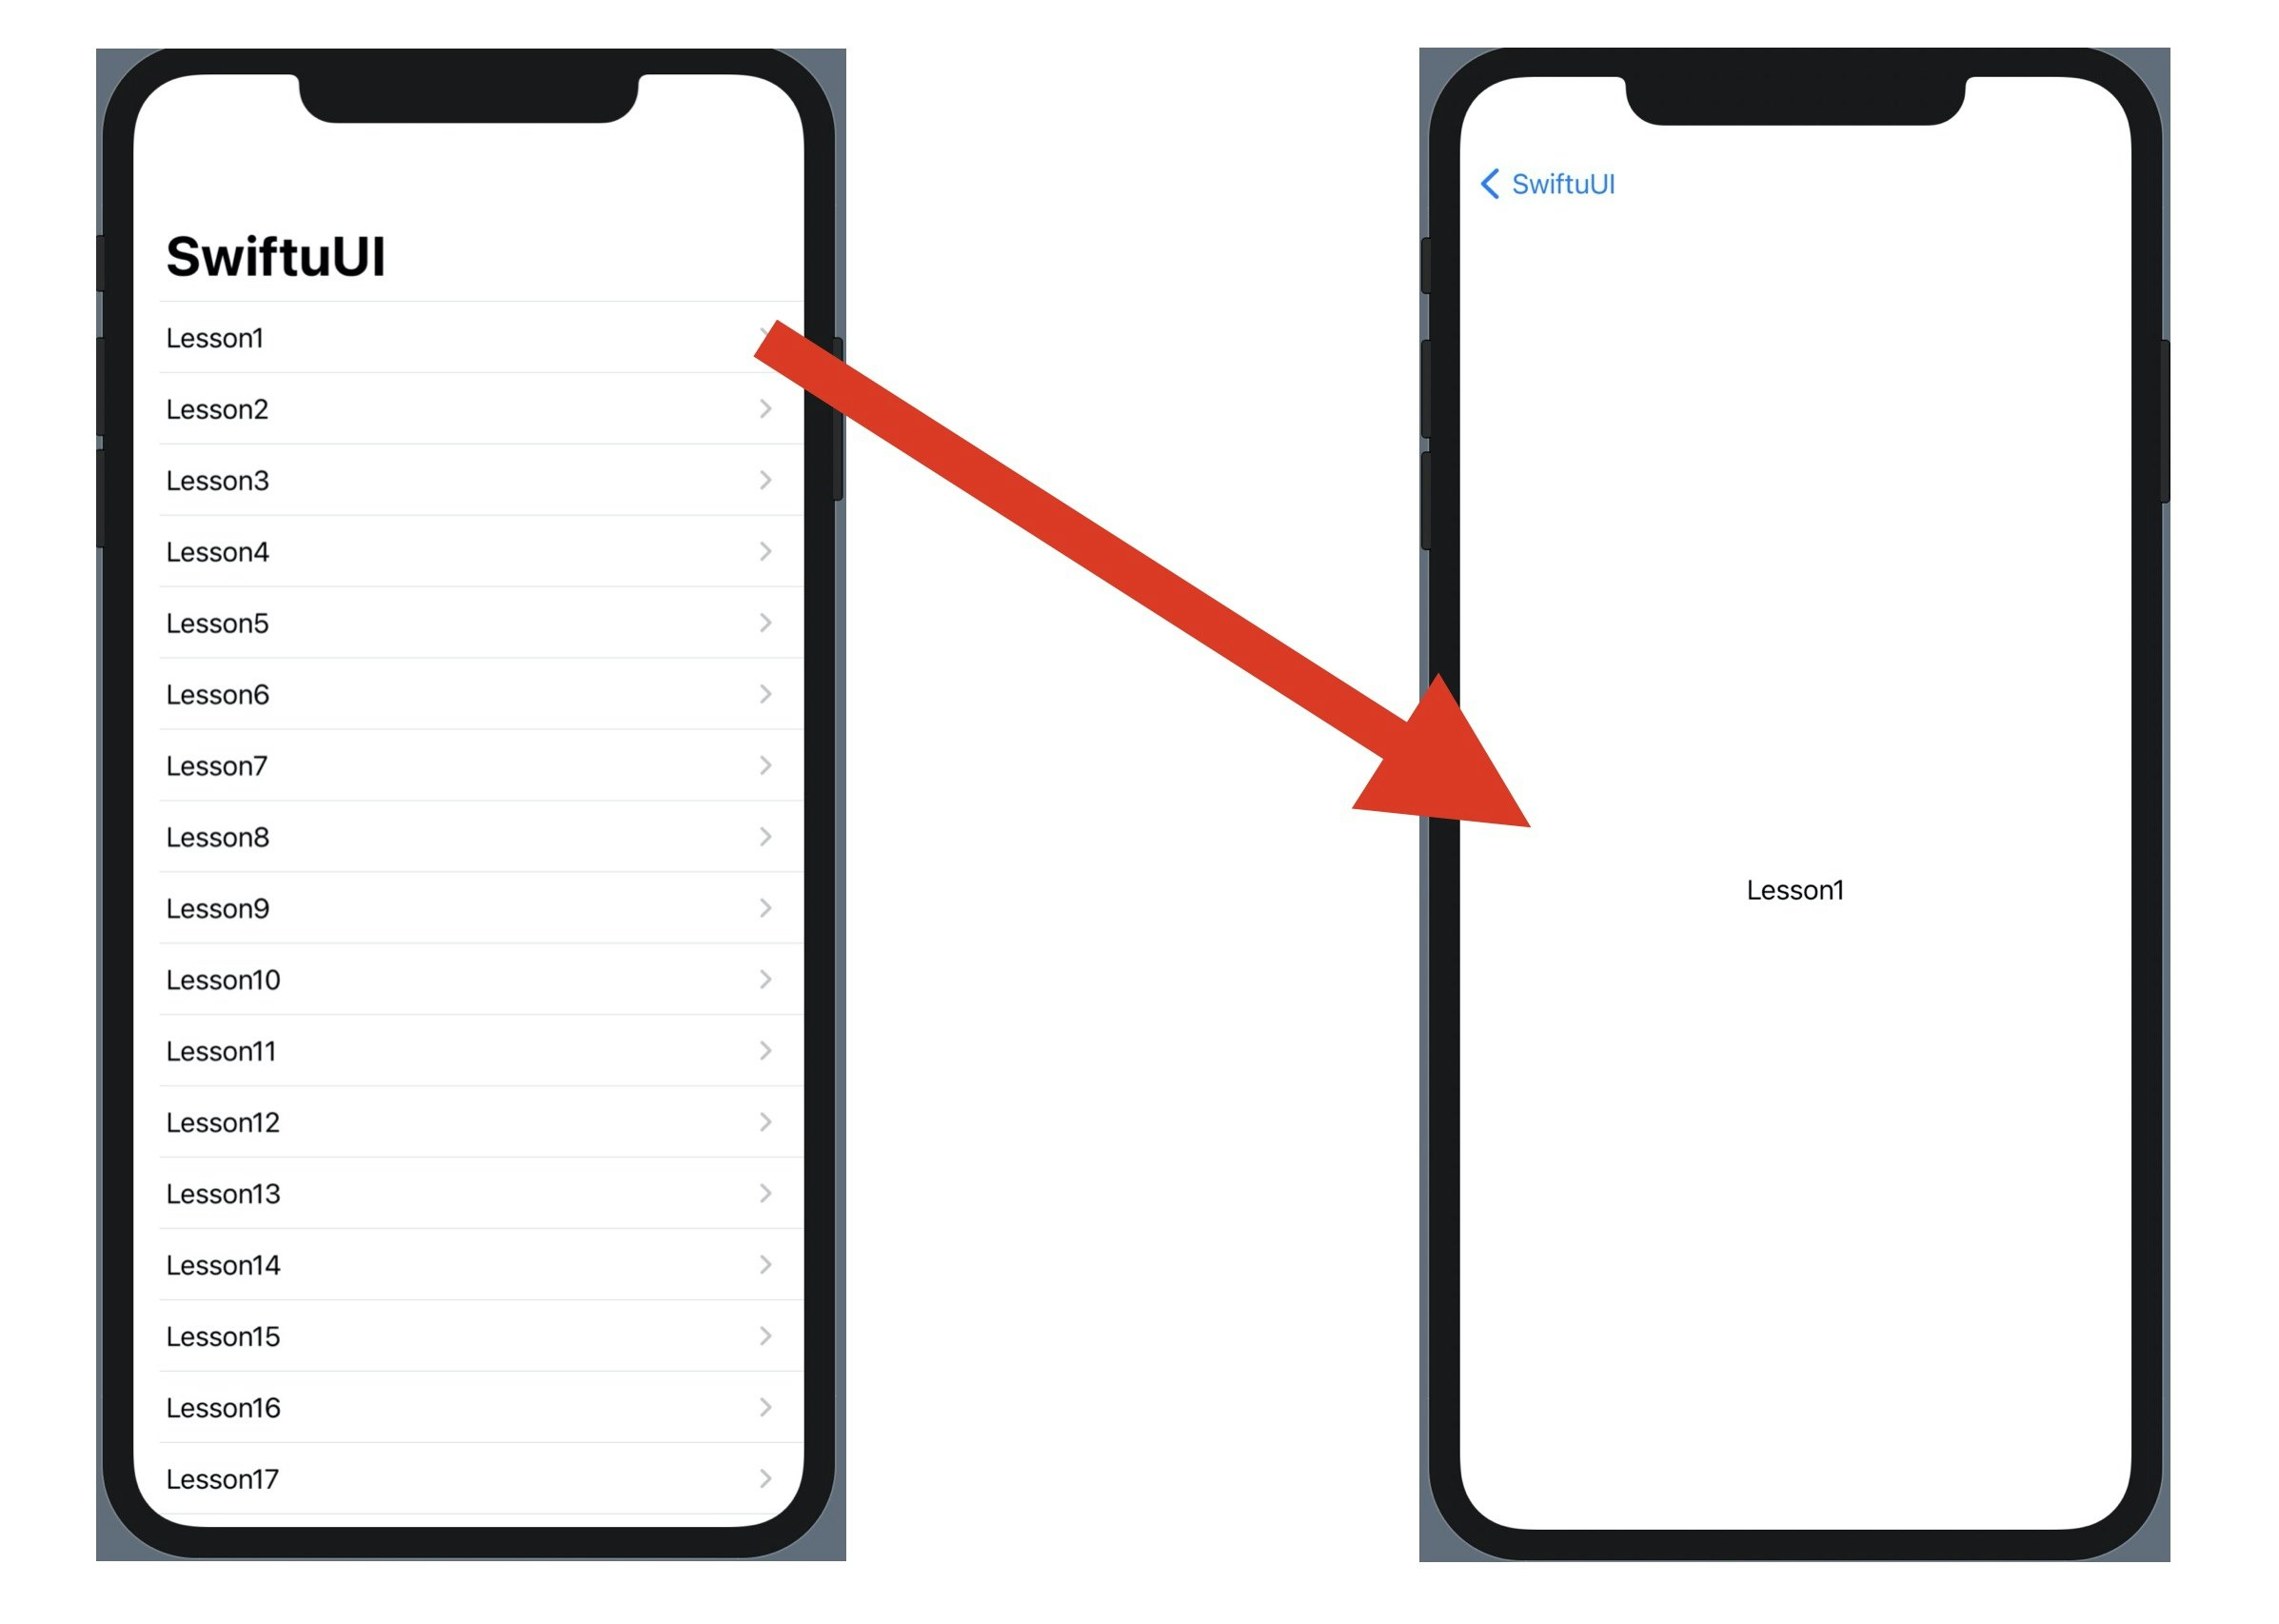
以下ではこの実装の解説をしていきます。
Code
struct ContentView: View {
    var body: some View {
        NavigationView {
            List(1..<100) { num in
                NavigationLink(destination: Text("Lesson\(num)")) {
                Text("Lesson\(num)")
                }
            }.navigationBarTitle("SwiftuUI")
        }
    }
}
これだけ少ないコードで上記の様な
・タイトル
・リスト
・遷移
を実装する事ができます。
ではどの様に実装しているか少し解説していきたいと思います。
解説
NavigationView
・NavigationLink
・navigationBarTitle
はもちろんですが、その他にも
・navigationBarItems
など使用するには必須。
List
(1..<100)でリストの個数を定義しています。今回は1〜99のリストを作成して数字はnumに返しているのでnumもそのままList内で使う事がきますのでText内などでも(\num)で使用する事ができます。
NavigationLink
destination以降でリンク先の表示するものを定義する事ができます。今回はテキストですがimageはもちろん、Viewを指定して画面を遷移させる事も可能です。
navigationBarTitle
("")内に書いたテキストをタイトル位置(画面の上部)に表示させる事ができます。
大きさは
("SwiftuUI", displayMode: .large)
displayModeの後に
large
inline
automatic
で指定する事ができます。
以上です。是非参考になれば嬉しいです。
最後に
普段は個人でSwiftUIでアプリを作っています。ハードも作るの大好きです。
よければ下記もチェックして下さい♪
Twitter
https://twitter.com/oka_yuuji
note
https://note.com/oka_yuuji