AMQP について
AMQPはメッセージングサービスのためのプロトコル。
誰かがQueueにメッセージを突っ込んで、誰かがQueueからメッセージを取り出すというもの。
という理解をしている。
詳しいことは以下のページがとても参考になる。
GREEのエンジニアさんのページ
読みやすくて、とても素晴らしい。
が、動かさないと理解できない質なので、実験。
実験に使う道具は以下のとおり
- RabbitMQ
- AMQPのサーバ
- https://www.rabbitmq.com/
- kombu
- PythonでAMQPを使うライブラリ
- https://pypi.python.org/pypi/kombu
- http://kombu.readthedocs.org/en/latest/
環境構築手順は後述
画面はRabbitMQのManagement Pluginのもの。
Exchangeを作る
GREEのエンジニアさんのページによると、Messageを受け取るのがExchangeで、ExchangeがQueueに渡すらしい。
とりあえず、Exchangeからつくろうと思い、kombuのサンプルコードを見て出来たものがこちら。
from kombu import Connection,Exchange

exchange = Exchange('foo_exc', type='direct')

with Connection('amqp://guest:guest@localhost:5672//') as c:
    bound = exchange(c.default_channel)
    bound.declare()
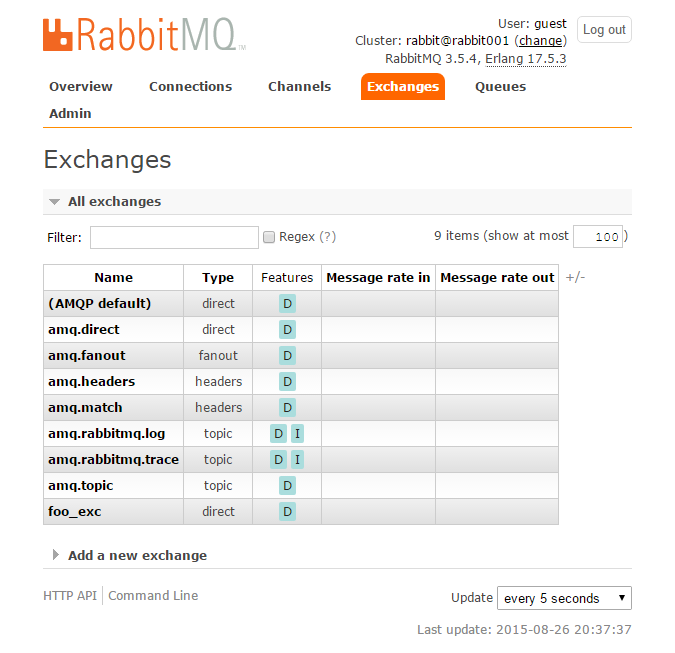
Exchangeが出来た。一番下の、foo_excが上の処理で作ったもの。
Queueを作る
引き続き、サンプルコードを元にQueueを作成。
from kombu import Connection,Exchange,Queue

exchange = Exchange('foo_exc', type='direct')
queue = Queue('bar_queue', exchange=exchange, routing_key='hoge.fuga')

with Connection('amqp://guest:guest@localhost:5672//') as c:
    bound = queue(c.default_channel)
    bound.declare()
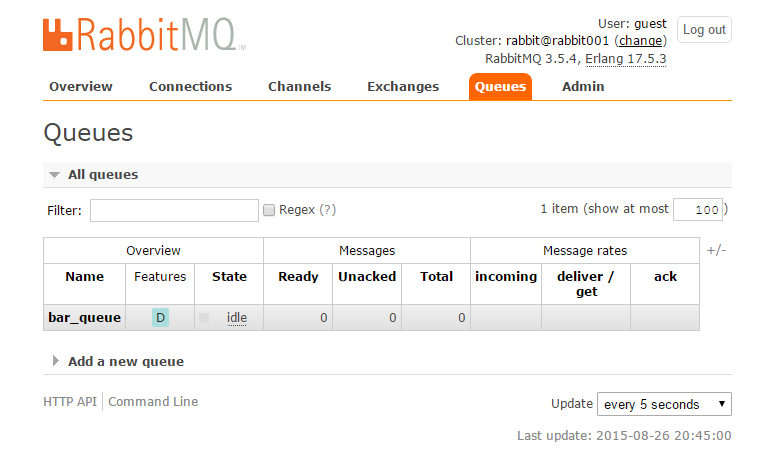
Queueが出来た。
Messageを作って投げる
いよいよMessageを作ってExchangeに突っ込む。
こちらはサンプルコードというよりはリファレンスを参照。
from kombu import Connection,Exchange

exchange = Exchange('foo_exc', type='direct')

with Connection('amqp://guest:guest@localhost:5672//') as c:
    bound_exc = exchange(c.default_channel)
    msg = bound_exc.Message("Hello, World")
    bound_exc.publish(msg, routing_key='hoge.fuga')
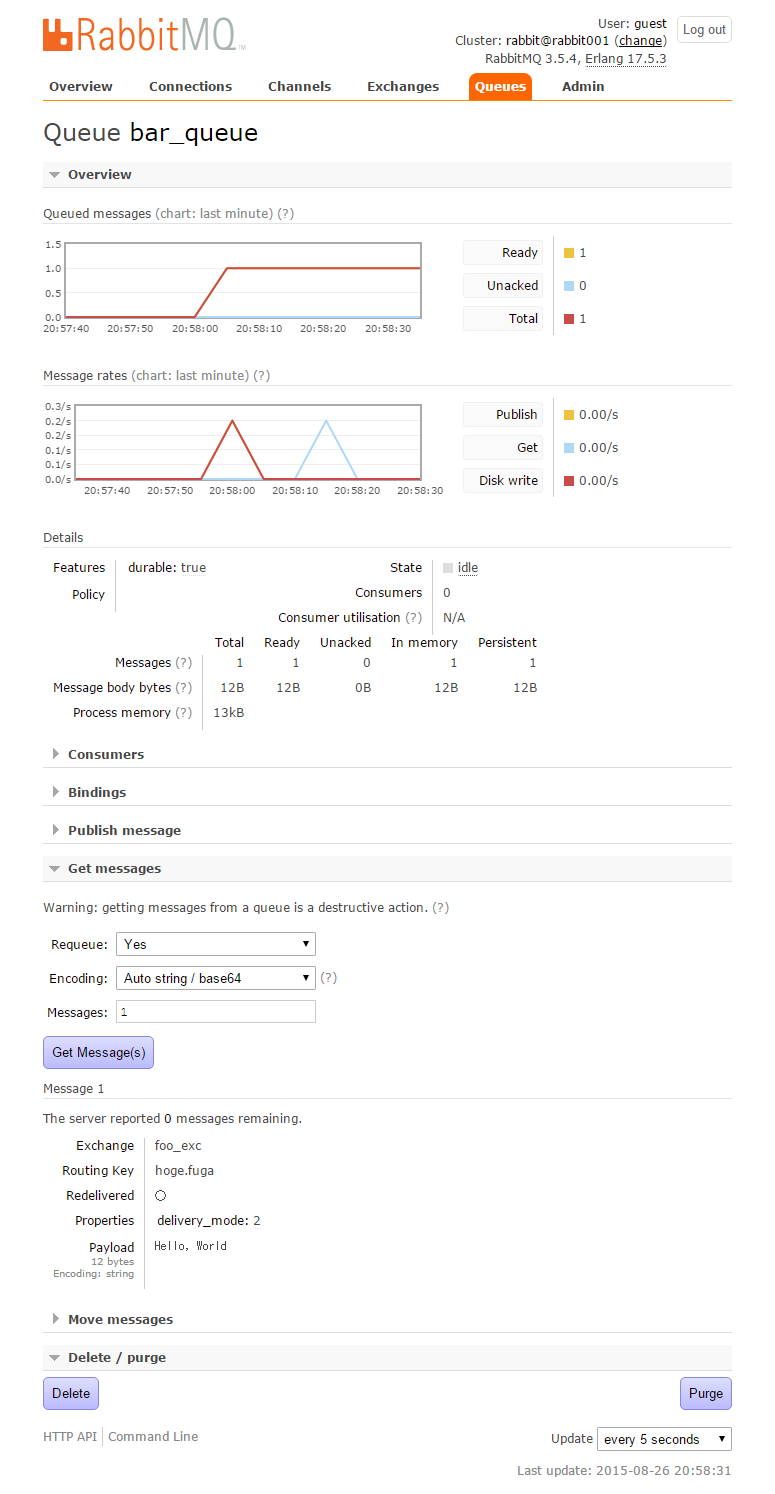
ちゃんとHello, Worldが入ったもよう。Get messagesのあたり。
Messageを取る
取られないMessageはただのゴミなので、取る。
サンプルコード
from kombu import Connection,Exchange,Queue,Consumer

exchange = Exchange('foo_exc', type='direct')
queue = Queue('bar_queue', exchange=exchange, routing_key='hoge.fuga')

def callback(body, message):
    print body
    message.ack()

with Connection('amqp://guest:guest@localhost:5672//') as c:

    with Consumer(c.default_channel, queues=[queue], callbacks=[callback]):
        c.drain_events()
結果
ubuntu@ubuntu:~$ python consume.py
Hello, World
Hello, Worldが表示された。
message.ack()を呼ばないと、Queueからメッセージが消えないもよう。
環境構築
RabbitMQ
Docker + docker-composeで構築
docker-compose.yml
rabbit:
    image: rabbitmq:3-management
    hostname: rabbit001
    ports:
        - "15672:15672"
        - "5672:5672"
kombu
普通にpipでインストール
pip install kombu