本記事は、「基礎&応用力をしっかり育成! Androidアプリ開発の教科書 第2版 Kotlin対応 なんちゃって開発者にならないための実践ハンズオン」を読みながら学習している筆者が学習メモとして随筆している記事です。
書籍内で存在自体は紹介されていますが、詳しくは掲載されていなかったので触れてみようと思います。
実務経験のエンジニアではないので、間違っているポイントがあると思います。
ViewBinderとは?
ただ、データそのままではなく加工した上で表示したい場合も出てきます。たとえば、データとして0か1がMap内に格納されており、0の場合は女性のアイコンを、1の場合は男性のアイコンを表示させるといったことが考えられます。その場合はViewBinderを使います。
引用元:基礎&応用力をしっかり育成!Androidアプリ開発の教科書 第2版 Kotlin対応 なんちゃって開発者にならないための実践ハンズオン Kindle版 WINGSプロジェクト 齊藤 新三 (著), 山田 祥寛 (監修) 322ページ
とあります。つまり、データを動的に加工して属性などを設定してViewで表示することができるものです。
実際に描いてみた
まずは元のコードです。書籍のコードを次のように改変しています。
- 関数内関数を利用して、menuListに要素を追加する処理を簡略化している
- 値段をInt型にしている
書籍の内容をそのまま利用している方は、次の内容をしていただけるとそのまま利用できるかなと思います。
- menuListのStringの2つめを
*に変更する - 値段のダブルクオーテーションと
円を消す
package xyz.miyayu.android.intentsample

import androidx.appcompat.app.AppCompatActivity
import android.os.Bundle
import android.widget.ListView
import android.widget.SimpleAdapter

class MainActivity : AppCompatActivity() {
    override fun onCreate(savedInstanceState: Bundle?) {
        super.onCreate(savedInstanceState)
        setContentView(R.layout.activity_main)

        val lvMenu = findViewById<ListView>(R.id.lvMenu)
        val menuList = mutableListOf<MutableMap<String,*>>()
        fun addMenu(name:String,price:Int){
            val menu = mutableMapOf("name" to name,"price" to price)
            menuList.add(menu)
        }
        addMenu("から揚げ定食",800)
        addMenu("ハンバーグ定食",850)
        addMenu("生姜焼き定食",850)
        addMenu("ステーキ定食",1000)
        addMenu("野菜炒め定食",750)
        addMenu("とんかつ定食",900)
        addMenu("ミンチかつ定食",850)
        addMenu("チキンカツ定食",900)
        addMenu("コロッケ定食",850)
        addMenu("回鍋肉定食",750)
        addMenu("麻婆豆腐定食",800)
        addMenu("A定食",900)
        addMenu("B定食",900)
        addMenu("C定食",900)
        addMenu("D定食",900)
        addMenu("E定食",900)
        addMenu("F定食",900)

        val from = arrayOf("name","price")
        val to = intArrayOf(android.R.id.text1, android.R.id.text2) // (1)
        val adapter = SimpleAdapter(this@MainActivity, menuList, android.R.layout.simple_list_item_2,from,to)
        // (2)
        lvMenu.adapter = adapter
    }
    // (3) ここに色々足します。
}
そうしましたら、早速(3)のところにViewBinderを追加してみます。
private class TextViewBinder: ViewBinder{
    override fun setViewValue(view: View, data: Any, textRepresentation: String): Boolean {
        if(view.id == android.R.id.text2){ // (4)

            //円を付け足したテキストを作る。
            val text = "${data}円"

            //viewをTextViewとして扱えるようにする(キャストする)
            val textView = view as TextView

            //viewのテキストを、円を付け足したテキストに変える。
            textView.text = text

            //色を変える
            textView.setBackgroundColor(Color.RED)
            return true // (5)
        }
        return false
    }
}
前提として、(5)でtrueを返した場合には、こちらが設定してあげた要素が表示されます。
falseの時は、元データ(今回はからあげ定食等の部分)がそのまま表示されます。
(4)の箇所では、画面部品のR値が書き換えたい箇所のものなのかを判断しています。
つまり、今回は金額の部分を書き換えたいので、(1)に書かれているandroid.R.id.text2を指定しています。
そして、文字列を作成し、viewに各種属性を設定していきます。
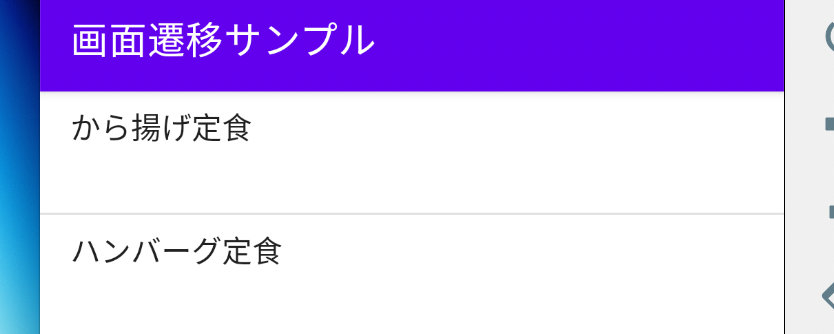
ちなみに、textview.text = 等を書かないと、次の画像のように何も表示されないので、新しい要素を作成して、テキストなどを設定していると考えて良いでしょう。
(trueを返す場合は、viewに表示したいデータを入れてあげないと何も表示されない。)
最後に、今作成したTextViewBinderを利用するようにします。(2)に次の文を追加します
adapter.viewBinder = TextViewBinder()
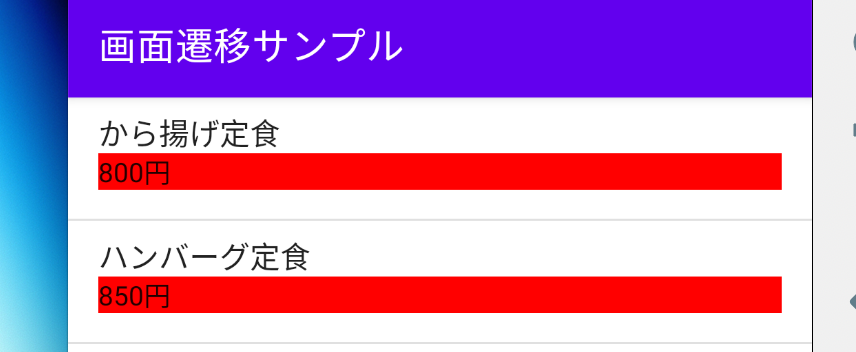
実行すると、次のようになるはずです。
以下、完成したコードです
package xyz.miyayu.android.intentsample

import android.graphics.Color
import androidx.appcompat.app.AppCompatActivity
import android.os.Bundle
import android.view.View
import android.widget.ListView
import android.widget.SimpleAdapter
import android.widget.SimpleAdapter.ViewBinder
import android.widget.TextView

class MainActivity : AppCompatActivity() {
    override fun onCreate(savedInstanceState: Bundle?) {
        super.onCreate(savedInstanceState)
        setContentView(R.layout.activity_main)

        val lvMenu = findViewById<ListView>(R.id.lvMenu)
        val menuList = mutableListOf<MutableMap<String,*>>()
        fun addMenu(name:String,price:Int){
            val menu = mutableMapOf("name" to name,"price" to price)
            menuList.add(menu)
        }
        addMenu("から揚げ定食",800)
        addMenu("ハンバーグ定食",850)
        addMenu("生姜焼き定食",850)
        addMenu("ステーキ定食",1000)
        addMenu("野菜炒め定食",750)
        addMenu("とんかつ定食",900)
        addMenu("ミンチかつ定食",850)
        addMenu("チキンカツ定食",900)
        addMenu("コロッケ定食",850)
        addMenu("回鍋肉定食",750)
        addMenu("麻婆豆腐定食",800)
        addMenu("A定食",900)
        addMenu("B定食",900)
        addMenu("C定食",900)
        addMenu("D定食",900)
        addMenu("E定食",900)
        addMenu("F定食",900)

        val from = arrayOf("name","price")
        val to = intArrayOf(android.R.id.text1, android.R.id.text2)
        val adapter = SimpleAdapter(this@MainActivity, menuList, android.R.layout.simple_list_item_2,from,to)
        adapter.viewBinder = TextViewBinder()
        lvMenu.adapter = adapter

    }

    private class TextViewBinder: ViewBinder{
        override fun setViewValue(view: View, data: Any, textRepresentation: String): Boolean {
            if(view.id == android.R.id.text2){ // (4)

                //円を付け足したテキストを作る。
                val text = "${data}円"

                //viewをTextViewとして扱えるようにする(キャストする)
                val textView = view as TextView

                //viewのテキストを、円を付け足したテキストに変える。
                textView.text = text

                //色を変える
                textView.setBackgroundColor(Color.RED)
                return true // (5)
            }
            return false
        }
    }
}