はじめに
iOS開発でTDDする際に準備しておくと良いことを記載しました。
個人的な備忘録も兼ねているので分かりづらい部分あるかもしれません。
気が向いたら内容をもう少し充実させたり、サンプルプロジェクトを追加したりしようと思います。
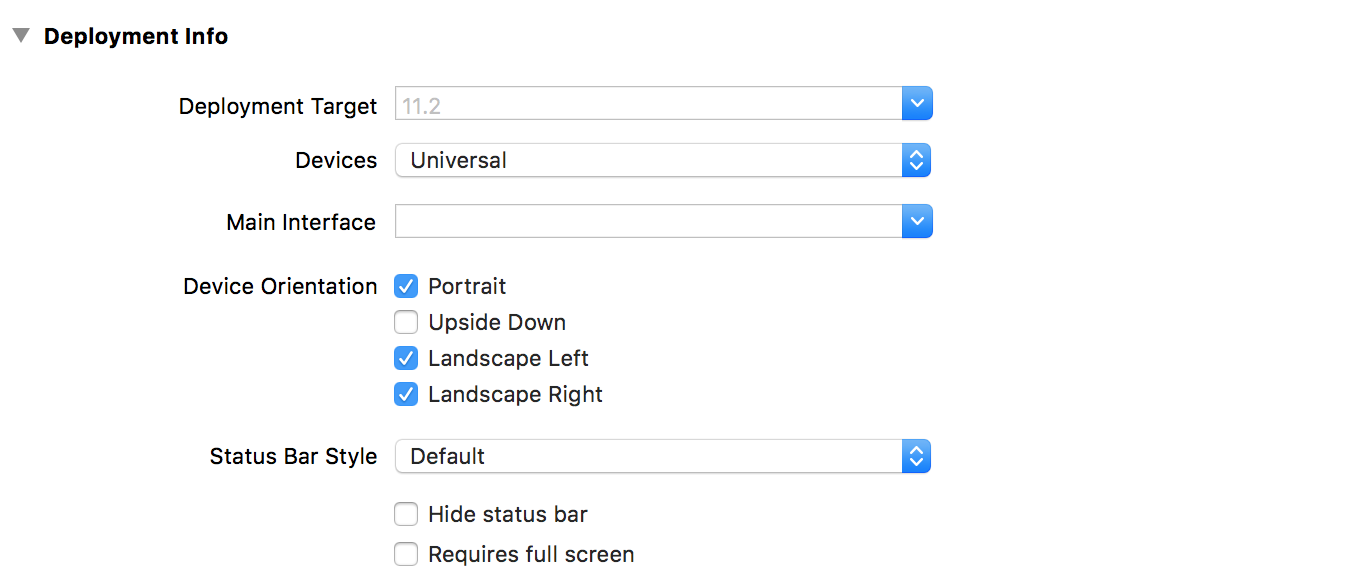
Main Interfaceを削除
Main Interfaceを削除しておきます。
デフォルトはMain.Storyboardが設定されています。
AppDelegateの設定
上記でMain Interfaceを削除してしまった代わりに、コードでwindowのrootViewControllerを指定します。
AppDelegate.swift
import UIKit

@UIApplicationMain
final class AppDelegate: UIResponder, UIApplicationDelegate {

    var window: UIWindow?

    func application(_ application: UIApplication, didFinishLaunchingWithOptions launchOptions: [UIApplicationLaunchOptionsKey: Any]?) -> Bool {

        window = UIWindow(frame: UIScreen.main.bounds)
        window?.rootViewController = SetUpVC() // 任意のViewController
        window?.makeKeyAndVisible()

        return true
    }
}
main.swiftの独自実装
main.swiftを準備します。
main関数を実行するためにAppDelegateから@UIApplicationMainを削除しておきます。
main.swift
// Xcode10
UIApplicationMain(CommandLine.argc,
                  CommandLine.unsafeArgv,
                  NSStringFromClass(UIApplication.self),
                  NSStringFromClass(AppDelegate.self))

// Xcode8 or 9
UIApplicationMain(CommandLine.argc,
                  UnsafeMutableRawPointer(CommandLine.unsafeArgv)
                    .bindMemory(
                        to: UnsafeMutablePointer<Int8>.self,
                        capacity: Int(CommandLine.argc)),
                  NSStringFromClass(UIApplication.self),
                  NSStringFromClass(AppDelegate.self))
追記:Xcode10では、第二引数をUnsafeMutableRawPointerを利用せず記述できるようになりました。
(@yukkobay さん情報提供ありがとうございます)
テスト用AppDelegateを作成
テストビルド時に起動するAppDelegateを準備します。
TestAppDelegate.swift
import UIKit

final class TestAppDelegate: UIResponder, UIApplicationDelegate {

    var window: UIWindow?

    func applicationDidFinishLaunching(_ application: UIApplication) {

        window = UIWindow(frame: UIScreen.main.bounds)
        window?.rootViewController = UIViewController() // 任意のViewController
        window?.makeKeyAndVisible()
    }
}
環境変数を設定し、参照できるようにする
Build Schemeに応じて任意のAppDelegateを起動するための前準備として環境変数の設定します。
ここでは上記で作成したTestAppDelegateを起動するために、テストビルドのArgumentsの設定に環境変数を追加しています。
- Product > Scheme > Edit Scheme を選択
- Environment Variables の項目で任意の Key と Value を設定

以下のコードでValueの値を参照することができます。
ProcessInfo.processInfo.environment["設定したKey"]
よしなに利用できるようにラッパーを用意すると良さそうです。
Global.swift
struct Global {
    static var isUnitTest: Bool {
        return ProcessInfo.processInfo.environment["isUnitTest"] == "true"
    }
}
main.swiftの修正
main.swift
import UIKit

private var appDelegateName: String {
    if Global.isUnitTest {
        return NSStringFromClass(TestAppDelegate.self)
    } else {
        return NSStringFromClass(AppDelegate.self)
    }
}

UIApplicationMain(CommandLine.argc,
                  UnsafeMutableRawPointer(CommandLine.unsafeArgv)
                    .bindMemory(
                        to: UnsafeMutablePointer<Int8>.self,
                        capacity: Int(CommandLine.argc)),
                  NSStringFromClass(UIApplication.self),
                  appDelegateName)
これでBuild Schemeに応じて任意のAppDelegateを起動できるように修正できました。
環境
- Xcode 9.2
- Swift 4.0