確定申告で毎回思うこと
今年も確定申告の時期が終わりましたね。毎年領収書を溜めていますが、電子帳簿も試したい!
現在は様々なサービスがあり OCR も非常に性能が良いです。
と思いつつも、中々気が進まない...。
というのも、レシートごとに画像を用意するのが面倒...。
つくりたいもの
そこで、パノラマ写真で領収書をバーっと撮影した画像を、一つ一つの領収書データに分けてくれるアプリをつくってみました。

こんな感じで複数の領収書が入った画像を分割して日付と店名をファイル名にします。

流れは次の通りです。
- 複数の領収書が撮影された1つの画像をアップロード
- 一つ一つの領収書画像に分割
- それぞれの領収書の「日付」「店名」を抽出し、ファイル名に入れて保存
つくりかた
Cloud Vision API を使いました。
フロントエンドは React 、バックエンドは Flask (Python) です。
receipt-ocr-app/
├── backend/
│   ├── app.py              ←OCR処理
│   ├── requirements.txt
│   ├── uploads/            ←使用する画像
│   └── output/             ←処理後の画像
├── frontend/
│   ├── src/
│   │   ├── App.jsx         ←メインのUI
│   │   ├── App.css
│   │   ├── index.js
│   │   └── index.css
│   ├── tailwind.config.js
│   ├── package.json
│   └── package-lock.json
※プロジェクト作成時の React の細々としたファイル群は省略しています。
フロントエンド
初期化等
frontend/ ディレクトリで準備をします。
npx create-react-app .
npm install -D tailwindcss postcss autoprefixer axios
npm install              # 念のためこの順番にしました
npx tailwindcss init -p  # tailwind.config.js を生成
module.exports = {
  content: [
    "./src/**/*.{js,jsx,ts,tsx}",
  ],
  theme: {
    extend: {},
  },
  plugins: [],
}
@tailwind base;
@tailwind components;
@tailwind utilities;
import React from 'react';
import ReactDOM from 'react-dom/client';
import App from './App.jsx'; // ← ここを .js → .jsx に変更
import './index.css';

const root = ReactDOM.createRoot(document.getElementById('root'));
root.render(
  <React.StrictMode>
    <App />
  </React.StrictMode>
);
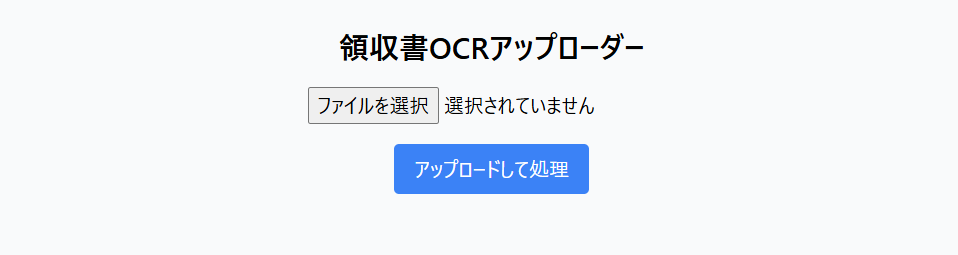
デザインはシンプルです。
import { useState } from "react";
import axios from "axios";

function App() {
  const [file, setFile] = useState(null);
  const [result, setResult] = useState(null);

  const handleUpload = async () => {
    if (!file) return;
    const formData = new FormData();
    formData.append("image", file);

    try {
      const res = await axios.post("http://localhost:5000/upload", formData, {
        headers: { "Content-Type": "multipart/form-data" },
      });
      setResult(res.data);
    } catch (err) {
      console.error(err);
      setResult({ message: "アップロード失敗" });
    }
  };

  return (
    <div className="min-h-screen bg-gray-50 p-6 flex flex-col items-center">
      <h1 className="text-2xl font-bold mb-4">領収書OCRアップローダー</h1>

      <input
        type="file"
        accept="image/*"
        onChange={(e) => setFile(e.target.files[0])}
        className="mb-4"
      />

      <button
        onClick={handleUpload}
        className="bg-blue-500 text-white px-4 py-2 rounded hover:bg-blue-600"
      >
        アップロードして処理
      </button>

      {result && (
        <div className="mt-6 text-left w-full max-w-2xl">
          <p className="font-semibold">{result.message}</p>

          <ul className="mt-4 space-y-2">
            {result.results &&
              result.results.map((r, index) => (
                <li key={index} className="border p-2 rounded bg-white shadow">
                  <p>📄 <strong>{r.file}</strong></p>
                  <p>📅 日付: {r.date}</p>
                  <p>🏪 店名: {r.store}</p>
                </li>
              ))}
          </ul>
        </div>
      )}
    </div>
  );
}

export default App;
バックエンド側で立ち上げる http://localhost:5000/ にポストしています。
バックエンド
パッケージの準備
Flask
flask-cors
google-cloud-vision
opencv-python
pip install -r requirements.txt
Python バージョンは3.12.2です。
また、Cloud Vision API を有効化し、サービスアカウントのキーを取得します。

手順は以下の通りです。
- Google Cloud でプロジェクトを立ち上げる
- Cloud Vision API を有効化
- サービスアカウントを作成し、キーの json ファイルをダウンロードする
{
  "type": "service_account",
  "project_id": "your-project-id",
  "private_key_id": "xxxxxxxxxxxxxxxxxxx",
  "private_key": "-----BEGIN PRIVATE KEY-----\n...\n-----END PRIVATE KEY-----\n",
  "client_email": "your-service-account@your-project-id.iam.gserviceaccount.com",
  "client_id": "123456789012345678901",
  "auth_uri": "https://accounts.google.com/o/oauth2/auth",
  "token_uri": "https://oauth2.googleapis.com/token",
  "auth_provider_x509_cert_url": "https://www.googleapis.com/oauth2/v1/certs",
  "client_x509_cert_url": "https://www.googleapis.com/robot/v1/metadata/x509/..."
}
ここまで準備ができたら、メインのコードを書いていきます。サービスアカウントのキーは配置したパスを以下のPATHに入れてください。
import os
import cv2
import re
from flask import Flask, request, jsonify
from flask_cors import CORS
from google.cloud import vision
from google.oauth2 import service_account

# Google Cloud Vision の認証設定
SERVICE_ACCOUNT_FILE = 'PATH'+'service_account_key.json'
credentials = service_account.Credentials.from_service_account_file(SERVICE_ACCOUNT_FILE)
vision_client = vision.ImageAnnotatorClient(credentials=credentials)

app = Flask(__name__)
CORS(app)

UPLOAD_FOLDER = 'uploads'
OUTPUT_FOLDER = 'output'

os.makedirs(UPLOAD_FOLDER, exist_ok=True)
os.makedirs(OUTPUT_FOLDER, exist_ok=True)

@app.route('/')
def index():
    return '領収書OCRサーバーが起動しています。'

@app.route('/upload', methods=['POST'])
def upload():
    if 'image' not in request.files:
        return '画像が見つかりませんでした', 400

    image = request.files['image']
    if image.filename == '':
        return 'ファイル名が空です', 400

    filepath = os.path.join(UPLOAD_FOLDER, image.filename)
    image.save(filepath)

    # 処理実行
    results = split_and_ocr_receipts(filepath)

    return jsonify({
        'message': f'処理完了:{len(results)} 件のレシートを出力しました。',
        'results': results
    })

def split_and_ocr_receipts(filepath):
    img = cv2.imread(filepath)
    gray = cv2.cvtColor(img, cv2.COLOR_BGR2GRAY)
    gray = cv2.GaussianBlur(gray, (5, 5), 0)
    _, thresh = cv2.threshold(gray, 0, 255, cv2.THRESH_BINARY + cv2.THRESH_OTSU)

    contours, _ = cv2.findContours(thresh, cv2.RETR_EXTERNAL, cv2.CHAIN_APPROX_SIMPLE)
    contours = sorted(contours, key=lambda cnt: cv2.boundingRect(cnt)[0])  # 画像を左から右の順に処理する

    results = []

    for i, cnt in enumerate(contours):
        x, y, w, h = cv2.boundingRect(cnt)
        if w < 200 or h < 200:
            continue

        roi = img[y:y+h, x:x+w]
        roi = cv2.resize(roi, (600, int(600 * h / w)))

        # OpenCV画像を変換してCloud Visionへ
        _, encoded_image = cv2.imencode('.jpg', roi)
        content = encoded_image.tobytes()
        vision_image = vision.Image(content=content)
        response = vision_client.text_detection(image=vision_image)
        texts = response.text_annotations
        text = texts[0].description if texts else ""

        # 日付の抽出
        date_match = re.search(r'\d{4}[/-]\d{1,2}[/-]\d{1,2}', text)
        date_str = date_match.group().replace('/', '-') if date_match else f'unknown{i+1}'

        # 店名の抽出
        store_name = 'unknown'
        for line in text.split('\n'):
            if '店' in line or len(line.strip()) >= 4:
                store_name = line.strip()
                break

        # ファイル名整形
        safe_store = re.sub(r'[\\/*?:"<>|]', '', store_name)
        filename = f'{date_str}_{safe_store}.png'

        output_path = os.path.join(OUTPUT_FOLDER, filename)
        cv2.imwrite(output_path, roi)

        results.append({
            'file': filename,
            'date': date_str,
            'store': store_name,
            'text': text
        })

    return results

if __name__ == '__main__':
    app.run(debug=True)
もし、文字化けなどがあれば unicodedata を使ってください。
サンプルコード
import unicodedatadef normalize_filename(name):
# NFC正規化 + ファイル名禁止文字の除去 + 半角変換など
name = unicodedata.normalize('NFKC', name)
name = re.sub(r'[\/*?:"<>|]', '', name) # 禁止文字を削除
name = name.encode('utf-8', 'ignore').decode('utf-8') # 不正な文字を除外
return name.strip()
実行結果
sample.jpg という画像データを入れると上手く、領収書を分割してくれました。
ただし、店名が上手く抽出できるように以下の部分は独自にコードを変えています。この辺りはぜひご自身のデータに合わせて調整して下さい。
# 日付の抽出
date_match = re.search(r'\d{4}[/-]\d{1,2}[/-]\d{1,2}', text)
date_str = date_match.group().replace('/', '-') if date_match else f'unknown{i+1}'

# 店名の抽出
store_name = 'unknown'
for line in text.split('\n'):
    if '店' in line or len(line.strip()) >= 4:
        store_name = line.strip()
        break
上手くいかなかった例
床を領収書として判定したり、日付や店名が取れない場合があります。


性能に関しては、撮影した画像、抽出のルール、そもそも難易度の高い領収書 (コンビニはやり易い) などの要素が関係してきます。黒い床や紙の上だとバウンディングボックスは作りやすいと思います。
また、Tesseract(pytesseract) も試してみましたが、今回の課題ではCloud Vision API に軍配が上がりました。
Tesseract(pytesseract)のコードについても記事を書いて、こちらにリンクをつくる予定です。
参考
やはり領収書の特徴を掴む手間があるので、こういったものも使ってみたいですね。
もし生成 AI でデータ構造化をしたい方はこちらが参考になります。