はじめに
弊社では建築資材の自社利用以外にリースも行っています。
資材貸出時の入出庫のタイミングでその数を目視で数えたりして管理していますが、数え間違いや作業時間の問題から、ディープラーニングを応用して撮影した資材の画像から個数を自動的に算出する仕組みを検討してみました。
検出対象の資材
初回の今回は、基本的に形状どれも同じで比較的実装が簡単そうな単管パイプから試してみることにしました。
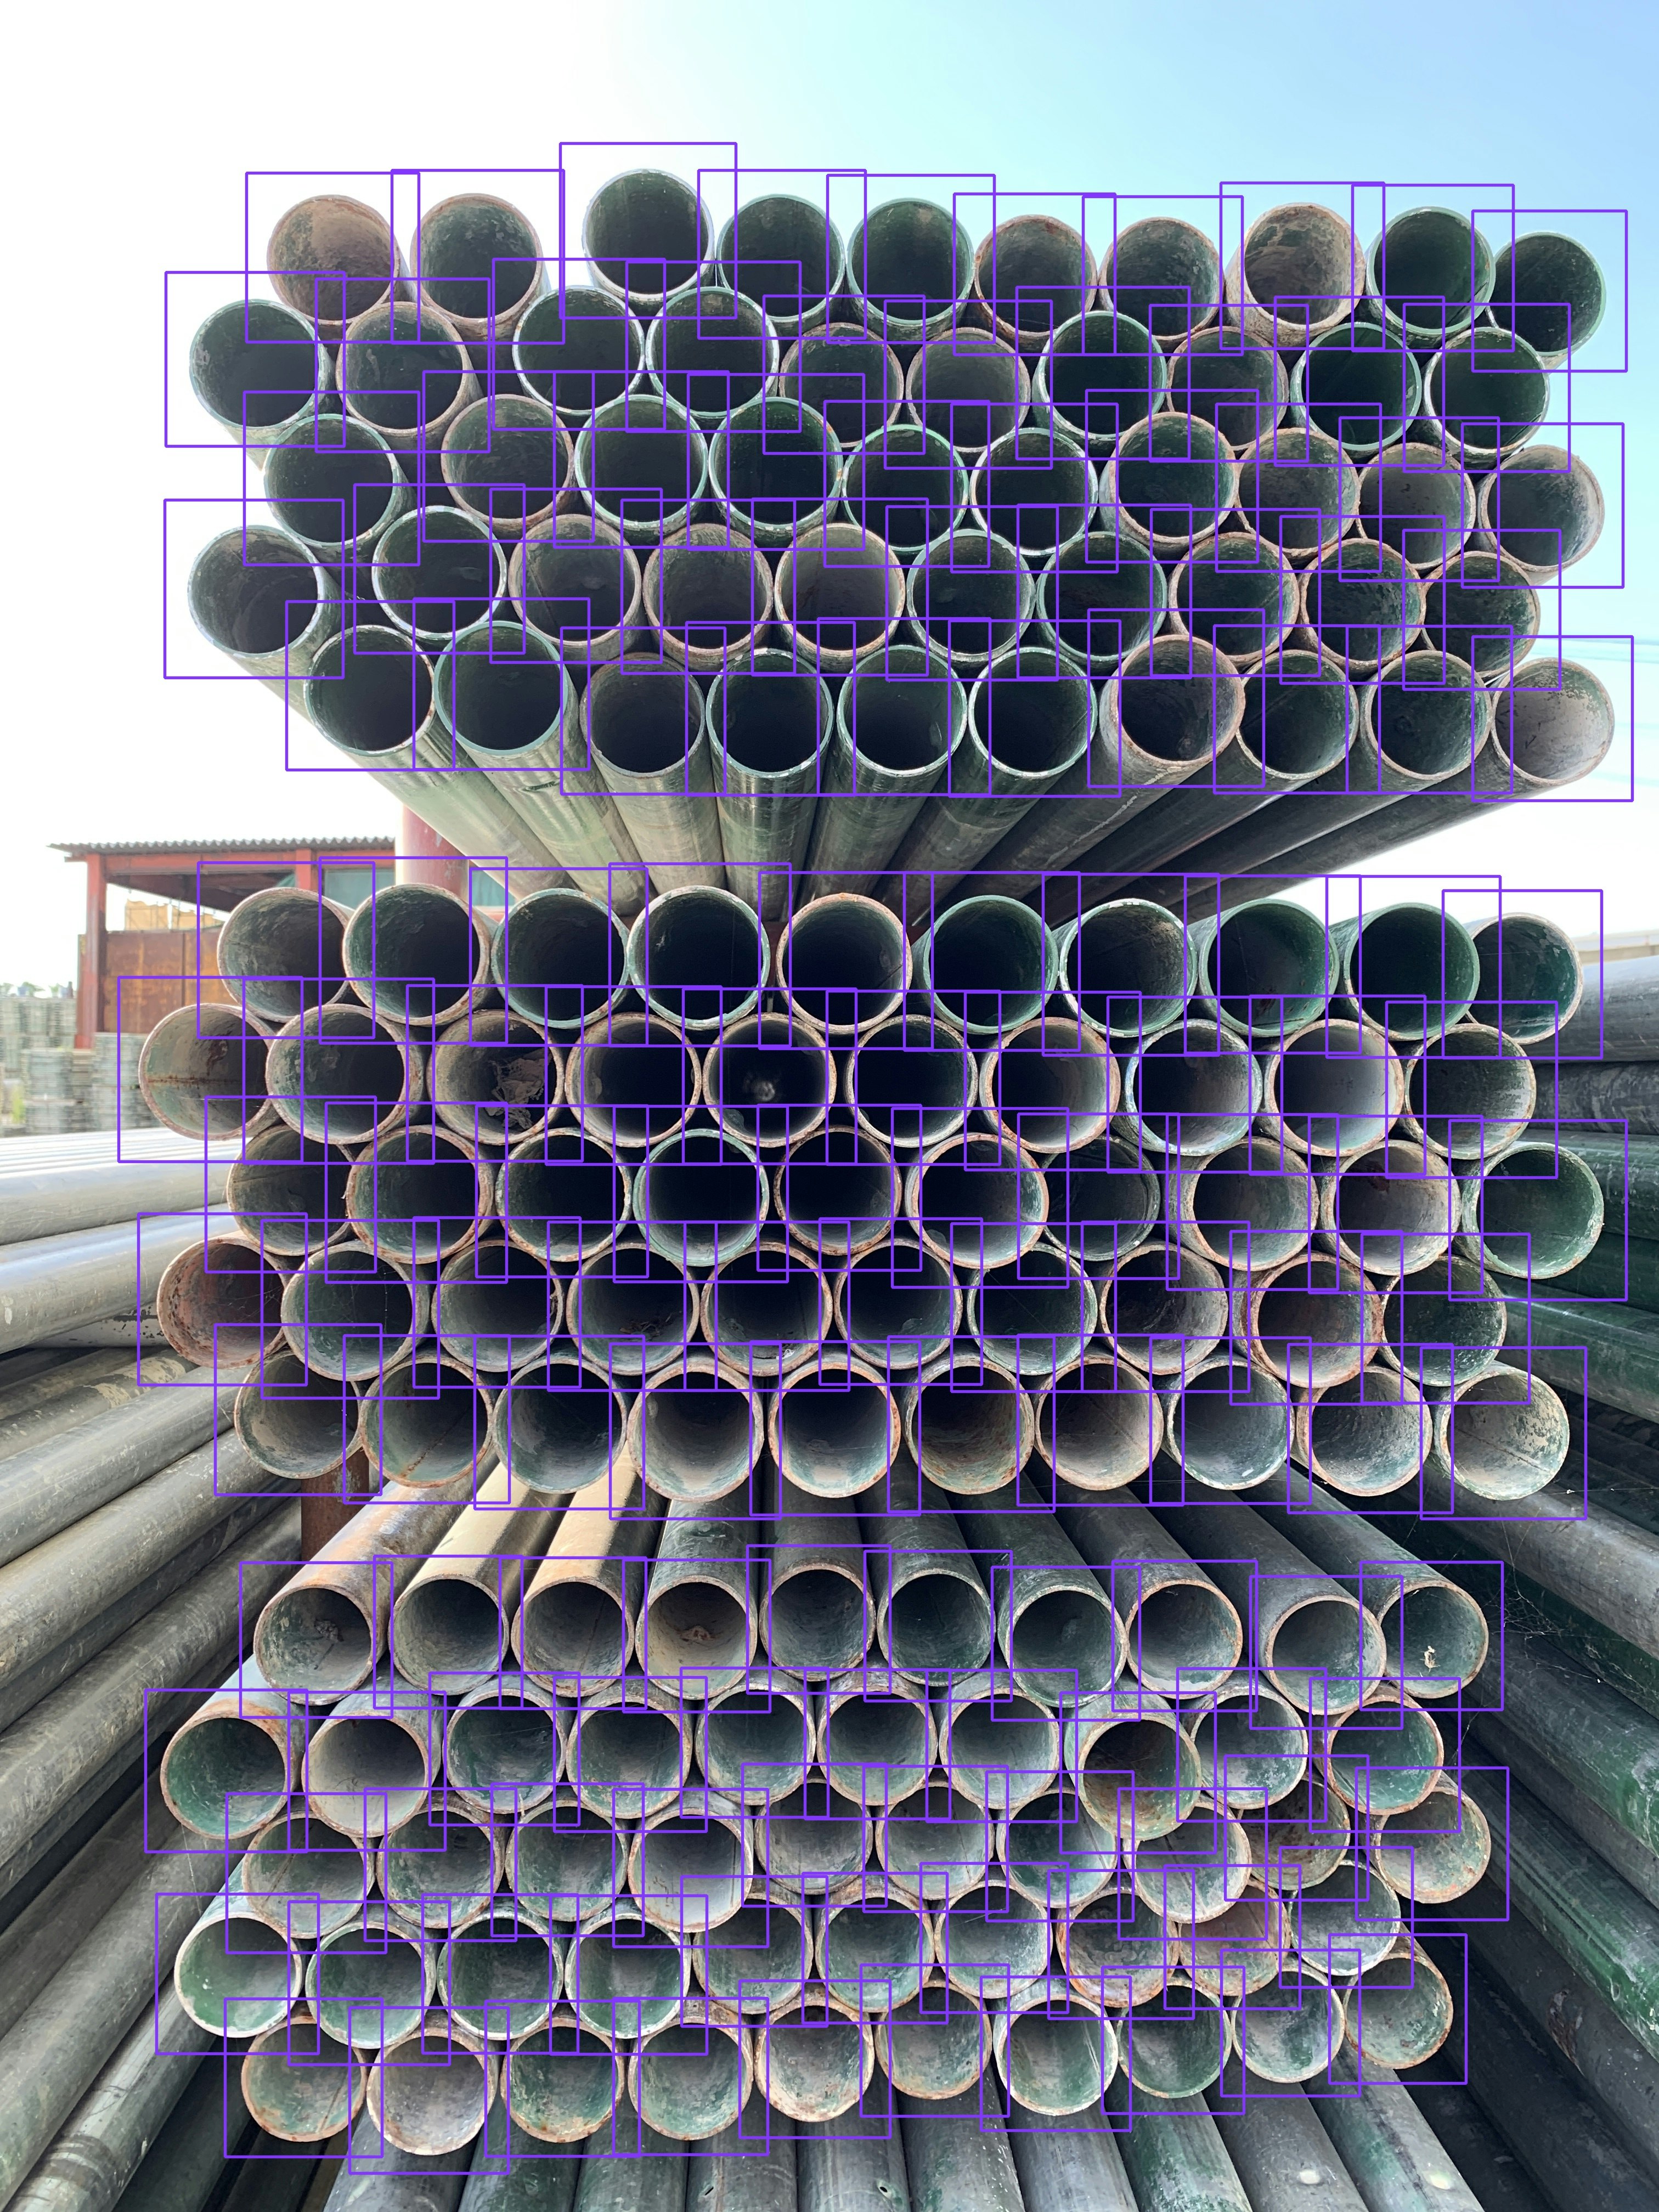
こんな感じの画像から、パイプの断面を検出して本数を数えるイメージです。

環境
- BTO で購入したデスクトップマシン
- このマシンに自前の GPU:RTX 3090 (24 GB) を装着
- OS:Ubuntu 22.10
- ライブラリ:YOLOv8 (ultralytics 8.0.143)
環境の具体的な構築方法はここでは割愛します。
特に難しい作業はありませんでした。
学習に使用するデータ
現場で撮影した 17 枚の写真を使用します。
iPhone で撮影した元の画像は解像度が高い (4032px × 3024px) のと、アノテーションソフトで開いた時に上下が逆になってしまうため、こちら の情報を参考に Exif 情報を反映し、1/4 にリサイズしました。
リサイズすると 1008px × 756px の画像サイズになります。
サンプルコード
import PIL.Image
import PIL.ImageOps
import numpy as np
import os


def exif_transpose(img):
    if not img:
        return img
    exif_orientation_tag = 274

    # Check for EXIF data (only present on some files)
    if hasattr(img, "_getexif") and isinstance(img._getexif(), dict) and exif_orientation_tag in img._getexif():
        exif_data = img._getexif()
        orientation = exif_data[exif_orientation_tag]

        # Handle EXIF Orientation
        if orientation == 1:
            # Normal image - nothing to do!
            pass
        elif orientation == 2:
            # Mirrored left to right
            img = img.transpose(PIL.Image.FLIP_LEFT_RIGHT)
        elif orientation == 3:
            # Rotated 180 degrees
            img = img.rotate(180)
        elif orientation == 4:
            # Mirrored top to bottom
            img = img.rotate(180).transpose(PIL.Image.FLIP_LEFT_RIGHT)
        elif orientation == 5:
            # Mirrored along top-left diagonal
            img = img.rotate(-90, expand=True).transpose(PIL.Image.FLIP_LEFT_RIGHT)
        elif orientation == 6:
            # Rotated 90 degrees
            img = img.rotate(-90, expand=True)
        elif orientation == 7:
            # Mirrored along top-right diagonal
            img = img.rotate(90, expand=True).transpose(PIL.Image.FLIP_LEFT_RIGHT)
        elif orientation == 8:
            # Rotated 270 degrees
            img = img.rotate(90, expand=True)

    return img


def load_image_file(file, mode='RGB'):
    # Load the image with PIL
    img = PIL.Image.open(file)

    if hasattr(PIL.ImageOps, 'exif_transpose'):
        # Very recent versions of PIL can do exit transpose internally
        img = PIL.ImageOps.exif_transpose(img)
    else:
        # Otherwise, do the exif transpose ourselves
        img = exif_transpose(img)
    img = img.convert(mode)

    return img


def main():
    CONVERTING = '/path/to/original'
    CONVERTED  = '/path/to/converted'

    for file in os.listdir(CONVERTING):
        if file.endswith('.jpg'):
            # exif Orientation
            img = load_image_file(os.path.join(CONVERTING, file))

            # 1/4にリサイズ
            width, height = img.size
            img = img.resize((int(width / 4), int(height / 4)))

            # 結果を保存
            img.save(os.path.join(CONVERTED, file))


if __name__ == '__main__':
    main()
次に YOLOv8 で学習するために指定サイズで切り抜きます。
YOLO は既定で 640px × 640px の画像サイズを入力としますので こちらや こちら を参考にランダムに10枚ずつ切り抜きます。
訂正
入力画像を既定で 640px × 640px にダウンスケーリングするのが正しい理解でした。
学習データの水増しの意味でとりあえずこのまま進めましたが、厳密にはインスタンスサイズが実際と異なりモデルの性能は若干低下すると認識しています。
サンプルコード
import cv2
import random
import os
from tqdm import tqdm

crop_n = 10             # クロップする回数
crop_size = (640, 640)  # クロップする画像のサイズ (height, width)

CONVERTED = '/path/to/converted'
CROP = '/path/to/crop'


def main():
    file_list = os.listdir(DATA_DIR)

    for file in tqdm(file_list, total=len(file_list)):
        if file.endswith('.jpg'):
            image_name = os.path.join(DATA_DIR, file)   # フルパス
            file_name, file_extension = os.path.splitext(file)

            # ベース画像の読み込み
            image = cv2.imread(image_name)
            h, w = image.shape[:2]

            # 入力画像が crop_size より小さい場合
            if h < crop_size[0] or w < crop_size[1]:
                print(f'Image {image_name} is too small for cropping')
                continue

            # 連続切り抜き処理
            for i in range(crop_n):
                # 切り抜く際の始点 (左上)
                x = random.randint(0, w-crop_size[1])
                y = random.randint(0, h-crop_size[0])

                # 切り抜き処理
                cut_image = image[y:y+crop_size[1], x:x+crop_size[0], :]

                # 切り抜き画像を保存
                cv2.imwrite(CROP + '/' + file_name + '_' + str(i).zfill(3) + '.jpg', cut_image)


if __name__ == '__main__':
    main()
- 訓練データ:103 枚
- 検証データ:45 枚
- テストデータ:17 枚
アノテーション
用意したデータにアノテーションを実施していきます。
アノテーションソフトとして labelImg の Windows 版 を使用します。
こんな感じでアノテーションしていきます。(labelImg の使用方法はここでは割愛します。)

訓練データと検証データのアノテーションで、1人で丸2日間かかりました。
画像によってはかなりの量のパイプが写っているものもあり、1時間もしないうちにマウスを持つ手の指が限界になります・・。
すべての画像をアノテーション完了後にインスタンス数 (バウンディングボックス数) を確認してると、1万ちょっとくらいでした。
サンプルコード
import os

def count_lines_in_file(file_path):
    with open(file_path, 'r', encoding='utf-8') as f:
        return len(f.readlines())


def main():
    DIR = '/path/to/labels'

    # ディレクトリ内の全てのファイルをリストアップ
    files = os.listdir(DIR)

    # テキストファイルのみをフィルタリング
    txt_files = [f for f in files if f.endswith('.txt')]

    total_lines = 0

    # 各テキストファイルの行数を合計
    for txt_file in txt_files:
        total_lines += count_lines_in_file(os.path.join(DIR, txt_file))

    print(f'インスタンス数: {total_lines}')


if __name__ == '__main__':
    main()
画像枚数は少ないものの、インスタンス数はそれなりに確保できたようです。
データの配置
用意したデータセットを以下のように配置します。
datasets
└── pipe
    ├── images
    │   ├── train
    │   │   ├── **.jpg
    │   │   └── **.jpg
    │   └── val
    │       ├── **.jpg
    │       └── **.jpg
    ├── labels
    │   ├── train
    │   │   ├── **.txt
    │   │   └── **.txt
    │   └── val
    │       ├── **.txt
    │       └── **.txt
    └── pipe.yaml
yaml ファイルはこんな感じです。
# Path
path: /path/to/datasets/pipe  # dataset root dir
train: images/train  # train images (relative to 'path')
val: images/val  # val images (relative to 'path')

# Classes
nc: 17  # number of classes
names: ['dog', 'person', 'cat', 'tv', 'car', 'meatballs', 'marinara sauce', 'tomato soup', 'chicken noodle soup', 'french onion soup', 'chicken breast', 'ribs', 'pulled pork', 'hamburger', 'cavity', 'pipe']
学習
用意したデータセットを学習していきます。
モデルの初期重みにはとりあえず "v8l" を用いました。
- epoch:100
- batch:16
- project:既定で 'runs/detect/trainX' (X は連番) というディレクトリが作成されます。何度も学習すると分かりにくくなるため変更します。
- name:"project" 配下のディレクトリ名です。どのようなパラメーターで学習したのか後で分かりやすいように記載すると良いかもしれません。
その他パラメーターは以下に記載されています。
https://docs.ultralytics.com/modes/train/#arguments
from ultralytics import YOLO

model = YOLO('yolov8l.pt')
model.train(
    data = '/path/to/datasets/pipe/pipe.yaml',
    epochs = 100,
    batch = 16,
    workers = 8,
    project = 'runs/pipe/train',
    name = 'yolov8l_16_100_v1',
    )
学習に要した時間とメモリはこのような感じです。
VRAM 16 GB の GPU でもギリギリいけそうでしょうか。
| 学習時間 | VRAM 使用量 |
|---|---|
| 327.6 sec | 約 13 ~ 17 GB / 1 epoch |
results.png は以下の通りです。
loss は落ち着いていって問題なさそうに見えます。

学習したモデルを使用して推論
weights ディレクトリに作成された "best.pt" で推論してみます。
今回はテストデータではなく、学習で使用していない後日撮影した画像を推論しました。
conf、iou は既定値ではなく 0.5 で見てみます。
推論のパラメーターは以下に記載されています。
https://docs.ultralytics.com/modes/predict/#inference-arguments
from ultralytics import YOLO

model = YOLO('/path/to/best.pt')
source = '/path/to/pictures'

results = model(
    source = source,
    show_labels = True,
    conf = 0.5,
    show_conf = True,
    iou = 0.5,
    line_width = 1,
    save = True,
    project = 'runs/clamp/predict',
    name = 'yolov8l_16_100_v1',
    )
- うまく検出しているパターン
実際の本数の 150 本をちゃんと検出できました。

- うまく検出していていないパターン
左下の雑草の背後にあるパイプを検出できていないようです。

他にも、以下のようなパターンでうまく検出できていませんでした。
- パイプによっては断面が奥まって隠れていて、画像上では三日月のような面積の少ない部分
- 劣化し断面が朽ちてきている、土等が詰まって断面境界が分かりにくく部分
- 逆光で光線が映りこんでいる
おわりに
今回は単管パイプの物体検出モデルの作成を検証しましたが、1発目でこのくらいの精度が出るモデルが作成できたことは若干驚きでした。
断面がキレイに写っている場合は、ほぼ 100% の精度で検出できていました。
いくつか課題はありチューニングの余地がありますが、オペレーション (撮影方法) で補える部分もありますので本番環境で十分に使用に耐えうるという感想を持ちました。