エディタ拡張 初心者の備忘録
初めてのエディタ拡張で分からないことだらけなので、
基本的なことからメモしていきたいと思っています。
良いサイトなどがあれば、教えていただけると幸いです。
概要
その1: Windowを作成しラベルを表示してみる
手順
Editorフォルダの作成
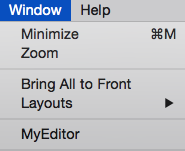
はじめに、Unityではエディタ拡張のお決まりとしてEditorフォルダを作成する。
Projectfile/Asset/Editorを作成し、その中にMyEditorWindow.csを作成する。
(Editorフォルダの場所はAsset以下ならどこでもOK)
EditorWindowの継承
独自Windowを作成する場合にはUnityEditor.EditorWindowを継承し、
必要とするGUIを配置していく。
ソースコード
MyEditorWindow.cs
using UnityEngine;
using UnityEditor;	//エディタ拡張関連は使用する
using System.Collections;

//独自のウインドウの作成
public class MyEditorWindow : EditorWindow {

	//メニューのWindowにEditorExの項目を追加
	[MenuItem("Window/MyEditor")]

	//staticにするのを忘れずに!
	static void open(){

		//MyEditorを選択するとopen()が呼ばれる
		EditorWindow.GetWindow<MyEditorWindow> ("MyEditor");

	}

	//Windowのクライアント領域のGUI処理
	void OnGUI(){

		//ラベル表示
		EditorGUILayout.LabelField( "Hello World!!" );

	}
}
確認
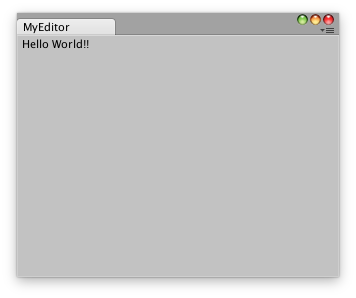
最後に、メニューのWindowからMyEditorを選択して表示を確認してみる。


おお~自作のWindowにHello World!!が表示された!
これでエディタ拡張の最初の一歩は踏み出せました。笑
これからも少しづつ勉強して自分の思い通りに拡張できるようになりたいですね。
参考
とてもわかりやすく説明されています。
ケットシーウェア【エディタ拡張徹底解説】