1
2

Delete article

Deleted articles cannot be recovered.

Draft of this article would be also deleted.

Are you sure you want to delete this article?

More than 5 years have passed since last update.

DELL管理ツール(OMSA)のインストール方法・利用方法

Last updated at Posted at 2021-01-07

はじめに

  • DELLのサーバを利用している方ならご存知かと思いますが、OMSA(OpenManage Server Administrator)のナレッジを整理します。

OMSAとは

  • DELLが提供している管理ツールOpenManage Server Administrator(通称:OMSA)のこと。
  • WebブラウザやCUIでHW状態確認が可能。

OMSAインストール手順

  • DELLのyum repositoryを設定。
# wget -q -O - http://linux.dell.com/repo/hardware/latest/bootstrap.cgi | sudo bash
  • OMSAのコンポーネントをyumでインストール。
# yum install -y srvadmin-all
  • OMSAを起動。
# /opt/dell/srvadmin/sbin/srvadmin-services.sh start

OMSAの利用

  • OMSAが起動した状態でWebブラウザから以下のURLへアクセスする。

    • https://<ホスト名 or IPアドレス>:1311/
  • 以下のログイン画面が出るので、ユーザとパスワードを入力する。

51526059-e5aef980-1e74-11e9-968a-a42836551bd4.png
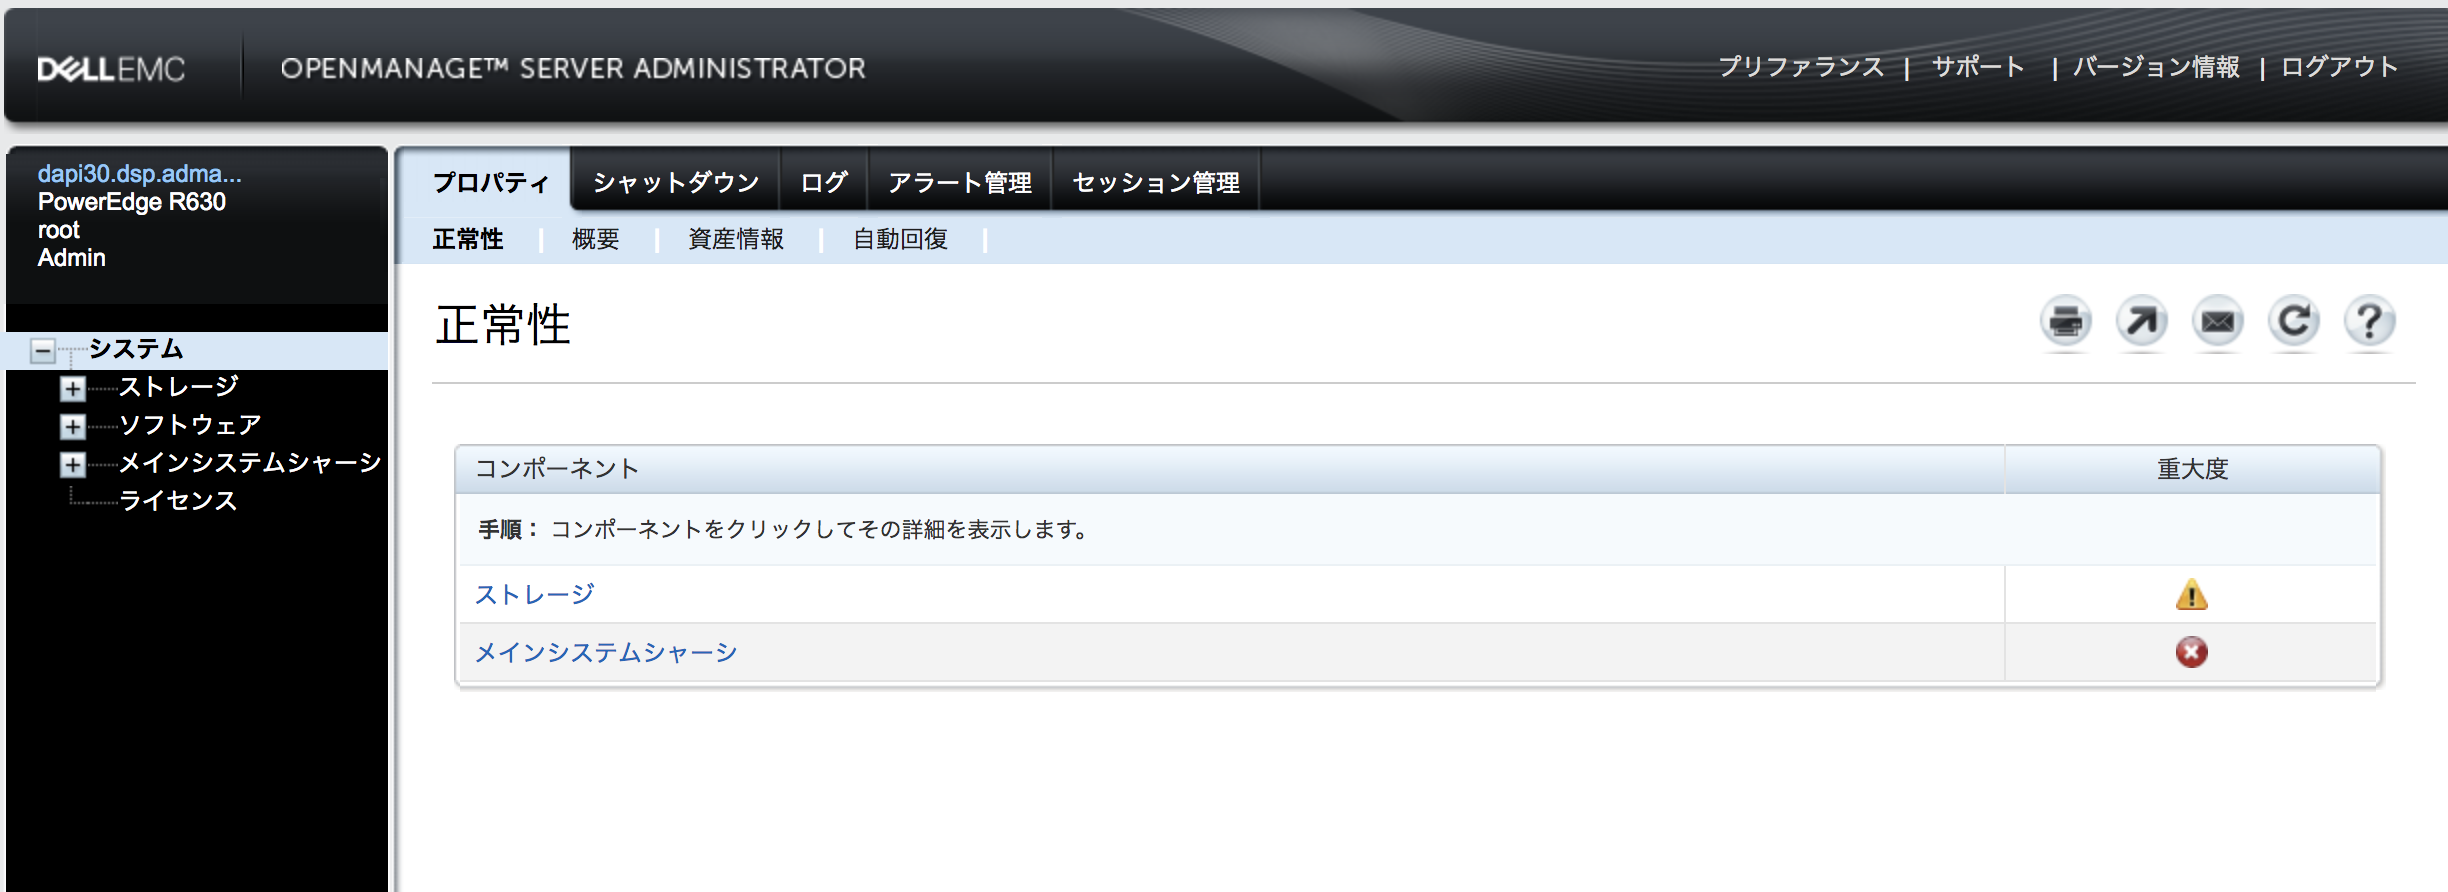
  • ログインをすると、HWの状態やログを確認することが可能となる。
    • 2枚目のキャプチャはストレージの状態を確認したサンプル
51526066-e8115380-1e74-11e9-816a-aaef12f857a5.png 51526080-eb0c4400-1e74-11e9-8bbb-38a40b2c8bdf.png

CLIの使い方

  • OMSAをインストールすると、CLIでHWの状態確認を行うことが可能になる。
    • 詳細は別途、整理予定。
1
2
0

Register as a new user and use Qiita more conveniently

  1. You get articles that match your needs
  2. You can efficiently read back useful information
  3. You can use dark theme
What you can do with signing up
1
2

Delete article

Deleted articles cannot be recovered.

Draft of this article would be also deleted.

Are you sure you want to delete this article?