#【Ruby on Rails】DB操作を含むプロジェクトの作成手順
Ruby on railsでプロジェクトの立ち上げからDB操作まで順を追って一つ一つ作成してく。
最終的に、DBから取得したデータをブラウザに表示する。
##目次
- はじめに
- プロジェクトの作成
- 必要なパッケージのインストール
- アプリケーションの作成
- ヘルプでコマンドラインを確認
- 忠告への対応
- サーバー起動
- ルーティングの作成
- コントローラの作成
- ビューの編集
- エラー対処法
- ホームのルーティングを追加
- モデルの生成
- マイグレーションファイルの役割と実行
- DB操作
- コントローラでDBのデータを取得する
- コントローラで処理したデータをビューで受け取る
- ブラウザに表示
##はじめに ###このページでできること
- Ruby on Railsでプロジェクトの新規作成
- ルーティングの設定
- DBの作成とデータの保存(モデルとDBの対応)
- DBからデータ抽出しブラウザに表示する
###bin/railsとbinの違いについて
railsコマンド実行の際に、公式ページに沿ってbin/railsとしているが、railsのみでも問題ありません。
bin/railsはbinディレクトリの中のrailsコマンドを実行していることを明記したもの。
###プロジェクトの作成 ##1. 必要なパッケージのインストール
- Ruby
- SQLite3
- Node.js
- yarn
- Gem
###1-1. rubyのインストール
インストール済みか確認。
$ ruby -v
ruby 2.7.0p0 (2019-12-25 revision 647ee6f091) [x86_64-darwin19]
インストールされていない場合は、以下ページから自分の環境にあったものを選択する。
https://www.ruby-lang.org/ja/documentation/installation/
##1-2. SQLiteのインストール
インストール済みか確認。
$ sqlite3 --version
3.28.0 2019-04-15 14:49:49 378230ae7f4
インストールされていない場合は、以下ページから自分の環境にあったものを選択する。
https://www.sqlite.org/download.html
##1-3. Nodeのインストール
インストール済みか確認。
$ node --version
v12.18.3
インストールされていない場合は、以下ページから自分の環境にあったものを選択する。
https://nodejs.org/en/download/
##1-4. yarnのインストール
$ yarn --version
1.22.10
インストールされていない場合は、以下コマンドを実行。
npm install --global yarn
npmよりもyarnの方が速度が早い。
##1-5. Gemのインストール
$ gem install rails
##2. アプリケーションの作成 blogアプリケーションを作成する。
$ rails new blog
アプリケーション名を変えたい場合は、blogを好きな名前にする。

3分ぐらい待って、これが出れば完成。
以降の操作のためプロジェクトディレクトリに移動しておく。
$ cd blog
##3. ヘルプでコマンドラインを確認 コマンドを確認しておく。
$ rails new -h
$ rails -h
##4. 忠告への対応 以下の警告に対応する。 ・bundlerのバージョンアップ ・tzinfo-dataの警告対応:bndleへのプラットフォーム追加
$ gem install bundler:2.2.2
$ bundle lock --add-platform x86-mingw32 x86-mswin32 x64-mingw32 java
これだけでは、bunldlerのエラーが消えないので以下も合わせて実行
$ gem update --system
5分くらいかかる。rails -hで警告が表示されなくなれば完了
**▼警告内容** >Warning: the running version of Bundler (2.1.2) is older than the version that created the lockfile (2.2.2). We suggest you to upgrade to the version that created the lockfile by running `gem install bundler:2.2.2`.
The dependency tzinfo-data (>= 0) will be unused by any of the platforms Bundler is installing for. Bundler is installing for ruby, x86_64-darwin-19 but the dependency is only for x86-mingw32, x86-mswin32, x64-mingw32, java. To add those platforms to the bundle, run
bundle lock --add-platform x86-mingw32 x86-mswin32 x64-mingw32 java.
##5. サーバー起動
$ bin/rails server
ページが表示されればOK。
ついでに、gitもコミットしておく。
$ git init
$ git add .
$ git commit -m "first commit"
##6. ルーティングの作成 ###ルーティングの書き方 routes.rbのdo endの中に以下を記述する。
・get "URI", to: "コントローラ名#アクション名"
###実際の処理
config > routes.rbの中に以下を記述する。
Rails.application.routes.draw do
  get "/articles", to: "articles#index"
end
URLが/articlesでリクエストがあったら、articlesコントローラのindexアクションを実行するという処理。
##7. コントローラの作成
・$ bin/rails generate controller <コントローラ名> <アクション名> --skip-routes
※コントローラ名にControllerは不要。デフォルトで追加される設定になるため。
###7-1. コントローラの作成
$ bin/rails generate controller Articles index --skip-routes

Running via Spring preloader in process 31185
      create  app/controllers/articles_controller.rb
      invoke  erb
      create    app/views/articles
      create    app/views/articles/index.html.erb
      invoke  test_unit
      create    test/controllers/articles_controller_test.rb
      invoke  helper
      create    app/helpers/articles_helper.rb
      invoke    test_unit
      invoke  assets
      invoke    scss
      create      app/assets/stylesheets/articles.scss
コントローラやビュー、ヘルパーなどが一気に作成される。(invokeは呼び出すという意味)
- app/controllers/articles_controller.rb
- app/views/articles/index.html.erb
- test/controllers/articles_controller_test.rb
- app/helpers/articles_helper.rb
- app/assets/stylesheets/articles.scss
###7-2. コントローラの確認 `app/controllers/articles_controller.rb`の中身を確認する。
class ArticlesController < ApplicationController
  def index
  end
end
コントローラはApplicationControllerを継承している。
作成した時点では、アクションの中に処理は何もない。ページを表示する前に処理を行いたい場合はここに記述していく。
###7-3. --skip-routes --skip-routesオプションがない場合は、コントローラを作成したときに、routes.rbが自動編集され、ルートが追加される。
get '<コントローラー名>/<アクション名>'
###7-4. コントローラ自動生成時の注意点
####7-4-1. コントローラ名を〇〇Controllerにした場合、Controllerは省略される。
$ bin/rails generate controller TestController send
Running via Spring preloader in process 31486
      create  app/controllers/test_controller.rb
       route  get 'test/send'
      invoke  erb
      create    app/views/test
      create    app/views/test/send.html.erb
      invoke  test_unit
      create    test/controllers/test_controller_test.rb
      invoke  helper
      create    app/helpers/test_helper.rb
      invoke    test_unit
      invoke  assets
      invoke    scss
      create      app/assets/stylesheets/test.scss
↓ ルーティングが自動追加
get 'test/send'
####7-4-2. to: は省略される `--skip-routes`を使わずルーティングを自動生成した場合、コントローラ名とアクション名は、URIと紐づくように設定される。
get 'test/send'
↓ 同じ
get 'test/send', to:'test#send'
ルーティングを変更すれば、上書きできる。
▼ルーティングの確認方法
$ rails routes list
##8. ビューの編集 コントローラを作成した際に自動生成された、ビューファイルを開く。`app/views/articles/index.html.erb`
<h1>Articles#index</h1>
<p>Find me in app/views/articles/index.html.erb</p>
デフォルトではアクション名とインデックス名&ファイルパスが記述されている。
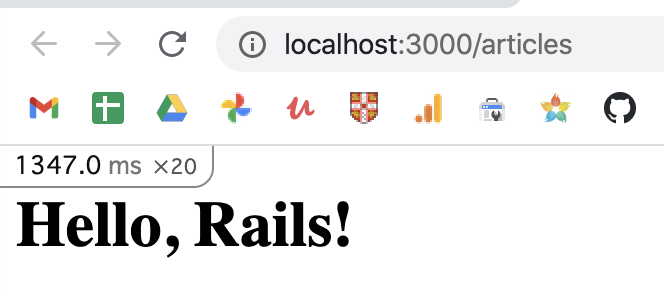
この内容を適当に変更。
<h1>Hello, Rails!</h1>
http://localhost:3000/articles にアクセスしてページが正しく表示されればOK。
##9. エラー対処法 http://localhost:3000/articles で以下のようなエラーが発生した場合は次を実行する。
Webpacker::Manifest::MissingEntryError in Articles#index
Webpacker can't find application.js in /Users/projects/my-pj/blog/public/packs/manifest.json. Possible causes:
- You want to set webpacker.yml value of compile to true for your environment
unless you are using thewebpack -wor the webpack-dev-server. - webpack has not yet re-run to reflect updates.
- You have misconfigured Webpacker's config/webpacker.yml file.
- Your webpack configuration is not creating a manifest.
Your manifest contains:
rails webpacker:install
rails webpacker:compile
webpackerがコンパイルされていないので、installで最新にアップデートした後に、コンパイルを実施する。
##10. ホームのルーティングを追加 routes.rbで`/`にアクセスしたときに実行するコントローラ名とアクション名を指定する。
root "<コントローラ名>#<アクション名>"
###実際の処理
Rails.application.routes.draw do
  root "articles#index"
  get "/articles", to: "articles#index"
end
http://localhost:3000/
にアクセスしたときに、Hello, Rails!が表示されればOK。
##11. モデルの生成 DB操作を行うためのモデルを作成する。
$ bin/rails generate model <モデル名> <カラム名>:<型>
- モデル名は冒頭大文字のキャメル、単数形で記述する。
- スネークケースの複数形のテーブルが自動生成される。
- カラムを追加する場合は、
<カラム名>:<型>をスペースを空けて記述していく。
###実際の処理
$ bin/rails generate model Article title:string body:text

Running via Spring preloader in process 34755
      invoke  active_record
      create    db/migrate/20210309094422_create_articles.rb
      create    app/models/article.rb
      invoke    test_unit
      create      test/models/article_test.rb
      create      test/fixtures/articles.yml
4つのファイルが生成される。大切なのは、No1のマイグレーションファイルと、No2のモデルファイル。
- db/migrate/20210309094422_create_articles.rb
- app/models/article.rb
- test/models/article_test.rb
- test/fixtures/articles.yml
##12. マイグレーションファイルの役割と実行
ruby on railsの中でDBを変更・作成する場合に、DBと直結すると変更反映など重くなってしまうため、DBのテーブルに依存しないようになっている。
DBテーブルに変更を反映する際に、このマイグレーションファイルを使って統合を行う。
###マイグレーションファイルの中身を確認
db/migrate/20210309094422_create_articles.rb
class CreateArticles < ActiveRecord::Migration[6.1]
  def change
    create_table :articles do |t|
      t.string :title
      t.text :body

      t.timestamps
    end
  end
end
ActiveRecordクラスのMicretionを拡張したクラスが生成される。
change関数が定義され、指定した型と名前のカラム(+タイムスタンプ)を持ったテーブルを作成する処理が記述されている。
t.timestampsメソッドは、created_atというカラムを作成する。
###マイグレーションの実行
以下を実行することで、マイグレーションファイルの内容がDBに反映される。
$ bin/rails db:migrate
##13. DB操作 モデルを作成し、DBのテーブルと同期できたため、これでDBの操作をすることができる。
railsの対話モードでDB操作を行う。
###13-1. オブジェクトの作成とDBへの保存
#対話モード
$ bin/rails console
2.7.0 :001 >


#オブジェクトを作成
2.7.0 :001 > article = Article.new(title: "Hello Rails", body: "I am on Rails!")
   (0.5ms)  SELECT sqlite_version(*)

#DBに保存
> article.save
  TRANSACTION (0.1ms)  begin transaction
  Article Create (0.4ms)  INSERT INTO "articles" ("title", "body", "created_at", "updated_at") VALUES (?, ?, ?, ?)  [["title", "Hello Rails"], ["body", "I am on Rails!"], ["created_at", "2021-03-09 10:06:42.394030"], ["updated_at", "2021-03-09 10:06:42.394030"]]
  TRANSACTION (1.0ms)  commit transaction
 => true
####オブジェクトの作成(.new)
・<モデル>.new(カラム名: "値",,,,)
通常、作成したオブジェクトは変数に代入する。
####DBに保存(.save)
・<オブジェクト>.save
###13-2. モデルとオブジェクトの確認 ・モデル名をそのまま入力すれば、カラム名や型などモデルの構造を確認できる。
・オブジェクト名を入力すれば、そのオブジェクトの中身を確認できる。
#モデルの構造を確認
2.7.0 :010 > Article
 => Article(id: integer, title: string, body: text, created_at: datetime, updated_at: datetime)

#オブジェクトの中身を確認
2.7.0 :014 > article
 => #<Article id: 1, title: "Hello Rails", body: "I am on Rails!", created_at: "2021-03-09 10:06:42.394030000 +0000", updated_at: "2021-03-09 10:06:42.394030000 +0000">
###13-3. DBからデータ取得 モデル名の後にメソッドを続けることで、指定したデータを取得することができる。
<モデル名>.メソッド
.all: 指定したテーブルのすべてのデータを取得
.find(id番号): 指定したidのデータを取得
2.7.0 :016 > Article.all
  Article Load (0.2ms)  SELECT "articles".* FROM "articles" /* loading for inspect */ LIMIT ?  [["LIMIT", 11]]
 => #<ActiveRecord::Relation [#<Article id: 1, title: "Hello Rails", body: "I am on Rails!", created_at: "2021-03-09 10:06:42.394030000 +0000", updated_at: "2021-03-09 10:06:42.394030000 +0000">]>

2.7.0 :017 > Article.find(1)
  Article Load (0.2ms)  SELECT "articles".* FROM "articles" WHERE "articles"."id" = ? LIMIT ?  [["id", 1], ["LIMIT", 1]]
 => #<Article id: 1, title: "Hello Rails", body: "I am on Rails!", created_at: "2021-03-09 10:06:42.394030000 +0000", updated_at: "2021-03-09 10:06:42.394030000 +0000">
.allメソッドを使うと、ActiveRecord::Relationオブジェクトを返す。
##14. コントローラでDBのデータを取得する 対話モードで行ったDB操作は、コントローラのアクションの処理として記述することができる。
###テーブルのデータを取得する処理
app/controllers/articles_controller.rbのindexアクションに以下を追記する。
class ArticlesController < ApplicationController
  def index
    @articles = Article.all
  end
end
変数の冒頭に@がつくと、インスタンス変数になる。(インスタンス毎に固有の変数)
インスタンス変数@articlesに、Articleモデル(articlesテーブル)のデータをすべて入れている。
##15. コントローラで処理したデータをビューで受け取る コントローラで取得したテーブルのデータをビューに渡して、ブラウザに表示する。
app/views/articles/index.html.erbに以下を記述。
<h1>Articles</h1>

<ul>
  <% @articles.each do |article| %>
    <li>
      <%= article.title %>
    </li>
    <li>
      <%= article.body %>
    </li>
  <% end %>
</ul>
・.erb
embeded rubyの略で、HTMLの中でrubyを使うことができる。
・<% %>
ブラウザに表示しないrubyの処理を記述する。最後は必ず<% end %>で処理を閉じる。
・<%= %>
ブラウザに出力したい処理を記述する。
・配列.each do | 変数 |
指定した配列の要素を一つずつ取り出し、変数に格納する。
・<%= article.title %>
eachメソッドで取得したデータのtitleプロパティを表示する。
##16. ブラウザに表示
http://localhost:3000/ にアクセス。
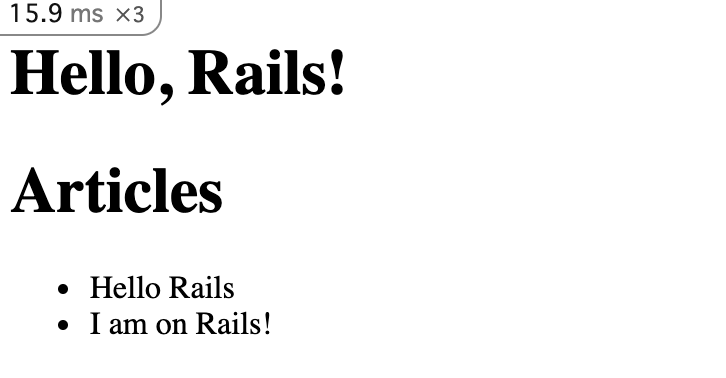
テーブルに保存した、titleとbodyプロパティの値が表示されていればOK。
###migration関連のエラーが出た場合
migrationを実行してくださいというエラーが出たら、以下を実行する。
bin/rails db:migration
##参考URL https://guides.rubyonrails.org/getting_started.html#setting-the-application-home-page
以上で、Ruby on Railsでプロジェクトの作成、DBの作成とデータの保存、DBからデータ抽出しブラウザに表示するまでが完了。
次は、CRUD操作を予定。