Visual Studio Codeを使用したC++開発環境構築
はじめに
- 本記事は、「Windows環境にフリーのC開発環境を構築した際のメモ」の続きです。
- gcc(MiGW)の環境を整えたが、秀丸エディタ+コマンドプロンプトでごりごりするのも面倒なので、Visual Studio Codeを導入することとしました。 その際の手順の控えです。
環境
Windows7 Home 32bit
CPU:2.53G
Memory:4G
事前準備
- 「Windows環境にフリーのC開発環境を構築した際のメモ」にて、gcc(MiGW)の環境が整っていること
- Powershellがインストール済みであること
インストールするもの
- Visual Studio Code
- https://code.visualstudio.com/download からインストールして下さい。
- 拡張機能から、「C/C++」、「CMake」をインストールします。
- CMake
- Makefile作成に使用する事にしました。
-
https://cmake.org/download からインストールして下さい。
- インストーラウィザードで、CMakeのパスを通す設定が有るので、お好みでパスを通します。
- インストール先は「C:\Program Files\CMake\」にしました。
ソースファイルの作成
- Visual Stdio Code にてソースファイルを作成(おなじみのHello World)
- D:\Dev\sample\Hello.c ファイルの作成
Hello.c
# include "stdio.h"

void main(void) {
    printf("hello world\n");
}
Visual Studio Codeの環境設定(c_cpp_properties.json)
- [表示]-[コマンドパレット]を選択し、表示されたリストから[C/Cpp: Edit Configurations...]を選択。
- 以下画面が表示される。
- (このタイミングで"D:\Dev\sample.vscode\c_cpp_properties.json"ファイルが作成されている。)

- Win32の設定にincludePathを追加します。ここで、gcc(MinGW)のインクルードパスを指定しないと、includeファイルの場所が分からないので、ビルドエラーが発生することとなります。
- gcc(MinGW)のインクルードパスの場所は、DOSのコマンドプロンプトでgccコマンドでも叩いて調べます。
C:\Users\yutaka>gcc -xc++ -E -v -
Using built-in specs.
COLLECT_GCC=gcc
Target: i686-w64-mingw32
Configured with:
(中略)
# include "..." search starts here:
# include <...> search starts here:
 C:/Program Files/mingw-w64/i686-8.1.0-posix-sjlj-rt_v6-rev0/mingw32/bin/../lib/gcc/i686-w64-mingw32/8.1.0/include/c++
 C:/Program Files/mingw-w64/i686-8.1.0-posix-sjlj-rt_v6-rev0/mingw32/bin/../lib/gcc/i686-w64-mingw32/8.1.0/include/c++/i686-w64-mingw32
 C:/Program Files/mingw-w64/i686-8.1.0-posix-sjlj-rt_v6-rev0/mingw32/bin/../lib/gcc/i686-w64-mingw32/8.1.0/include/c++/backward
 C:/Program Files/mingw-w64/i686-8.1.0-posix-sjlj-rt_v6-rev0/mingw32/bin/../lib/gcc/i686-w64-mingw32/8.1.0/include
 C:/Program Files/mingw-w64/i686-8.1.0-posix-sjlj-rt_v6-rev0/mingw32/bin/../lib/gcc/i686-w64-mingw32/8.1.0/include-fixed
 C:/Program Files/mingw-w64/i686-8.1.0-posix-sjlj-rt_v6-rev0/mingw32/bin/../lib/gcc/i686-w64-mingw32/8.1.0/../../../../i686-w64-mingw32/include
End of search list.
(ここで、Ctrl+Cで抜けます)
- 上記コマンドで調べたincludepathをc_cpp_properties.jsonに追記します。私の環境では、以下の設定となります。読者の環境とは異なる場合が有ります。
{
    "configurations": [
        {
            "name": "Win32",
            "includePath": [

                "C:/Program Files/mingw-w64/i686-8.1.0-posix-sjlj-rt_v6-rev0/mingw32/bin/../lib/gcc/i686-w64-mingw32/8.1.0/include/c++",
                "C:/Program Files/mingw-w64/i686-8.1.0-posix-sjlj-rt_v6-rev0/mingw32/bin/../lib/gcc/i686-w64-mingw32/8.1.0/include/c++/i686-w64-mingw32",
                "C:/Program Files/mingw-w64/i686-8.1.0-posix-sjlj-rt_v6-rev0/mingw32/bin/../lib/gcc/i686-w64-mingw32/8.1.0/include/c++/backward",
                "C:/Program Files/mingw-w64/i686-8.1.0-posix-sjlj-rt_v6-rev0/mingw32/bin/../lib/gcc/i686-w64-mingw32/8.1.0/include",
                "C:/Program Files/mingw-w64/i686-8.1.0-posix-sjlj-rt_v6-rev0/mingw32/bin/../lib/gcc/i686-w64-mingw32/8.1.0/include-fixed",
                "C:/Program Files/mingw-w64/i686-8.1.0-posix-sjlj-rt_v6-rev0/mingw32/bin/../lib/gcc/i686-w64-mingw32/8.1.0/../../../../i686-w64-mingw32/include"
            ]
        }
    ],
    "version": 4
}
Visual Studio Codeの環境設定(CMake)
- CMakeの設定ファイルを作成します。
(D:\Dev\sample\CMakeLists.txt)
CMakeLists.txt
cmake_minimum_required(VERSION 2.8)
add_executable(hello hello.c)
Visual Studio Codeの環境設定(ビルドタスクの登録)
- ビルドタスクの登録
-
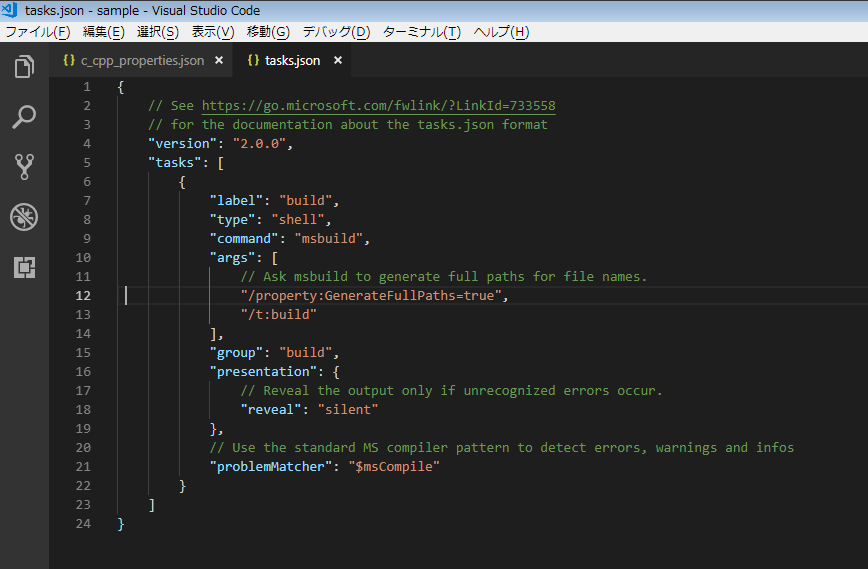
[表示]-[コマンドパレット]-[Tasks: Configure Task]-[TemplateからTask.jsonを生成]-[MS build]を選択
-
"D:\Dev\sample.vscode\tasks.json"が生成されます。
-
自動生成されたjson設定値を変更して、まず、Debugビルドの構成に直します。
-
変更点①:labelの値を分かりやすい名前のdebugに変更
-
変更点②:commandをpowershellに変更
-
変更点③:argsをCmakeのコマンドを実行するように修正。cmake、mingwのPath設定済みの記載にして有ります。Pathを通すなり、フルパスを記載するなり変更してください。
-
変更点④:optionを追加して、作業ディレクトリ"${workspaceRoot}/debug"を指定しています。
-
変更点⑤:problemMatcherをgccの出力がされるように正規表現の設定をしました。
-
ここまでの設定内容が以下です。
-
tasks.json(Debugビルドのタスク)
{
    // See https://go.microsoft.com/fwlink/?LinkId=733558
    // for the documentation about the tasks.json format
    "version": "2.0.0",
    "tasks": [
        // ************ //
        // debugビルド
        // ************ //
        {
            "label": "debug",   //変更点①
            "type": "shell",
            "command": "powershell",    //変更点②
            "args": [
				"-Command",
				"\"cmake -DCMAKE_BUILD_TYPE=Debug -G \\\"MinGW Makefiles\\\" ..; mingw32-make.exe -f Makefile\""   //変更点③ cmake,mingwへのパス設定済み
            ],
            //変更点④
			"options": {
				"cwd": "${workspaceRoot}/debug"
			},
            "group": "build",
            "presentation": {
                // Reveal the output only if unrecognized errors occur.
                "reveal": "silent"
            },
            // Use the standard MS compiler pattern to detect errors, warnings and infos
            //変更点⑤
			"problemMatcher": {
				"owner": "gcc",
				"fileLocation": "absolute",
				"pattern": {
					"regexp": "^(.*):(\\d+):(\\d+):\\s+(.*):\\s+(.*)$",
					"file": 1,
					"line": 2,
					"column": 3,
					"endLine": 2,
					"endColumn": 3,
					"severity": 4,
					"message": 5
				}
			}
        }
    ]
}
- 出来上がったdebugビルドの設定をコピーしてreleaseビルドの設定を追記します。設定内容はdebugを参照下さい。完成形が以下です。
tasks.json(完成形)
{
    // See https://go.microsoft.com/fwlink/?LinkId=733558
    // for the documentation about the tasks.json format
    "version": "2.0.0",
    "tasks": [
        // ************ //
        // debugビルド
        // ************ //
        {
            "label": "build-debug",   //変更点①
            "type": "shell",
            "command": "powershell",    //変更点②
            "args": [
				"-Command",
				"\"cmake -DCMAKE_BUILD_TYPE=Debug -G \\\"MinGW Makefiles\\\" ..; mingw32-make.exe -f Makefile\""   //変更点③ cmake,mingwへのパス設定済み
            ],
            //変更点④
			"options": {
				"cwd": "${workspaceRoot}/debug"
			},
            "group": "build",
            "presentation": {
                // Reveal the output only if unrecognized errors occur.
                "reveal": "always"
            },
            // Use the standard MS compiler pattern to detect errors, warnings and infos
            //変更点⑤
			"problemMatcher": {
				"owner": "gcc",
				"fileLocation": "absolute",
				"pattern": {
					"regexp": "^(.*):(\\d+):(\\d+):\\s+(.*):\\s+(.*)$",
					"file": 1,
					"line": 2,
					"column": 3,
					"endLine": 2,
					"endColumn": 3,
					"severity": 4,
					"message": 5
				}
			}
        },
        // ************ //
        // releaseビルド
        // ************ //
        {
            "label": "build-release",
            "type": "shell",
            "command": "powershell",
            "args": [
				"-Command",
				"\"cmake -DCMAKE_BUILD_TYPE=Release -G \\\"MinGW Makefiles\\\" ..; mingw32-make.exe -f Makefile\""   //変更点③ cmake,mingwへのパス設定済み
            ],
			"options": {
				"cwd": "${workspaceRoot}/release"
			},
            "group": "build",
            "presentation": {
                // Reveal the output only if unrecognized errors occur.
                "reveal": "always"
            },
            // Use the standard MS compiler pattern to detect errors, warnings and infos
			"problemMatcher": {
				"owner": "gcc",
				"fileLocation": "absolute",
				"pattern": {
					"regexp": "^(.*):(\\d+):(\\d+):\\s+(.*):\\s+(.*)$",
					"file": 1,
					"line": 2,
					"column": 3,
					"endLine": 2,
					"endColumn": 3,
					"severity": 4,
					"message": 5
				}
			}
        }
    ]
}
ビルドの確認
- [ターミナル]-[ビルドタスクの実行]-[ビルドデバッグ]を選択します。
- 以下、出力されました。デバッグビルドできたようです。

デバッグ実行の設定
- Visual Studio Codeにて、[デバッグ]-[構成の追加]-["(gdb) Launch]を選択します。
- launch.jsonが作成されますので、以下編集します。
- program を"${workspaceRoot}/debug/hello.exe"に変更
- cwdを"${workspaceRoot}"に変更(各位の環境に合わせてください)
- miDebuggerPathを"gdb"に変更(Pathを通している為。Pathを通していない場合はフルパス指定してください。)
デバッグ実行
- [デバッグ] - [デバッグ開始] でデバッグ実行出来ます。