概要
- Dev Containerを触る機会が有ったので、手軽にセットアップする手順をまとめました
- 簡易に作成できるよう、Dev Containerで用意されている開発コンテナを使用しています
- 手順は 公式サイト をベースにしました
環境
Ubuntu 22.04 on WSL2
手順
1. 作業用フォルダの作成
- WSLターミナルにてコマンド実行
mkdir devcontainer-start && cd $_
2. VS Codeを開く
code .
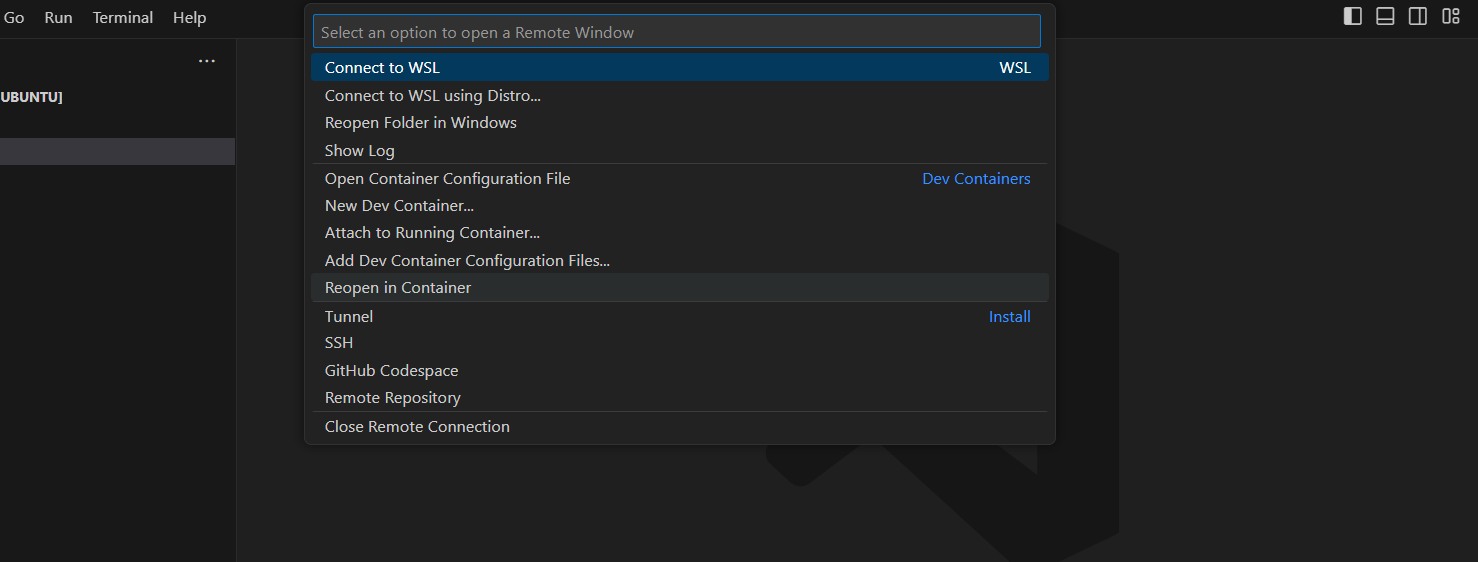
3. コマンドパレットを開き、開発コンテナを設定する
-
Ctrl + Shift + P(Windows/Linuxの場合)またはCmd + Shift + P(Macの場合)を押して、コマンドパレットを開く

-
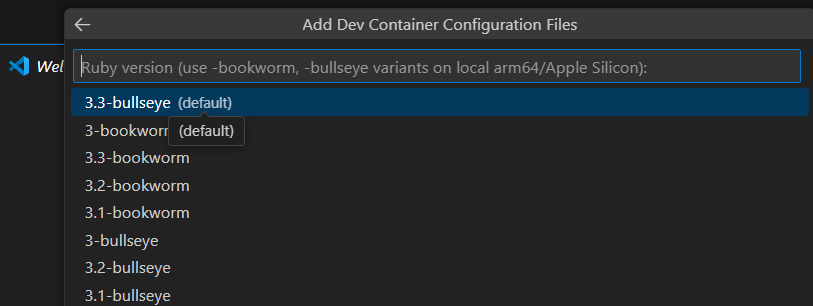
「Dev Containers: Add Development Container Configuration Files」を選択

-
ウィザード形式で質問に答えていきます
-
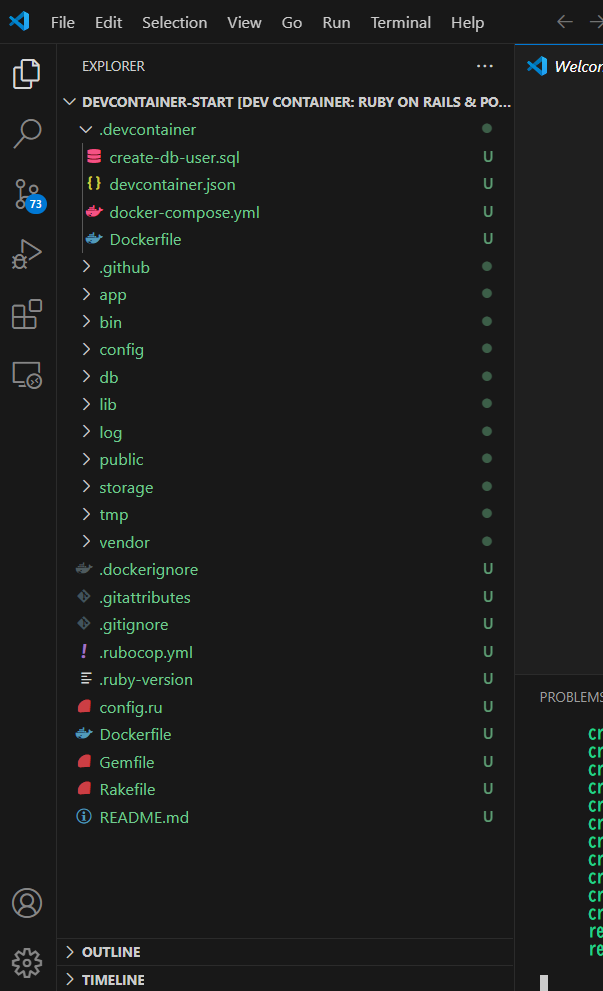
Dev Containerの一通りの設定ファイルが作成されます

- .devcontainer/devcontainer.json
- Dev Containerの構成ファイルです。docker-composeのファイル名、サービス名、ワークスペース等指定します
- .devcontainer/devcontainer.json
// For format details, see https://aka.ms/devcontainer.json. For config options, see the
// README at: https://github.com/devcontainers/templates/tree/main/src/ruby-rails-postgres
{
	"name": "Ruby on Rails & Postgres",
	"dockerComposeFile": "docker-compose.yml",
	"service": "app",
	"workspaceFolder": "/workspaces/${localWorkspaceFolderBasename}",
	"features": {
		"ghcr.io/robbert229/devcontainer-features/postgresql-client:1": {
			"version": "13"
		}
	}

	// Features to add to the dev container. More info: https://containers.dev/features.
	// "features": {},

	// Use 'forwardPorts' to make a list of ports inside the container available locally.
	// This can be used to network with other containers or the host.
	// "forwardPorts": [3000, 5432],

	// Use 'postCreateCommand' to run commands after the container is created.
	// "postCreateCommand": "bundle install && rake db:setup",

	// Configure tool-specific properties.
	// "customizations": {},

	// Uncomment to connect as root instead. More info: https://aka.ms/dev-containers-non-root.
	// "remoteUser": "root"
}
- .devcontainer/docker-compose.yml
- Dockerコンテナの設定ファイル
version: '3'

services:
  app:
    build:
      context: ..
      dockerfile: .devcontainer/Dockerfile

    volumes:
      - ../..:/workspaces:cached

    # Overrides default command so things don't shut down after the process ends.
    command: sleep infinity

    # Runs app on the same network as the database container, allows "forwardPorts" in devcontainer.json function.
    network_mode: service:db

    # Use "forwardPorts" in **devcontainer.json** to forward an app port locally.
    # (Adding the "ports" property to this file will not forward from a Codespace.)

  db:
    image: postgres:latest
    restart: unless-stopped
    volumes:
      - postgres-data:/var/lib/postgresql/data
      - ./create-db-user.sql:/docker-entrypoint-initdb.d/create-db-user.sql
    environment:
      POSTGRES_USER: postgres
      POSTGRES_DB: postgres
      POSTGRES_PASSWORD: postgres
      # Your config/database.yml should use the user and password you set here,
      # and host "db" (as that's the name of this service). You can use whatever
      # database name you want. Use `bin/rails db:prepare` to create the database.
      #
      # Example:
      #
      #  development:
      #    <<: *default
      #    host: db
      #    username: postgres
      #    password: postgres
      #    database: myapp_development

    # Add "forwardPorts": ["5432"] to **devcontainer.json** to forward PostgreSQL locally.
    # (Adding the "ports" property to this file will not forward from a Codespace.)

volumes:
  postgres-data:
- .devcontainer/Dockerfile
- app のDockerfile
FROM mcr.microsoft.com/devcontainers/ruby:1-3.3-bullseye

# Install Rails
RUN su vscode -c "gem install rails webdrivers"
RUN su vscode -c "/usr/local/rvm/bin/rvm fix-permissions"

# Default value to allow debug server to serve content over GitHub Codespace's port forwarding service
# The value is a comma-separated list of allowed domains
ENV RAILS_DEVELOPMENT_HOSTS=".githubpreview.dev,.preview.app.github.dev,.app.github.dev"

# [Optional] Uncomment this section to install additional OS packages.
# RUN apt-get update && export DEBIAN_FRONTEND=noninteractive \
#     && apt-get -y install --no-install-recommends <your-package-list-here>

# [Optional] Uncomment this line to install additional gems.
# RUN su vscode -c "gem install <your-gem-names-here>"

# [Optional] Uncomment this line to install global node packages.
# RUN su vscode -c "source /usr/local/share/nvm/nvm.sh && npm install -g <your-package-here>" 2>&1
- .devcontainer/create-db-user.sql
- 選択したPostgreSQLの初期セットアップに使用するSQL
CREATE USER vscode CREATEDB;
CREATE DATABASE vscode WITH OWNER vscode;
4. Dev Container環境を開く
-
Dev Container の初期ローディング時は以下の様に初期設定が実行されます
5. Railsプロジェクトを作成する
- Dev Container上のターミナルにて以下コマンド実行
rails new . --database=postgresql --skip-test
6. DB接続設定を行う
-
config/database.ymlファイルを開き以下追加
  host: db
  username: postgres
  password: postgres
7. (任意設定) RSpecのセットアップ
- 単体テストライブラリ RspecをGemfileに追加します
gem 'rspec-rails'
8. ライブラリのインストール
- Gemfileの手直しを行う
- デフォルトだとpgのライブラリが古いので ''' rails db:create ''' でエラーしてしまう
- 以下修正する
gem "pg", "~> 1.5"
- ライブラリのインストール
bundle install
9. (任意設定) RSpenのセットアップ
rails generate rspec:install
10. Dev Containerの再ビルド
- VS Codeのコマンドパレットで「Rebuild Container」を選択して、Dev Containerを再ビルドします
11. Railsアプリケーションの起動
- DB作成
rails db:create
- 初回のマイグレーション
rails db:migrate
- Railsアプリケーションの起動
rails s
12. 起動したアプリケーションの確認
-
http://localhost:3000にアクセス
最後に
- Dev Container環境を使用する事で迅速に環境を構築する事が出来ます
- ただ、環境によっては、Docker環境ではまったりしました
- 今回の手順では、はまりにくい形で構築しています
- 何個か環境を構築してみるとコツをつかんでスムーズにいくかと思いました


