イントロ
railsのウェブアプリが既にAWSのEC2インスタンスで稼働しており、ドメインも取得済みの状態を前提にしています。
rails:4.2.0
nginx: 1.10.2
Rails側の準備
以下のコードを追加します。
# nginxのconfigファイル

# httpでアクセスされたものをhttpsにリダイレクト
server {
        listen 80;
        proxy_set_header X-Forwarded-Proto $scheme;
        if ( $http_x_forwarded_proto != 'https' ) {
          return 301 https://$host$request_uri;
        }

# httpsサーバー
server {
        listen 443 ssl;
        server_name ウェブサイトurl;
    }
# コメントアウトされていたものを外す
# 全てのアクセスをhttpsに強制する
config.force_ssl = true
AWS側の準備
1. Amazon Certificate ManagerでSSL証明書を取得する
こちらのサイトの「利用手順」→「証明書の作成」に従って証明書を作成してください。すぐ終わります。
2. ELBでClassic Load Balancerの作成
EC2→Load Balancers→Create a Load Balancerでロードバランサーを作成します。
Select Load Balancer Type
Classic Load Balancer を選択。
Step 1: Define Load Balancer
適当な名前を決めて、プロトコルを1つ追加(画像参照)。その他はデフォルトのままでいい。

Step 2: Assign Security Groups
新しいsecurity groupを作成、その他はデフォルトのまま。下の画像のようになるはず。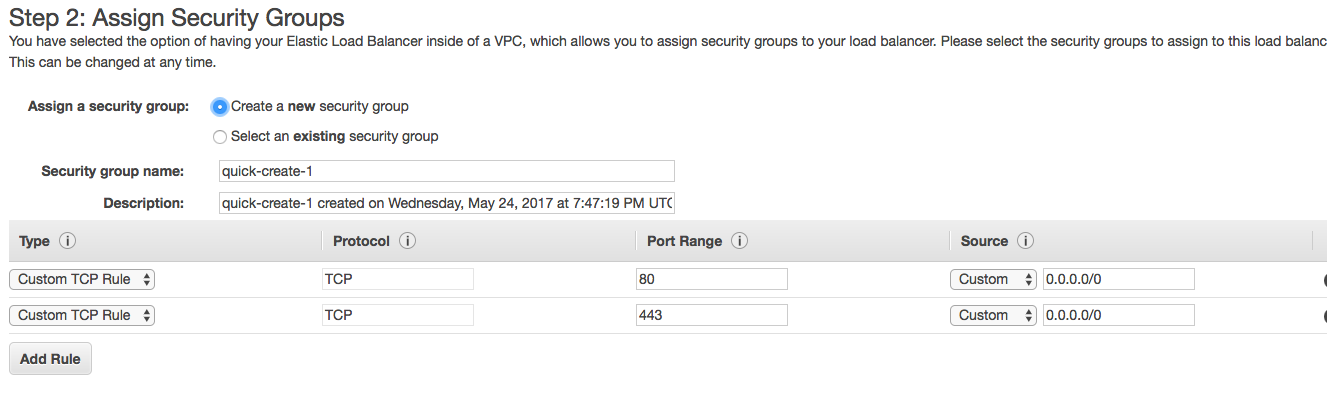
Step 3: Configure Security Settings
先ほど作成したcertificateを選択。その他はデフォルトのまま。
Step 4: Configure Health Check
ping protocol : TCP, ping port : 80 に変更。その他はデフォルトのまま。
Step 5: Add EC2 Instances
ウェブアプリのEC2インスタンスを選択。
Step 6: Add Tags
特に必要なし
Step 7: Review
設定を確認して完了。
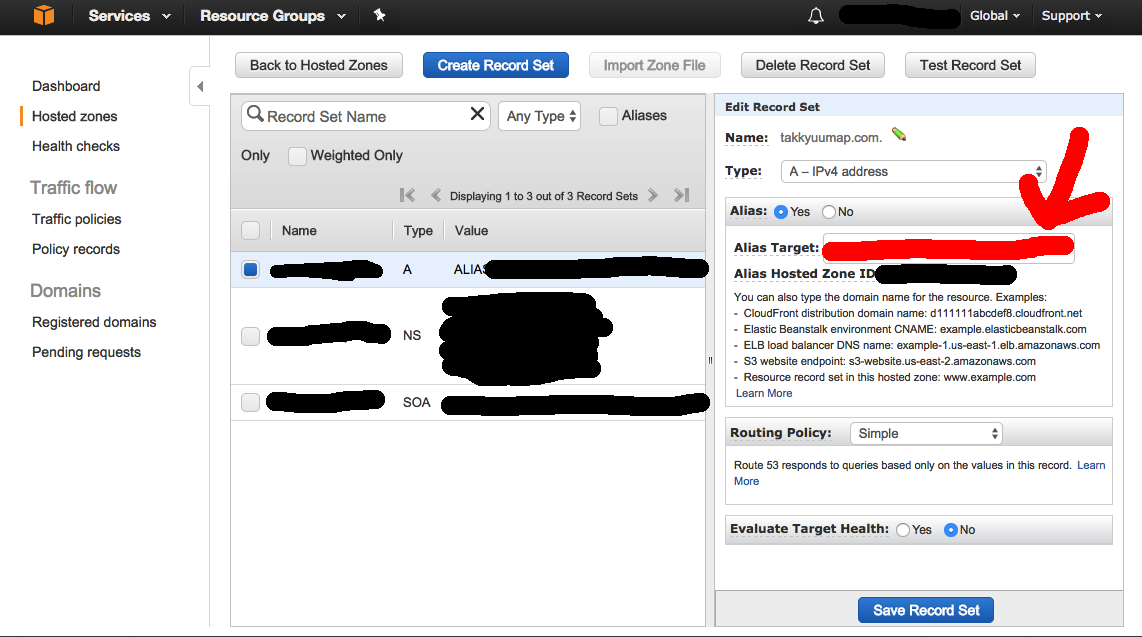
3. Route53の設定
Route53に登録されている自分のドメインのAレコードのALIASをLoadBalancerのDNS名に変更。
これで設定は全て終了!httpsからアクセスできるようになっているはずです。
参考にしたサイト・記事
AWSでドメイン、SSL証明書の取得、設定
http://qiita.com/masch/items/a5ef84998fb7784f9115
AWS ELB, Nginx, Rails, SSL: The final word.
http://pricees.github.io/2014/03/25/aws-elb-nginx-rails-ssl-the-final-word/
AWS Certificate ManagerでSSLをお手軽に!
http://blog.serverworks.co.jp/tech/2016/04/07/acm_beginner/
最後に
筆者はまだエンジニア経験が浅く、理解も十分でない点もあるので間違いや改善点があればぜひご指摘お願いします。