背景
前回、keycloakの設定まで実施した。今回は認証機能を導入するElectronアプリを実装してみる。
https://qiita.com/yusuke-ka/items/69d4146f344a95aa4662
Auth0のブログで公開されているやり方が安全そうな気がするので、ここを参考にしてやってみようと思う。
https://auth0.com/blog/securing-electron-applications-with-openid-connect-and-oauth-2/
といっても、今回は単純なElectronアプリを作るだけで、認証回りは次回。
準備
まずは、プロジェクトの作成から。
> mkdir electron
> cd electron
> yarn init
initはすべてデフォルトのまま。
続いて依存のインストールを実施する。
> yarn add electron --dev
Electronのインストールだけ。少し時間がかかった。
Electronアプリの作成
最初に、アプリのホームページを作ってみる。
renderersというフォルダを作り、その下に以下のようなファイル(home.html)を作成する。
<!DOCTYPE html>
<html lang="en">
  <head>
    <meta charset="UTF-8" />
    <title>Electron App</title>
  </head>

  <body>
    <p>Home</p>
    <button id="logout" class="btn">Logout</button>
  </body>

</html>
直接ブラウザでhome.htmlを読み込んだ際の見た目はこんな感じ。
テスト用なので、Homeという文字とログアウトボタンだけを配置したシンプルなホームページ。
もちろん、ログアウトボタンを押しても何も起こらない。
続いて、このページをElectronで表示するようにしてみる。
今度はmainというフォルダを作成し、その下にapp-process.jsというファイルを置く。
const { BrowserWindow } = require("electron");

function createAppWindow() {
  let win = new BrowserWindow({
    width: 1000,
    height: 600,
    webPreferences: {
      nodeIntegration: true,
      enableRemoteModule: true,
    },
  });

  win.loadFile("./renderers/home.html");

  win.on("closed", () => {
    win = null;
  });
}

module.exports = createAppWindow;
nodeIntegration: trueは、Node.jsの組み込みを実施するための設定。
enableRemoteModule: trueは、レンダラープロセスがメインプロセスと通信するための設定。
createAppWindowというfunctionをexportして公開している。
続いて、ルートフォルダの下に、最初に呼び出されるファイル(main.js)を作成する。
const {app} = require('electron');

const createAppWindow = require('./main/app-process');

async function showWindow() {
  try {
    return createAppWindow();
  } catch (err) {
    // TODO 認証
  }
}

app.on('ready', showWindow);

app.on('window-all-closed', () => {
  app.quit();
});
今はまだ、先ほどのapp-process.jsが公開しているcreateAppWindowを呼び出すだけの実装。
とりあえず、この状態で動かしてみる。
package.jsonに以下を追記。
  "scripts": {
    "start": "electron ./main.js"
  }
electronコマンドでmain.jsを呼び出しているだけ。
実行。
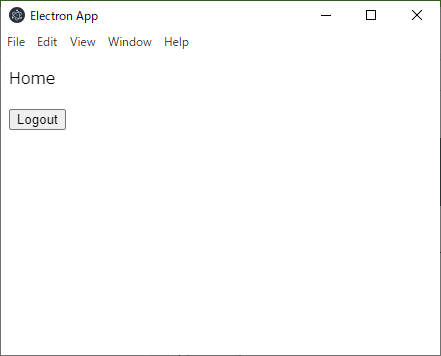
> yarn start
Electronアプリとして、ホームページが表示された。
次回予告
ElectronアプリでKeycloakと連携したログイン機能を実装するために、今回は、確認用のシンプルなElectronアプリの実装をおこなった。
次は、いよいよElectronアプリに認証機能を導入する。
https://qiita.com/yusuke-ka/items/17a5b8fbd544c4c211a3

