前提
VIPERでログイン機能を作るための要素を勉強中です。
今回は入力チェックの導入として空値チェックを実装してみます。
環境
- macOS 11.4
- xcode13
- swift5
ゴール
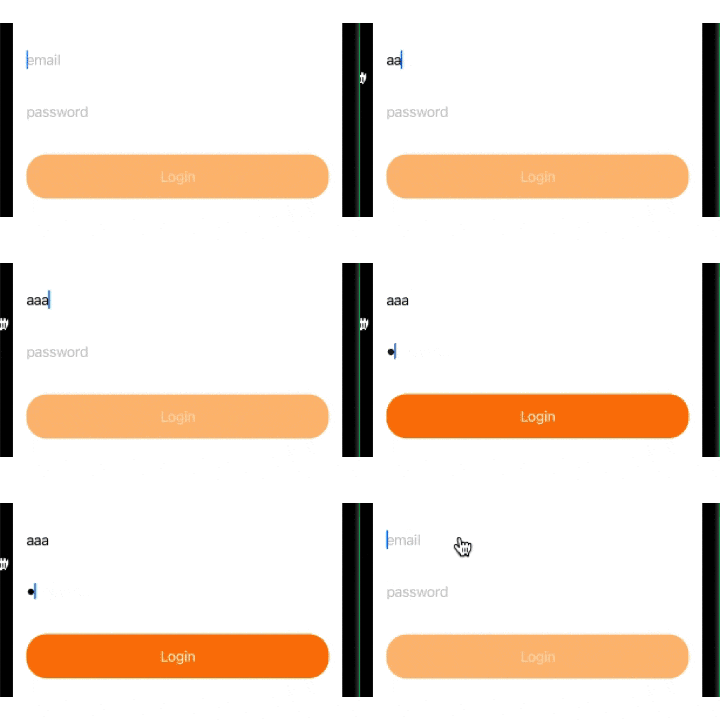
TextFieldに文字列が入力されていればButtonを活性化する
という単純な処理をSwiftUI + Combine で実装する
参考
実装
LoginPresenter
最終的にVIPERにしたいので、Presenterを作ってバインディングするプロパティなどを記述していきます。
MVVMの場合はViewModelに同じように書いていくと良いと思います。
protocol LoginPresentation {
    func didTapLoginButton()
}

final class LoginPresenter: ObservableObject {
    let emailPlaceholder = "email"
    let passwordPlaceholder = "password"
    let loginButtonTitle = "Login"

    @Published var email = ""
    @Published var password = ""
    @Published var isValid = false

    init() {
        Publishers.CombineLatest($email, $password)
            .map { email, password in
                return !email.isEmpty && !password.isEmpty
            }.assign(to: &$isValid)
    }

}

extension LoginPresenter: LoginPresentation {
    func didTapLoginButton() {
        print("Login")
    }
}
重要なのはこの部分
emailとpasswordの両方の値を監視して
変更があった場合にisValidの値を処理結果に応じて更新しています
Publishers.CombineLatest($email, $password)
    .map { email, password in
        return !email.isEmpty && !password.isEmpty
    }.assign(to: &$isValid)
LoginView
email, password共にPresenter(ViewModel)に記述した値を使っています。
struct LoginView: View {
    @ObservedObject var presenter: LoginPresenter

    var body: some View {
        VStack {
            emailTextField
            passwordSecureField
            loginButton
        }
    }

    var emailTextField: some View {
        TextField(presenter.emailPlaceholder, text: $presenter.email)
            .autocapitalization(.none)
            .padding()
    }

    var passwordSecureField: some View {
        SecureField(presenter.passwordPlaceholder, text: $presenter.password)
            .autocapitalization(.none)
            .padding()
    }

    var loginButton: some View {
        Button(presenter.loginButtonTitle) {
            presenter.didTapLoginButton()
        }
        .frame(maxWidth: .infinity)
        .padding()
        .foregroundColor(.white)
        .background(Color(.orange))
        .cornerRadius(24)
        .padding()
        .disabled(!presenter.isValid)
        .opacity(presenter.isValid ? 1: 0.5)
    }
}
肝心のボタンを非活性化させているのはこの部分で
isValidの値に応じてdisabledとopacityが変化します。
.disabled(!presenter.isValid)
.opacity(presenter.isValid ? 1: 0.5)
まとめ
Combineを使って、入力値をチェックすることができました。
今回は空文字かどうかのチェックしかしていませんが色々と応用できそうです。
次に記事にしたいこと
- $つけるつけないの判断はどうやってするのか
- Publisherで購読しているものはdeinitで購読解除しなくて良いのか
- Presenterに定数書くのは正しいのか(VIPERの理解)
