概要
GISシステムで表示してる地図の上に、ちゃんとした魔法陣を描く。
はじめに
MIERUNEの鈴木です。
好きな寿司ネタはエンガワ、サーモン、イカにタコにモズクといったコスパが割といいエンジニアです。実はスシよりヒッセンが好きです。
それはさておき。
先日、Django Congress 2022 というオンラインイベントに発表者で参加してきました。
このイベントでは Python の Webフレームワーク・Django にまつわる情報交換を参加者と行うといった内容で、私も Django の GIS 機能で使われているが、あまり知られてない気がする GEOS API について発表してきました。
発表した資料についてはこちらをご覧ください。 https://speakerdeck.com/mierune/gistodjango-geos-apinohua
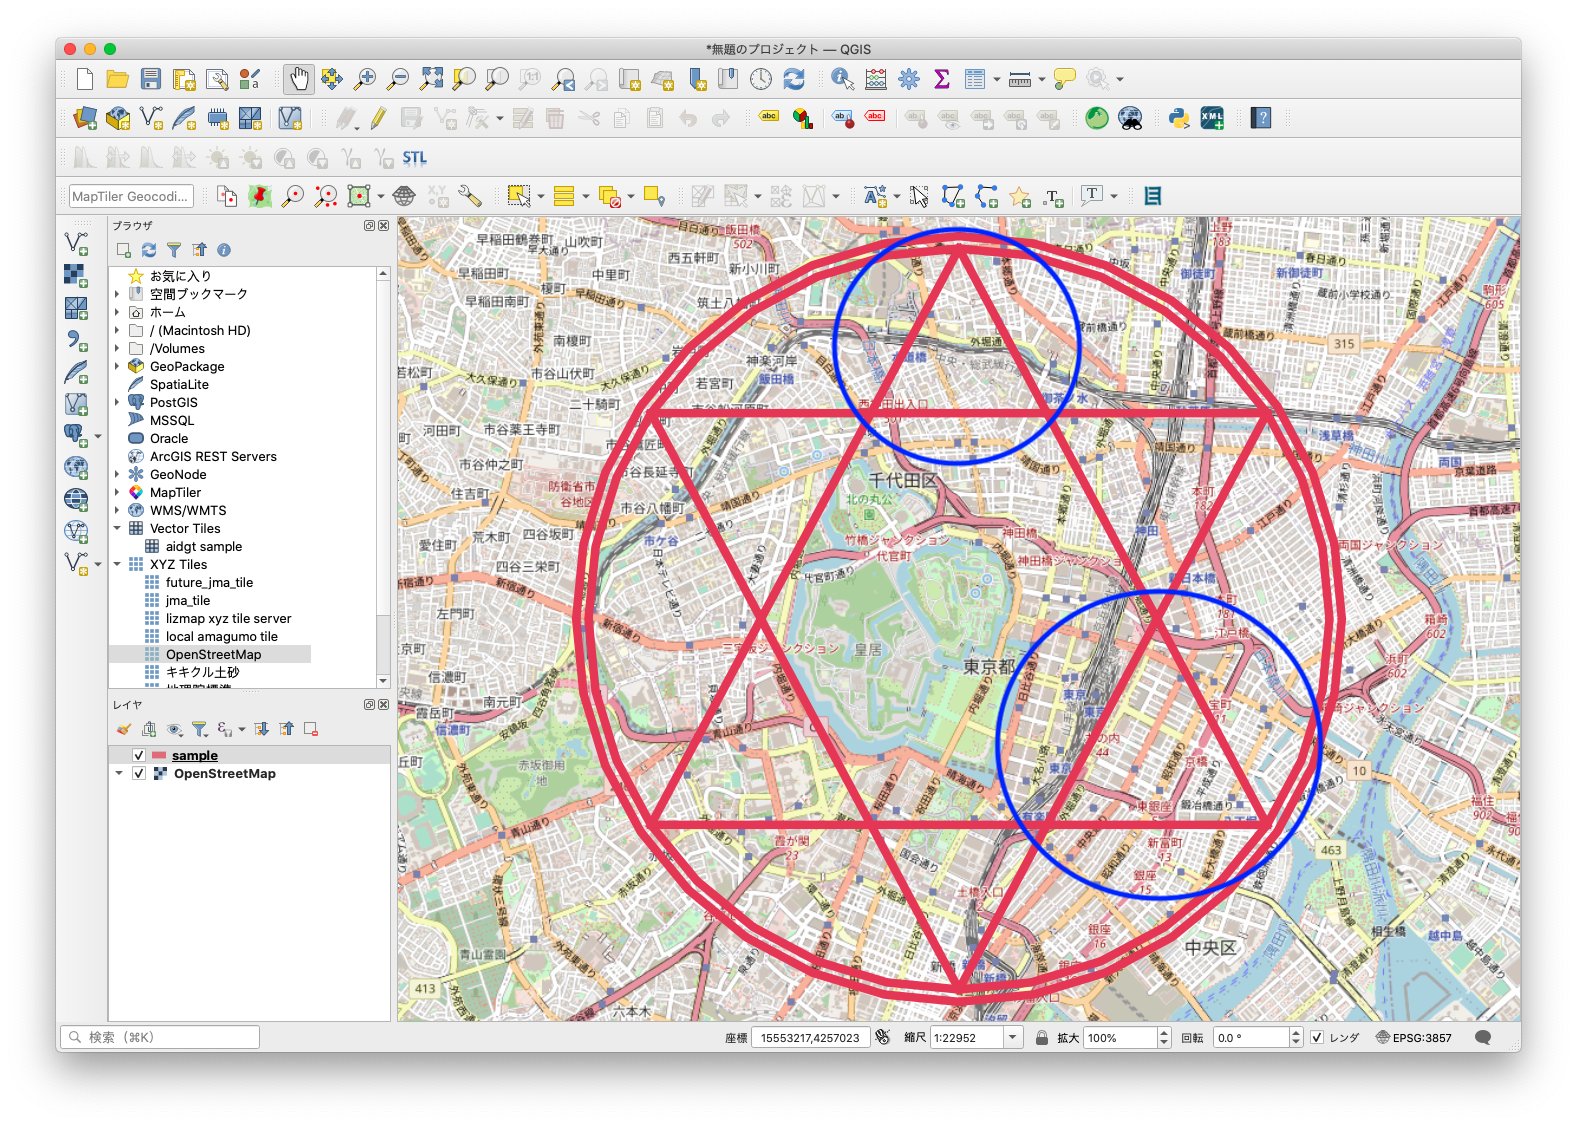
この発表の際、Django GEOS API のデモとして、GISシステムの地図の上にホントにあったらだいぶ巨大な魔法陣を突貫工事で描いてみたのですが、それが以下の画像。
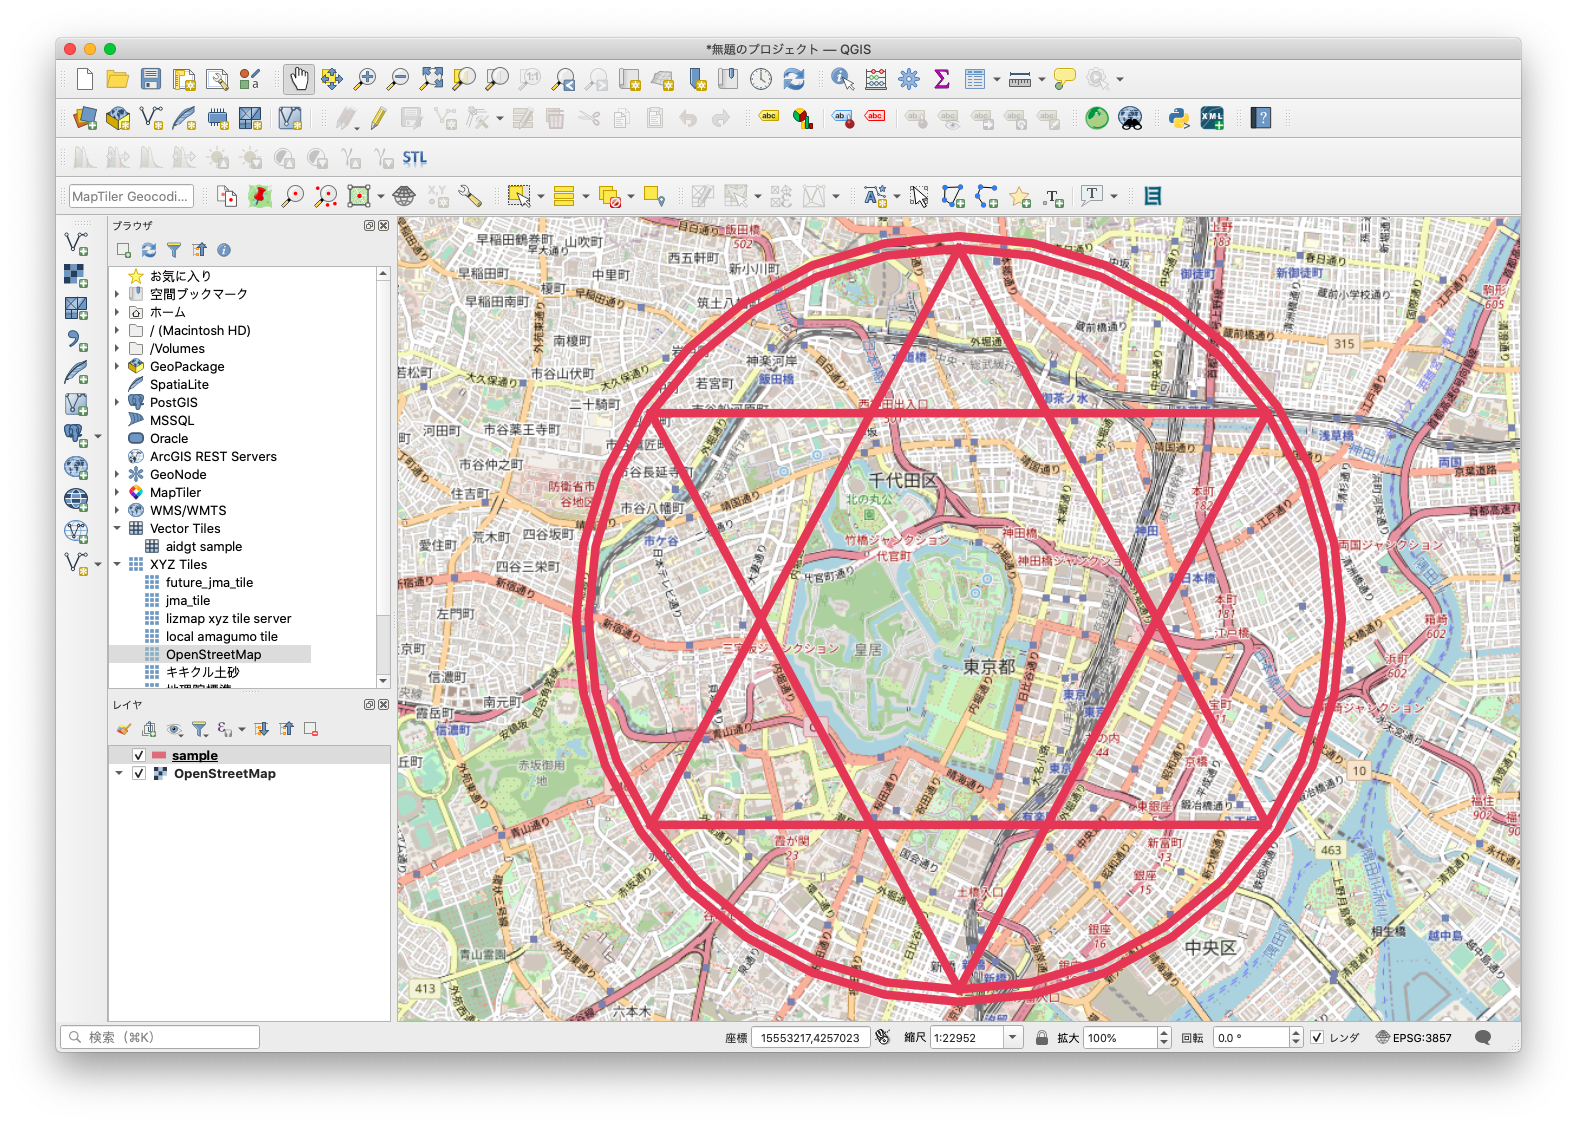
一見、魔法陣ができてますが、よくよくみると、円に含む六芒星の六角形が縦に伸びてたり、周りを囲む三角形の形もまちまち。
なんだかイマイチです。
リニューアル前の魔法陣
これでは召喚させたい何かは出てこないし、悪いヤツから大事な何かを守ることもできなさそう。
というわけで、会社のアドベントカレンダーの機会を使い、もうちょいちゃんとした魔法陣を描いてみようと思った次第です。
もちろん Django GEOS API でね。
リニューアルした魔法陣
さっそくですが、結果です。
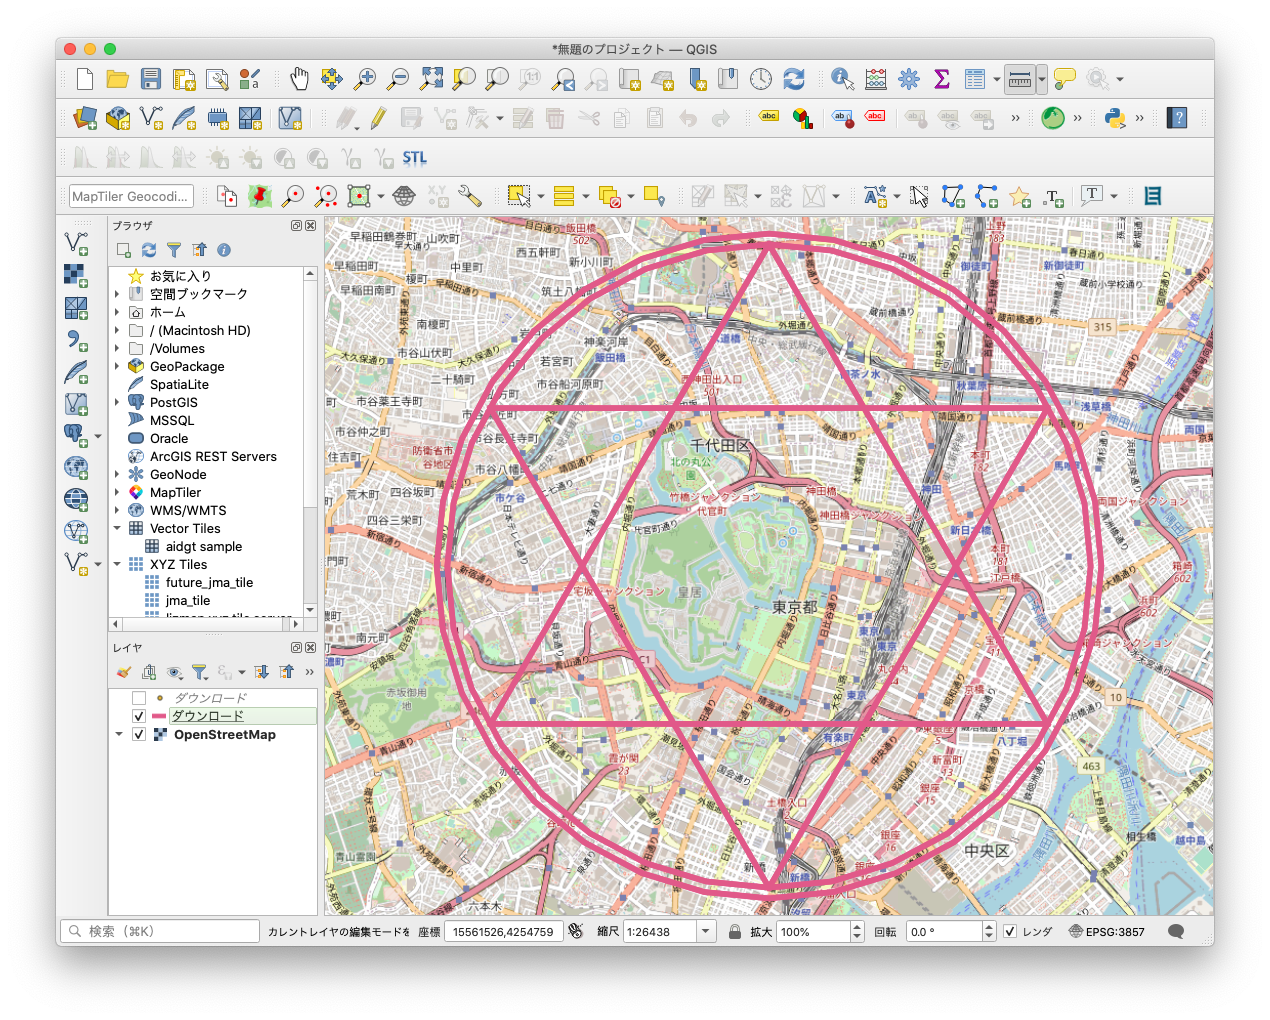
いかがでしょう。元の魔法陣よりはだいぶマシに見えないでしょうか?
これなら魔法陣を使って転生し、盾の勇者になって成り上がったり、皇帝や、いきなり許婚から婚約を破棄されちゃう悪役令嬢にだってなれるかも(無理)
コード
ということで、リニューアルした魔法陣を描くコードです。
このコード、Django GEOS APIを使ってジオメトリを描くサンプルでもあります。
何がどうしてこうなったかはコード中に入れたコメントをご覧ください。
from rest_framework.views import APIView
from rest_framework.response import Response
from django.contrib.gis import geos
import json
import copy
import math
# Create your views here.


class TestJsonView(APIView):

    # 描画するジオメトリを管理するクラス変数
    geom_array = []

    def __appendGeomArray(self, geom):
        """
        描画するジオメトリをクラス変数に設定する。

        Args:
            geom (_type_): _description_
        """
        # オブジェクトのコピーを格納する
        # (オリジナルを格納した場合、その後のオブジェクト操作で値が変わってしまうので)
        cloneobj = copy.copy(geom)
        self.geom_array.append(cloneobj)


    def __drawGeoJson(self):
        """
        クラス変数に格納したジオメトリを元に、GeoJSONとして認識するオブジェクトを生成する。

        Args:
            geom (_type_): _description_
        """
        # 戻り値の GeoJSON の雛形
        result_geojson = {
            "type": "FeatureCollection",
            "features": []
        }

        # feature オブジェクトのテンプレートobj
        feature_obj_template = {
            "type": "Feature",
            "properties": {},
        }

        for geom in self.geom_array:
            feature = copy.copy(feature_obj_template)
            feature["geometry"] = json.loads(geom.json)
            result_geojson["features"].append(feature)

        return result_geojson


    def get(self, request, *args, **kwargs):
        """
        get 処理。
        """

        # 中心座標となる Point の座標を固定値で定義
        lon = 139.7572988221492
        lat = 35.68552588150811
        center_point = geos.Point(lon, lat, srid=4326)
        self.__appendGeomArray(center_point)

        # 中心座標の point から円っぽい形の多角形ポリゴンを buffer メソッドを使って取得。
        # 計算の都合で、投影を EPSG:4326 > EPSG:3857 に変換して処理。
        center_point.transform(3857)
        radius = 3000 # バッファで描く円の半径を3000mと設定
        circle1 = center_point.buffer(radius)
        circle1.transform(4326)
        # バッファとして作られるのは Polygon。
        # 必要なのは Polygon を囲む円周だけなので、
        # Polygon から boundary を取り、LineString を取得。
        # ジオメトリ情報を描写するジオメトリ管理用配列にオブジェクトを追加。
        self.__appendGeomArray(circle1.boundary)

        # 円をもう一個追加。外側の円。
        center_point.transform(3857)
        circle2 = center_point.buffer(radius + 100)  # さきほど描いた円より100m分大きく半径を設定
        circle2.transform(4326)
        self.__appendGeomArray(circle2.boundary)

        # 六芒星を内包する円を囲む bbox の対角線座標を取得
        circle1_extent = circle1.extent

        # circle1.extent で得られる情報としては、
        # (139.73034936362563, 35.66363369545635, 139.78424828067278, 35.70741206169219)
        # 円を囲む bbox の対角線座標。
        # print(circle1_extent)

        # 取得した extent 情報から試しにポリゴンを作ってみる
        # extent_poly = geos.Polygon([
        #     [circle1_extent[0], circle1_extent[1]],
        #     [circle1_extent[2], circle1_extent[1]],
        #     [circle1_extent[2], circle1_extent[3]],
        #     [circle1_extent[0], circle1_extent[3]],
        #     [circle1_extent[0], circle1_extent[1]],
        # ])
        # self.__appendGeomArray(extent_poly.boundary)

        # 円の中心から真北・真南にあるポイントも取得
        point_north_side = geos.Point(lon, circle1_extent[1])
        point_south_side = geos.Point(lon, circle1_extent[3])
        # self.__appendGeomArray(point_north_side)
        # self.__appendGeomArray(point_south_side)

        # 円を描いた際の boundary を構成する座標を使って、
        # 円周上に重なる点となる適当なポイントを作成。
        # Point の x座標は円を囲む bbox の西端・東端の緯度を指定。
        # Point の y座標は中心座標の経度を指定。
        point_west_side = geos.Point(circle1_extent[0], lat, srid=4326)
        point_east_side = geos.Point(circle1_extent[2], lat, srid=4326)
        # self.__appendGeomArray(point_west_side)

        # 中心座標から point_west_side, point_east_sideのポイントに向けて線を引いた
        # LineString を生成。
        point_west_side.transform(3857)
        tmp_line_west = geos.LineString(center_point, point_west_side, srid=3857)
        point_east_side.transform(3857)
        tmp_line_east = geos.LineString(center_point, point_east_side, srid=3857)

        # 円周上と中心点に頂点を持つ、中心角30度の直角三角形の底辺を半径の長さから求め、
        # 頂点になる箇所の位置を Point で取得する。
        # (三角関数 cosθ θ=30 より、(円の半径の長さ / 2) * math.sqrt(3) (ルート3)が底辺の長さ)
        dist = (radius/2) * math.sqrt(3)
        tmp_point_west = tmp_line_west.interpolate(dist)
        tmp_point_east = tmp_line_east.interpolate(dist)

        # 得た Point の投影を 3857 > 4326 に変換して描写用配列に追加
        tmp_line_west.transform(4326)
        tmp_point_west.transform(4326)
        tmp_line_east.transform(4326)
        tmp_point_east.transform(4326)
        # self.__appendGeomArray(tmp_line_west)
        self.__appendGeomArray(tmp_point_west)
        # self.__appendGeomArray(tmp_line_east)
        self.__appendGeomArray(tmp_point_east)

        # 六芒星の円周上のポイントを管理する配列を準備
        circle_intersect_point_list = []

        # 三角関数で求めた tmp_point_west, tmp_point_east 2点分を処理するループ
        for item in [tmp_point_west, tmp_point_east]:
            # 半径の LineString に対し、底辺距離に打った
            # tmp_point_west, tmp_point_east から、
            # 円を囲んでる bbox の真北・真南側の座標に向けて線を引く。
            bbox_north_point = geos.Point(item.x, circle1_extent[1])
            bbox_south_point = geos.Point(item.x, circle1_extent[3])
            tmp_line_to_north = geos.LineString(item, bbox_north_point, srid=4326)
            tmp_line_to_south = geos.LineString(item, bbox_south_point, srid=4326)
            # self.__appendGeomArray(tmp_line_to_north)
            # self.__appendGeomArray(tmp_line_to_south)

            # 真北・真南側に引いた線と、円周が交わる箇所の Point 情報を取得
            circle_intersect_point1 = circle1.boundary.intersection(tmp_line_to_north)
            circle_intersect_point2 = circle1.boundary.intersection(tmp_line_to_south)

            # 上の処理で求めた Point 情報を circle_intersect_point_list に格納
            circle_intersect_point_list.append(circle_intersect_point1)
            circle_intersect_point_list.append(circle_intersect_point2)
            # self.__appendGeomArray(circle_intersect_point1)
            # self.__appendGeomArray(circle_intersect_point2)

        # ここまでの処理で取得した Point 情報を用いて、三角形を二つ描く。
        # 組み合わせると六芒星になる。

        # 三角形1:下向き三角形
        line1 = geos.LineString(circle_intersect_point_list[0], circle_intersect_point_list[2])
        line2 = geos.LineString(circle_intersect_point_list[2], point_south_side)
        line3 = geos.LineString(point_south_side, circle_intersect_point_list[0])
        multiline = geos.MultiLineString(line1, line2, line3)
        self.__appendGeomArray(multiline)

        # 三角形2:上向き三角形
        line1 = geos.LineString(circle_intersect_point_list[1], circle_intersect_point_list[3])
        line2 = geos.LineString(circle_intersect_point_list[3], point_north_side)
        line3 = geos.LineString(point_north_side, circle_intersect_point_list[1])
        multiline = geos.MultiLineString(line1, line2, line3)
        self.__appendGeomArray(multiline)

        # クラス変数にて管理するジオメトリ配列群に格納したジオメトリ情報を元に
        # GeoJSON オブジェクトを生成。レスポンスで GeoJSON 文字列を戻す。
        geojson = self.__drawGeoJson()
        return Response(geojson)
        # 終わり
以上。