概要
Custom Integrationを使うといろんな連携が出来るため、今回はいくつか使用パターンを説明します。OpsRampのドキュメント見ただけではちょっと分かりにくい部分まで含んで説明しますので、淡々と長めの記事になっています。
Custom Integrationとは
ざっと説明するとRESTAPIやWebhookでのやり取りをするアダプター的なものです。
これを設定しておくと、テナント内でWebhook用のエンドポイントの生成やOAuth2.0でアクセストークンを要求できたりします。
設定方法
個々の利用パターンで異なりますので、それぞれの項目を確認して下さい。
OpsRampの提供しているエンドポイントを利用する
こちらがおそらく一番わかりやすい方法です。
設定方法
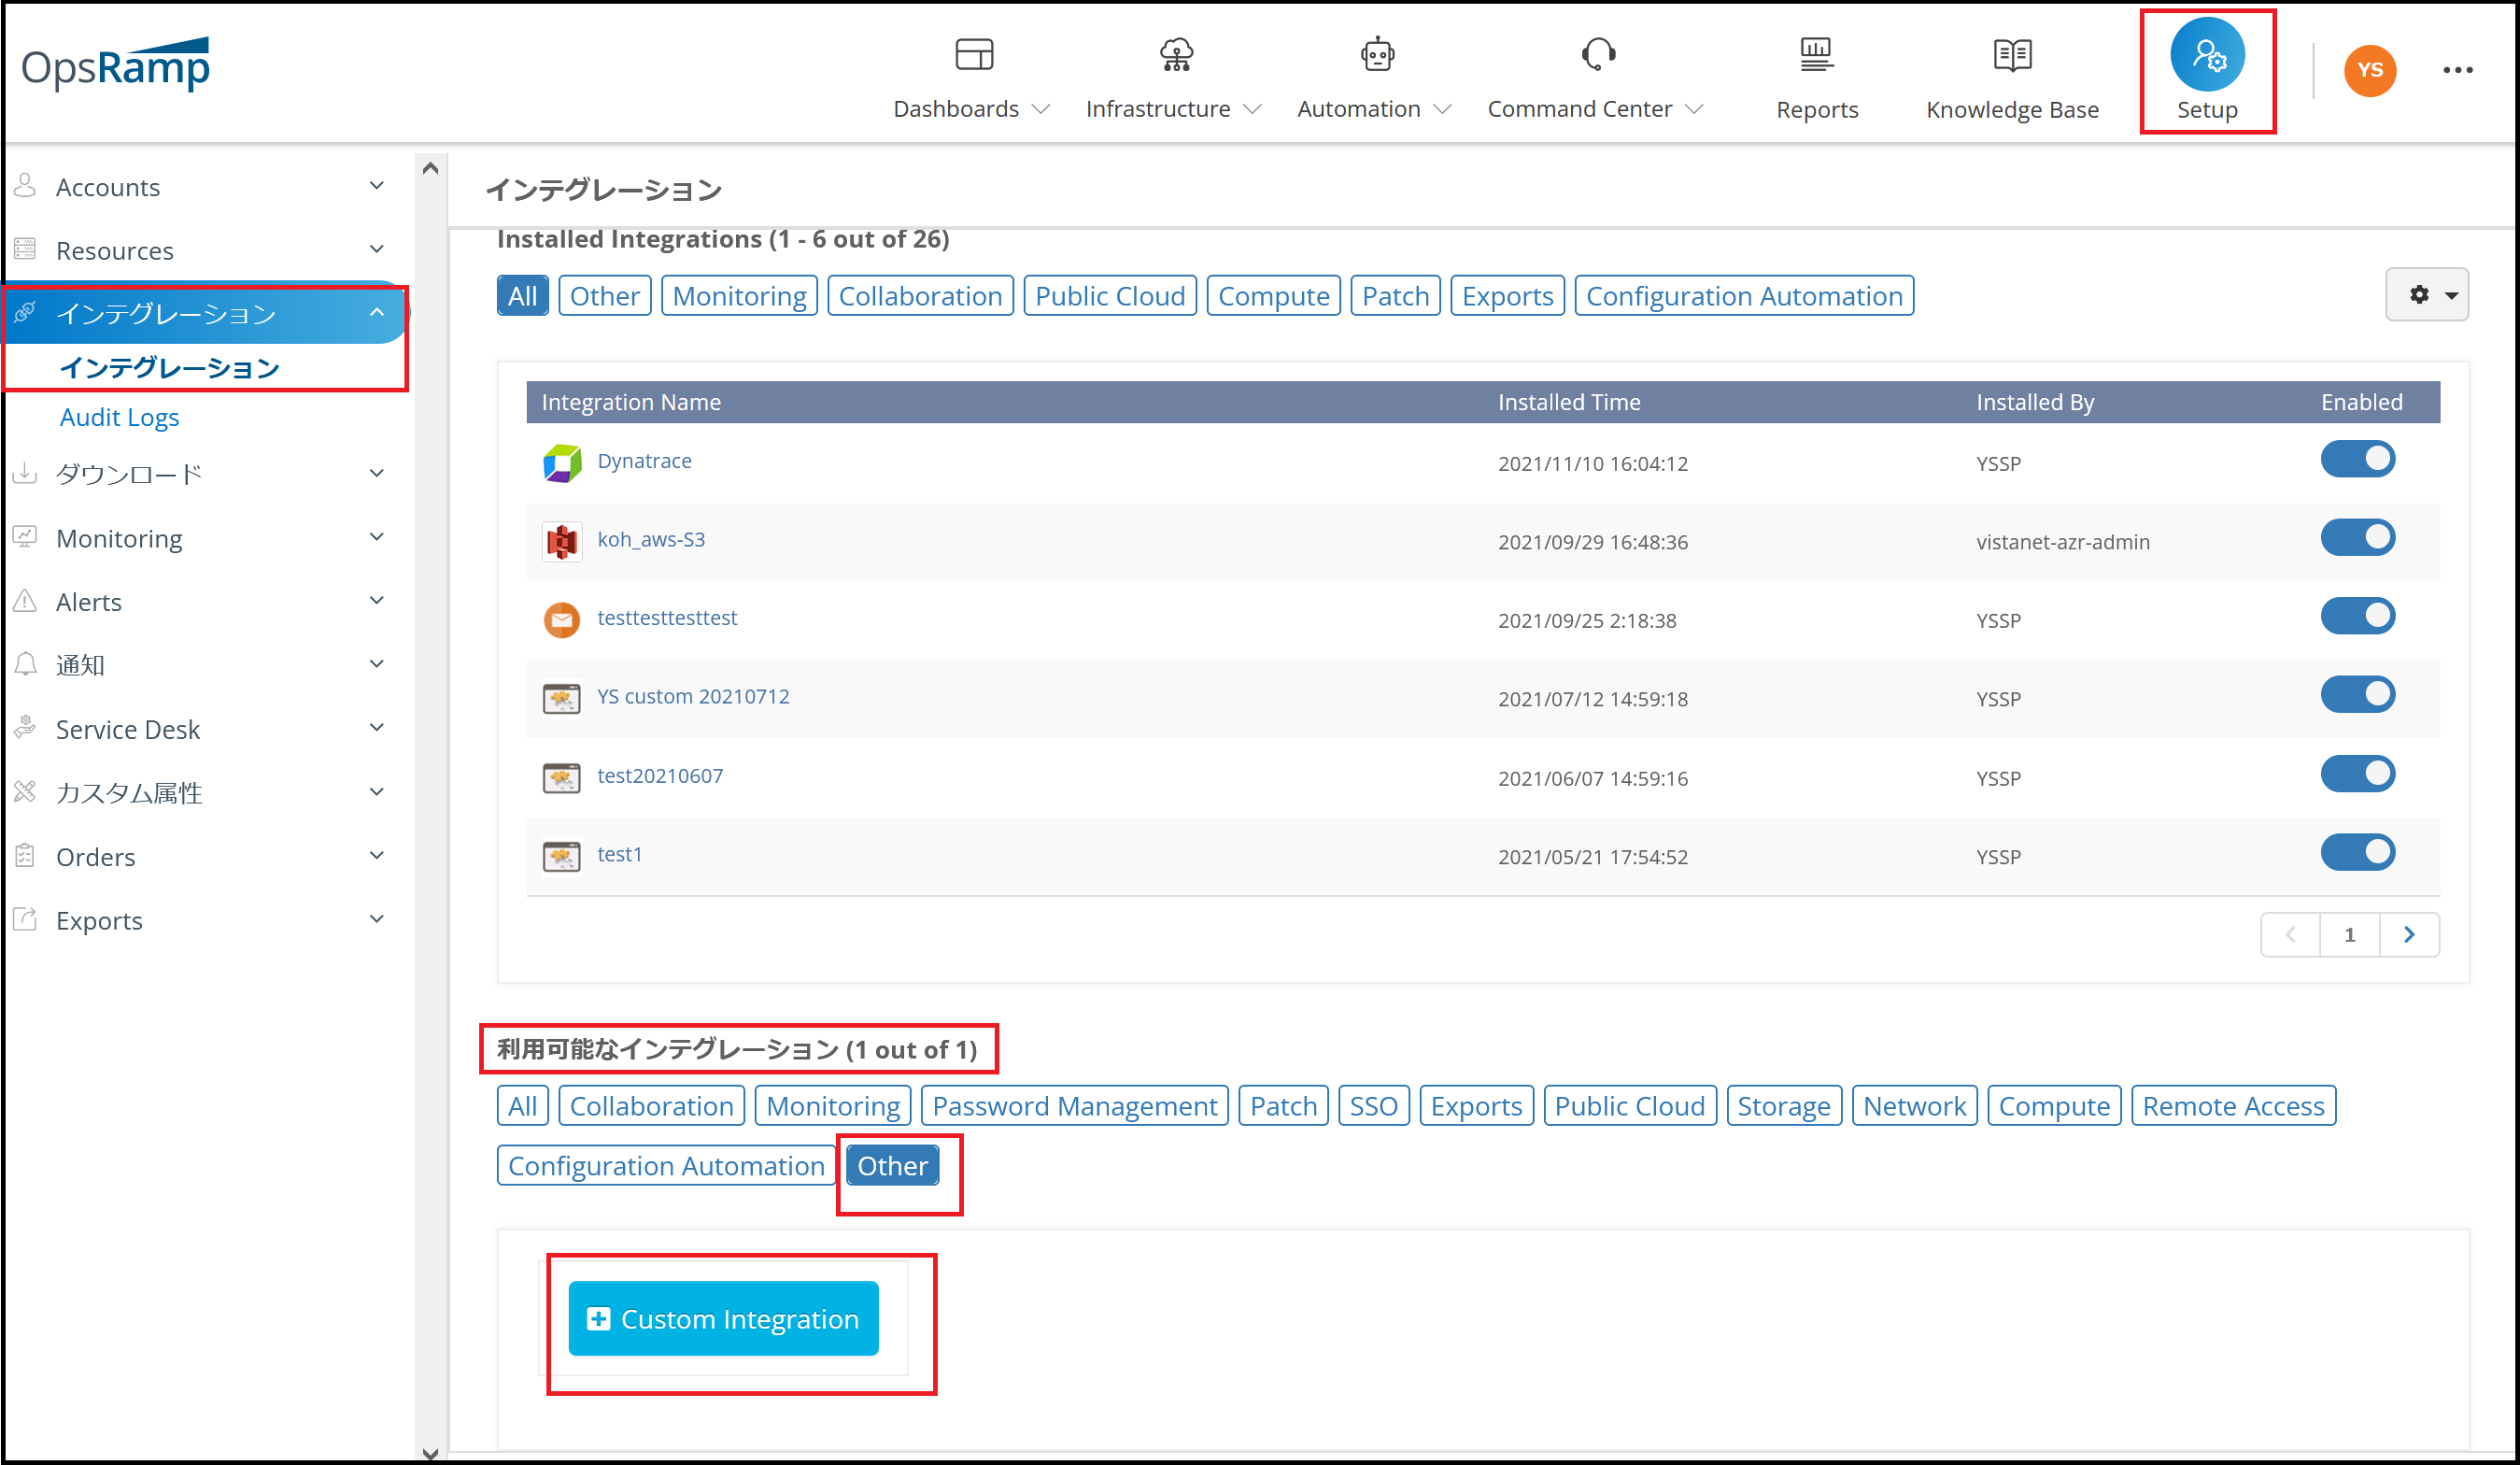
1, Setup>インテグレーション>利用可能なインテグレーション>Other>Custom Integration
「Custom Integration」をクリックしてインストールします。
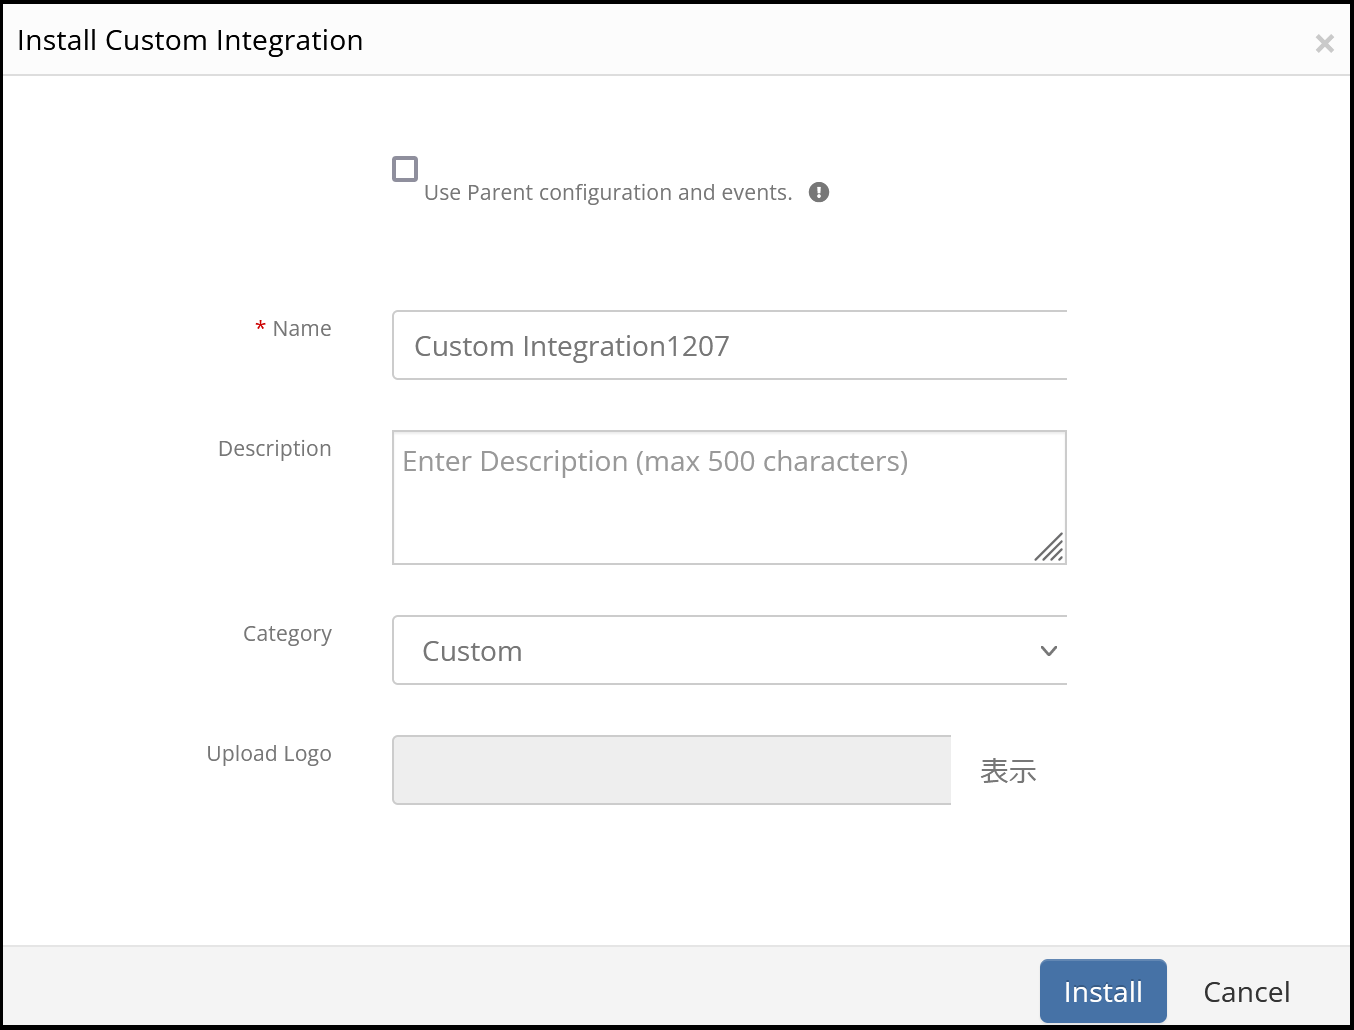
2, 「Name」は何か名前つけて下さい。「Category」は「Custom」にします。
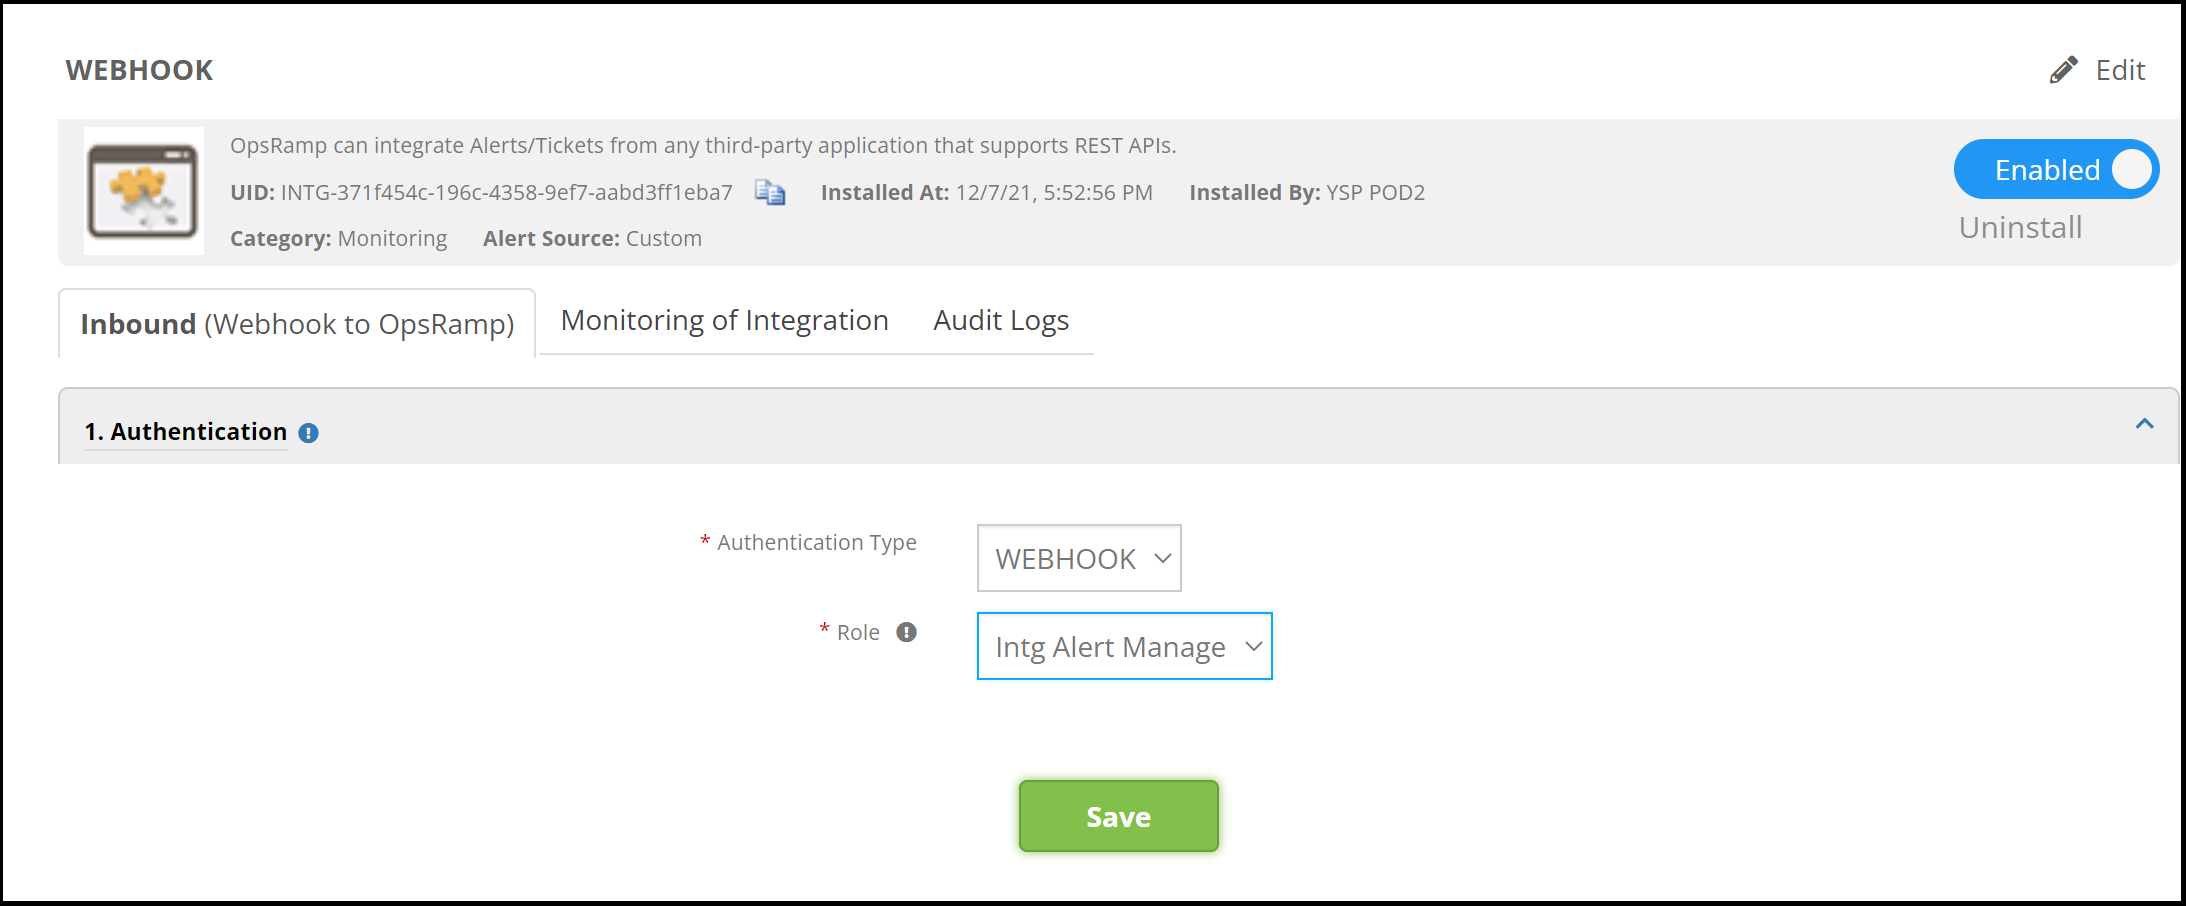
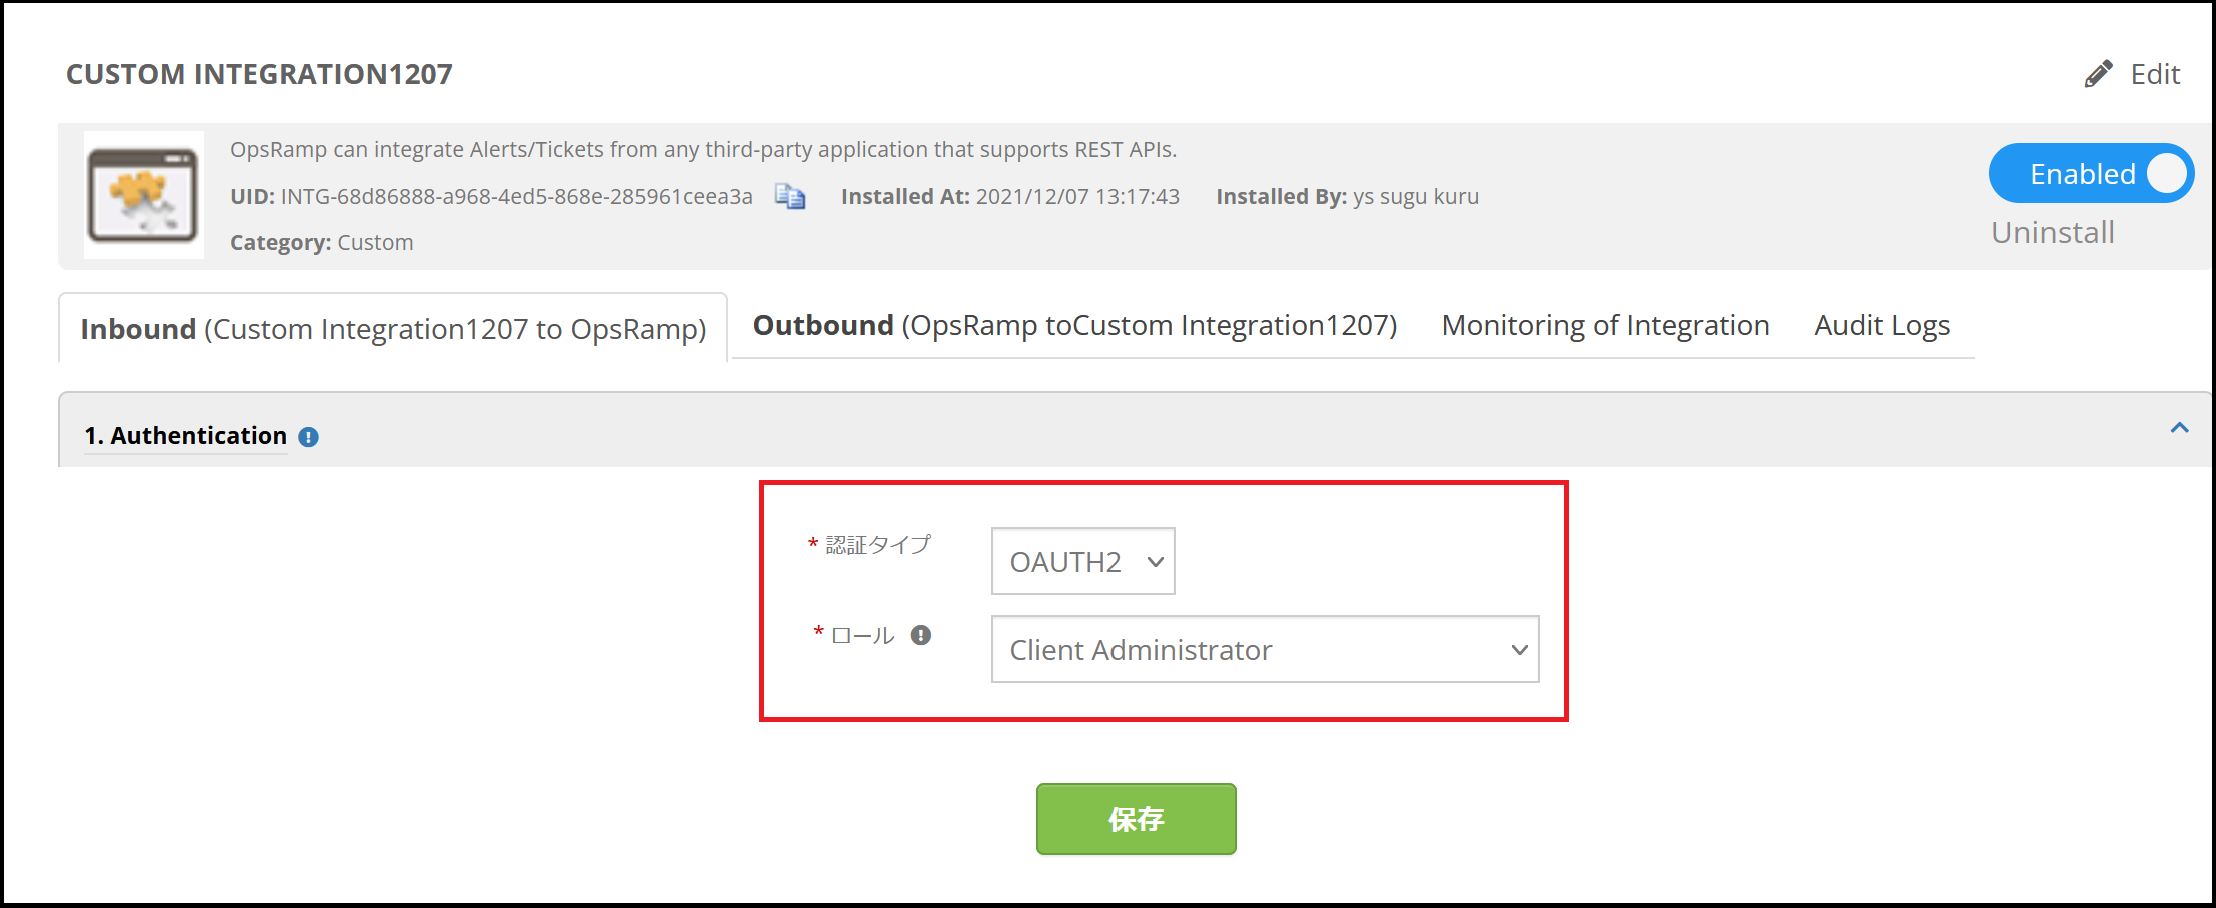
3, 「1, Authentication」の部分をデフォルト(画像の通り)にして「保存」をクリック。
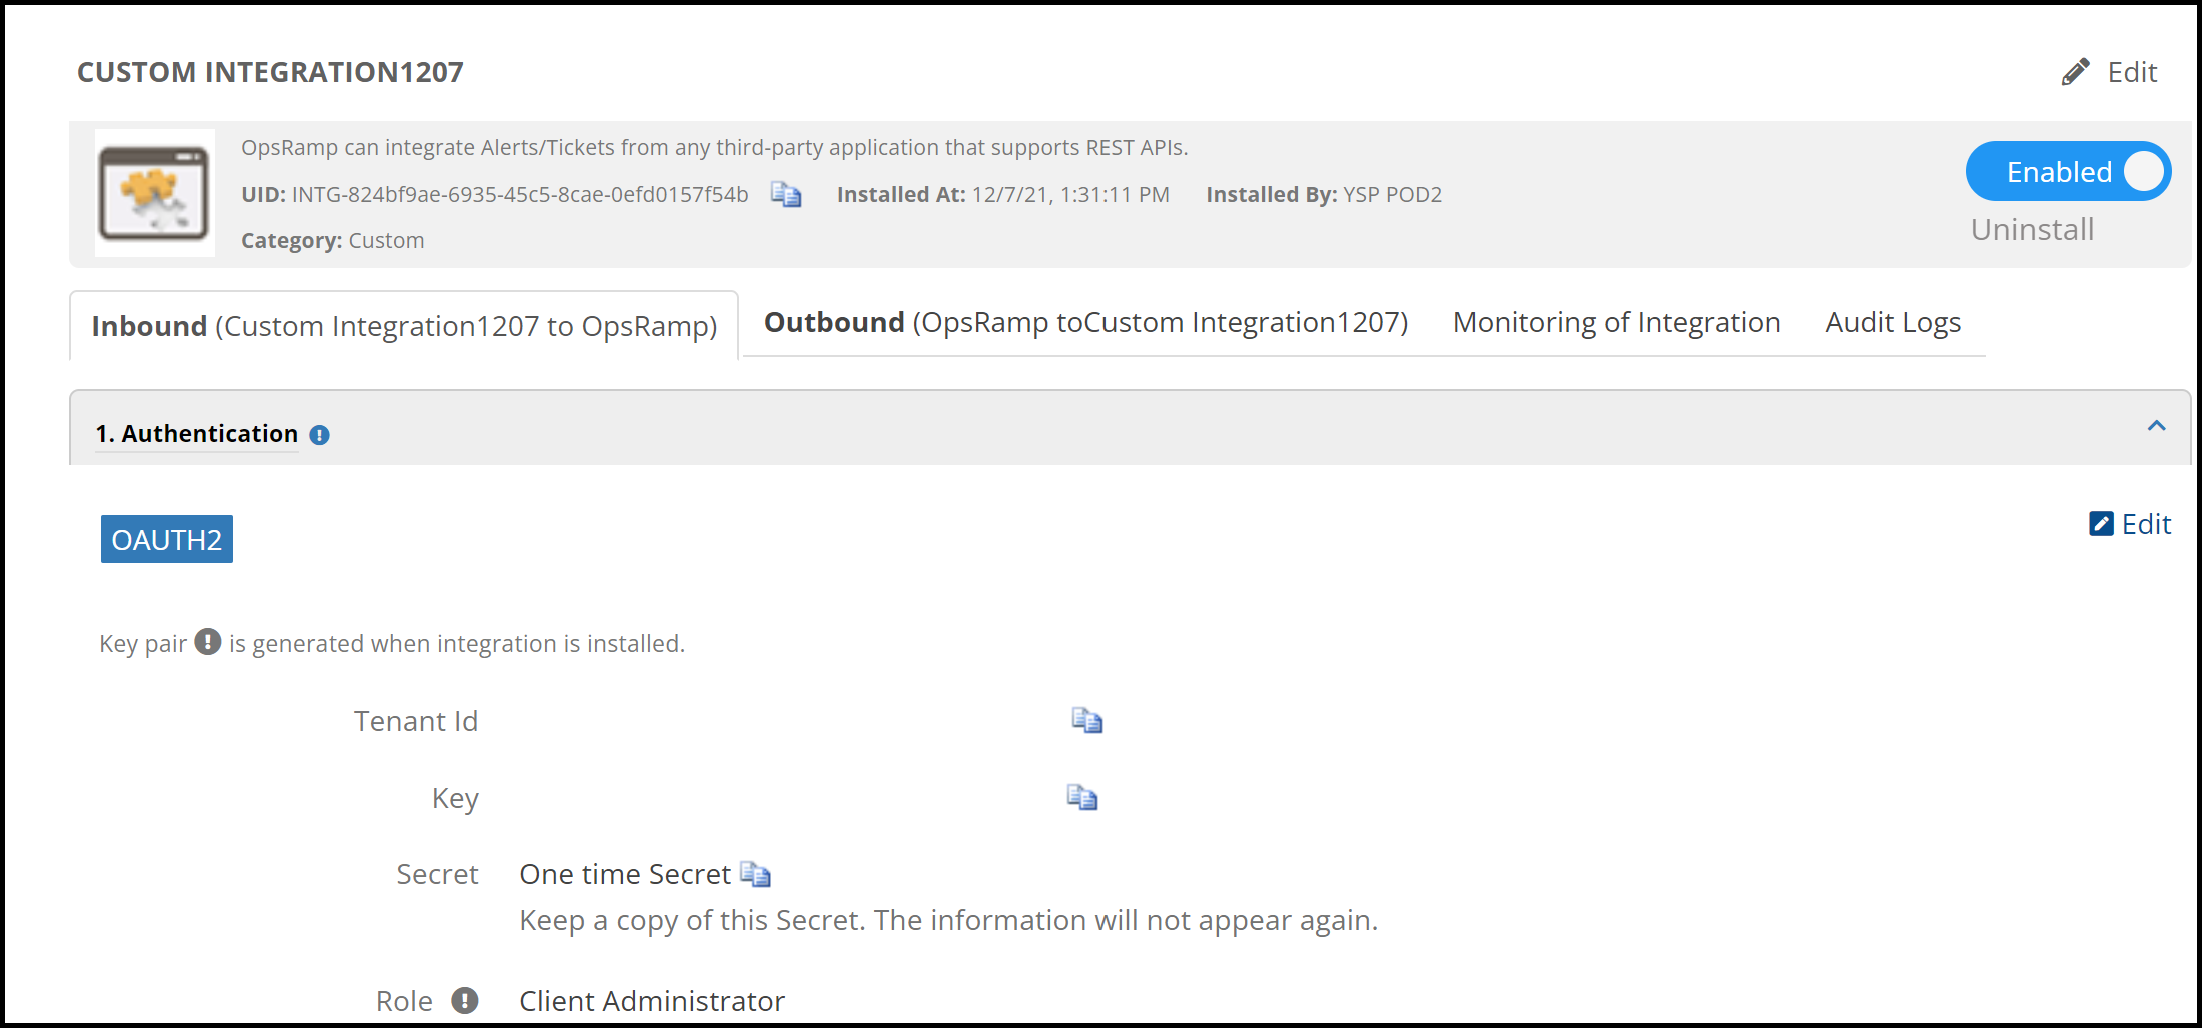
4, 設定完了です。
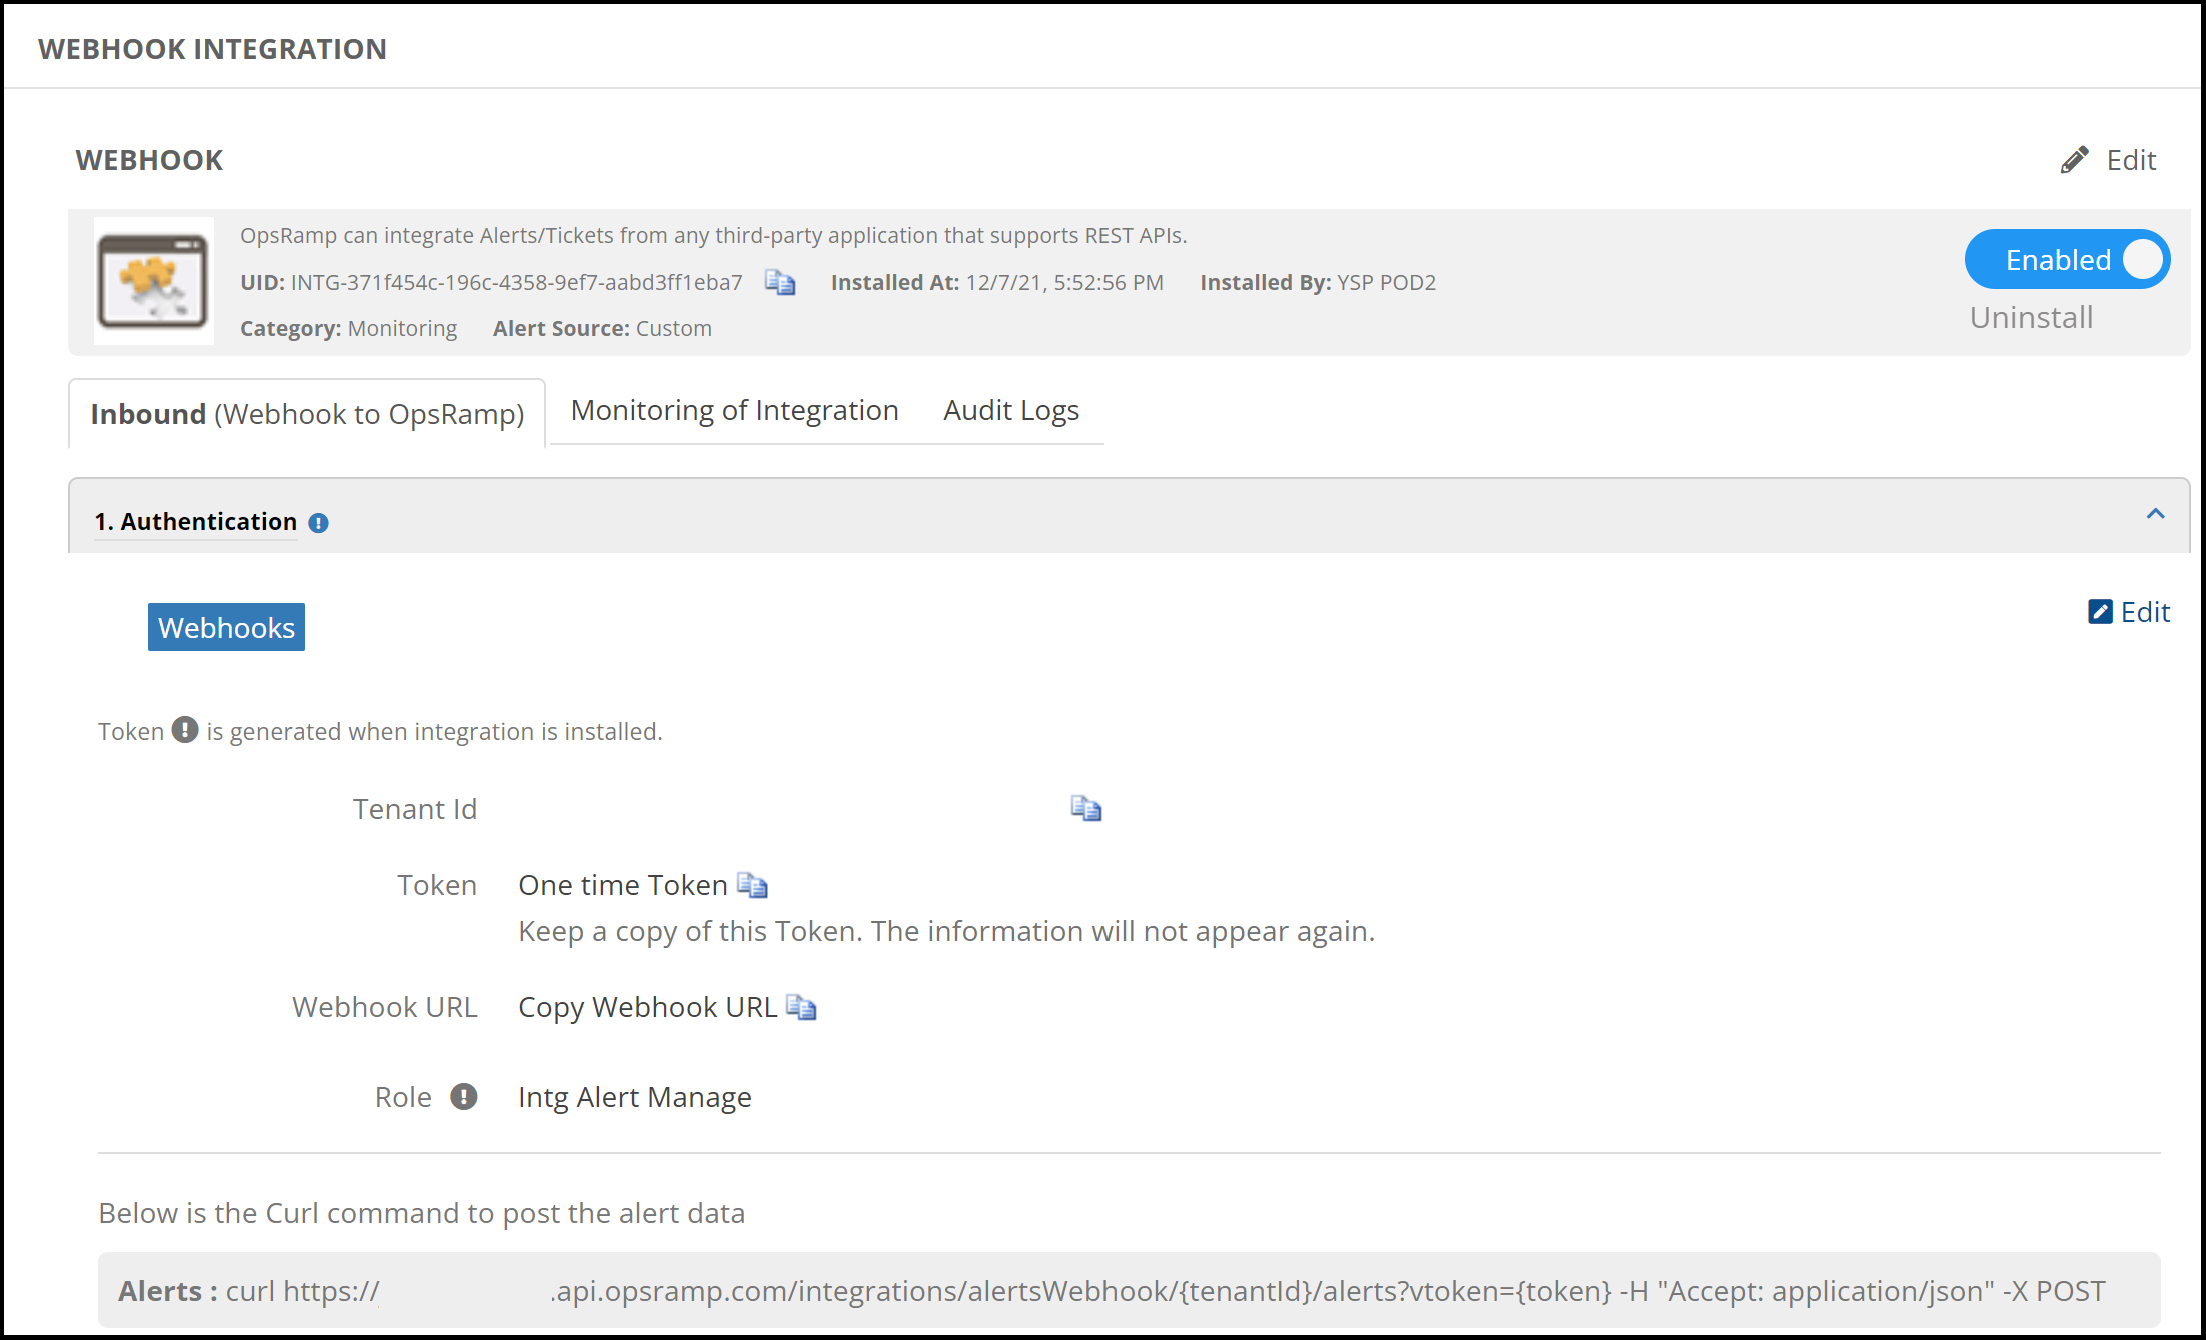
テナント情報が出てしまうため、マスクしていますが、Tenant Id、Keyのところに文字列が表示されます。
利用方法
設定はこれだけで、後はOpsRampが提供しているエンドポイントを自由に活用できます。
内容は充実しており、下記リンクを参照に試してみて下さい。
https://develop.opsramp.com/
実行例
※テナントURL、CrientKey/Secret、アクセストークンは置き換えてください。
1, アクセストークンの取得
レスポンスはアクセストークンが期限等の情報と共に返ってきます。
root@xxx:~# curl https://xxx.api.opsramp.com/auth/oauth/token -H "Content-Type: application/x-www-form-urlencoded" -H "Accept: application/json" -d "grant_type=client_credentials&client_id=xxxxxxxxx&client_secret=xxxxxxxxxx" -X POST
{"access_token":"ef52c738-b412-4068-a773-60c8feb6da91","token_type":"bearer","expires_in":7199,"scope":"global:manage"}
2, アクセストークンを利用してGET、またはPOSTする
POSTの際はペイロードに必要項目をJSONフォーマットで記載することで対象のデータがOpsRamp上に作成されます。
レスポンスはGETした内容、またはPOSTで作成された内容が返ってきます。
root@xxx:~# curl https://xxx.api.opsramp.com/api/v2/tenants/xxxxxxxxx/incidents -H "Authorization: Bearer 1b20e531-83b1-4f70-ad6c-55ee48923aea" -H "Content-Type: application/json" -H "Accept:application/json" -d '{"subject":"Test INCIDENT","description":"Test Description"}' -XPOST
{"id":"INC0024827818","subject":"Test INCIDENT","description":"Test Description","status":"New","oldStatus":"New","priority":"Low","oldPriority":"Low","requester":{"id":"USR0000000002","loginName":"opsramp_api_user","lastName":" ","firstName":"API User","email":"xxx@opsramp.com","userPreferences":{"displayMode":"light"}},"devices":[],"createdUser":{"id":"USR0000000002","loginName":"opsramp_api_user","lastName":" ","firstName":"API User","email":"xxx@opsramp.com","userPreferences":{"displayMode":"light"}},"alertIds":[],"reOpenCount":0,"estimatedHours":0,"timeSpent":0,"estimatedMinutes":0,"createdDate":"2021-12-07T07:51:39+0000","allowedStatus":[{"id":"2","name":"Open","reasonsEnabled":false,"reasonsDefined":false},{"id":"3","name":"Pending","reasonsEnabled":false,"reasonsDefined":false},{"id":"6","name":"On Hold","reasonsEnabled":false,"reasonsDefined":false},{"id":"4","name":"Resolved","reasonsEnabled":false,"reasonsDefined":false},{"id":"5","name":"Closed","reasonsEnabled":false,"reasonsDefined":false}],"client":{"id":4363,"uniqueId":"d8601056-bc21-4ce7-988c-40e42a1cf1c9","name":"vnamdemo01","activated":true,"offlineAlertstoThirdPartyTool":false,"uuid":"d8601056-bc21-4ce7-988c-40e42a1cf1c9","addOns":["Adapter Integrations","Alert Problem Area","Extended Data Retention","IT Workflow Automation","Knowledgebase Management","Offline Alerts","OS Service Start/Stop Actions","Process Automation","Remote Access Management","SMS and Voice"],"packages":["Hybrid Discovery and Monitoring","Event and Incident Management","Remediation and Automation"],"featureFlags":{}},"sourcePolicyType":"INTEGRATION","updatedDate":"2021-12-07T07:51:39+0000","priorityUpdatedBy":{"id":"USR0000000002","loginName":"opsramp_api_user","lastName":" ","firstName":"API User","email":"xxx@opsramp.com","userPreferences":{"displayMode":"light"}},"priorityUpdatedDate":"2021-12-07T07:51:39+0000","statusUpdatedBy":{"id":"USR0000000002","loginName":"opsramp_api_user","lastName":" ","firstName":"API User","email":"xxx@opsramp.com","userPreferences":{"displayMode":"light"}},"statusUpdatedDate":"2021-12-07T07:51:39+0000","slaDetails":{"resolutionTime":0,"responseTime":0,"responseBreach":false,"resolutionBreach":false,"responseBreachDate":"","resolutionBreachDate":""},"source":"INTEGRATION","sourceEntityType":"INCIDENT","resources":[],"statusFlow":[{"status":"New","createdDate":"2021-12-07T07:51:39+0000","updatedBy":{"id":"USR0000000002","loginName":"opsramp_api_user","lastName":" ","firstName":"API User","email":"xxx@opsramp.com","userPreferences":{"displayMode":"light"}}}],"originalTicketId":"","lastUpdatedBy":{"id":"USR0000000002","loginName":"opsramp_api_user","lastName":" ","firstName":"API User","email":"xxx@opsramp.com","userPreferences":{"displayMode":"light"}},"mapping":false}
OpsRampからIncidentを元にデータを送信する
先程作成したCustom Integrationから、OpsRampのインシデントチケットをトリガーにして外部ツールのAPIエンドポイントにPOSTすることも出来ます。
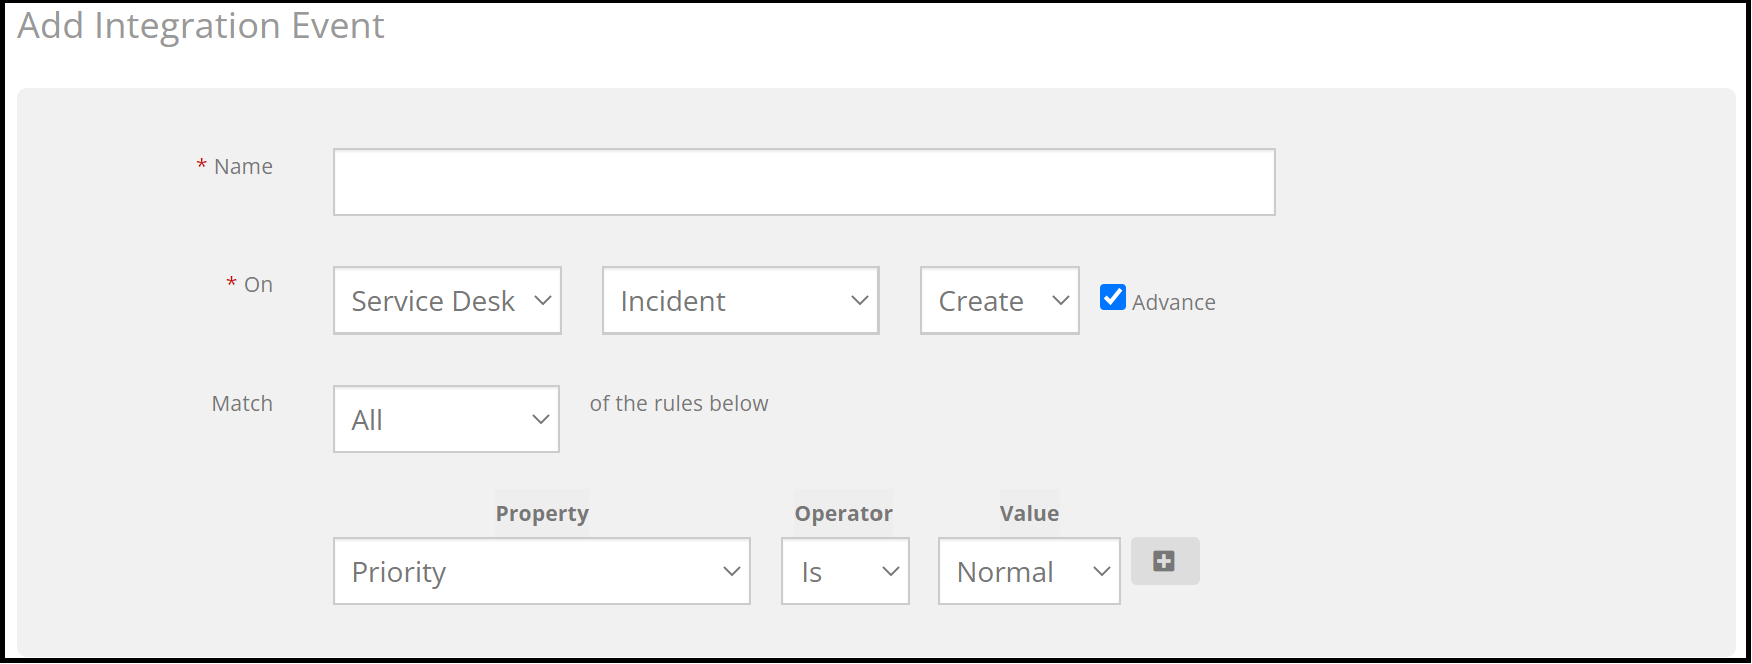
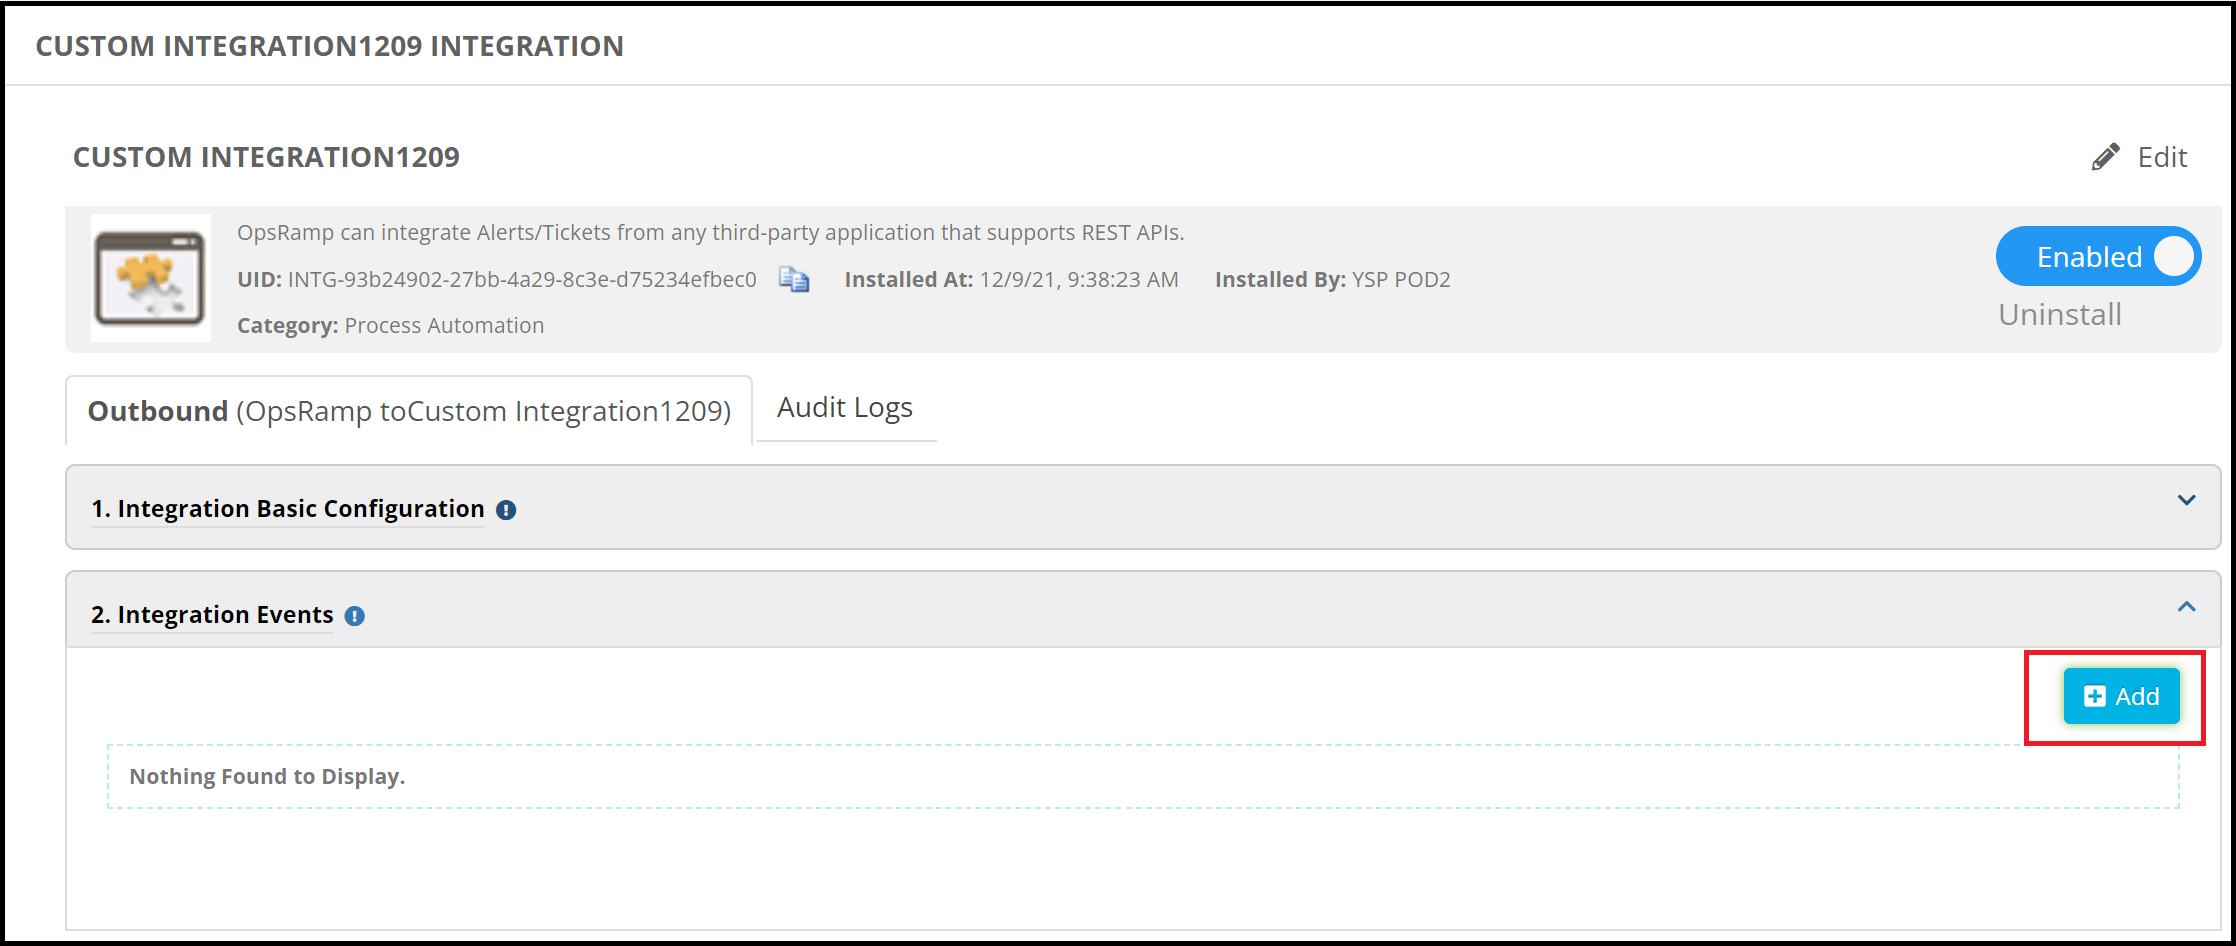
1, 「Outbound」のタブから「3,Integration Events」の「Add」をクリック。
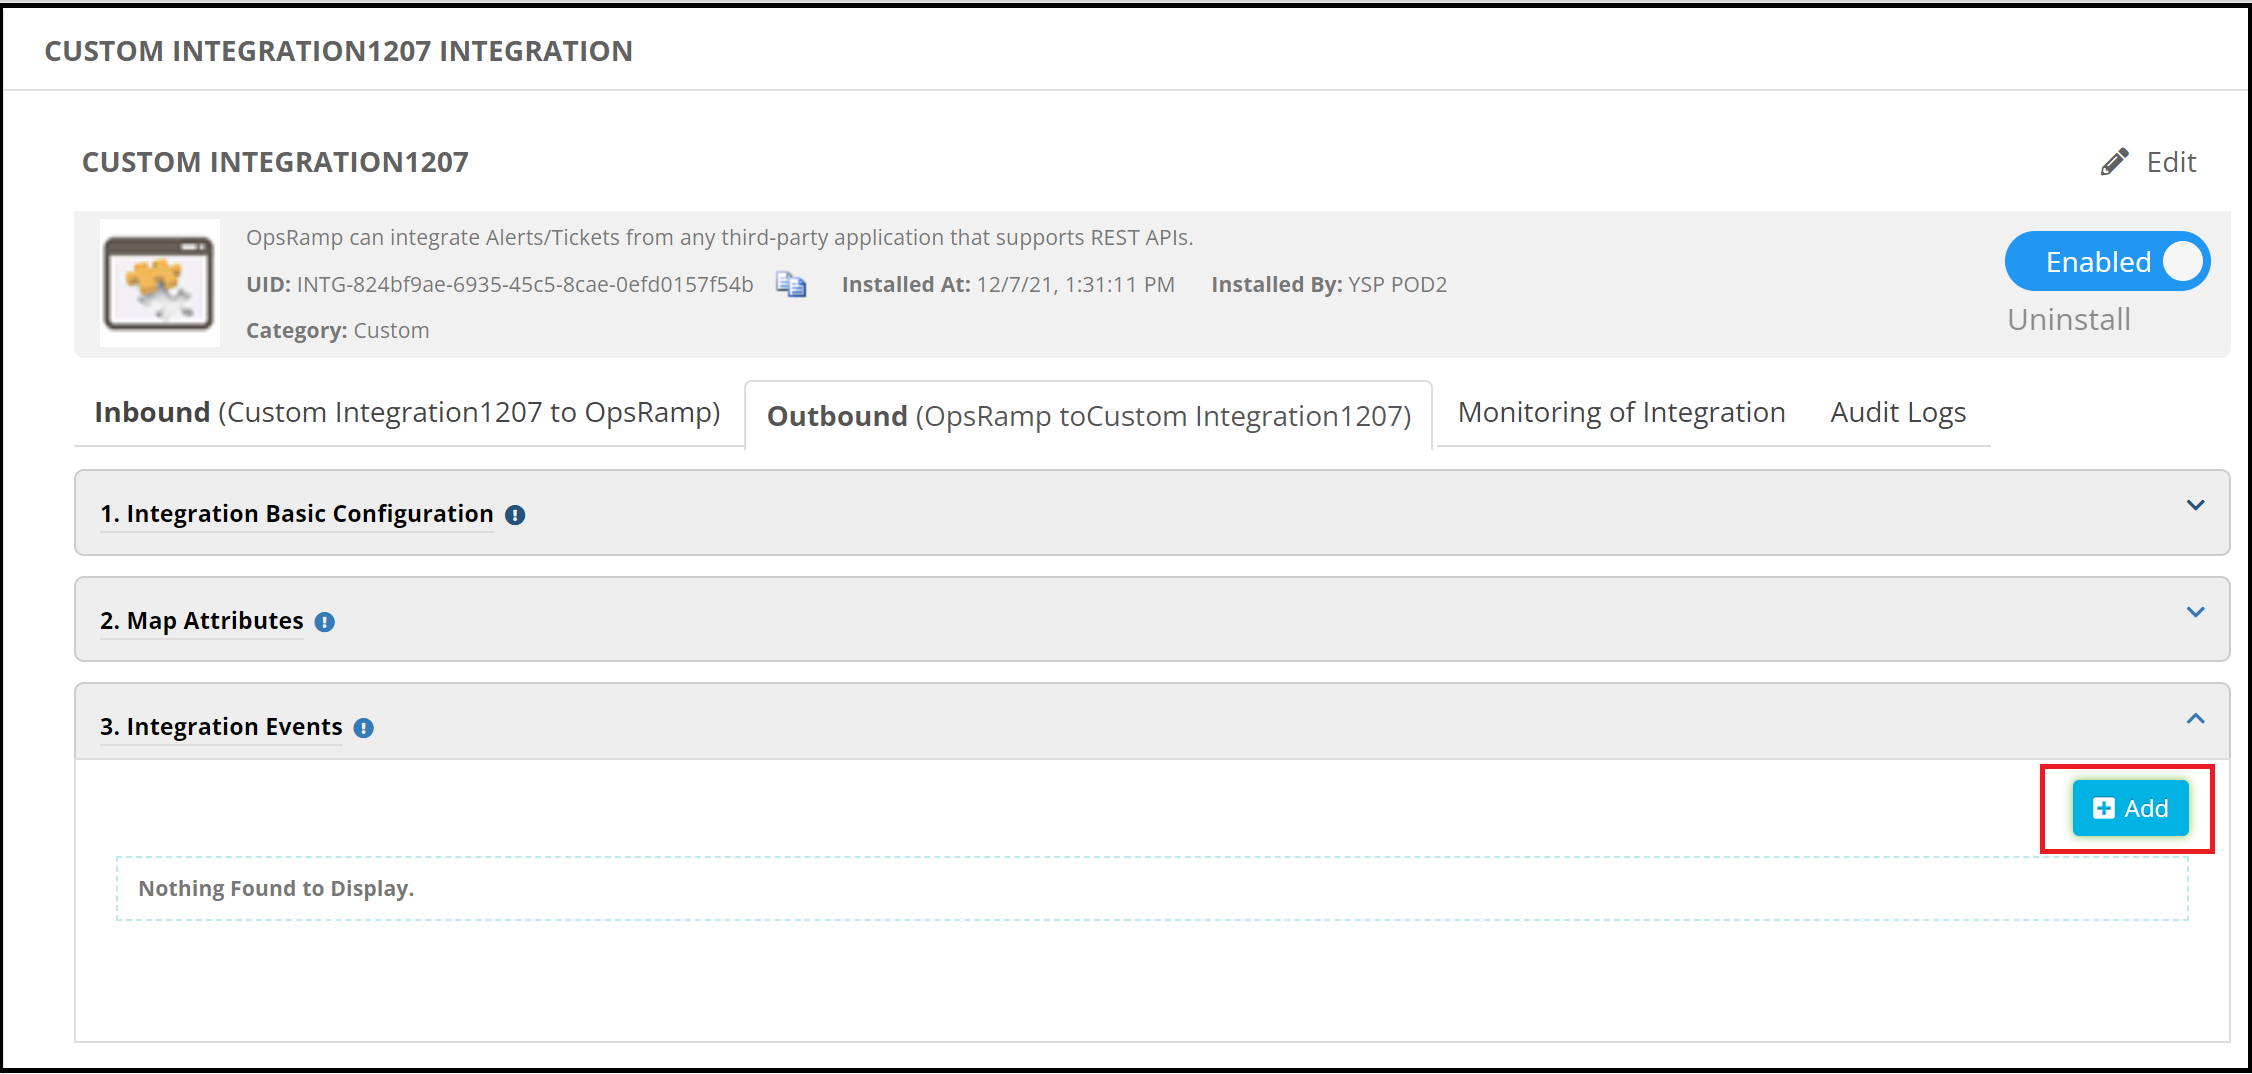
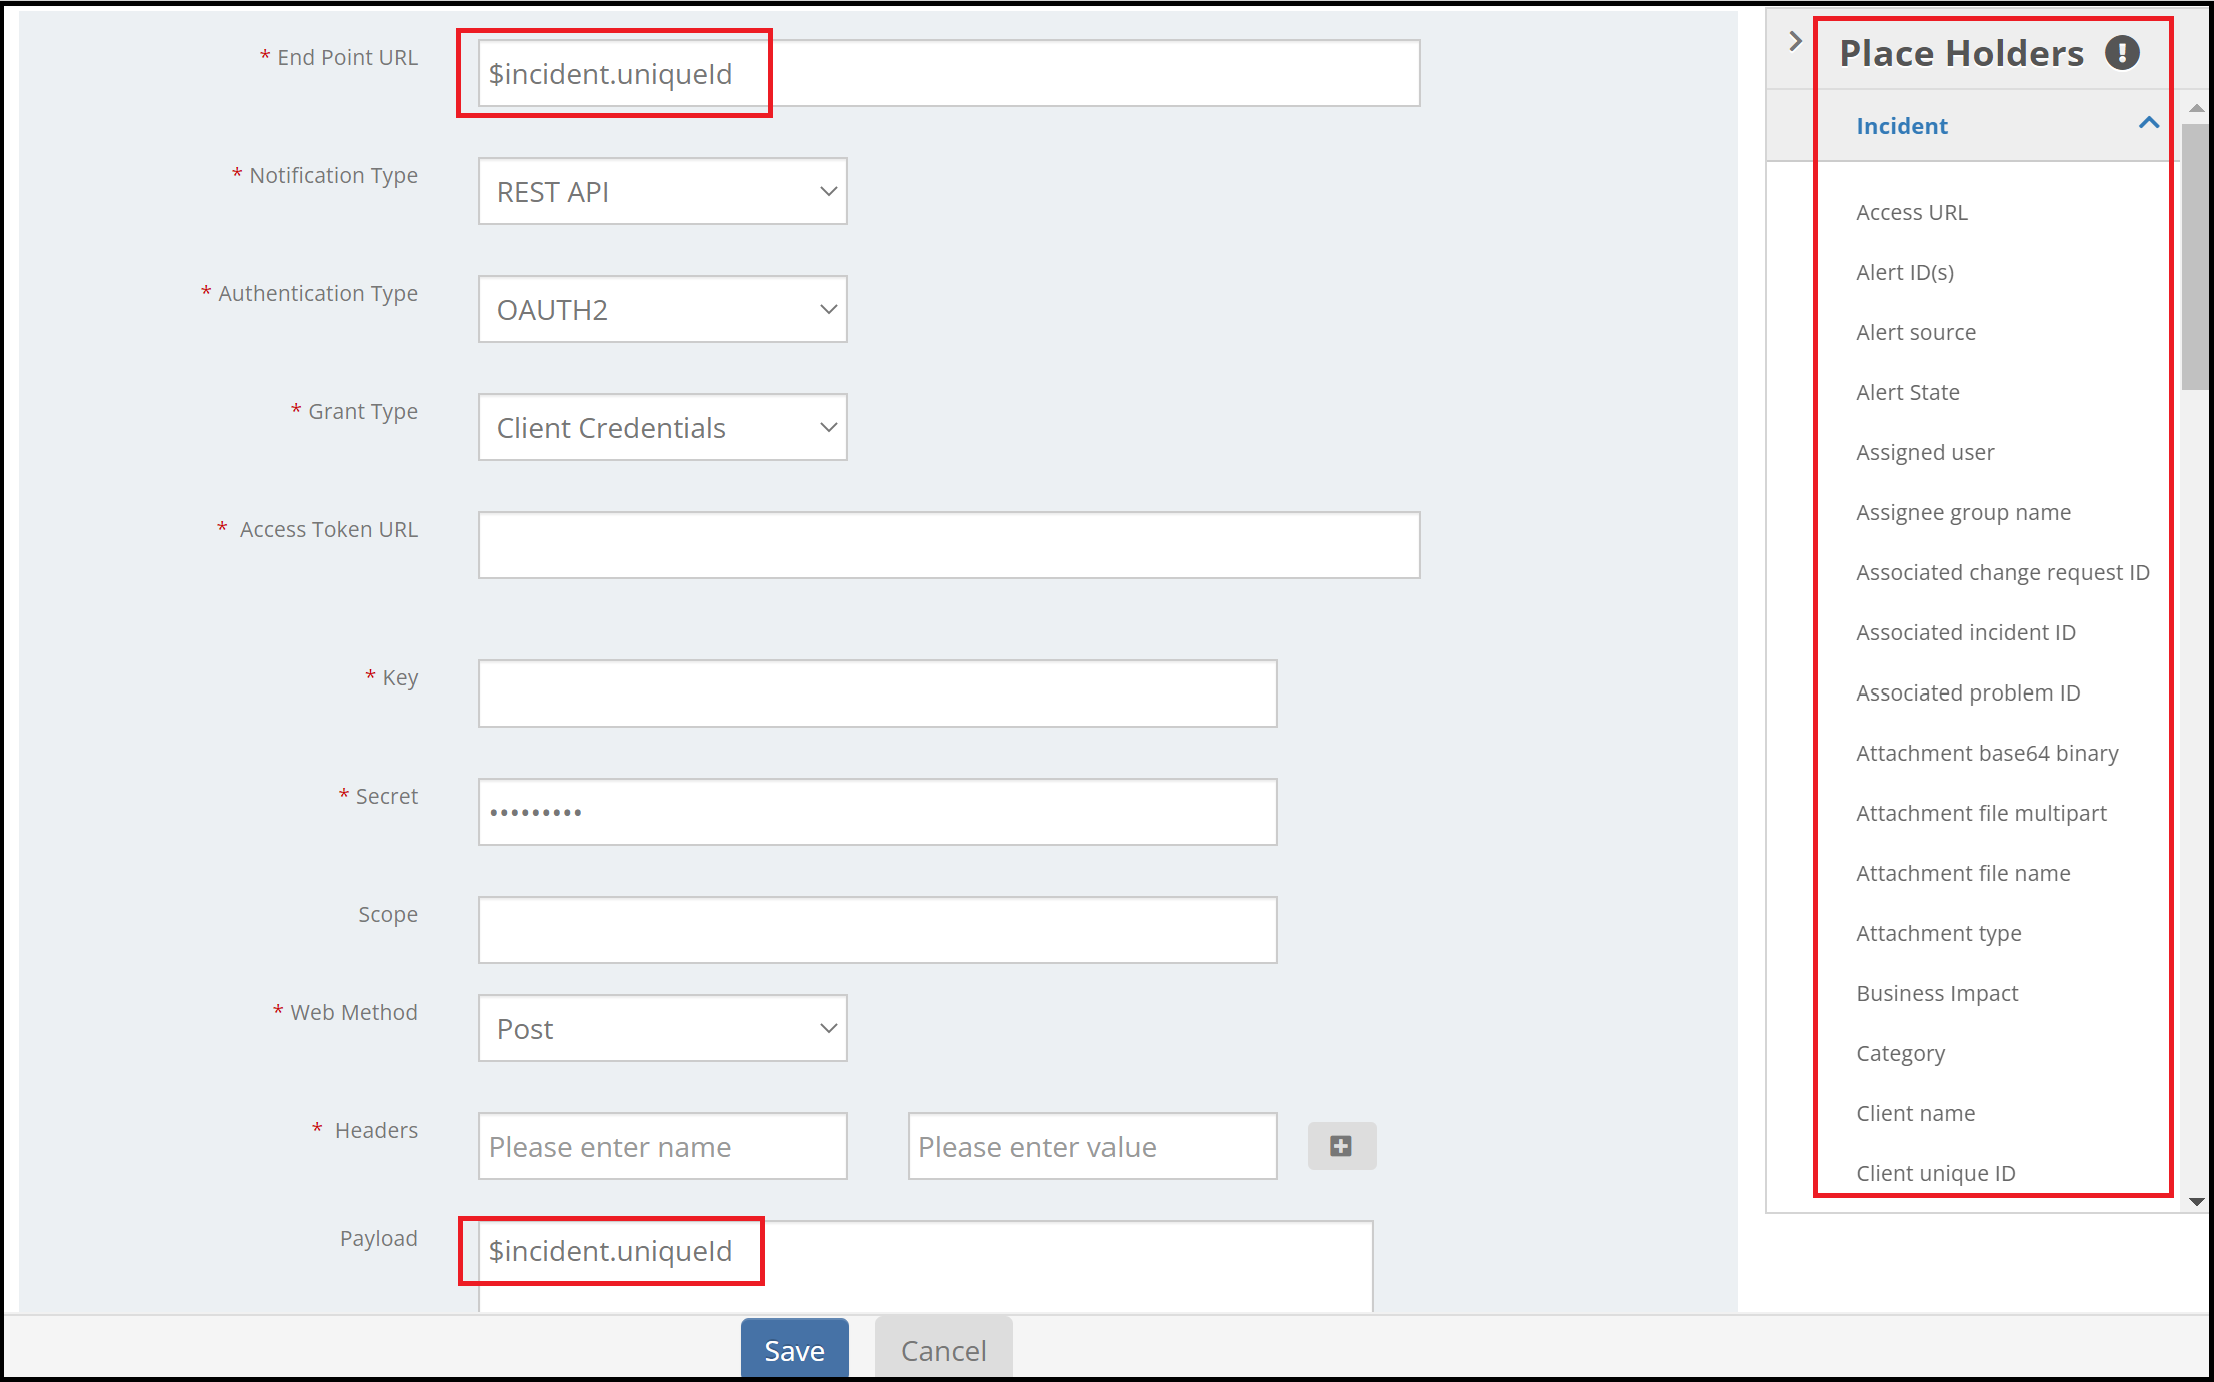
3, その後、送信先のエンドポイント情報を入力します。
こちらは送信先の仕様に合わせて入力してください。
右側に見える「Place Holders」の部分からOpsRamp側の情報を挿入できます。
例えば画像ですと「End Point URL」に「$incident.uniqueId」というのが見えますが
これはPlace Holdersを挿入した場合にこの様に表示されます。右側からほしい情報をクリックすると、現在選択されているフィールドに自動的に挿入されます。
ですので、エンドポイントやペイロード内にOpsRampの情報を入れ込むことが出来ます。
具体例:ペイロードのidの部分はOpsRamp側のトリガーとなったインシデントチケットのIDを挿入したい。
"id":"$incident.uniqueId"
必要項目入力して最後に「Save」すると、それ以降対象の条件にマッチするIncidentが作成/更新された際に、OpsRampから対象のエンドポイントに対してデータの送信を行います。
Integrationに無い監視ツールのアラートを取り込む
OpsRampは既に多くの監視ツールからのアラートを取り込めるようにそれぞれIntegrationを用意しています。
https://docs.opsramp.com/integrations/a2r/3rd-party/
Q:ここに無いものは非対応ですか?
A:JSONフォーマットで飛ばしてもらえれば取り込めます。
Webhookでの実現方法を説明します。
1, Custom Integrationをインストールする。
インストール時に「Category」=「Monitoring」,「Alert Source」=「Custom」にしてください。
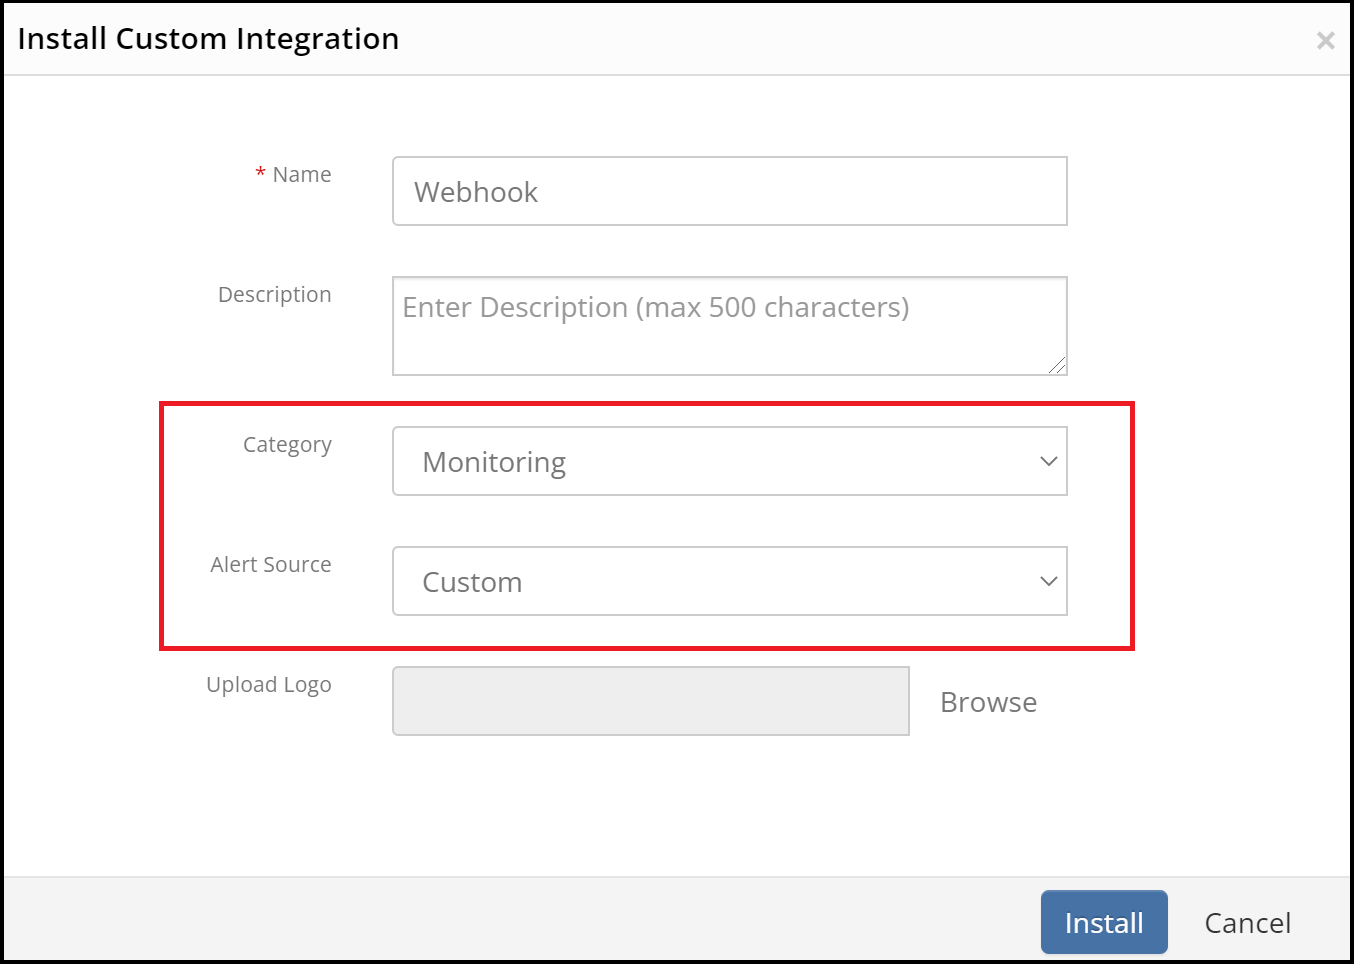
3, WebhookのURLが出来ましたので、これを監視ツール側のトリガーやアクションのPolicyとかに登録してもらえれば、監視ツール側からデータを受信できるようになります。
https://xxx.api.opsramp.com/integrations/alertsWebhook/xxxxxxxxxxxx/alerts?vtoken=Vk8ex2DxadGnUa5rwS2jBZvBFJNCNRXT
4, マッピング
現状だと、Alertは受け取れますが、エラーになります。
監視ツール側の各フィールドとOpsRamp側のものが一致しないからです。
そのためフィールドのマッピングが必要になります。
画像の様に「2, Map Attributes」で来たデータをOpsRampフィールドにマッピングしていきます。
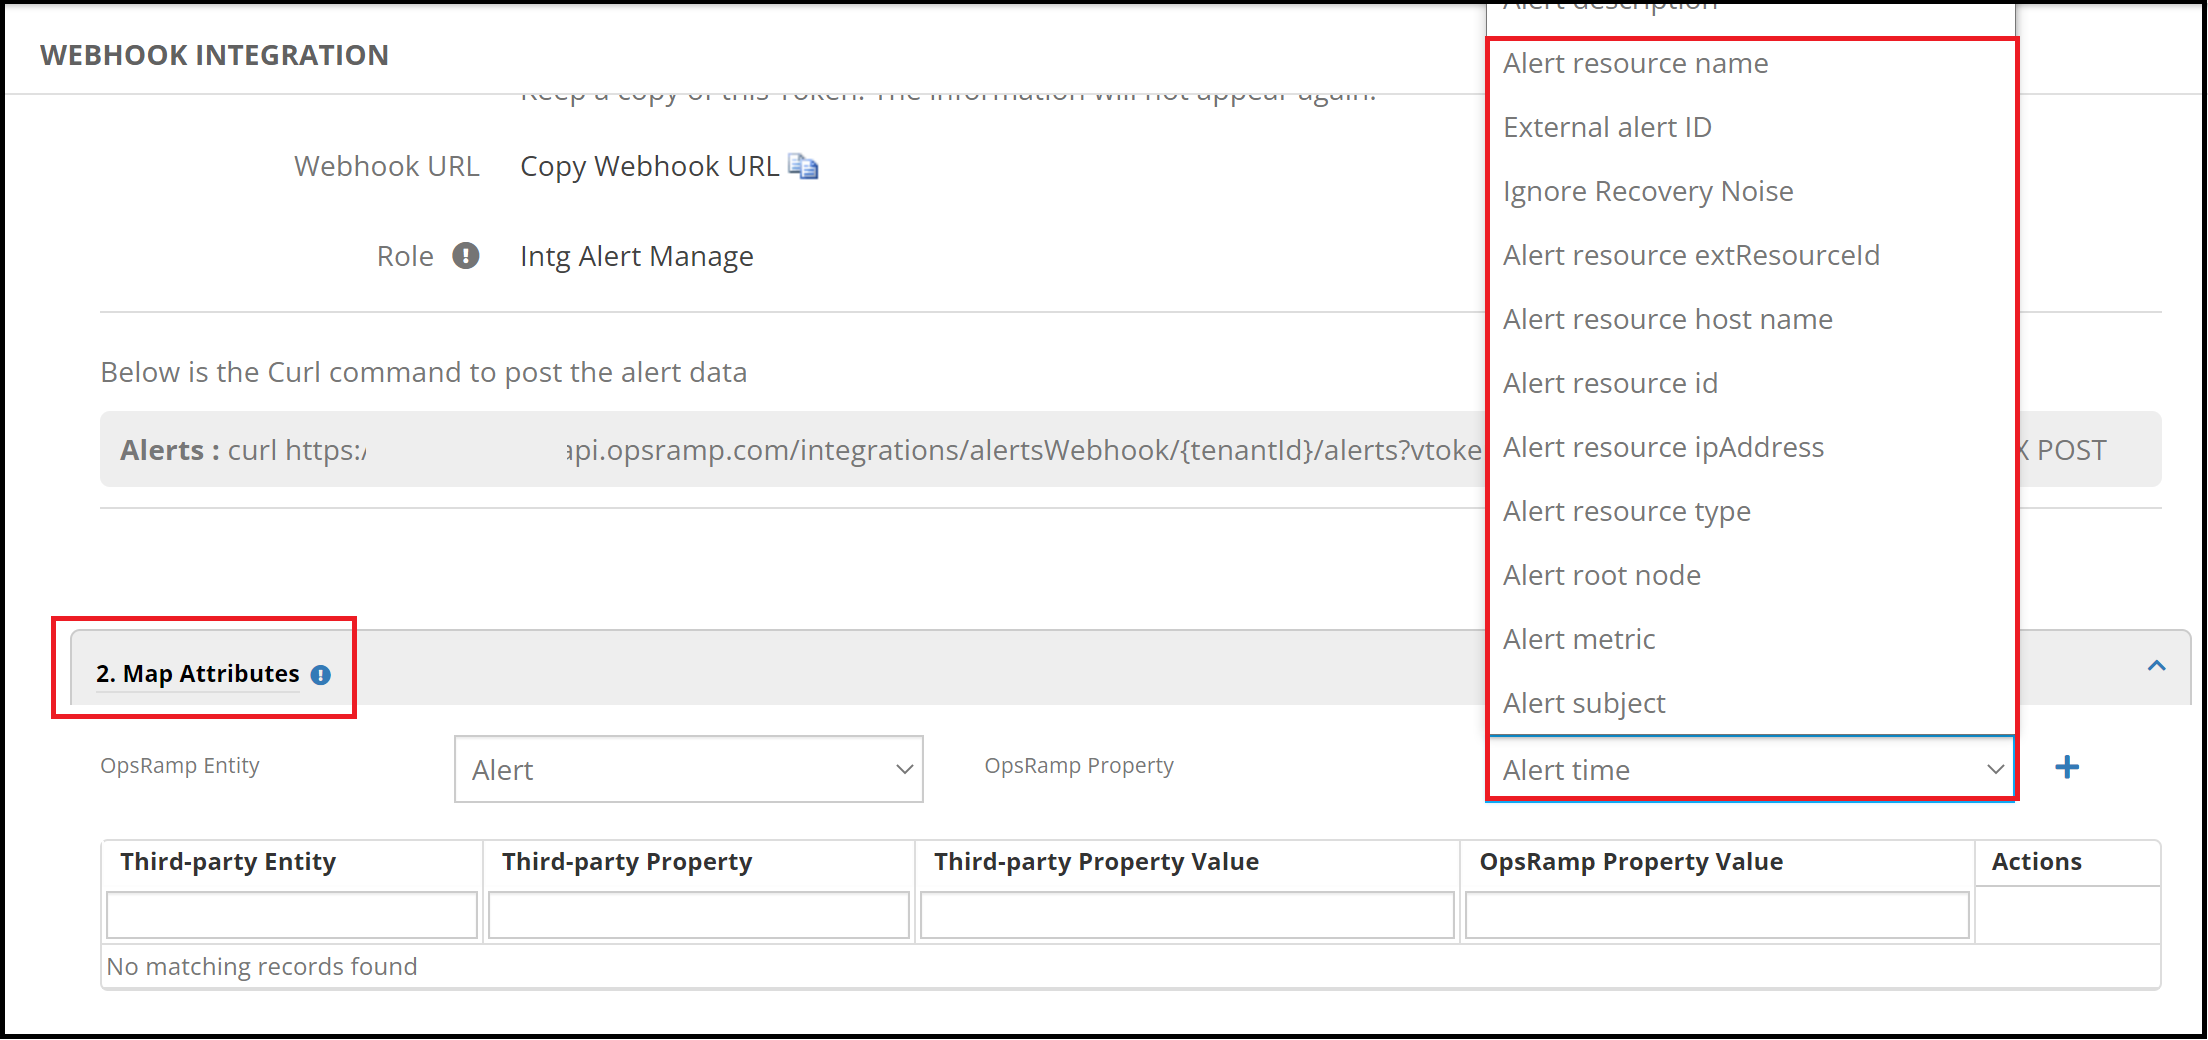
マッピング具体例
例えばこういうデータが来るとします。
{"alert":{"id":"12345","resource_name":"TABLET-8NU04T4F","alert_name":"system.cpu.utilization","condition":"system.cpu.utilization","state":"Open","summary":"CPU utilization is critical."},"version":"1.2"}
OpsRampのアラート生成必須項目のみでマッピングしてみます。
下記の様にマッピングすることで最低限アラートが作成出来ます。
ポイントは、
「Third-party Property」はもちろん取得したいデータの階層まで記載してください。
「Alert State」は取得したデータが、OpsRampのどのデータなのか、を具体的にMappinngします。
今回はOpen=Criticalという感じにしました。なので例えばClosed=OKという感じも並列でかけます。
| OpsRamp Property | Third-party Entity | Third-party Property | Third-party Property Value | OpsRamp Property Value |
|---|---|---|---|---|
| Alert Resource Name | alert | alert.resource_name | なし | なし |
| Alert State | alert | alert.state | Open | Critical |
| Alert metric | alert | alert.condition | なし | なし |
| Alert subject | alert | alert.summary | なし | なし |
登録はじめはドロップダウンでOpsRamp Propertyを選んで「+」アイコンをクリックして始めてください。編集は画像の「+」アイコンの下にActionとして編集アイコンが出てきます。

インシデントチケットではなくてアラートから外部にPOSTしたい
Process Workflowで実現出来ます。
1, Custom Integrationをインストールする。
インストール時に「Category」=「Process Workflow」にしてください。
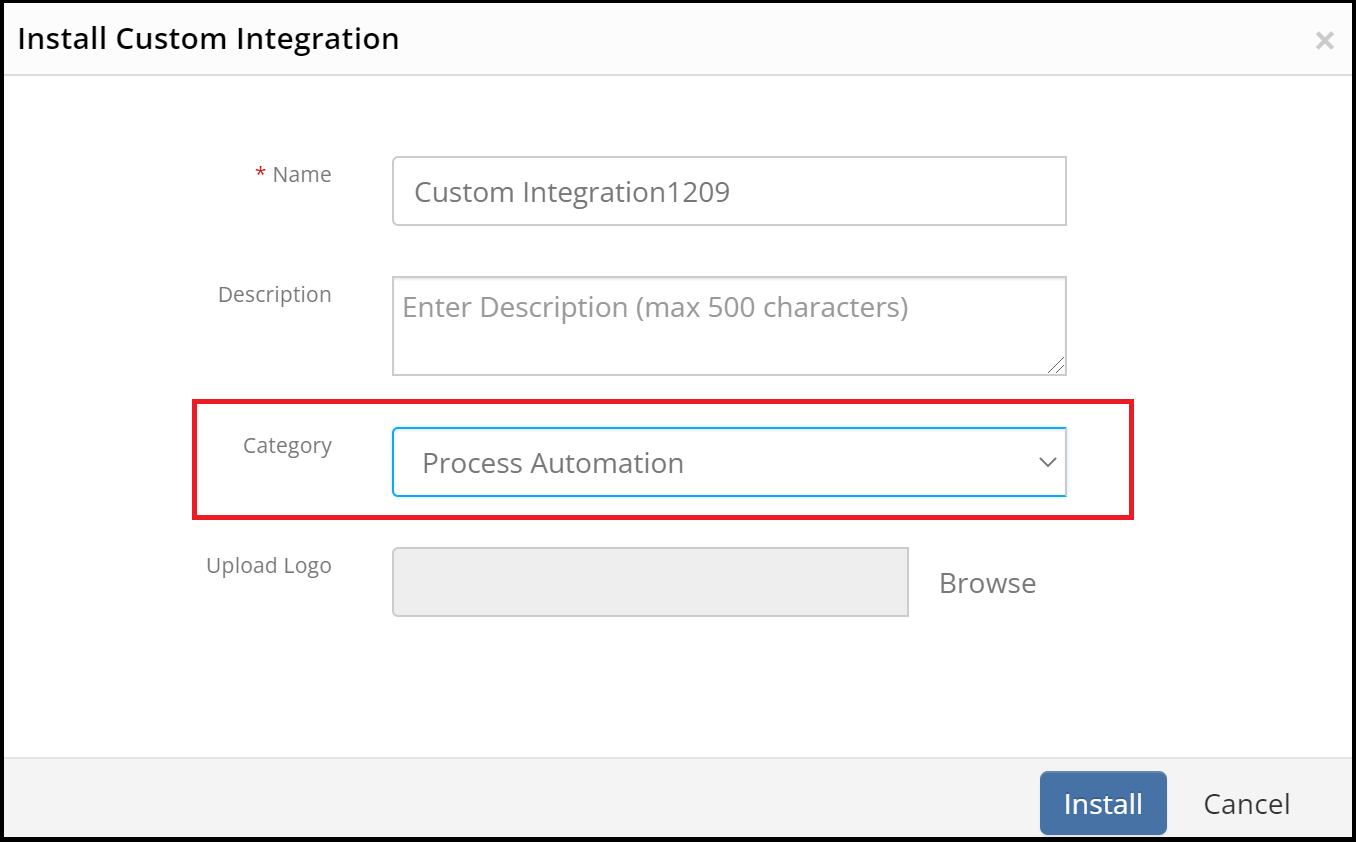
2, 「2, Integration Events」の「Add」をクリック。
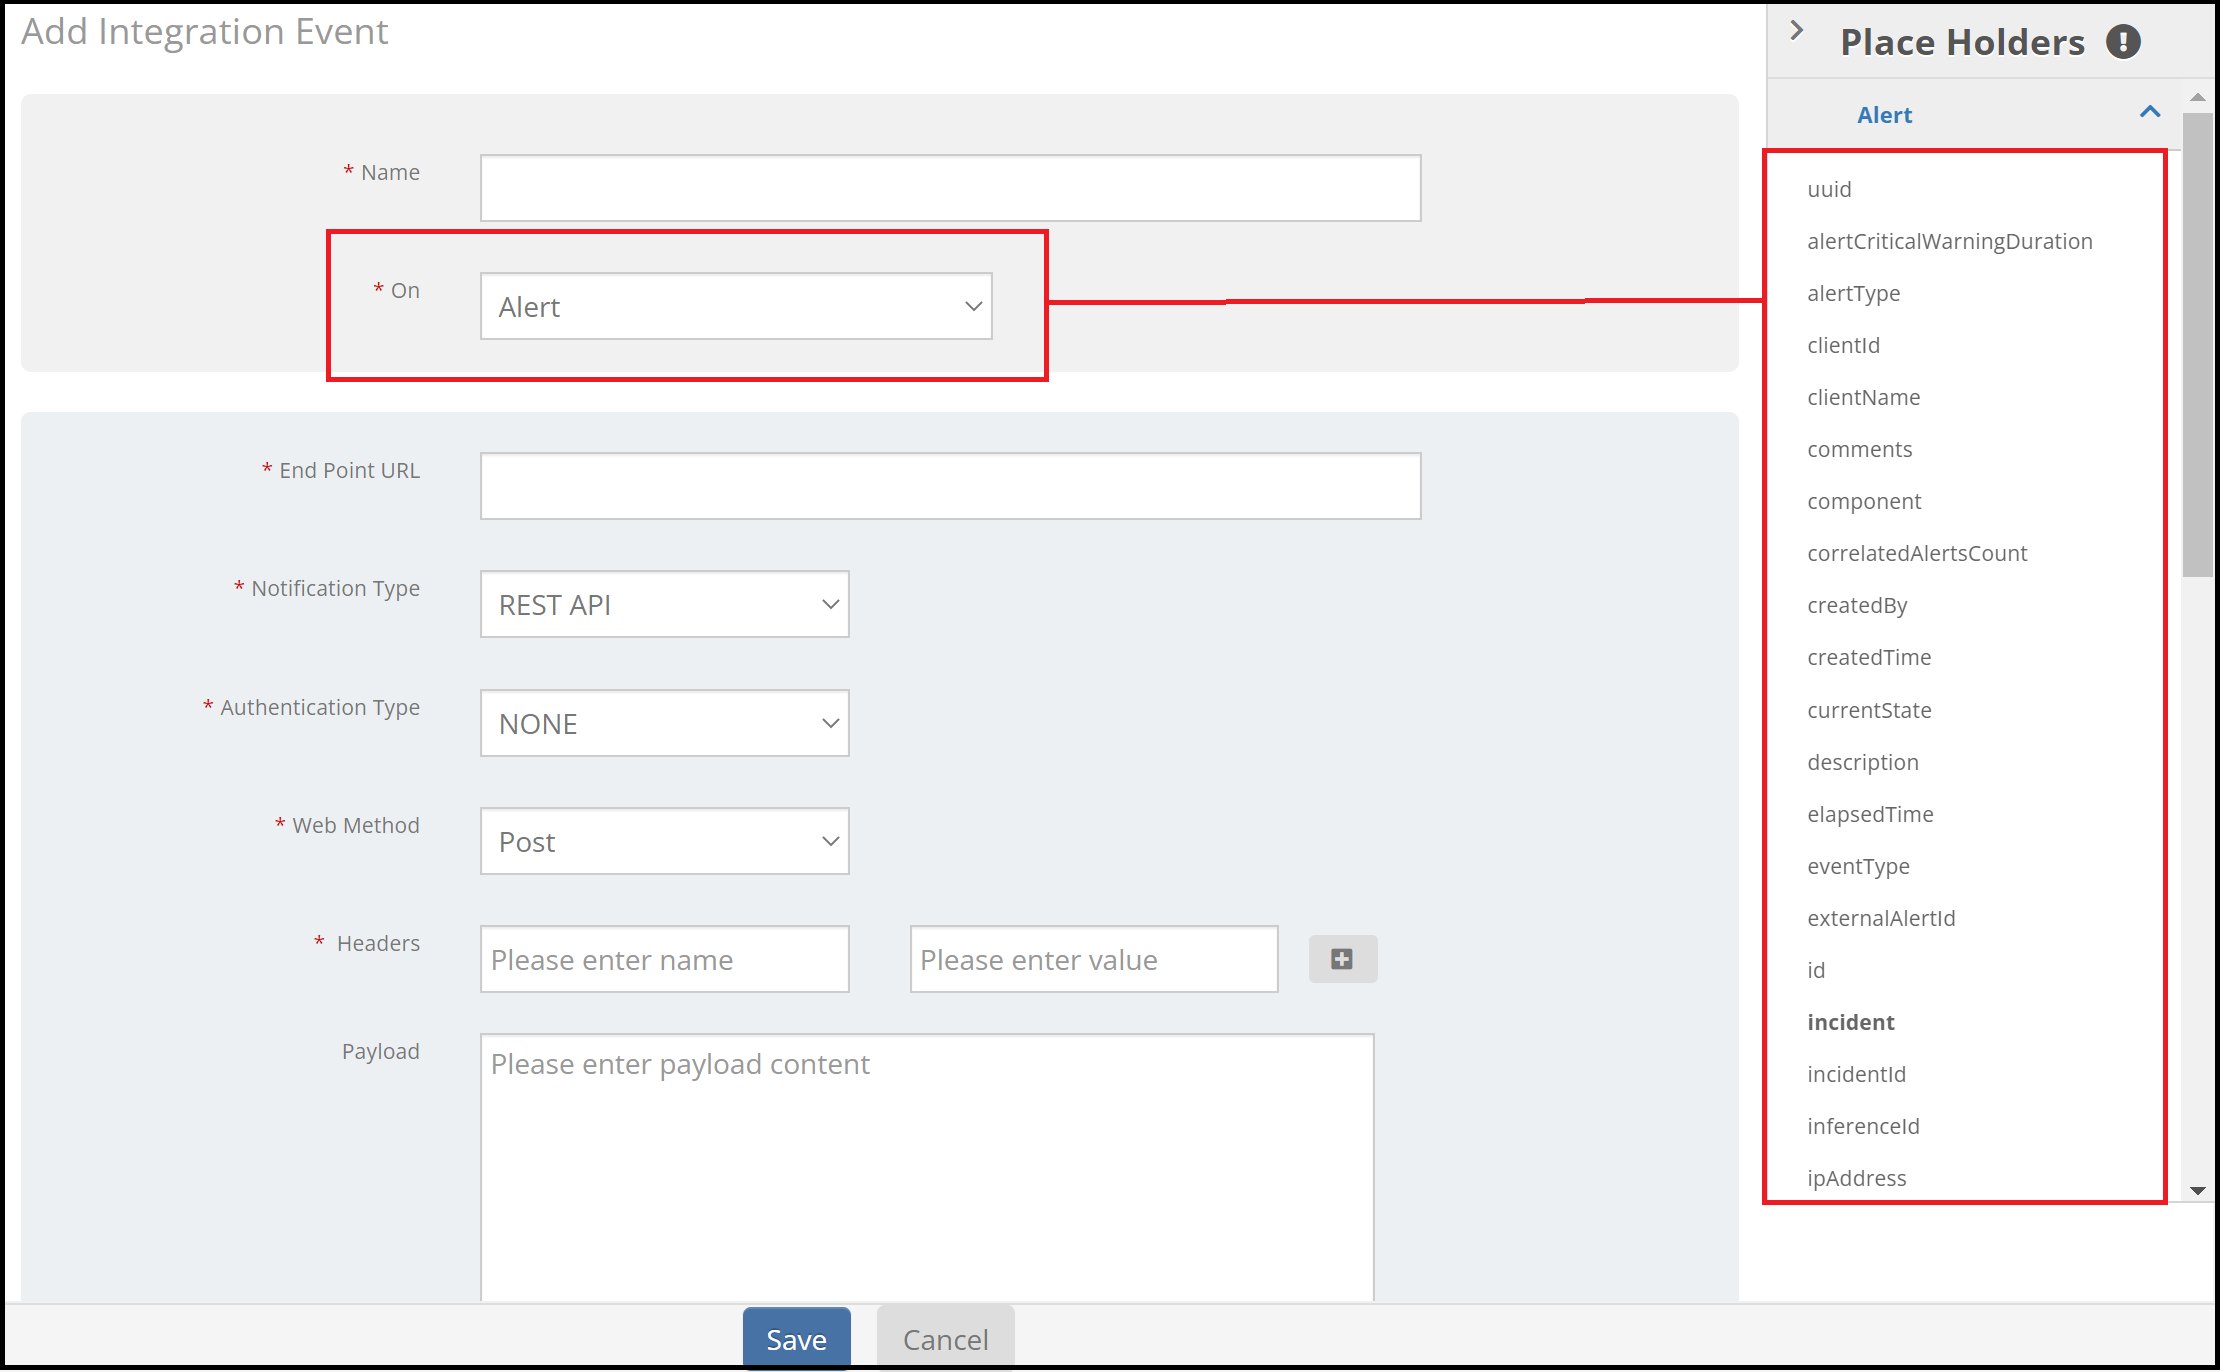
3, Eventを設定します。
Onの部分は右側のPlace Holderの表示トークンに紐付いています。
エンドポイントURLやペイロードにOpsRamp側の情報を挿入したい場合は、
それに紐付いた項目を入力してください。
例) アラートのIDを挿入したい場合、「On」は「Alert」を選択し、Place Holerで「uuid」をクリックすれば挿入できます。
その先の送信先のエンドポイント情報については、前述の「OpsRampからIncidentを元にデータを送信する」を参照してください。
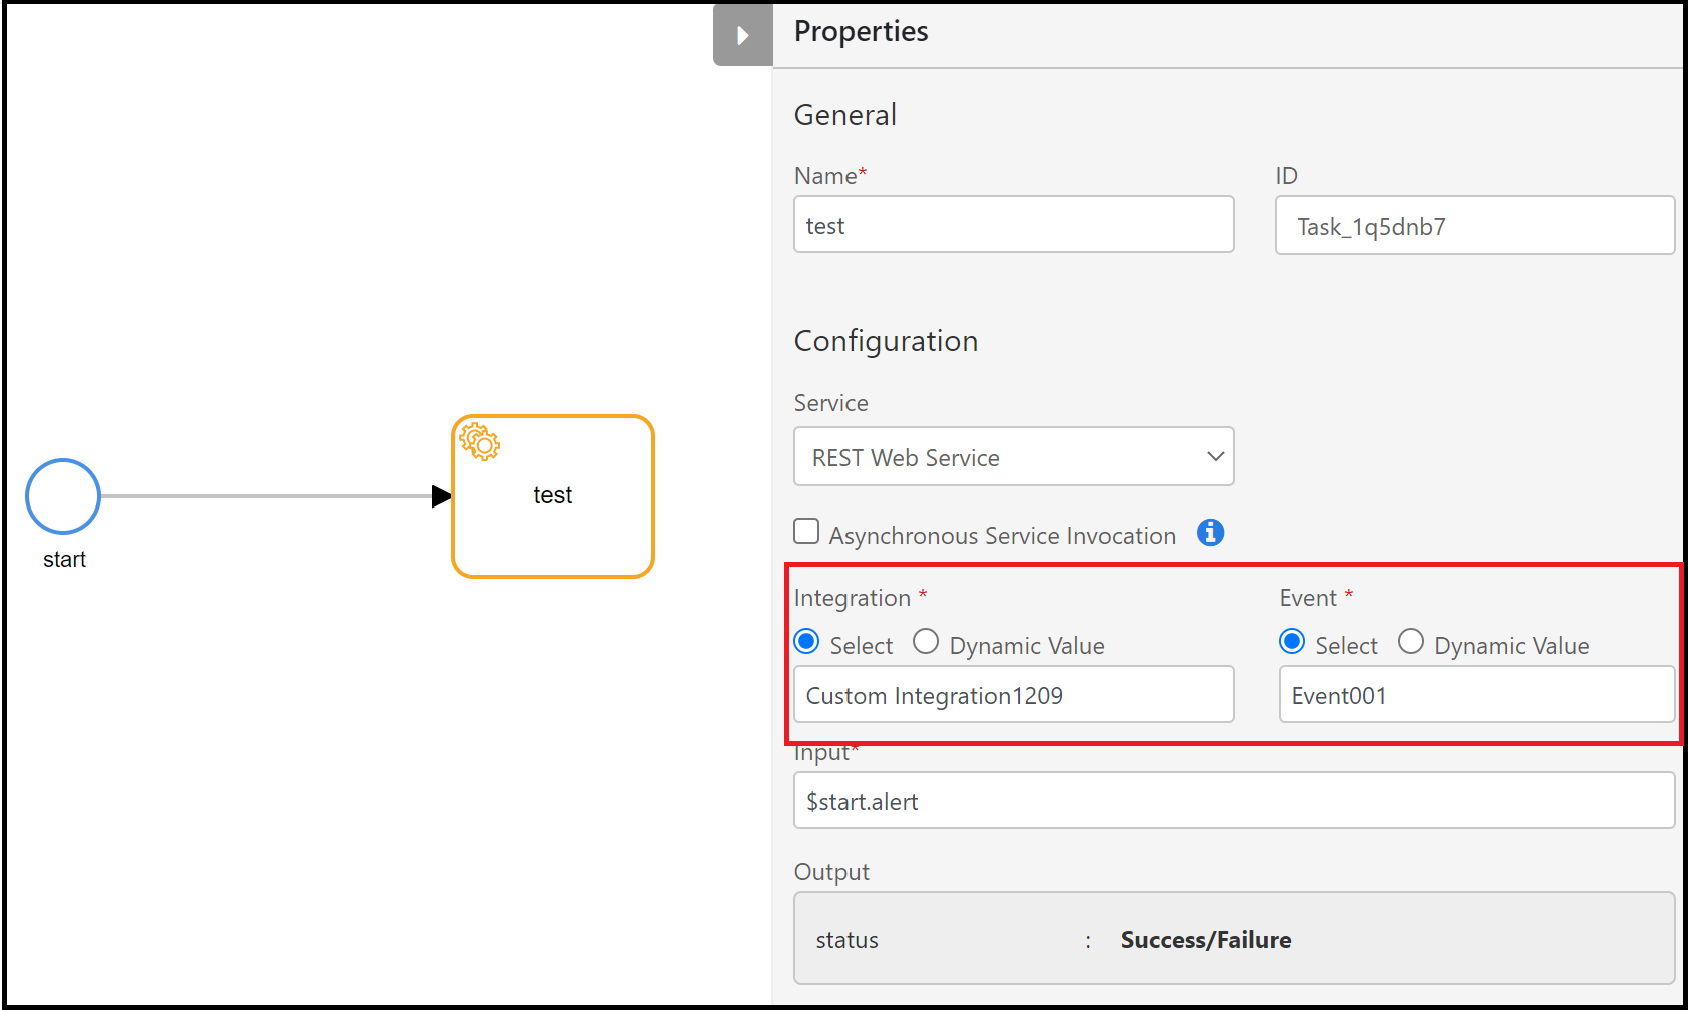
4, Process Workflowで対象のEventを指定します。
Service Task選択時に「Service」で「REST Web Service」を選択します。
そうすると、IntegrationとEventを選ぶ項目が出てきます。
ここに先程作成したEventを入れることが出来るということです。
InputにはEvnetの「On」で指定した内容が取得できるような内容を入力します。
例)図の例ではアラートをトリガーにして対象のEventを実行します。
Event内の「On」は「Alert」にしていますので、「start」でトリガーになったアラートから
取得した情報が対象になるように”$start.alert”としています。
以上です。
