この記事を読むとわかること
Git/GitHubを使い始めてまだ日が浅い初心者で、例えば月1回など、頻繁に使わない場合、使い方の流れを忘れてしまいます。
Git/GitHubを使う為の初期設定は済んでいるが、リポジトリを作って〜公開までの一連の動作を体でまだ覚えていない場合のレファレンスに適しています。全体の操作の流れを掴む事ができます。
前提条件
OSバージョン: macOS Mojave Version 10.14.6
homebrewがインストール済みであること
gitバージョン: 2.27.0
参考: 全体の操作の流れの確認
久しぶりの操作の前に、以下を眺めて全体の操作フローを思い出すのに活用できます。
以下はGit/GitHubを使い始める為の設定・操作方法の初心者向けの説明です。動画・記事両方とも内容は同じです。
Lesson Supplement Getting Started With Git and Github
10分5秒から通常の操作の説明に入ります。
Getting Started with Git and GitHub
WindowsとMacOSの2パターンが掲載されており、MacOSは後半に手順の説明があります。
1. ローカルのGitでの基本操作
1. リポジトリの初期化
$ mkdir test
$ cd test
$ git init
Initialized empty Git repository in /Users/yurachika/html/test/.git/
初期化に成功したら、git initを実行したディレクトリに.gitディレクトリが作成される。この.gitディレクトリにカレントディレクトリ以下を管理するリポジトリデータが格納される。
2. リポジトリの状態を確認
git statusコマンドで現在のリポジトリの状態を確認できます。
$ git status
On branch master

No commits yet

Untracked files:
  (use "git add <file>..." to include in what will be committed)
	index.html
	styles.css

nothing added to commit but untracked files present (use "git add" to track)
"On branch master"により、現在はmasterというブランチにいる事が確認できました。
"No commits yet"により、コミットがされていない事が確認できました。これの意味は、現時点では作成したこのリポジトリには何のファイルのどんな状態も何も記録されていないことを意味します。
また、上記に表示されている二つのファイル index.html, styles.cssは今回の管理対象にしたいファイルですが、"Untracked files"により、管理対象になっていない事がわかります。
3. ステージ領域にファイルを追加
Gitリポジトリのワーキングツリーでファイルを作成しただけでは、バージョン管理の対象ファイルとして認識されません。
そこで、ファイルを管理対象として登録する為、git addコマンドを使い、ステージ領域にファイルを登録します。
ステージ領域とはコミットをする前の一時領域です。

出典: [2.2 Git Basics - Recording Changes to the Repository (git-scm.com)]
(https://git-scm.com/book/en/v2/Git-Basics-Recording-Changes-to-the-Repository)より抜粋
実際にターミナルからgit addコマンドを実行してステージ領域に管理対象にしたいファイルを登録します。
ドット"."で指定すると、カレントディレクトリにあるファイル全てを登録できます。
具体的にファイル名指定でもOKですし、複数であればスペース区切り、またワイルドカード"*"でも指定できます。
$ git add .
$ git status
On branch master

No commits yet

Changes to be committed:
  (use "git rm --cached <file>..." to unstage)
	new file:   index.html
	new file:   styles.css
ファイルをステージ領域に登録できたので、git statusの結果も"Changes to be committed"に変わっています。
4. リポジトリのヒストリを記録
git commitはステージ領域にあるファイルをリポジトリのヒストリに記録するコマンド。この記録を元に、ファイルをワーキングツリーに復元したりする事ができます。
git commitする際に、"-m"オプションを付けてコミットに関する備忘録などを一緒に記録しておきます。
$ git commit -m "First commit"
[master (root-commit) c21f5f1] First commit
 2 files changed, 233 insertions(+)
 create mode 100644 index.html
 create mode 100644 styles.css
5. コミット後の状態を確認
$ git status
On branch master
nothing to commit, working tree clean
現在のワーキングツリーの状態は、最後にコミットした状態から何も変更が加えられていない事が確認できました。
2. リモートのGitHubでの基本操作
1. リポジトリの新規作成
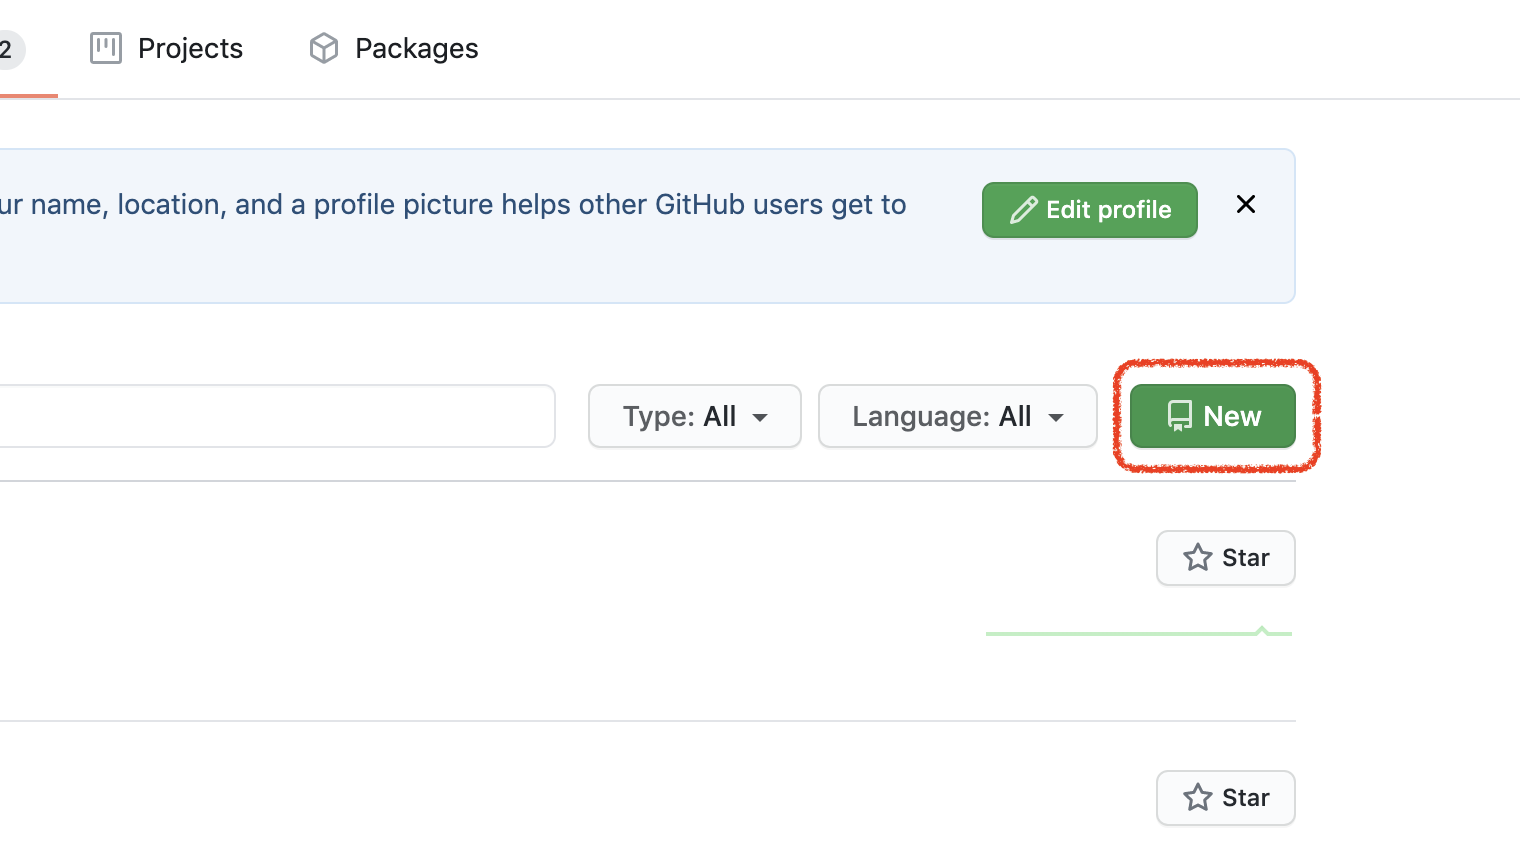
GitHubの"Your repositories"に行き、以下のボタンを押します。

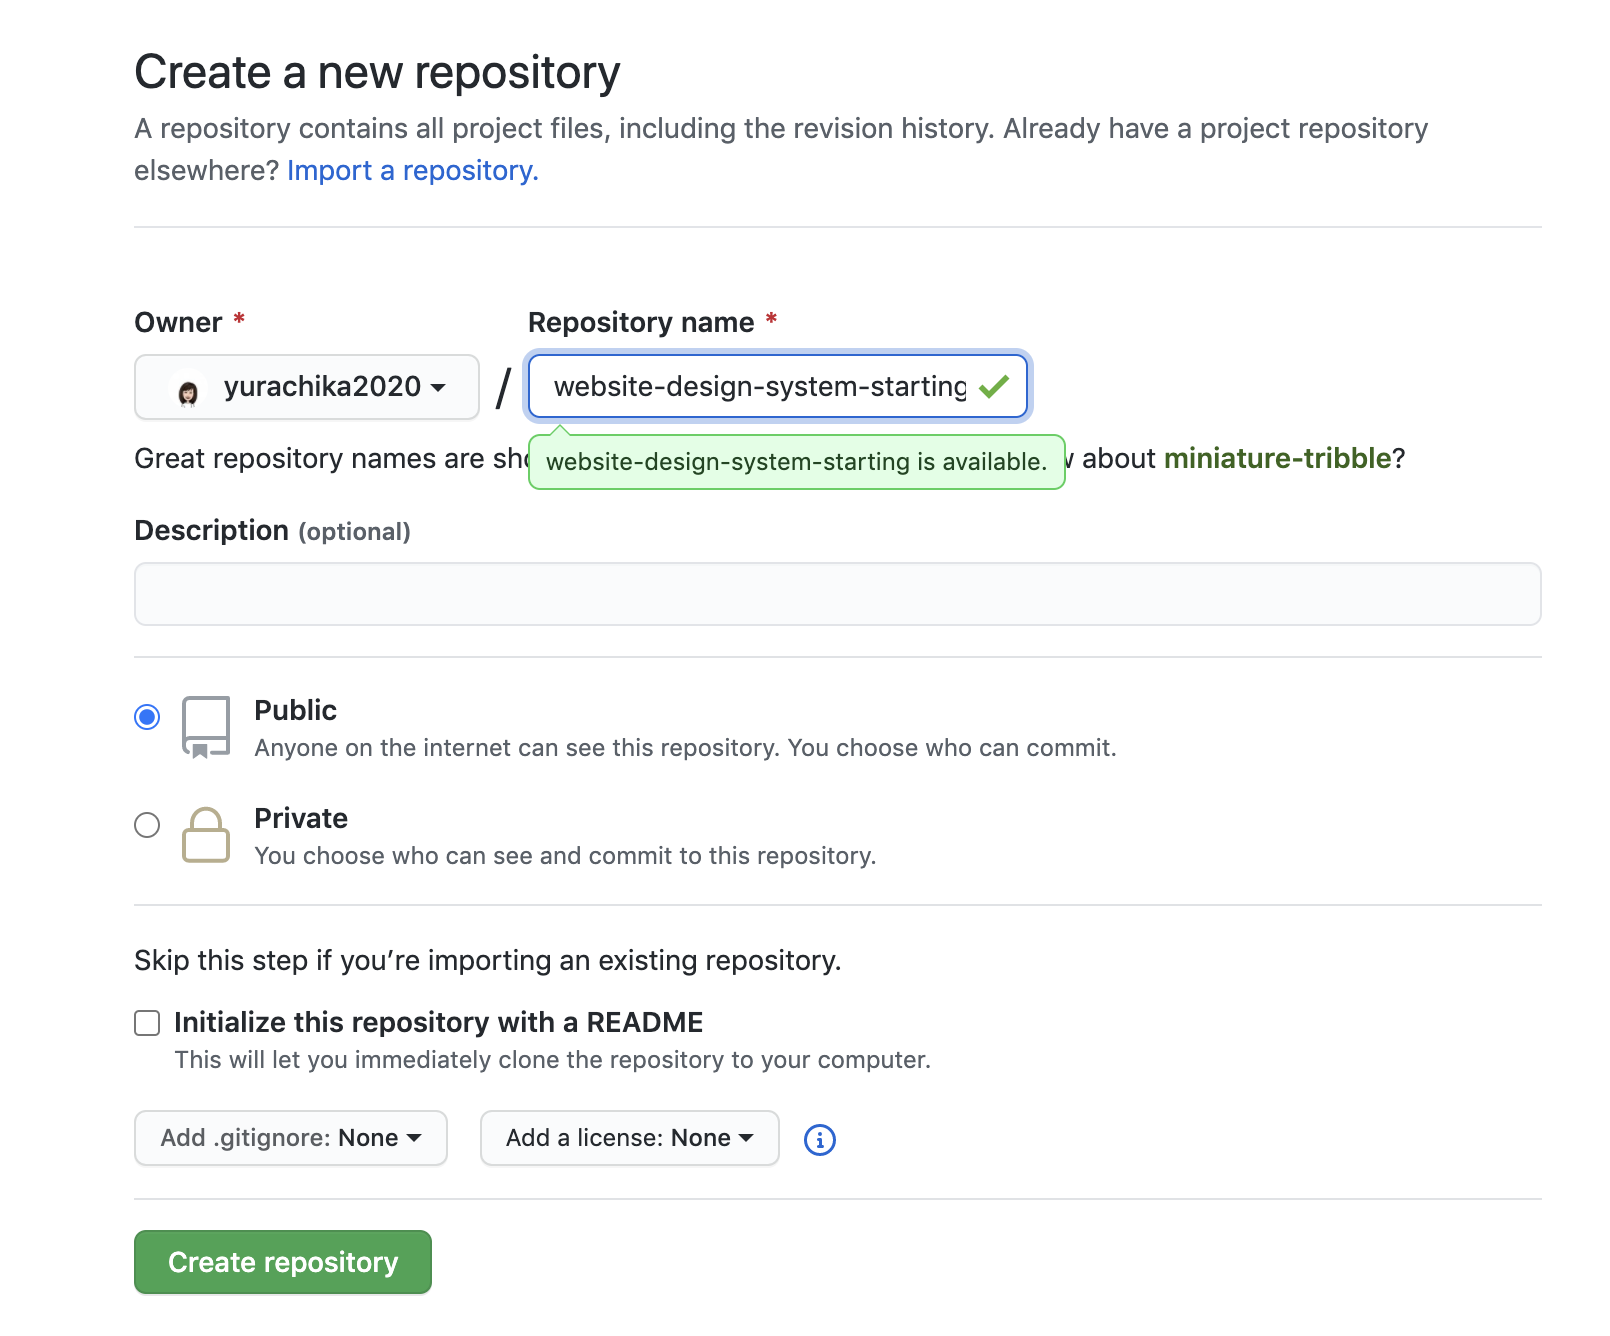
リポジトリに名前を付けます。ローカルのGitの管理ディレクトリと同じ名前が混乱が無くて良いです。
通常は"Public"を選択、全て公開されるリポジトリとなります。"private"は、アクセス制限が設定できる有料機能です。

"Initialize this repository with a README"については、すでにローカルのGitリポジトリにあるものをGitHubに登録したい場合はチェックを入れず、手動で後ほどpushします。
(チェックを入れるのは、GitHubリポジトリの初期化とREADMEファイルの初期化を自動でやってもらいたい時だけです。その場合、このリポジトリを作成直後にcloneできるようになります。)
"Create repository"を押します。すると、リポジトリの作成が完了します。
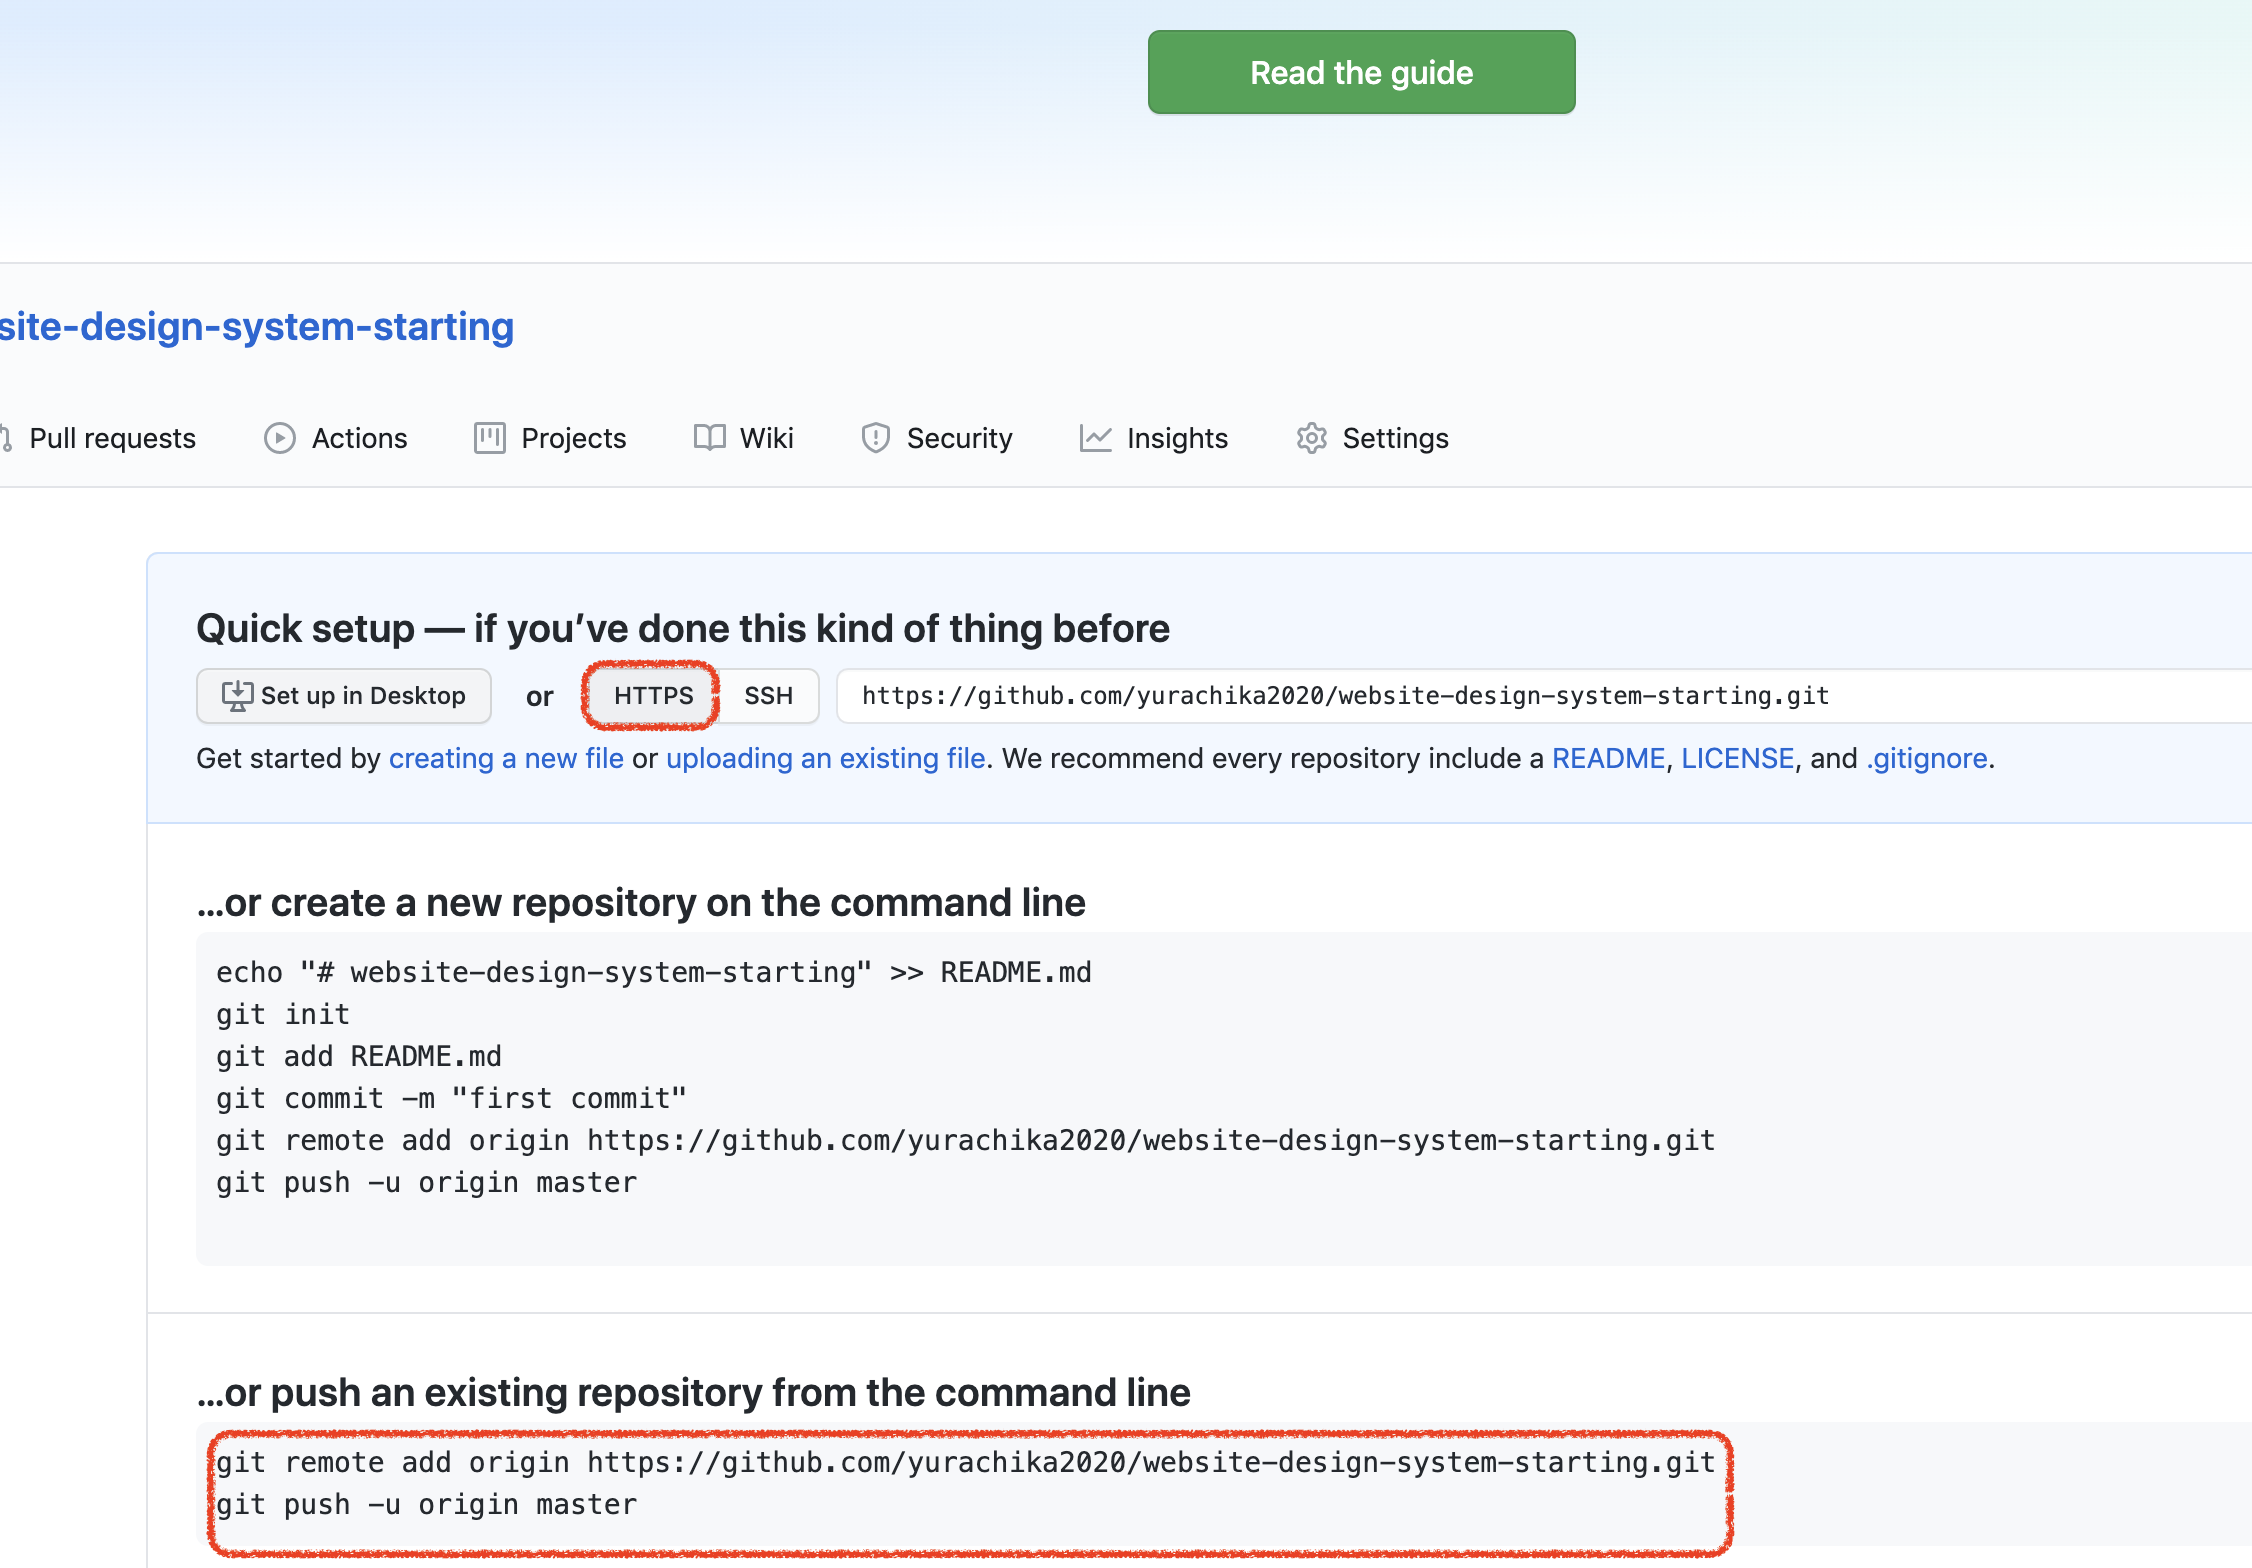
リポジトリの作成完了後、GitHubにリポジトリページが表示されます。 ページにて、"HTTPS"が選択されていることを確認してください。
次に、下部"…or push an existing repository from the command line"の箇所にあるコマンドを

3. 再度ローカルのGitでの基本操作
1. pushする
ローカルに戻りpushを実施することで、GitHub側のリポジトリを更新する。これでGitHubにコードが公開されます。
$ git remote add origin https://github.com/yurachika2020/website-design-system-starting.git
$ git push -u origin master
Enumerating objects: 4, done.
Counting objects: 100% (4/4), done.
Delta compression using up to 4 threads
Compressing objects: 100% (4/4), done.
Writing objects: 100% (4/4), 1.72 KiB | 1.72 MiB/s, done.
Total 4 (delta 0), reused 0 (delta 0), pack-reused 0
To https://github.com/yurachika2020/website-design-system-starting.git
 * [new branch]      master -> master
Branch 'master' set up to track remote branch 'master' from 'origin'.
4. 再度リモートGitHubでの基本操作
1. GitHubにコードが公開されたことを確認する
操作 2-1 で作成したリポジトリにアクセスして、コードがリストされていることを確認する。

終わり。
参考情報
[Getting Started with Git and GitHub (Codecademy Articles)]
(https://www.codecademy.com/articles/f1-u3-git-setup)
[7.14 Git Tools - Credential Storage (git-scm.com)]
(https://git-scm.com/book/en/v2/Git-Tools-Credential-Storage)