Laravel Homestead (https://laravel.com/docs/5.4/homestead)をしてみたときのメモ。イタリック体のところは作業当時のもので、適宜読み替えてください。
私の環境
- macOS Sierra (10.12.3)
- MacBook Air (13-inch, Early 2015)
環境の用意
VirtualBoxとVagrantをダウンロードし、インストールします。これらはインストーラーがあるので特に問題はないでしょう。
- VirtualBox
https://www.virtualbox.org/wiki/Downloads
VirtualBox binaries ⇒ VirtualBox 5.1.18 platform packages ⇒ OS X hosts でディスクイメージをダウンロードし、インストーラーからインストール。 - Vagrant
https://www.vagrantup.com/downloads.html
Mac OS X ⇒ Universal (32 and 64-bit) でディスクイメージをダウンロードし、インストーラーからインストール。
Vagrant環境の用意
Vagrantは仮想マシンを管理するコマンドラインツールです。Macの場合、「ターミナル」でコマンドを打ち込んで操作します。
Vagrantで利用する仮想マシンのひな形を「Box」といい、Laravelがすぐに使えるBoxを「Laravel Homestead(以下、「Homestead」)」といいます。
Homestead Boxのインストール
ここでは、作業はホームディレクトリ直下で行うものとします。適宜、好きなディレクトリの下で作業してください。ターミナルを立ち上げ、以下のコマンドを入力します。
$ vagrant box add laravel/homestead
以下のように出力され、仮想環境について尋ねられます。
==> box: Loading metadata for box 'laravel/homestead'
    box: URL: https://atlas.hashicorp.com/laravel/homestead
This box can work with multiple providers! The providers that it
can work with are listed below. Please review the list and choose
the provider you will be working with.

1) hyperv
2) parallels
3) virtualbox
4) vmware_desktop

Enter your choice:
ここでは、VirtualBoxを使うので、「3」と答えます。ダウンロードがはじまり、Successfully added box ... の行が表示されたら無事完了です。
Enter your choice: 3
==> box: Adding box 'laravel/homestead' (v2.0.0) for provider: virtualbox
    box: Downloading: https://atlas.hashicorp.com/laravel/boxes/homestead/versions/2.0.0/providers/virtualbox.box
==> box: Successfully added box 'laravel/homestead' (v2.0.0) for 'virtualbox'!
ちなみにHomestead Boxは、ゲストOSがUbuntu 16.04です。
Homesteadのインストール
次にVagrantfileを含むHomestead用の設定ファイルをGitHubからダウンロードします。
$ git clone https://github.com/laravel/homestead.git Homestead
Cloning into 'Homestead'...
remote: Counting objects: 2154, done.
remote: Compressing objects: 100% (46/46), done.
remote: Total 2154 (delta 15), reused 0 (delta 0), pack-reused 2107
Receiving objects: 100% (2154/2154), 385.37 KiB | 581.00 KiB/s, done.
Resolving deltas: 100% (1237/1237), done.
続いて初期設定をしましょう。
に、安定版がタグ付きで案内されているので、最新の安定版をチェックアウトした上で、初期化スクリプトinit.shを動かします。
$ cd Homestead/
$ git checkout v5.1.0
Note: checking out 'v5.1.0'.

You are in 'detached HEAD' state. You can look around, make experimental
changes and commit them, and you can discard any commits you make in this
state without impacting any branches by performing another checkout.

If you want to create a new branch to retain commits you create, you may
do so (now or later) by using -b with the checkout command again. Example:

  git checkout -b <new-branch-name>

HEAD is now at 760bd98... 💎 🔖 Updating for 5.1.0 release (#524)
$ bash init.sh
Homestead initialized!
Homesteadの初期設定
続いて初期設定です。~/Homestead の中に、Homestead.yamlというファイルがありますので、ここでいくつかの設定を行います。例えば、以下のような設定ファイルとします。
---
ip: "192.168.20.10"
memory: 2048
cpus: 1
provider: virtualbox
mariadb: true

authorize: ~/.ssh/id_rsa.pub

keys:
    - ~/.ssh/id_rsa

folders:
    - map: ~/Code
      to: /home/vagrant/Code

sites:
    - map: homestead.app
      to: /home/vagrant/Code/Laravel/public

databases:
    - homestead
Homestead.yamlを書くときに、注意すべきポイントは以下の通りです。
- ipには、自分のローカルネットワークのサブネット空間以外のローカルのIPアドレスを記入します。例えば、自分のIPアドレスが192.168.10.5だったら、192.168.20.10などに設定してみると良いです。
- authorize、keysには、自分で作成した公開鍵、秘密鍵へのパスを入力します。
$ ssh-keygen -t rsaなどで作成しましょう。 - foldersは、VirtualBoxの共有フォルダ機能に使われます。map:が Mac側のパス、to:がVirtualBox側のパスです。事前にMac側のパスに書いたディレクトリを作成しておきましょう。
- sitesには、map:に開発用のドメイン名を、to:にLaravelのpublicディレクトリへのパスを入れます。
- databasesは初期で作成されるデータベース名を入れます。複数指定すれば、その分だけデータベースを増やせます。
/etc/hostsファイルの設定
開発用のドメイン名で、ローカルアドレスにアクセスできるようにするため、Mac側でhostsファイルの設定をします。以下はvimで開いた場合ですが、他の方法でも構いません。
$ sudo vi /etc/hosts
Password: (Macのログインパスワードを入れる)
例えば、最後の行に以下のように追記します。
192.168.20.10 homestead.app
Vagrant環境の操作
起動
ここまで終わったら、いよいよvargantで仮想マシンを立ち上げます。
$ vagrant up
Bringing machine 'homestead-7' up with 'virtualbox' provider...
(長いので省略)
==> homestead-7: Running provisioner: shell...
    homestead-7: Running: /var/folders/wr/756b49y578s8k0cq9rschdb80000gn/T/vagrant-shell20170406-65347-h33jfq.sh
このように、基本操作はvagrantコマンドで行います。
途中で何かうまくいかなければ、エラーを吐き出して終わるので、設定などを見直しましょう。ネットワーク設定の問題が多いと思います。
ゲストOSへログイン
ゲストOSへのログインは、以下のコマンドでssh接続を行います。
$ vagrant ssh

Welcome to Ubuntu 16.04.2 LTS (GNU/Linux 4.4.0-51-generic x86_64)

 * Documentation:  https://help.ubuntu.com
 * Management:     https://landscape.canonical.com
 * Support:        https://ubuntu.com/advantage

3 packages can be updated.
0 updates are security updates.


vagrant@homestead:~$
この状態で、ゲストOSのUbuntuのコンソールになりました。このままでも使い始められますが、せっかくなのでシステムの更新をしてみましょう。
vagrant@homestead:~$ sudo apt-get update
Hit:1 https://deb.nodesource.com/node_6.x xenial InRelease
(以下略)

vagrant@homestead:~$ sudo apt-get upgrade
Reading package lists... Done
(中略)
Need to get 67.5 MB of archives.
After this operation, 2,024 kB of additional disk space will be used.
Do you want to continue? [Y/n]
(以下「Y」と押してreturnすると更新がはじまる。略)
- 途中でgrup-pcパッケージの更新でインストールデバイスを求められたら、一番上の /dev/sda (42949 MB; VBOX_HARDDISK) にチェック(スペースキーでオンオフ)を入れ、カーソルで<Ok>を反転させて押すと良いです。
- アップデートが終わったら、
sudo rebootしておきましょう。
リブート後、起動したら再びvagrant sshして接続しておきます。
Laravelプロジェクトの作成
上記の設定だと、ログインホームディレクトリは/home/vagrantになっていると思います。さらに、Homestead.yamlの編集の時に、共有ディレクトリの設定をしましたが、Codeディレクトリが自動的に出来ていることがわかると思います。
vagrant@homestead:~$ ls
Code
この中に入って、最初のプロジェクトを作成してみましょう。
vagrant@homestead:~$ cd Code
vagrant@homestead:~$ composer create-project laravel/laravel --prefer-dist Laravel
Installing laravel/laravel (v5.4.16)
(中略)
> php artisan key:generate
Application key [base64:aXxbcYTd/pVxk839vBVTvZ8s4CJvjn4askR++KNCIT4=] set successfully.
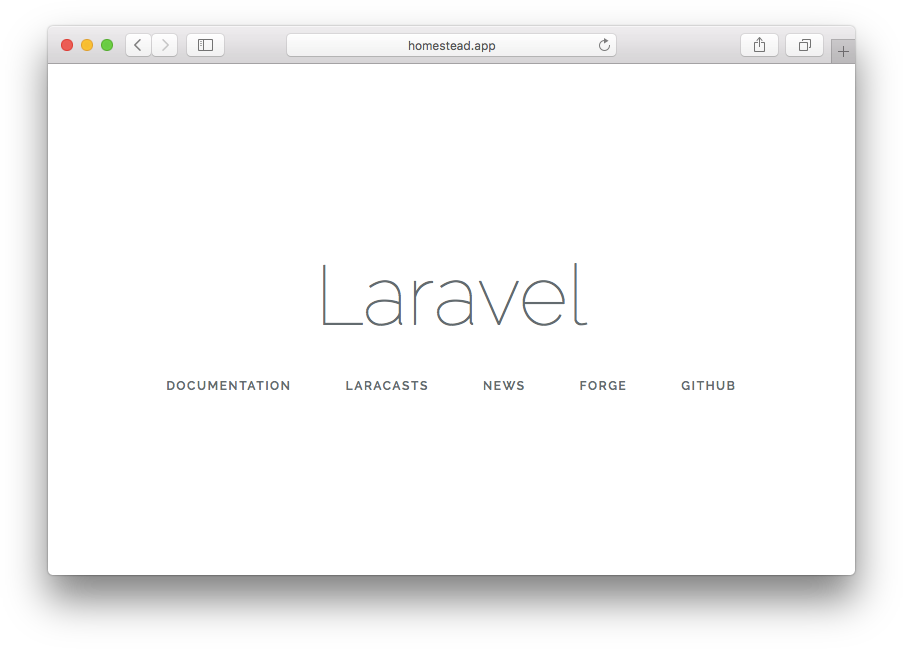
ここまできたら、ブラウザで http://homestead.app にアクセスしてみましょう。VirtualBox内に構築されたLaravelアプリケーションにアクセスできます。
Hello, Laravel!
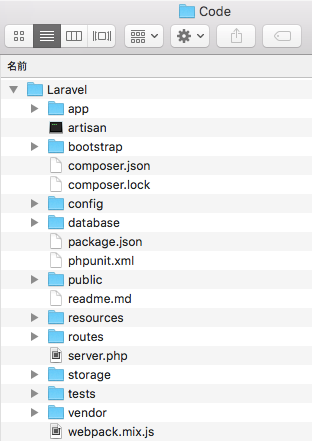
Mac側のCodeフォルダをFinderで見ると、生成されたコードが閲覧できますので、好きなエディタでアプリケーションを書き始めることができます。
例えば、routes/web.phpを開いて、以下のようなコードを書いてみます。
<?php

/*
|--------------------------------------------------------------------------
| Web Routes
|--------------------------------------------------------------------------
|
| Here is where you can register web routes for your application. These
| routes are loaded by the RouteServiceProvider within a group which
| contains the "web" middleware group. Now create something great!
|
*/

Route::get('/', function () {
    return 'hello, laravel';
});
リロードすると、(かなり素っ気ないですが)「hello, laravel」と出るはずです。

