Firebase Cloud Messaging(FCM)を使って AndroidでPush通知を実装したときのメモです。(2020/4/29時点)
Firebase Cloud Messagingとは
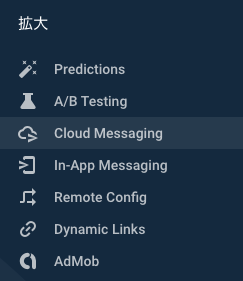
Firebase Cloud Messaging(FCM)は、メッセージを無料で確実に配信するためのクロスプラットフォーム メッセージング ソリューションです。以前は Google Cloud Messaging API が使われていたようですが、現在はFCMに移行しています。
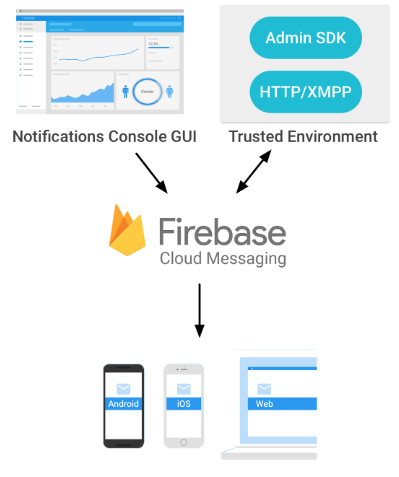
FCMで端末にメッセージを送信すると、スリープ画面でも通知メッセージを表示できます。
Push通知の実装なおおまかな流れ
- Androidアプリの作成 - Android Studio
- Firebaseプロジェクトの作成 - Firebaseコンソール
- Androidアプリでサービスを実装 - Android Studio
- テスト通知 - Firebaseコンソール
それでは、順番にやっていきます。
Androidアプリの作成
最初にAndroid Studioでスケルトンアプリを作成します。
-
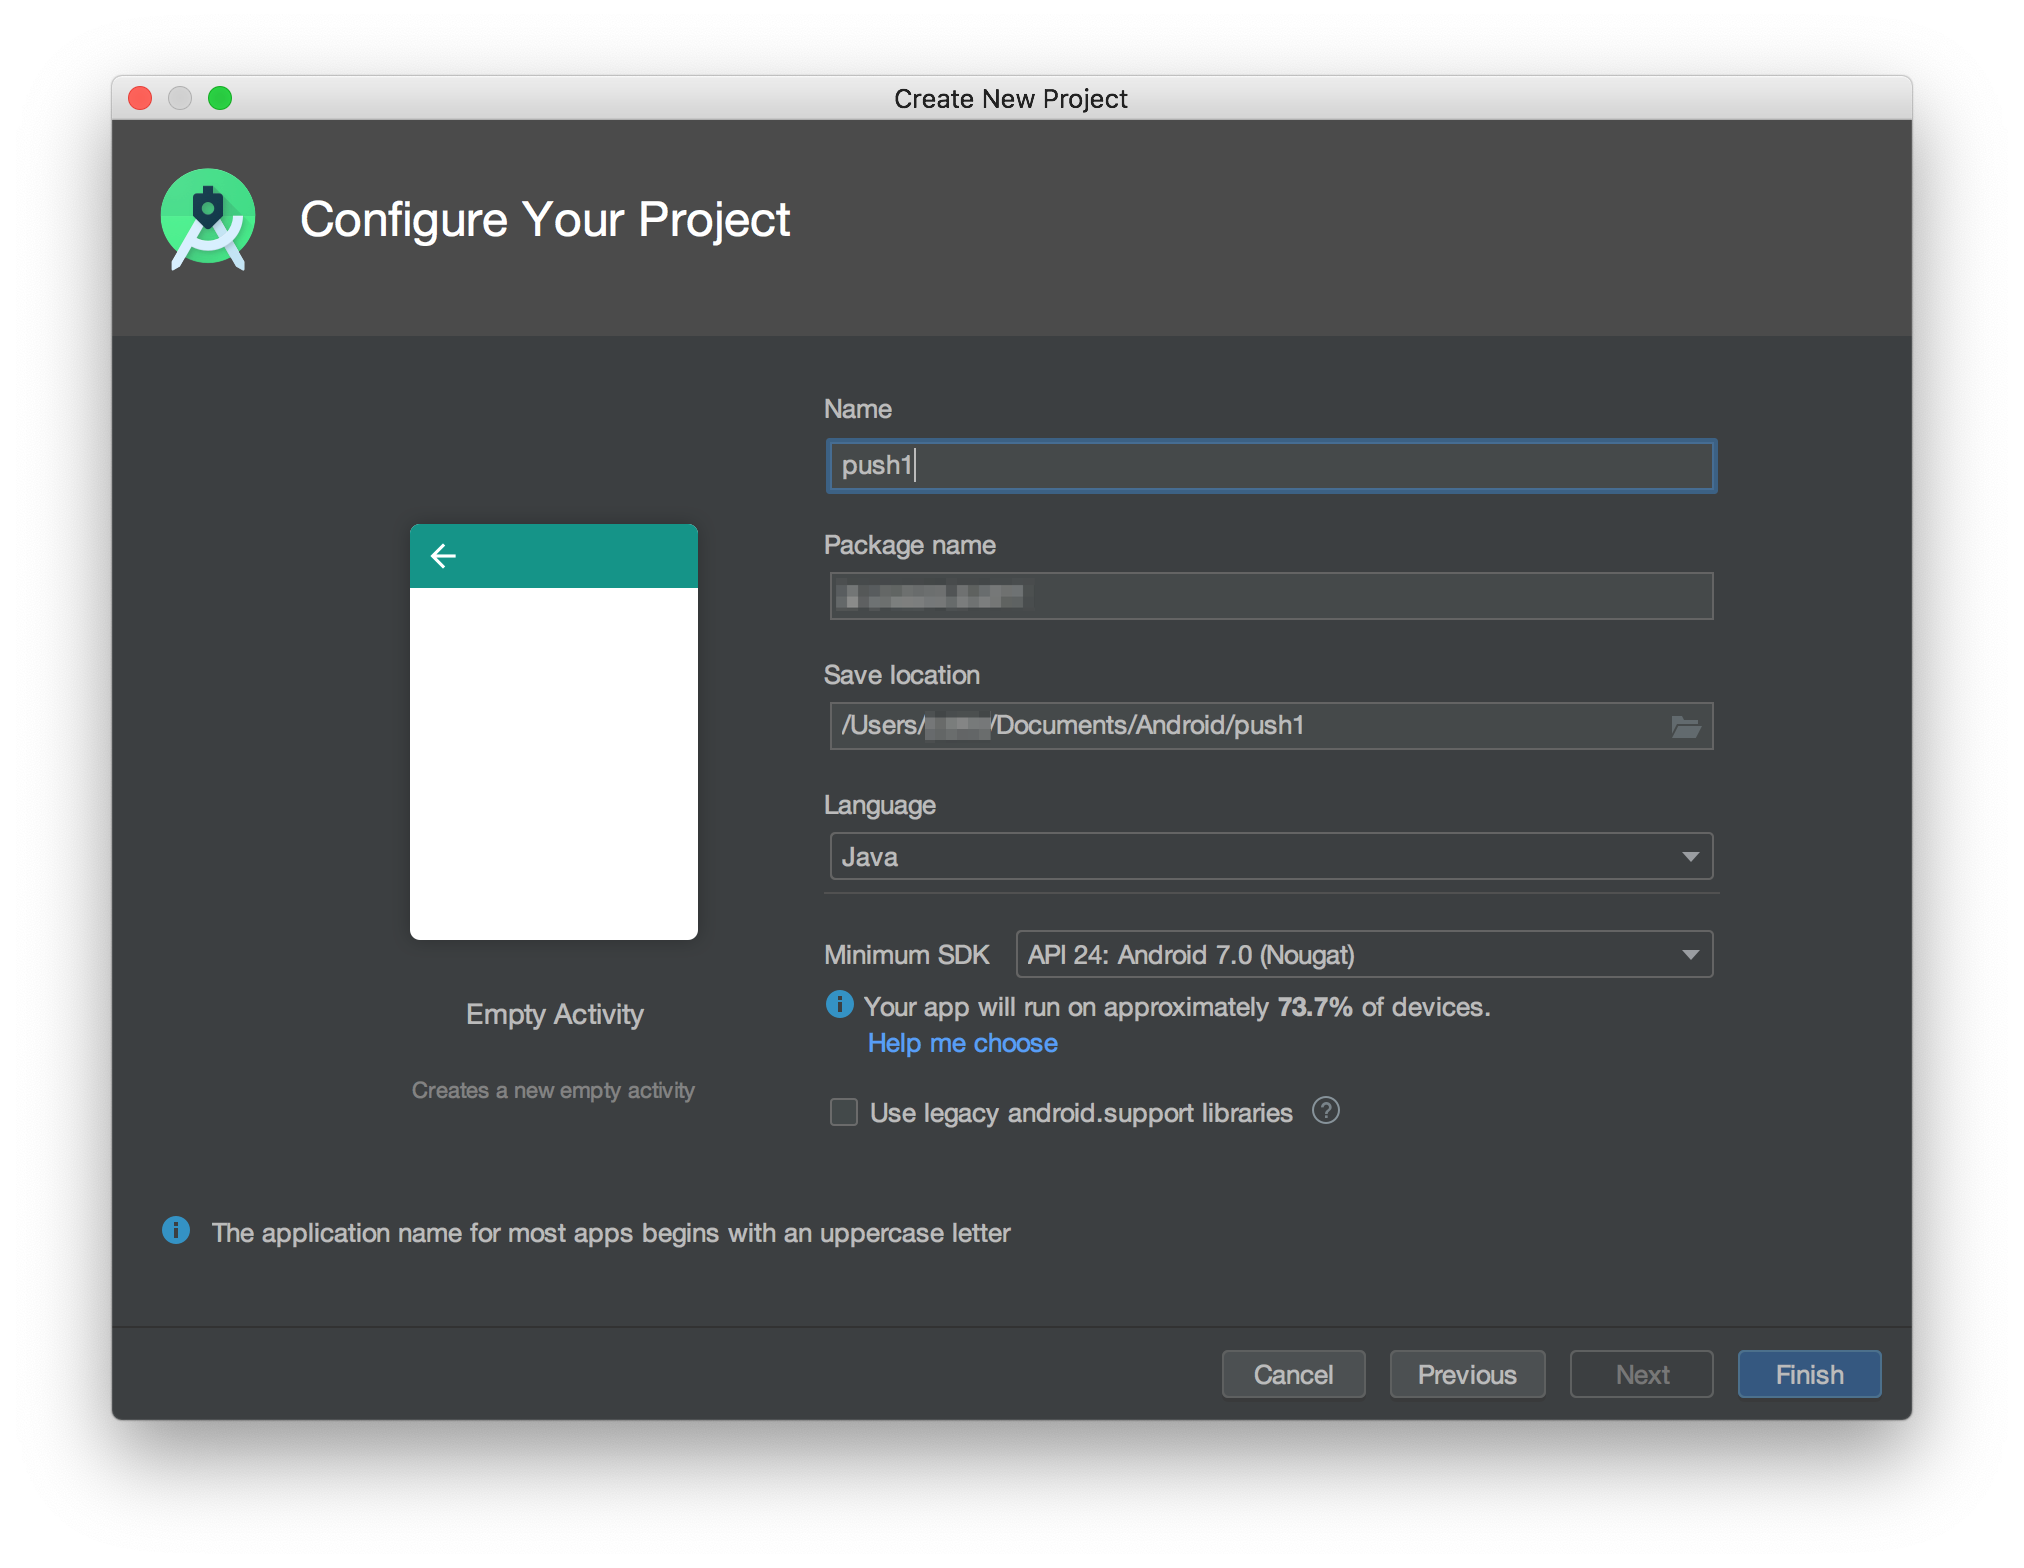
Android StudioでEmpty Activityプロジェクトを作成
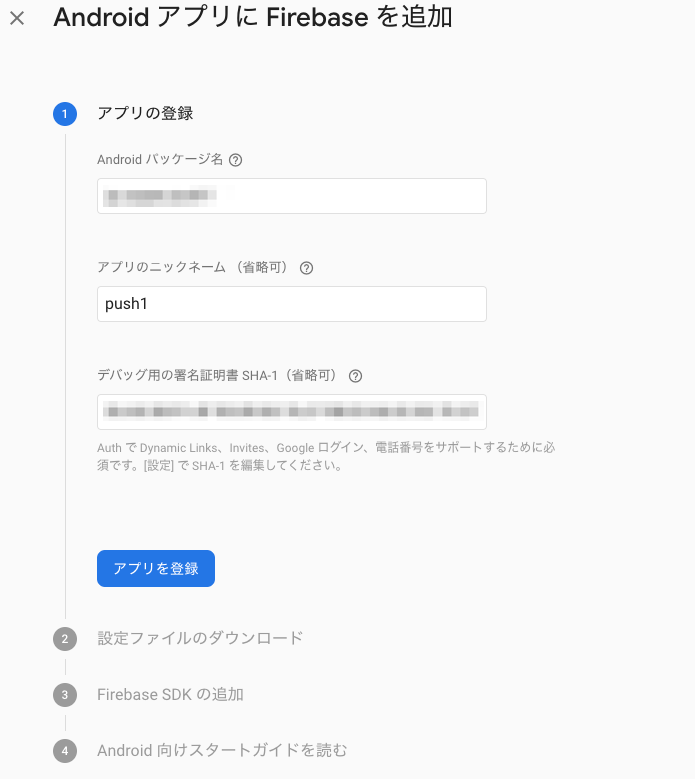
ここで指定したPackage nameは後ほどFirebaseプロジェクトに設定します。
-
Firebaseのデバッグ用証明書キーの取得
Firebaseプロジェクトの作成時にSHA-1が必要になります。画面右のGradleタブを引き出して、app > Tasks > singningReportを右クリックして「Run」をクリックします。
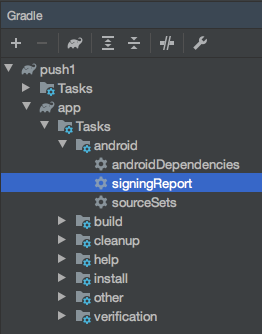
Buildペインにキーストア情報が表示されます。ここで表示されたSHA-1は後ほどFirebaseプロジェクトに設定します。

Firebaseプロジェクトの作成
-
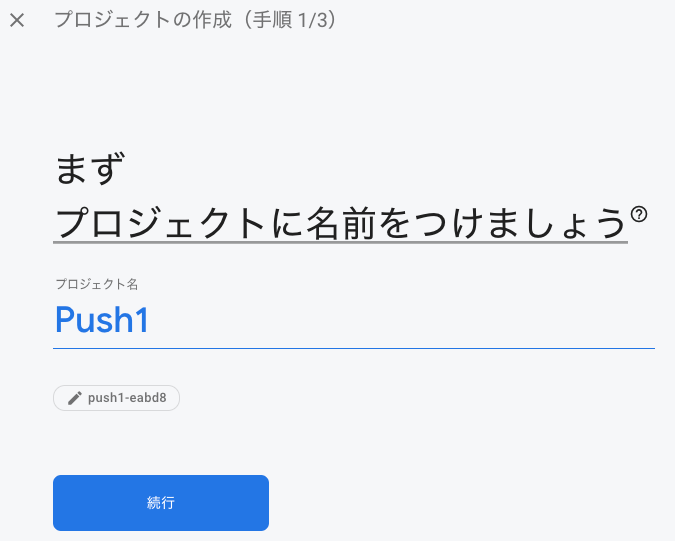
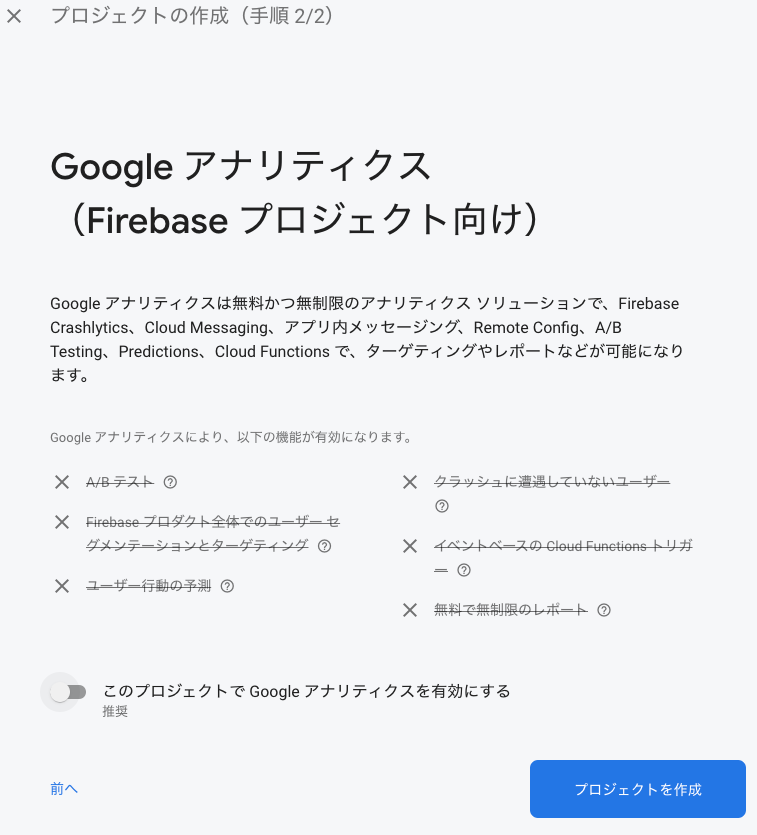
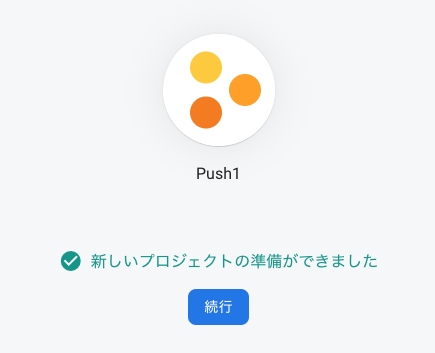
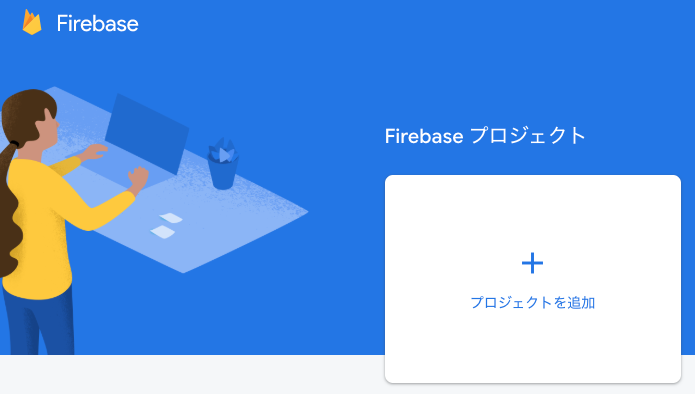
Firebaseのコンソールから新規にプロジェクトを作成
Firebaseコンソール
https://console.firebase.google.com/
-
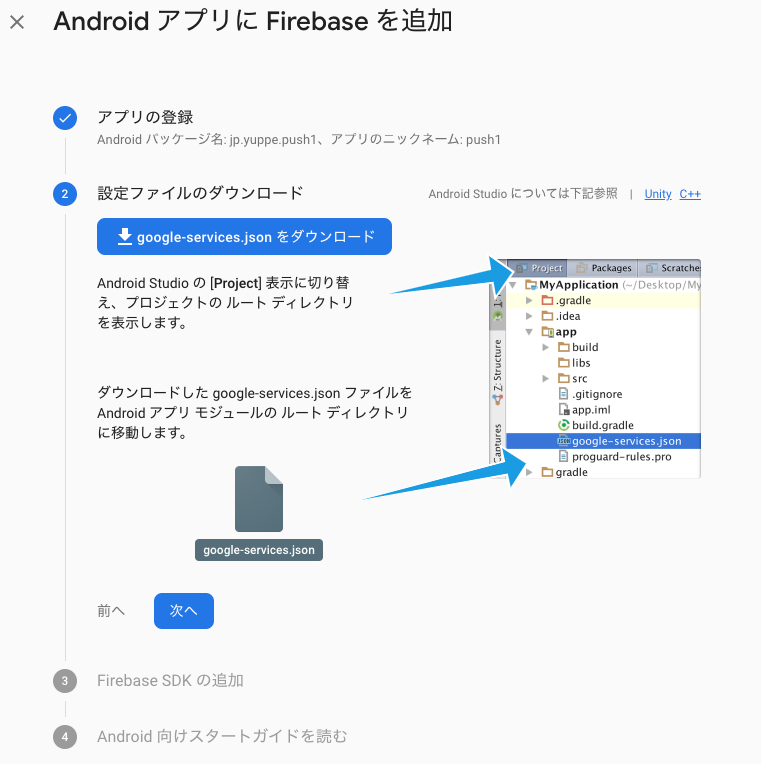
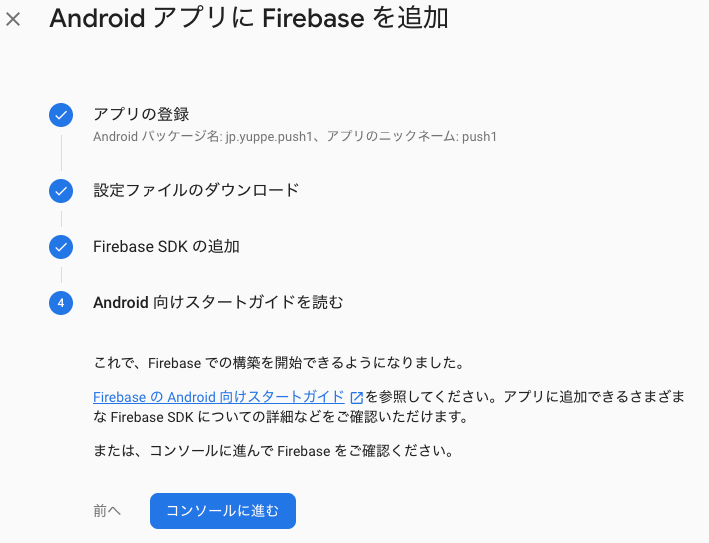
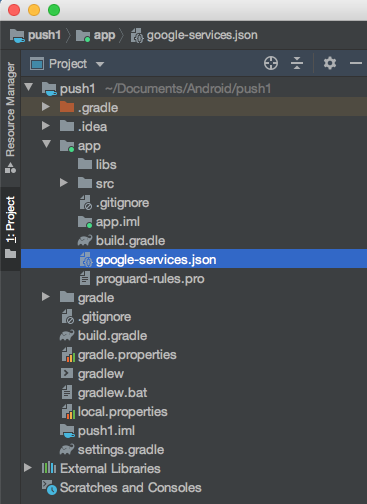
ダウンロードした設定ファイルgoogle-services.jsonをAndroid Studioに追加します。
Finderで設定ファイルをコピー(command+C)し、プロジェクトのappフォルダーにフォーカスを当てた状態でペースト(command+V)します。
Androidアプリの設定
-
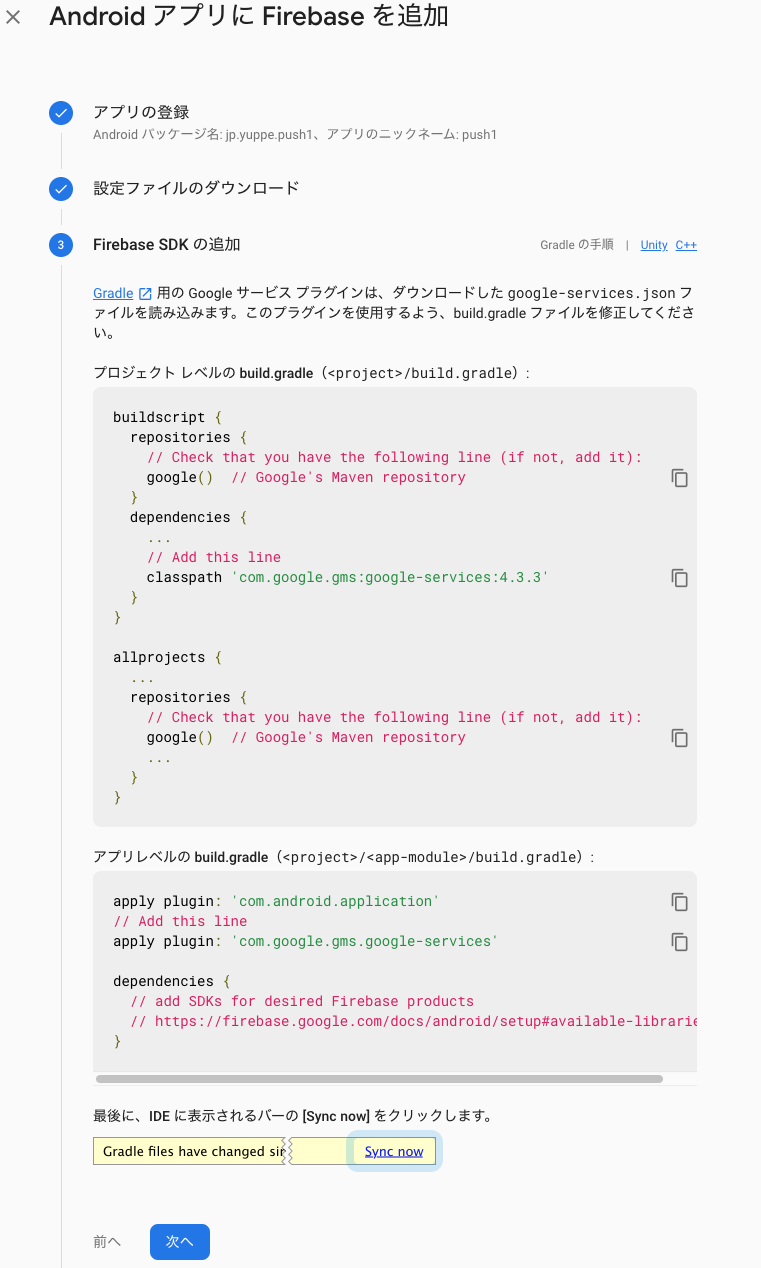
プロジェクトレベルのbuild.gradleを修正
dependenciesにclasspath 'com.google.gms:google-services:4.3.3'を追加します。build.gradle(Project)// Top-level build file where you can add configuration options common to all sub-projects/modules. buildscript { repositories { google() jcenter() } dependencies { classpath 'com.android.tools.build:gradle:3.6.3' // Add this line classpath 'com.google.gms:google-services:4.3.3' // NOTE: Do not place your application dependencies here; they belong // in the individual module build.gradle files } } allprojects { repositories { google() jcenter() } } task clean(type: Delete) { delete rootProject.buildDir } -
アプリレベルのbuild.gradleを修正
dependenciesにimplementation 'com.google.firebase:firebase-messaging:20.0.0'を追加します。
必要なライブラリは使用可能なライブラリの一覧(https://firebase.google.com/docs/android/setup#available-libraries) の「Cloud Messaging」の項目を確認します。デバイス登録トークンを取得するために、getToken()を呼び出す場合は、末尾に
apply plugin: 'com.google.gms.google-services'を追加しておきます。build.gradle(app)apply plugin: 'com.android.application' android { compileSdkVersion 29 buildToolsVersion "29.0.1" defaultConfig { applicationId "jp.yuppe.push1" minSdkVersion 24 targetSdkVersion 29 versionCode 1 versionName "1.0" testInstrumentationRunner "androidx.test.runner.AndroidJUnitRunner" } buildTypes { release { minifyEnabled false proguardFiles getDefaultProguardFile('proguard-android-optimize.txt'), 'proguard-rules.pro' } } } dependencies { implementation fileTree(dir: 'libs', include: ['*.jar']) implementation 'androidx.appcompat:appcompat:1.1.0' implementation 'androidx.constraintlayout:constraintlayout:1.1.3' // Add this line implementation 'com.google.firebase:firebase-messaging:20.0.0' testImplementation 'junit:junit:4.12' androidTestImplementation 'androidx.test.ext:junit:1.1.1' androidTestImplementation 'androidx.test.espresso:espresso-core:3.2.0' } // Add this line apply plugin: 'com.google.gms.google-services'修正したら「Sync now」をクリックします。
-
FirebaseMessagingServiceを継承したMyFirebaseMessagingServiceクラスを追加
Firebaseのガイド(https://firebase.google.com/docs/cloud-messaging/android/receive) を参考にサービスクラスを追加します。MyFirebaseMessagingService.javapackage jp.yuppe.push1; import android.app.NotificationChannel; import android.app.NotificationManager; import android.app.PendingIntent; import android.content.Context; import android.content.Intent; import android.media.RingtoneManager; import android.net.Uri; import android.os.Build; import android.util.Log; import android.widget.Toast; import androidx.core.app.NotificationCompat; import com.google.firebase.messaging.FirebaseMessagingService; import com.google.firebase.messaging.RemoteMessage; public class MyFirebaseMessagingService extends FirebaseMessagingService { private static final String TAG = MyFirebaseMessagingService.class.getSimpleName(); @Override public void onNewToken(String token) { Log.d(TAG, "Refreshed token: " + token); // If you want to send messages to this application instance or // manage this apps subscriptions on the server side, send the // Instance ID token to your app server. // sendRegistrationToServer(token); } @Override public void onMessageReceived(RemoteMessage remoteMessage) { // ... // TODO(developer): Handle FCM messages here. // Not getting messages here? See why this may be: https://goo.gl/39bRNJ Log.d(TAG, "From: " + remoteMessage.getFrom()); // Check if message contains a data payload. if (remoteMessage.getData().size() > 0) { Log.d(TAG, "Message data payload: " + remoteMessage.getData()); if (/* Check if data needs to be processed by long running job */ true) { // For long-running tasks (10 seconds or more) use WorkManager. //scheduleJob(); } else { // Handle message within 10 seconds //handleNow(); } } // Check if message contains a notification payload. String messageBody = ""; if (remoteMessage.getNotification() != null) { messageBody = remoteMessage.getNotification().getBody(); Log.d(TAG, "Message Notification Body: " + messageBody); } // Also if you intend on generating your own notifications as a result of a received FCM // message, here is where that should be initiated. See sendNotification method below. sendNotification(messageBody); } /** * Create and show a simple notification containing the received FCM message. * * @param messageBody FCM message body received. */ private void sendNotification(String messageBody) { Intent intent = new Intent(this, MainActivity.class); intent.addFlags(Intent.FLAG_ACTIVITY_CLEAR_TOP); PendingIntent pendingIntent = PendingIntent.getActivity(this, 0 /* Request code */, intent, PendingIntent.FLAG_ONE_SHOT); //String channelId = getString(R.string.default_notification_channel_id); String channelId = "001"; Uri defaultSoundUri = RingtoneManager.getDefaultUri(RingtoneManager.TYPE_NOTIFICATION); NotificationCompat.Builder notificationBuilder = new NotificationCompat.Builder(this, channelId) //.setSmallIcon(R.drawable.ic_stat_ic_notification) .setSmallIcon(R.drawable.ic_launcher_foreground) .setContentTitle("Push1 App") .setContentText(messageBody) .setAutoCancel(true) .setSound(defaultSoundUri) .setContentIntent(pendingIntent); NotificationManager notificationManager = (NotificationManager) getSystemService(Context.NOTIFICATION_SERVICE); // Since android Oreo notification channel is needed. if (Build.VERSION.SDK_INT >= Build.VERSION_CODES.O) { NotificationChannel channel = new NotificationChannel(channelId, "Channel human readable title", NotificationManager.IMPORTANCE_DEFAULT); notificationManager.createNotificationChannel(channel); } notificationManager.notify(0 /* ID of notification */, notificationBuilder.build()); } } -
AndroidManifest.xmlにサービスを登録
AndroidManifest.xml<?xml version="1.0" encoding="utf-8"?> <manifest xmlns:android="http://schemas.android.com/apk/res/android" package="jp.yuppe.push1"> <application android:allowBackup="true" android:icon="@mipmap/ic_launcher" android:label="@string/app_name" android:roundIcon="@mipmap/ic_launcher_round" android:supportsRtl="true" android:theme="@style/AppTheme"> <activity android:name=".MainActivity"> <intent-filter> <action android:name="android.intent.action.MAIN" /> <category android:name="android.intent.category.LAUNCHER" /> </intent-filter> </activity> <!-- add ここから --> <service android:name=".MyFirebaseMessagingService" android:exported="false"> <intent-filter> <action android:name="com.google.firebase.MESSAGING_EVENT" /> </intent-filter> </service> <!-- add ここまで --> </application> </manifest> -
これで完成
Androidアプリを実行するとPush通知が受け取れるようになります。
テストメッセージを送信
Firebaseコンソール(https://console.firebase.google.com/) でテスト用の通知メッセージを作成します。
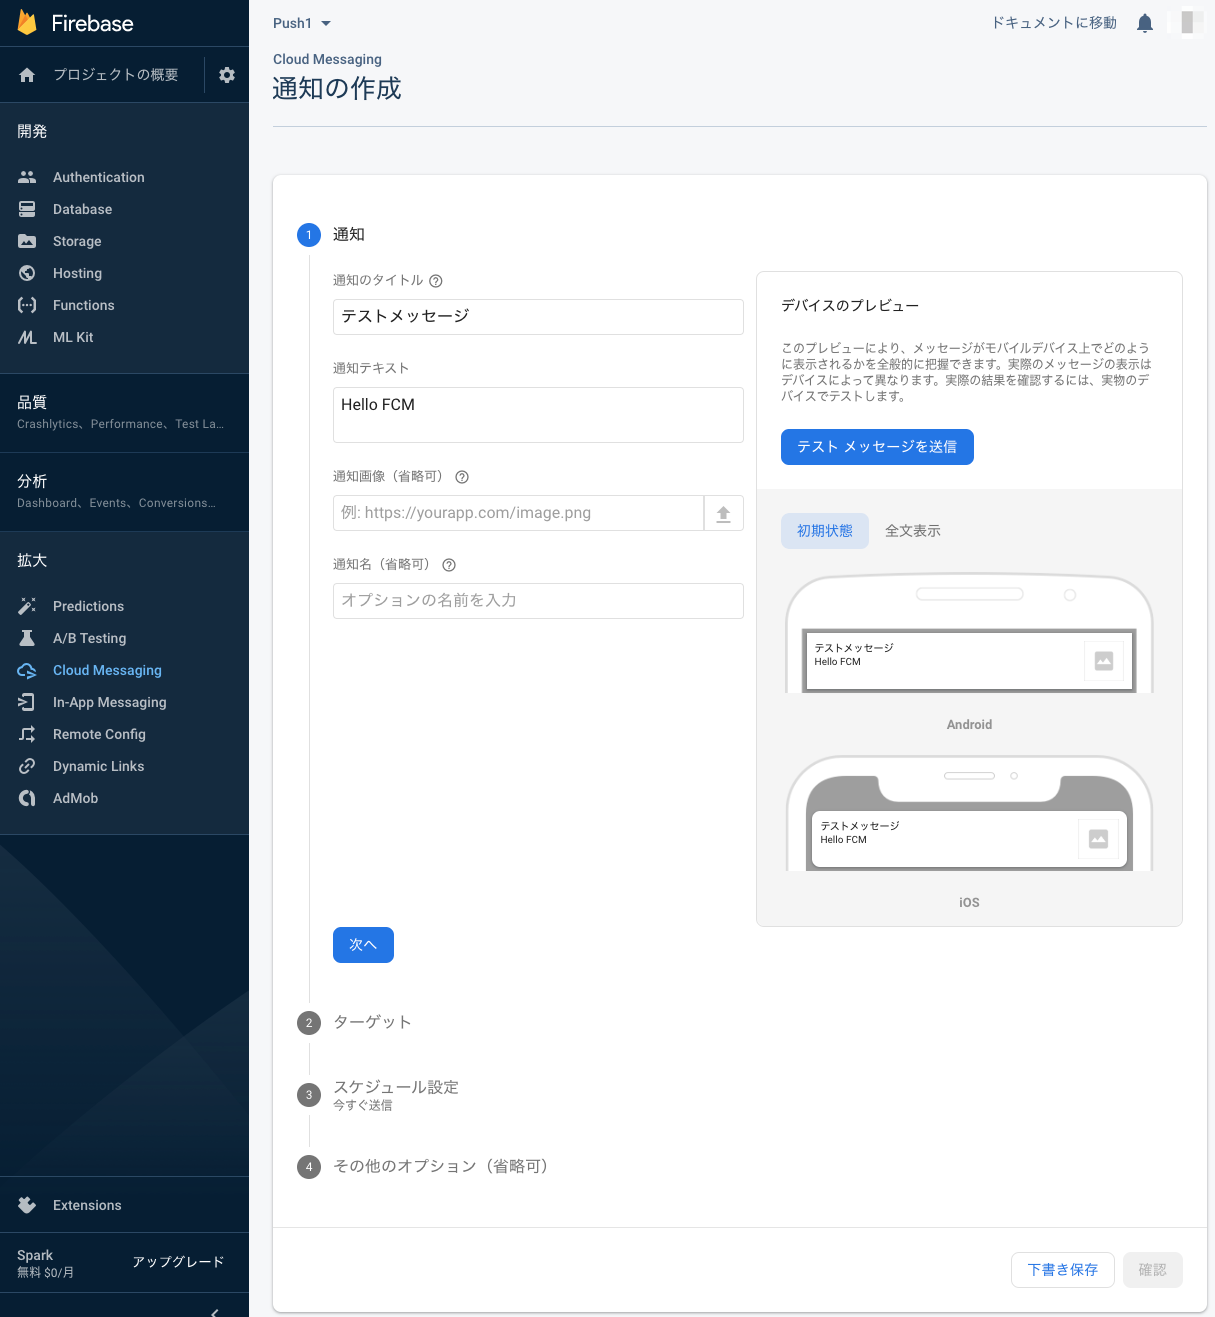
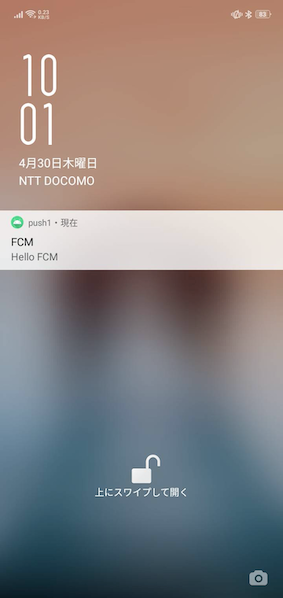
メッセージを送信するとAndroidアプリにPush通知が表示されます。
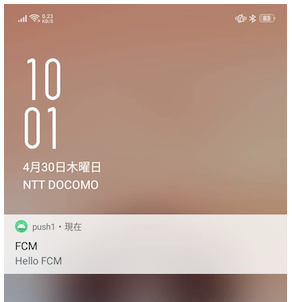
アプリがバックグランドにまわっている、アプリがKillされている、端末がスリープ状態のいづれも通知を受け取ることができます。アプリがフォアグラウンド以外の場合はFMCによって自動的に通知が処理されます。
デバイス登録トークンを取得する
通知対象を単一のデバイスを対象にする場合、またはデバイス グループを作成する場合は、FirebaseMessagingService を拡張して onNewToken をオーバーライドすることで、このトークンにアクセスする必要があります。
public class MainActivity extends AppCompatActivity {
    private static final String TAG = MainActivity.class.getSimpleName();

    @Override
    protected void onCreate(Bundle savedInstanceState) {
        super.onCreate(savedInstanceState);
        setContentView(R.layout.activity_main);

        FirebaseInstanceId.getInstance().getInstanceId()
                .addOnCompleteListener(new OnCompleteListener<InstanceIdResult>() {
                    @Override
                    public void onComplete(@NonNull Task<InstanceIdResult> task) {
                        if (!task.isSuccessful()) {
                            Log.w(TAG, "getInstanceId failed", task.getException());
                            return;
                        }

                        // Get new Instance ID token
                        String token = task.getResult().getToken();

                        // Log and toast
                        String msg = "token:" + token;
                        Log.d(TAG, msg);
                        Toast.makeText(MainActivity.this, msg, Toast.LENGTH_SHORT).show();
                    }
                });
    }
}
例外が発生したら
この例外が出る場合は、プロジェクトの設定が不十分な場合に発生します。
Default FirebaseApp is not initialized in this process <パッケージ名>. Make sure to call FirebaseApp.initializeApp(Context) first.
アプリレベルのbuild.gradleに、 apply plugin: 'com.google.gms.google-services' が追加されているか確認してください。これは公式のチュートリアルに書かれていますので、参考にしてください。
curlでメッセージを投げる
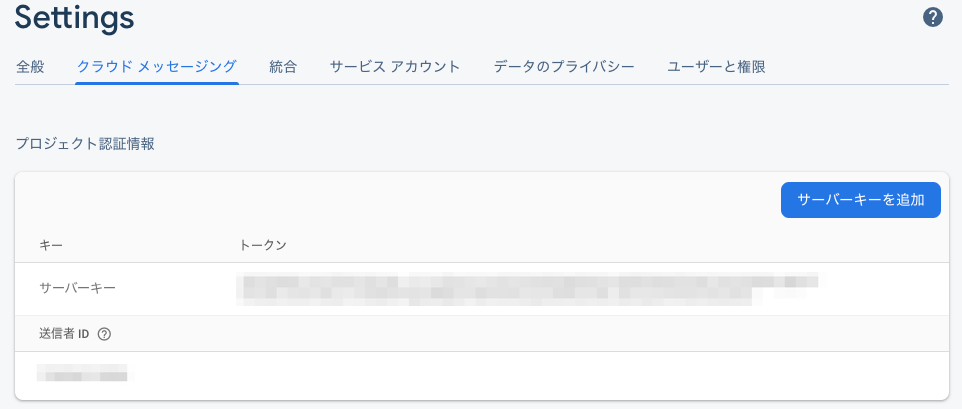
POSTでリクエストを投げるときに、「サーバーキー」が必要になります。Firebaseコンソールのプロジェクト認証情報で確認しておきます。
2つタイプのメッセージを送信できます。
- 通知メッセージ: 「表示メッセージ」とみなされることもあります。FCM SDK によって自動的に処理されます。
- データ メッセージ: クライアント アプリによって処理されます。
参考: https://firebase.google.com/docs/cloud-messaging/concept-options
通知メッセージ
curl \
-X POST \
--header "Authorization: key=<your_server_key>" \
--Header "Content-Type: application/json" \
https://fcm.googleapis.com/fcm/send \
-d "{ \
  \"to\":\"<device_token>\",
  \"notification\":{ \
    \"title\" : \"FCM Message\" \
    \"body\" : \"Hello FCM\" \
  }, \
  \"priority\":10  \
}"
データメッセージ
curl \
-X POST \
--header "Authorization: key=<your_server_key>" \
--Header "Content-Type: application/json" \
https://fcm.googleapis.com/fcm/send \
-d "{ \
  \"to\":\"<device_token>\",
  \"data\":{ \
    \"key1\" : \"val1\", \
    \"key2\" : \"val2\", \
    \"key3\" : \"val3\" \
  }, \
  \"priority\":10  \
}"

