PushKitとCallKitを使うための手順が多かったので自分用の備忘録。
全体の流れ
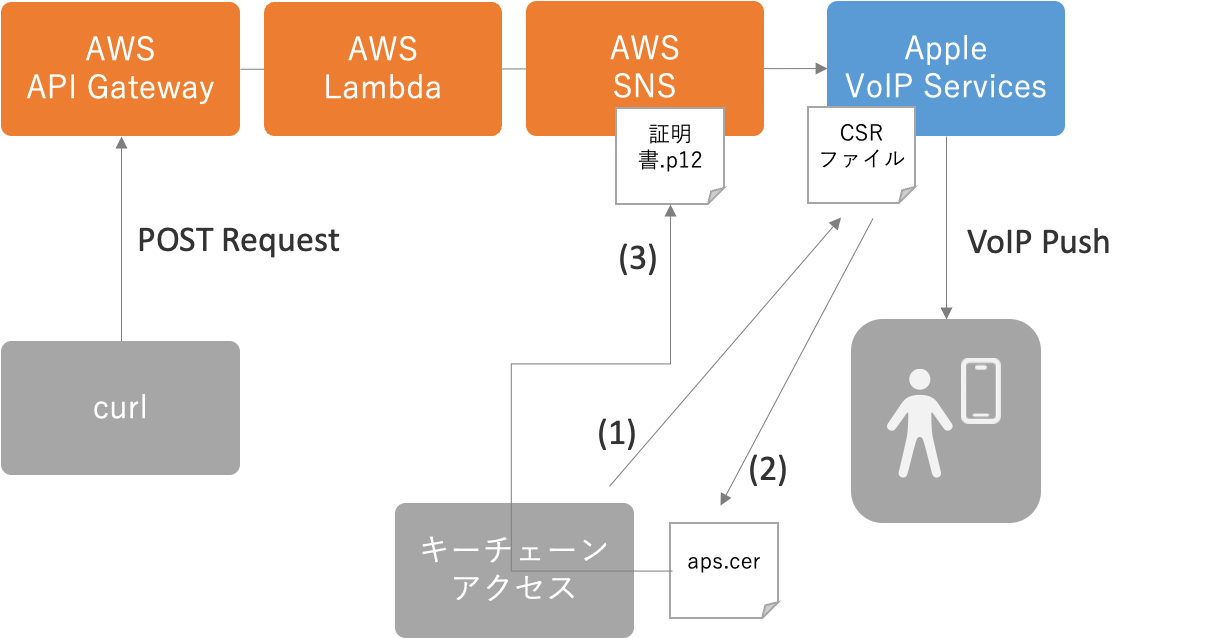
- VoIP Pushを受信するための最低限のアプリを実装: Xcode
- CSRファイルの作成(1): キーチェーンアクセス
- aps.cerファイルのダウンロード(2): Apple Developerサイト
- AWS SNSの作成(3): AWSコンソール
- SNSを呼び出すLambda関数を作成: AWSコンソール
- API Gatewayの作成: AWSコンソール
環境
- Xcode: 14.2
- iOS: 16.2
- AWS Lambda: Node.js 18.x
GitHub
作業手順
VoIP Pushを受信するための最低限のアプリを実装
-
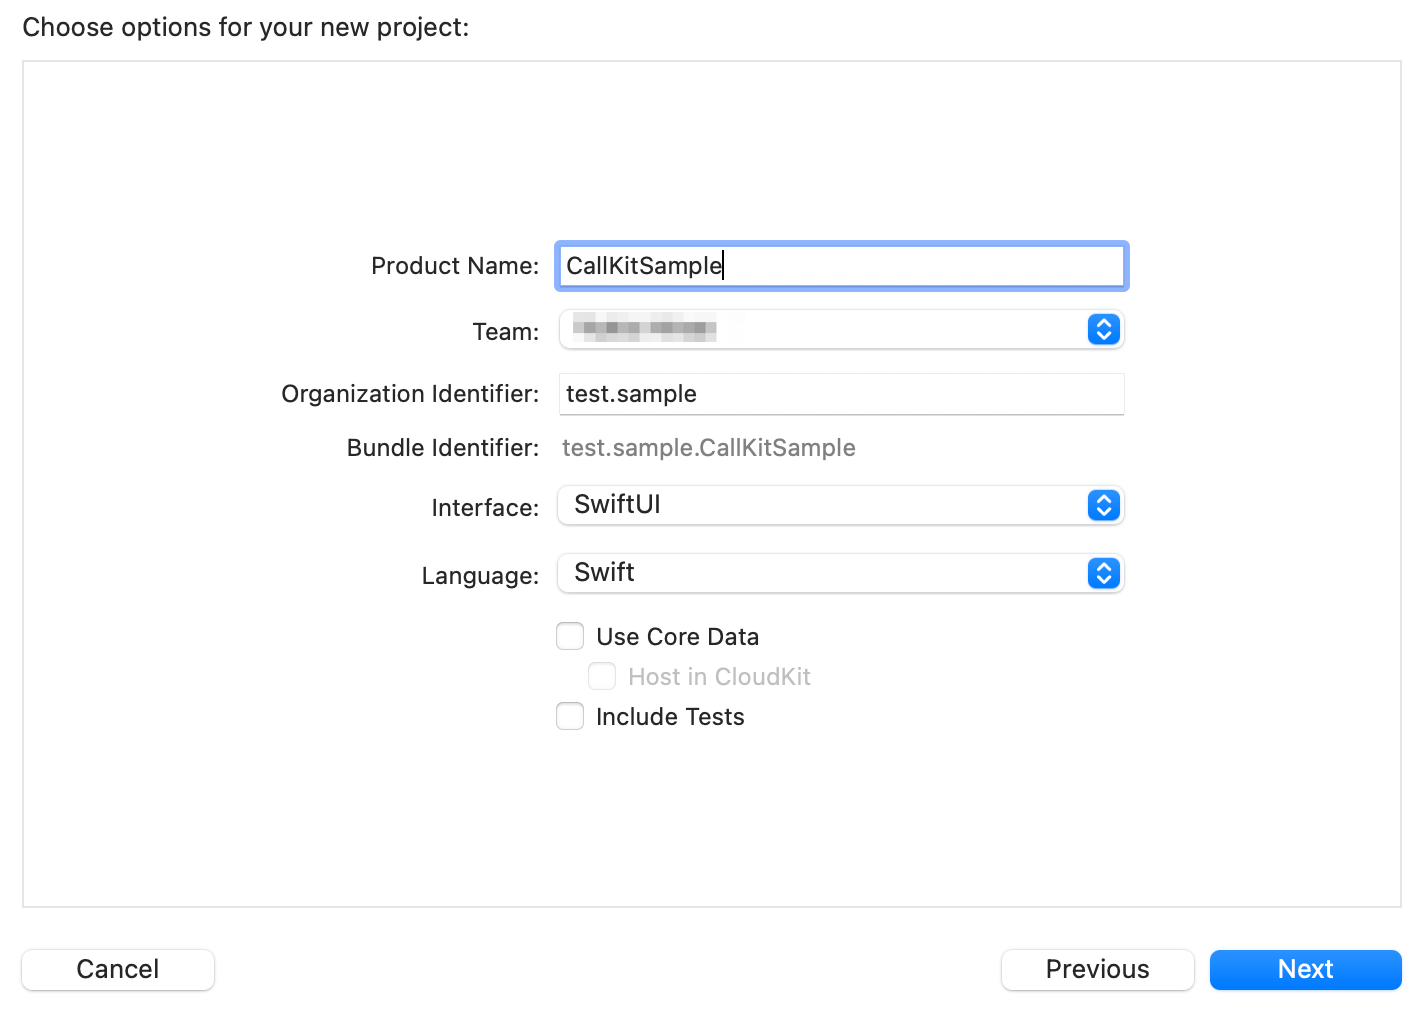
Xcodeでプロジェクト作成
今回はSwiftUIで作成。
-
Capabilityを追加
Signing & CapablilitiesからPush NotificationsとBackgrond Modesを追加し、Voice over IPをチェック。

-
CallKitのラッパークラスを作成
Push通知を受信したらすぐさまCallKitを呼び出されないとペナルティーがあるため、あらかじめCallキットのを呼び出すコードを用意しておく。https://developer.apple.com/documentation/pushkit/pkpushtype/1614481-voip
Apps receiving VoIP push notifications must report the call quickly to CallKit, so it can alert the user to the presence of the incoming call. For apps linked against the iOS 13 SDK or later, the system terminates your app if you fail to report these notifications to CallKit. If your app repeatedly fails to report VoIP notifications to CallKit, the system stops launching your app for VoIP push notifications.CallModel.swiftimport Foundation import AVFoundation import CallKit import UIKit final class CallModel: NSObject { private let controller = CXCallController() private let provider: CXProvider private var uuid = UUID() static let shared = CallModel(supportsVideo: true) // singleton private init(supportsVideo: Bool = false) { let providerConfiguration = CXProviderConfiguration() providerConfiguration.supportsVideo = supportsVideo provider = CXProvider(configuration: providerConfiguration) } func setup(_ delegate: CXProviderDelegate) { provider.setDelegate(delegate, queue: nil) } func StartCall(_ hasVideo: Bool = false) { uuid = UUID() let handle = CXHandle(type: .generic, value: "name1") let startCallAction = CXStartCallAction(call: uuid, handle: handle) startCallAction.isVideo = hasVideo let transaction = CXTransaction(action: startCallAction) controller.request(transaction) { error in if let error = error { print("*** CXStartCallAction error: \(error.localizedDescription)") } } } func IncomingCall(_ hasVideo: Bool = false, displayText: String) { uuid = UUID() let update = CXCallUpdate() update.remoteHandle = CXHandle(type: .generic, value: displayText) update.hasVideo = hasVideo provider.reportNewIncomingCall(with: uuid, update: update) { error in if let error = error { print("*** reportNewIncomingCall error: \(error.localizedDescription)") } } } func EndCall() { let action = CXEndCallAction(call: uuid) let transaction = CXTransaction(action: action) controller.request(transaction) { error in if let error = error { print("*** CXEndCallAction error: \(error.localizedDescription)") } } } func Connecting() { provider.reportOutgoingCall(with: uuid, startedConnectingAt: nil) } func Connected() { provider.reportOutgoingCall(with: uuid, connectedAt: nil) } func ConfigureAudioSession() { try? AVAudioSession.sharedInstance().setCategory(AVAudioSession.Category.playAndRecord, mode: .voiceChat, options: []) } } extension CallModel { func setupNotifications() { print("*** setupNotifications") NotificationCenter.default.addObserver(self, selector: #selector(handleRouteChange), name: AVAudioSession.routeChangeNotification, object: nil) NotificationCenter.default.addObserver(self, selector: #selector(handleInterruption), name: AVAudioSession.interruptionNotification, object: nil) NotificationCenter.default.addObserver(self, selector: #selector(handleMediaServerReset), name: AVAudioSession.mediaServicesWereResetNotification, object: nil) } @objc func handleRouteChange(notification: Notification) { print("*** handleRouteChange: \(notification)") } @objc func handleInterruption(notification: Notification) { print("*** handleInterruption: \(notification)") } @objc func handleMediaServerReset(notification: Notification) { print("*** handleMediaServerReset: \(notification)") } } -
UIApplicationDelegateとPKPushRegistryDelegateを実装
ViewModel.swiftimport Foundation import SwiftUI import CallKit import PushKit class ViewModel: NSObject, ObservableObject { let callModel = CallModel.shared } extension ViewModel: UIApplicationDelegate { func application(_ application: UIApplication, didFinishLaunchingWithOptions launchOptions: [UIApplication.LaunchOptionsKey : Any]? = nil) -> Bool { setupPushKit() return true } func setupPushKit() { print("*** setupPushKit") let voipRegistry: PKPushRegistry = PKPushRegistry(queue: .main) voipRegistry.delegate = self voipRegistry.desiredPushTypes = [.voIP] } } extension ViewModel: PKPushRegistryDelegate { func pushRegistry(_ registry: PKPushRegistry, didUpdate pushCredentials: PKPushCredentials, for type: PKPushType) { print("*** pushRegistry: didUpdate pushCredentials") let deviceToken = pushCredentials.token.map { String(format: "%02.2hhx", $0) }.joined() print("*** device token: \(deviceToken)") } func pushRegistry(_ registry: PKPushRegistry, didInvalidatePushTokenFor type: PKPushType) { print("*** didInvalidatePushTokenFor") } func pushRegistry(_ registry: PKPushRegistry, didReceiveIncomingPushWith payload: PKPushPayload, for type: PKPushType) { print("*** didReceiveIncomingPushWith") let dictionary = payload.dictionaryPayload as NSDictionary let aps = dictionary["aps"] as! NSDictionary let alert = aps["alert"] if let message = alert as? String { callModel.IncomingCall(true, displayText: "\(message)") } else { callModel.IncomingCall(true, displayText: "(none)") } } } -
ApplicationDelegateを実装
SwiftUIなので@UIApplicationDelegateAdaptorを使用する。CallKitSampleApp.swiftimport SwiftUI @main struct CallKitSampleApp: App { @UIApplicationDelegateAdaptor(ViewModel.self) var viewModel var body: some Scene { WindowGroup { ContentView() .environmentObject(viewModel) } } } -
実行
iPhoneを接続してXcodeから実行。デバイストークンが表示される。

あとでAWSのSNSエンドポイントを登録するときに使用するのでメモっておく。いったんXcodeでの作業は終了。
CSRファイルの作成
-
キーチェーンアクセス
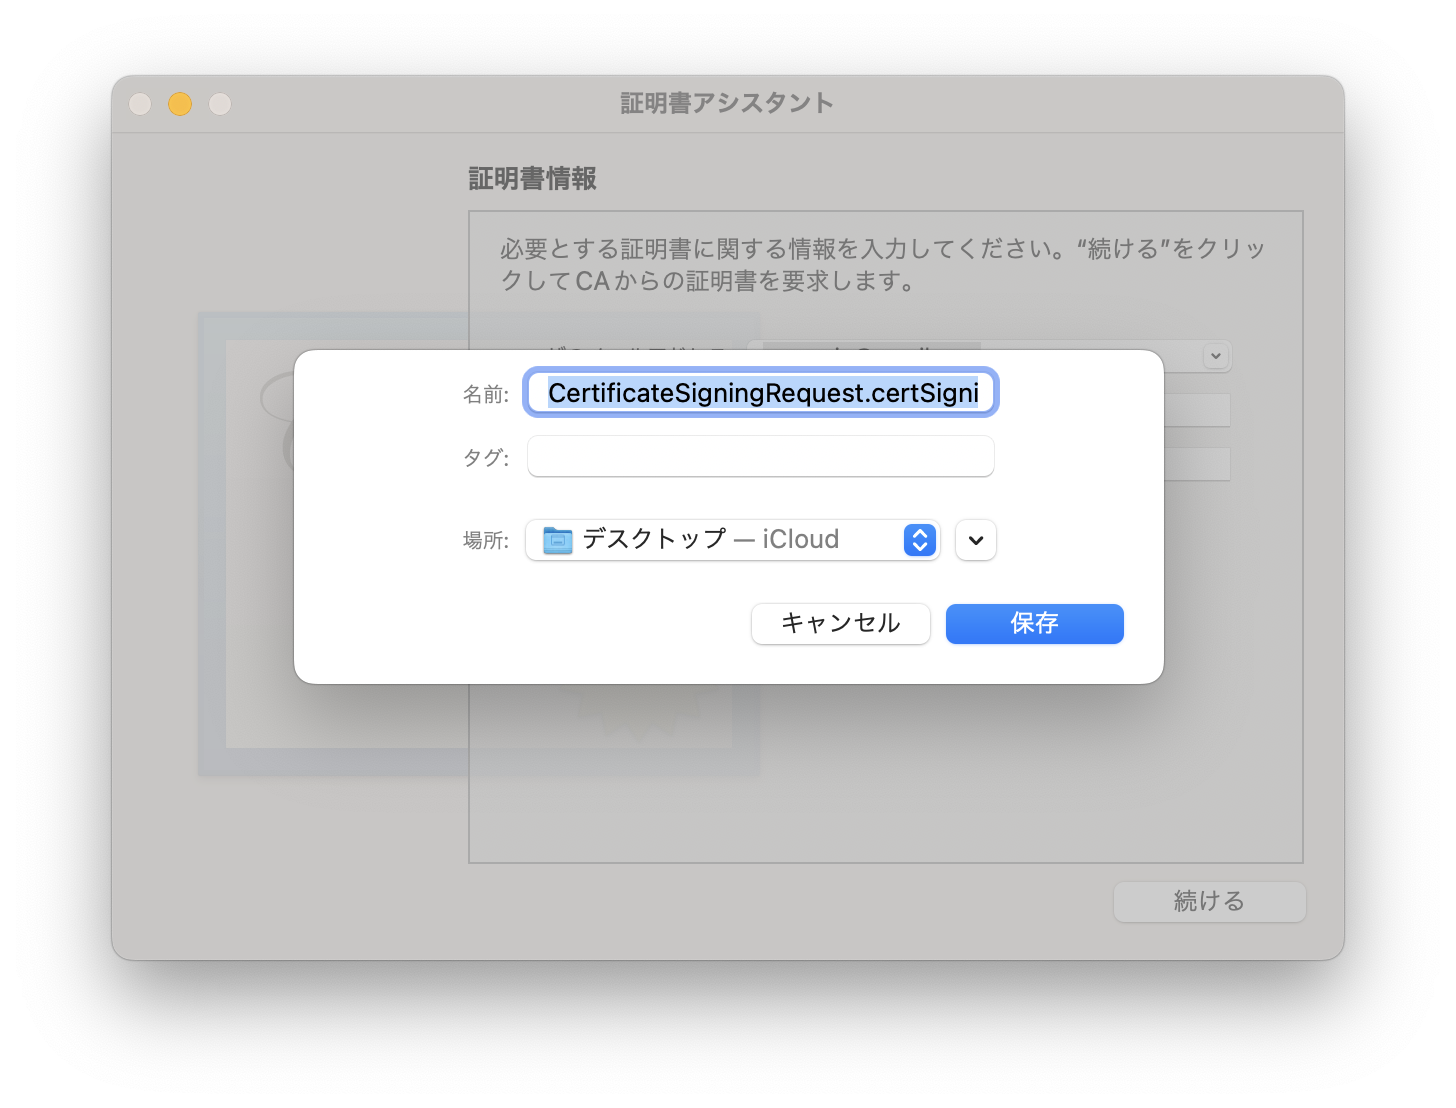
証明書アシスタント > 認証局に証明書を要求...
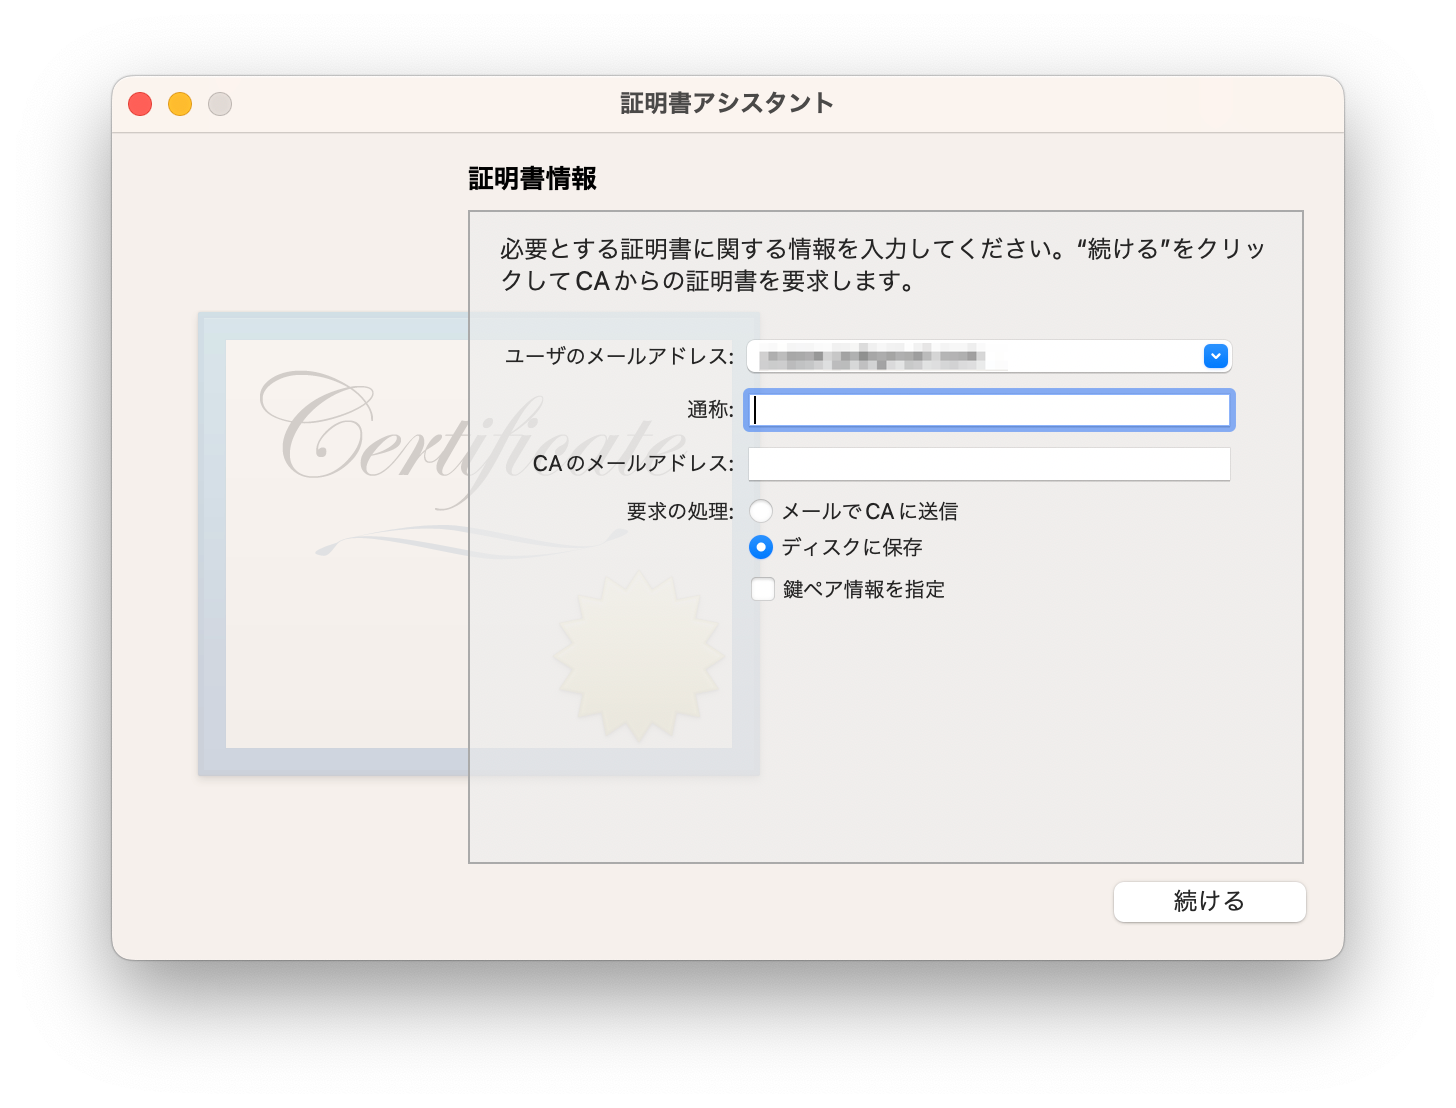
項目 設定内容 ユーザーのメールアドレス 自分のメールアドレス 通称 (空欄で先に進めた) CAのメールアドレス (空欄で先に進めた) 要求の種類 ディスクに保存 鍵ペア情報を指定 OFF 公式情報
https://developer.apple.com/help/account/create-certificates/create-a-certificate-signing-request -
保存
とりあえずデスクトップに保存。
VoIP Cettificatesの追加
-
Apple Developperサイトの証明書を開く
https://developer.apple.com/account/ -
IdentifiersにXcodeで作成したアプリが登録されていることを確認
表示されない場合はXcodeでPush NotificationsのCapabilityを追加するのを忘れているはず。
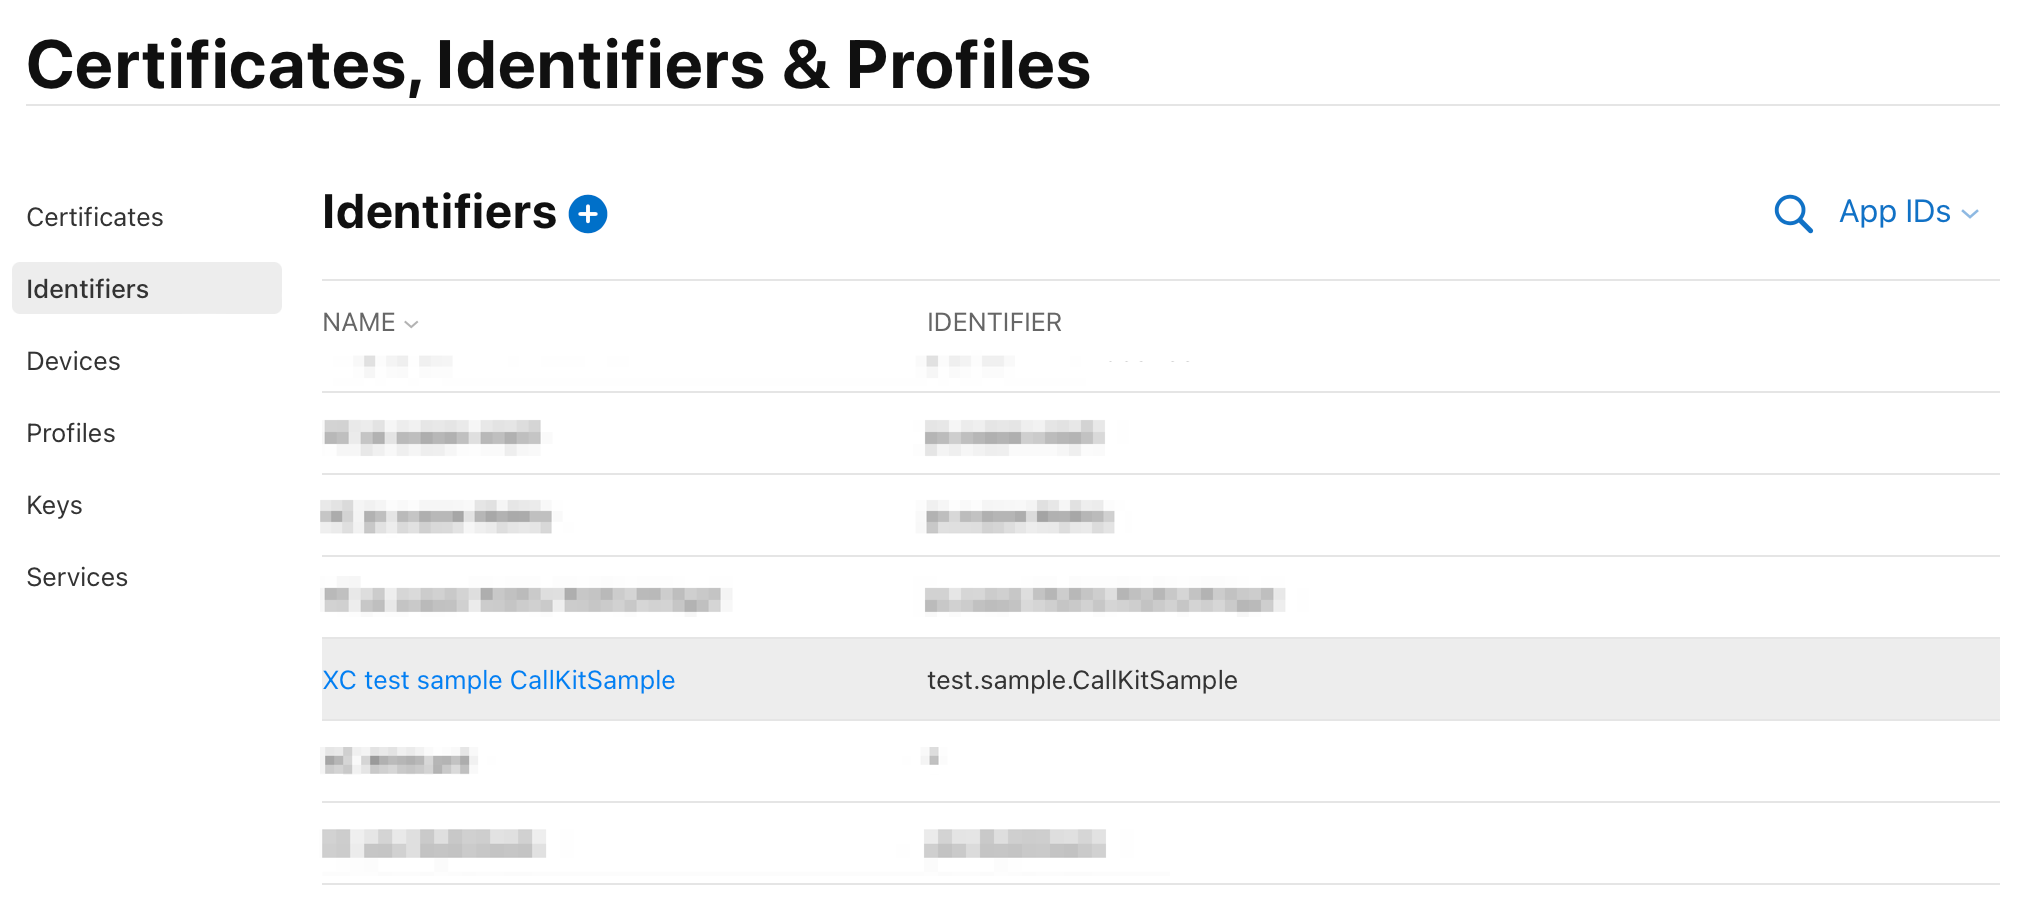
NAMEをクリックしてConfigiurationを表示。
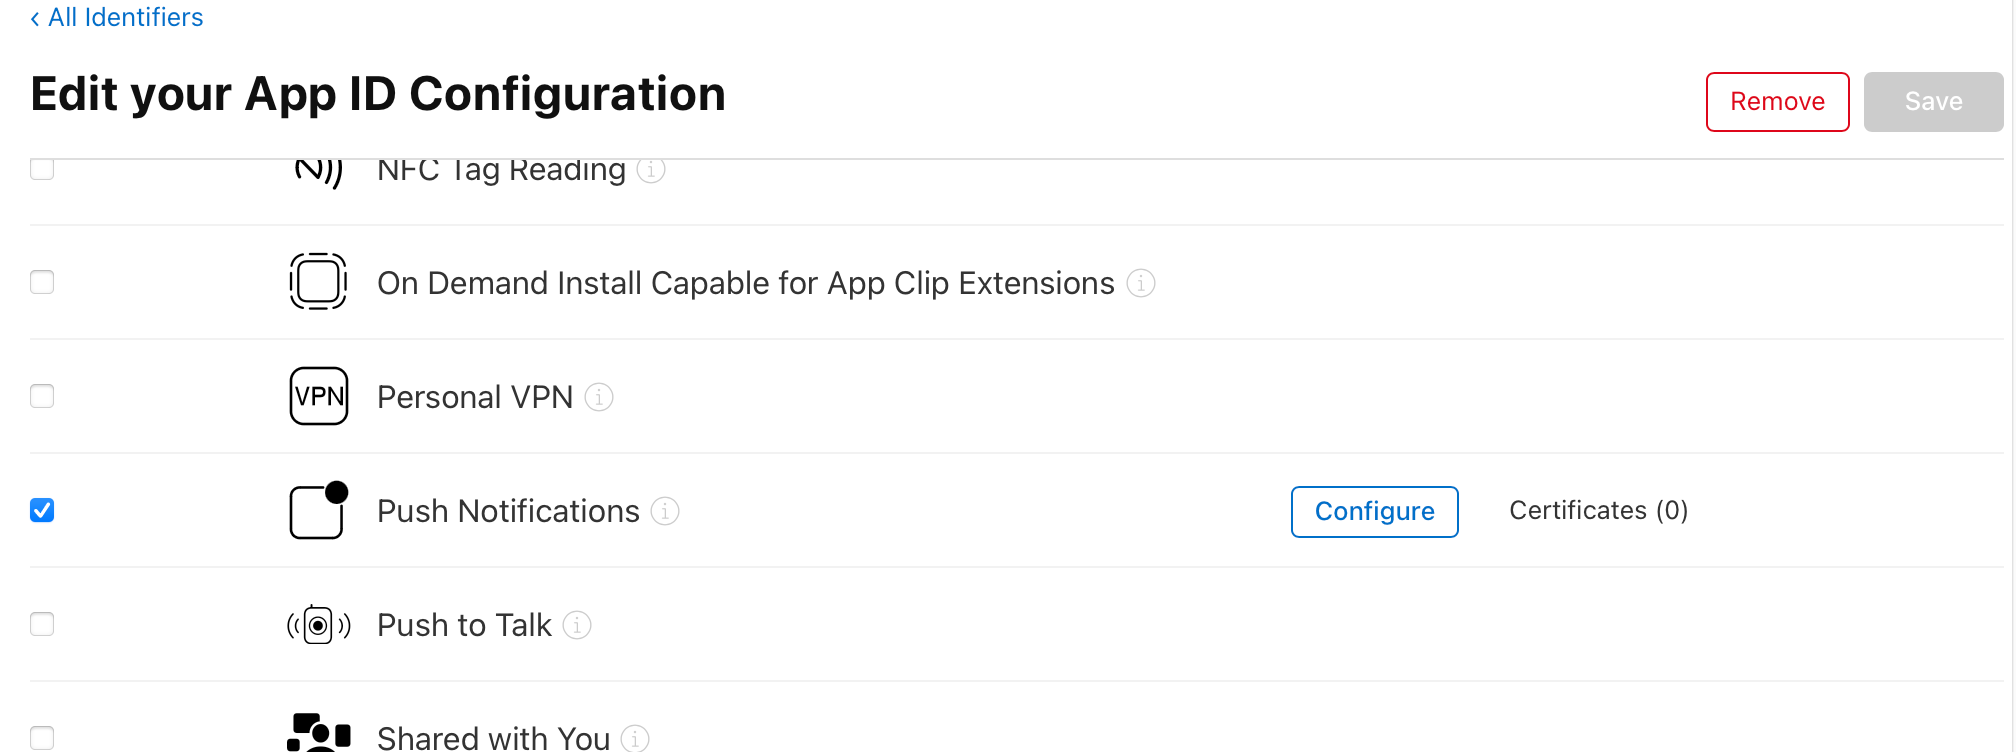
Push Notificationsにチェックが入っていることを確認。
-
Cettificatesを追加

-
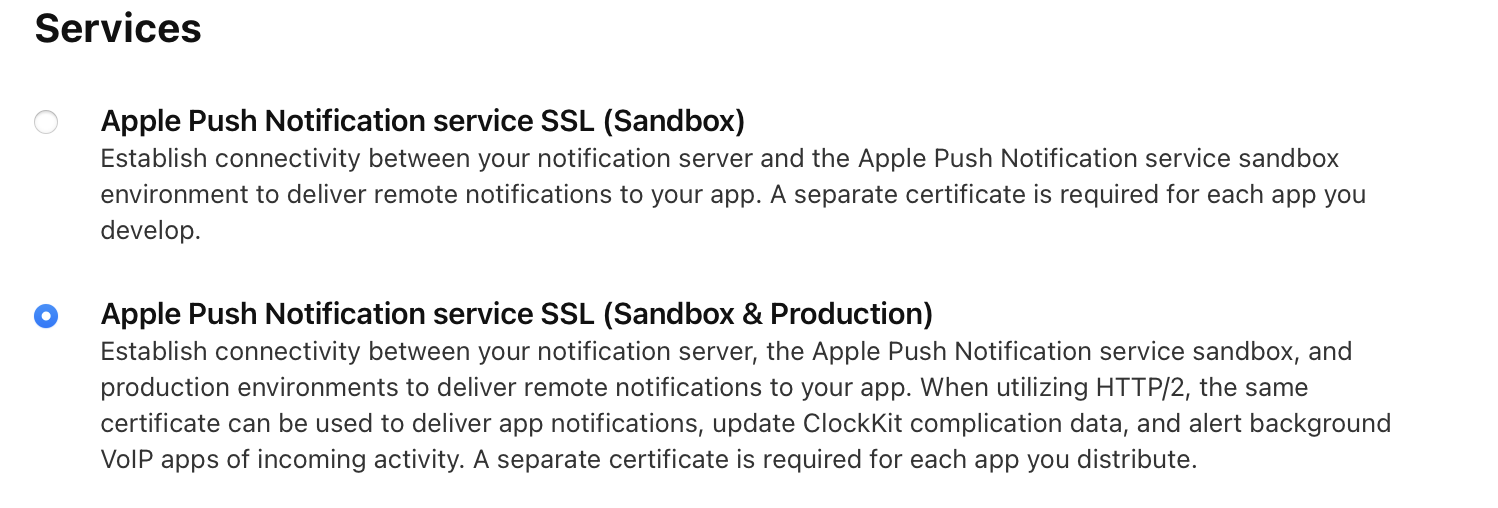
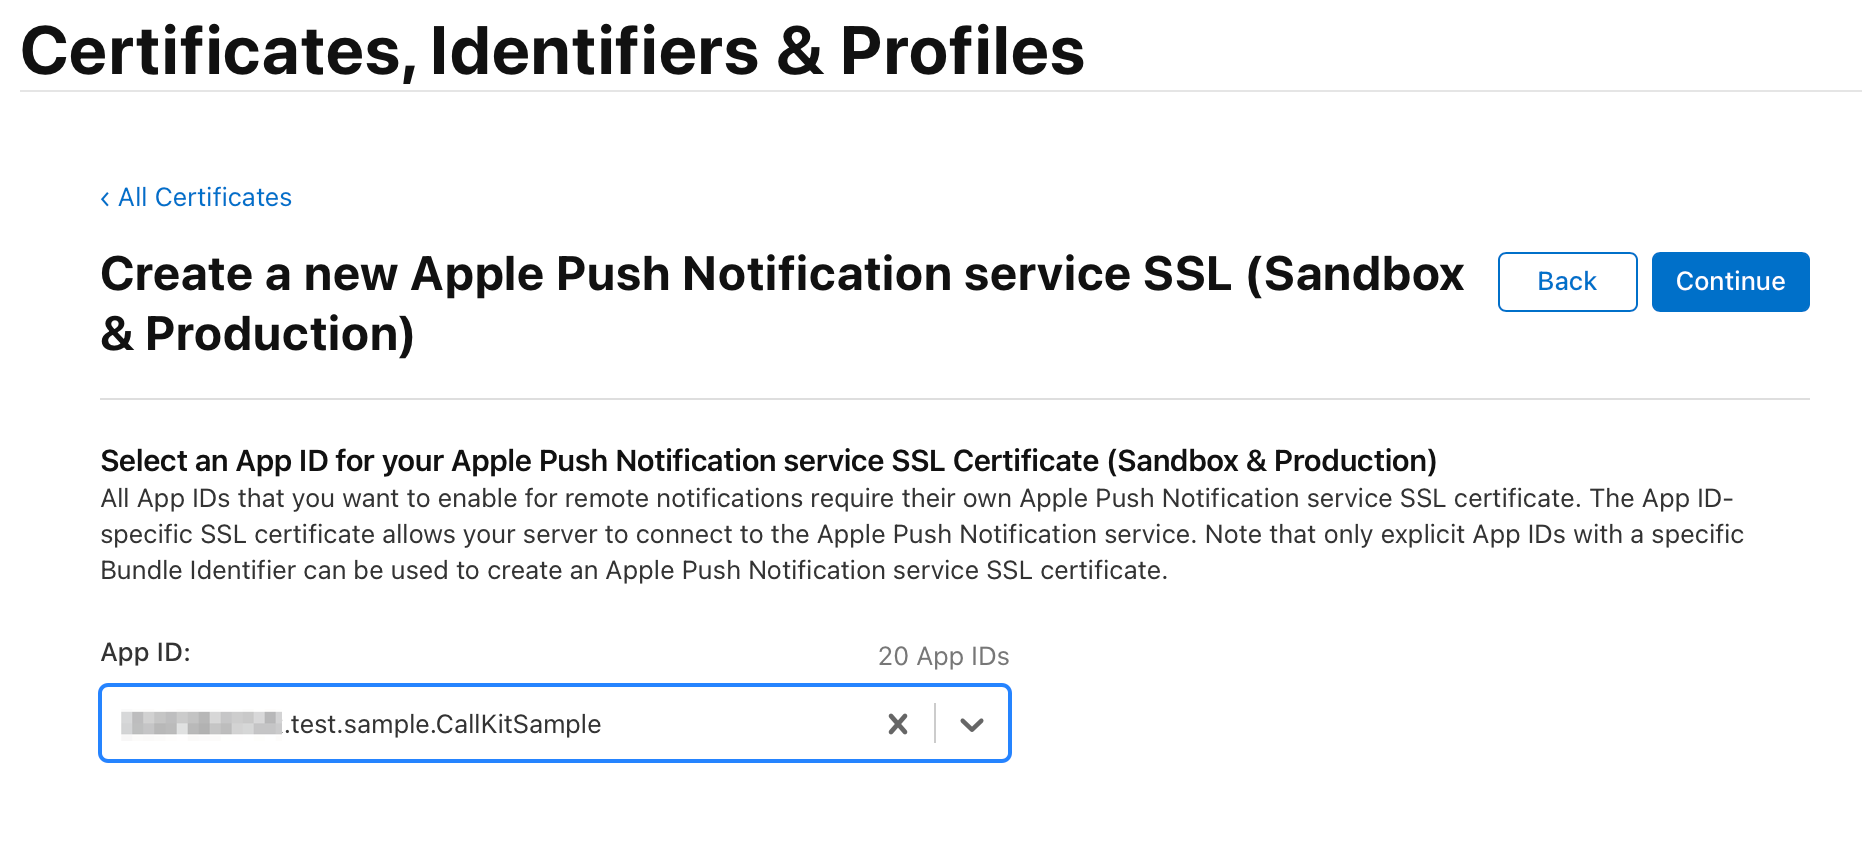
Apple Push Notification service SSLを選択
-
App IDを選択
一覧に今回のアプリIDがあるはずなので選択する。
-
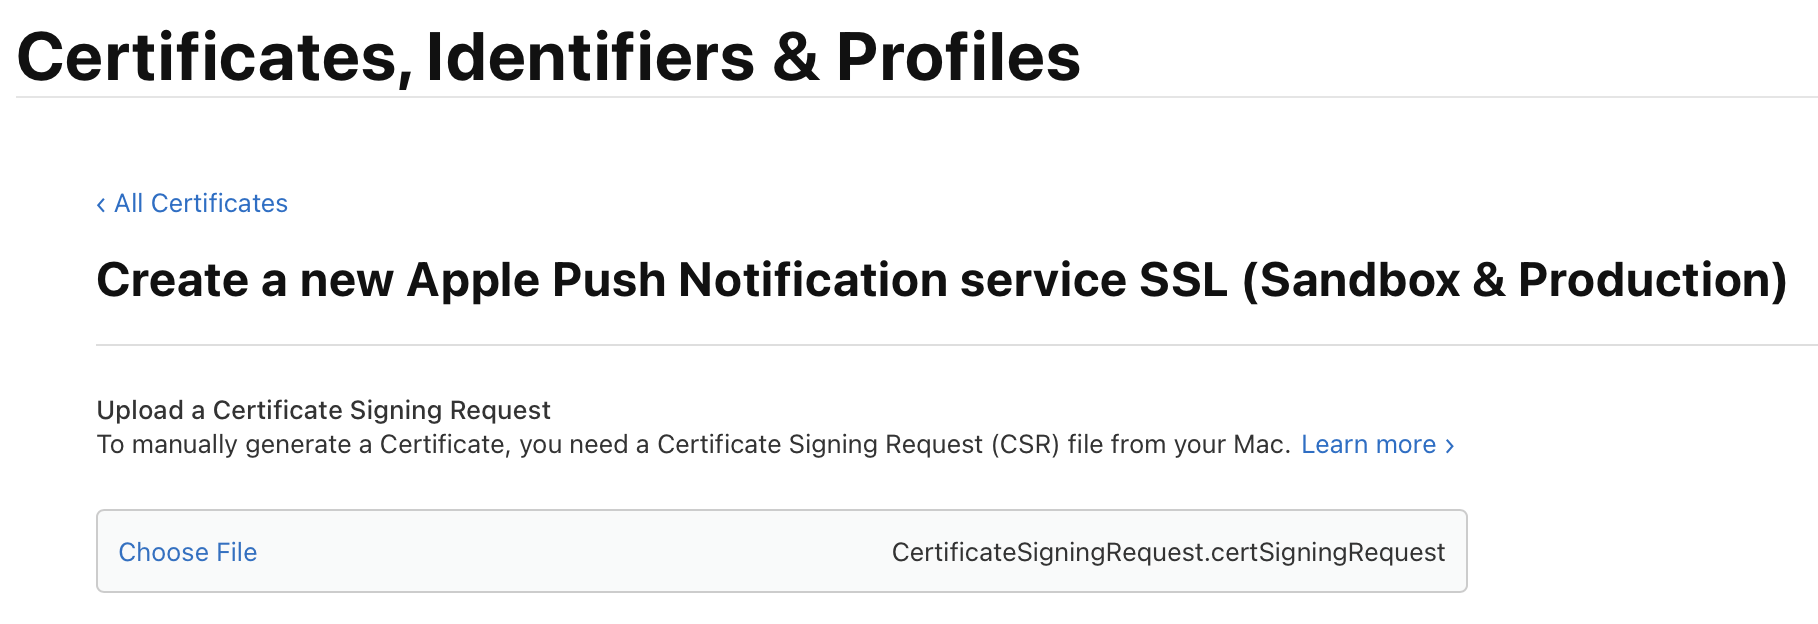
CSRファイルを指定
キーチェーンで作成しておいたCSRファイルを指定する。
-
ダウンロード
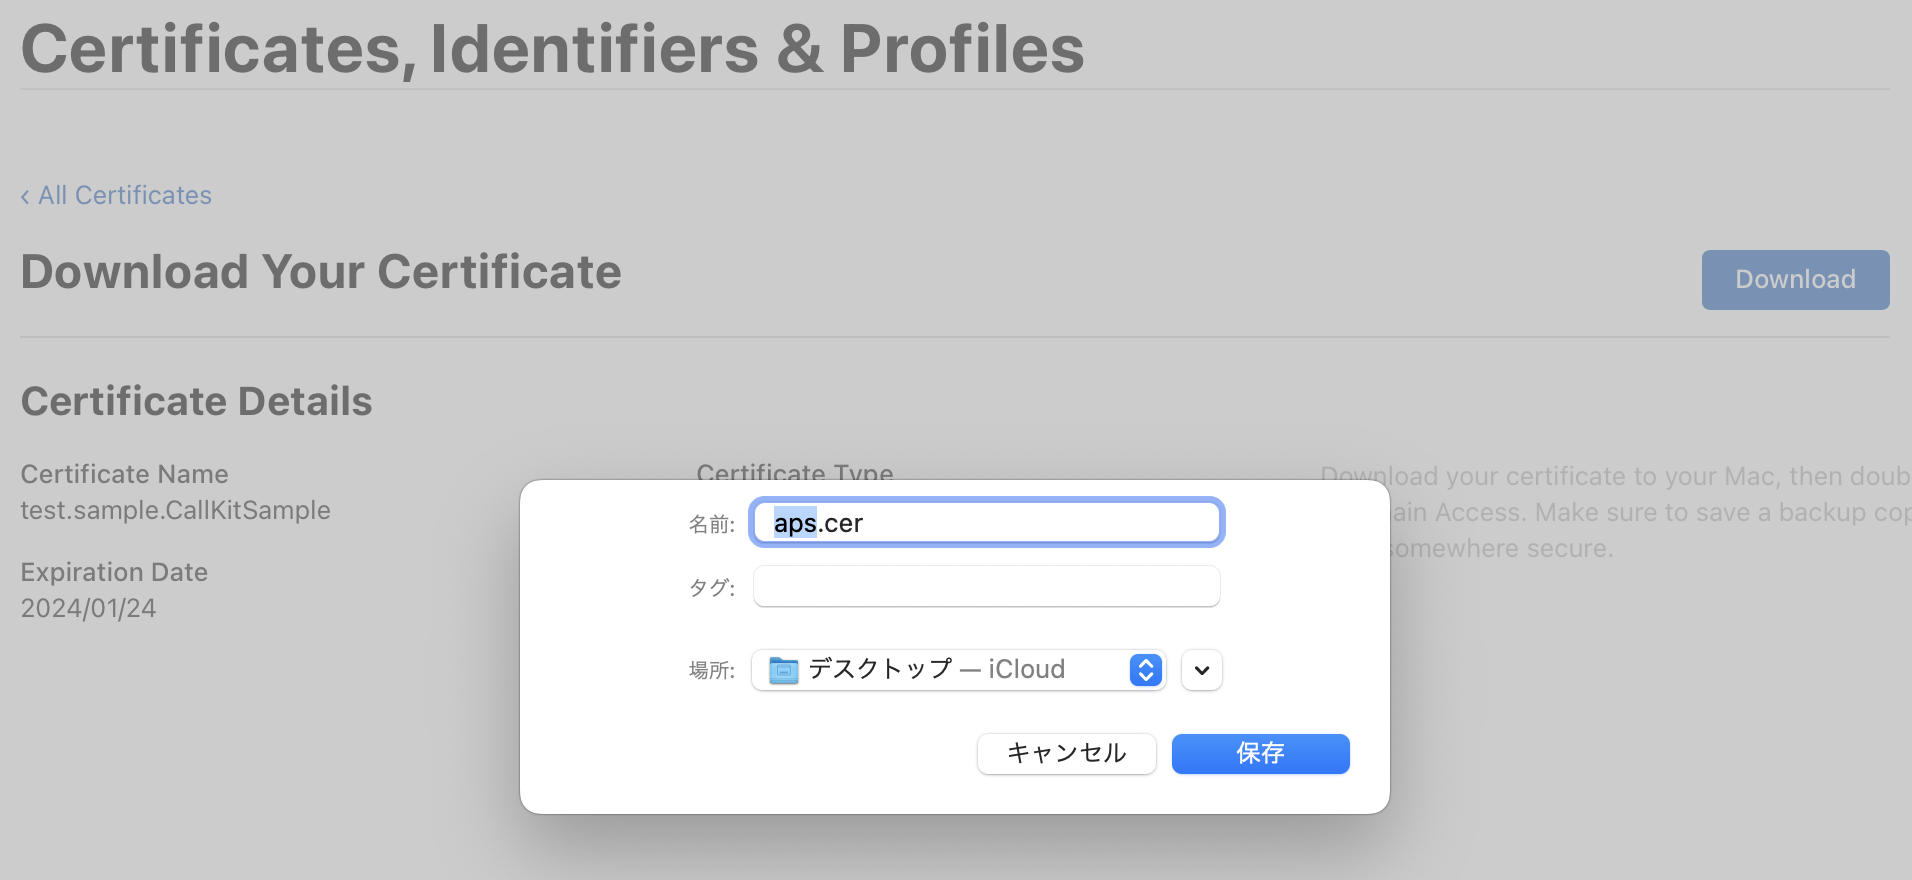
-
ダウンロードしたaps.cerをダブルクリック
キーチェーンアクセスで証明書を書き出す。
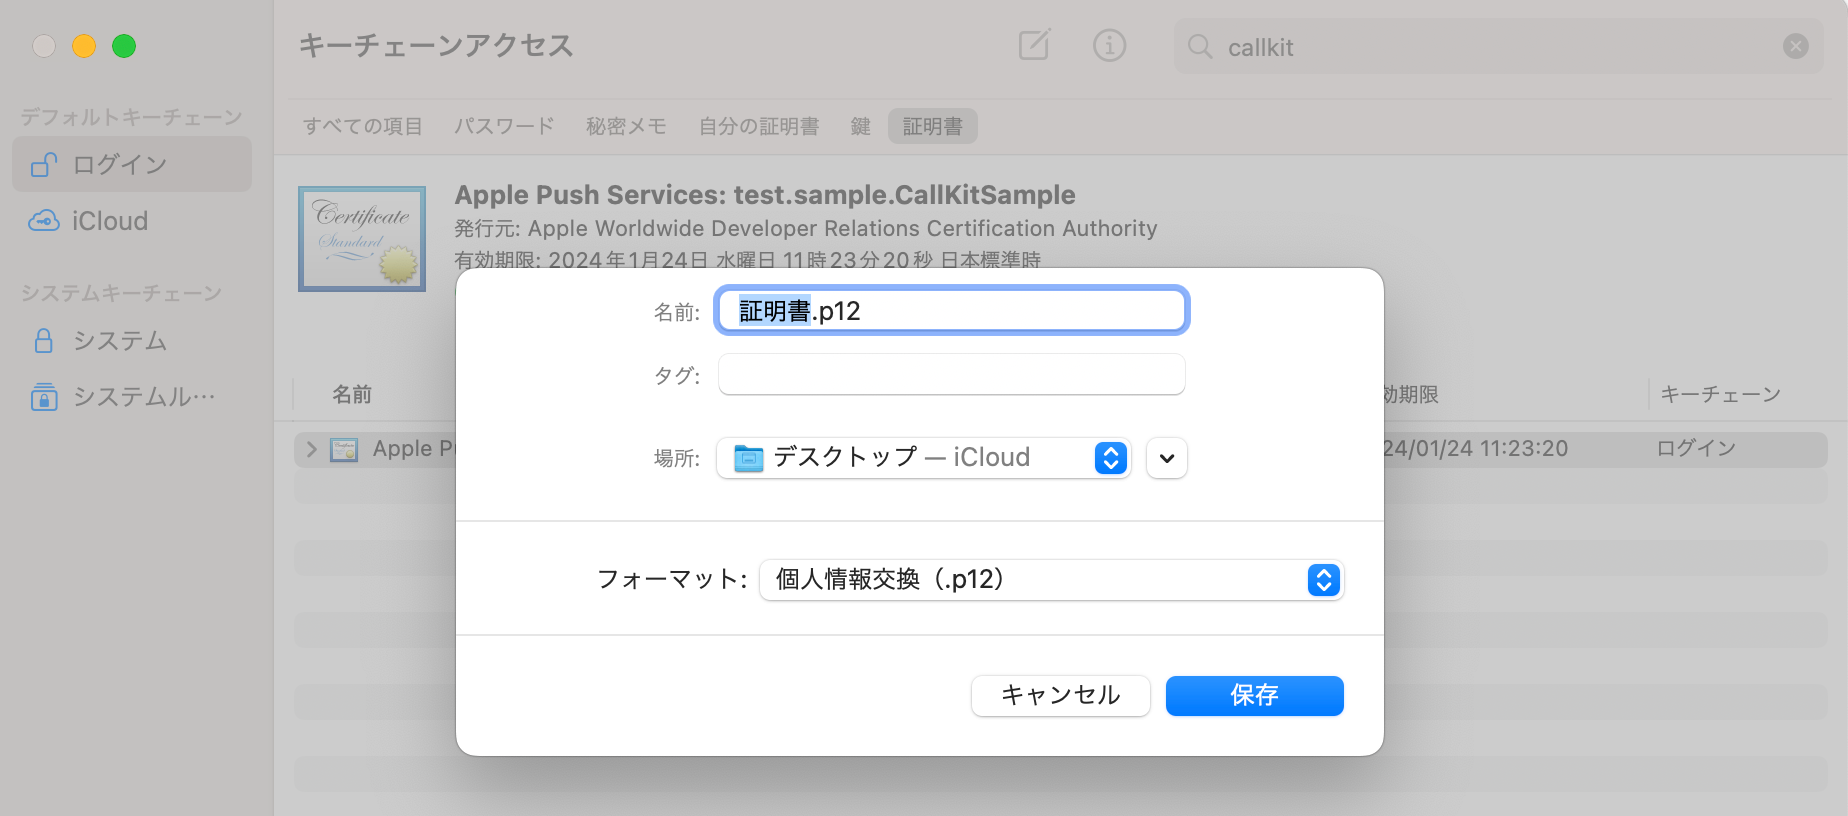
-
p12になっていることを確認して保存
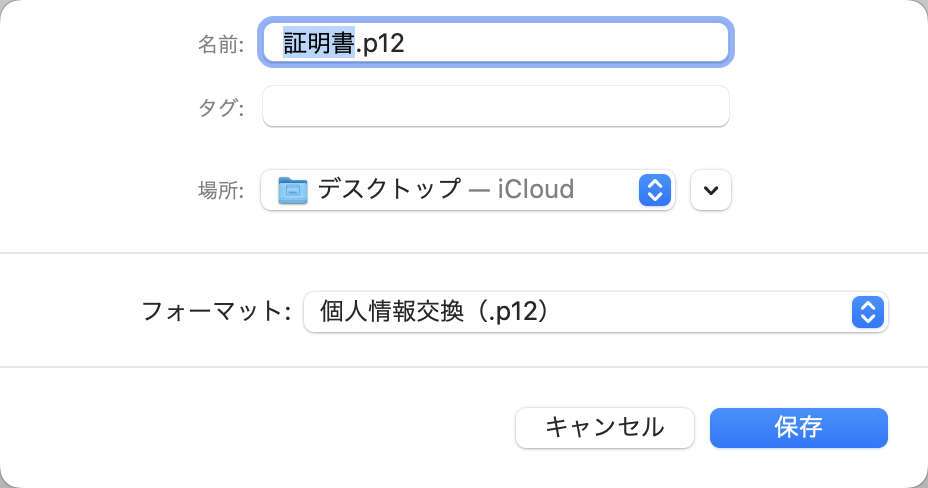
-
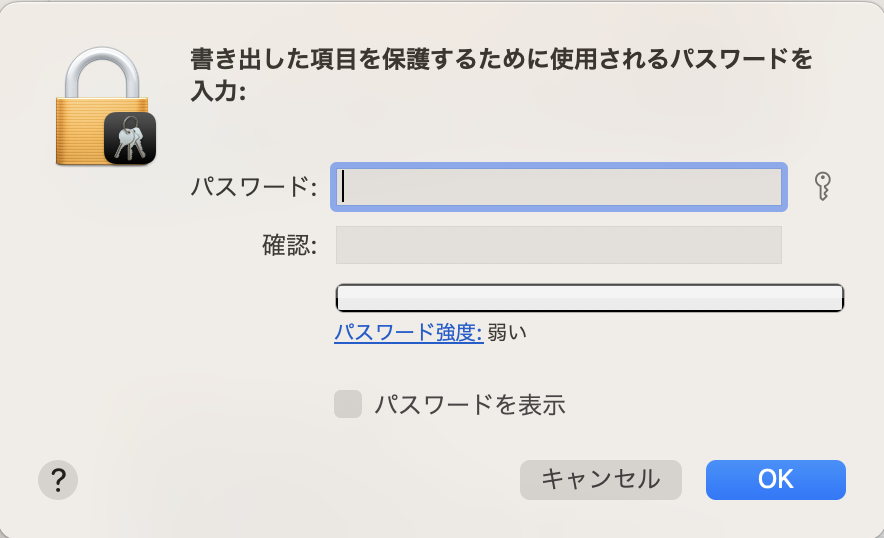
パスワードを設定
後でAWSへ証明書をアップロードするときにパスワードを指定するので忘れないようにメモしておく。
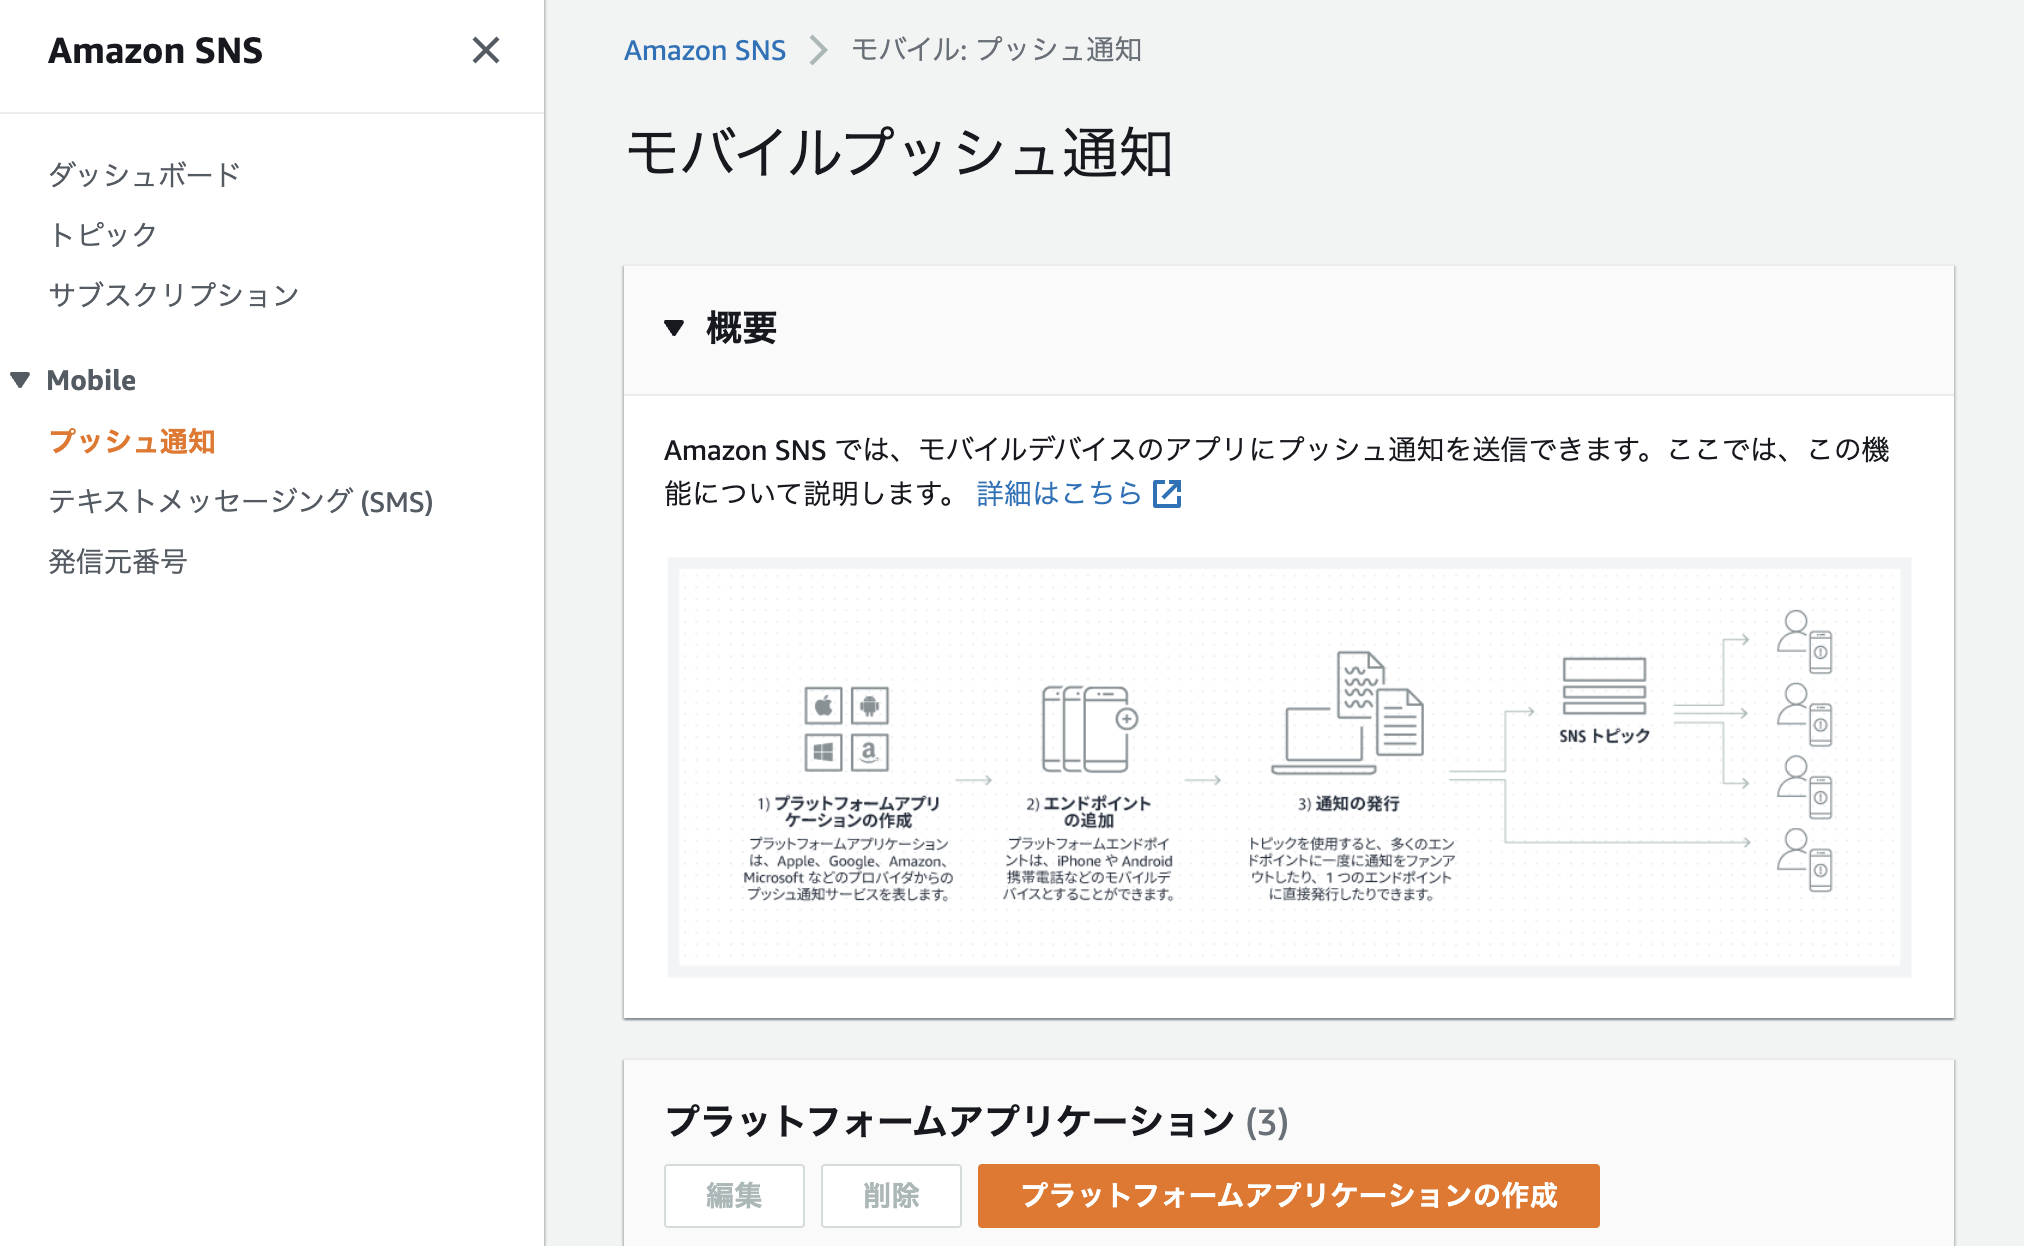
AWS SNSの作成
-
SNS-モバイルプッシュ通知の作成
-
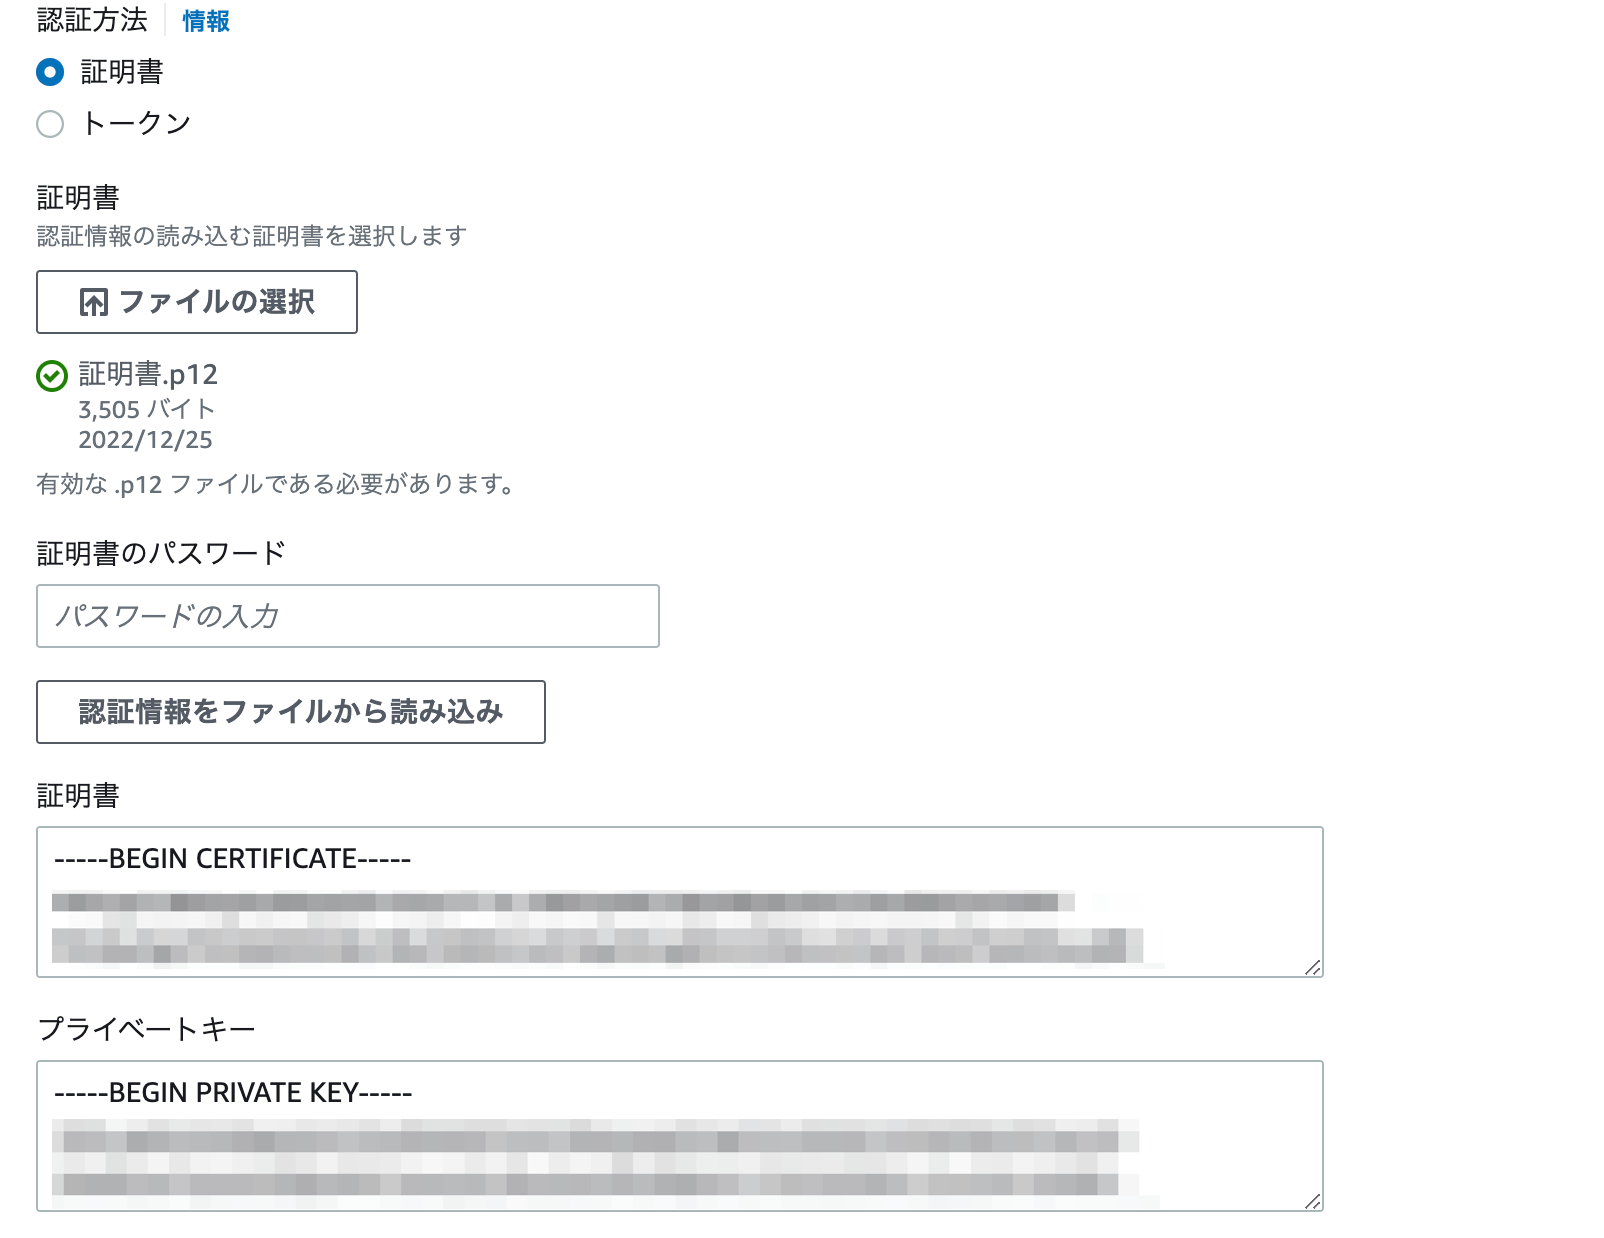
iOS用のVoIPを設定
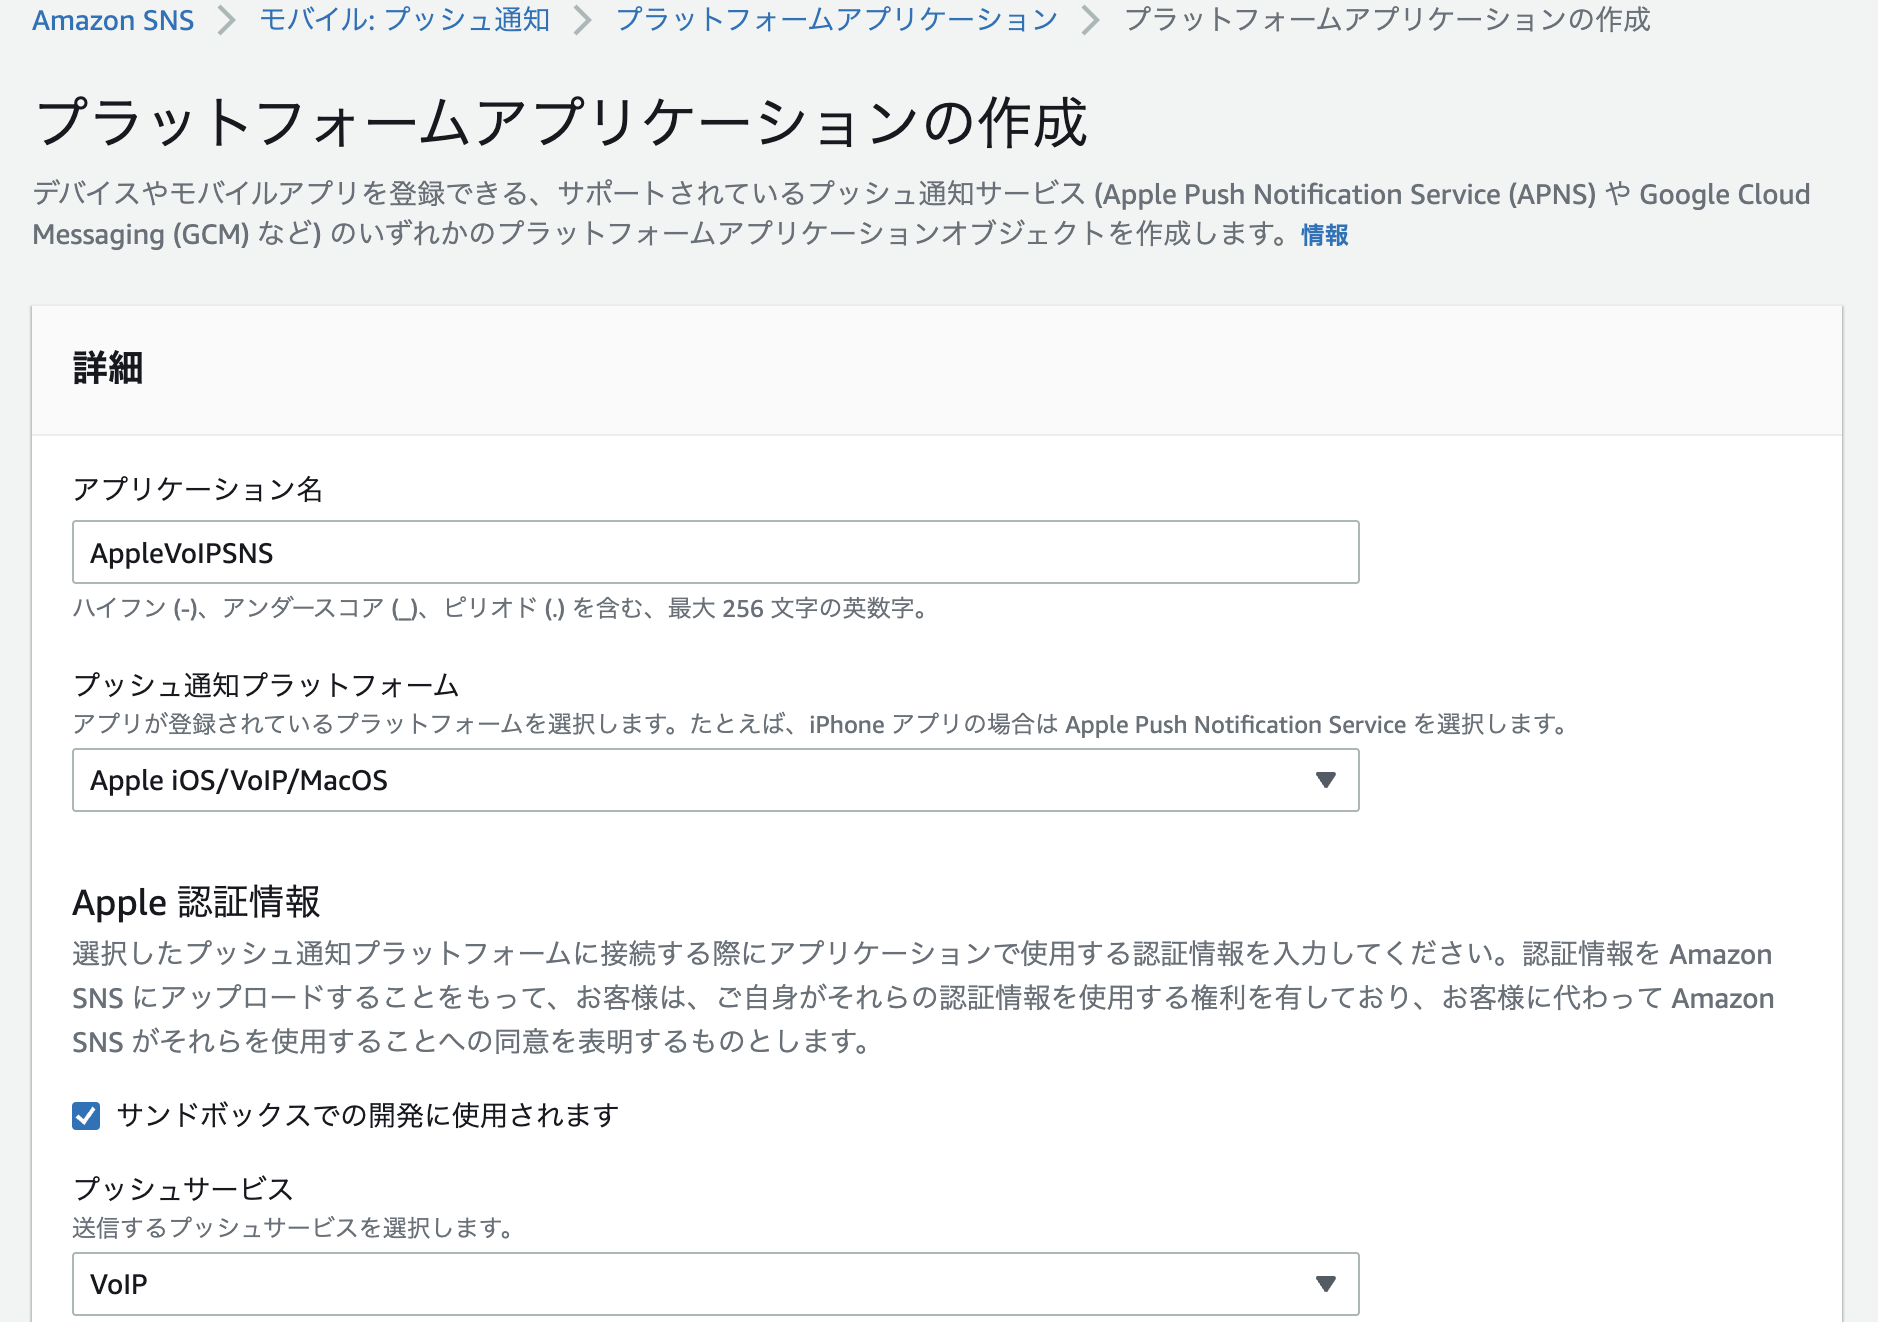
- テスト用なので「サンドボックス」を選択
- ファイルの選択をクリックして先ほど作成した証明書.p12を指定
- その他はデフォルトのまま
-
証明書をファイルから読み取り
キーチェーンアクセスで指定したパスワードを入力すると読み込まれる。
-
これでSNSの作成完了
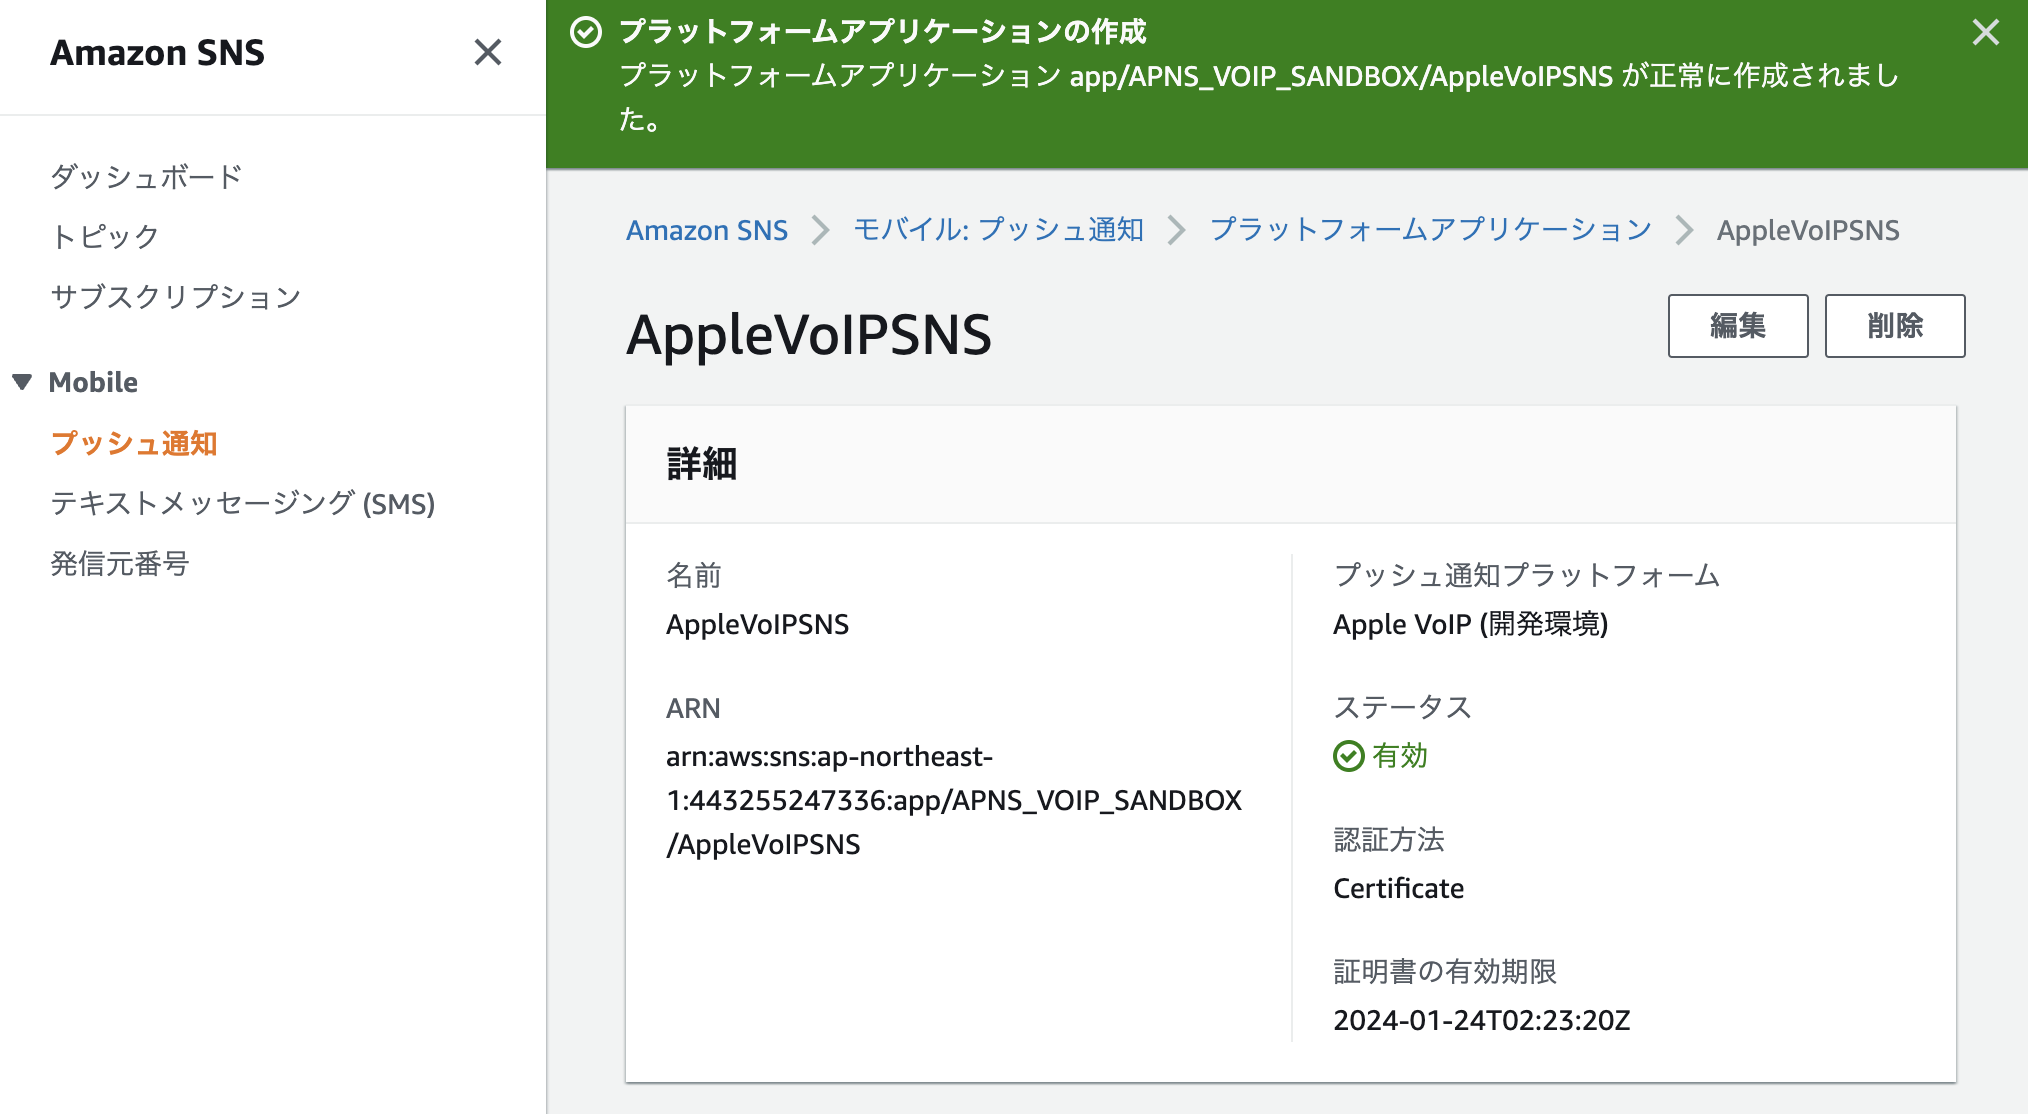
-
続けてエンドポイントの作成
Xcodeのコンソールに表示されたデバイストークンを設定。
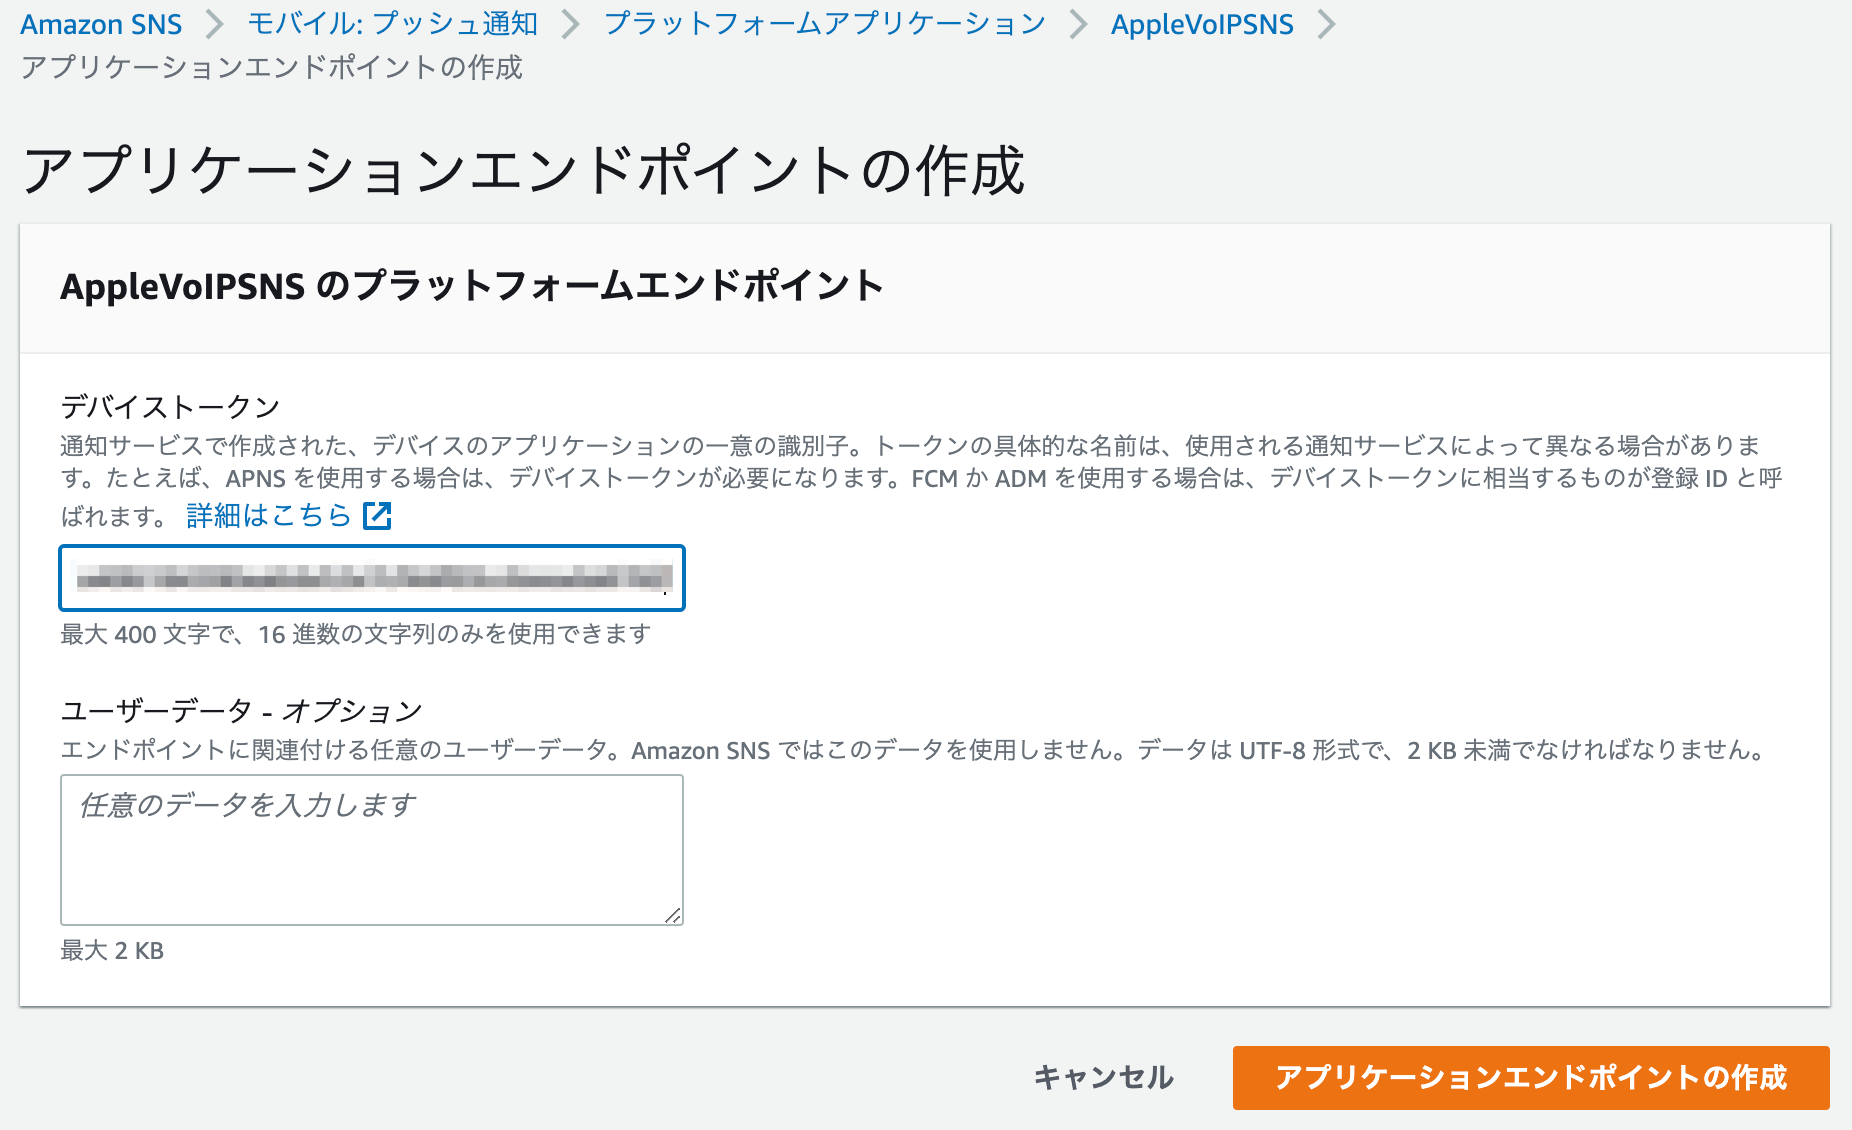
-
エンドポイントが作成される
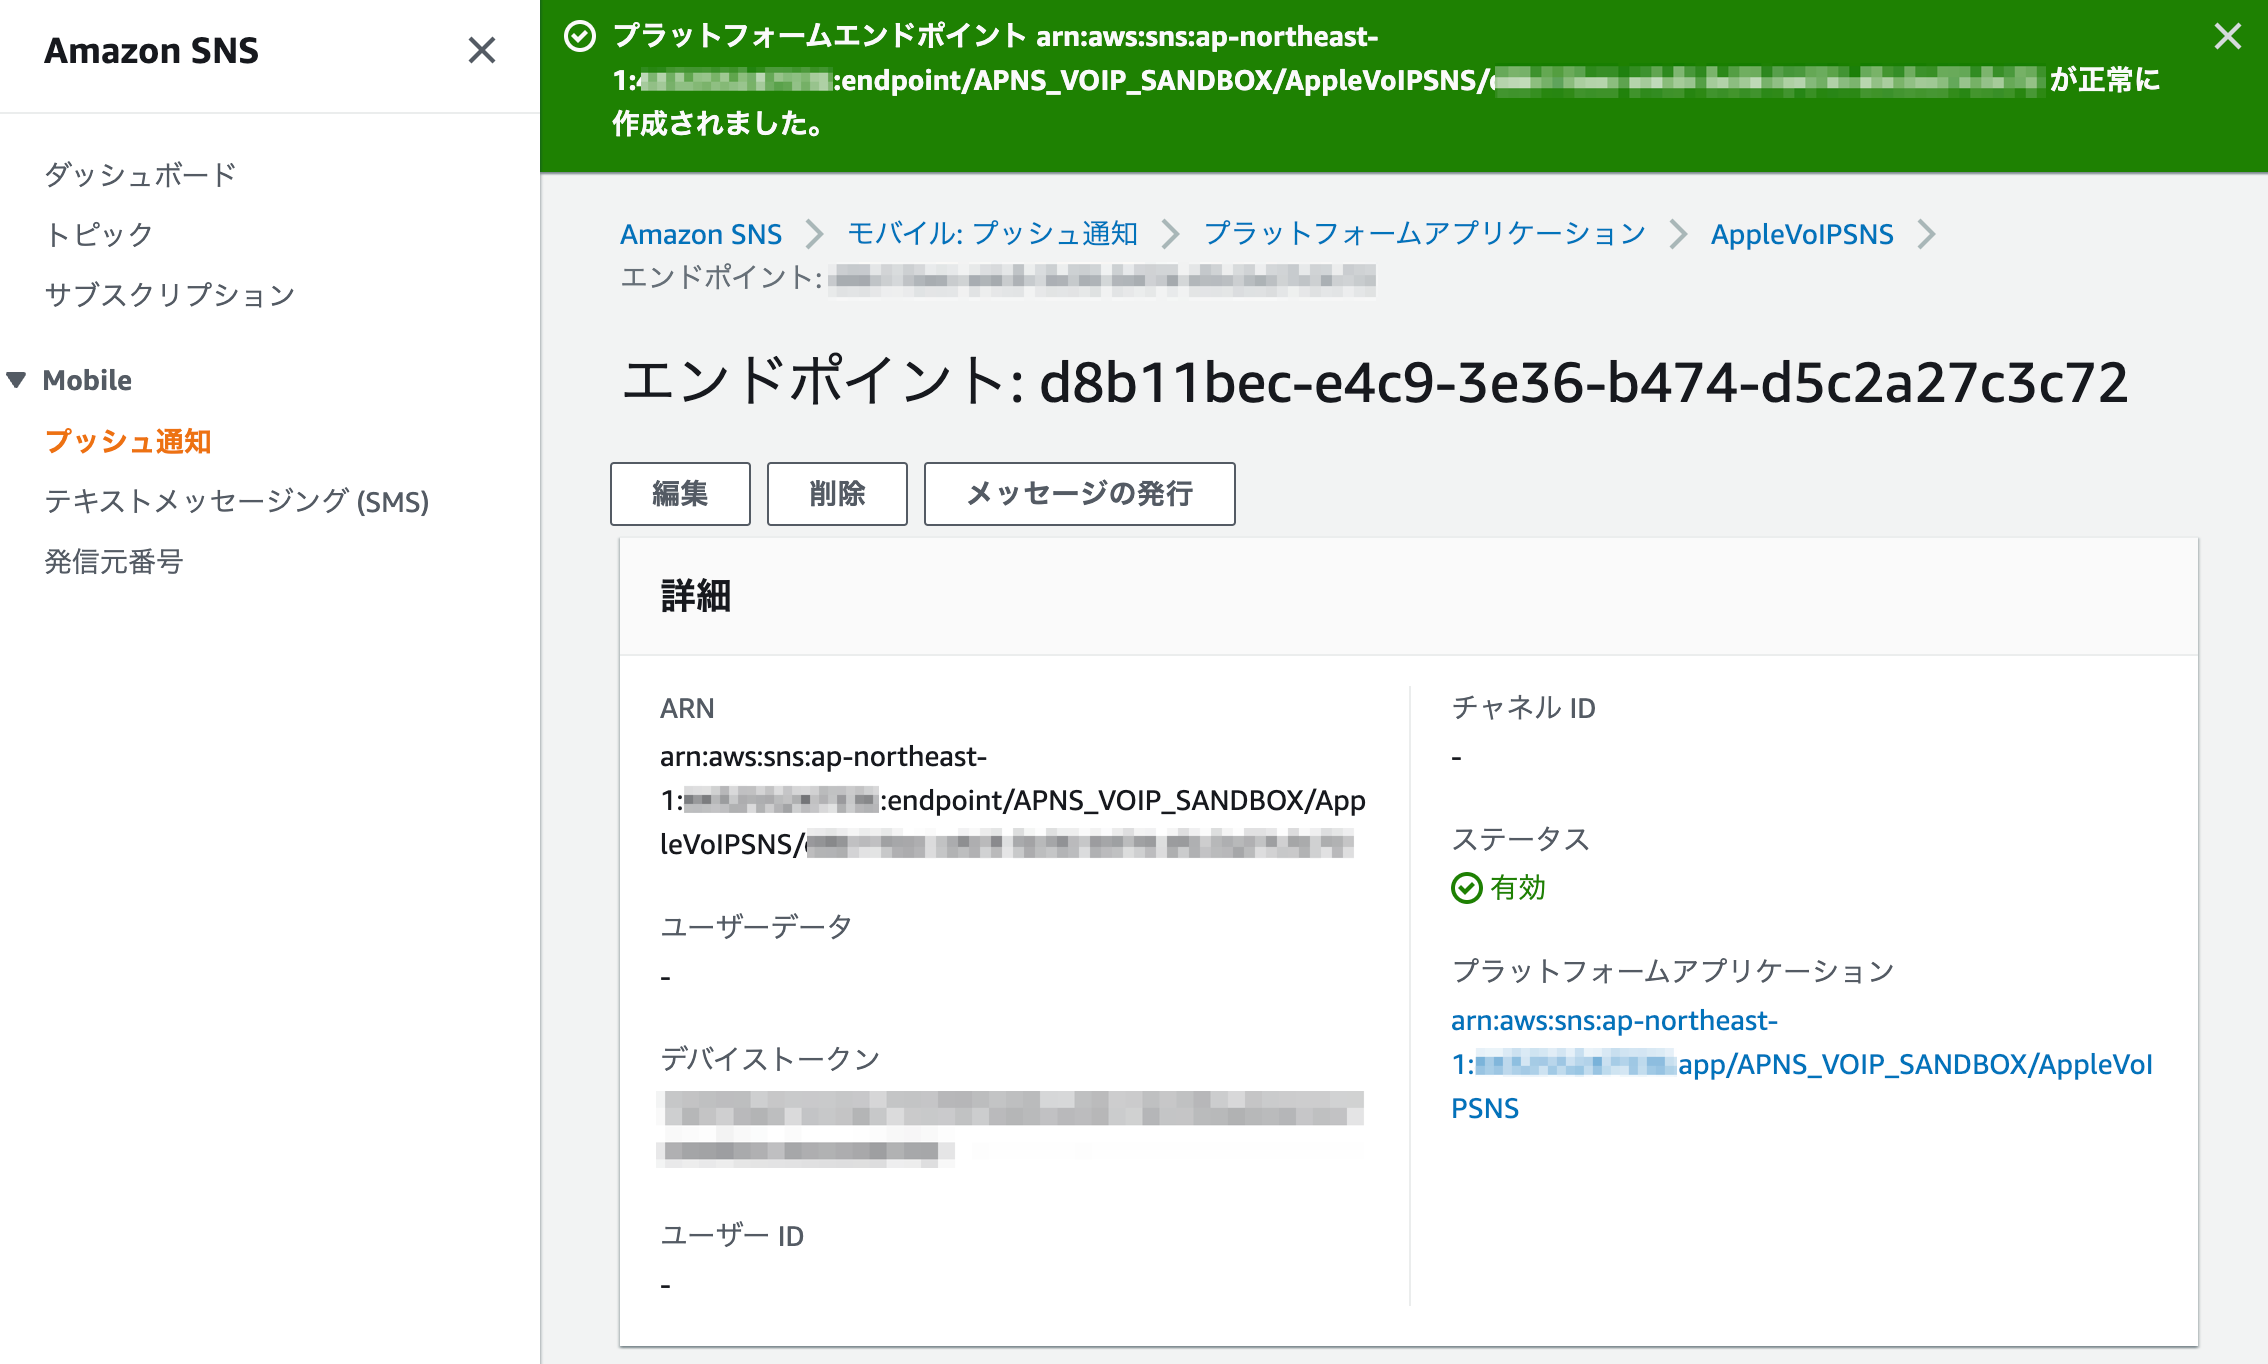
-
テストメッセージの発行
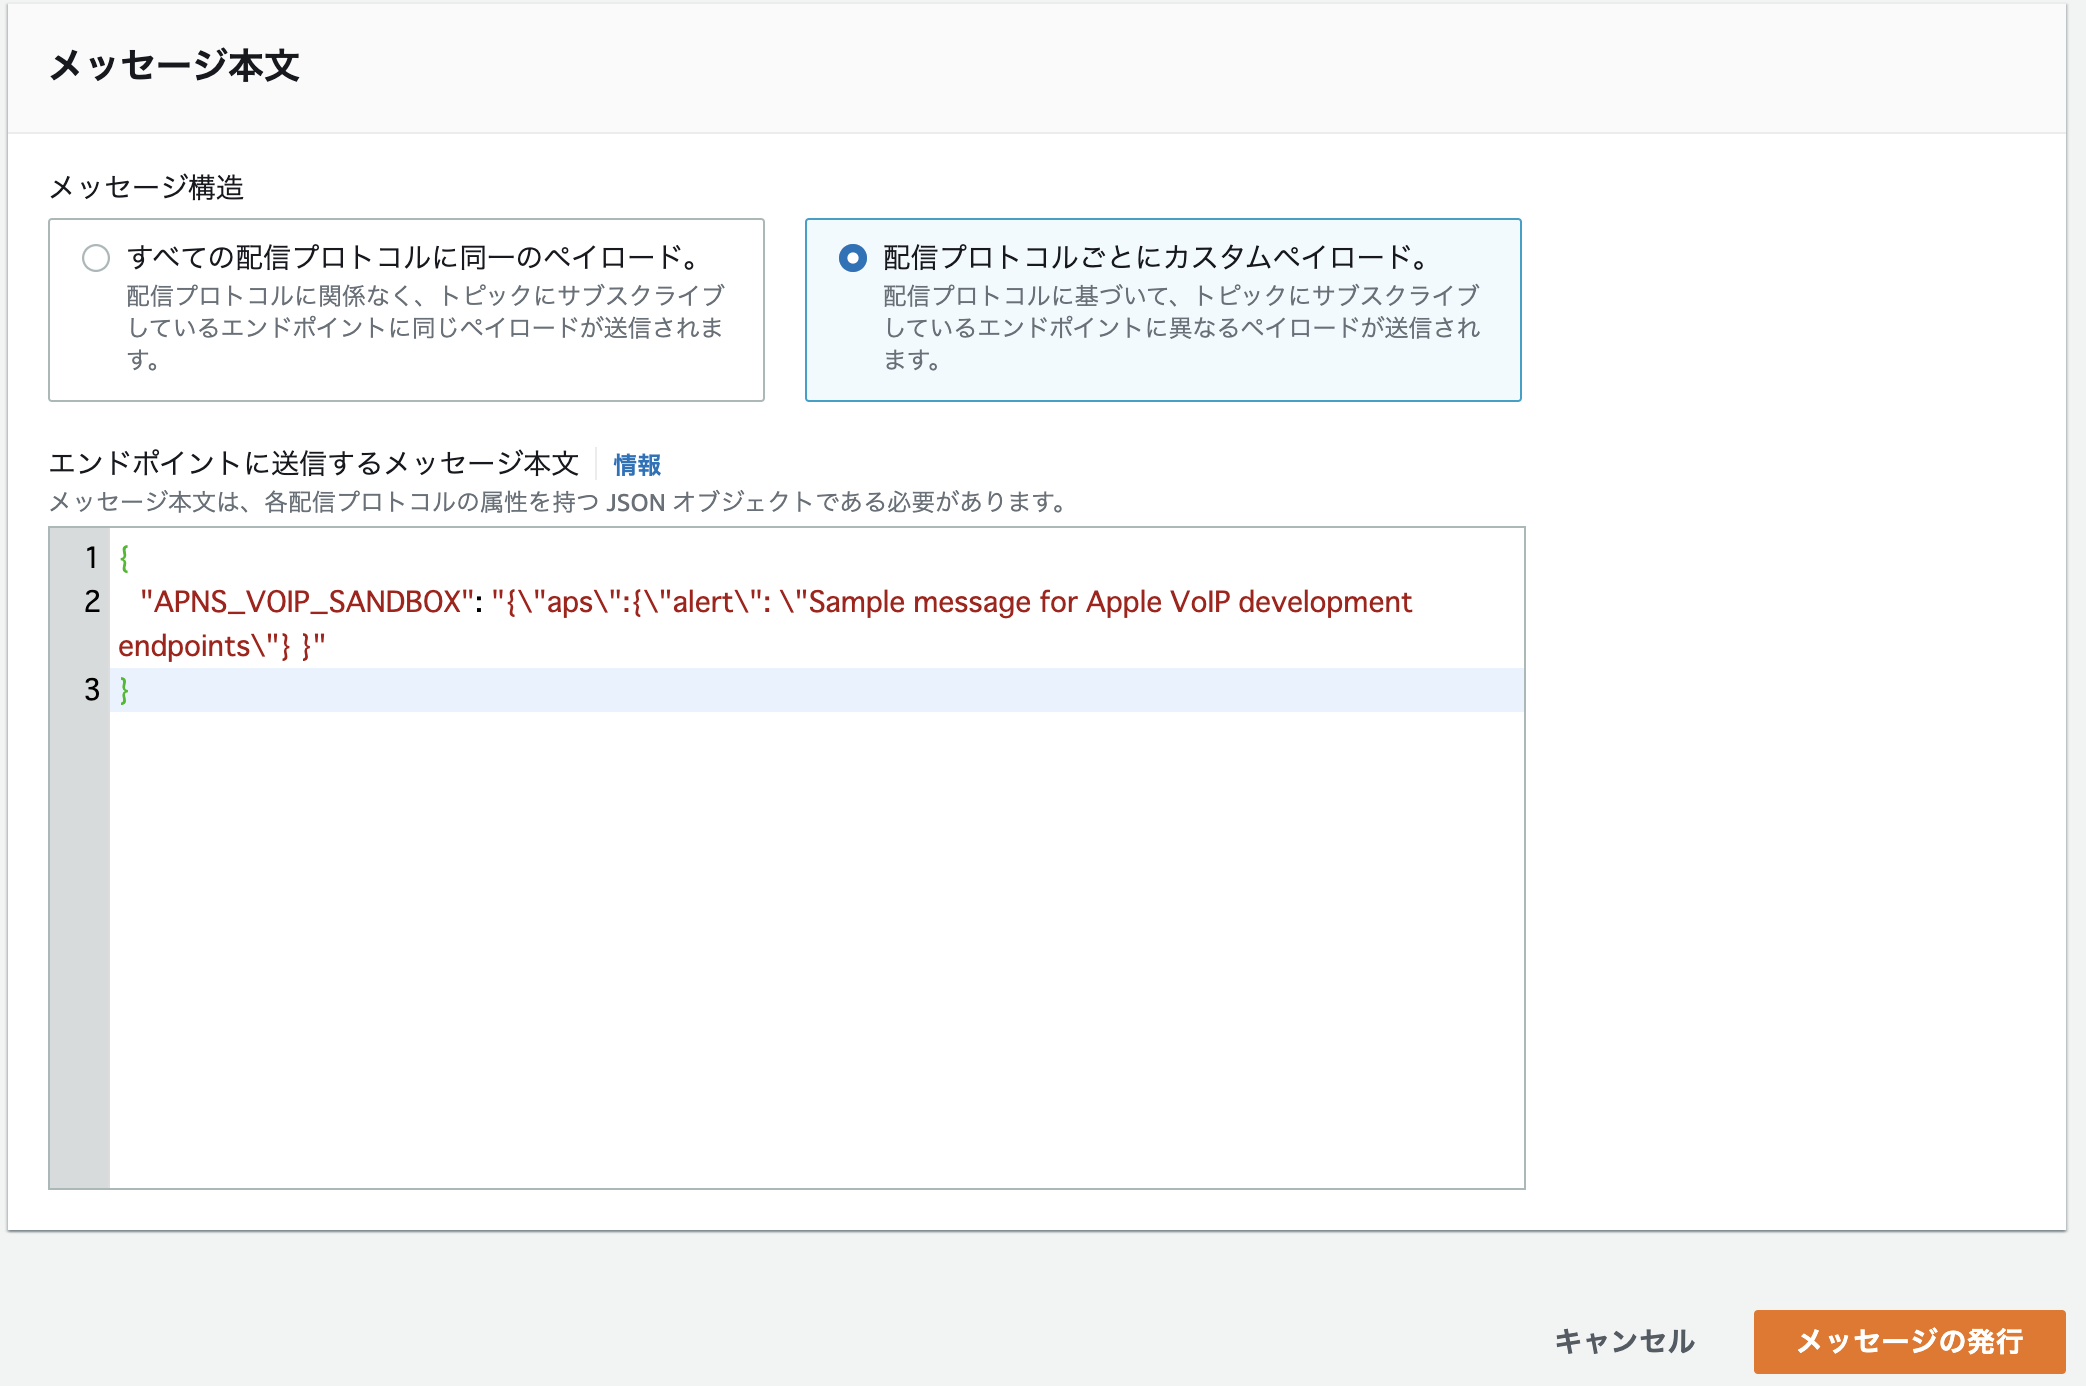
メッセージを発行しても反応なし...。ログを確認したいので続けてログを設定。 -
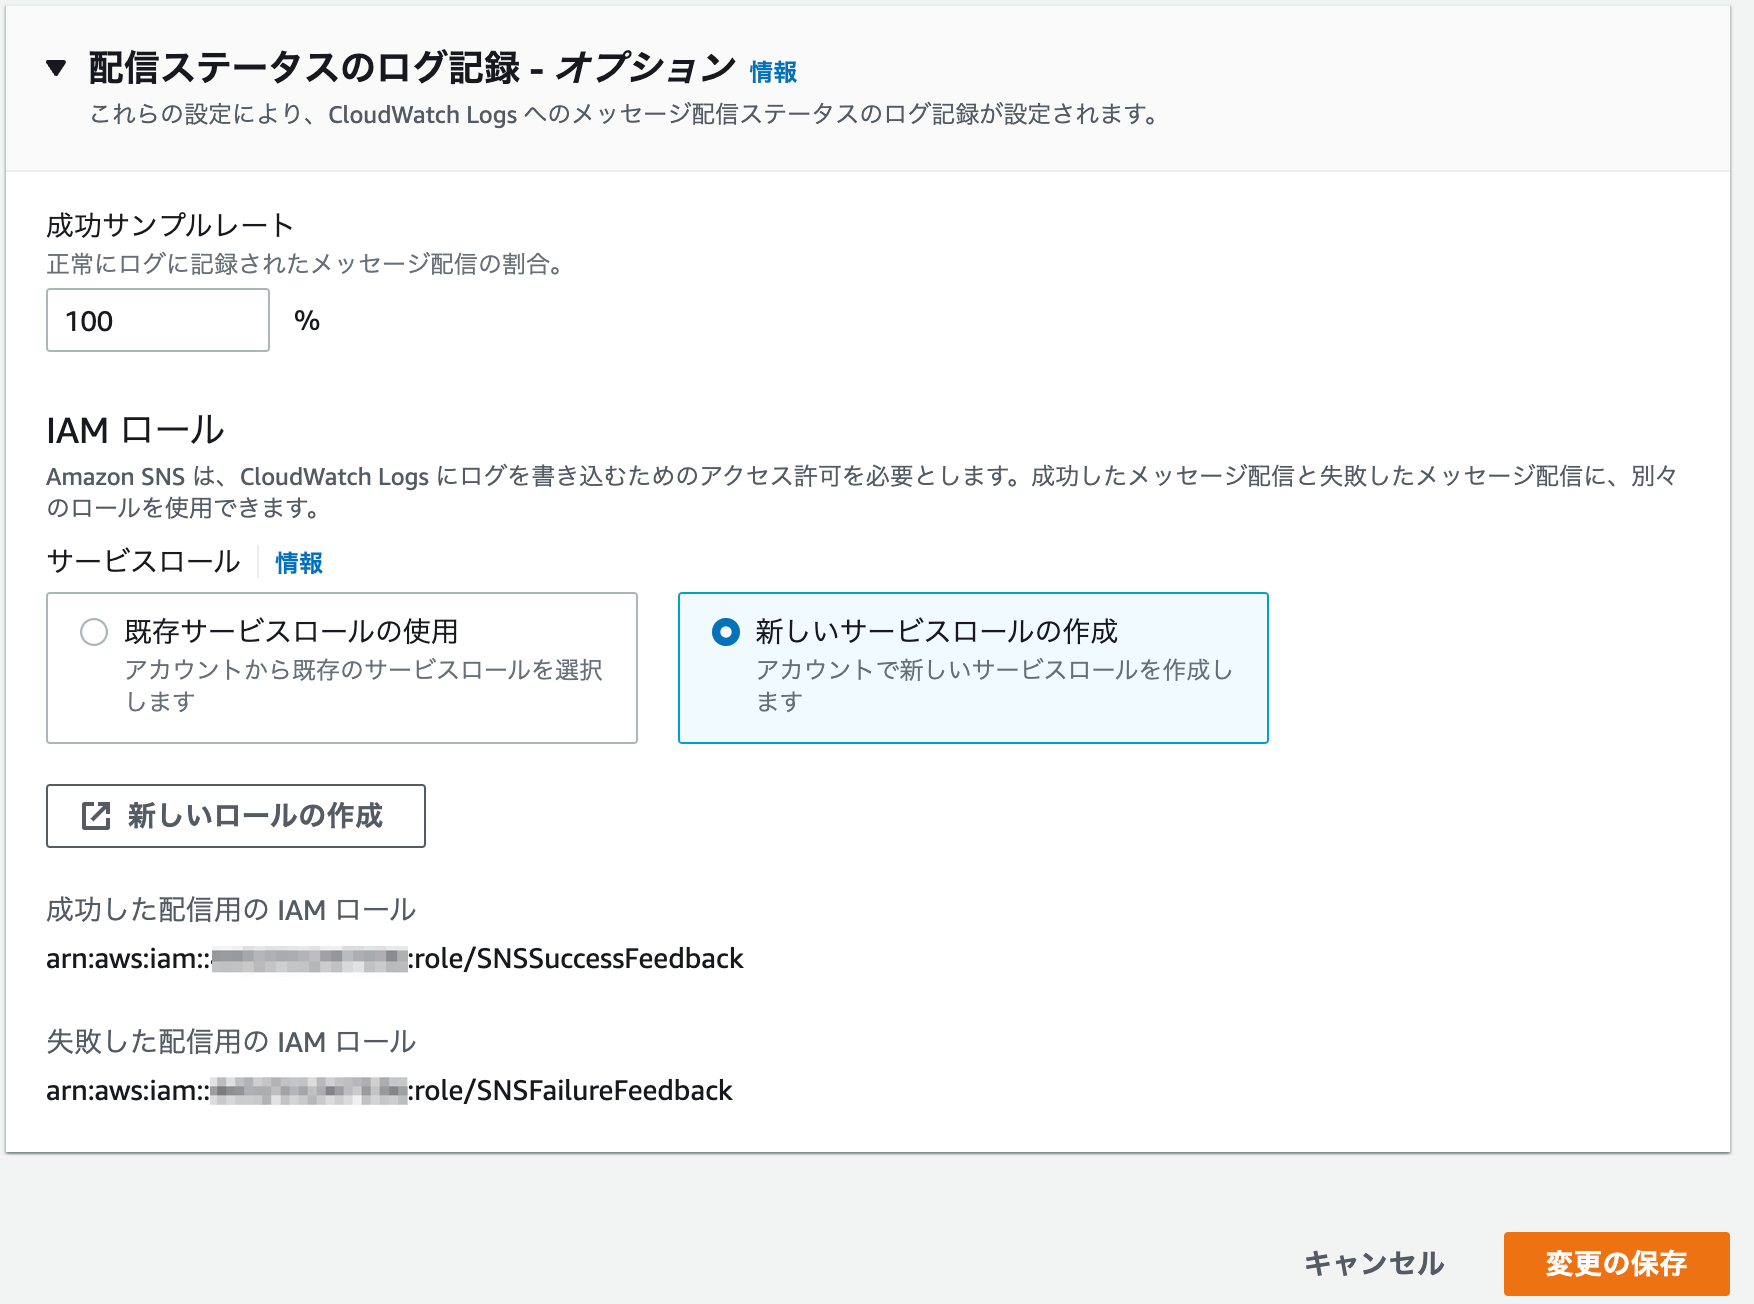
ログ用の新しいサービスロールを作成
設定 >配信ステータスのログ記録>新しいサービスロールの作成
-
ログを確認
InvalidPushTypeになっている。メッセージの発行ではApple VoIPは送れないっぽい...
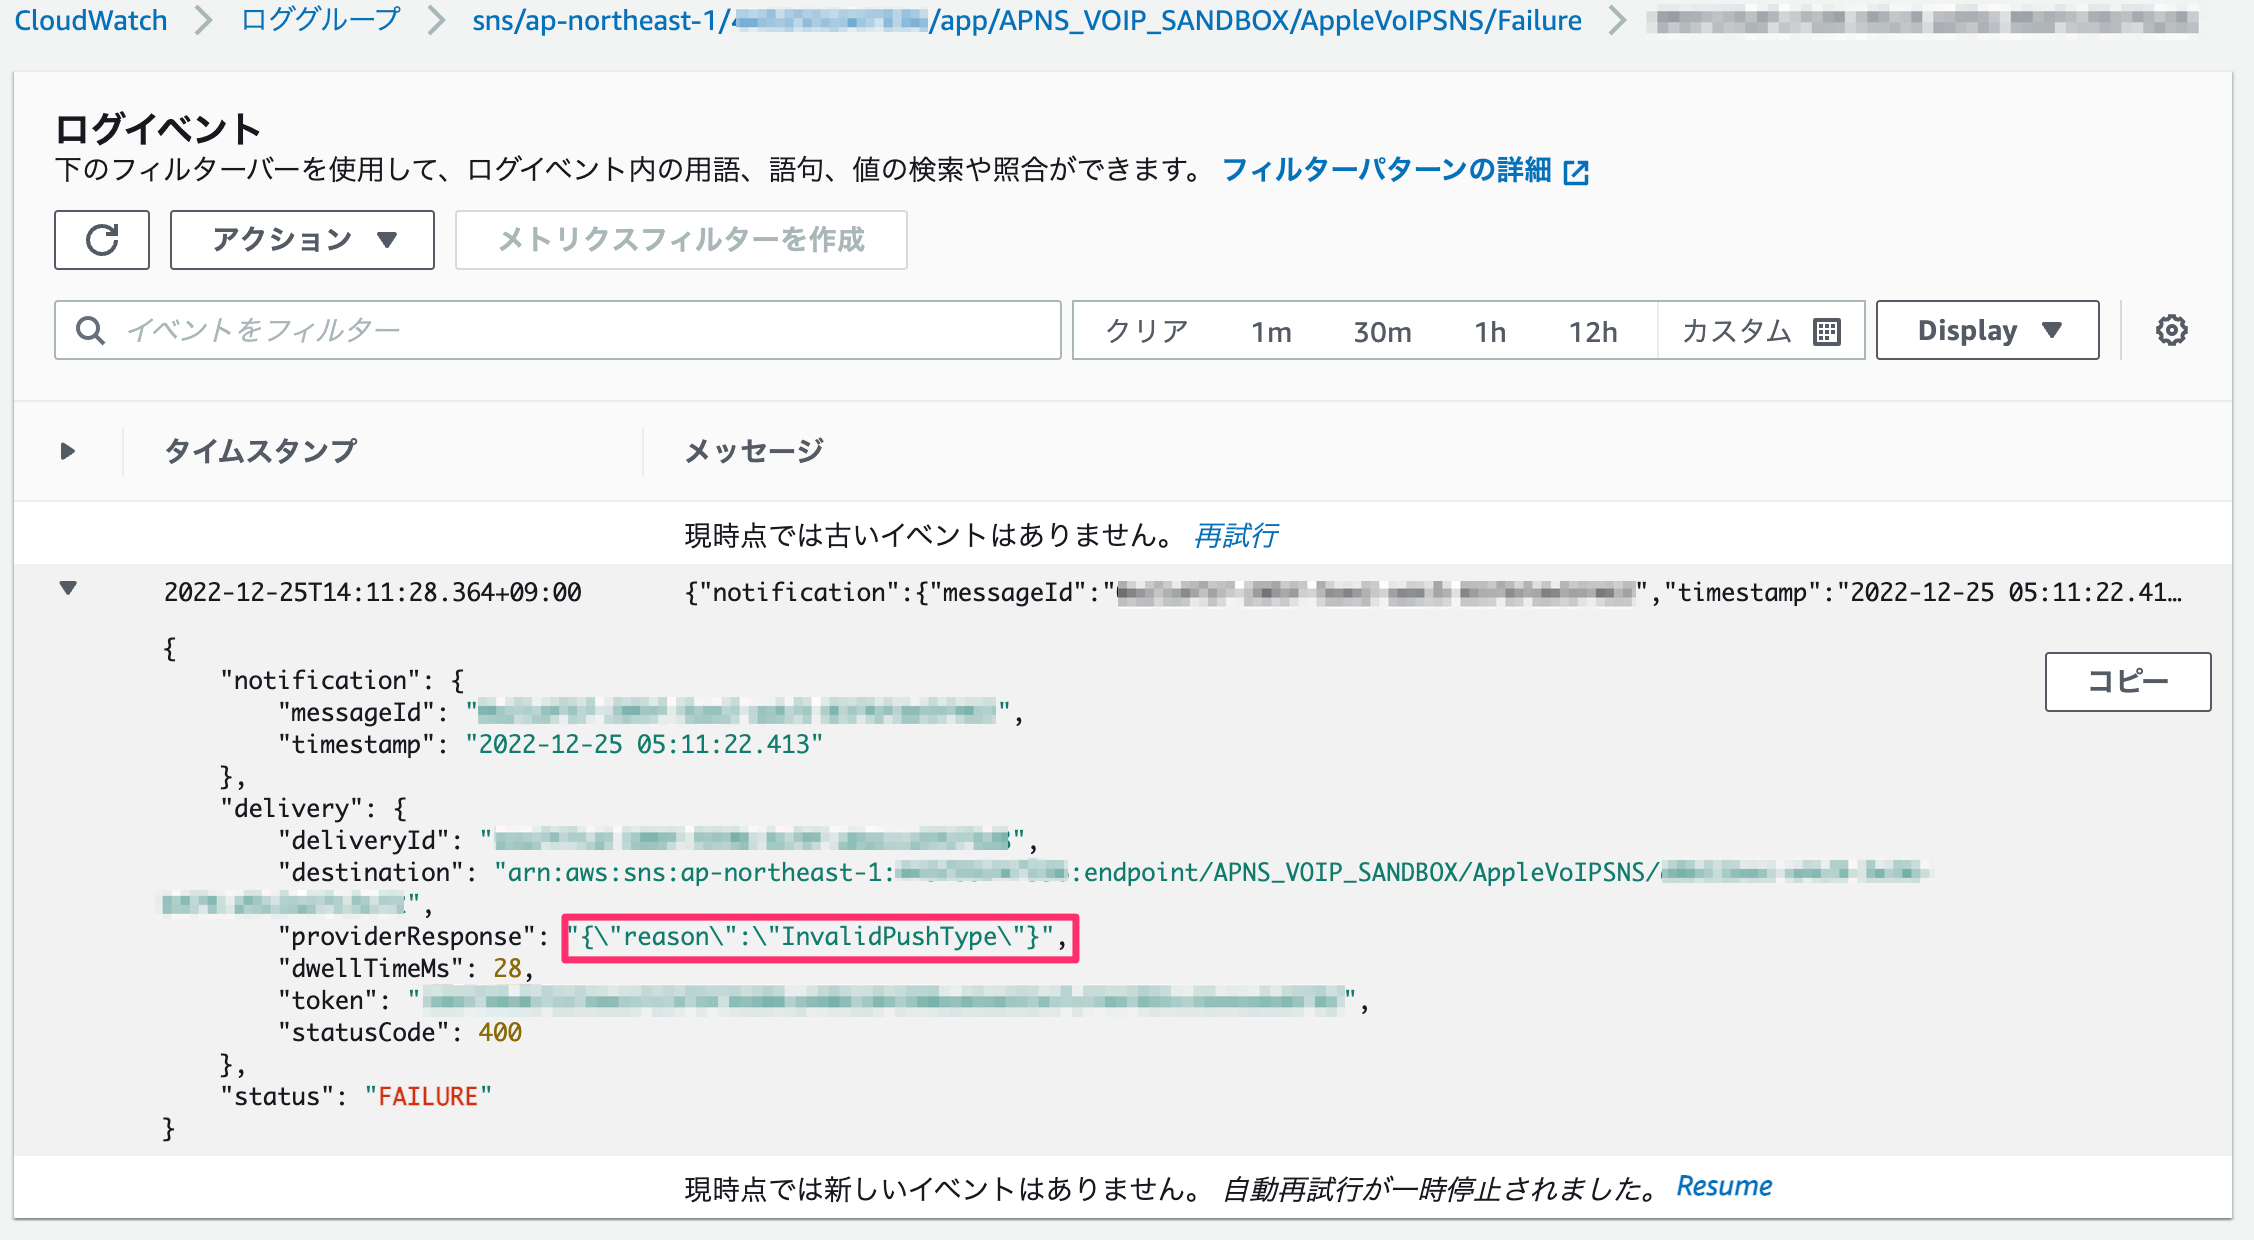
こここはあきらめてLambdaの設定に進む。LambdaからmessageAttributesのPush Typeを指定するようにする。
SNSを呼び出すLambda関数を作成
-
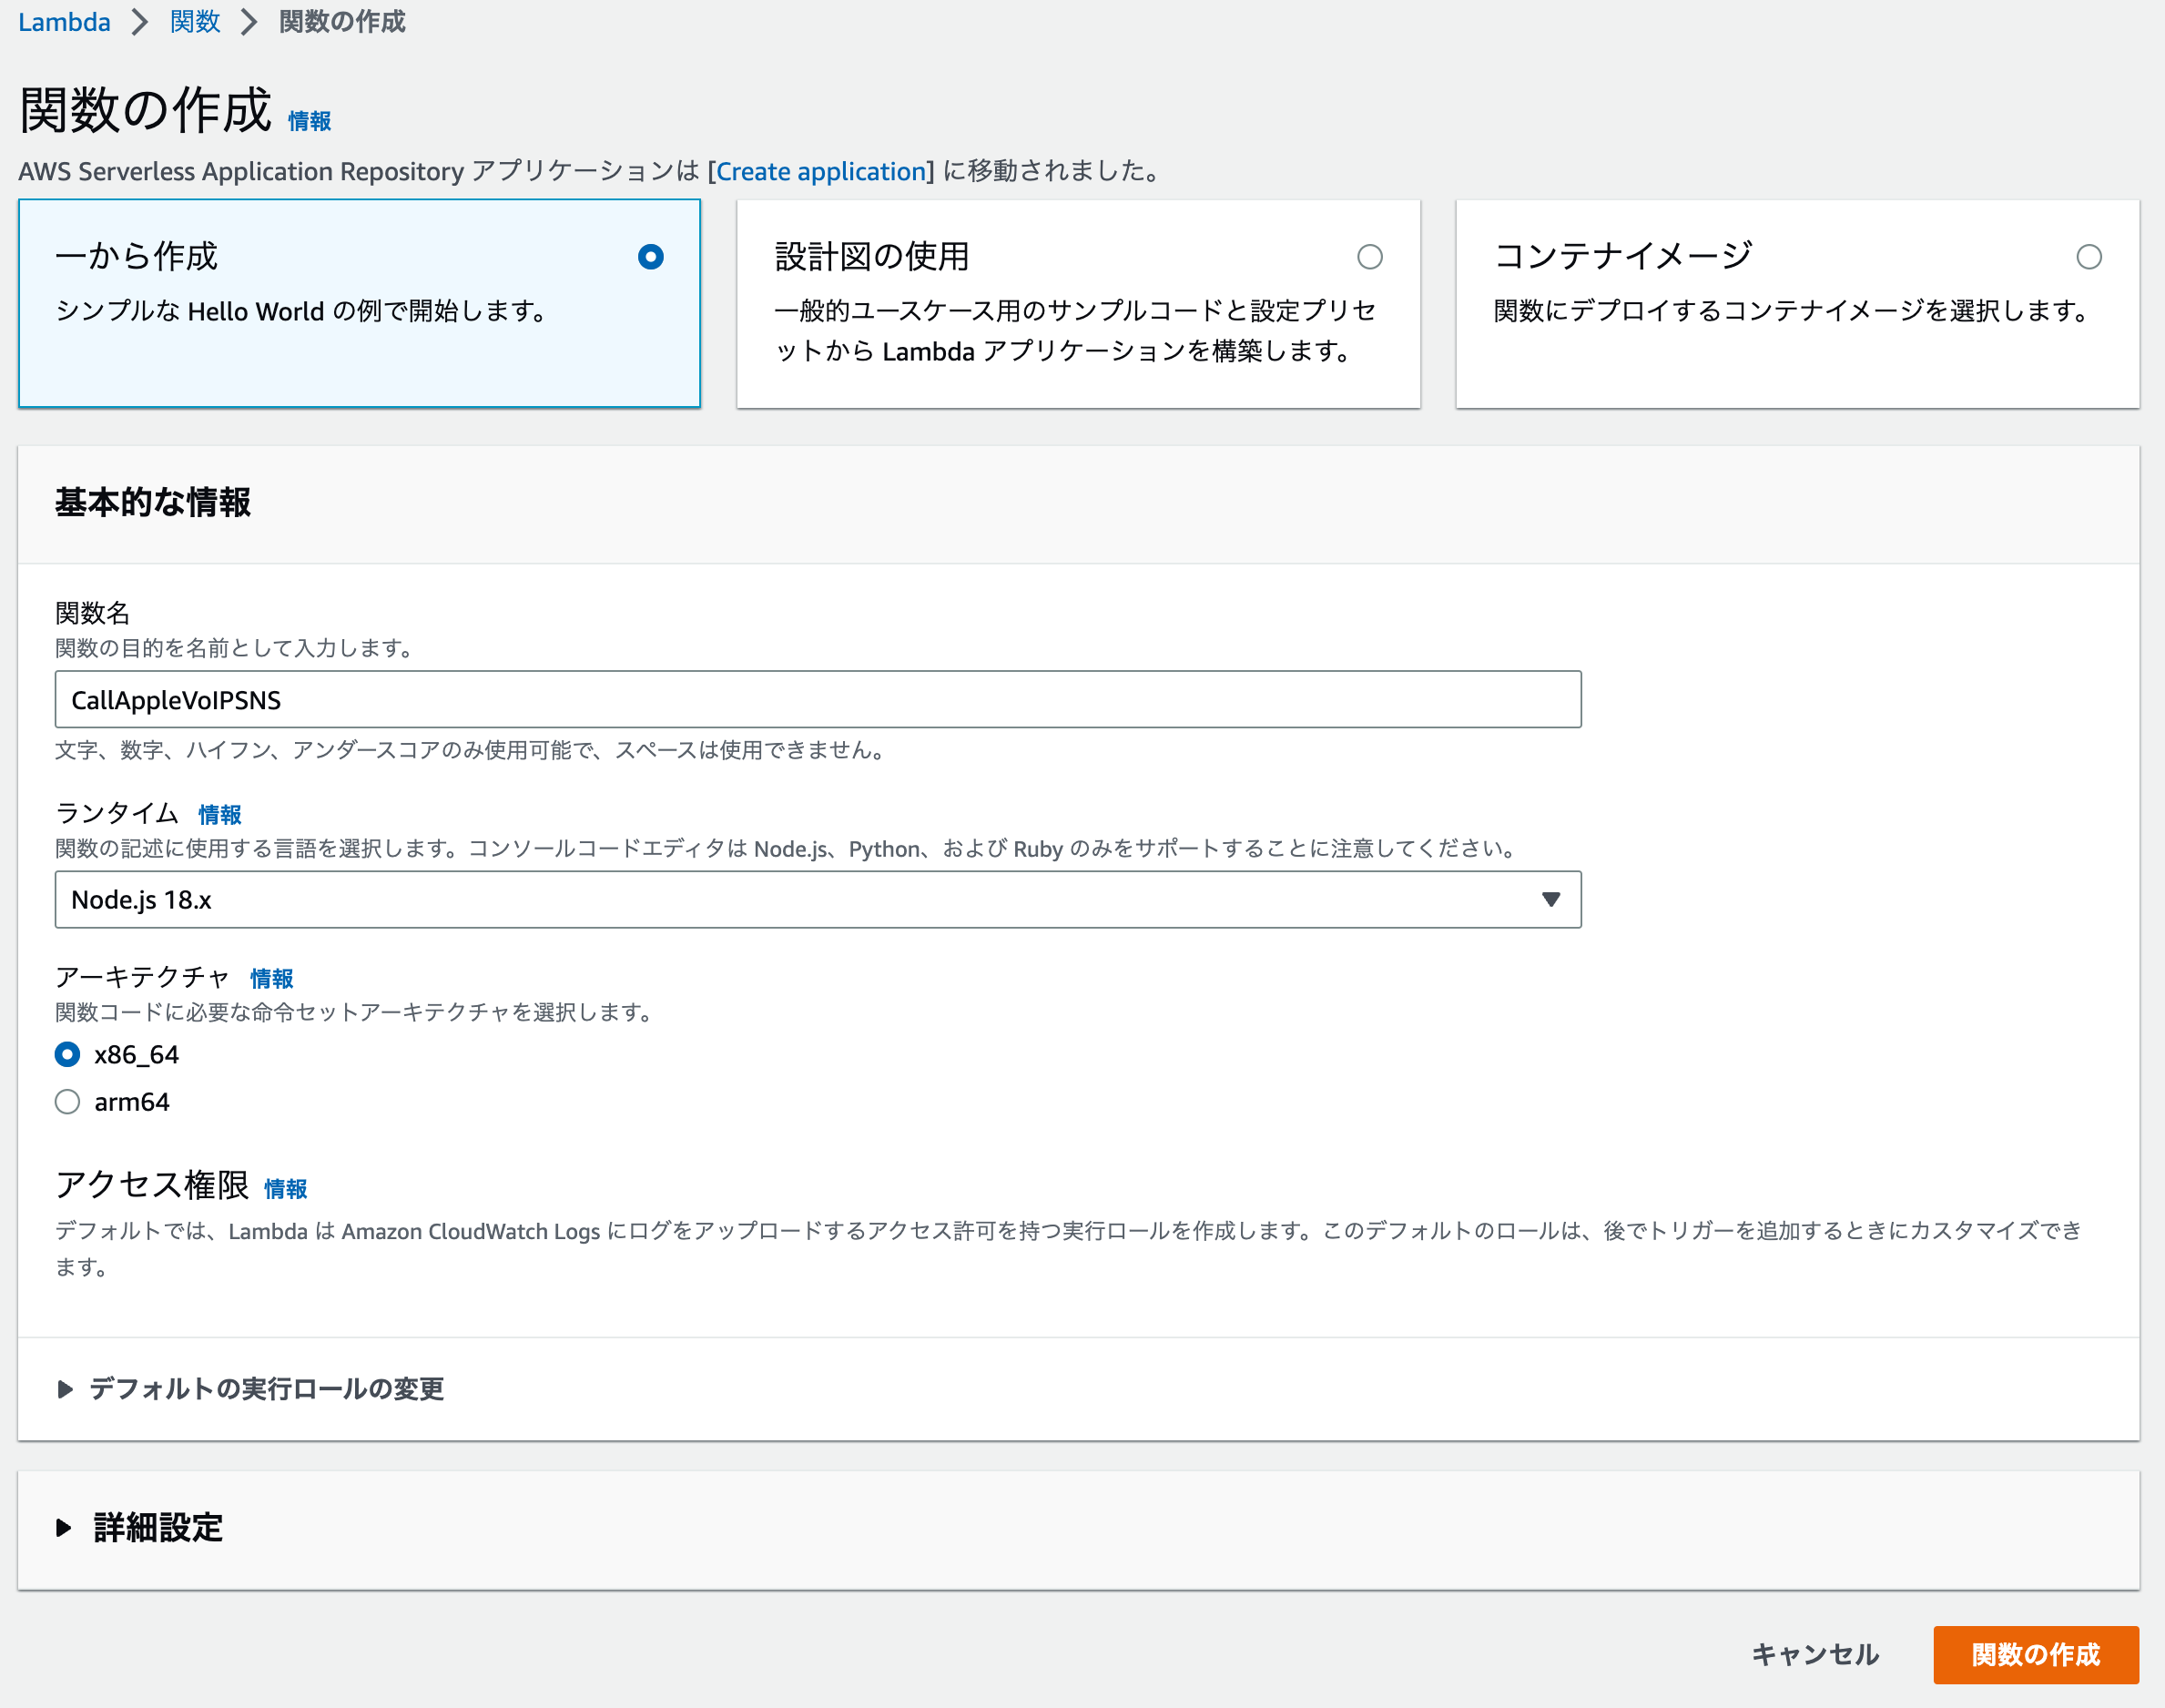
関数の作成
関数名を指定。その他はすべてデフォルト。
-
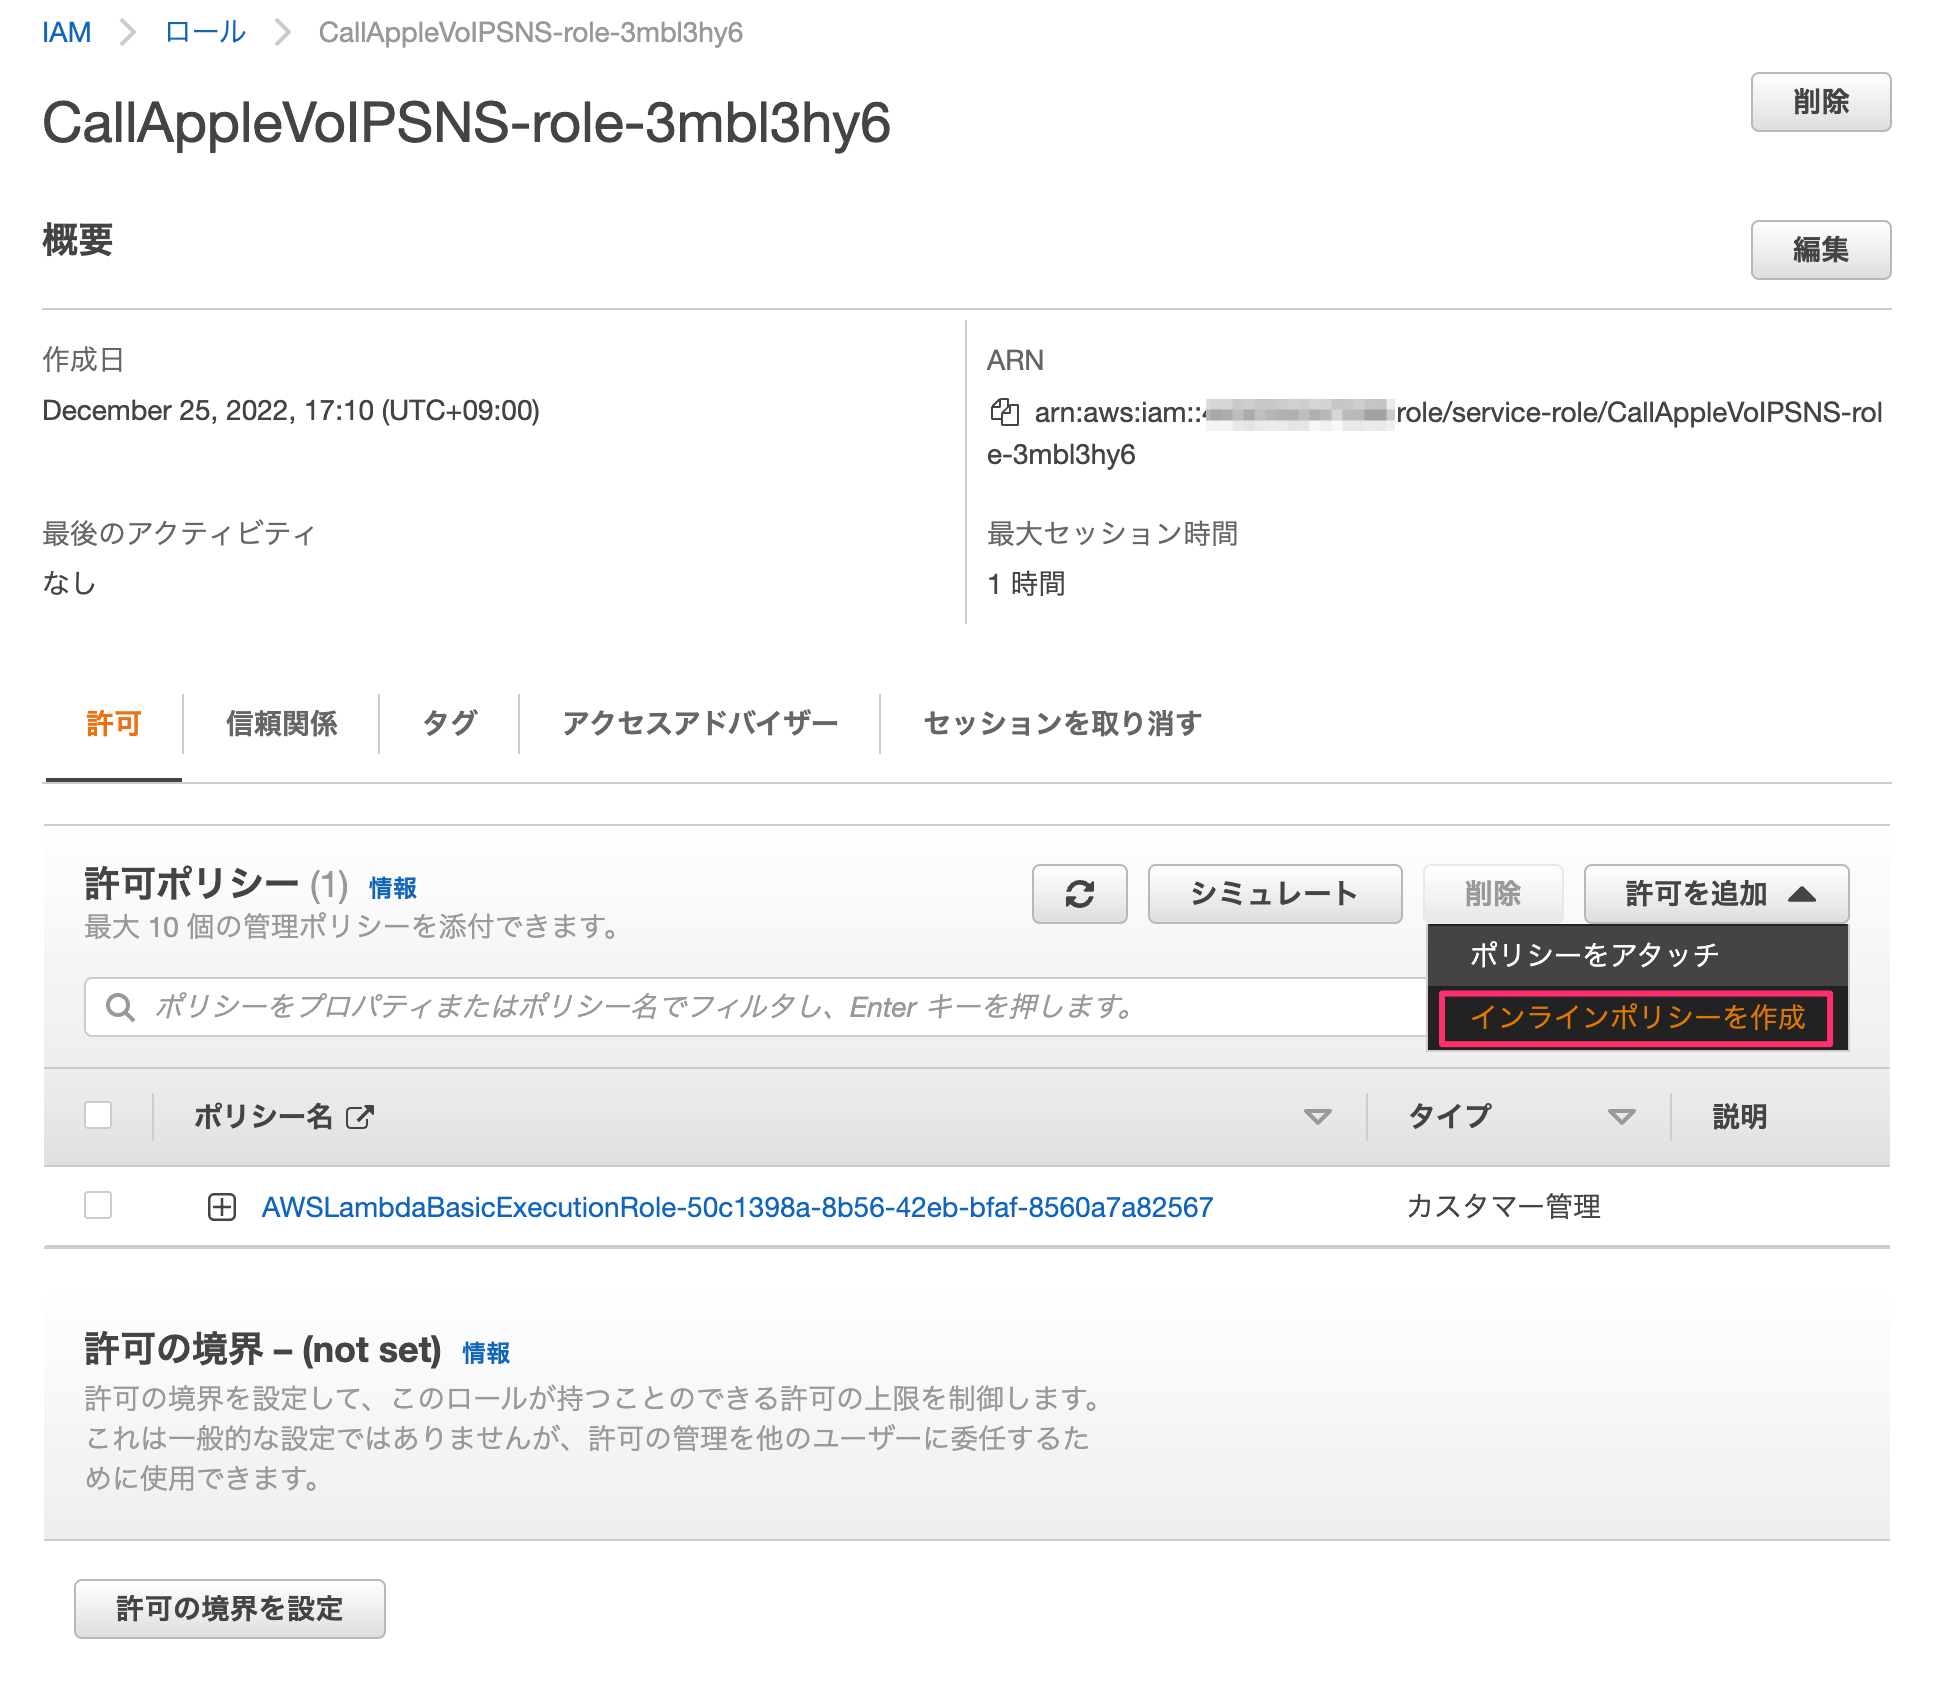
IAMでLambdaロールにSNSのアクセス権を追加
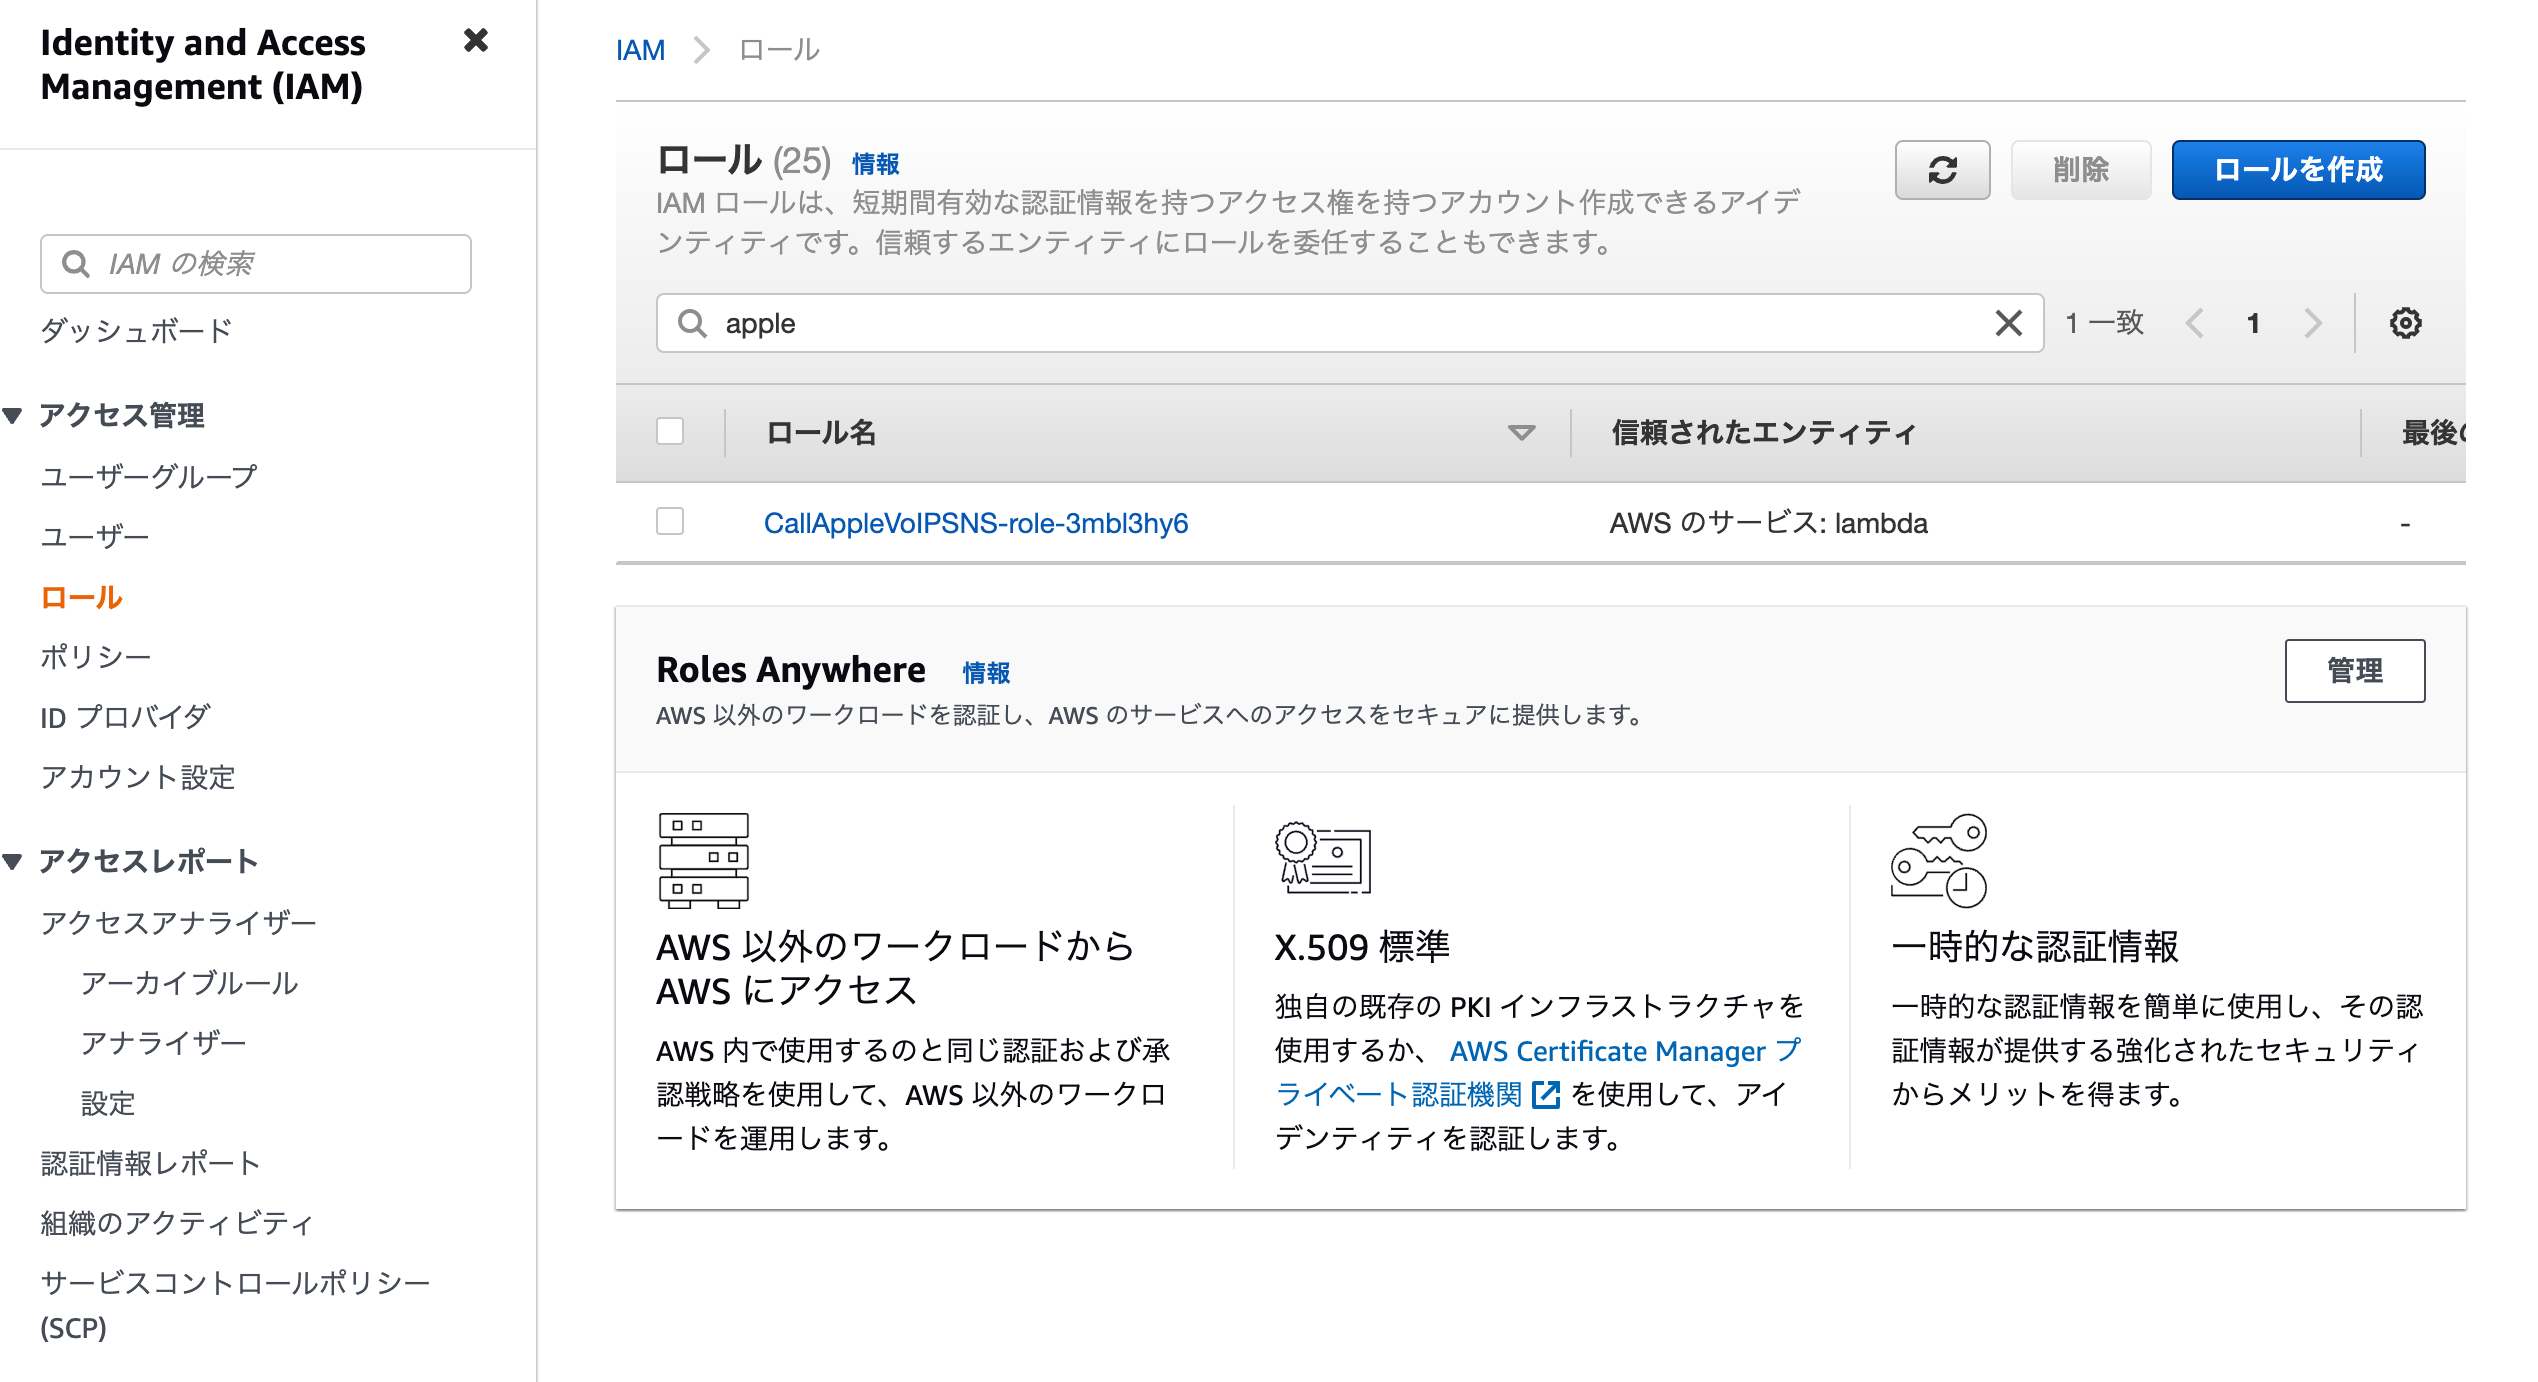
-
インラインポリシーを作成
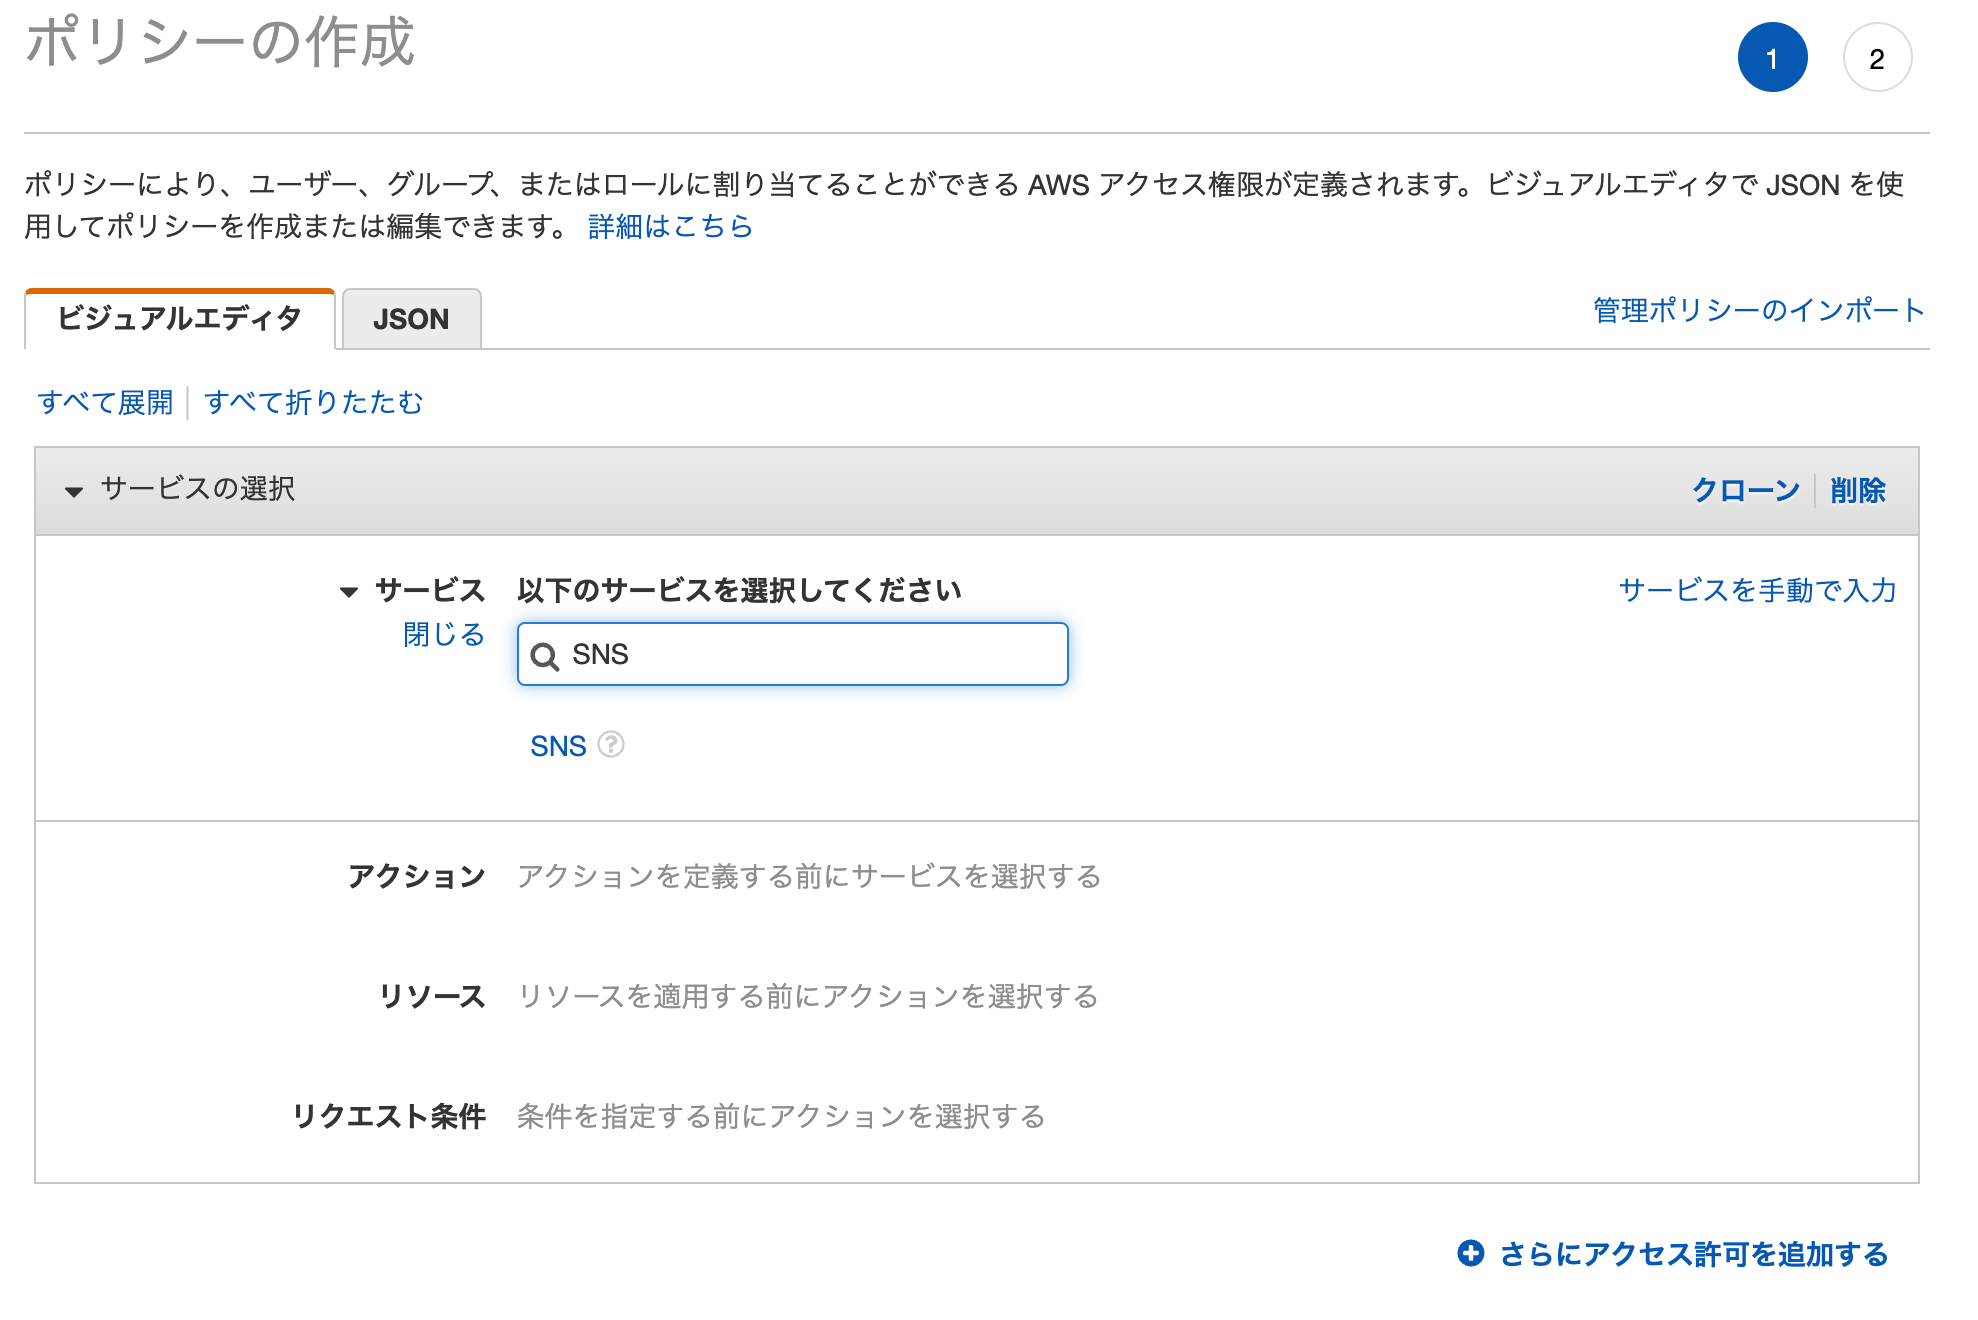
-
SNSを追加
-
Publishを選択
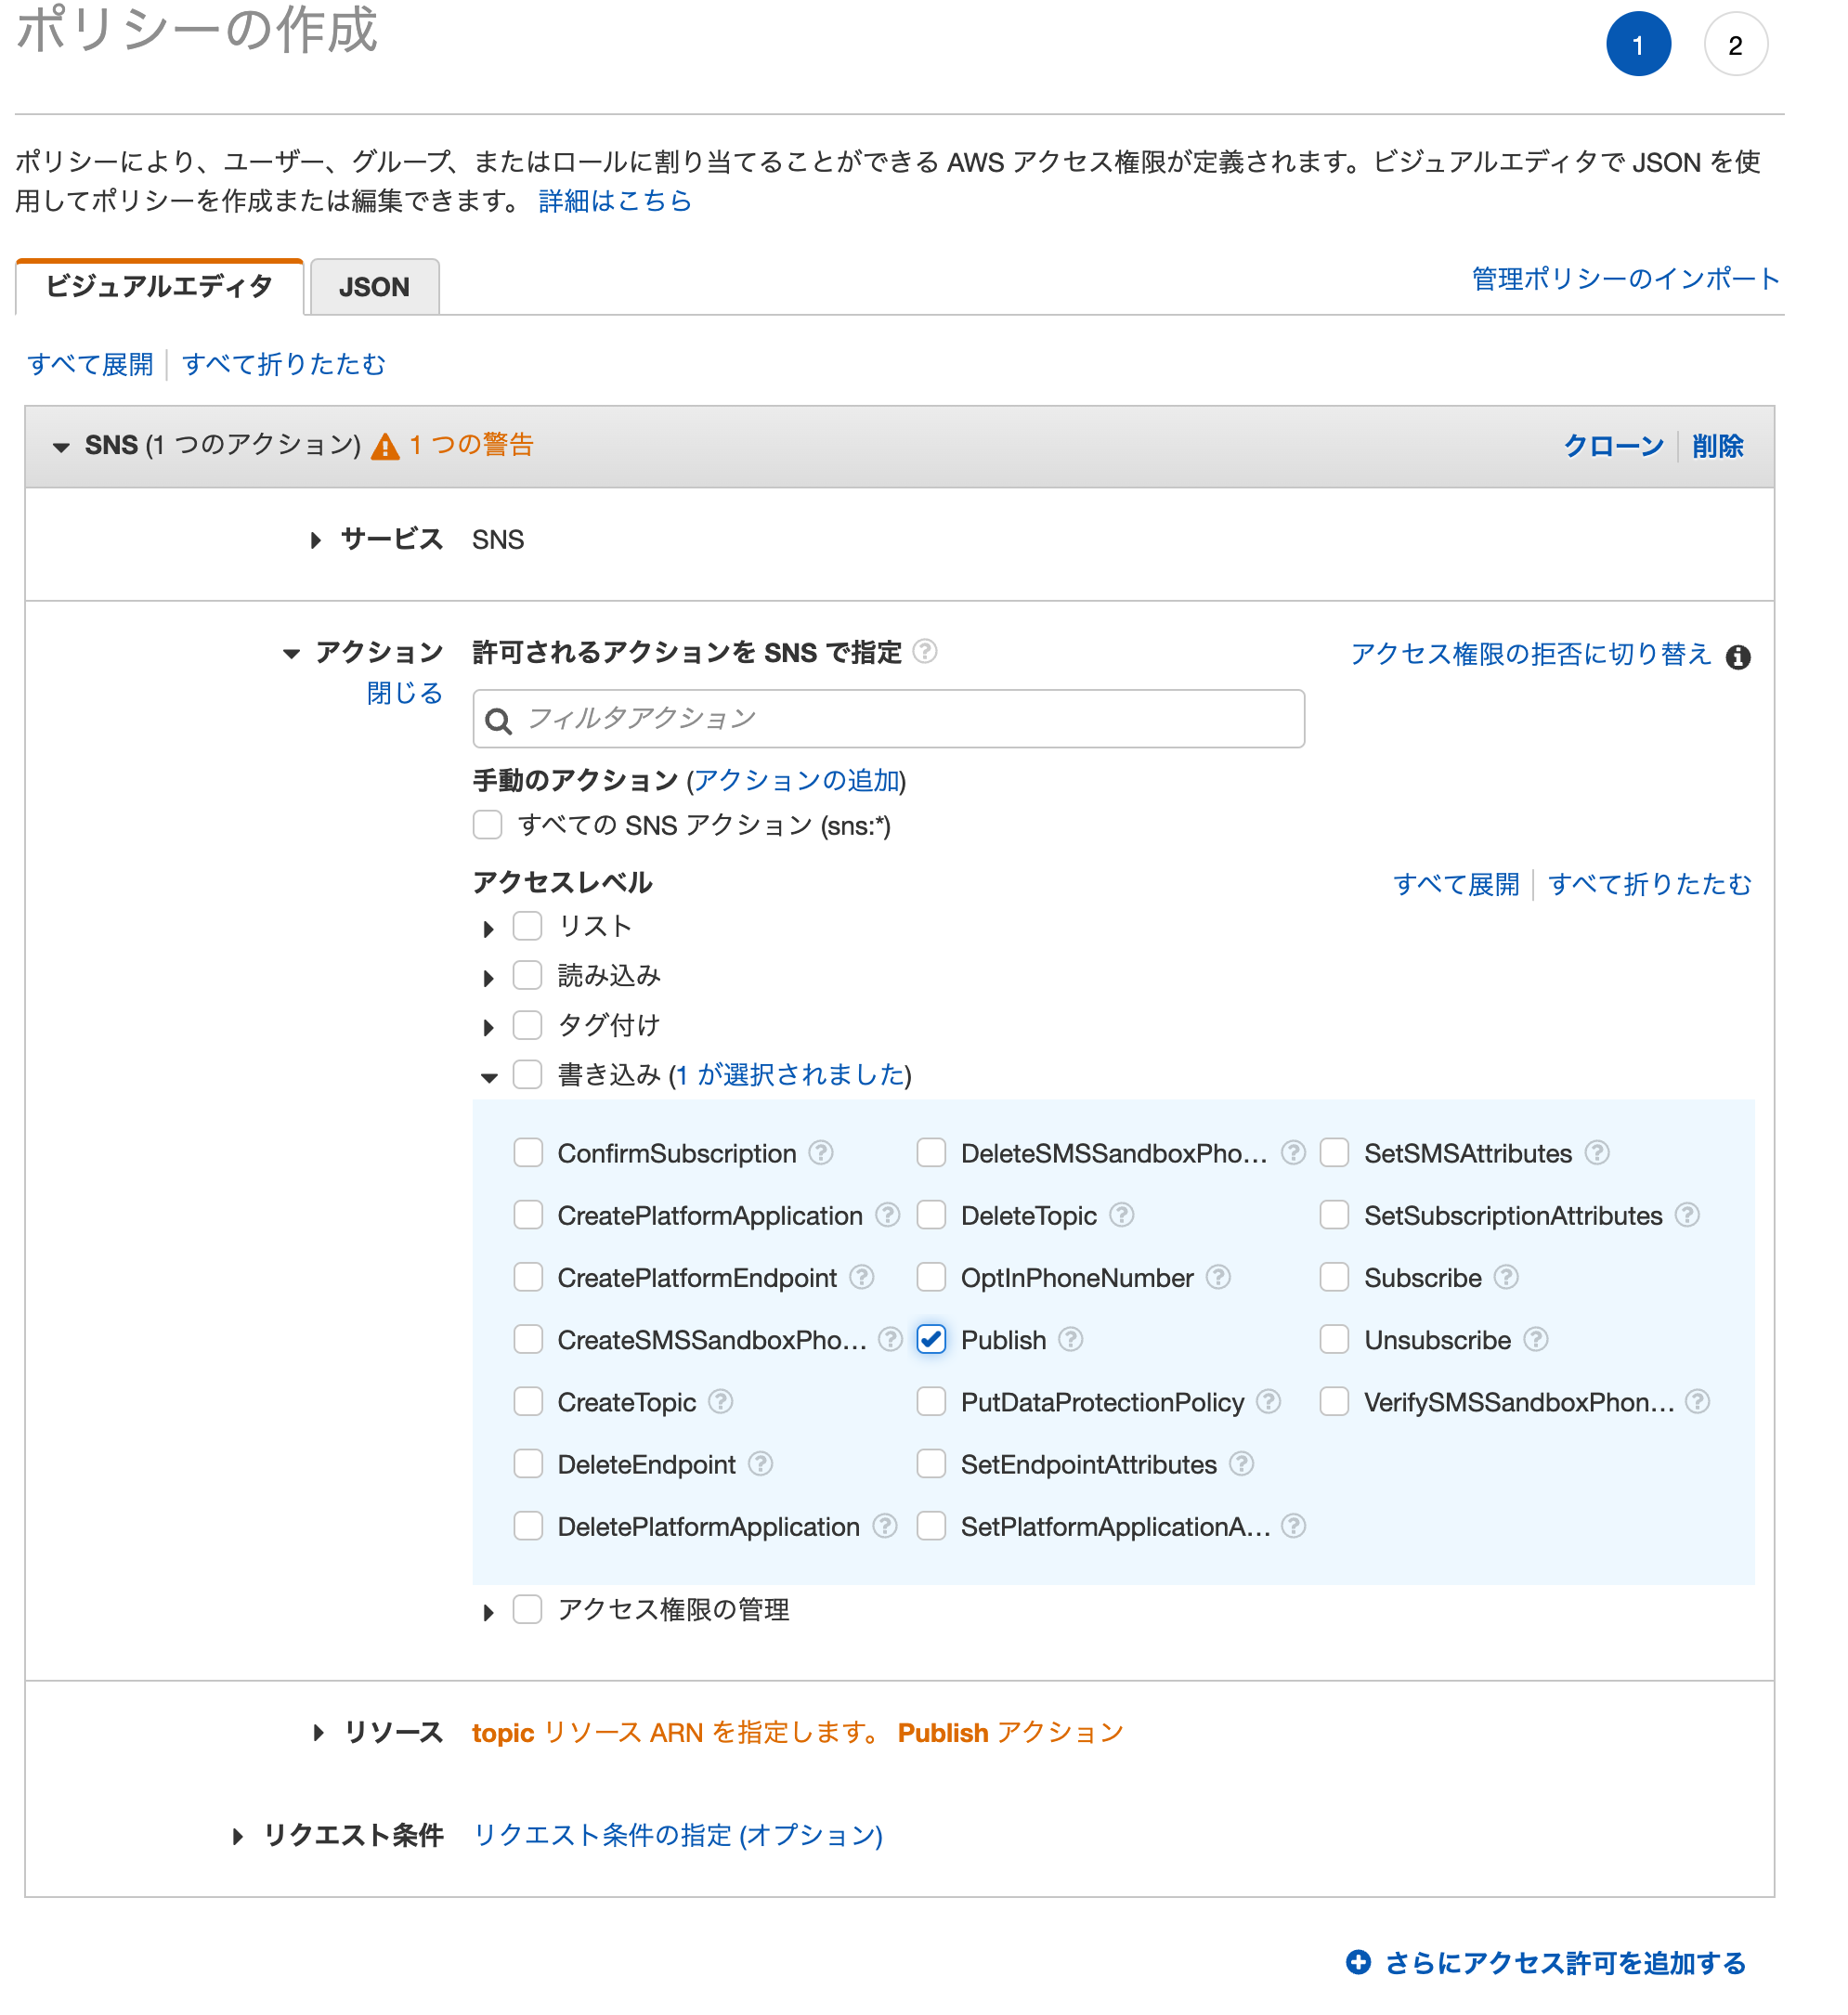
-
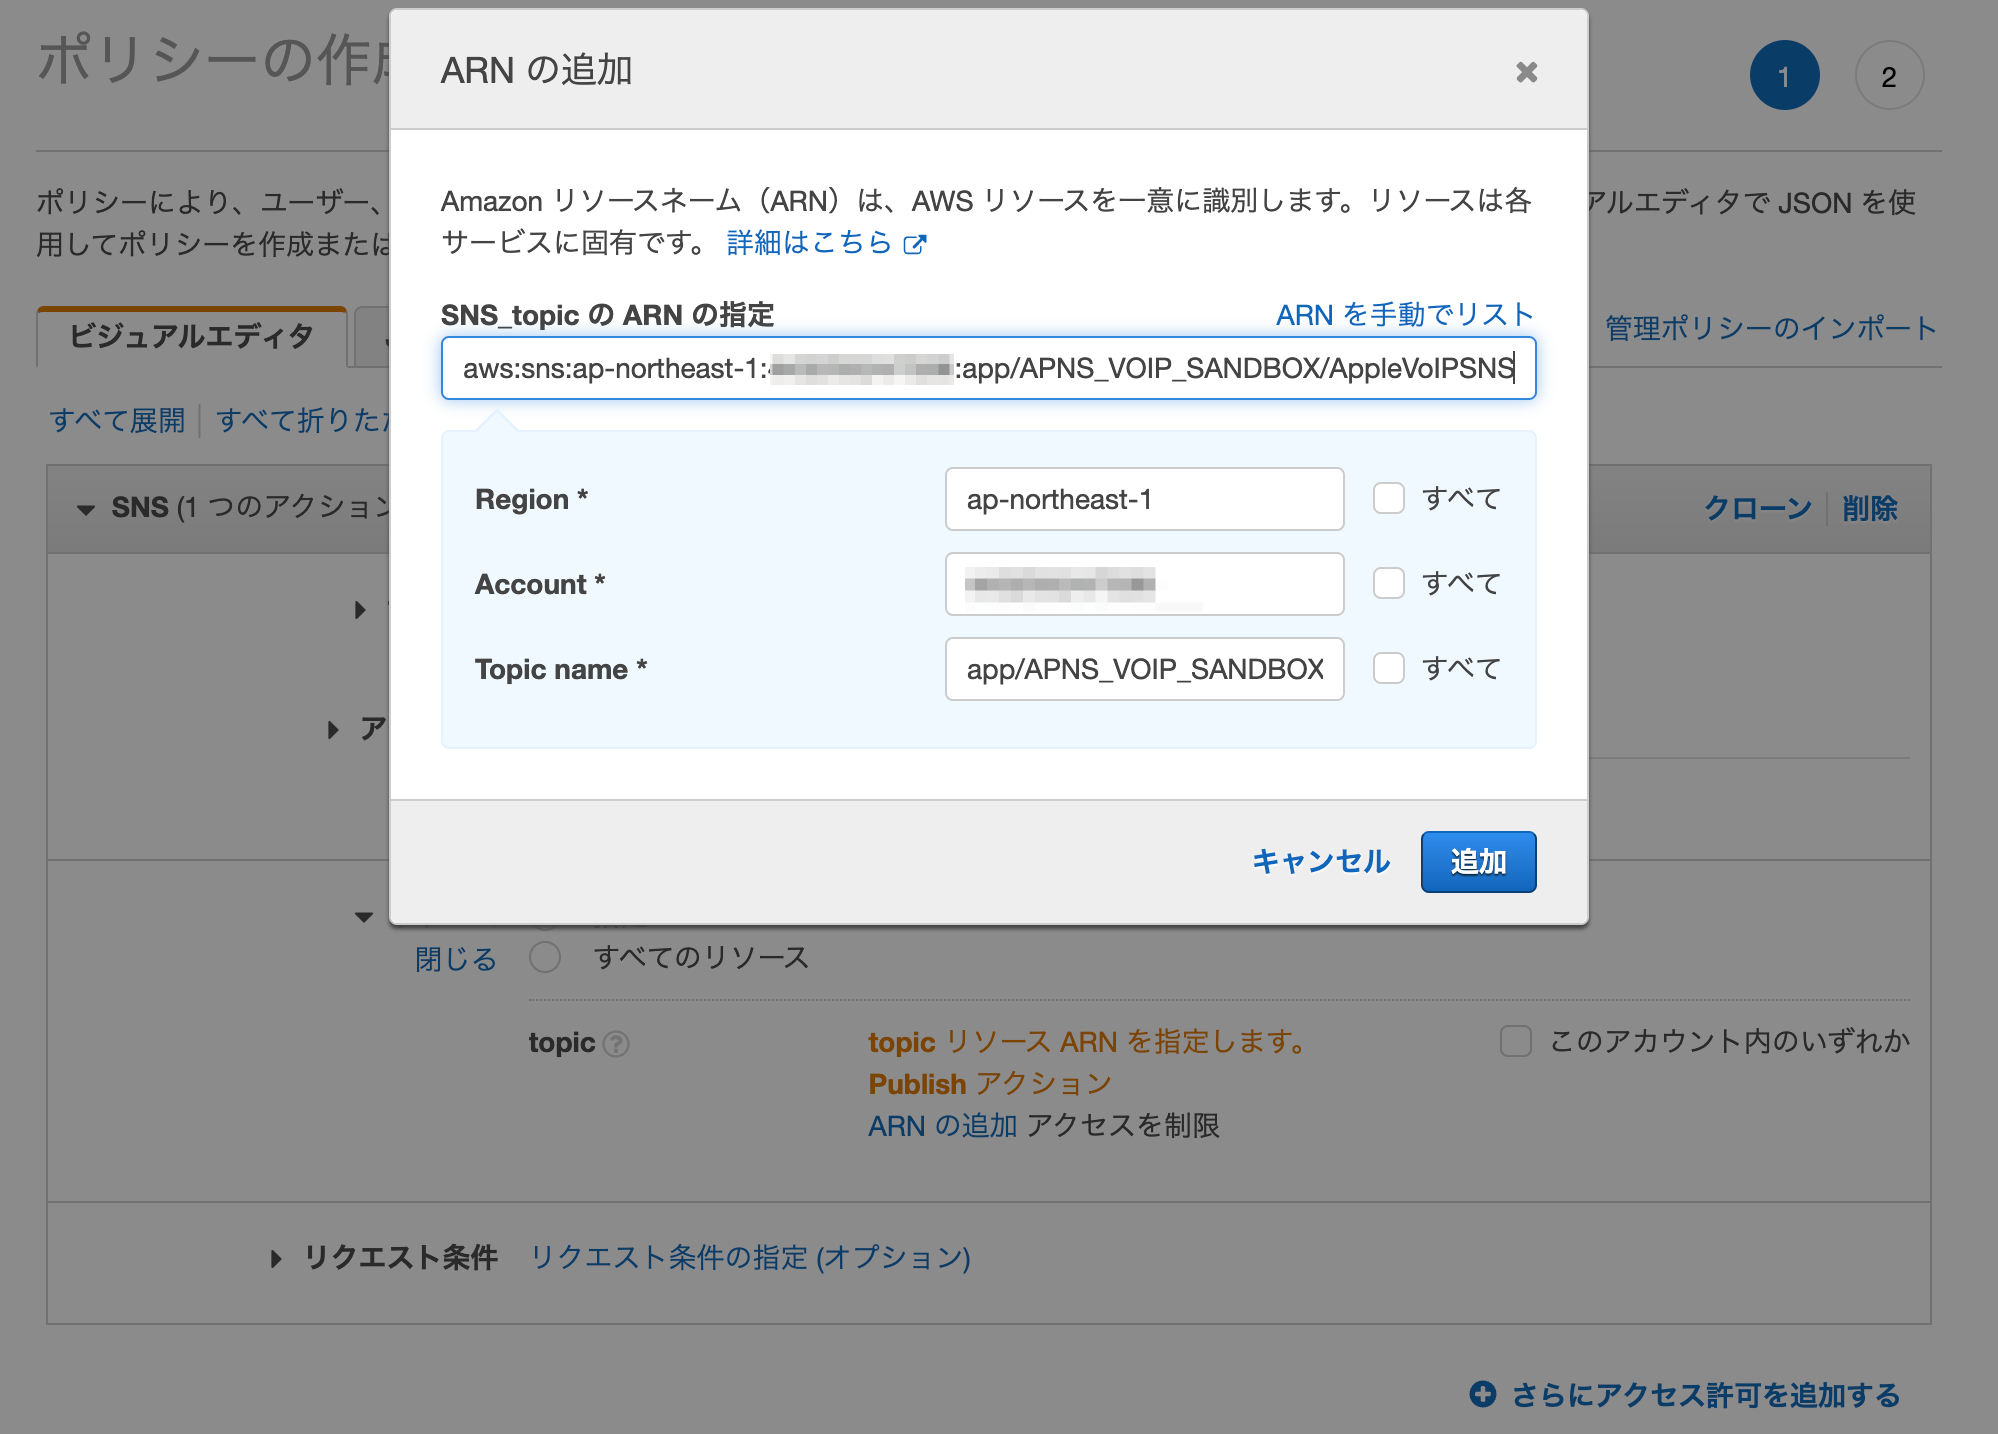
対象リソースを指定
SNSのARNを指定。
-
ポリシー名を指定
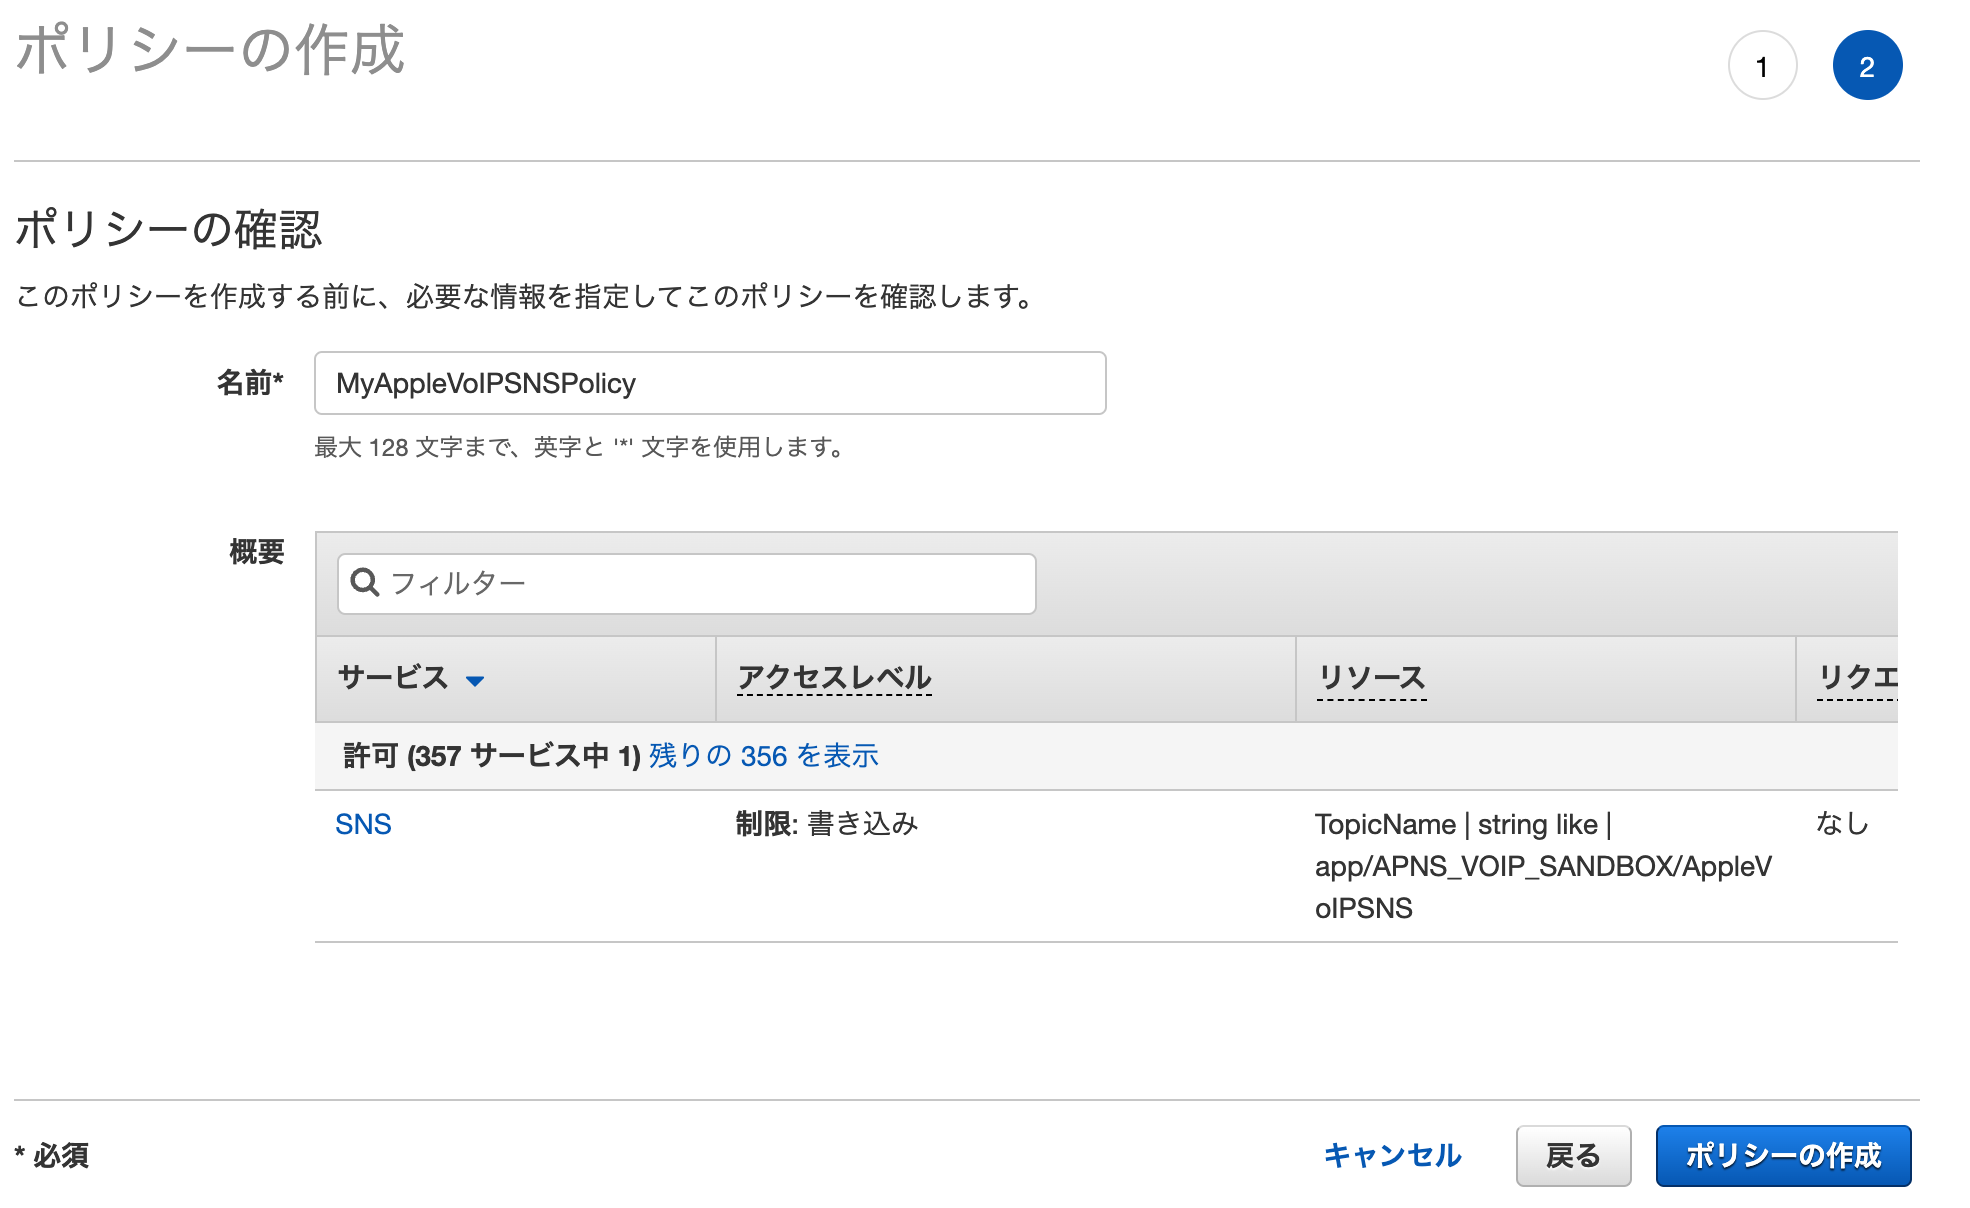
-
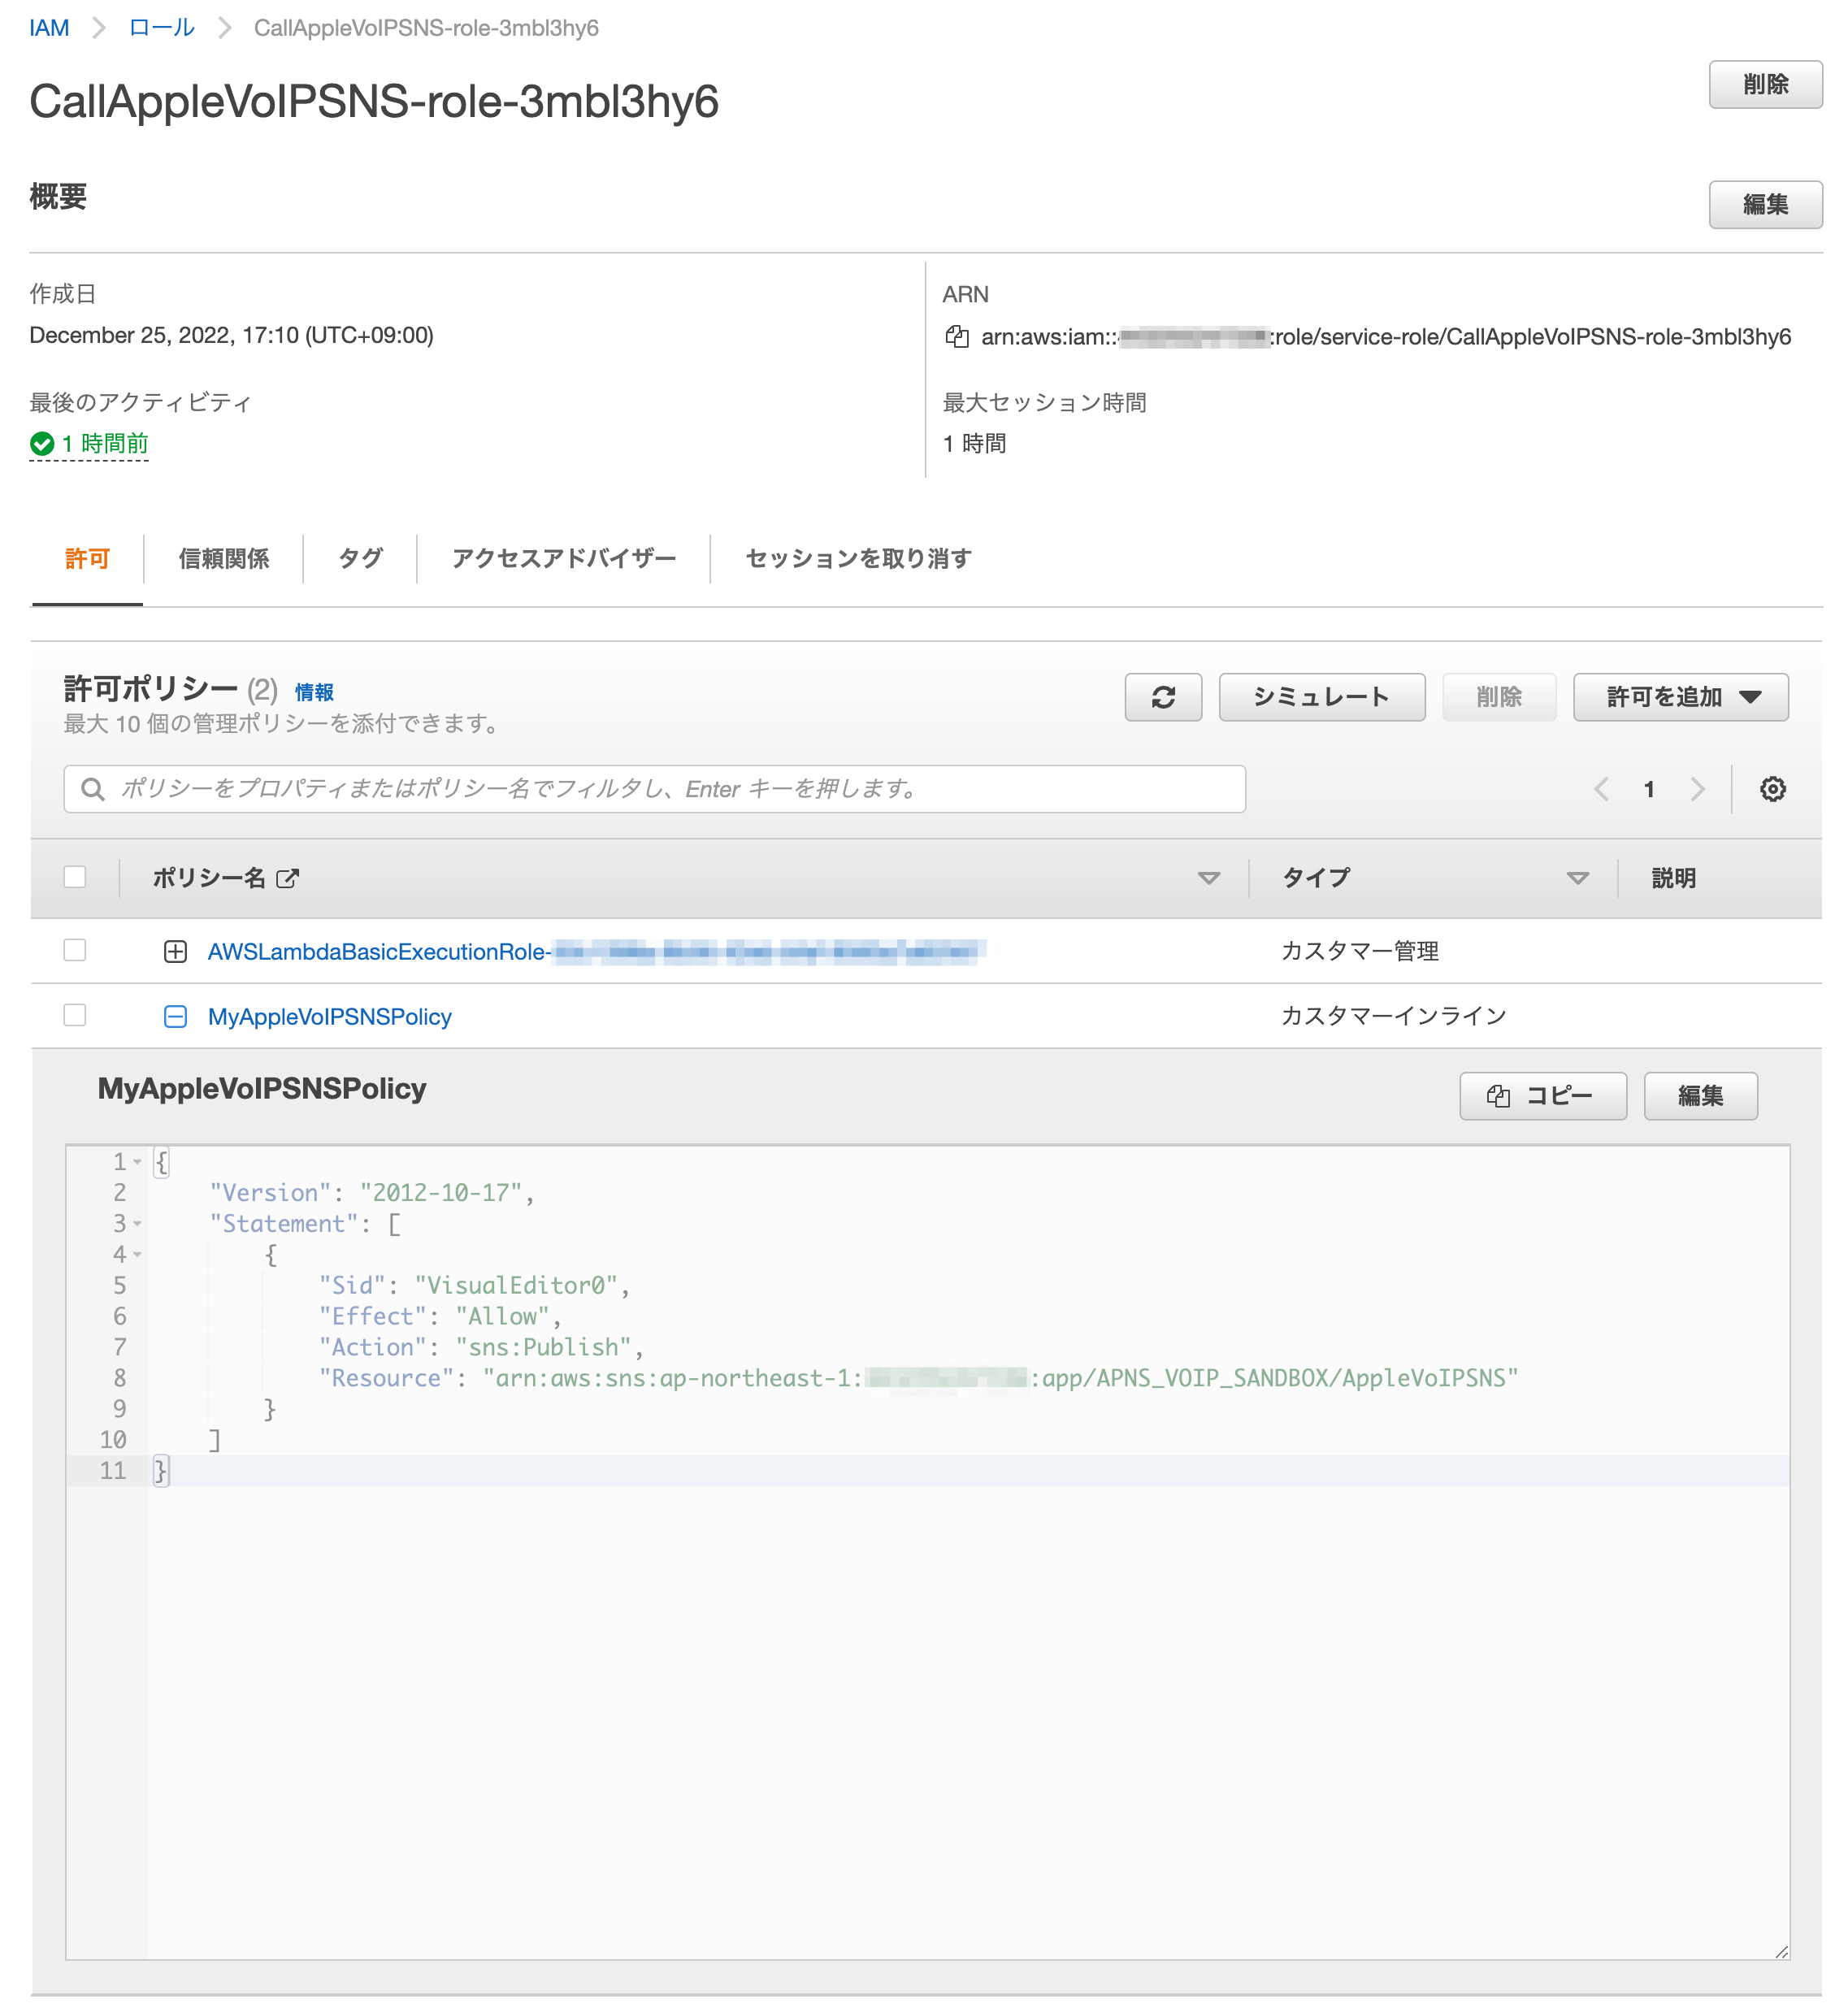
IAMの設定完了
ポリシーが追加されていることを確認。
-
Lambdaに戻ってSNSを呼び出すコードを実装
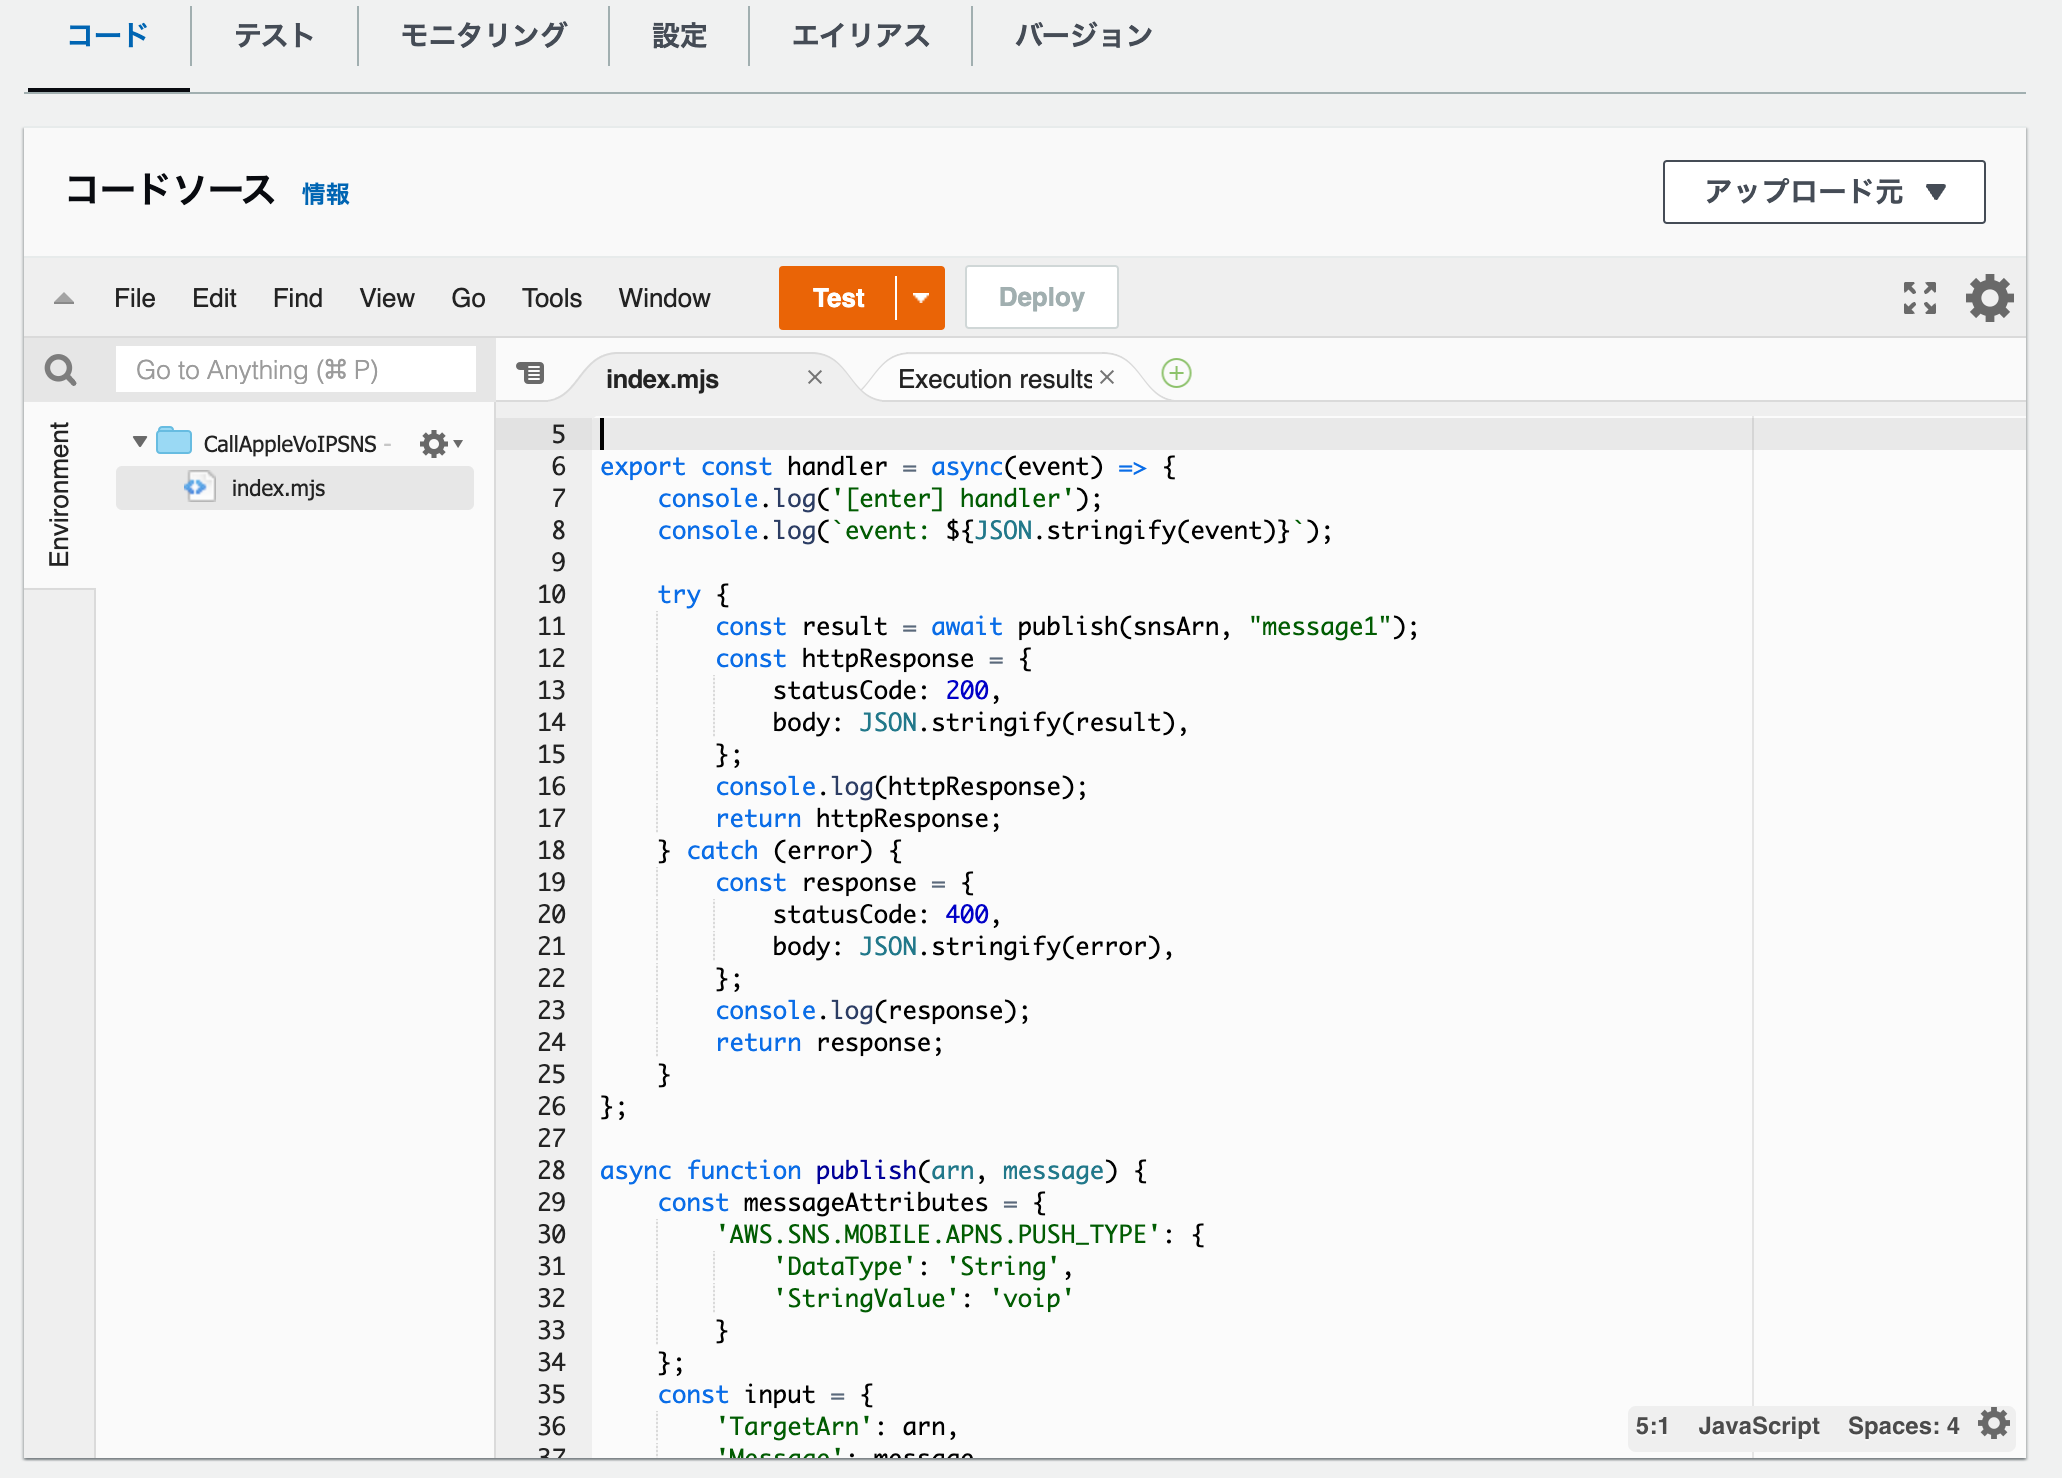 index.mjs
import { SNSClient, PublishCommand } from "@aws-sdk/client-sns"; const client = new SNSClient(); const snsArn = 'arn:aws:sns:ap-northeast-1:XXXXXXXXXXXX:endpoint/APNS_VOIP_SANDBOX/AppleVoIPSNS/XXXXXXXX-XXXX-XXXX-XXXX-XXXXXXXXXXXX'; export const handler = async(event) => { console.log('[enter] handler'); console.log(`event: ${JSON.stringify(event)}`); try { const result = await publish(snsArn, "message1"); const httpResponse = { statusCode: 200, body: JSON.stringify(result), }; console.log(httpResponse); return httpResponse; } catch (error) { const response = { statusCode: 400, body: JSON.stringify(error), }; console.log(response); return response; } }; async function publish(arn, message) { const messageAttributes = { 'AWS.SNS.MOBILE.APNS.PUSH_TYPE': { 'DataType': 'String', 'StringValue': 'voip' } }; const input = { 'TargetArn': arn, 'Message': message, 'Subject': 'subject1', 'MessageAttributes': messageAttributes }; const command = new PublishCommand(input); const response = await client.send(command); return response; } -
テスト実行
デプロイしてTestをクリック -
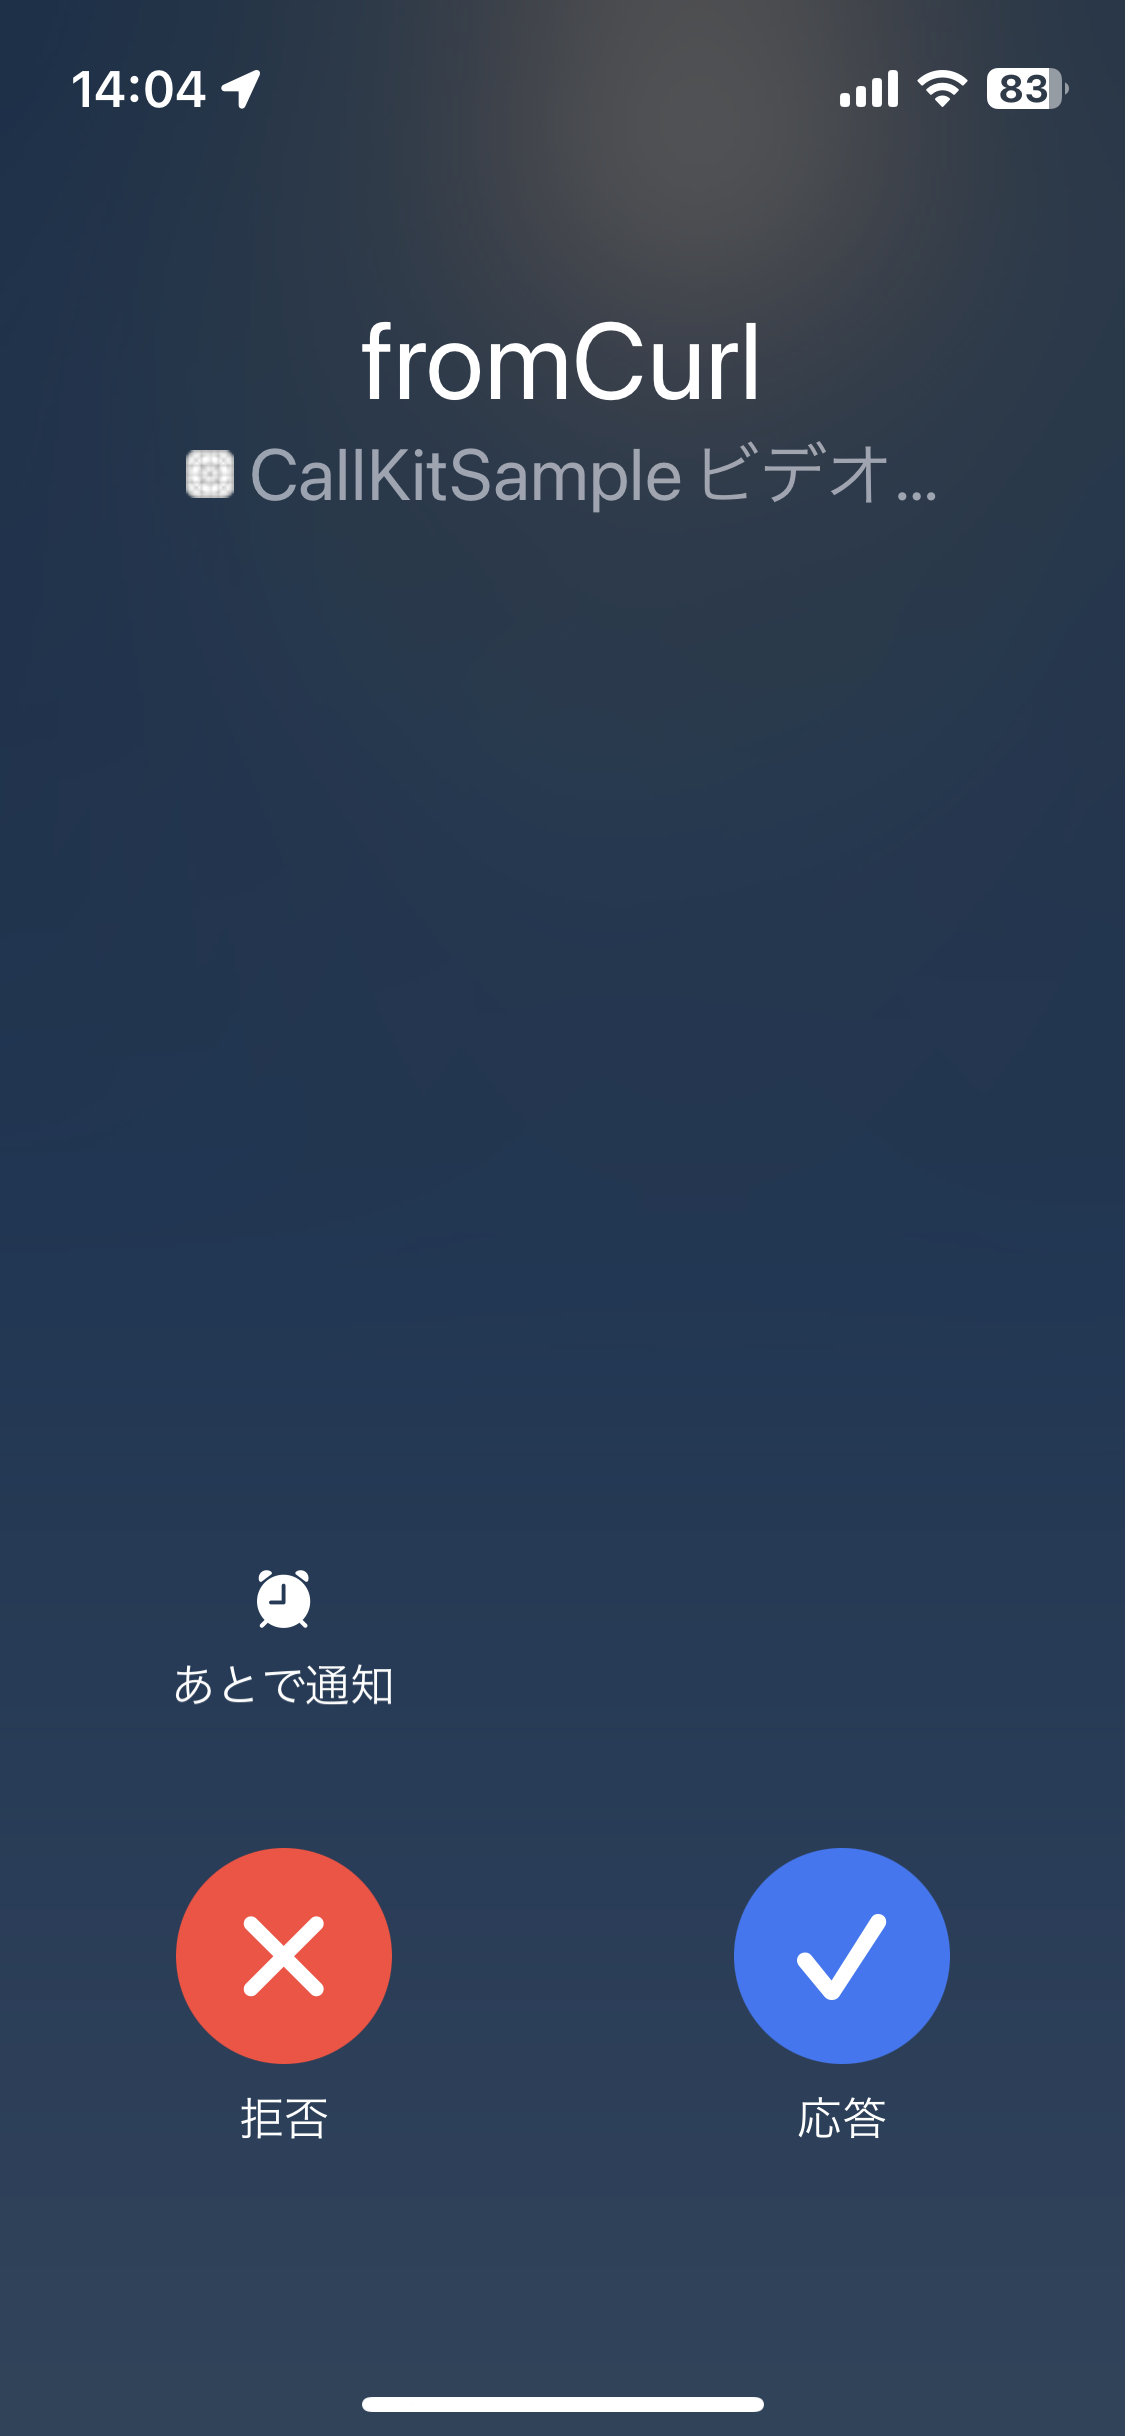
iPhoneに着信したら成功

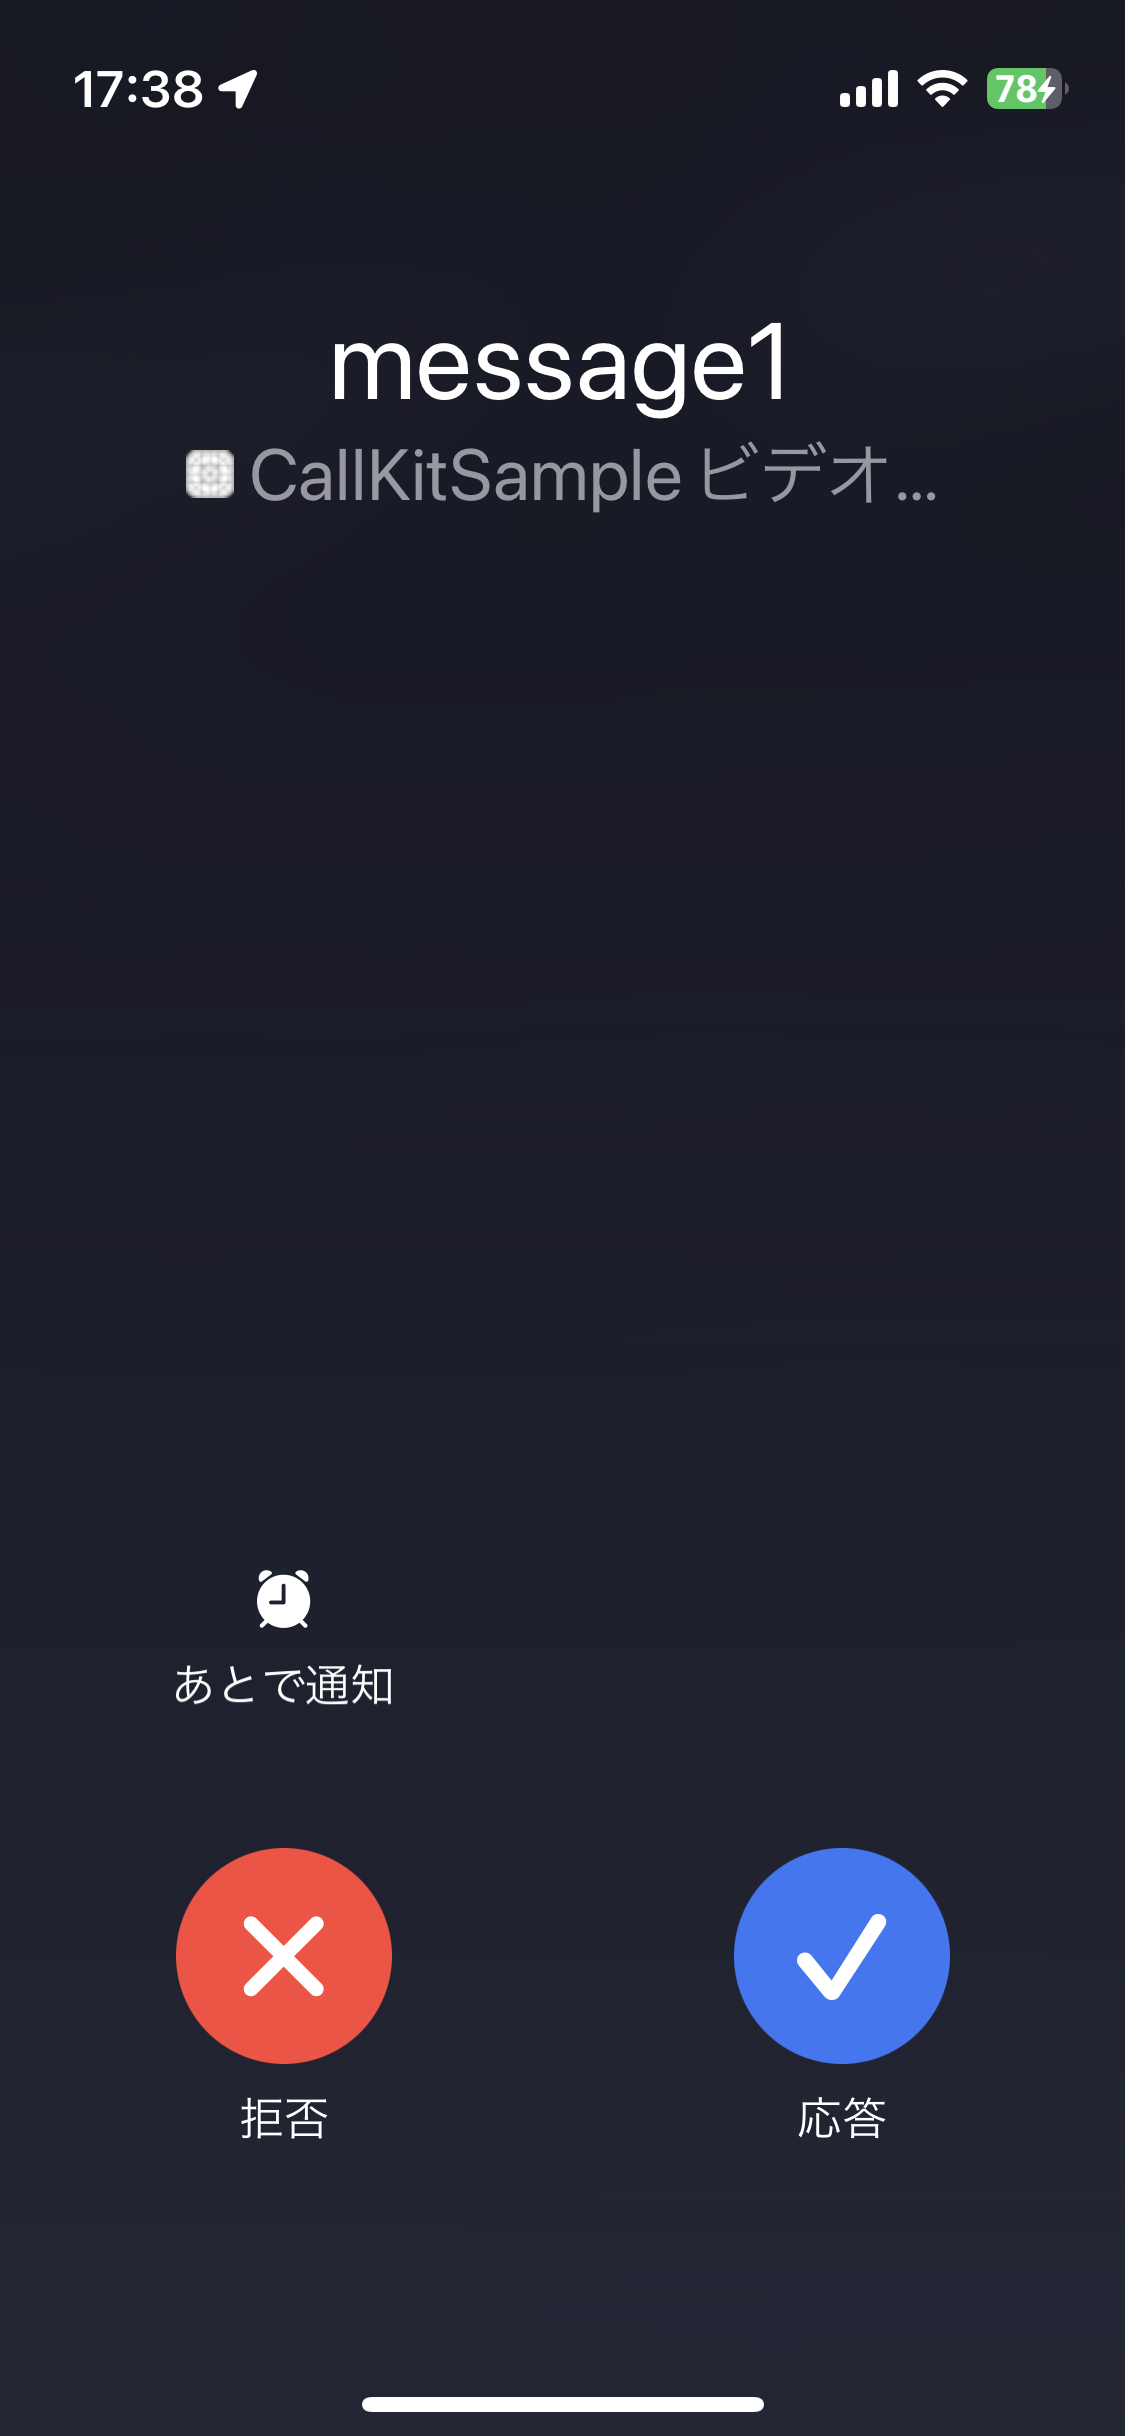
API Gatewayの作成
-
REST APIの作成
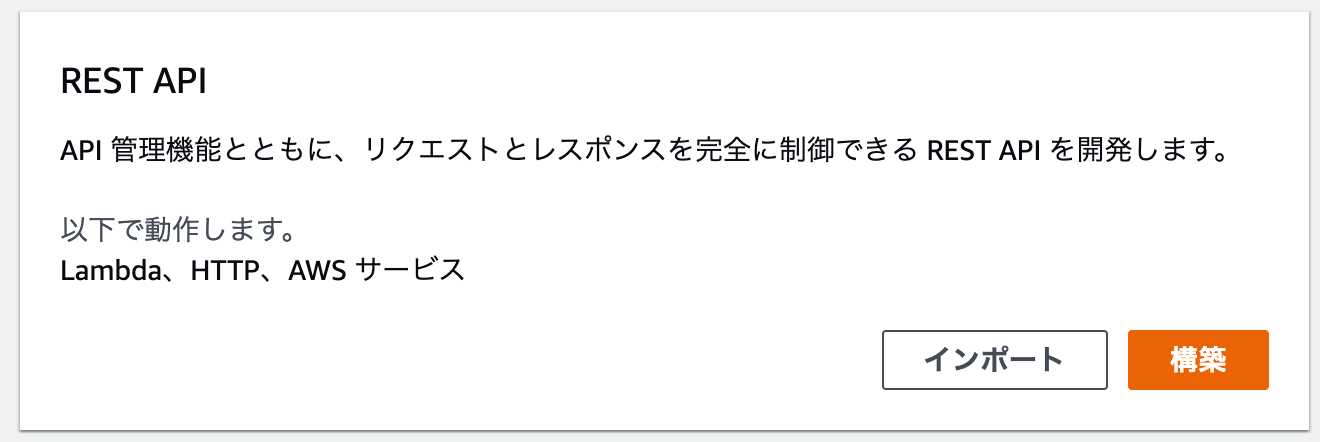
-
新しいAPIの作成

-
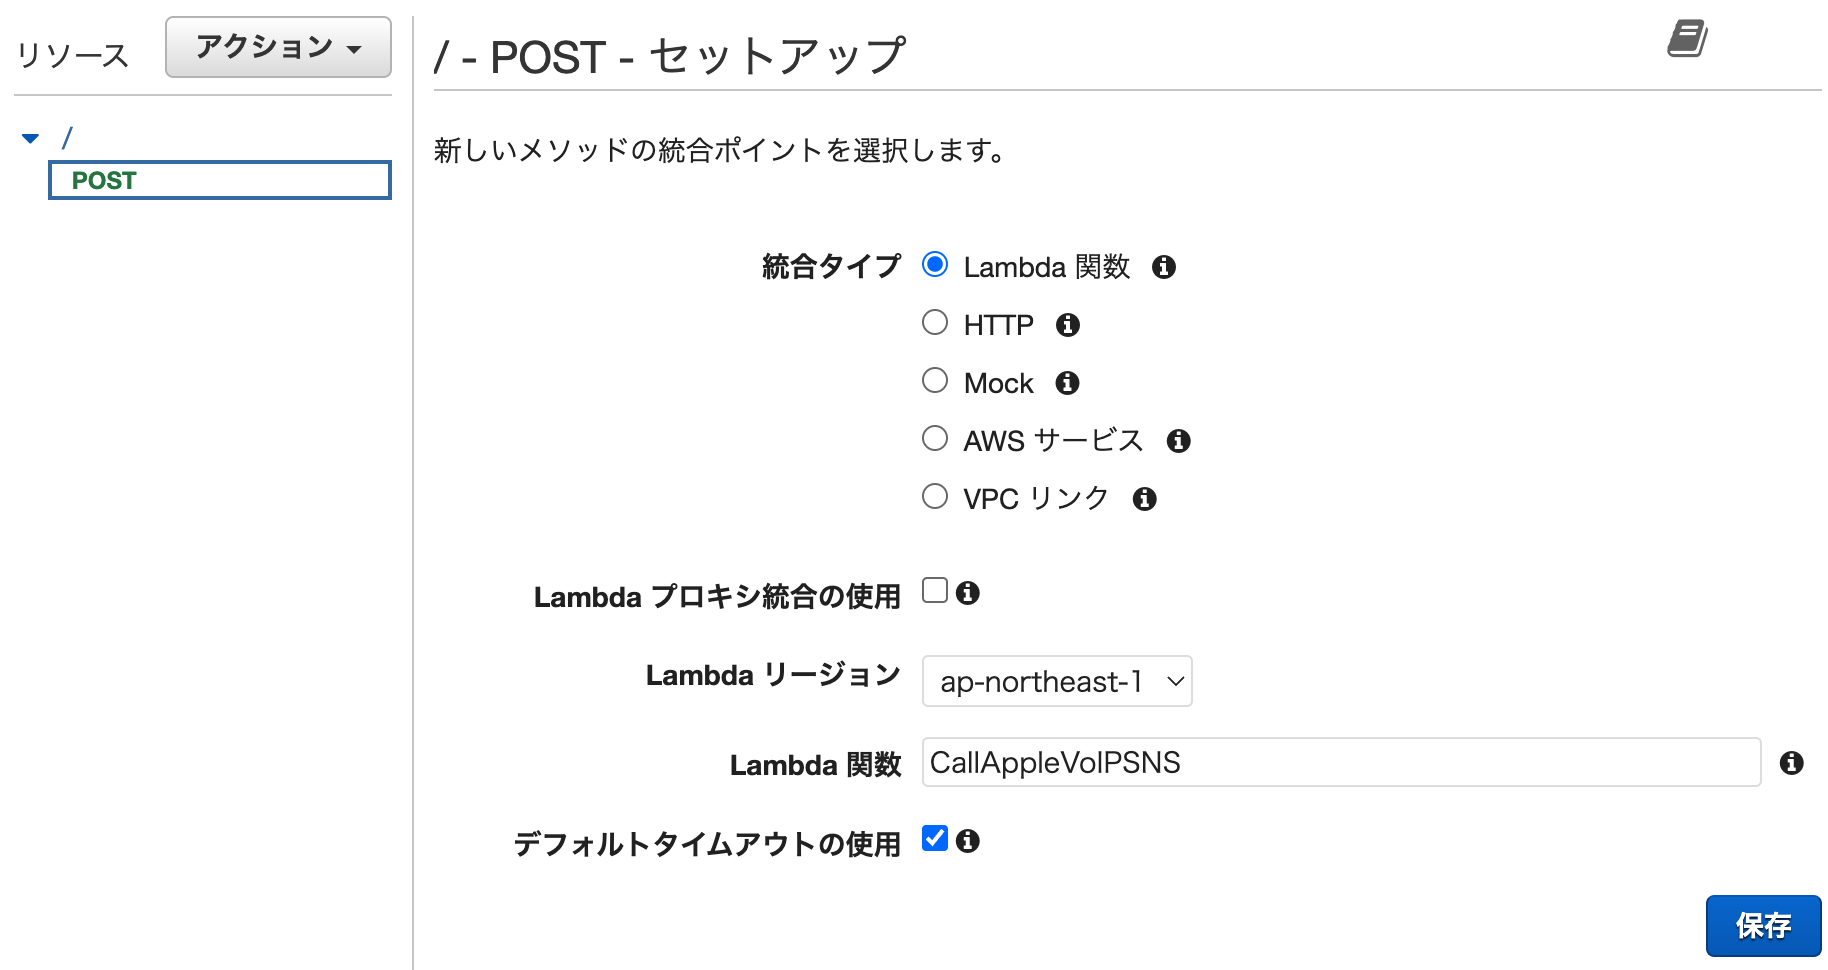
メソッドの作成
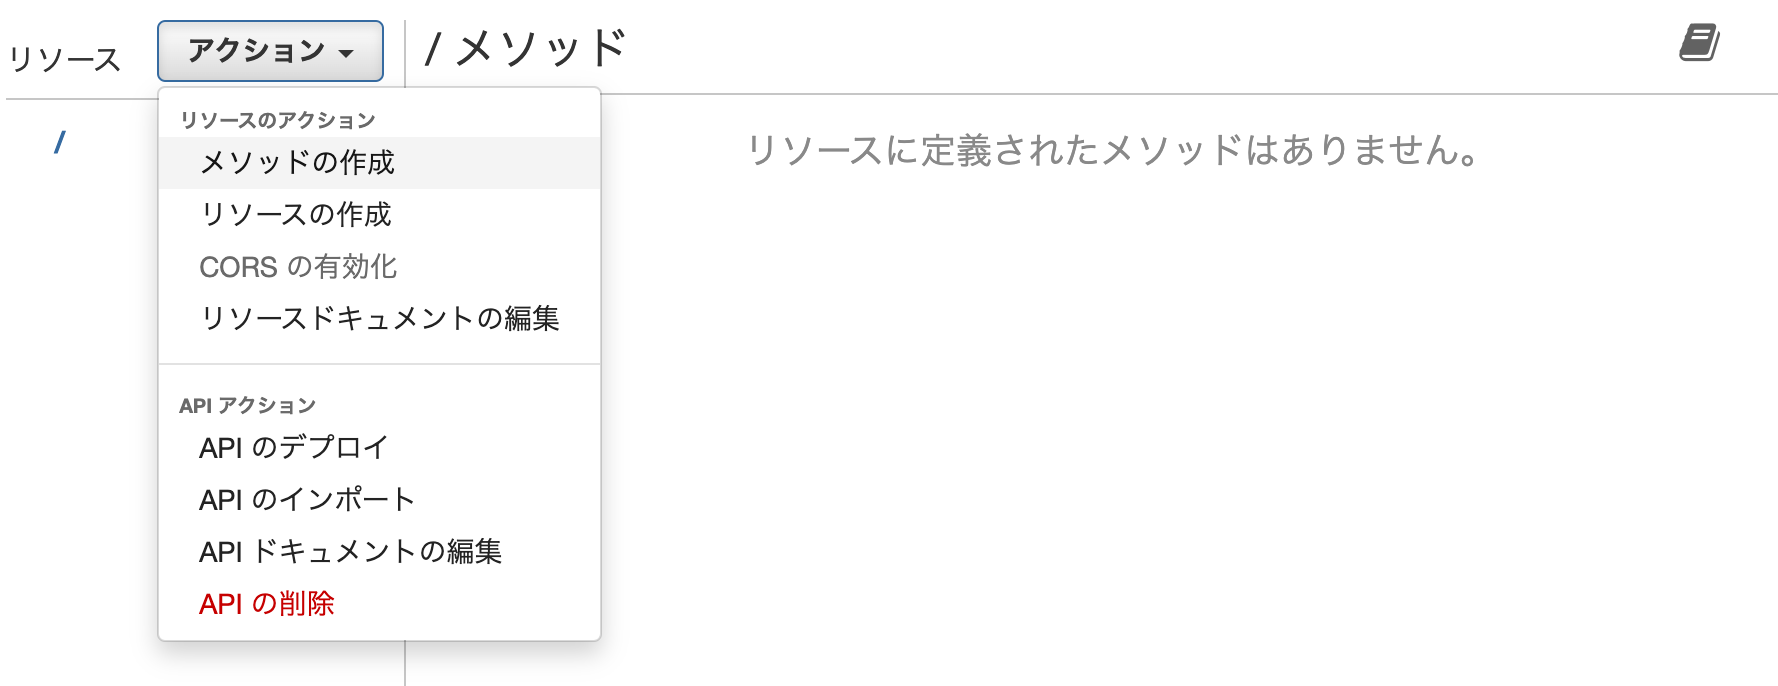
-
POSTを追加
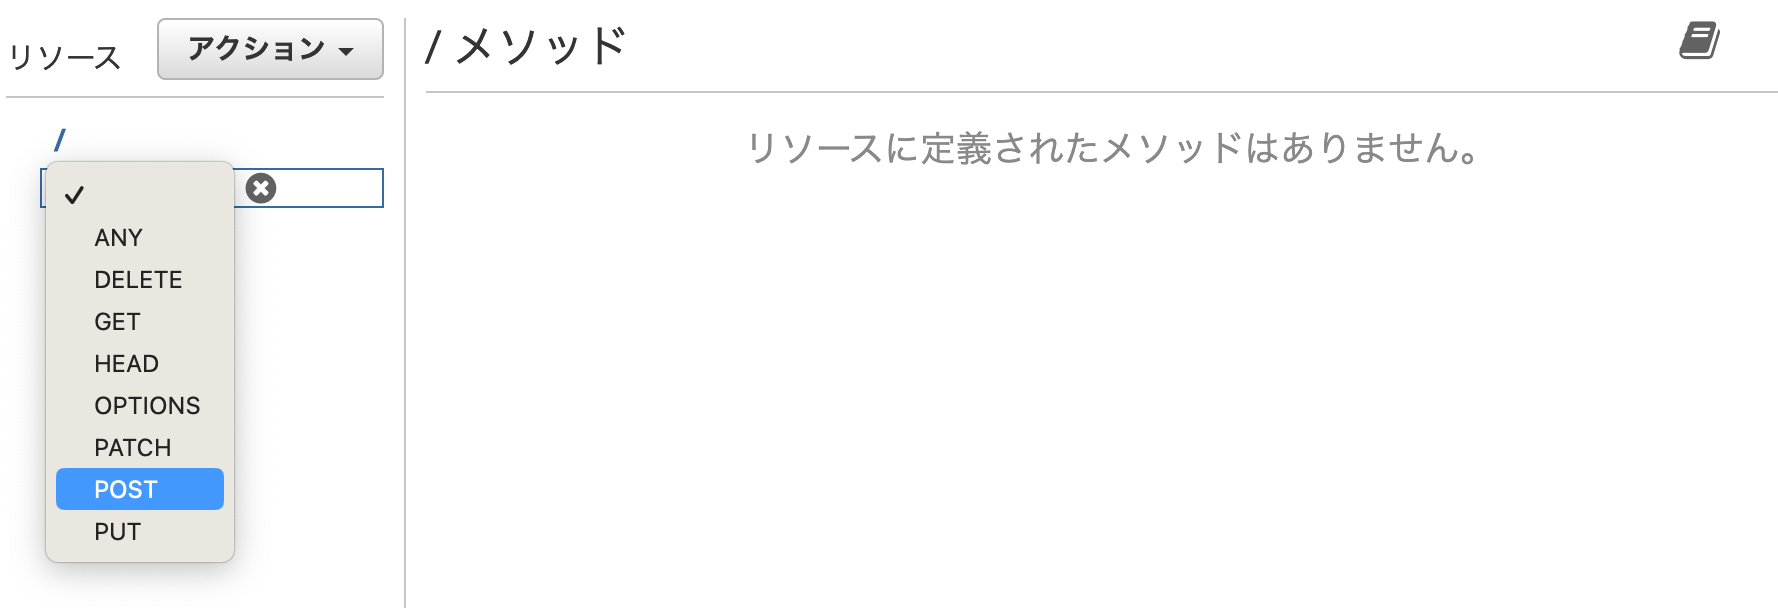
-
Lambda関数を設定
-
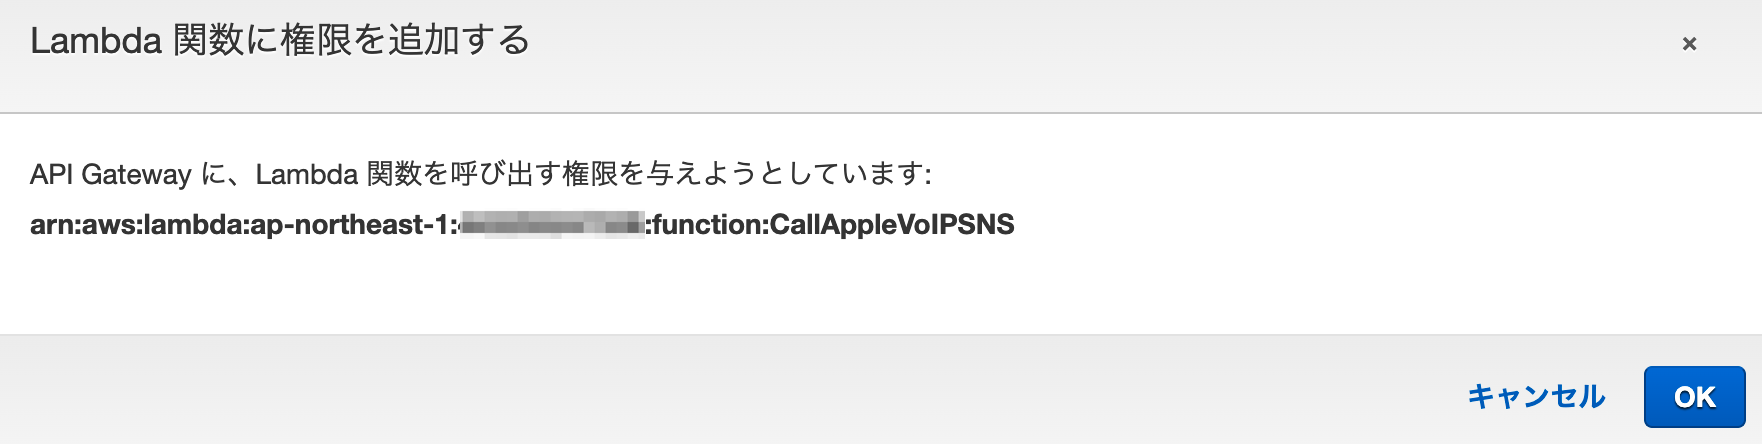
権限追加の確認
-
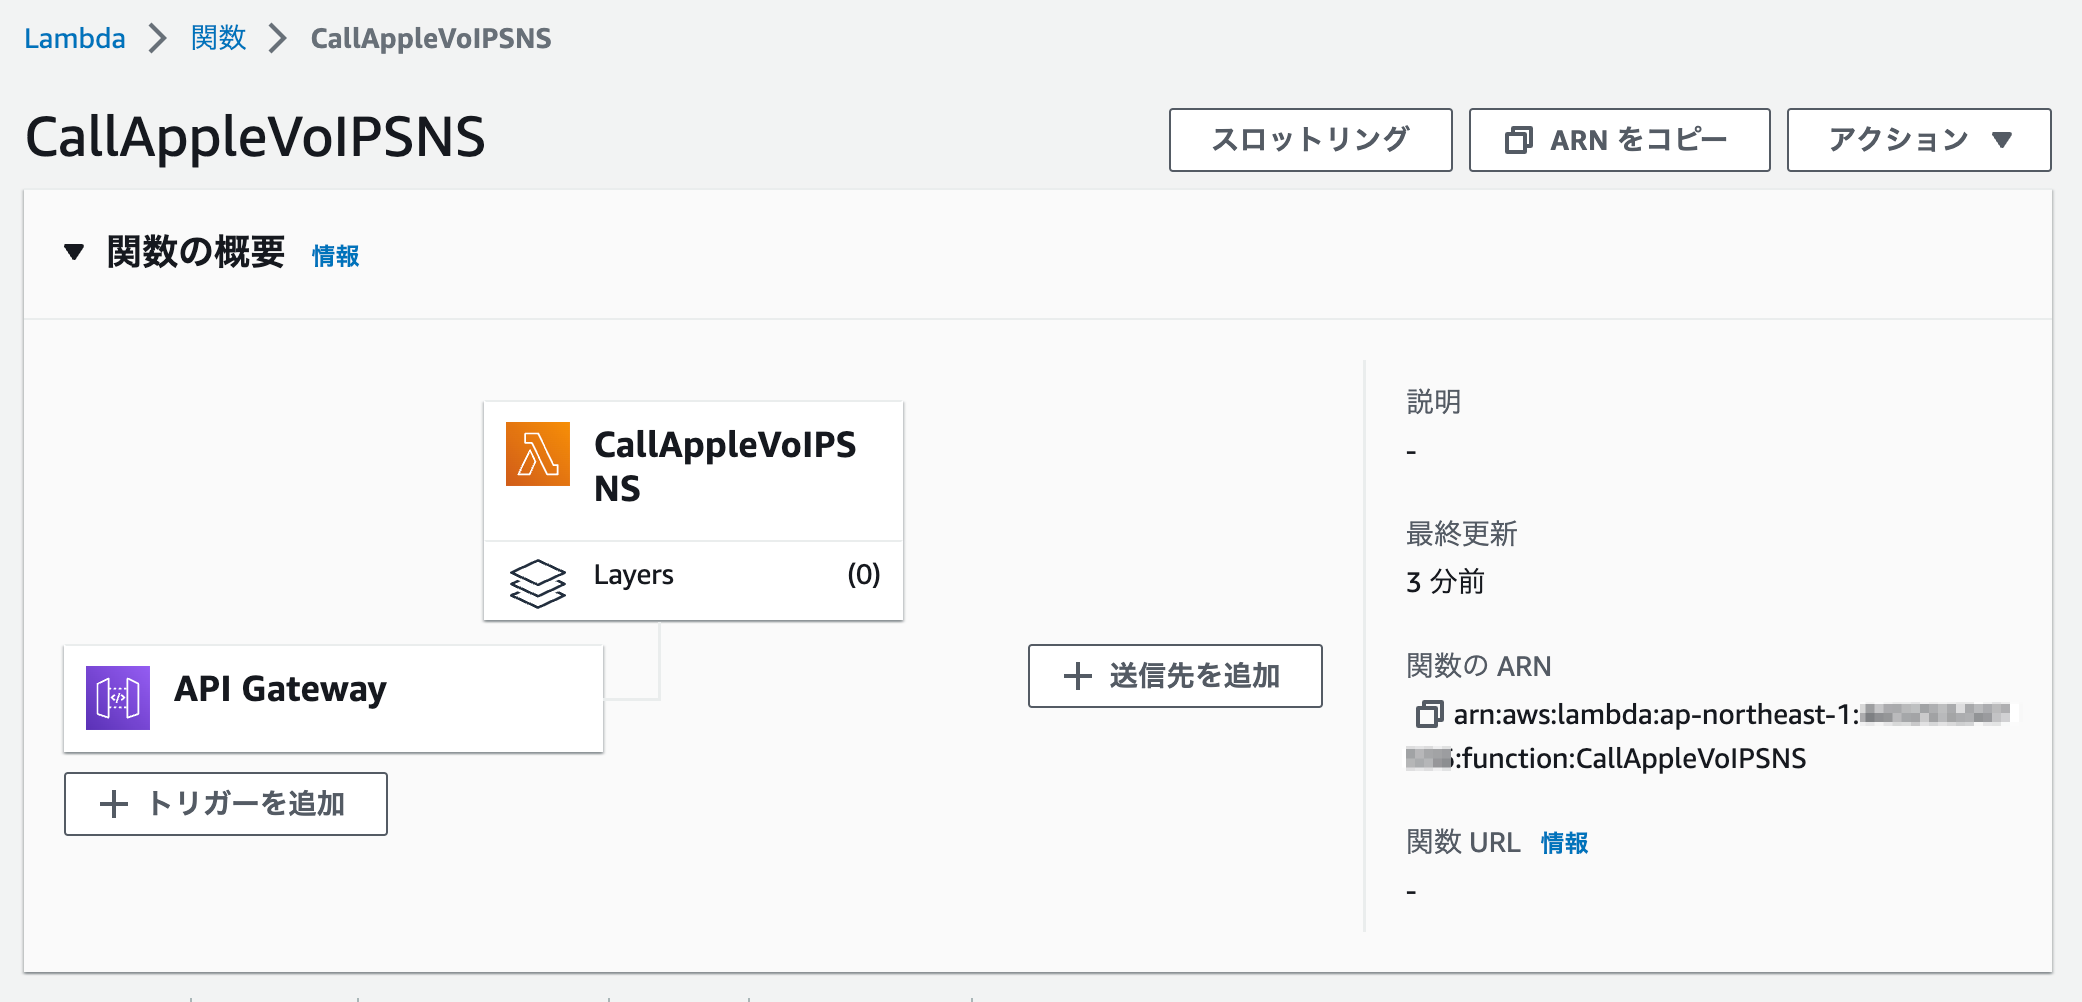
メソッドが作成される
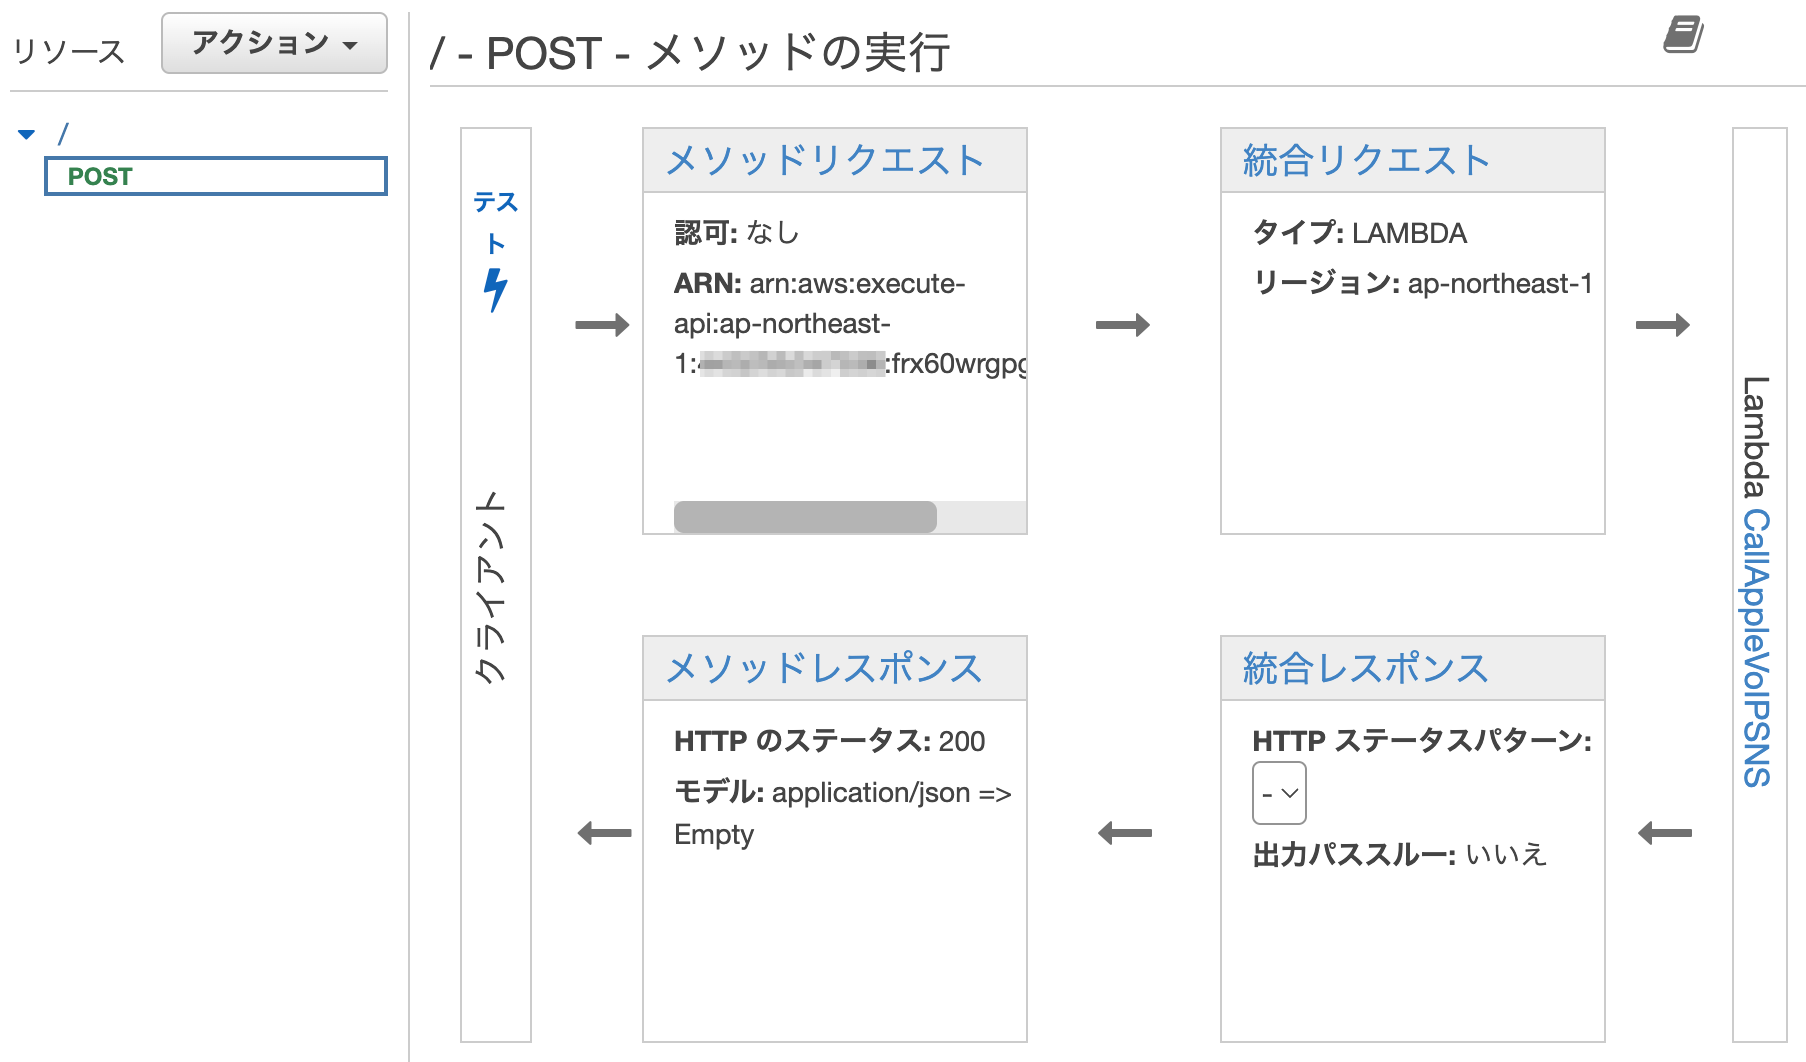
Lambda側にAPI Gatewayが追加されている。
-
テスト実行
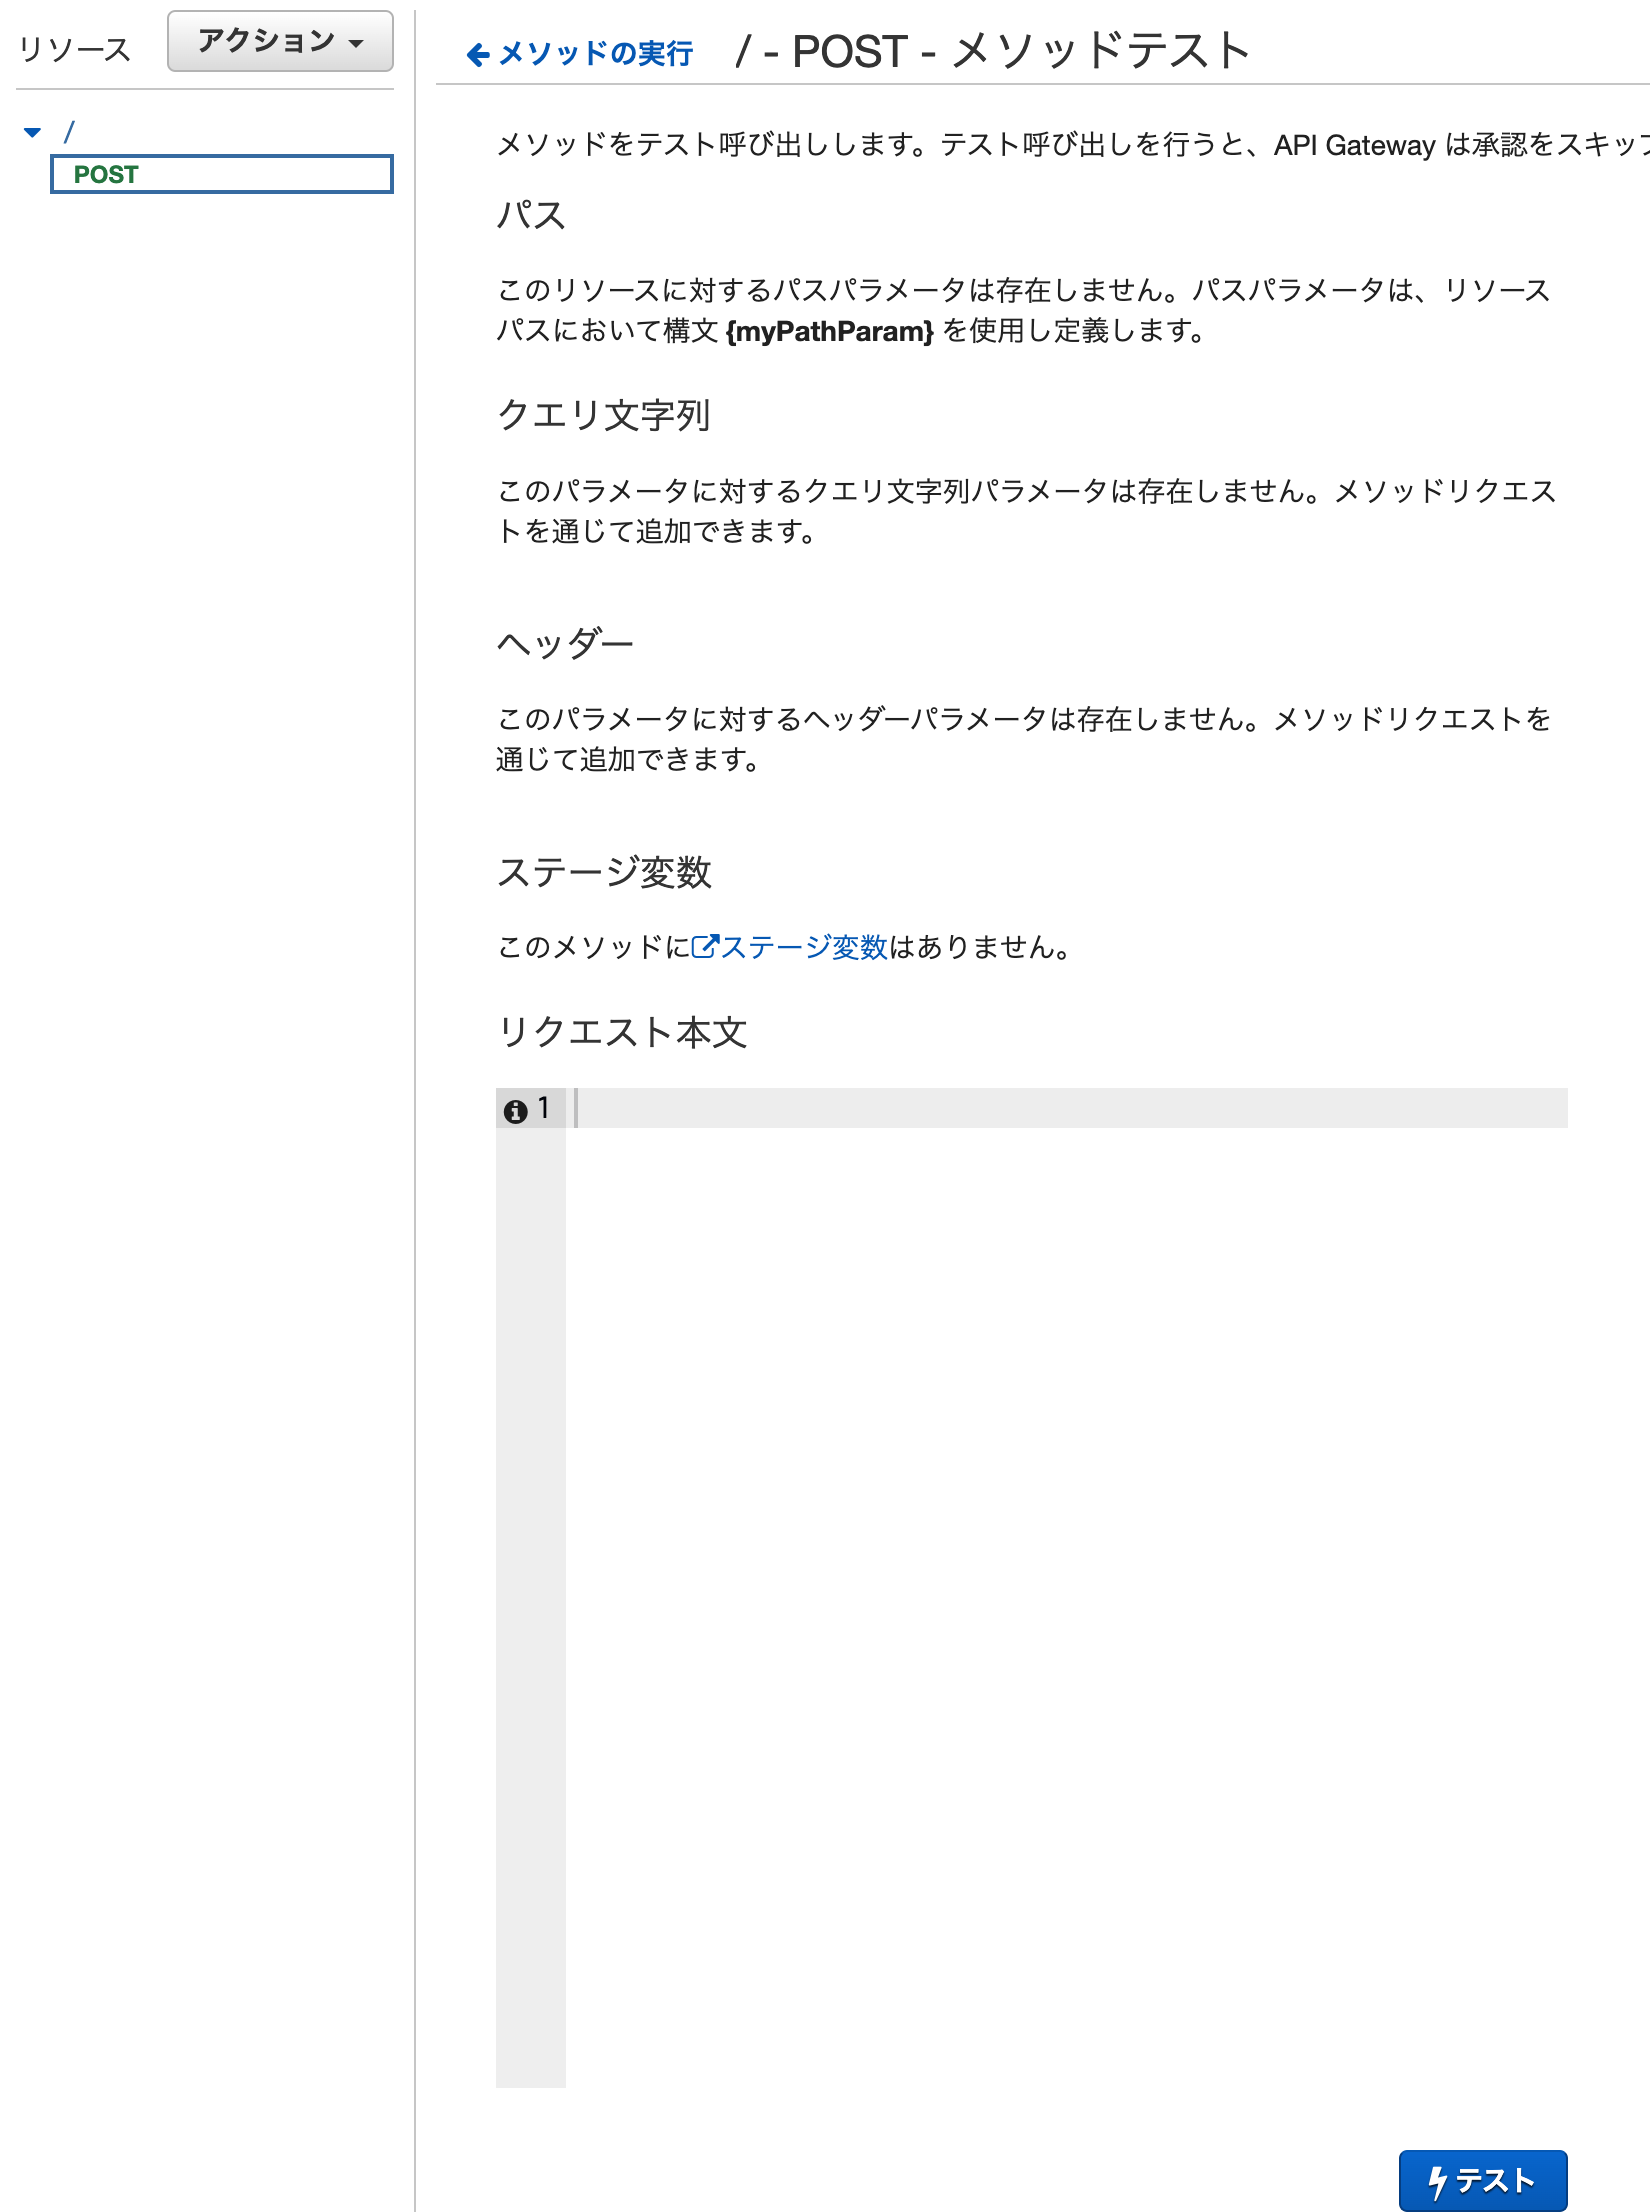
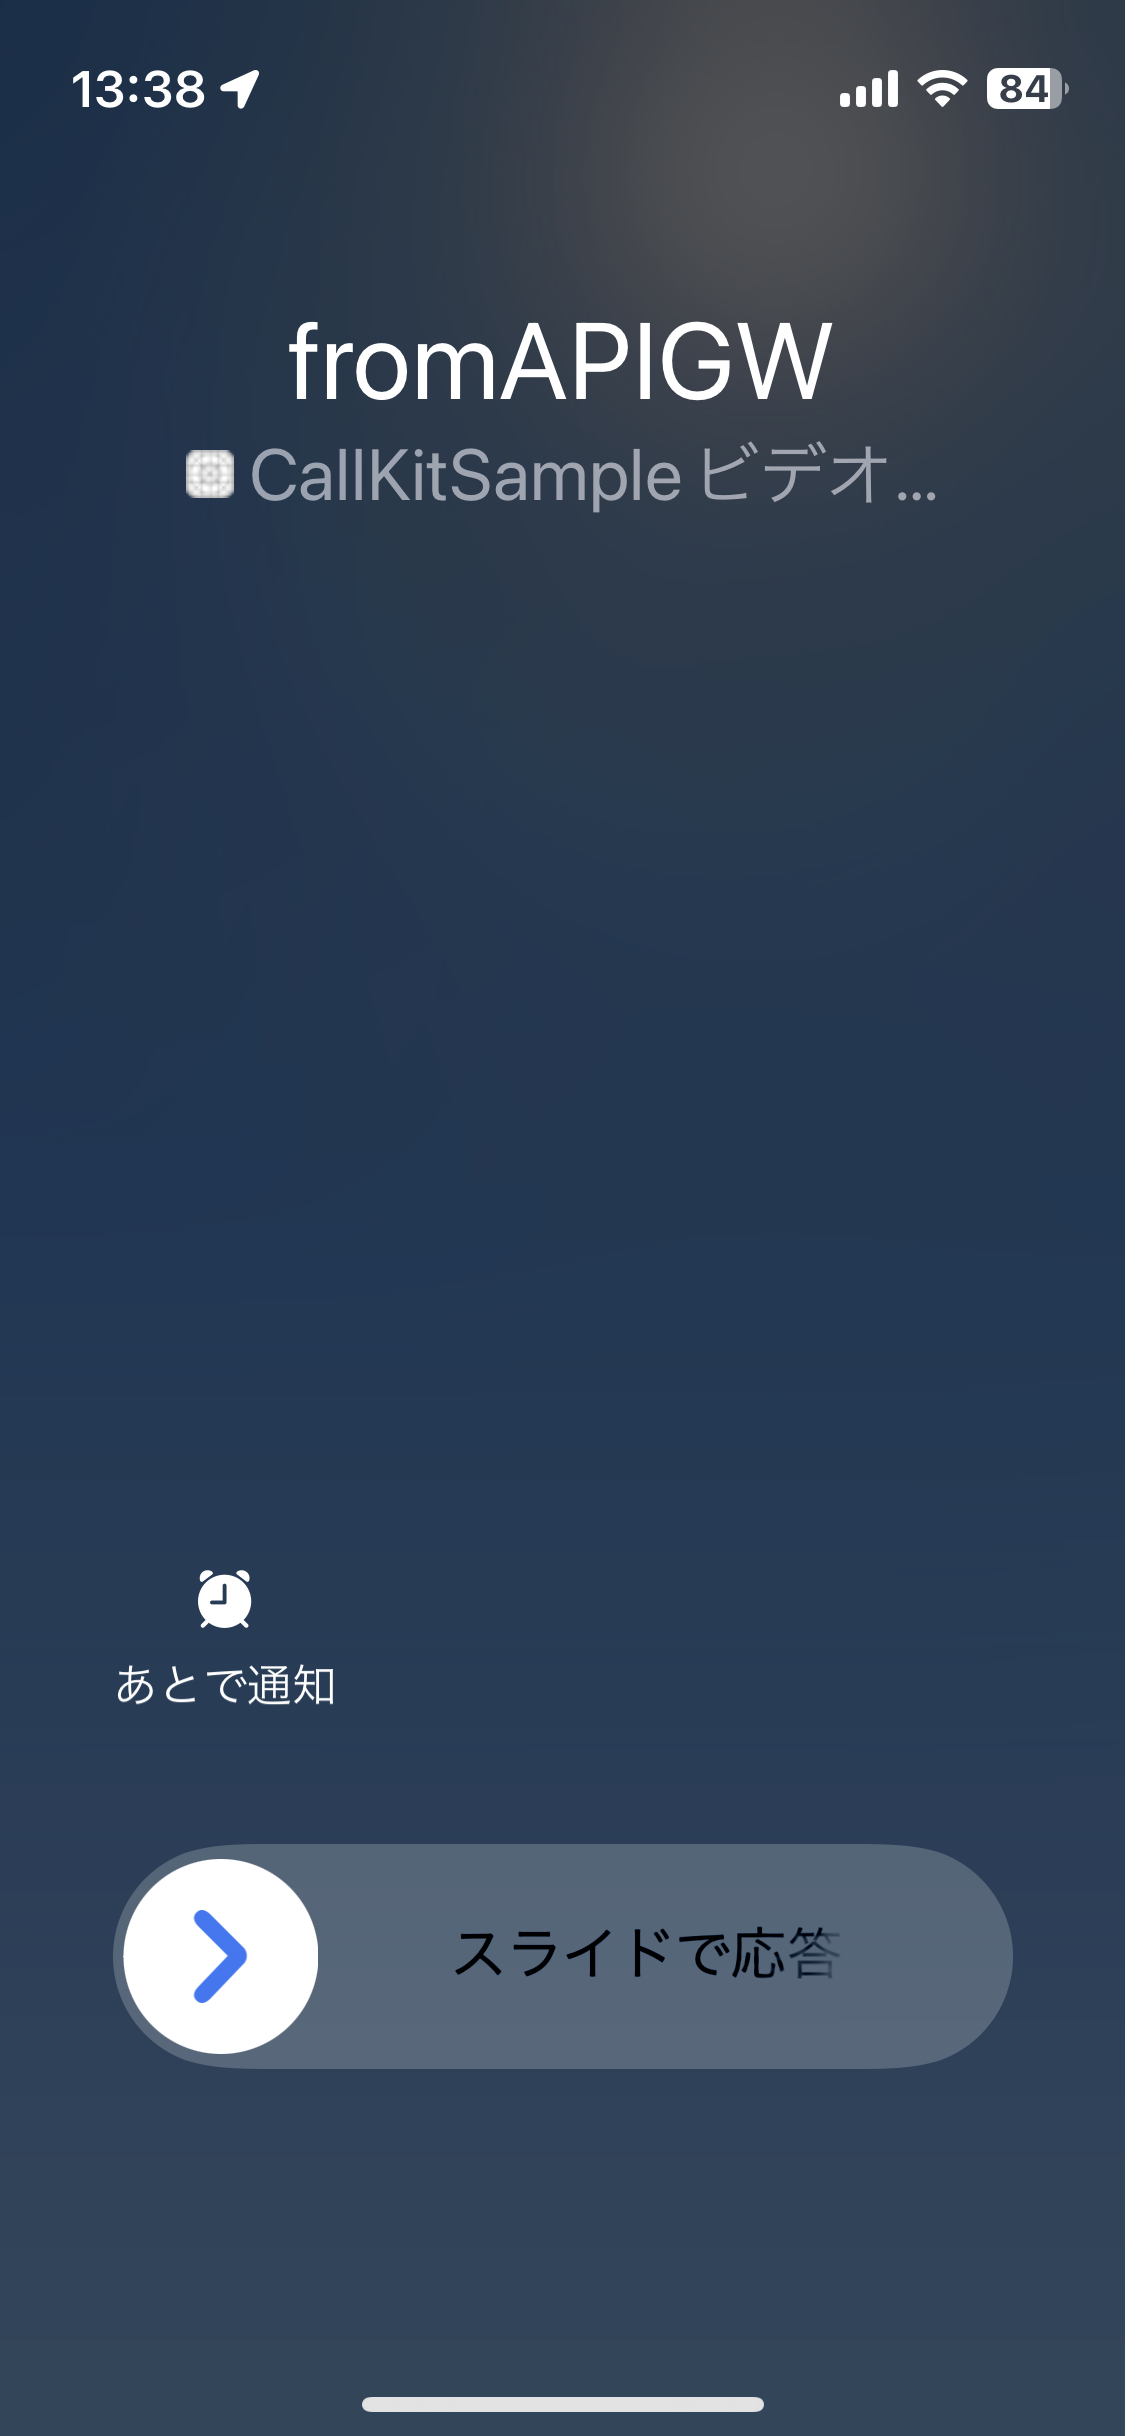
iPhoneに着信したら成功
メッセージをパラメーター渡しに変更する
- Lambda関数を修正
index.mjs
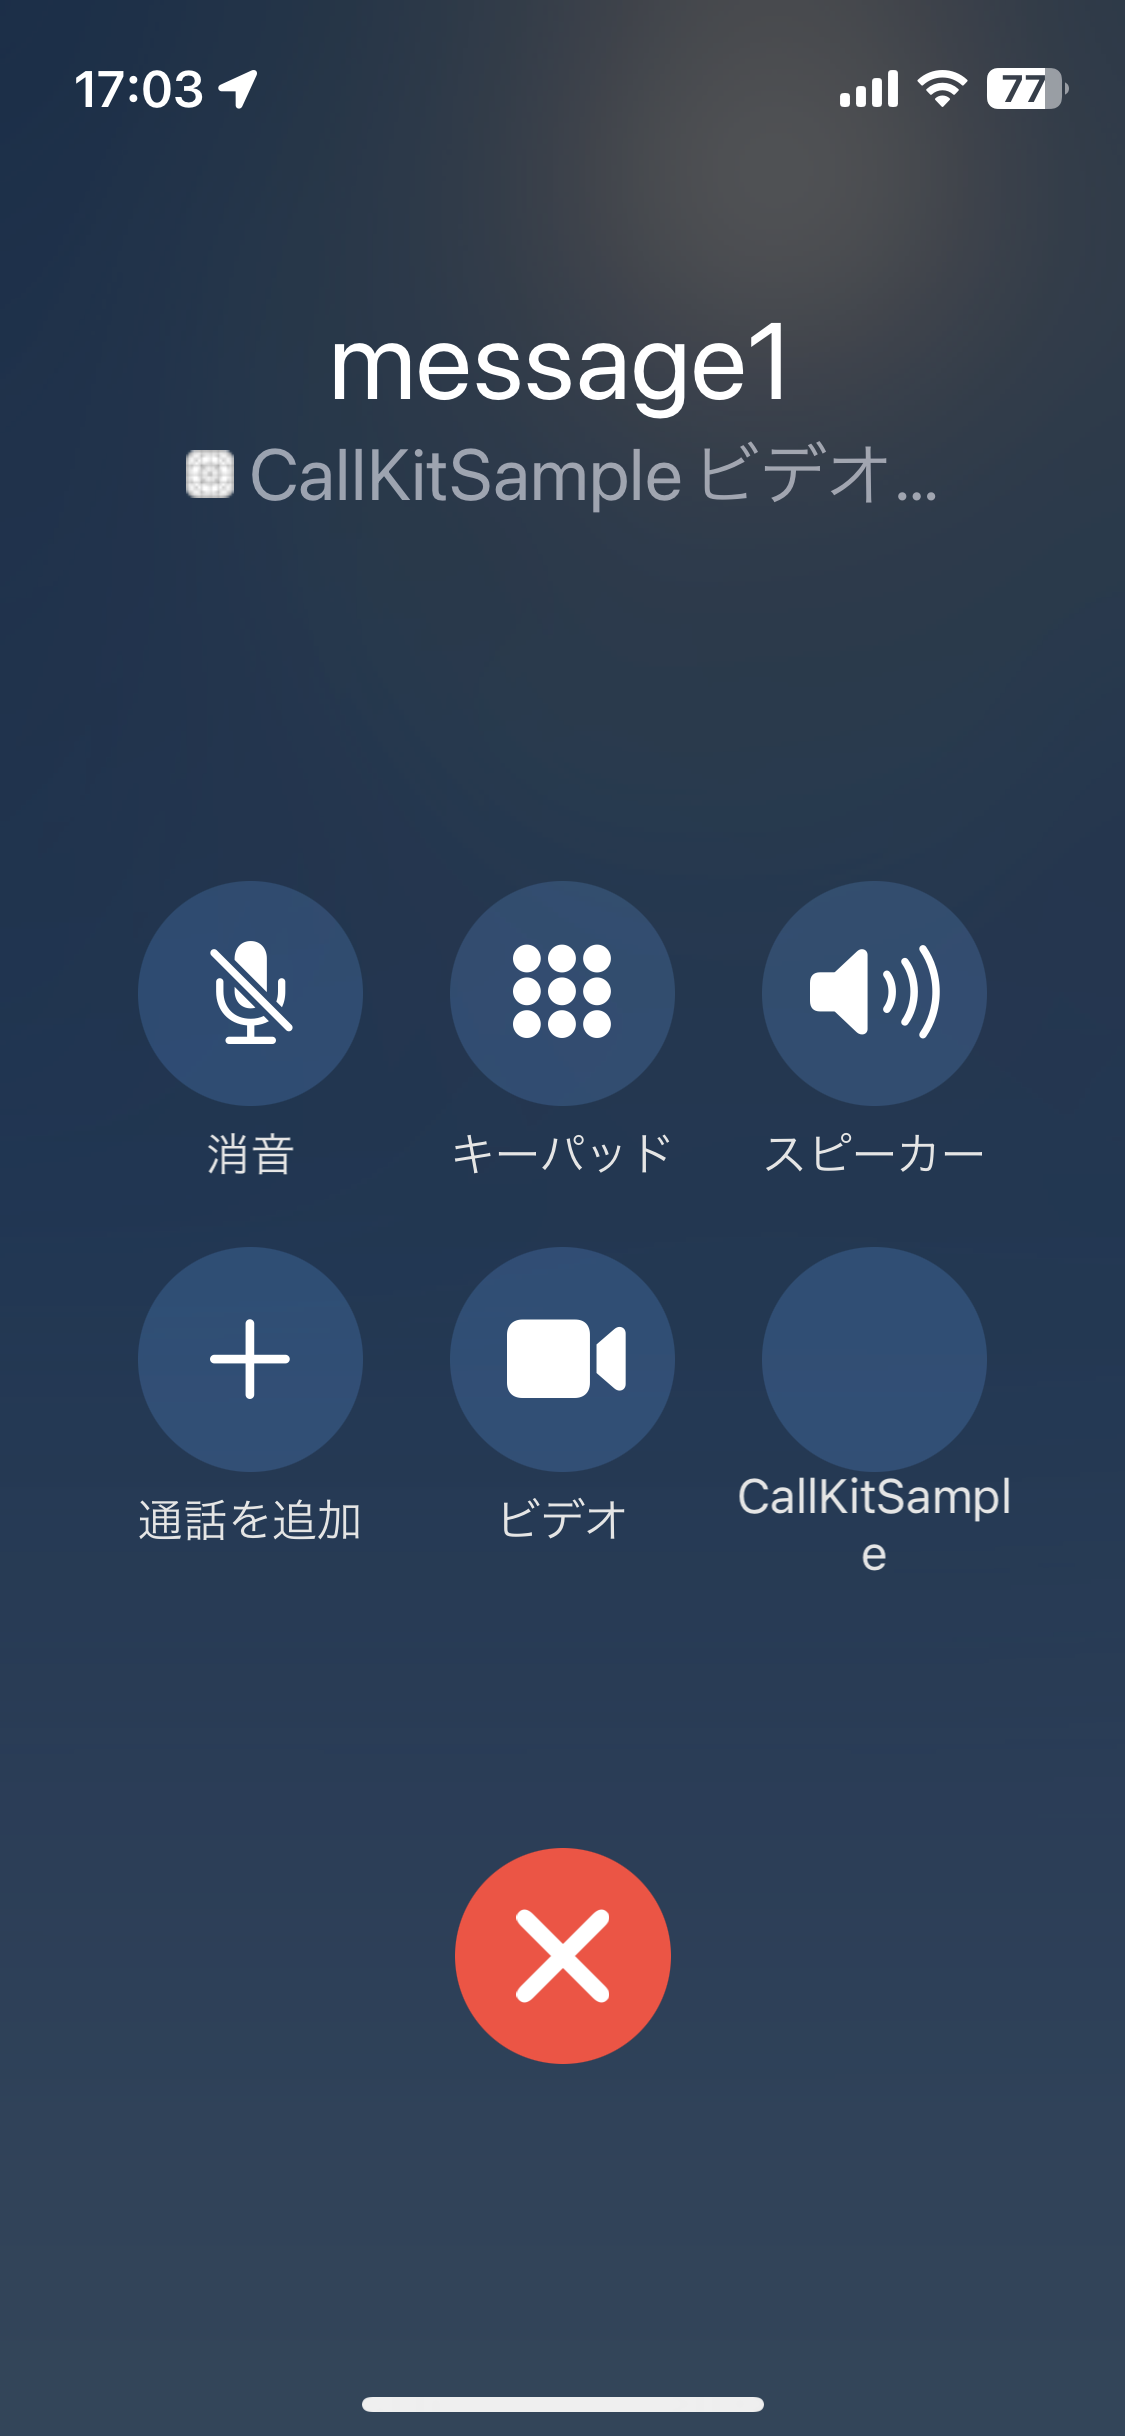
import { SNSClient, PublishCommand } from "@aws-sdk/client-sns"; const client = new SNSClient(); const snsArn = 'arn:aws:sns:ap-northeast-1:XXXXXXXXXXXX:endpoint/APNS_VOIP_SANDBOX/AppleVoIPSNS/XXXXXXXXX'; export const handler = async(event) => { console.log('[enter] handler'); console.log(`event: ${JSON.stringify(event)}`); try { + const message = event.message; + const result = await publish(snsArn, message); const httpResponse = { statusCode: 200, body: JSON.stringify(result), }; console.log(httpResponse); return httpResponse; } catch (error) { const response = { statusCode: 400, body: JSON.stringify(error), }; console.log(response); return response; } }; async function publish(arn, message) { const messageAttributes = { 'AWS.SNS.MOBILE.APNS.PUSH_TYPE': { 'DataType': 'String', 'StringValue': 'voip' } }; const input = { 'TargetArn': arn, 'Message': message, 'Subject': 'subject1', 'MessageAttributes': messageAttributes }; const command = new PublishCommand(input); const response = await client.send(command); return response; } - API Gatewayでテスト実行
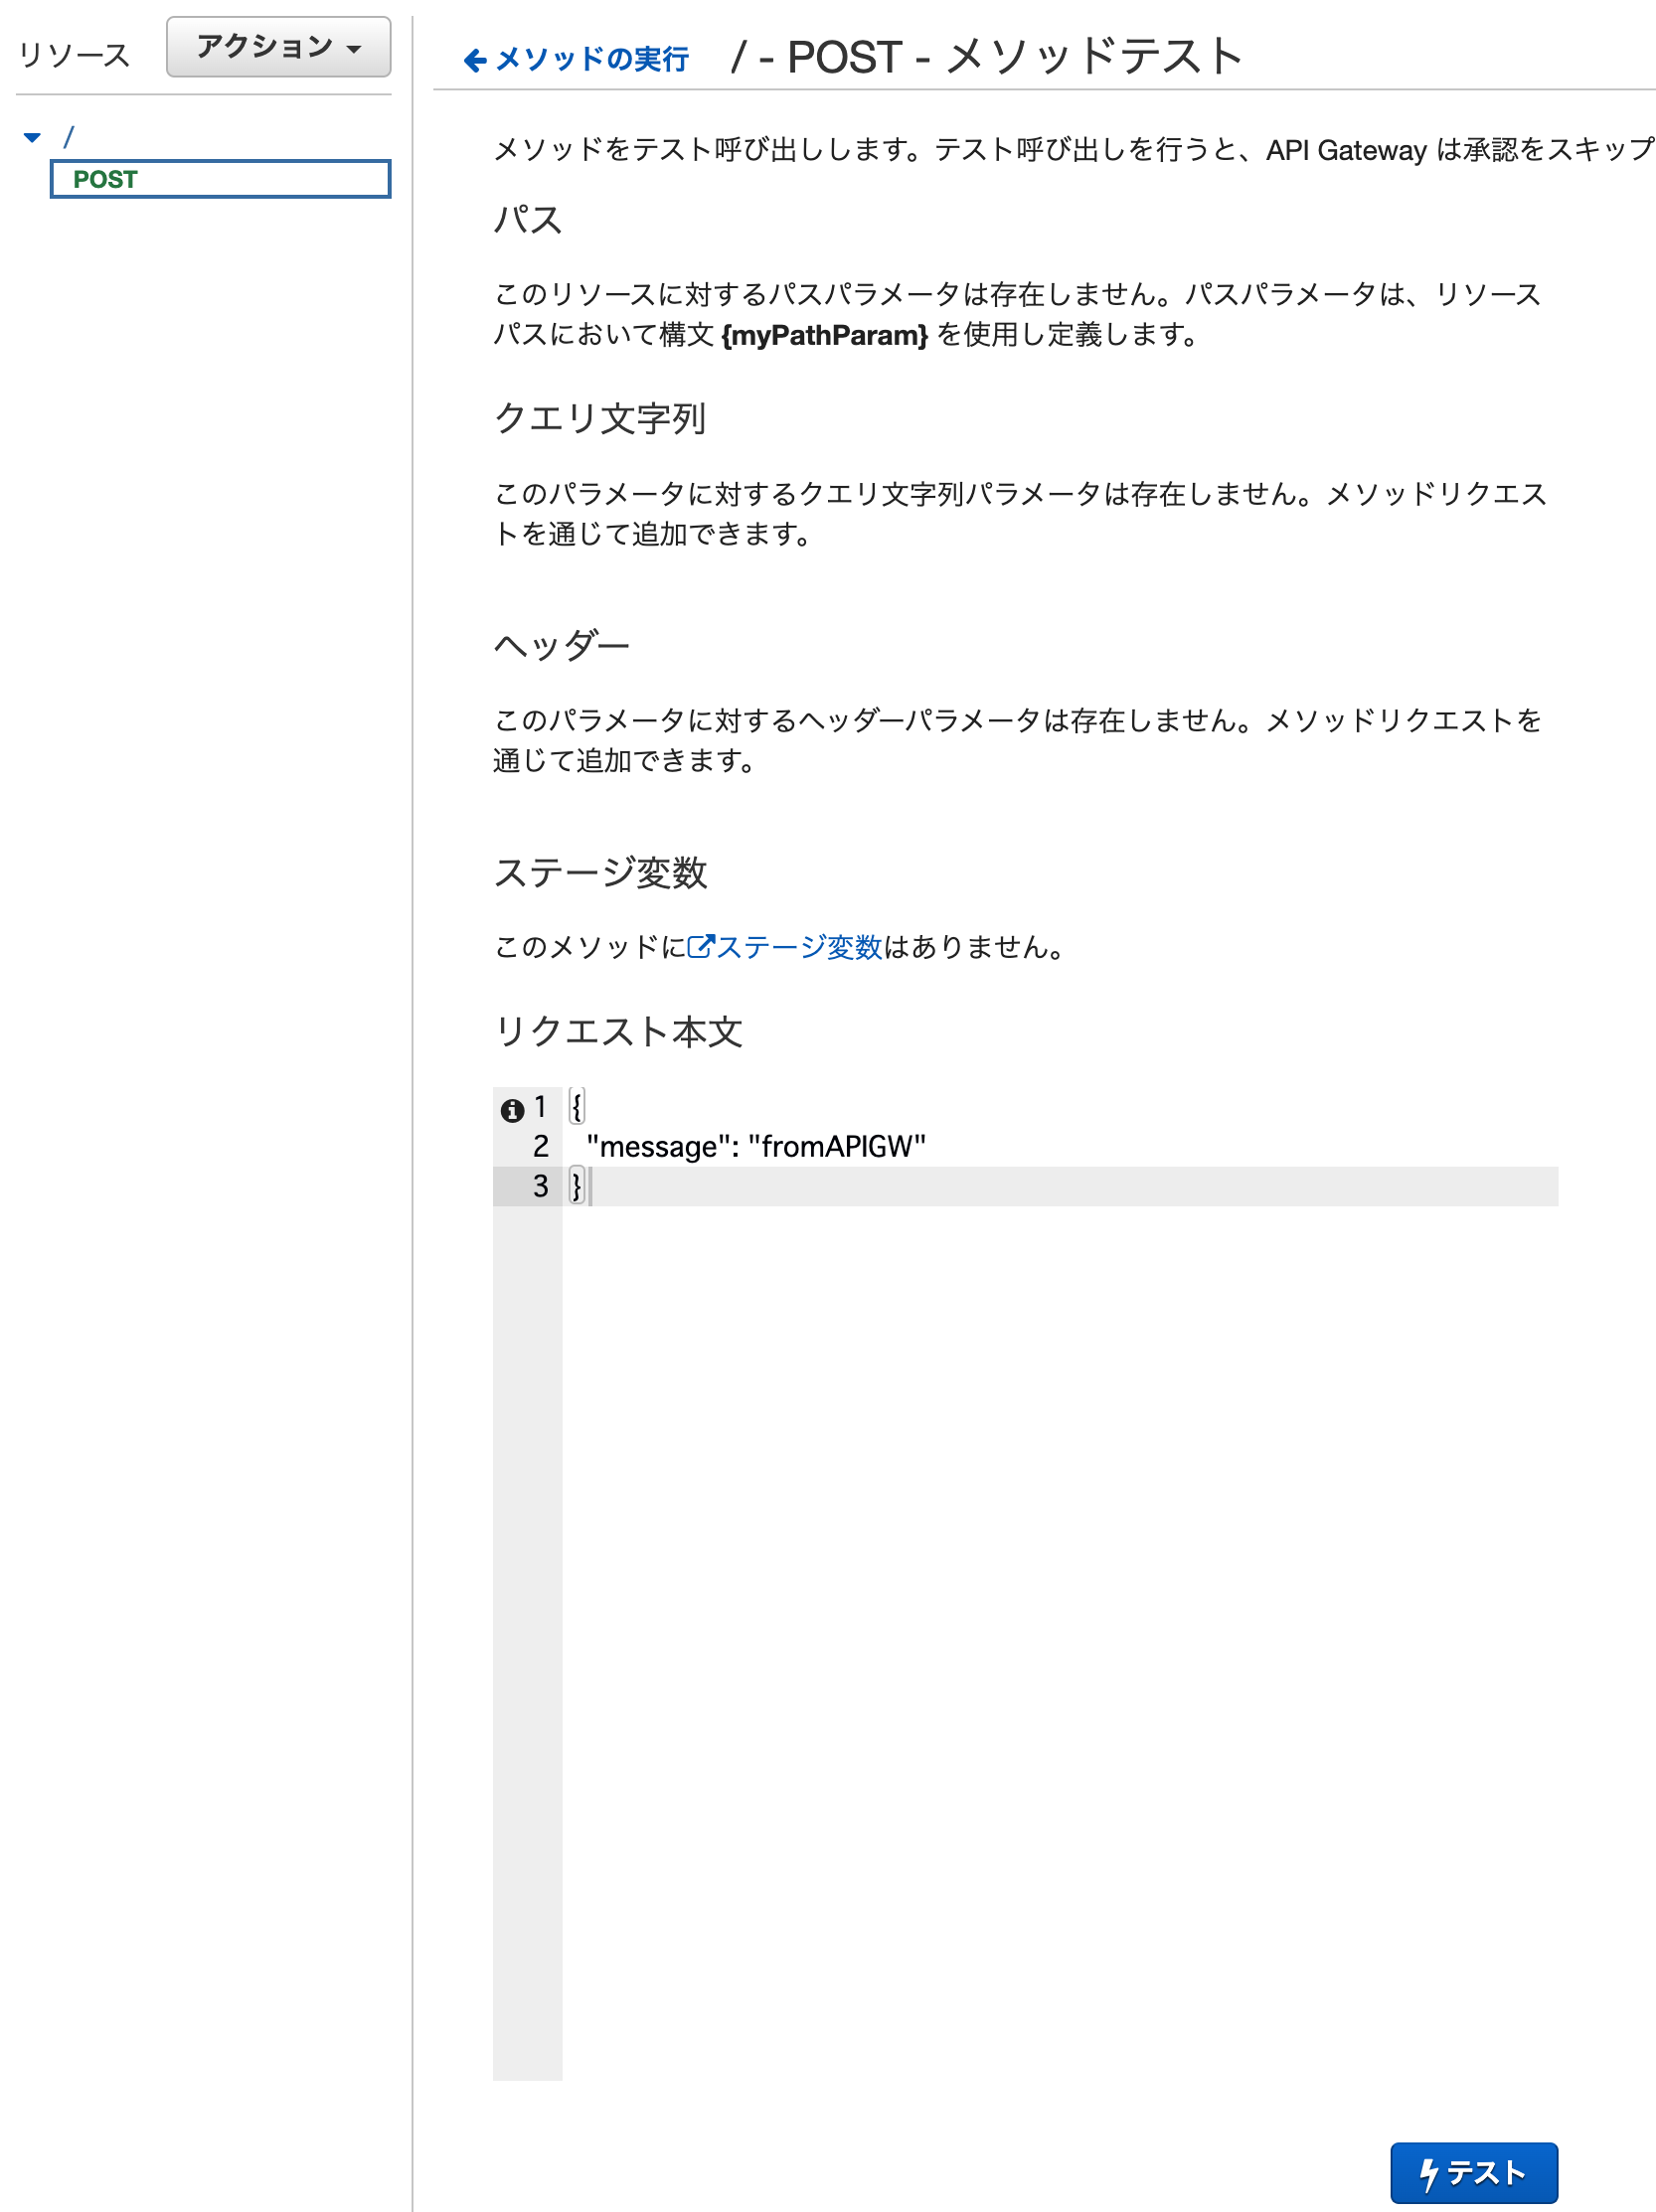
パラメーターで指定したメッセージが表示される。
APIの公開
-
APIのデプロイ
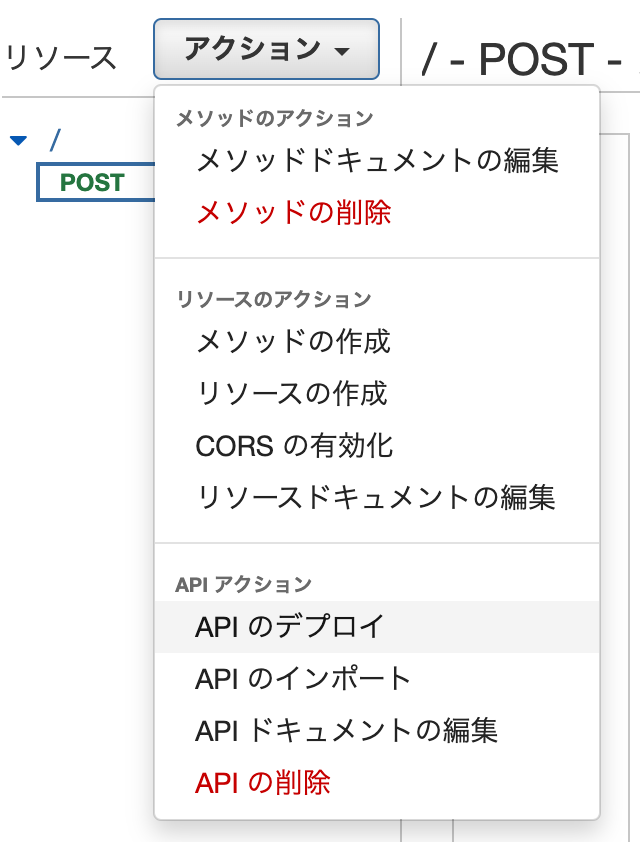
-
新しいステージをデプロイ
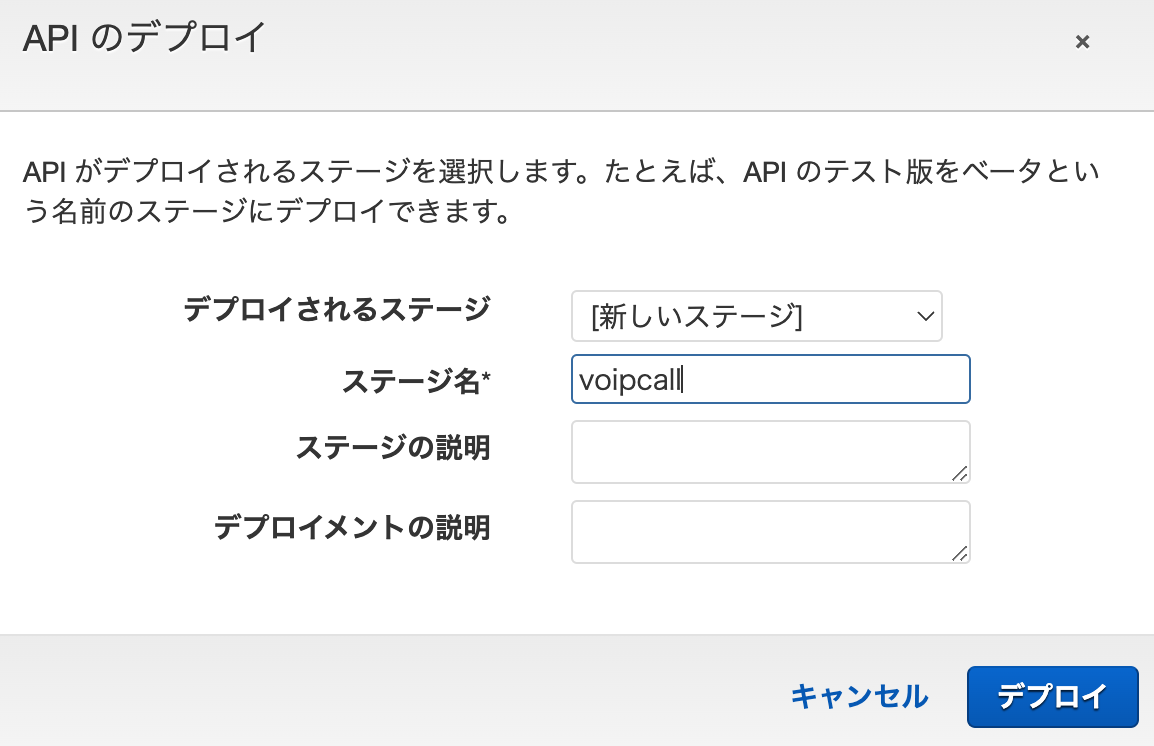
作成できた。

-
curlで疎通確認
curl -X POST 'https://XXXXXXXXXX.execute-api.ap-northeast-1.amazonaws.com/voipcall' -d '{"message": "fromCurl"}' | jq呼び出し成功。
通話中のアイコンを設定
アイコンが表示されない...
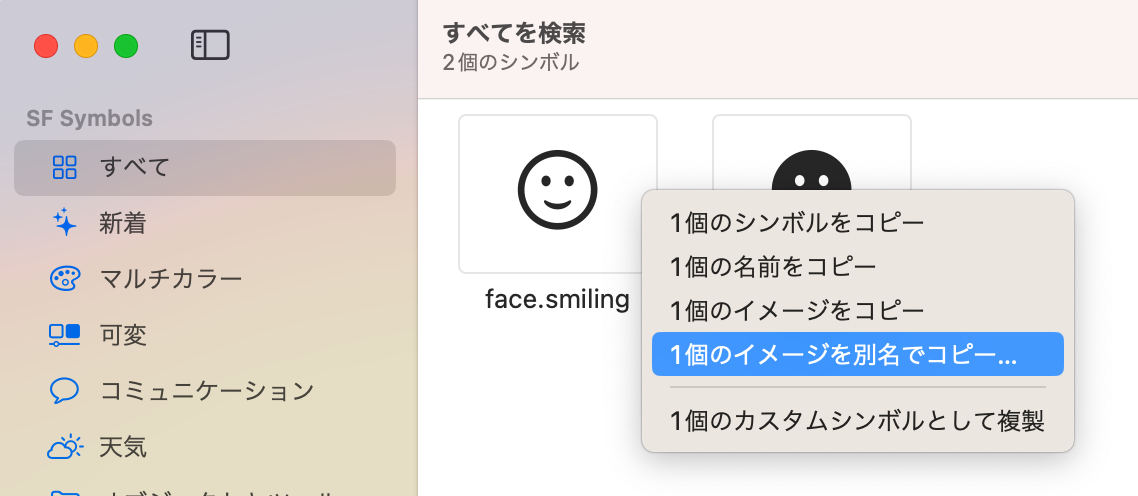
40ポイントの白マスク透過画像が必要。テスト用にとりあえずSF Symbolsを利用。
The icon image should be a square with side length of 40 points. The alpha channel of the image is used to create a white image mask, which is used in the system native in-call UI for the button which takes the user from this system UI to the 3rd-party app.
-
SF Symbolsで適当なシンボルをクリップボードへコピー
-
ポイントサイズを40にする
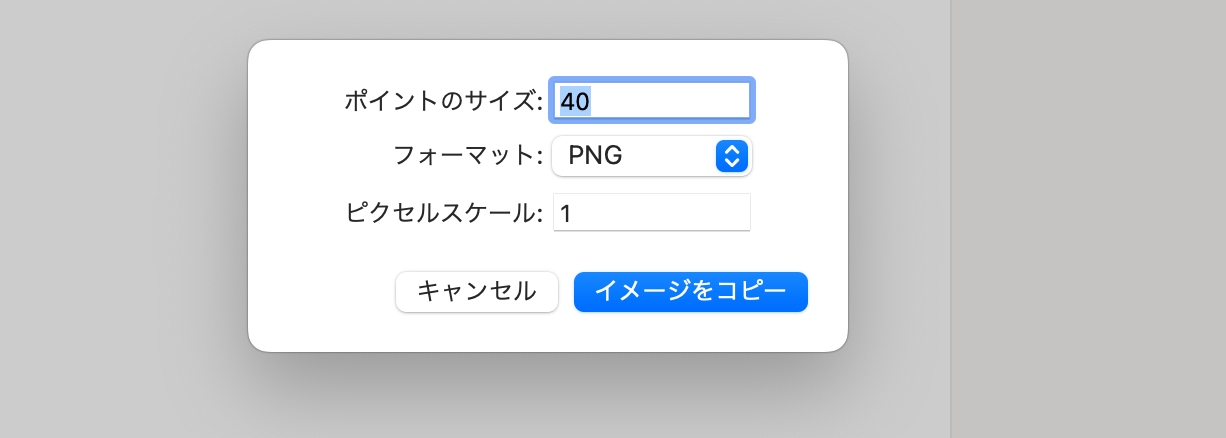
-
XcodeのAssetsにクリップボードからペースト
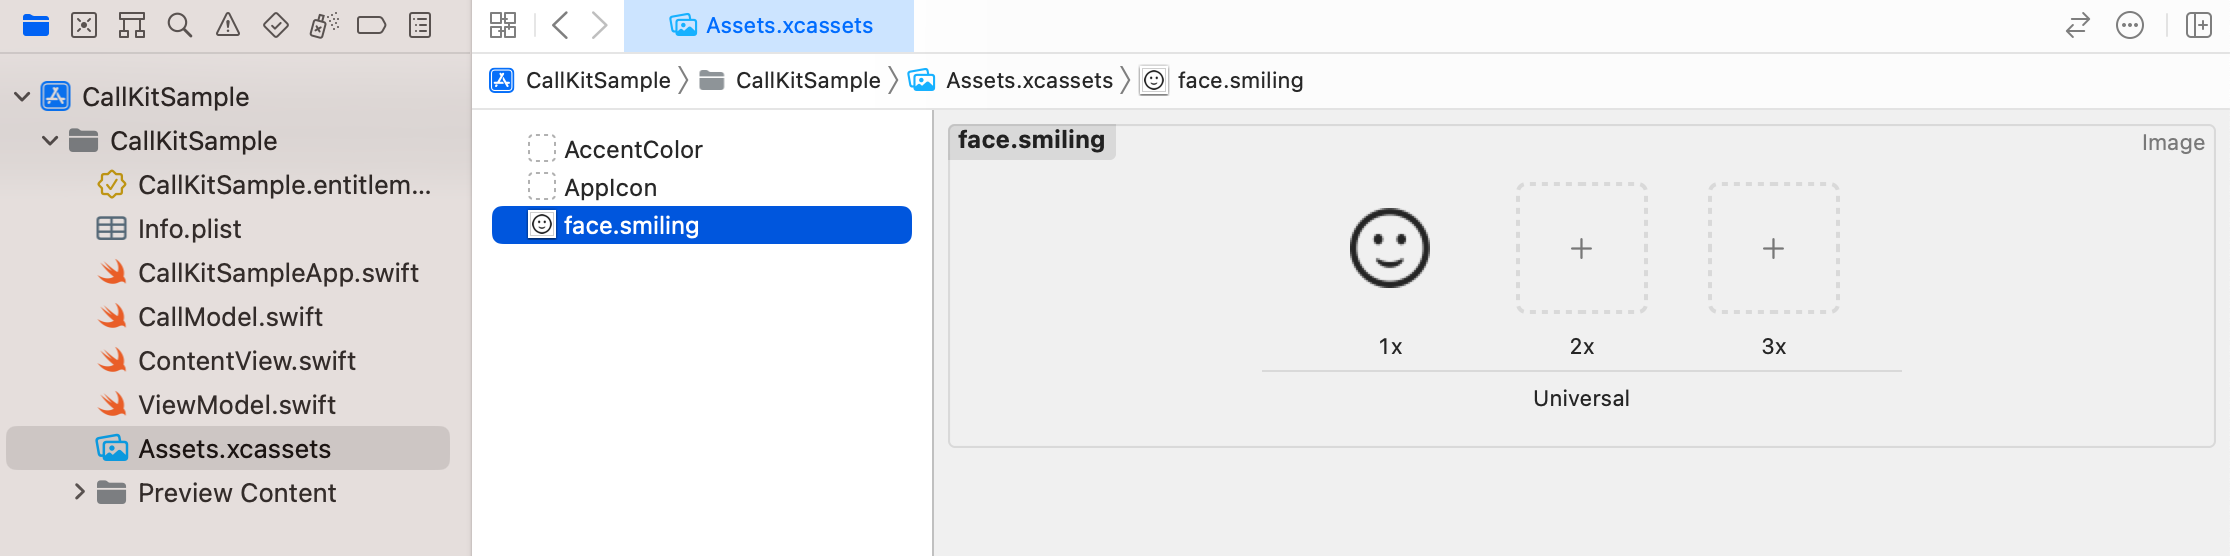
-
コードを修正
CallModel.swiftfinal class CallModel: NSObject { ... private init(supportsVideo: Bool = false) { let providerConfiguration = CXProviderConfiguration() providerConfiguration.supportsVideo = supportsVideo + if let image = UIImage(named: "face.smiling") { + providerConfiguration.iconTemplateImageData = image.pngData() + } provider = CXProvider(configuration: providerConfiguration) } -
表示された
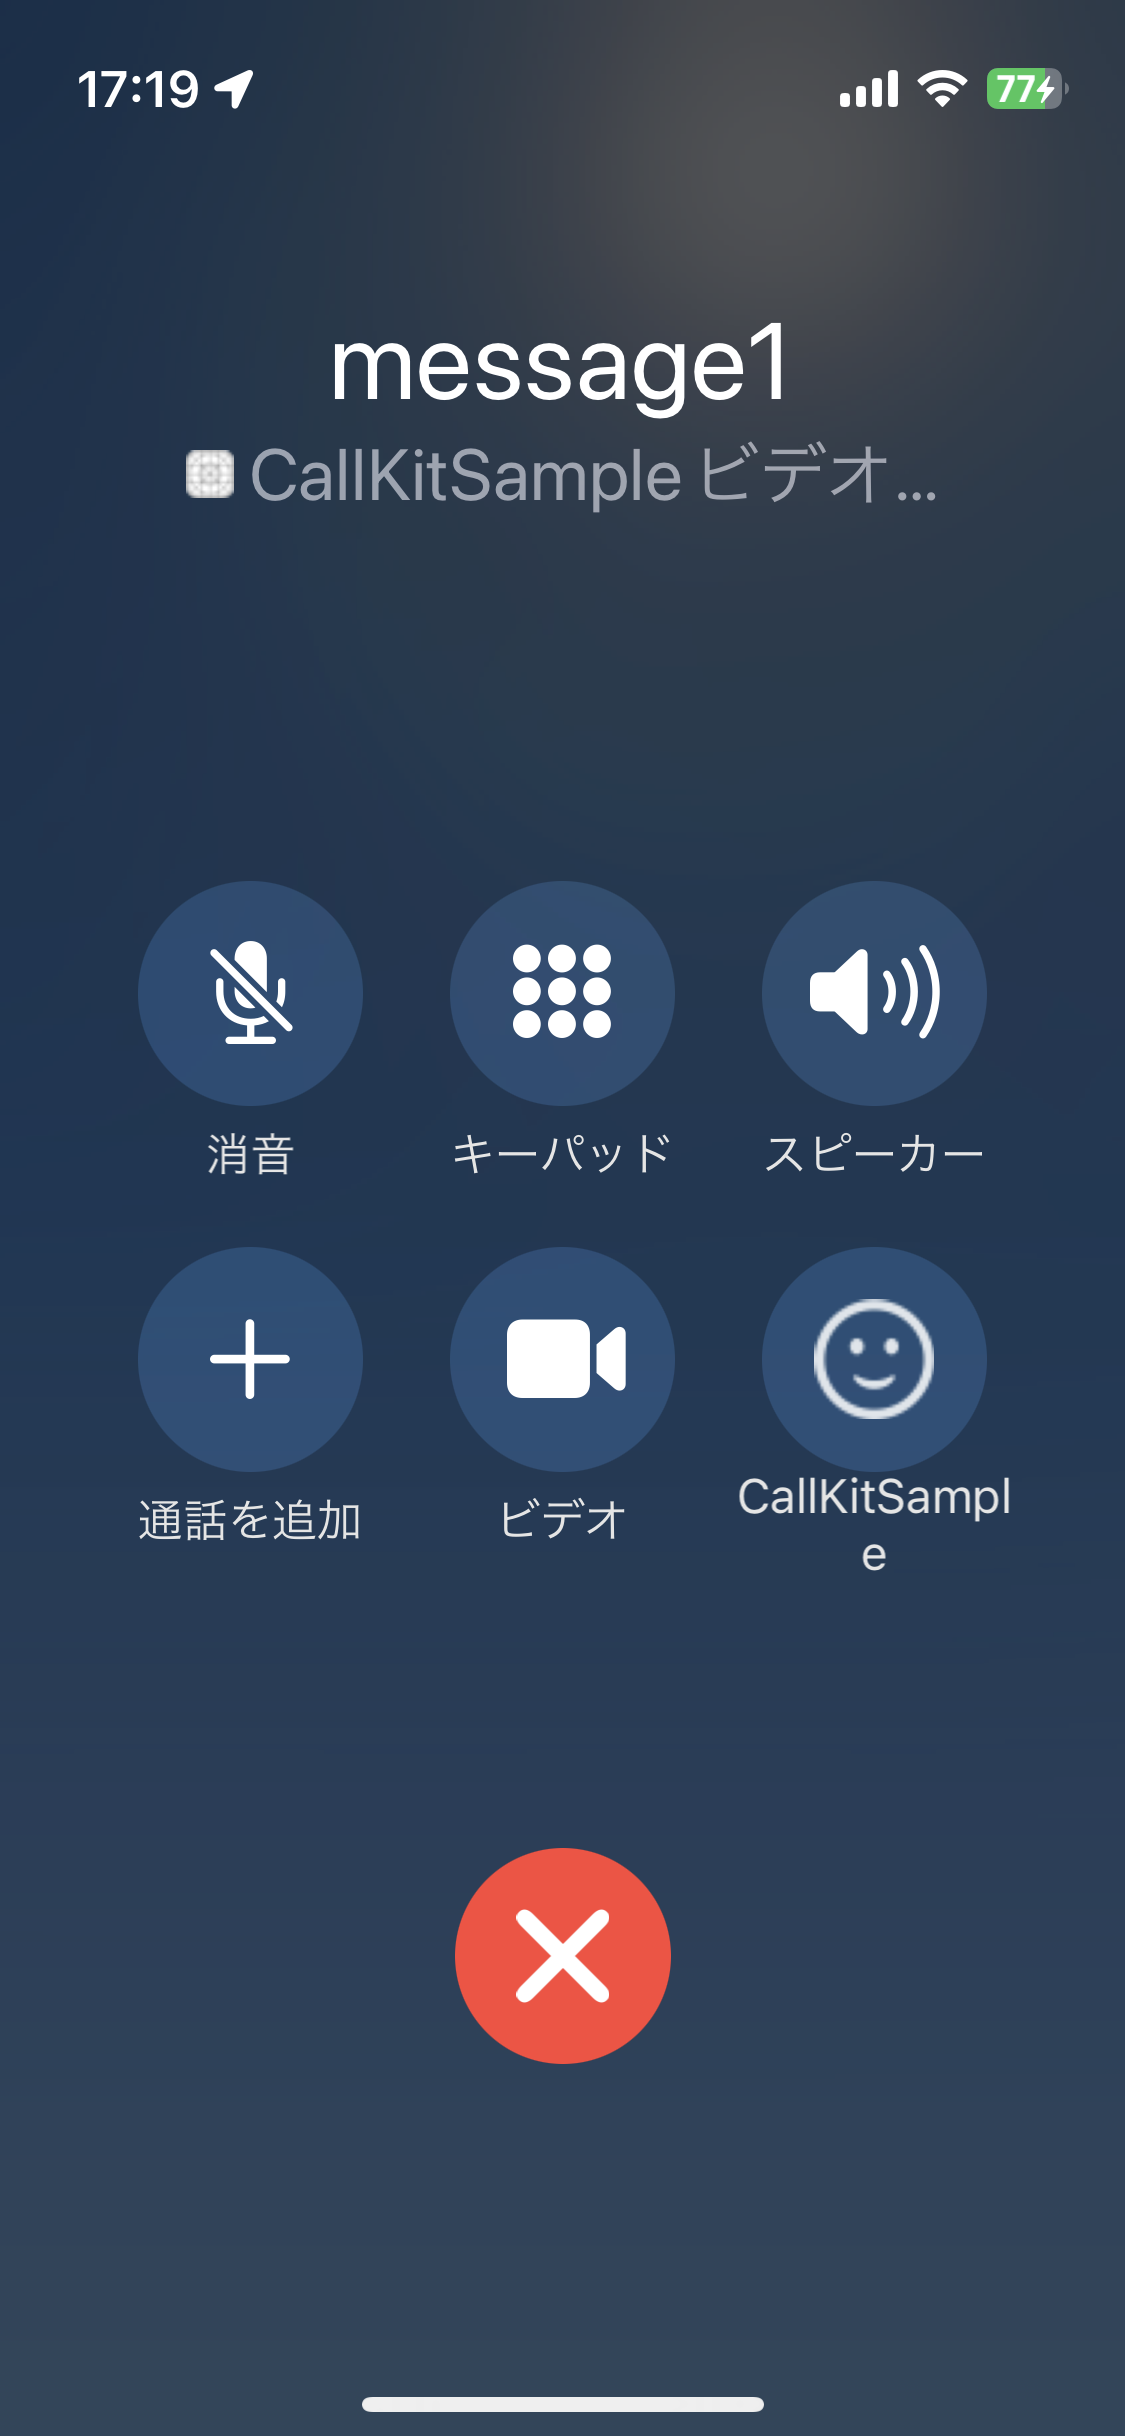
これで一通り完了。
参考
Apple
AWS
参考サイト
非常に参考になりました。貴重な情報ありがとうございました。