gradio入門
はじめてのWEB UI作成
gradioをインストール
pip install gradio
シンプルなWEB UIを作成して起動
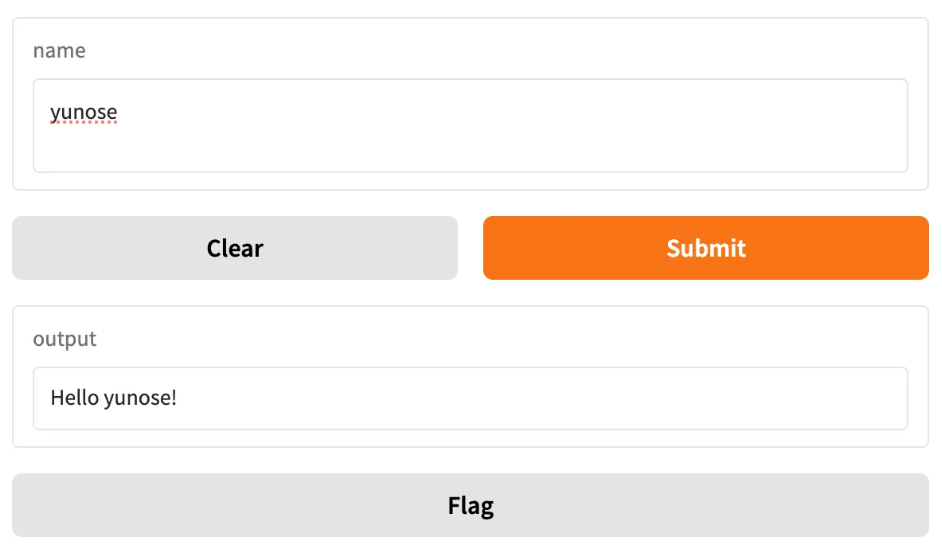
( 名前を入力して名前へのあいさつを出力するWEB UI )
import gradio as gr

# あいさつの関数
def greet(name):
    return "Hello " + name + "!"

# Interfaceの作成
demo = gr.Interface(
    fn=greet,
    inputs="text",
    outputs="text"
)

# 起動
demo.launch()
実行
Interface
interface は関数をUIでラップするためのクラス
主なパラメータは以下の通り
- fn : ラップする関数
- inputs : 入力コンポーネント ( “text” “image” “audio”など )
- outputs : 出力コンポーネント ( “text” “image” “label”など )
コンポーネント
「inputs」と「outputs」には「コンポーネント」を指定することができる。
コンポーネントは、コンポーネント属性でカスタマイズできる。
以下では、inputs にコンポーネント「TextBox」を指定し、行数に2、プレースホルダーに ”Name Here…” を指定している。
import gradio as gr

# あいさつの関数
def greet(name):
    return "Hello " + name + "!"

# Interfaceの作成
demo = gr.Interface(
    fn=greet,
    inputs=gr.Textbox(
        lines=2, #行数
        placeholder="Name Here..." # プレースホルダ
    ),
    outputs="text",
)

# 起動
demo.launch()
実行
複数の入出力
「inputs」と「outputs」には複数のコンポーネントを指定することもできる。
これによって複数の入出力を持つ関数をラップすることができる。
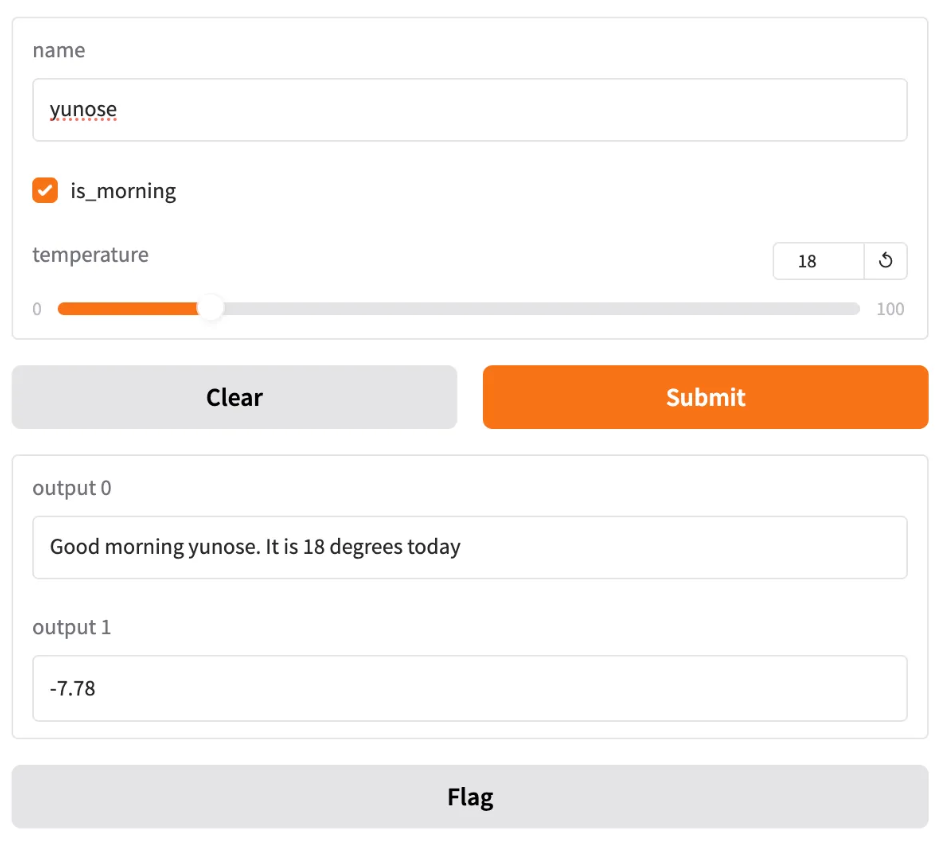
以下では複数の入出力を行っている。
import gradio as gr

# あいさつの関数
def greet(name, is_morning, temperature):
    salutation = "Good morning" if is_morning else "Good evening"
    greeting = f"{salutation} {name}. It is {temperature} degrees today"
    celsius = (temperature - 32) * 5 / 9
    return greeting, round(celsius, 2)

# Interfaceの作成
demo = gr.Interface(
    fn=greet,
    inputs=["text", "checkbox", gr.Slider(0, 100)],
    outputs=["text", "number"]
)

# 起動
demo.launch()
** temperature = 温度
実行
画像の入出力
「gradio」は「Image」「DataFrame」「Video」「Label」など様々なコンポーネントをサポートしている。
以下では画像の入出力を行っている。
import numpy as np
import gradio as gr

# セピア化の関数
def sepia(input_img):
    sepia_filter = np.array([
        [0.393, 0.769, 0.189],
        [0.349, 0.686, 0.168],
        [0.272, 0.534, 0.131]
    ])
    sepia_img = input_img.dot(sepia_filter.T)
    sepia_img /= sepia_img.max()
    return sepia_img

# Interfaceの作成
demo = gr.Interface(
    fn=sepia,
    inputs=gr.Image(shape=(200, 200)),
    outputs="image"
)

# 起動
demo.launch()
import numpy as np
import gradio as gr
from PIL import Image

# セピア化の関数
def sepia(input_img):
    # 入力画像をリサイズ(200x200)する
    input_img = input_img.resize((200, 200))

    sepia_filter = np.array([
        [0.393, 0.769, 0.189],
        [0.349, 0.686, 0.168],
        [0.272, 0.534, 0.131]
    ])

    # 画像をNumPy配列に変換してフィルタを適用
    input_np = np.array(input_img)
    sepia_img = input_np.dot(sepia_filter.T)

    # ピクセル値を0〜255の範囲にスケーリング
    sepia_img = np.clip(sepia_img, 0, 255).astype(np.uint8)

    return Image.fromarray(sepia_img)

# Interfaceの作成
demo = gr.Interface(
    fn=sepia,
    inputs=gr.Image(image_mode="RGB"),  # shapeではなくimage_modeを指定
    outputs="image"
)

# 起動
demo.launch()
実行
Blocks
gradioはアプリを構築するため、「Interface」の他に「Blocks」も提供する。
- Interface : 関数をUIでラップするための高レベルクラス
- Blocks : より柔軟なレイアウトとデータフローを実現するための低レベルクラス
以下では、「はじめてのWEB UIの作成」を「Blocks」で書き直す。
import gradio as gr

# あいさつの関数
def greet(name):
    return "Hello " + name + "!"

# Blocksの作成
with gr.Blocks() as demo:
    # UI
    name = gr.Textbox(label="Name")
    output = gr.Textbox(label="Output Box")
    greet_btn = gr.Button("Greet")

    # イベントハンドラー
    greet_btn.click(fn=greet, inputs=name, outputs=output)

# 起動
demo.launch()
実行
複雑なBlocksの例
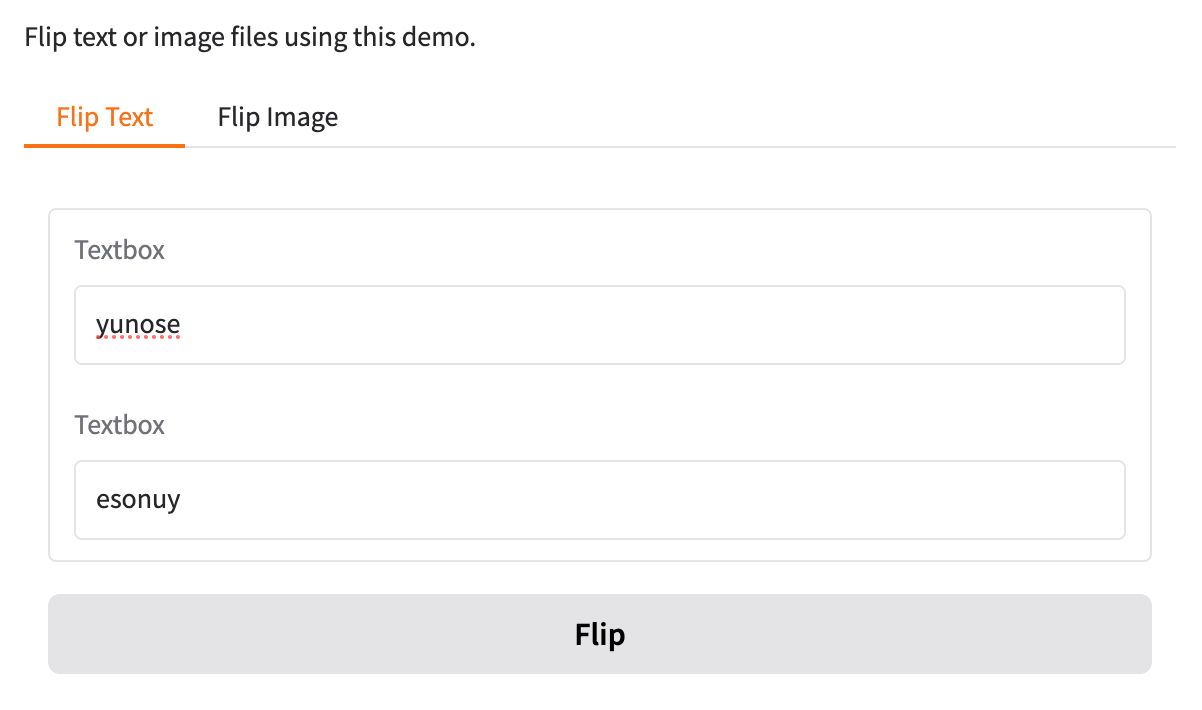
以下はより複雑な「Blocks」の例
import numpy as np
import gradio as gr

# テキストフリップの関数
def flip_text(x):
    return x[::-1]

# 画像フリップの関数
def flip_image(x):
    return np.fliplr(x)

# Blocksの作成
with gr.Blocks() as demo:
    # UI
    gr.Markdown("Flip text or image files using this demo.")
    with gr.Tabs():
        # Flip Textタブ
        with gr.TabItem("Flip Text"):
            text_input = gr.Textbox()
            text_output = gr.Textbox()
            text_button = gr.Button("Flip")

        # Flip Imageタブ
        with gr.TabItem("Flip Image"):
            with gr.Row():
                image_input = gr.Image()
                image_output = gr.Image()
            image_button = gr.Button("Flip")

    # イベントリスナー
    text_button.click(flip_text, inputs=text_input, outputs=text_output)
    image_button.click(flip_image, inputs=image_input, outputs=image_output)

# 起動
demo.launch()
** flip = 反転
実行


