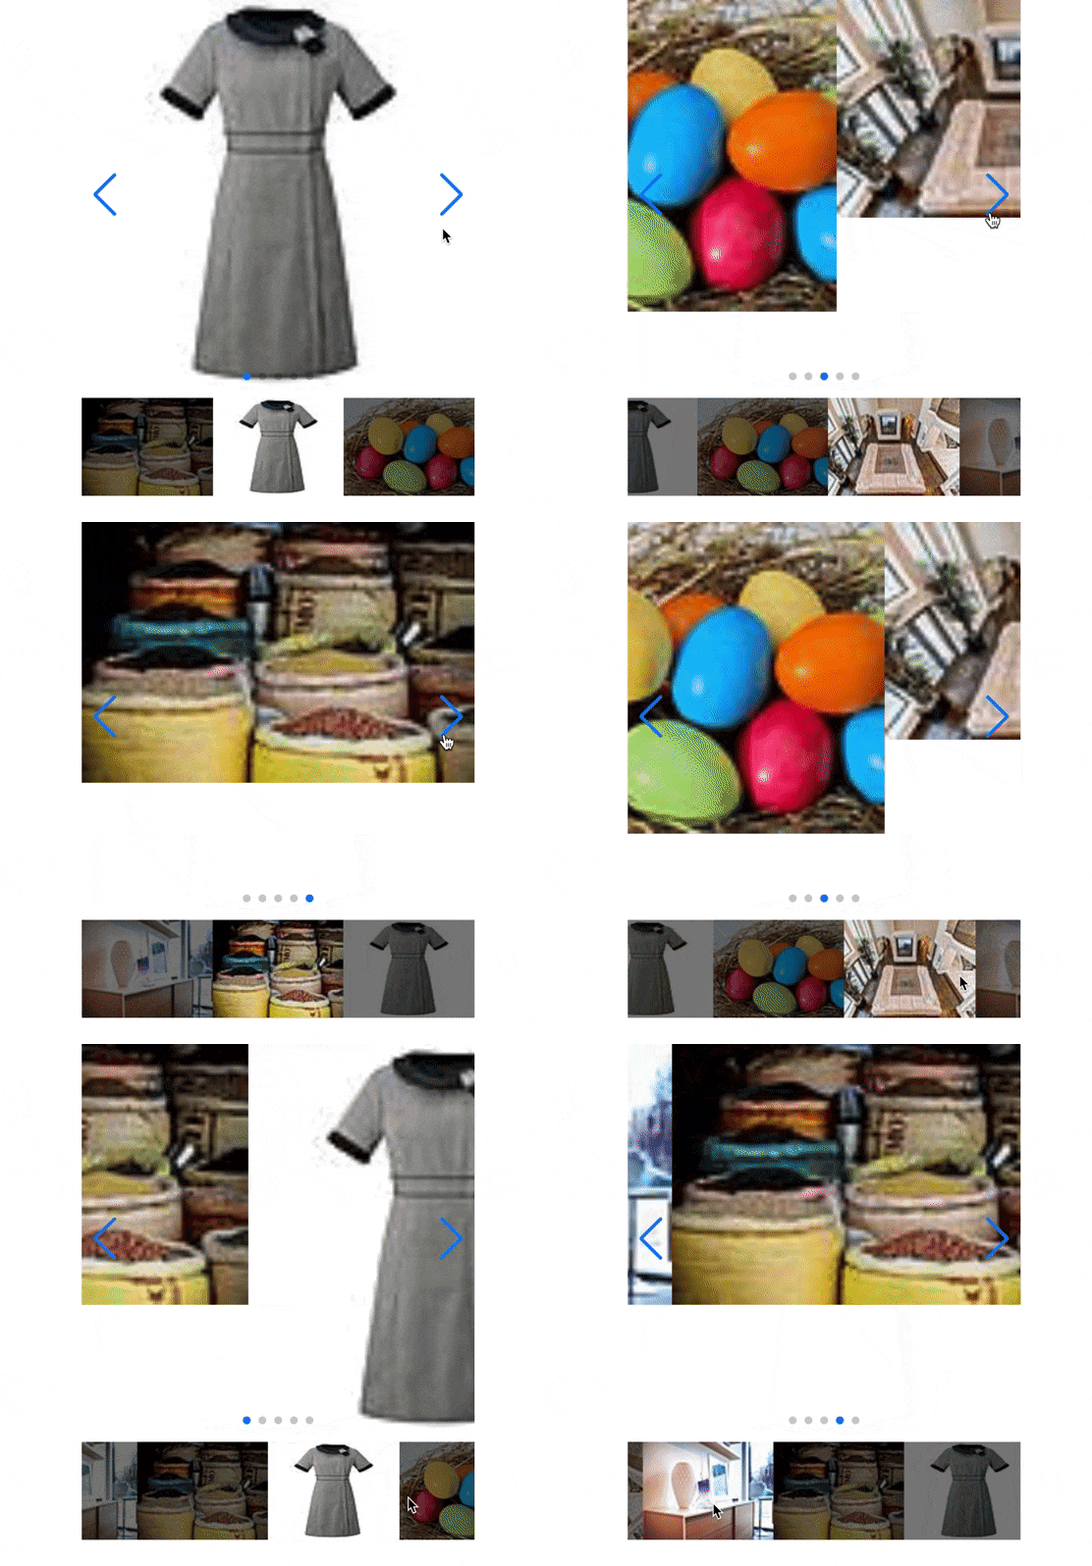
完成イメージ
Swiperとは
スライダー(カルーセル)が作れるJavaScriptライブラリです。
しかもPCでもスマホでも使えて、レスポンシブ対応可能!
引用元 https://garigaricode.com/swiper/
使用準備
今回はCDNから読み込む方法で行きます。
!!!
%html
  %head
    %meta{:content => "text/html; charset=UTF-8", "http-equiv" => "Content-Type"}/
    %title FrimaApp
    %script{src: "https://js.pay.jp/", type: "text/javascript"}
    = csrf_meta_tags
    = csp_meta_tag
    = stylesheet_link_tag    'application', media: 'all'
    %link{:href => "https://unpkg.com/swiper/css/swiper.min.css", :rel => "stylesheet"}/
    = javascript_include_tag 'application'
  %body
    %script{:src => "https://unpkg.com/swiper/js/swiper.min.js"}
    = yield
%link{:href => "https://unpkg.com/swiper/css/swiper.min.css", :rel => "stylesheet"}/
は%haad内に
%script{:src => "https://unpkg.com/swiper/js/swiper.min.js"}
は%body内に記述します。
ビュー
              / メイン表示部分、各スライド
              .swiper-container.swiper1
                .swiper-wrapper
                  - @images.each do |images|
                    = image_tag asset_path(images.content), class:"swiper-slide"
                / 次へ、前へボタン
                .swiper-button-prev.prev1
                .swiper-button-next.next1
                / ページネーション
                .swiper-pagination

              / 2段目、各スライド
              .swiper-container.swiper2
                .swiper-wrapper
                  - @images.each do |images|
                    = image_tag asset_path(images.content), class:"swiper-slide"
JSファイル
$(function(){
	var mySwiper1 = new Swiper('.swiper1', {
		loop: true, // ループ
		loopedSlides: (".swiper1").length, // loop: trueの場合必須 総スライド数の半分以上の値を設定
		navigation: {
			nextEl: '.next1', // 次ページボタンのセレクタ名を指定
			prevEl: '.prev1', // 前ページボタンのセレクタ名を指定
		},
		pagination: {
			el: '.swiper-pagination', // ページネーションのセレクタ名を指定
			type: 'bullets', // ●○◯◯形式
			clickable: true, // type: 'bullets'の時のみ有効 ◯クリックで直接そのスライドへ移動
		},
	});
	var mySwiper2 = new Swiper('.swiper2', {
		loop: true,
		loopedSlides: (".swiper2").length, // 最初の前、最後の後に複製される非表示のスライド数を指定
		slideToClickedSlide: true, // スライドクリックでそのスライドに移動する
		centeredSlides: true, // センター表示
		slidesPerView: 3, // 一度に表示するスライド数を指定
		controller: {
			control: mySwiper1, // 連動させるSwiperの定義名を指定
			by: 'slide',  // 連動Swiperをスライド単位で制御
		},
	});
	mySwiper1.controller.control = mySwiper2;
});
mySwiper1.controller.control = mySwiper2は
なぜ1個目と2個目のSwiperでcontollerの指定方法が違っているかというとですね、コードは上から順番に実行されるため、1個目のSwiperを作っている最中は2個目のSwiperは定義前なのでまだ存在しません。
この状態で連携しようとしても「そんなものないですよ」という判断になってしまいます。
2個目のSwiperを作っている時には、1個目のSwiperはすでに存在しているため、var mySwiper2 = … の中で書くことができます。
なので、2個目のSwiperも作り終わってから1個目のcontoller指定をしてやるとうまくいきます。
引用元 https://garigaricode.com/swiper/
SCSS
              .swiper-container {
                width: 400px;
                font-size: 0;
              }
              /* 2段目のSwiper全体のスタイル */
              .swiper2 {
                margin-top: 8px;
              }
              /* 2段目のSwiperのスライドのスタイル */
              .swiper2 .swiper-slide {
                height: 100px;
                line-height: 100px;
                -webkit-filter: brightness(0.5);
                filter: brightness(0.5); // 画像の明度調節
              }
              /* 2段目のSwiperの現在のスライドのスタイル */
              .swiper2 .swiper-slide-active {
                -webkit-filter: brightness(1);
                filter: brightness(1);
              }
-webkit-
-webkit-とは?
webkitの記述は、ベンダープレフィックスと呼ばれCSS3で実装予定の機能をブラウザ各社が先行して実装した機能を各ブラウザで使えるようにしたものです。
引用元 https://code-schools.com/css-webkit/
完成
引用を多用しました。
ご指摘等あればぜひコメントお願いします!!
