追記
この記事ではsshの鍵が.sshではない場所にありますが、どう考えてもよろしくないので、善良なるこの記事を見ている皆さんは素直に.sshの配下に鍵を配置しましょう。
はじめに
VSCodeにはRemote Developmentという拡張があります。まだPreview版ですが、出てからそこそこ経ったので試してみました。
結論
おそらくssh-agentのからみから、msys2のsshを使うのはうまく行かず、Windows10標準搭載のsshを使うことになります。
前提
msys2から普通に目的のサーバーにコマンドラインでsshできる状態。もちろんパスワード認証なんかじゃなくて公開鍵認証で。~/.ssh/configには
Host irregular-at-tus.work
    IdentityFile ~/key_webarena/key_webarena
    Port 110
    User yumetodo
のようにある。つまり
├─.ssh
│  ├─config
│  └─known_hosts
├─key_webarena
│  ├─key_webarena
│  └─key_webarena.pub
のようなdirectory構成。
この記事でのSSH先はWebARENAのVPSで動いているUbuntu 18.04 Server。
Windowsでsshするのにmsys2ないしgit-bash使ってないとか有りえんので、この段階に至ってない場合は多分この拡張にお世話になることはないはず。
remoteは今の所glibcベースで動いているx86_64なLinux環境のみ対応。
Windows10標準搭載のsshとmsys2のpacmanで落とせるsshで設定を共有しつつsshできるように
シンボリックリンクを貼る
まずは~/.ssh/configおよび設定で参照している認証鍵にシンボリックリンクを貼ります。
コマンドプロンプトを立ち上げ以下のように。ユーザー名は適宜読み替えてください。
C:\Users\yumetodo>mklink /D .ssh "C:\msys64\home\yumetodo\.ssh"
.ssh <<===>> C:\msys64\home\yumetodo\.ssh のシンボリック リンクが作成されました
C:\Users\yumetodo>mklink /D key_webarena "C:\msys64\home\yumetodo\key_webarena"
key_webarena <<===>> C:\msys64\home\yumetodo\key_webarena のシンボリック リンクが作成されました
C:\Users\yumetodo>dir | findstr SY
2017/11/17  13:03    <SYMLINKD>     .gnupg [C:\msys64\home\yumetodo\.gnupg]
2019/08/05  20:46    <SYMLINKD>     .ssh [C:\msys64\home\yumetodo\.ssh]
2019/08/01  01:01    <SYMLINKD>     key_webarena [C:\msys64\home\yumetodo\key_webarena]
.gnupgは別件なので気になさらずに・・・。
鍵のあるdirectoryの権限設定
~/.ssh/configのIdentityFileで指定した鍵ファイルがあるdirectoryをWindowsのエクスプローラーからたどり、プロパティ→セキュリティで以下の画面が開きます。
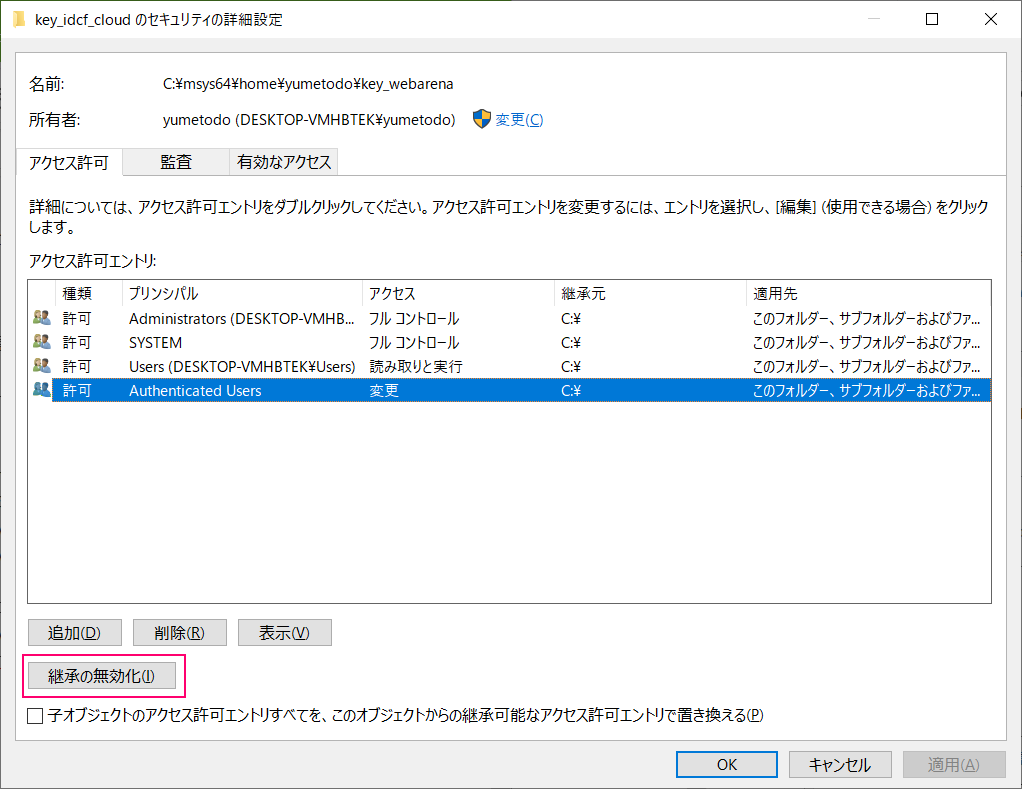
さらに詳細設定を押すと以下の画面が開きます。
ここで継承の無効化を押します。
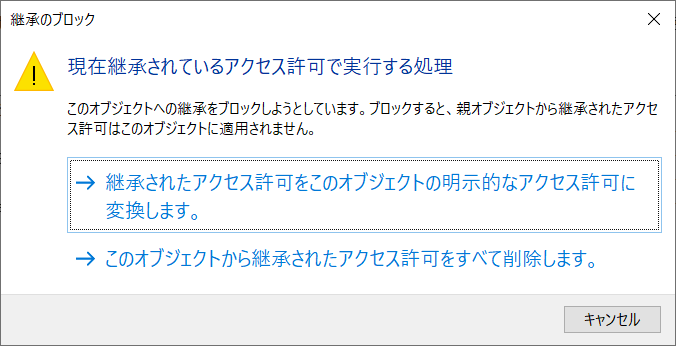
確認画面がでるので変換します。
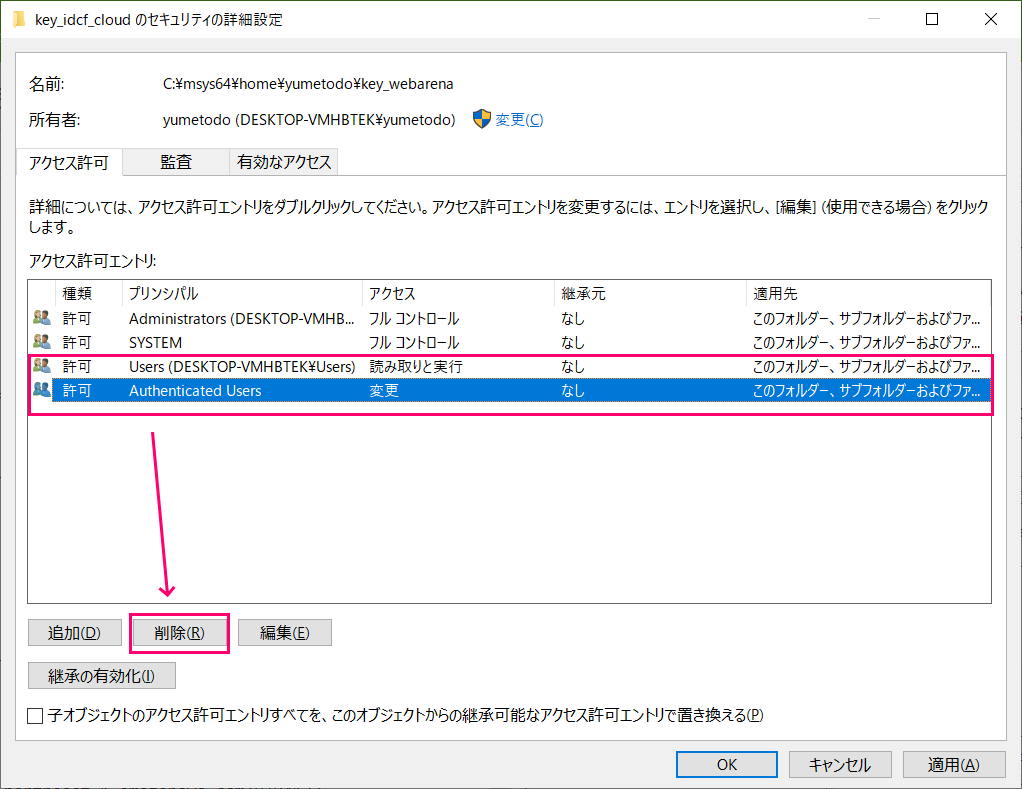
すると編集ができるようになるので、「Users」と「Authenticated Users」を削除します。
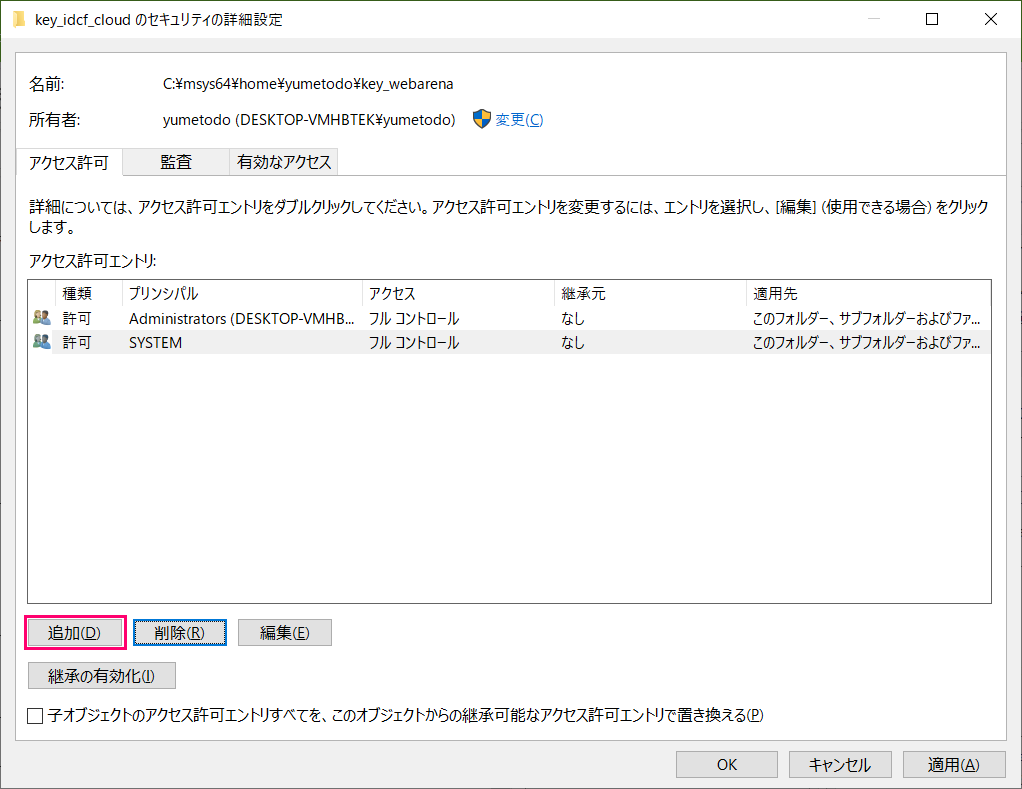
追加を押します。
プリンシパルの選択を押します。
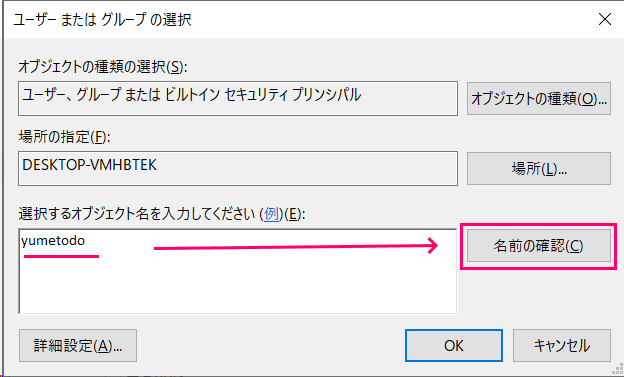
自分のWindowsログインユーザー名を入れて、「名前の確認」を押します。
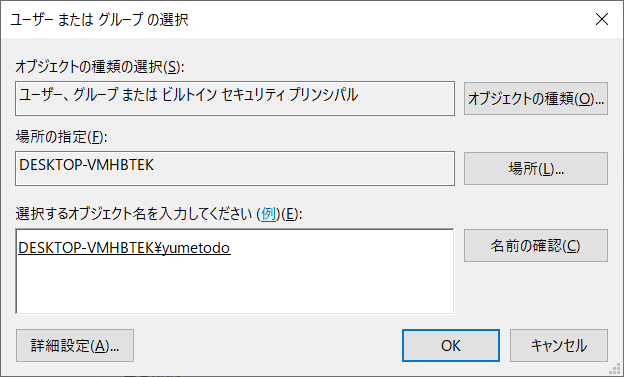
サジェストされるのでOKで閉じます。
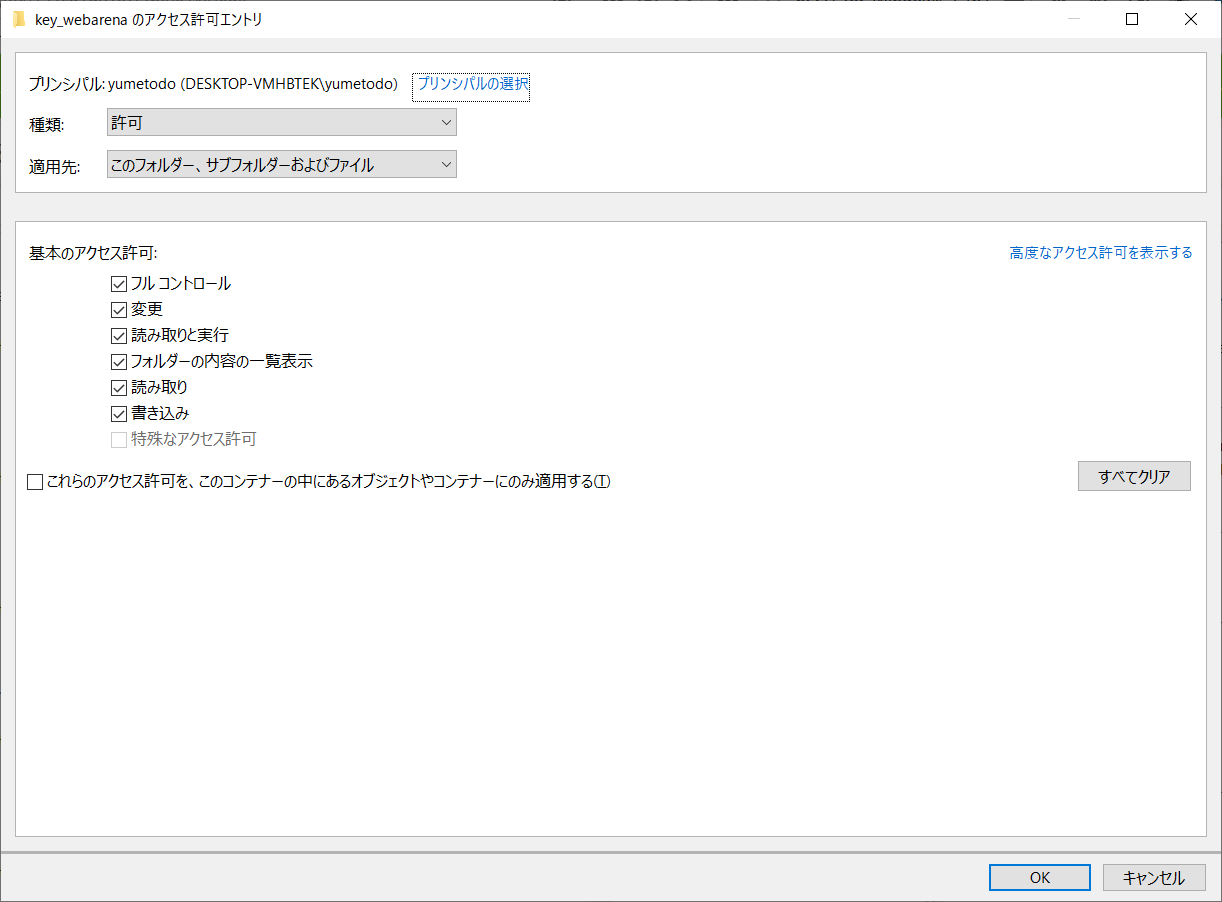
「フルコントロール」にチェックを付けてOKします。
最終的にこんな感じになっているはず・・・。
OKで閉じます。
~/.ssh/configの権限設定
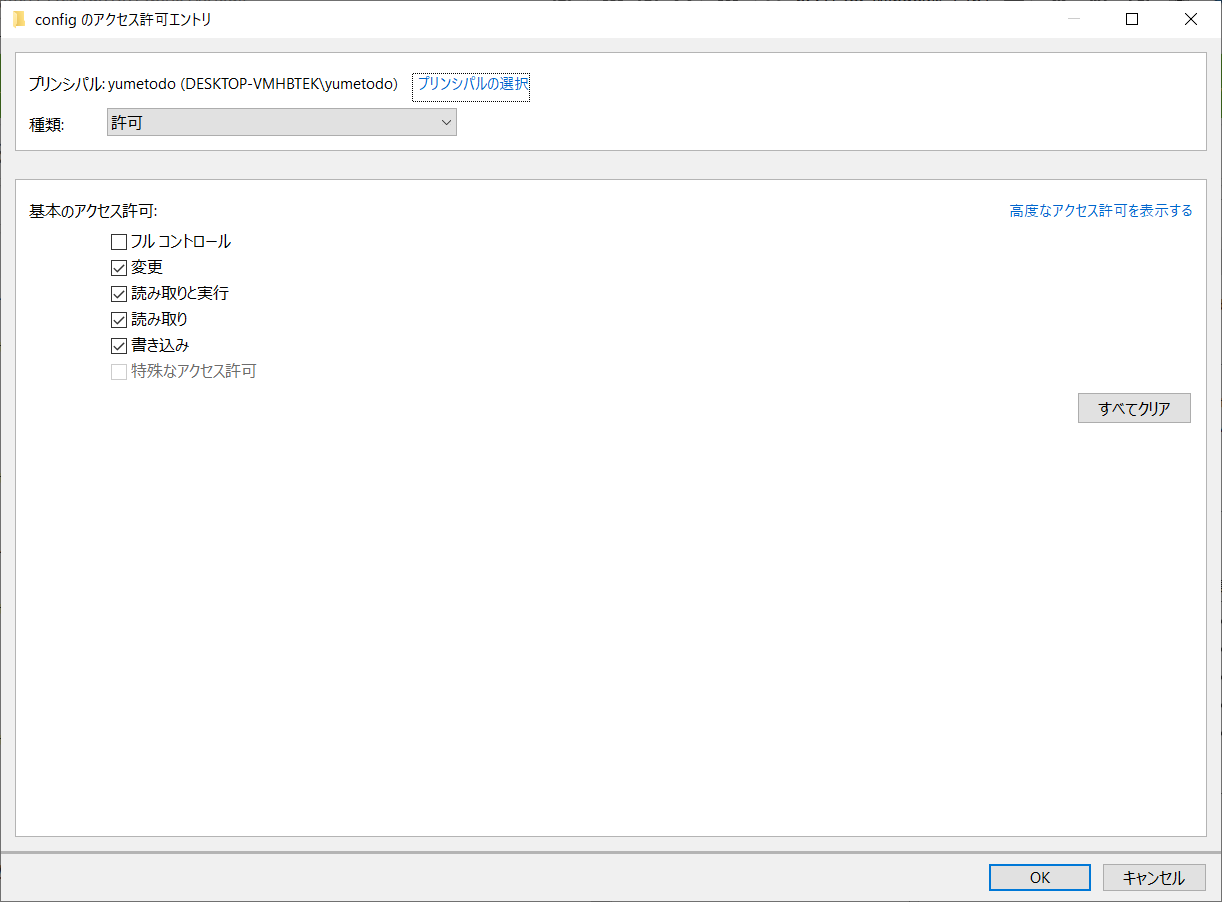
~/.ssh/configをWindowsのExplorerからたどってプロパティを開いて先ほどと同様に設定してきます。ただし以下の画面で「フルコントロール」ではなく「変更」に。
ssh-agentの有効化
他にもやり方はあるのですがコマンドラインからやるなら、管理者権限のPowerShellを立ち上げて
Set-Service ssh-agent -StartupType Automatic
Start-Service ssh-agent
Get-Service ssh-agent
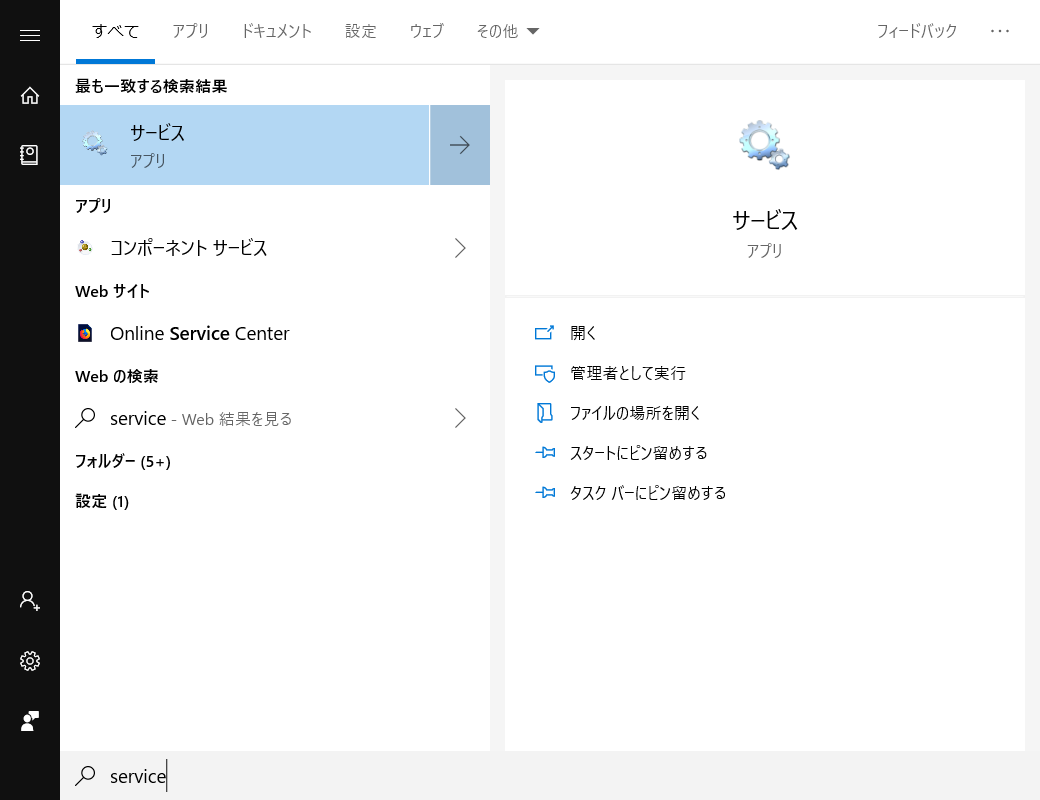
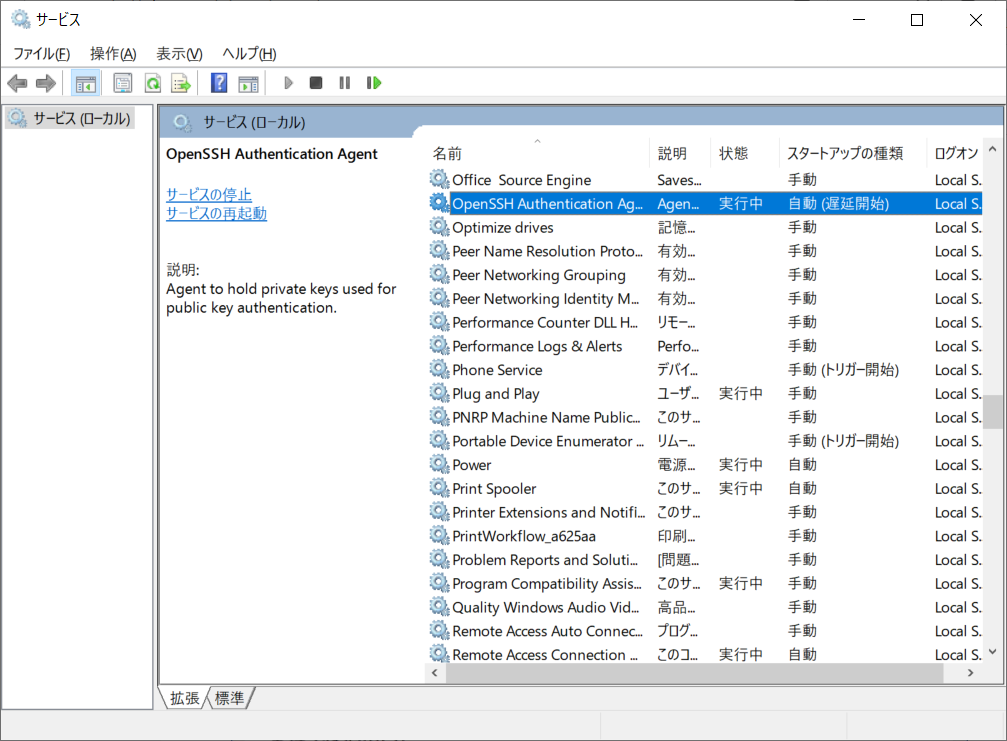
とすればいいです。GUIからやるならServiceで検索して
OpenSSH Authentication Agentを探して
スタートアップの種類を「自動」もしくは「自動(遅延起動)」にすればいいです。
ssh-add
C:\Users\yumetodo>ssh-add C:\msys64\home\yumetodo\key_webarena\key_webarena
Enter passphrase for C:\msys64\home\yumetodo\key_webarena\key_webarena:
Identity added: C:\msys64\home\yumetodo\key_webarena\key_webarena (yume-wikijp@live.jp)
C:\Users\yumetodo>ssh-add -l
4096 SHA256:P81NFT/HJeeQk1jXGzZeZ4cQ/XGLDKnDbgxHmFMhDgU yume-wikijp@live.jp (RSA)
ssh
C:\Users\yumetodo>ssh irregular-at-tus.work
warning: agent returned different signature type ssh-rsa (expected rsa-sha2-512)
Welcome to Ubuntu 18.04.2 LTS (GNU/Linux 4.15.0-55-generic x86_64)

 * Documentation:  https://help.ubuntu.com
 * Management:     https://landscape.canonical.com
 * Support:        https://ubuntu.com/advantage
Welcome to Ubuntu 18.04.2 LTS (GNU/Linux 4.15.0-55-generic x86_64)

 * Documentation:  https://help.ubuntu.com
 * Management:     https://landscape.canonical.com
 * Support:        https://ubuntu.com/advantage

  System information as of Mon Aug  5 20:50:22 JST 2019

  System load:  0.0                Processes:           130
  Usage of /:   46.4% of 19.56GB   Users logged in:     0
  Memory usage: 36%                IP address for ens3: 140.227.235.169
  Swap usage:   6%

 * MicroK8s 1.15 is out! Thanks to all 40 contributors, you get the latest
   greatest upstream Kubernetes in a single package.

     https://github.com/ubuntu/microk8s

 * Canonical Livepatch is available for installation.
   - Reduce system reboots and improve kernel security. Activate at:
     https://ubuntu.com/livepatch

5 packages can be updated.
2 updates are security updates.


Last login: Mon Aug  5 20:32:52 2019 from 119.173.37.16
Agent pid 26403

yumetodo@btgf1b8n ~
vscodeでSSHできるまで
拡張の導入
を入れます。
設定は特に弄ることはないです。
接続
Ctrl+Shift+ Pでコマンドパレットを開いて、Remote-SSH: Connect to Hostを選びます。
~/.ssh/configに書いたHostが列挙されます。接続したい先を選びます。
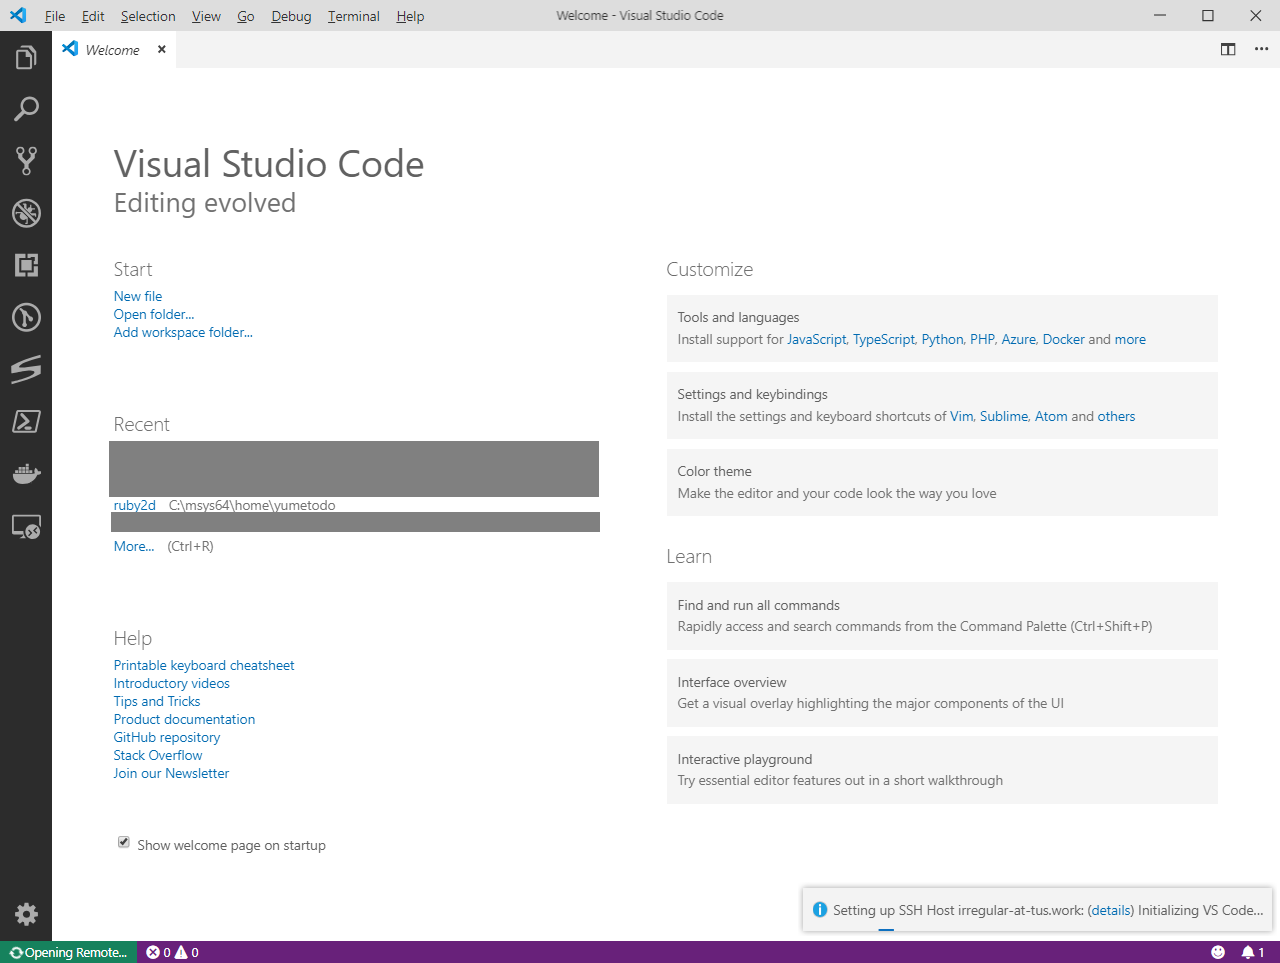
接続中・・・
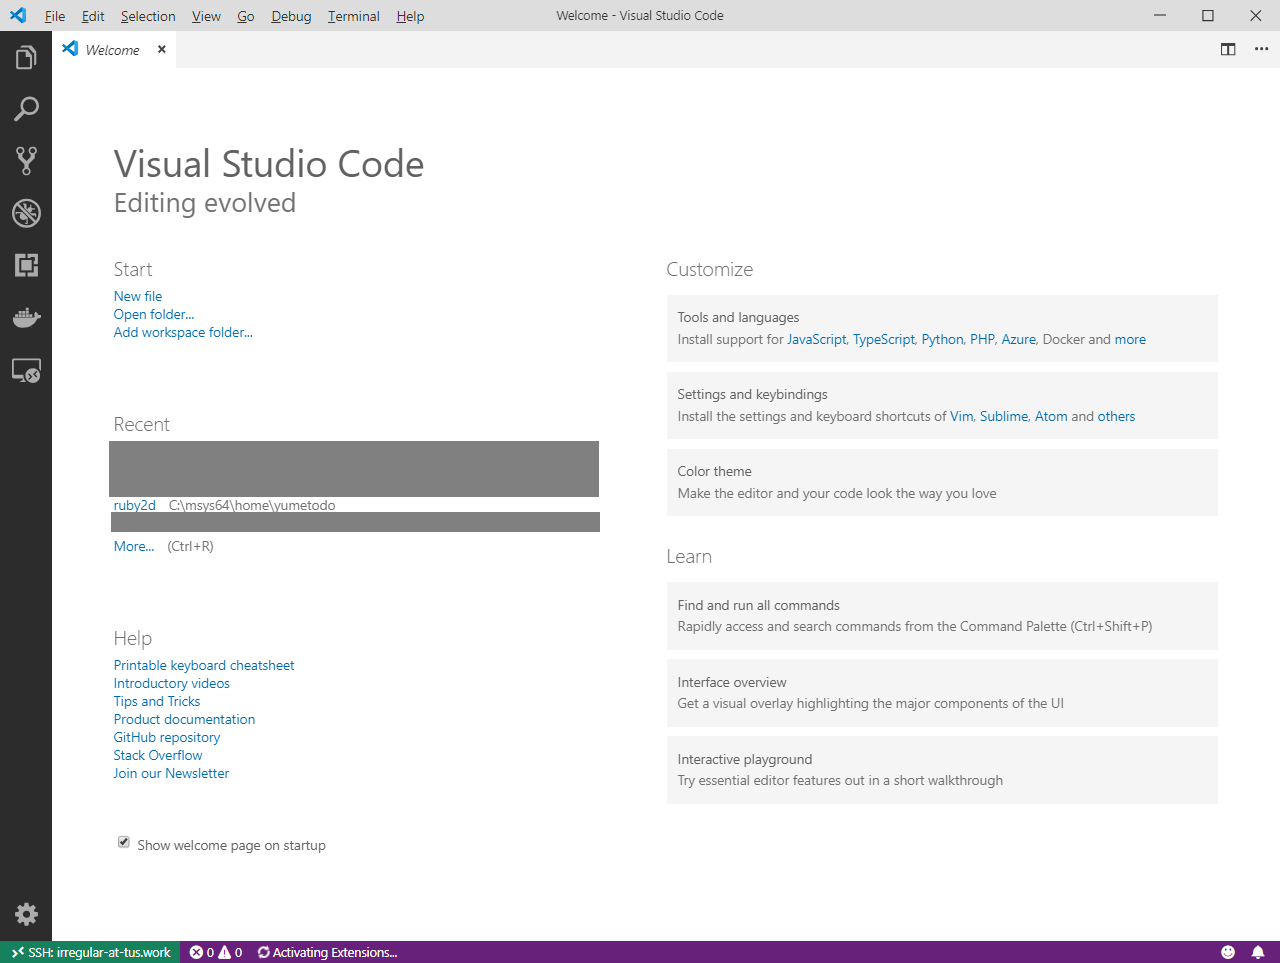
うまくいけばActivating Extensions...と下に出てきます。それが終われば使えます。
試しに適当なDirectoryを開いてみる
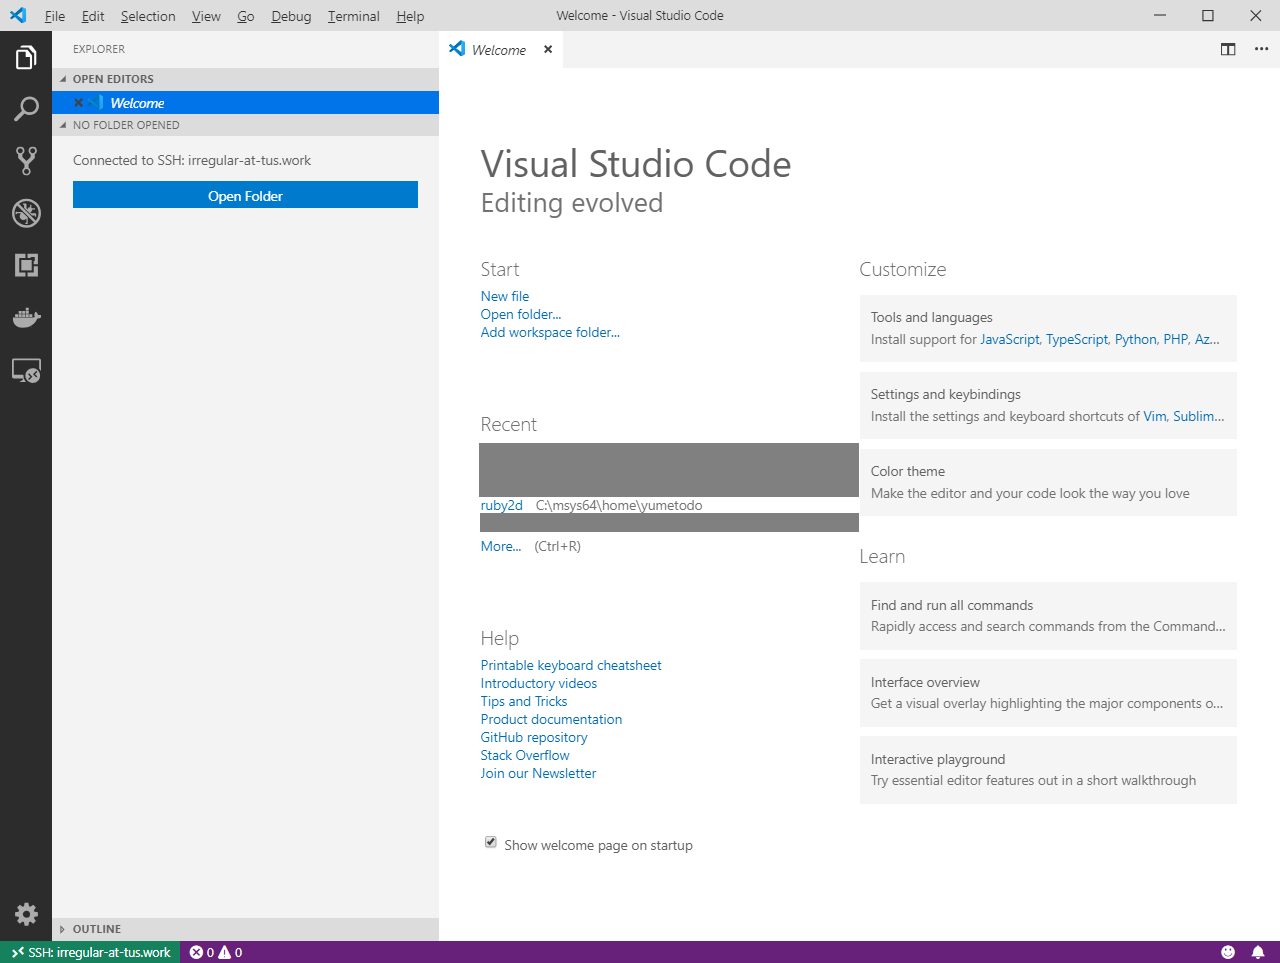
ファイラータブを開くとOpen Folderというボタンが見えます。
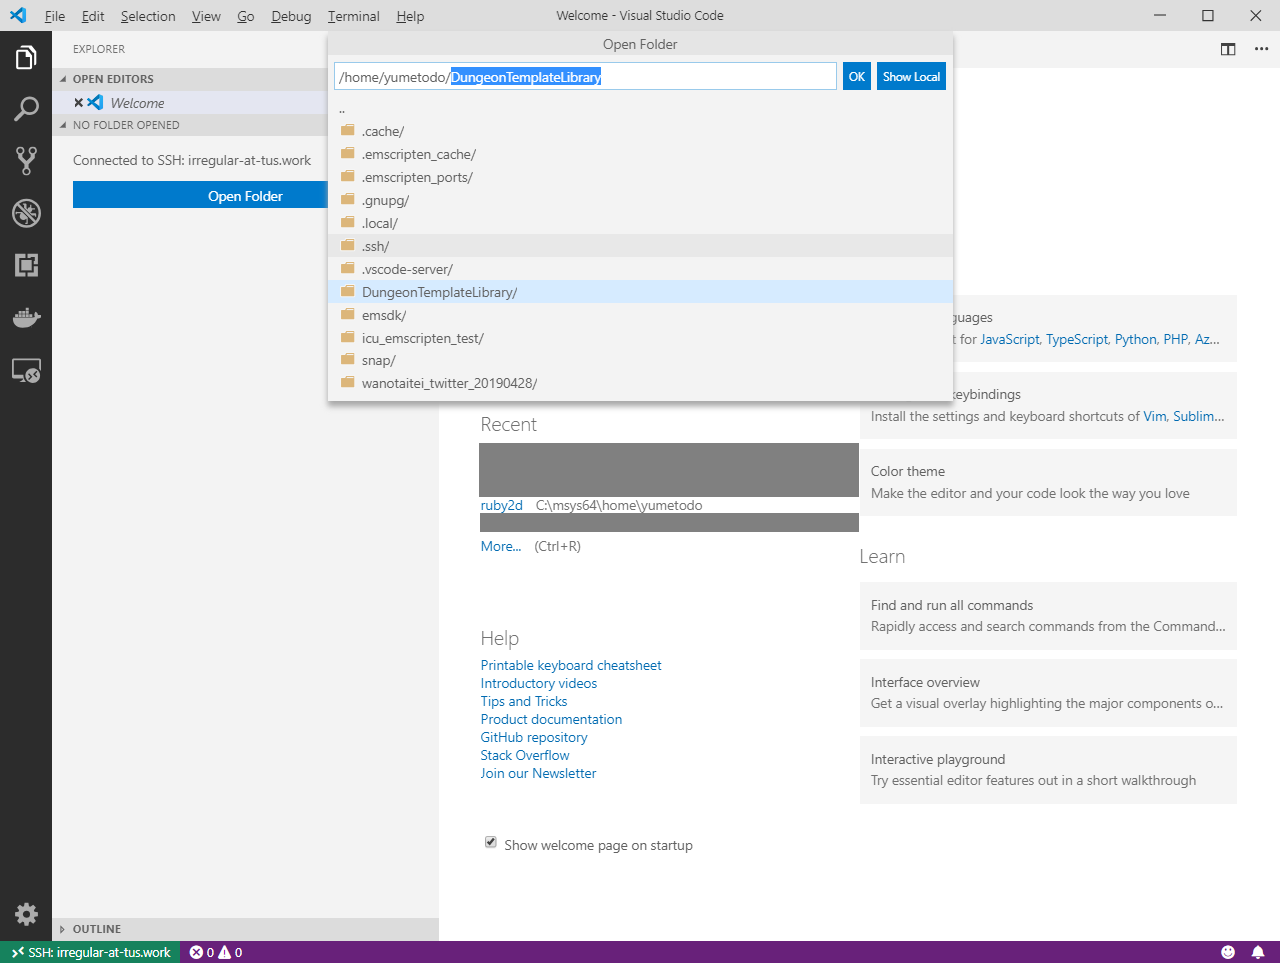
押すと現在(HOME directory)のリストが出てきます。試しに @Gaccho さんの DungeonTemplateLibraryをたまたまCloneしてあったのでこれを開いてみます(謎の宣伝)。
カーソルを合わしてOKを2回押します。
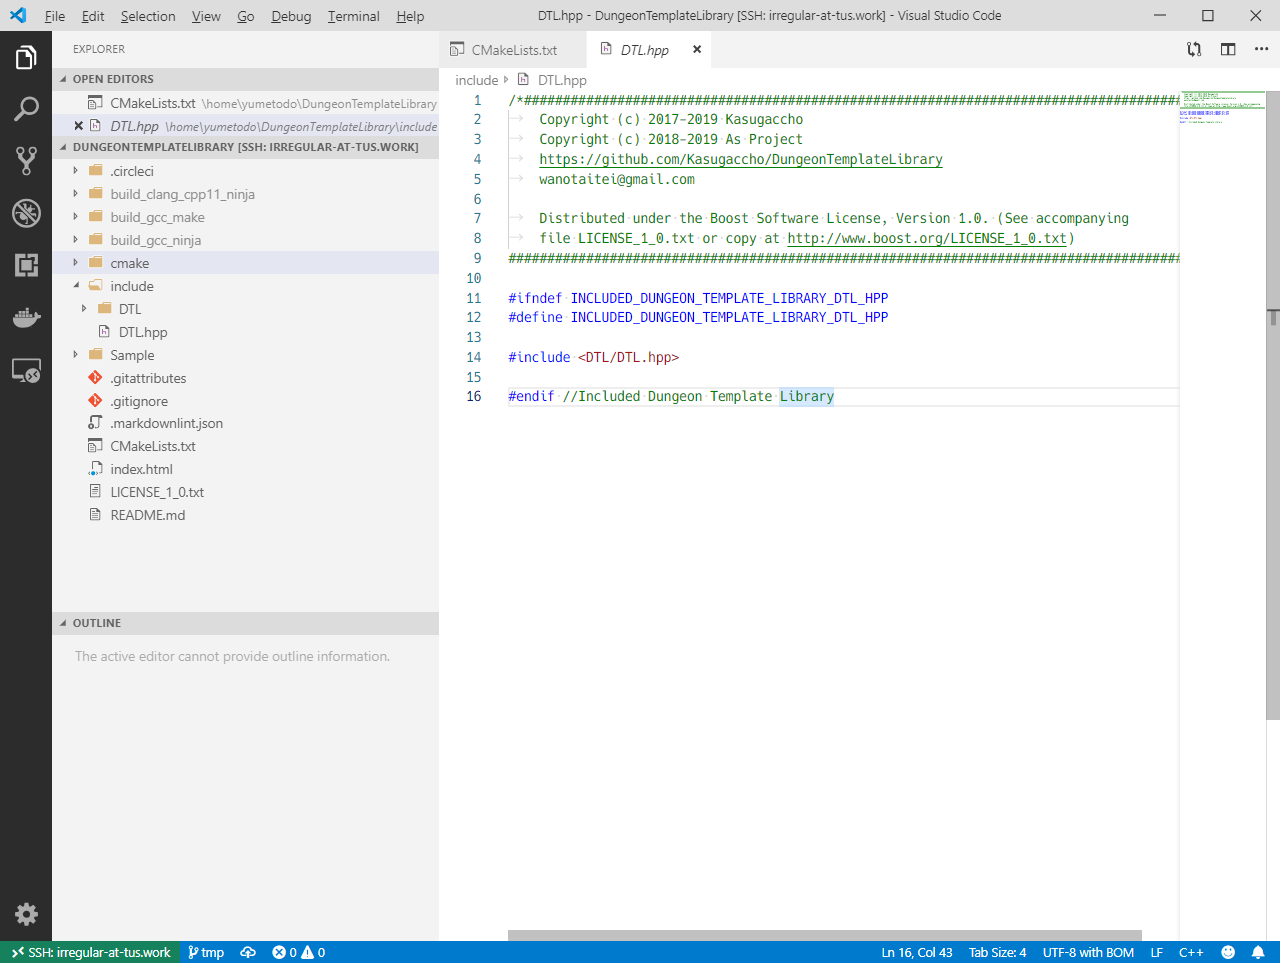
開けました。
端末を開いてみる
Ctrl+Shift+ @でとくに何も苦戦せずに端末が立ち上がって普通に使える。
次のステップ
Visual Studio Code Remote Development Troubleshooting Tips and Tricks
にも載っているように、サーバー側に入れないと動かない拡張もある。多分CMakeもそうだと思われる。そのへんを調整する必要がありそう。
全部のremoteに対して入れたい拡張を指定するには"remote.SSH.defaultExtensions"があるらしい。

