[2020/03/17 20:13 更新]
v0.5.6へのアップデートで正常に動作するようになりました。うちの環境ではだめ!とかあればコメントかGithubで教えてもらえると嬉しいです。
作ったもの
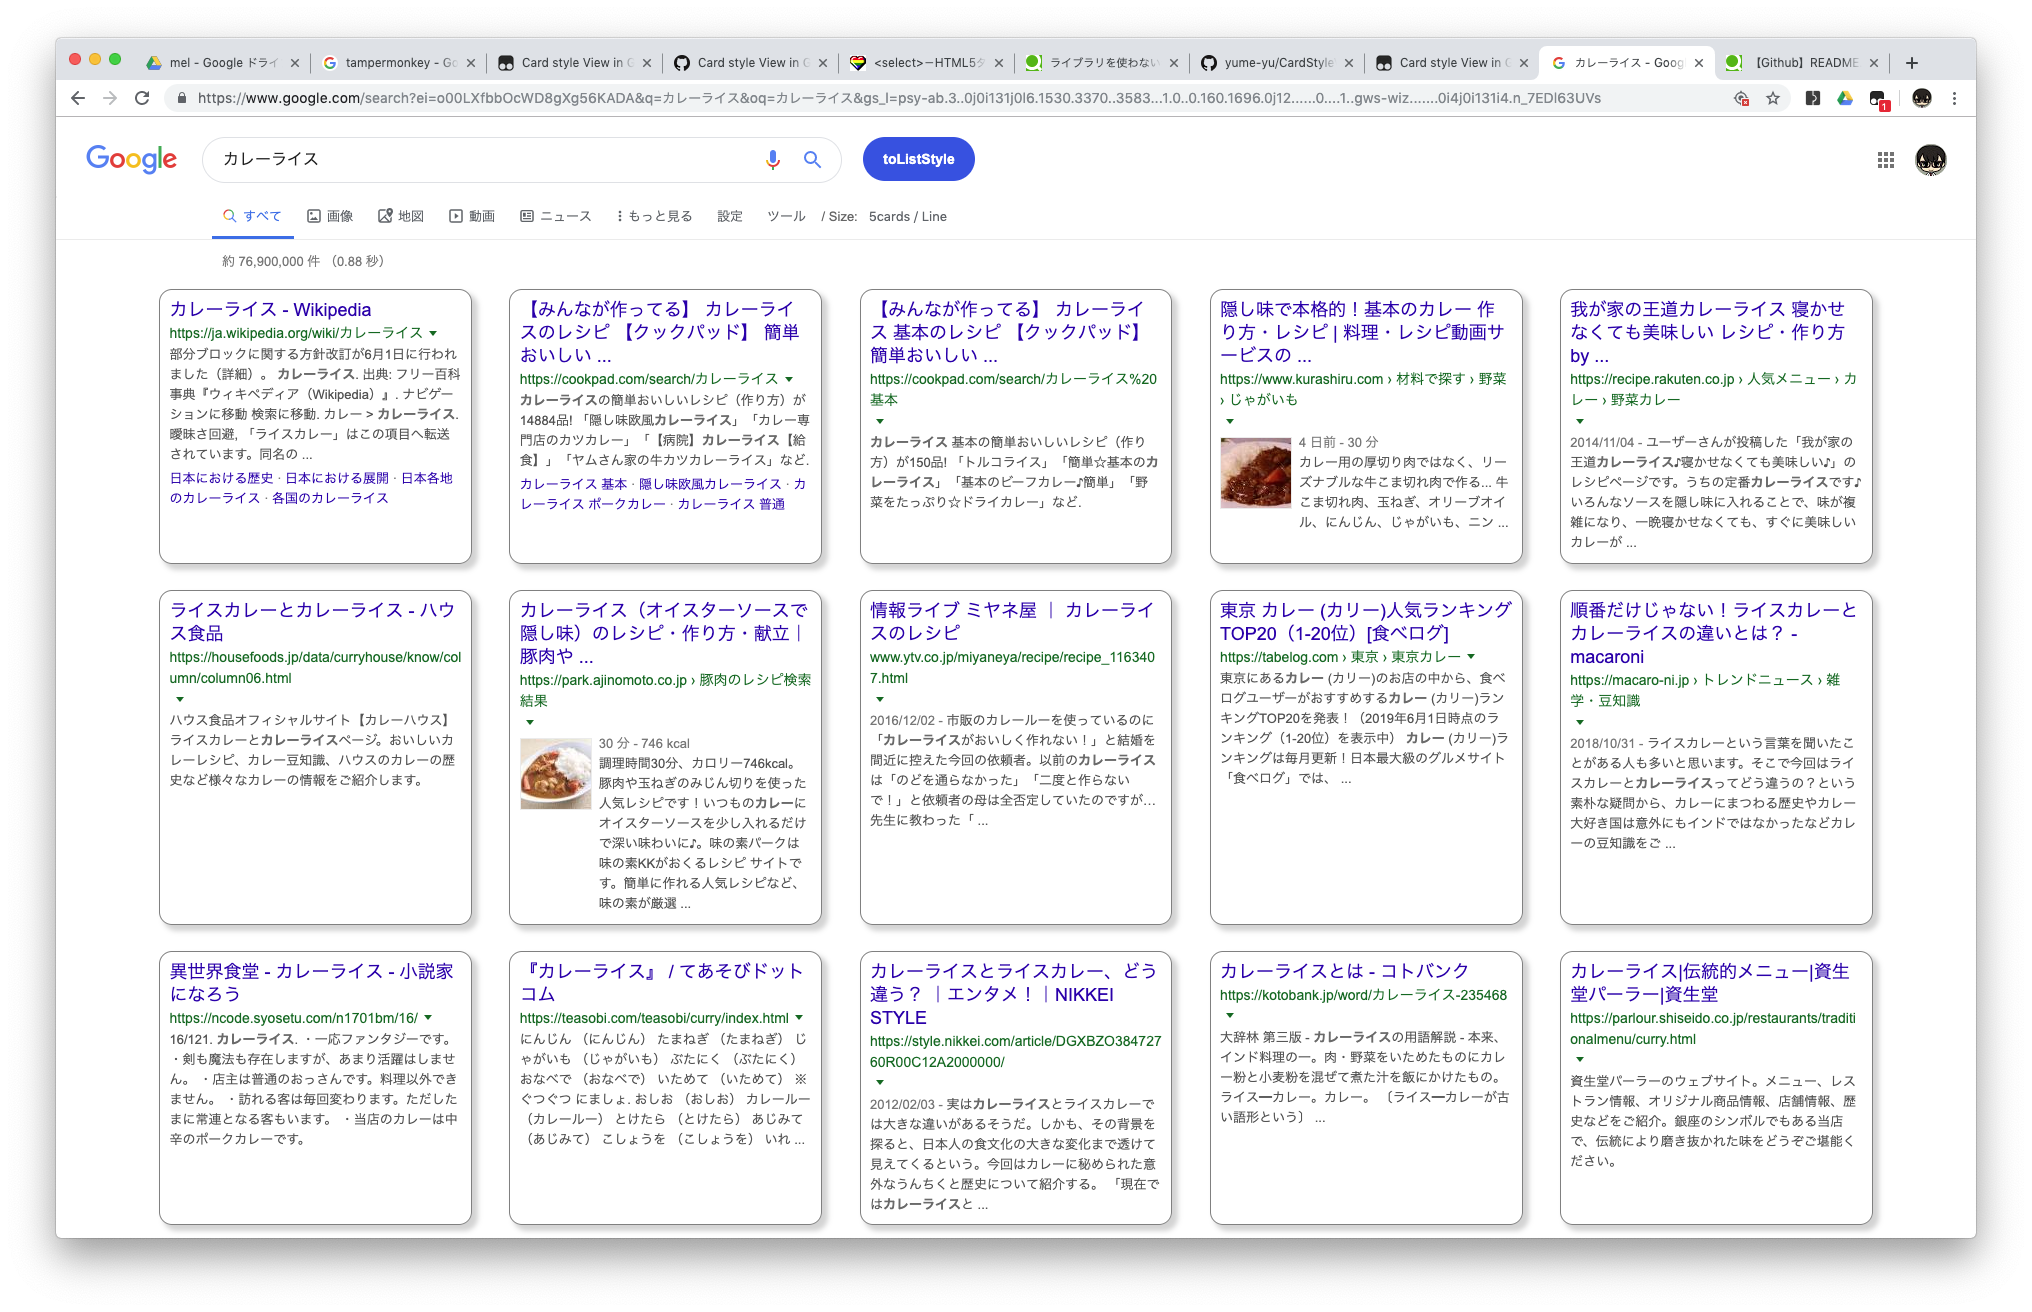
Tampermonkeyで使えるGoogleの検索結果をカード表示っぽくするscriptを書きました。
yume-yu/CardStyleView-in-GoogleResult

でかい解像度で表示するときに右の大きな余白がなくなるのがメリットです。
何をしてるのか
検索結果を抽出して検索結果だけのブロックをつくる
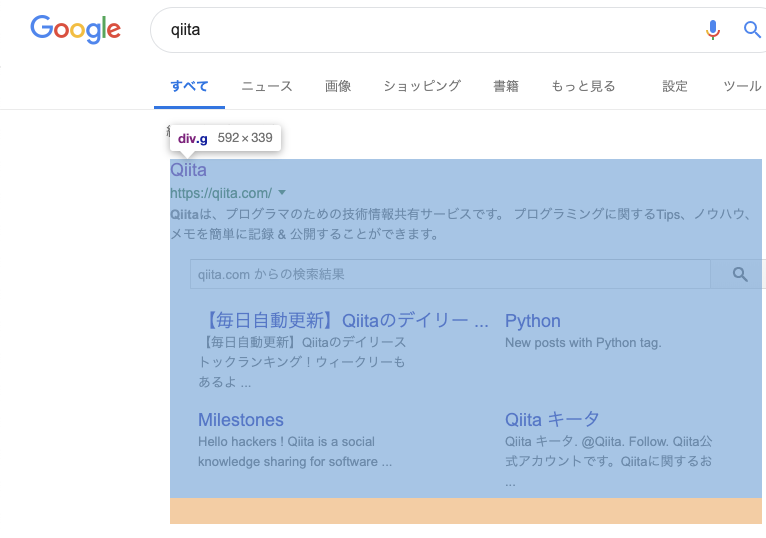
googleの検索結果のそれぞれのdivには .g classがついています(2019/05/16現在)。

これをjsで集めてまとめてCard表示用のdivをつくります。
// "g" classの要素をまとめて選択
var nodeItems = document.querySelectorAll('.g')
var items = [...nodeItems]                         // これでリストを展開できるの知らなかった
var cardDiv;                                       // カード表示用の検索結果収納div
var modelcase = document.getElementById("rso");
// もともと検索結果群を小要素に持つid=rsoの要素から1つとって構造をコピー、これをモデルにdivを作る
for(var i in modelcase.children){
    if(modelcase.children[i].getElementsByClassName("srg").length != 0){
        cardDiv = modelcase.children[i].cloneNode(true);
        break;
    }
}
// モデルのうち検索結果を含んでいる要素を空にする
cardDiv.getElementsByClassName("srg")[0].textContent = "";

// 集めた検索結果を空にした要素に流し込む
for(var item in items){
    cardDiv.getElementsByClassName("srg")[0].append(items[item].cloneNode(true));
}

// 最後にstyleを当てるためのclassを当てる
cardDiv.className += " cardList invisible"

// 検索結果の最上位にねじ込む
document.getElementById("rso").insertBefore(cardDiv,document.getElementById("rso").firstChild)
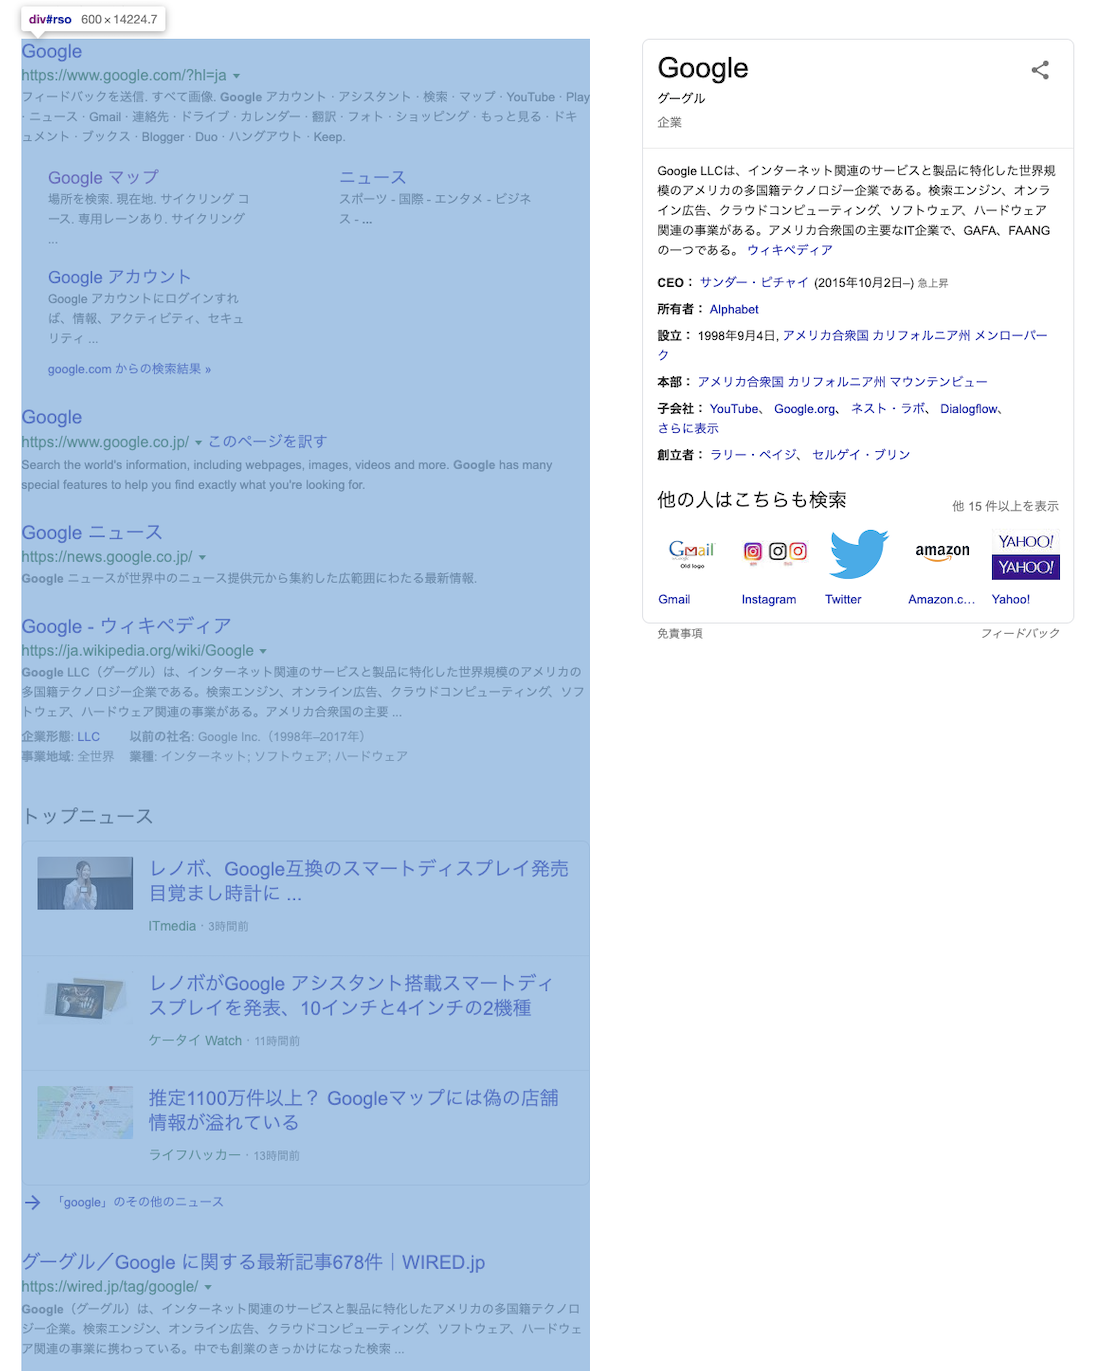
#rso の要素はこんなかんじ。検索結果すべてを含む要素。

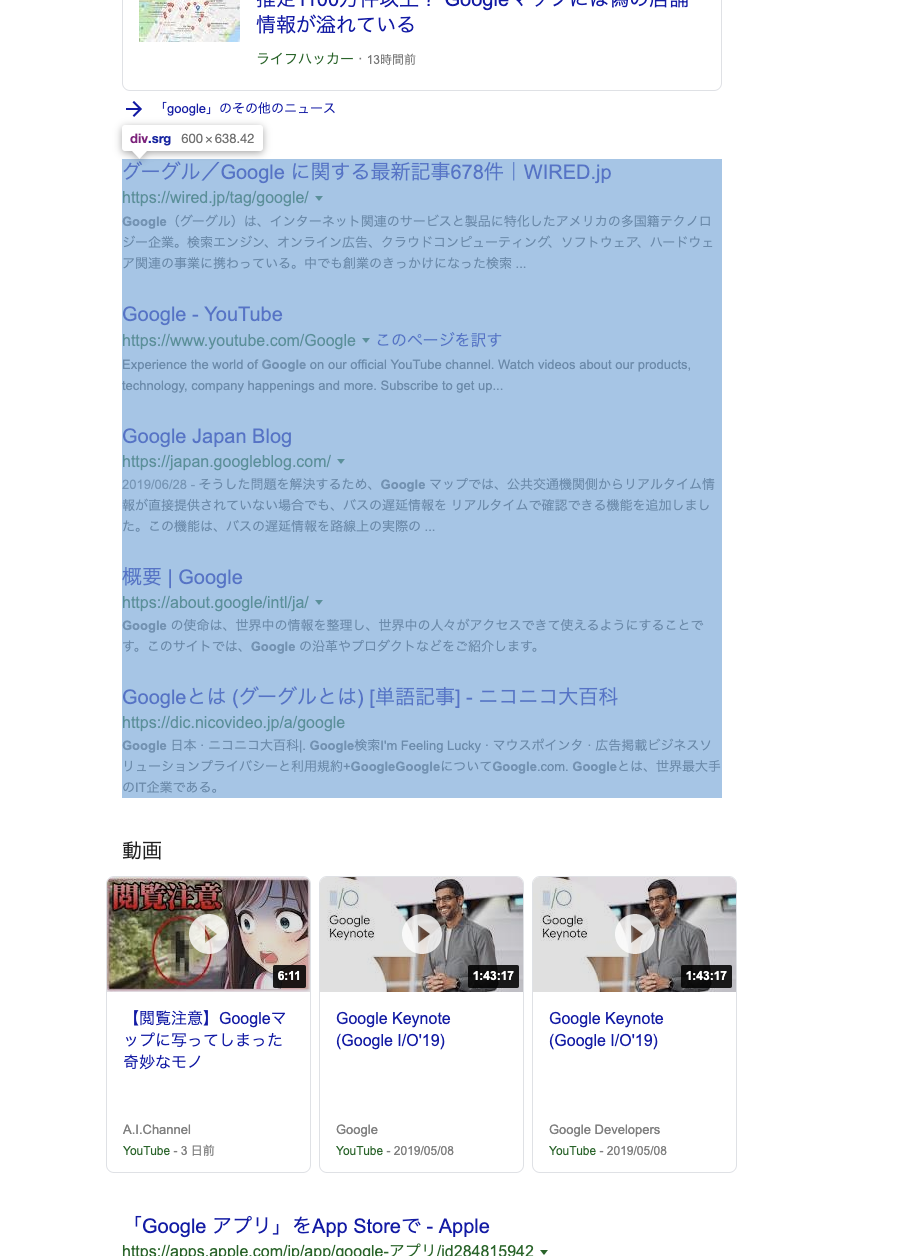
.srgの要素は一定数で区切られた検索結果をもつ要素。

作ったブロックにスタイルをあててカード表示にする
次にこのCard表示用のdivと、周りの要素にstyleをあててカード表示できるようにします。かなり力技でstyle要素をjsで作ってjsでねじ込む操作をしてます。
.mw {
max-width:none;
}

# fld {
display:none;
}

# rhs {
display:none;
}

div.col {
width:100%;
}

# cnt #center_col{
width:calc(100vw - 2 * 75px);
}

.mw #center_col {
margin-left: 75px !important;
margin-right: 75px;

}

.g cite {
word-break:break-all;
overflow-wrap:anywhere;
hyphens: auto;
}

# bottomads {
display: none;
}

.g-blk {
display:none;
}

.cardList .g {
line-height: 1.6;
text-align: left;
padding: 3%;
border: 1px solid gray;
border-radius: 1rem;
box-shadow: 5px 5px 5px 1px rgba(200, 200, 200, 0.8);
}

.cardList .g table{
display:none;
}

.cardList .g:hover {
border:1px solid gray;
box-shadow: 10px 10px 7px 1px rgba(200, 200, 200, 0.4);
}

div.srg {
width:  100%;
display: grid;
grid-template-columns: repeat(auto-fill, calc('; var css_after =  '));
justify-content: space-around;
grid-column-gap: 13px;
}

g-section-with-header{
margin:0;
}

g-scrolling-carousel{
margin:0 !important;
}

.card-section .brs_col{
display:flex;
}

/*画像検索の結果*/
div#imagebox_bigimages.g  g-section-with-header{
overflow:auto;
}

.exp-outline {
    display: none;
}
ある程度挙動もそれっぽくなるようにカードにドロップシャドウ?な感じで影を入れたり、マウスオーバーしたらふわっとするようになっています。ここにいくつかあるg-hogehogeなタグはよく右側に出てくるwikipediaからの参照のカードや画像検索の検索結果などちょっと特殊な検索結果の要素です。
カード表示の肝は検索結果を表示する要素(#cnt #center_col)の横幅固定を解除することと、検索結果の親(div.srg)をgrid表示にすることで要素を並べられるようにしているところです。ちなみにgrid-template-columnsのところはカードの横幅をjs側からもらって可変にできるようになっています。見やすい大きさは個人差があるので。
もとの検索結果を隠す
検索結果を集めた要素を作ったので、カード表示しているときはもともとある検索結果は邪魔です。なので表示しない側にはクラス .invisibleをつけ、さらに.invisibleはdisplay:none;するようにスタイルを当てます。
// カード表示側が.invisibleを持つときはオリジナル側は持ってないのでtoggleで切り替える
for(g in [...Array(document.getElementById("rso").children.length).keys()]){
    try{
        document.getElementById("rso").children[g].classList.toggle("invisible")
    }catch(e){
        // こういうのはよくない
    }
}
ボタンを作ってスイッチできるようにする
最後に表示を切り替えられるようにスイッチするボタンを作ります。
var button = document.createElement("div");
button.name= "switchCard";
button.id="switch";
button.className += document.querySelector("#tsf div:nth-of-type(2) div:first-of-type button").className
var buttonStyle = {
    display: "inline-flex",
    alignItems: "center",
    justifyContent: "center",
    width : "112px",
    //height : "100%",
    padding:0,
    position : "absolute",
    backgroundColor : "rgba(22,90,226,1)",
    zIndex : 999,
    textAlign:"center",
    borderRadius: "2rem",
    //top: "20px",
    left: "807px"
}
for(var buttonstyleKey in buttonStyle){
    button.style[buttonstyleKey] = buttonStyle[buttonstyleKey];
}
var label = document.createElement("a");
label.textContent = "toCardStyle"
var labelStyle = {
    display: "block",
    cursor: "pointer",
    textAlign: "center",
    padding: "0.5em 1em",
    width: "100%",
    color: "white",
    fontSize: "14px",
    fontWeight: "bold",
    userSelect:"none",
    textDecoration:"none"
}
for(var astyleKey in labelStyle){
    label.style[astyleKey] = labelStyle[astyleKey];
}
これにさっきのclassをtoggleするスクリプトをaddEventListenerでくっつければモードが切り替えできるようになります。切り替えのときに最後に使ったモード(card or list)をlocalstorageに記憶させるので次にgoogleを開いたときもモードは維持されます。

わかったこと など
- ライブラリなどなしでもDOM操作はできる。なれると感覚をつかめるので以外とスラスラ使えるが補完はほしい。
- 他人が書いたhtml/cssを説明無しでいじったり拡張するのは難しい。すごく。
- カード風にするスタイルを自作したけど、スマホ版はカード表示なのでそっちを拝借したほうがいいかも。
2019-07-10 追記
参考
- ライブラリを使わない素のJavaScriptでDOM操作 よくまとまっていて参考になりました