サーバーレスアドベントカレンダー2日目です。
株式会社CotoLab.エンジニアの山田祐真と申します。
ServerlessのBlogに載っていた手順を利用してチャットボットを作ってみました。
Serverlessでチャットボットを作った日本語の資料があまり見つからなかったのと、同じような記事はあったのですがv0系だったこと、また、元記事が画像などがなく若干わかりづらかったので、その補足となれればと思い書いてみます。
Serverlessの導入方法や簡単なチュートリアルはこちらをご参照ください。
http://qiita.com/tsuuuuu_san/items/81b0de19ecc6dcd1f6c3
こちらはより詳細な説明が載っています。
http://qiita.com/horike37/items/b295a91908fcfd4033a2
動作環境
- Serverless v1.2.1
- node.js(Lambda上) v4.3.0
Serverlessはv1系であれば問題なく動くと思います。
Serverlessでプロジェクトを作成
まずはプロジェクトを新規作成します。
node.jsテンプレートを使用し、プロジェクト名を"quotebot"で作成します。
serverless create --template aws-nodejs --path quotebot
Facebookアプリ登録
Facebookにアプリを登録します。
名称はquotebot,カテゴリは"Communication"と設定しました。何でも大丈夫です。
Facebookのアカウント登録方法、及びデベロッパーの登録方法はこちらをご参照ください。
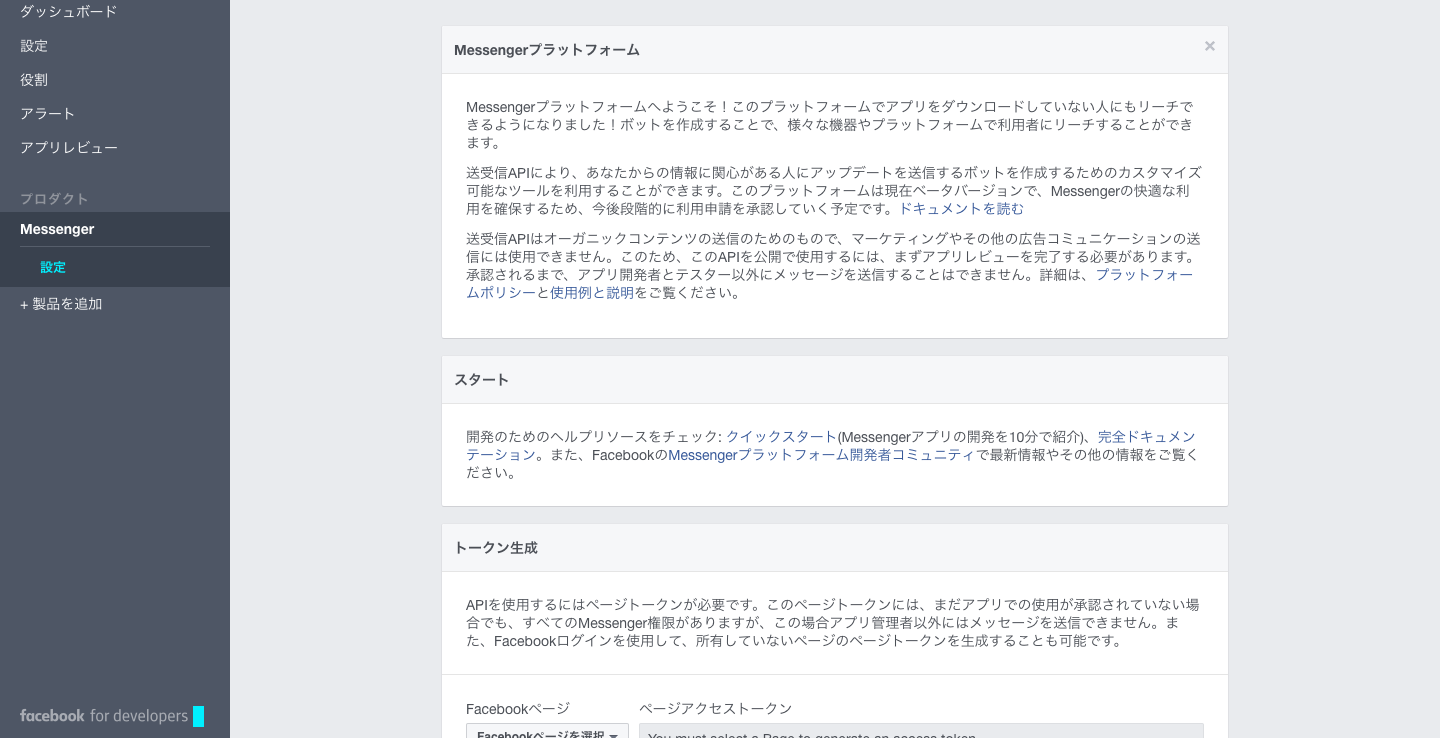
登録したらアプリのダッシュボードの左サイドバーから「製品を追加」をクリックし、Messengerのところにある「スタート」をクリックします。
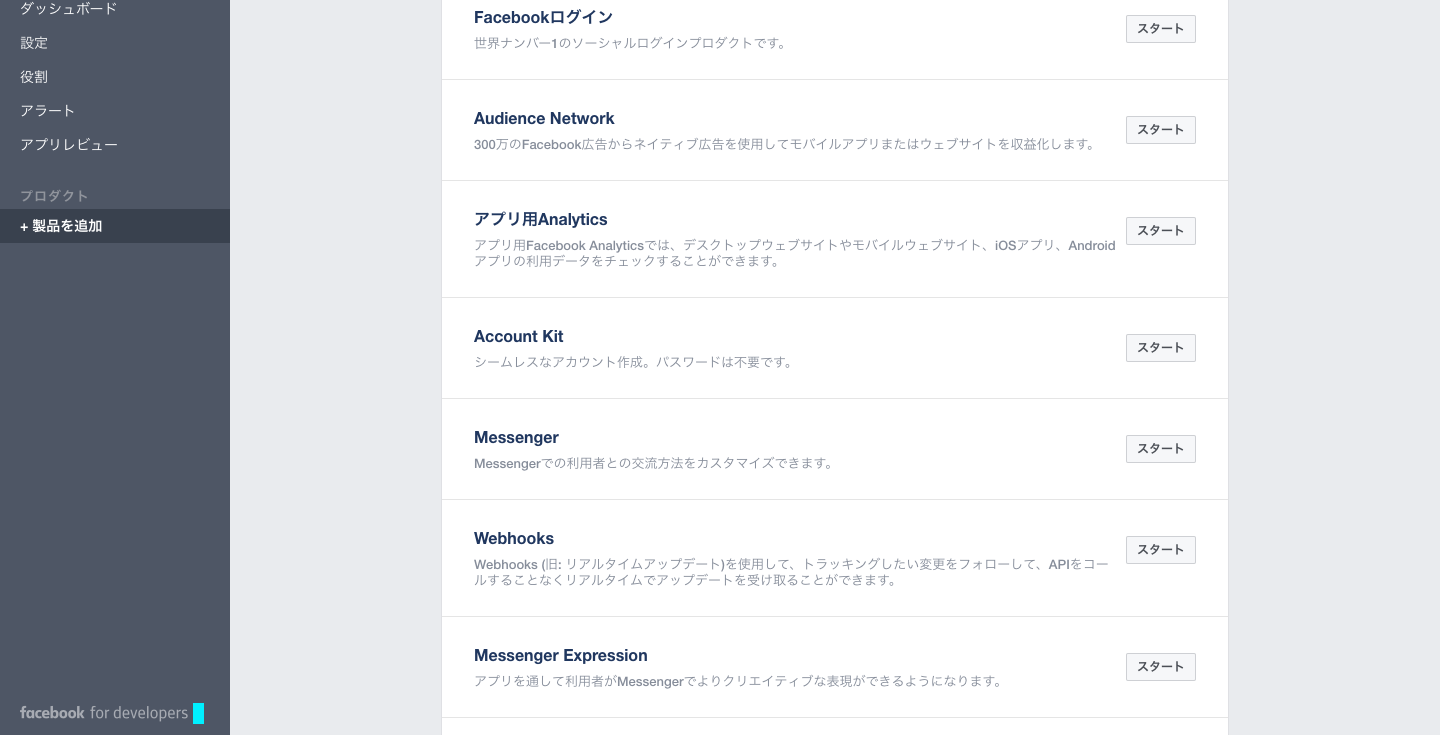
そうすると、下記画面のようにMessengerの設定画面が出現します。今後Messengerの設定画面は左サイドバーのプロダクトの欄から飛べるようになります。
ここまでいったら次にServerlessの設定をします。
Webhookを作成する
serverless.ymlの編集
serverless.ymlに以下の通り記述します。
service: quotebot

provider:
  name: aws
  runtime: nodejs4.3

functions:
  webhook:
    handler: handler.webhook
    events:
      - http:
          path: webhook
          method: GET
          integration: lambda
      - http:
          path: webhook
          method: POST
          integration: lambda
新規作成時に既にhelloファンクションがありますが、名前をwebhookに置き換えてください。
また、events以下に2つのhttpイベント(GET,POST)を追加します。
handler.jsの編集
'use strict';

// Your first function handler
module.exports.webhook = (event, context, callback) => {
  if (event.method === 'GET') {
    // facebook app verification
    if (event.query['hub.verify_token'] === 'STRONGTOKEN' && event.query['hub.challenge']) {
      return callback(null, parseInt(event.query['hub.challenge']));
    } else {
      return callback('Invalid token');
    }
  }
};
"STRONGTOKEN"の箇所はアプリを公開する場合は複雑なものに変更してください。
その後、ターミナルで以下のコマンドを入力し、プロジェクトをAWSにデプロイします。
serverless deploy
そうするとターミナルでAPIのエンドポイントが出力されます。
serverless deploy
Serverless: Packaging service...
Serverless: Uploading CloudFormation file to S3...
Serverless: Uploading service .zip file to S3 (533 B)...
Serverless: Updating Stack...
Serverless: Checking Stack update progress...
..........
Serverless: Stack update finished...

Service Information
service: quotebot
stage: dev
region: us-east-1
api keys:
  None
endpoints:
  GET - https://xxx.execute-api.us-east-1.amazonaws.com/dev/webhook
  POST - https://xxx.execute-api.us-east-1.amazonaws.com/dev/webhook
functions:
  quotebot-dev-webhook: arn:aws:lambda:us-east-1:xxx:quotebot-dev-webhook
上記endpointsのGET(https://xxx.execute-api.us-east-1.amazonaws.com/dev/webhook)
にアクセスしてください。おそらく{"errorMessage":"Invalid token"}と出力されます。
FacebookにWebhookを認証させる
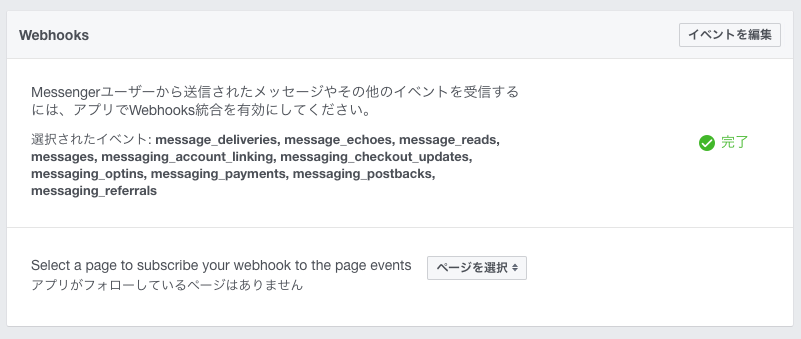
再度FacebookのMessengerの設定画面に戻り、Webhookの設定をします。
設定画面真ん中あたりにWebhooksという欄があるので、そこから設定します。
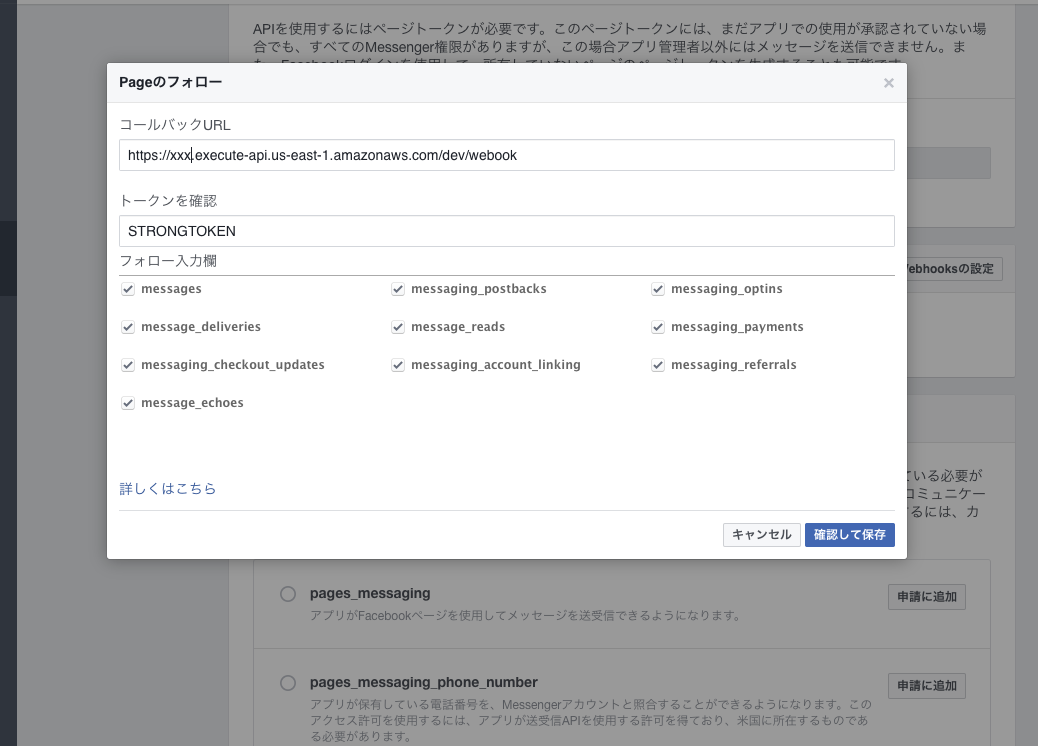
コールバックURLには先ほどServerlessで設定したendpointsのGETのurlを指定します。
また、トークンを確認には先ほど設定したトークン(先のSTRONGTOKEN)を入力します。
フォロー入力欄は取り敢えず全部にチェックをして「確認して保存」をクリックします。
Facebookページの作成と設定を行う
下記URLよりFecebookページの作成をします。
https://www.facebook.com/business/products/pages
今回は"Quotebot"というページを作成しました。
作り方は以下を参考いただければと思います。
ページ名やプロフィール画像、基本設定は適当で大丈夫です。
http://smmlab.jp/?p=28438
その後Facebook Messengerの設定画面に戻ります。
ページを一度更新してください。
Webhooksの欄の上にある「トークン生成」の欄からQuotebotのページを選択し、アカウントのプロフィールへのアクセスの許可を求められるので、OKします。
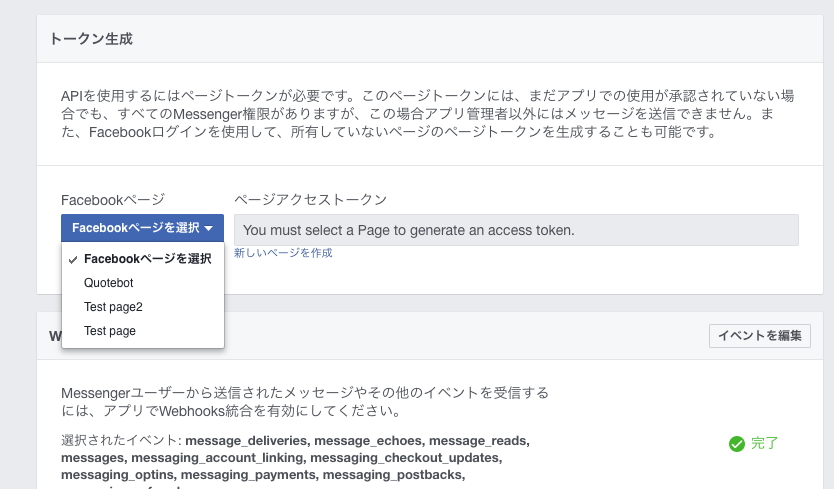
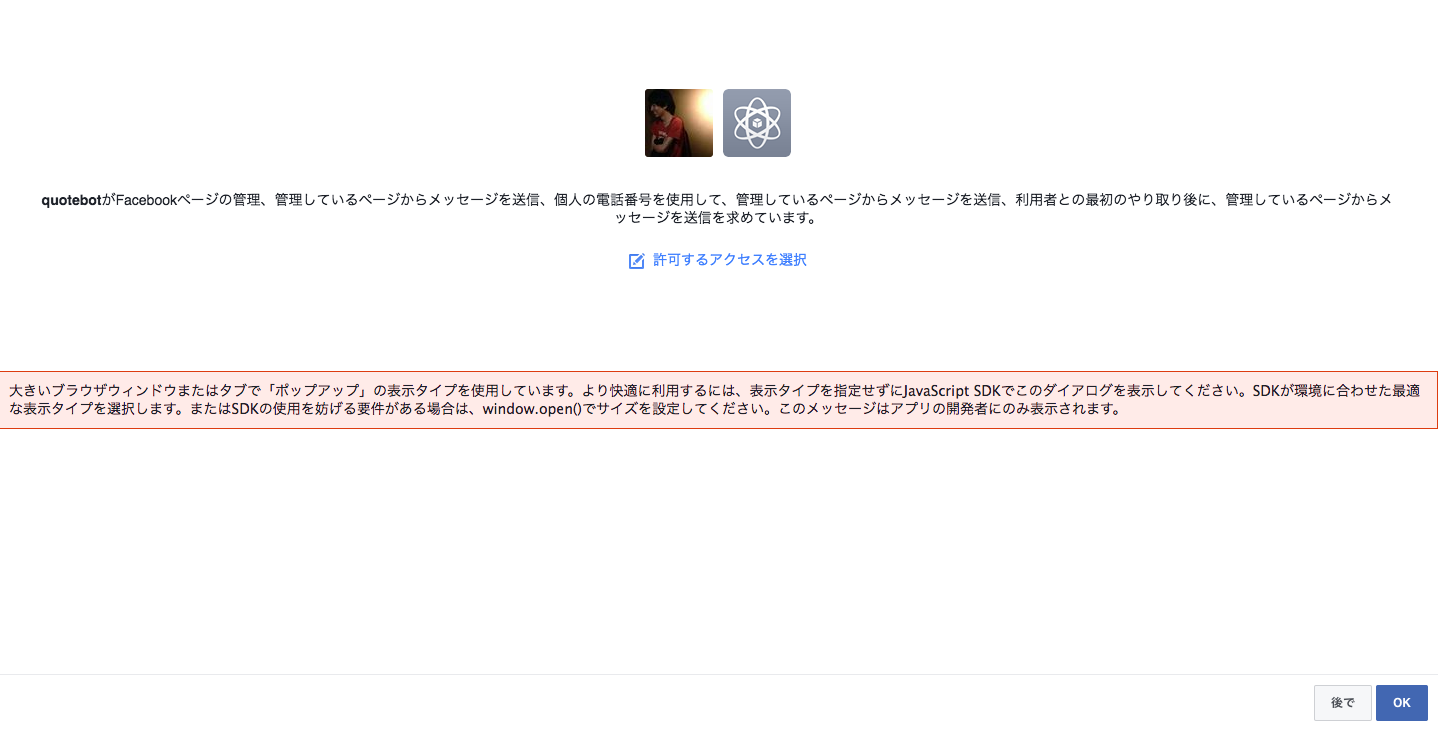
すると、「ページアクセストークン」の欄にトークンが生成されるので、クリックしてコピーします。
このトークンは該当のFacebookページとcahtbotを結びつける役割を果たします。
次にターミナルを開いて以下のコマンドを入力します。
curl -X POST
"https://graph.facebook.com/v2.6/me/subscribed_apps?access_token=<PAGE_ACCESS_TOKEN>"
<PAGE_ACCESS_TOKEN>には先ほど取得した「ページアクセストークン」を入力し、エンターで実行します。
成功すると、{"success":true}と出力されます。
ここまで出来たら次にチャットボットのロジックを作成していきます。
チャットボットのロジックを作成する
ロジックを書く前にaxiosというパッケージをnpmでインストールします。
このパッケージをインストールすることでhttpリクエストが使えるようになります。
quotebotのプロジェクトを作成したフォルダ直下にpackage.jsonファイルを作成します。
{
  "name": "quotebot",
  "version": "0.1.0",
  "description": "A Serverless Chatbot which will send you quotes",
  "scripts": {
    "test": "echo \"Error: no test specified\" && exit 1"
  },
  "author": "",
  "license": "MIT",
  "dependencies": {
    "axios": "^0.14.0"
  }
}
そして、ターミナルで npm installを実行し、axiosをインストールします。
そして、handler.jsにaxiosをインポートします。
const axios = require('axios');
上記設定ができたら、次にhandler.jsに以下の条件文を書いていきます。
if (event.method === 'POST') {
    event.body.entry.map((entry) => {
      entry.messaging.map((messagingItem) => {
        if (messagingItem.message && messagingItem.message.text) {
          const accessToken = '<PAGE_ACCESS_TOKEN>';

          const quotes = [
            'Don\'t cry because it\'s over, smile because it happened. - Dr. Seuss',
            'Be yourself; everyone else is already taken. - Oscar Wilde',
            'Two things are infinite: the universe and human stupidity; and I\'m not sure about the universe. - Albert Einstein',
            'Be who you are and say what you feel, because those who mind don\'t matter, and those who matter don\'t mind. - Bernard M. Baruch',
            'So many books, so little time. - Frank Zappa',
            'A room without books is like a body without a soul. - Marcus Tullius Cicero'
          ];

          const randomQuote = quotes[Math.floor(Math.random() * quotes.length)];

          const url = "https://graph.facebook.com/v2.6/me/messages?access_token=${accessToken}";

          const payload = {
            recipient: {
              id: messagingItem.sender.id
            },
            message: {
              text: randomQuote
            }
          };

          axios.post(url, payload).then((response) => callback(null, response));
        }
      });
    });
  }
const accessTokenの<PAGE_ACCESS_TOKEN>と const urlの${accessToken}に先ほどFacebookから取得したページアクセストークンを記入します。
そして、
serverless deploy
でデプロイします。
テストする
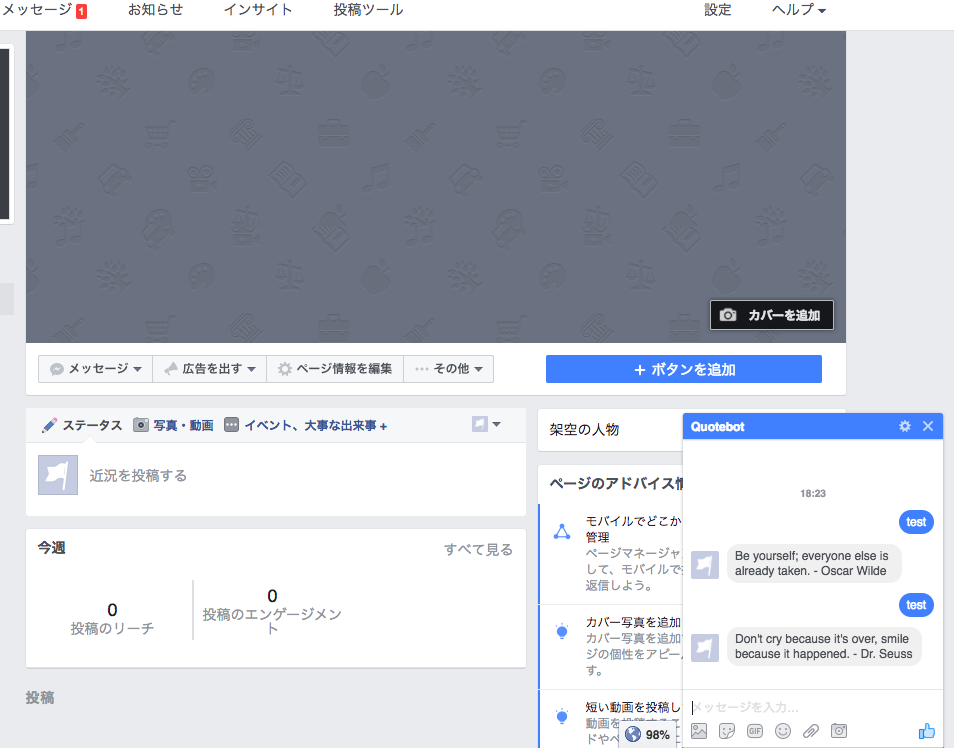
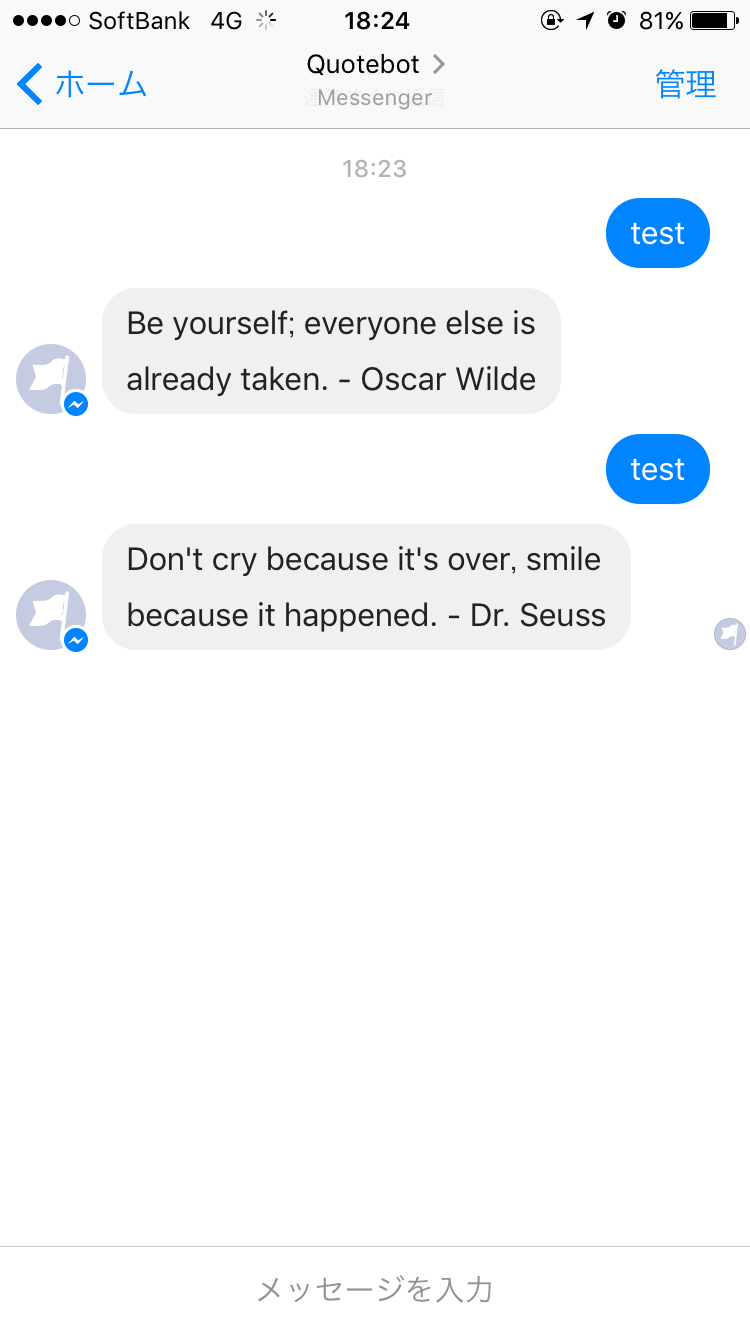
表示されました。Quoteもランダムに出力されています。
まとめ
以上の手順で簡単ではありますがチャットボットがちゃんと作れました。
ここにデータベースを用意して形態素解析とかやってちゃんと文章を返すようにすればまともなボットになるのではないでしょうか。
全てのソースコードは製作元のものが参考になります。
https://github.com/pmuens/quotebot/
Webhookのリファレンスです。
https://developers.facebook.com/docs/messenger-platform/webhook-reference
