先日、oneAPIを試してみると題して、FPGA向けoneAPI環境のインストールとちょっとしたテストの仕方について記事を上げました。
その時も触れたのですが、現状公式には、インテル®PAC向けoneAPI環境はUbuntu18.04のみのサポートとなっています。
Intel® FPGA Add-On for oneAPI Base Toolkit Software Requirements
一方、インテル®より別途Red Hat Enterprise Linux 7.4上でoneAPIのFPGAデザインをコンパイルするための情報が出されています。
Compiling Intel® oneAPI DPC++ FPGA Designs on Red Hat Enterprise Linux (RHEL)* 7.4 OS (Kernel 3.10)
これに従うと、RHELでもインテル®PAC+oneAPIの運用が可能です。
筆者も自分のCentOS7.8環境に、インテル® PAC (インテル® Arria® 10 GX FPGA 搭載版)向けoneAPI環境のインストールを試みまして、無事正常動作しているようなので、メモがてら記事を書いてみました。
(ですので、インテルがCentOS7.8を公式にサポートしているということではないので注意してください。あくまで個人的に動作を確認した記事という理解でお願いしますーーー!!)
と言いましても、やることは単に上記の記事の内容に従うだけです。ですんで、上のURLを紹介した時点でこの記事は終わったも同然です。
以下は、上のURLをクリックするのが面倒くさい人向けです。基本的に上の記事のコピペで作ってますが、自分の記事と自分の所属先の記事なので、怒られることはないでしょう。
はじめに
結局Ubuntu18.04へのインストール時に使うIntel® oneAPI toolkitsとFPGA Add-onは必要になりますので、先にダウンロードしておきます。以下のURLからダウンロードページに飛んでください。
ダウンロードページに飛ぶと、Operating SystemやらDistribution形式やらを設定します。今回は、下の画面のような感じにしてみました。
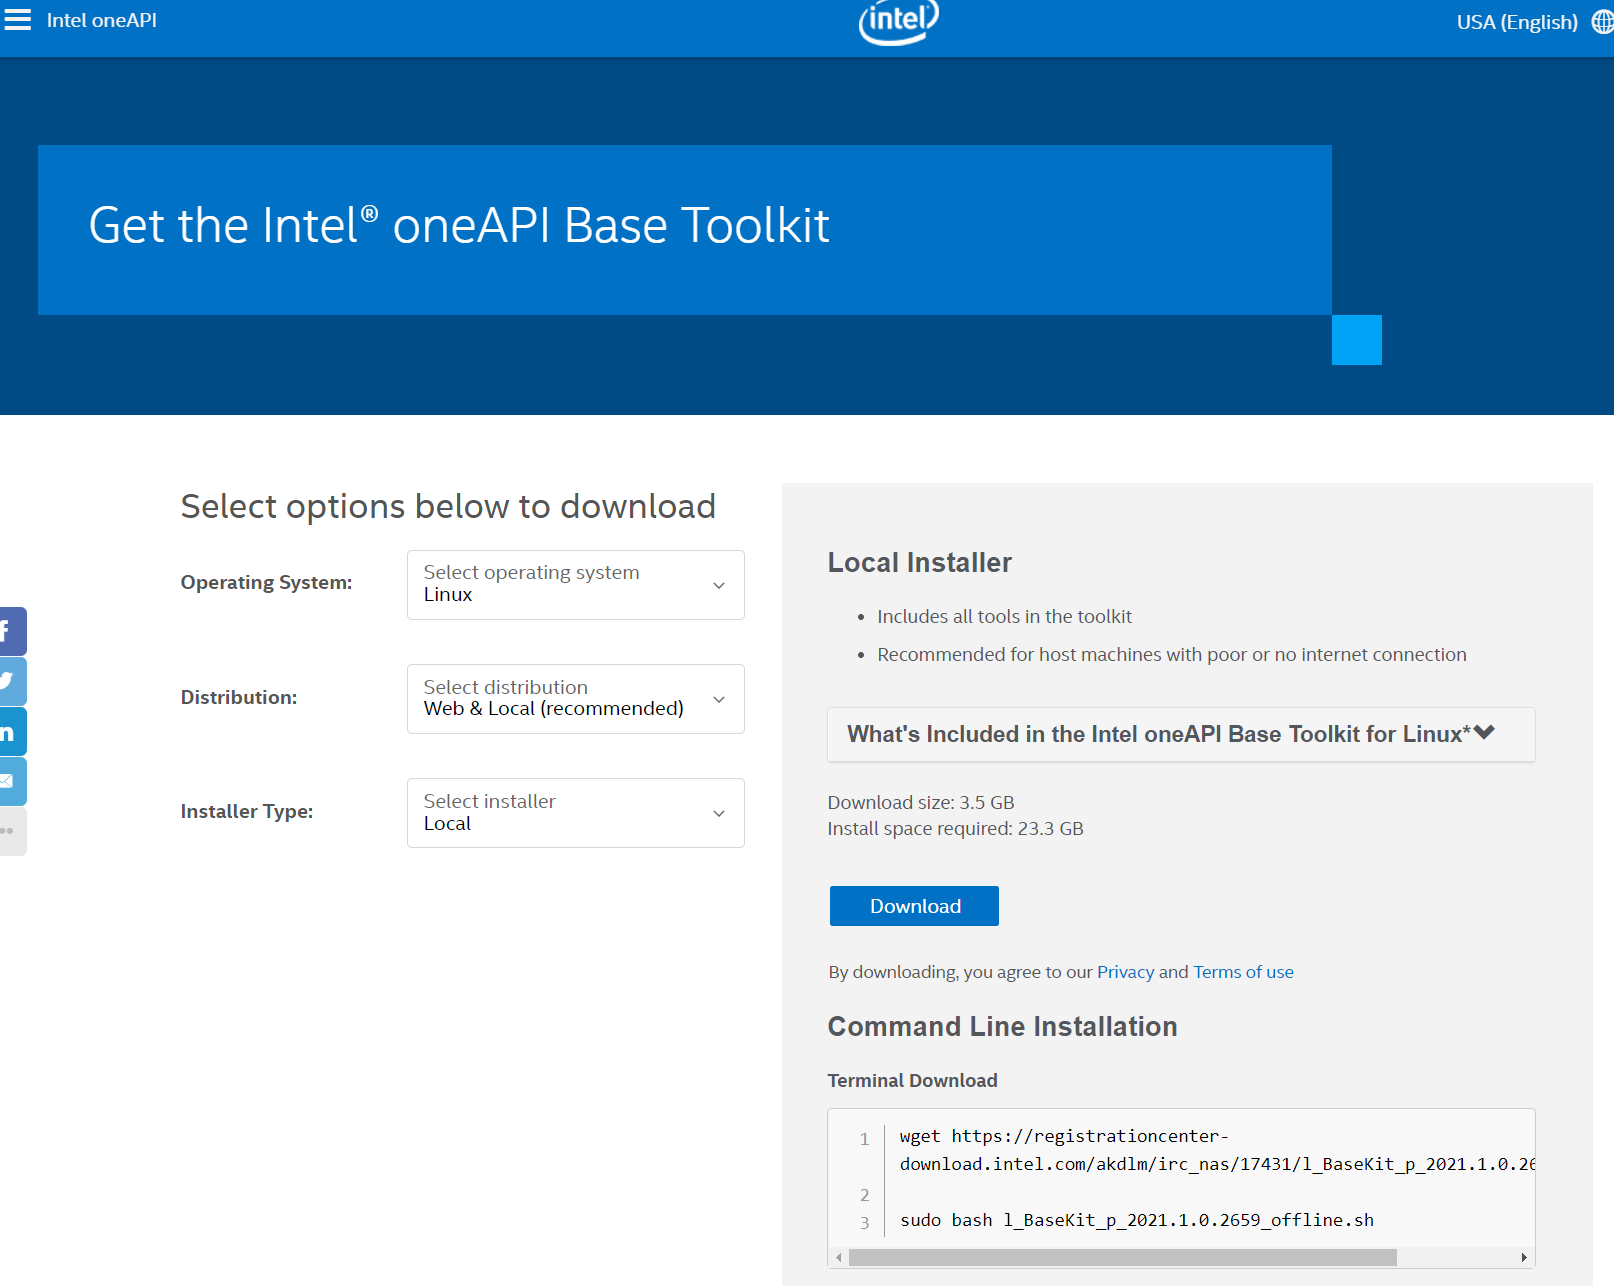
今回私はwgetでのファイルを取得を試しました。
$ wget https://registrationcenter-download.intel.com/akdlm/irc_nas/17431/l_BaseKit_p_2021.1.0.2659_offline.sh
後ほど、ここでダウンロードしたl_BaseKit_p_2021.1.0.2659_offline.shを実行します。
一緒に、FPGA用のAdd-onもダウンロードします。上の画像の状態で、下にスクロールするとFPGA用のダウンロードリンクが出てきます。
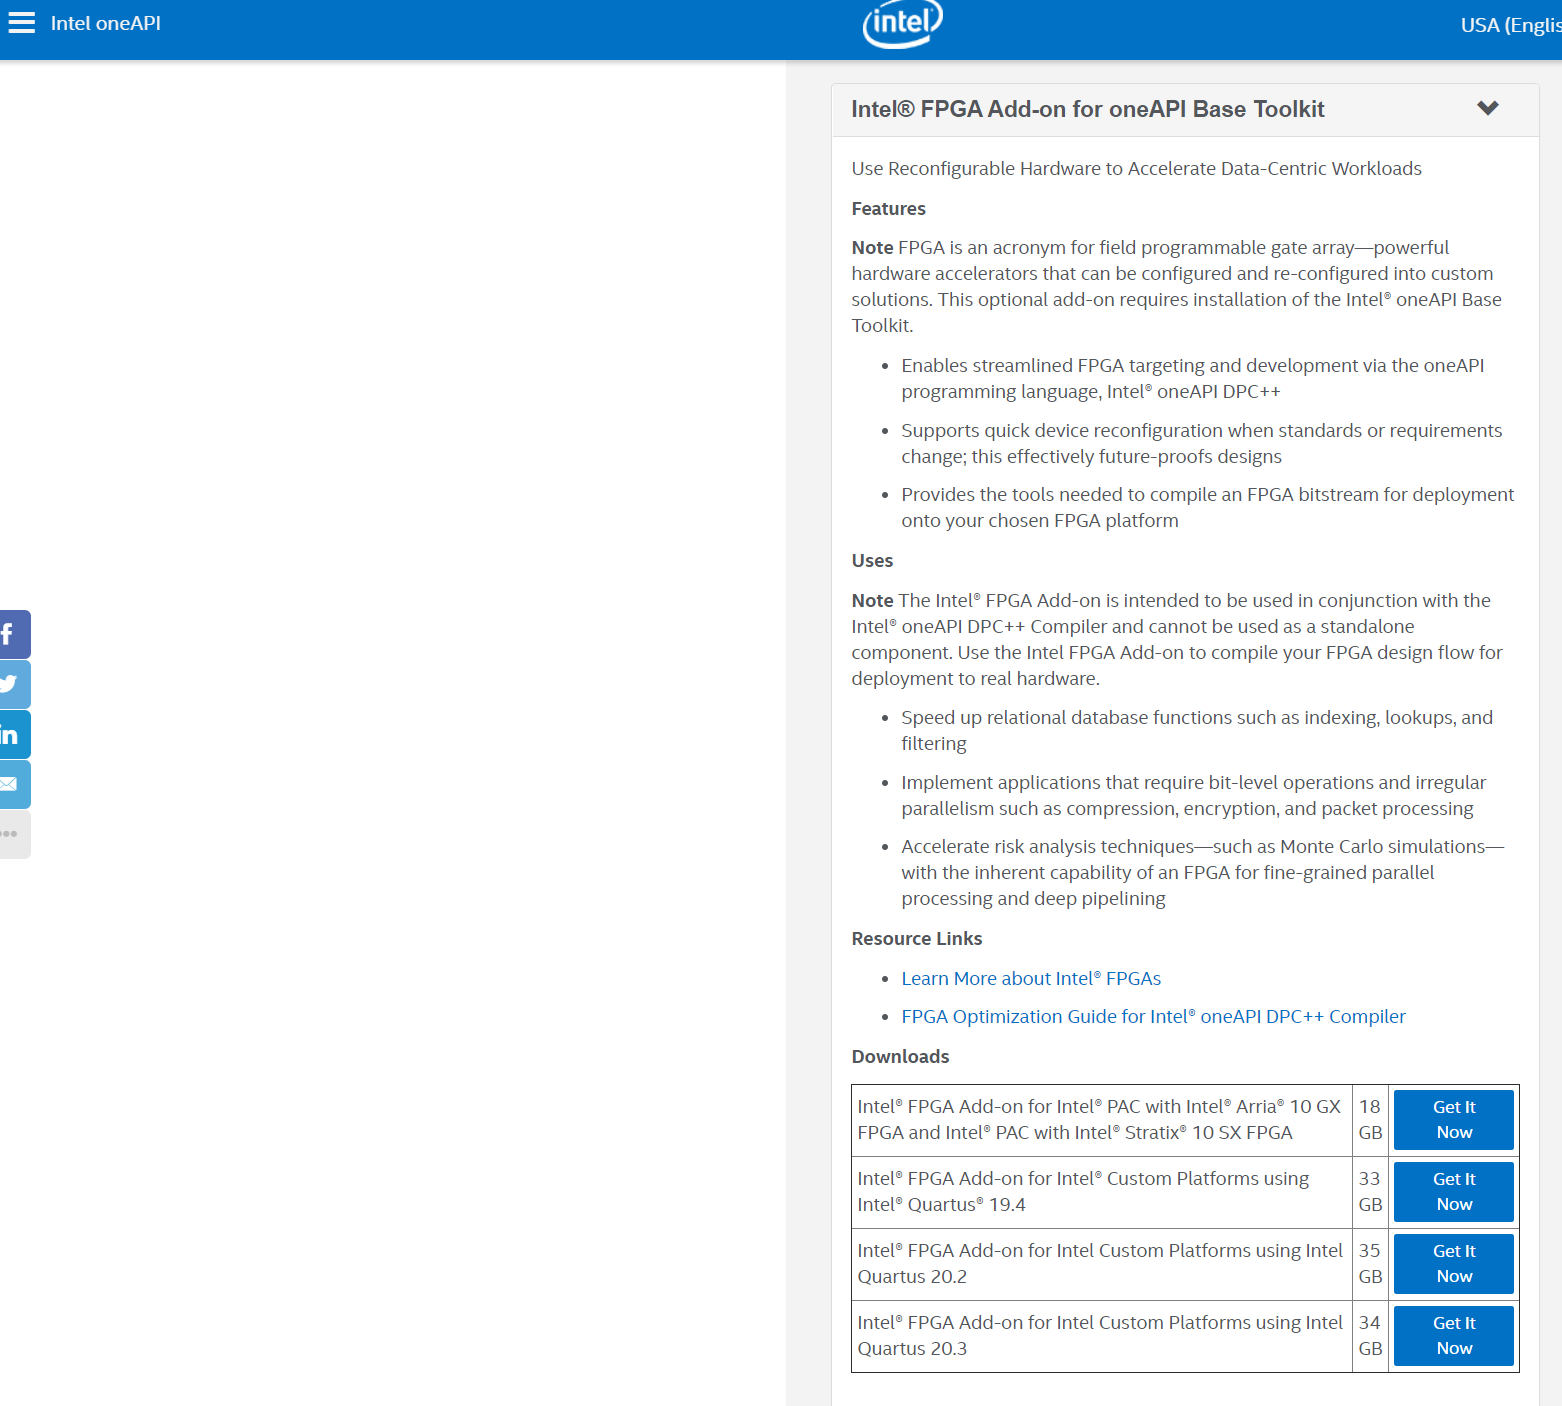
一番上の、
Intel® FPGA Add-on for Intel® PAC with Intel® Arria® 10 GX FPGA and Intel® PAC with Intel® Stratix® 10 SX FPGAをダウンロードしておきます。18GBあるやつです。
色々インストール
ざっと以下を実行していきます(出力ログは省略してあります)。
$ sudo yum install https://dl.fedoraproject.org/pub/epel/epel-release-latest-7.noarch.rpm
$ sudo yum install gcc gcc-c++ cmake make autoconf automake \
  libxml2 libxml2-devel json-c-devel boost ncurses ncurses-devel \
  ncurses-libs boost-devel libuuid libuuid-devel python2-jsonschema \
  doxygen hwloc-devel libpng12 rsync python2-pip tbb-devel
$ sudo pip install intelhex
$ sudo yum install -y python36 python36-pip
$ sudo yum install redhat-lsb-core
GCC7.4をインストール
大きなポイントになるのが、新しめのGCCを入れることです。ここでは/usr/local/binにgccの7.4を入れてしまいますが、ユーザローカルにインストールしてPATHで制御してもよいかと思います。
ざっと以下を実行していきます(出力ログは省略してあります)。
$ yum -y install bzip2
$ wget http://ftp.mirrorservice.org/sites/sourceware.org/pub/gcc/releases/gcc-7.4.0/gcc-7.4.0.tar.gz
$ tar zxf gcc-7.4.0.tar.gz
$ cd gcc-7.4.0
$ ./contrib/download_prerequisites
$ ./configure --disable-multilib --enable-languages=c,c++
$ make -j 4
$ sudo make install
-jのジョブの数は適当に。実行後、場合によってはターミナルを開きなおして、正常にgccの7.4がインストールされたことを確認します。
$ which gcc
/usr/local/bin/gcc
$ gcc --version
gcc (GCC) 7.4.0
Copyright (C) 2017 Free Software Foundation, Inc.
This is free software; see the source for copying conditions.  There is NO
warranty; not even for MERCHANTABILITY or FITNESS FOR A PARTICULAR PURPOSE.
Base ToolkitとFPGA Add-onのインストール
先ほどダウンロード(ものすご時間はかかるはずですが)しておいたBase Toolkitのインストーラーを実行します。デフォルトで指定されたPATHにインストールすることをお勧めします(あまり根拠なし。EDAツールに苦しんだ経験から来ています)。
$ sudo bash l_BaseKit_p_2021.1.0.2659_offline.sh
同様に、FPGA Add-onもインストールします。
$ unzip intel-fpga-addon-for-oneapi-base-kit-for-a10gx-s10sx-linux.zip
$ cd intel-fpga-addon-for-oneapi-base-kit-for-a10gx-s10sx-linux/l_intel_fpga_dpcpp-a10gx-s10sx-2021.1.1/
$ sudo ./setup.sh
$ aocl install intel_a10gx_pac
最後のaocl installをお忘れなきよう。忘れてた人からの重要なアドバイスです。これを忘れると、エミュレーションは動いたのに実機では動かない~と悩むことになります。
テスト!
では、何か適当にコンパイル・実行を試してみましょう。
まずは環境設定から。
$ source /opt/intel/oneapi/setvars.sh
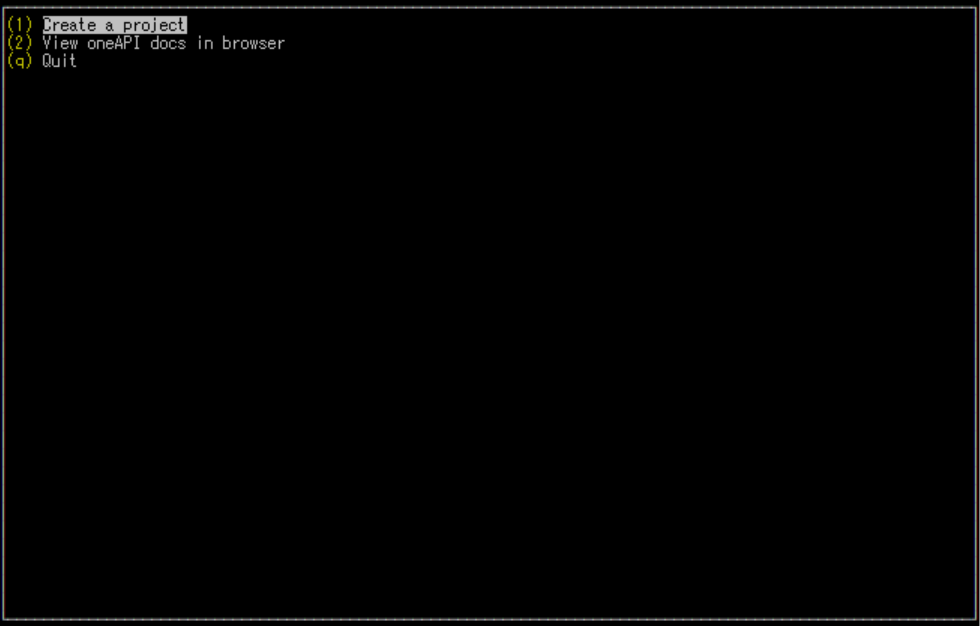
試すサンプルですが、以下のツールを使って適当に生成しましょう。
$ oneapi-cli
(以下コピペ)
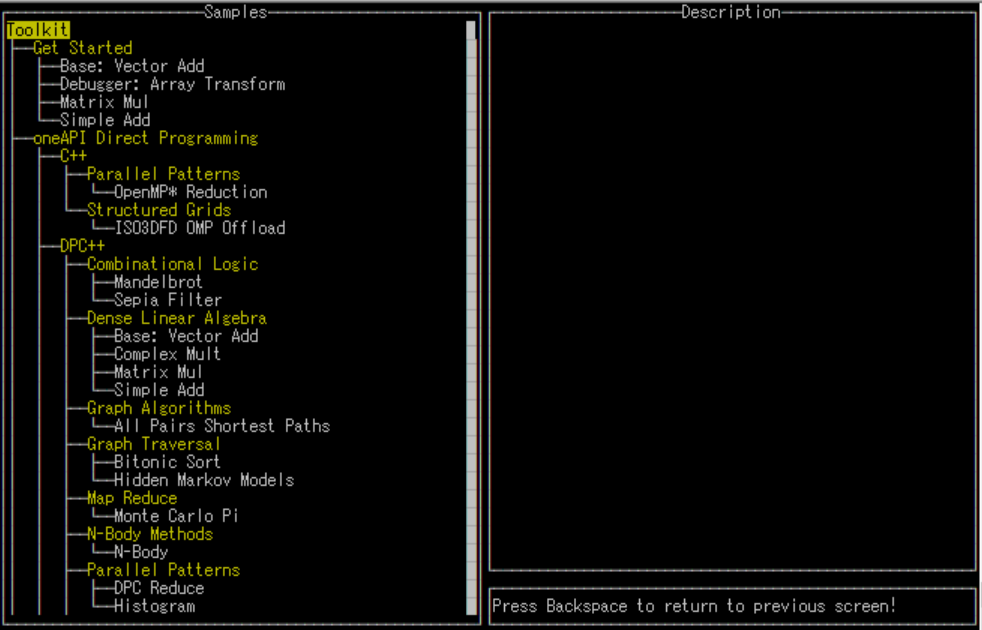
以下のような画面が表示されますので、「Create a project」を選択します。1キーを押しても良いですし、上下カーソルキーで選択してリターンキーでもOKです。
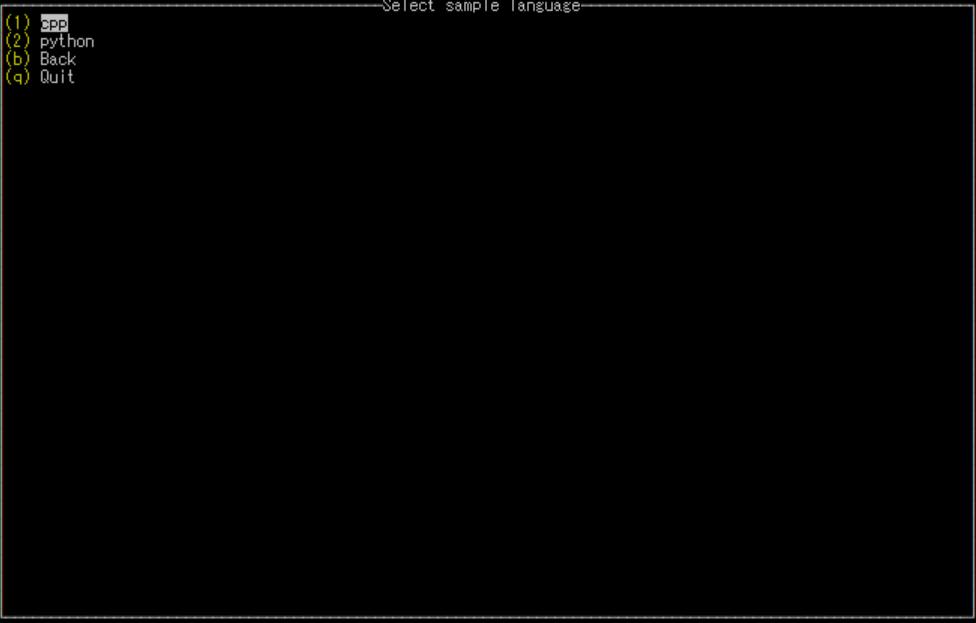
このような画面に遷移しますので、「cpp」を選択します。
ここで、実際のサンプルを選択する画面になります。上下カーソルキーで移動して、好きなサンプルを選択しましょう。プロジェクトのテンプレートなんかも用意されていることが分かると思います。
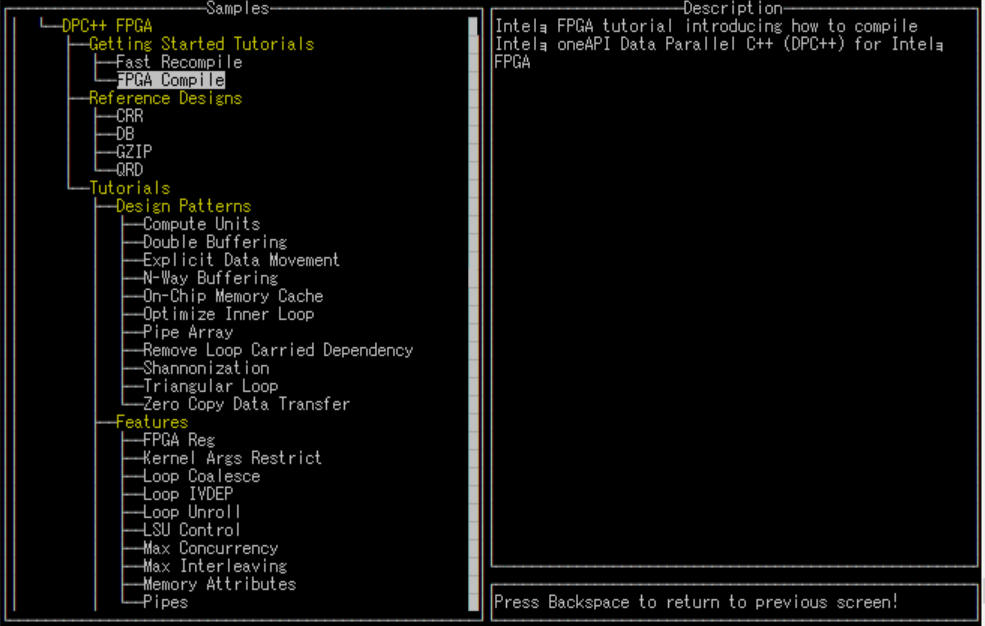
ここでは、簡単なところで「FPGA Compile」というDPC++のサンプルを選択してみます。リターンキーを押して選択しましょう。
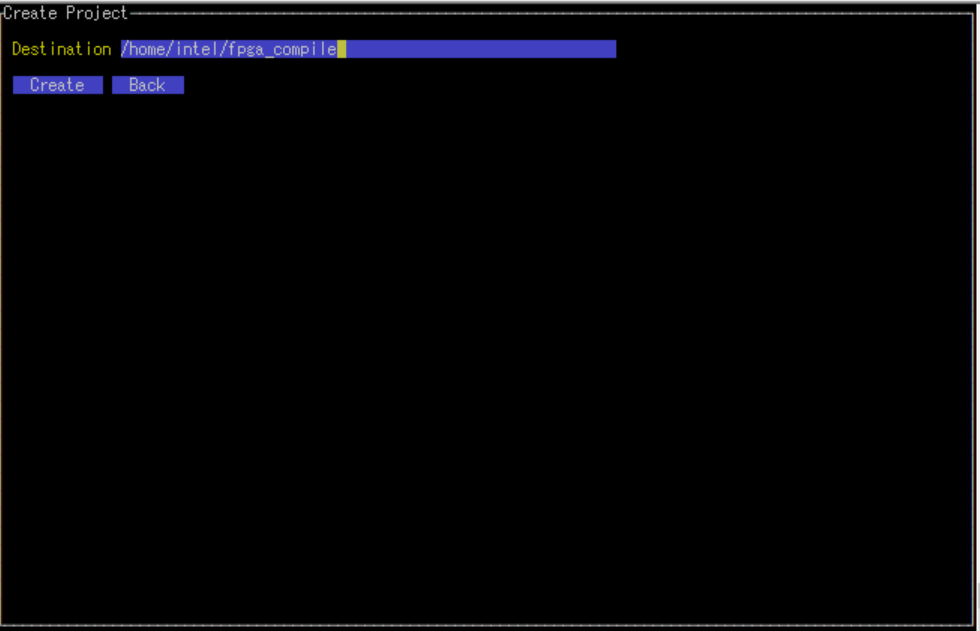
以下のようなディレクトリ入力画面に移行します。好きなPATHを入力できますが、ここではそのままリターンキーで行きます。自動的にCreateというボタンに移動しますので、もう一度リターンキーを押します。
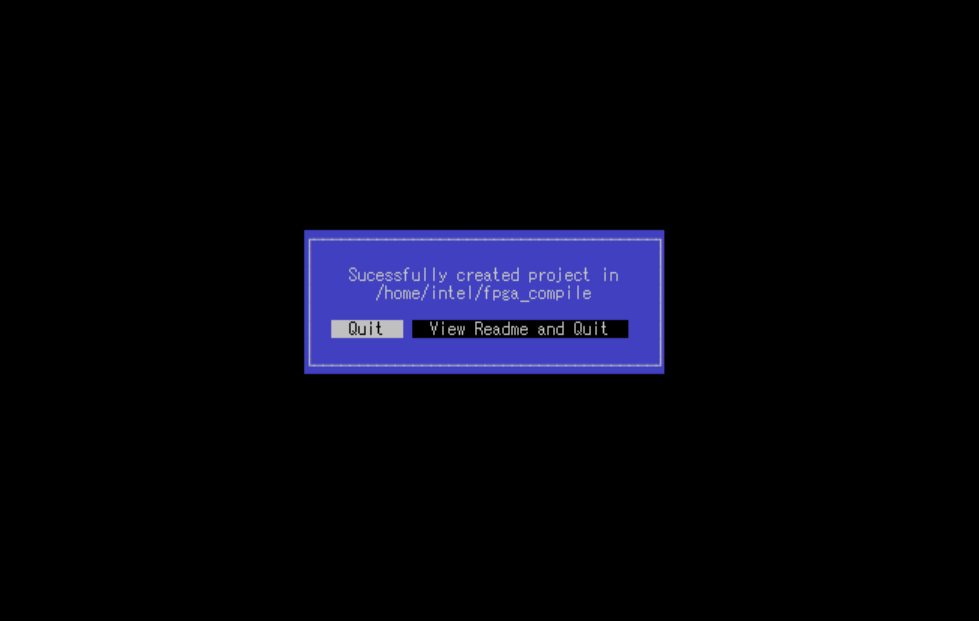
サンプルデザインが生成されました。そのままリターンキーを押して終了します。
(コピペ終わり)
では、コンパイルを試しましょう。
$ cd fpga_compile
$ mkdir build
$ cd build
$ cmake .. -DFPGA_BOARD=intel_a10gx_pac:pac_a10 -DCMAKE_CXX_FLAGS=--gcc-toolchain=/usr/local
$ make fpga_emu
$ make fpga
最後のmakeは実際にFPGAのコンパイルまで走るので、かなり時間がかかります。
コンパイルが終わったら実行(ログは省略)。
$ ./fpga_compile.fpga_emu
$ ./fpga_compile.fpga
ここで、ライブラリ関係のエラーが出る場合は、以下の設定が必要かもしれません。
$ export LD_LIBRARY_PATH=/usr/local/lib64:$LD_LIBRARY_PATH
以上でインストールは終了です。お疲れさまでした。
ちなみに
oneAPIをインストールすると、自動的にIntel FPGA SDK for OpenCLもインストールされますし、もちろん普通に使えます。筆者は立場上oneAPIとOpenCLの両方で同等のコードを書くことがあるので、便利に使ってます。
$ which aoc
/opt/intel/oneapi/compiler/2021.1.1/linux/lib/oclfpga/bin/aoc
$ aoc --version
Warning: Command has been deprecated. Please use -version instead of --version
Intel(R) FPGA SDK for OpenCL(TM), 64-Bit Offline Compiler
Version 20.3.0 Build 168.5 Pro Edition
Copyright (C) 2020 Intel Corporation
Notices & Disclaimers
Intel technologies may require enabled hardware, software or service activation.
No product or component can be absolutely secure.
Your costs and results may vary.
© Intel Corporation. Intel, the Intel logo, and other Intel marks are trademarks of Intel Corporation or its subsidiaries. Other names and brands may be claimed as the property of others.