Blender Advent Calendar 2020の空き空欄を埋めるため
仕事で使用したスクリプトを公開します
オブジェクトのアニメーションした軌跡をオブジェクトを作るスクリプト
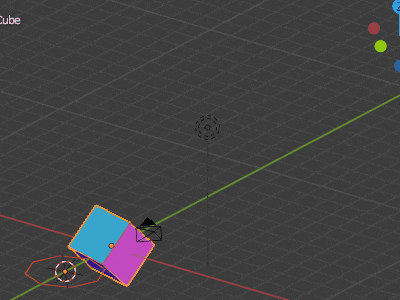
アクティブオブジェクトのレンダリング範囲の動きを記録して
選択オブジェクトを断面としてメッシュを張る そんな仕様です
make_trailobject.py
import bpy
import os
import math
from mathutils import Vector, Euler, Matrix, Quaternion
# データからメッシュオブジェクトの作成
def add_mesh_from_data(name,vertices,faces):
mesh = bpy.data.meshes.new(name)
obj = bpy.data.objects.new(name, mesh)
bpy.context.scene.collection.objects.link(obj)
mesh.from_pydata(vertices, [], faces)
mesh.update()
return obj
# レンダリングフレームの範囲のオブジェクトの動きをマトリックスで取得
def get_matrix_all_flame(obj):
#フレームの範囲を取得
frame_start = scene.frame_start
frame_end = scene.frame_end
matrix_list = []
for t in range(frame_start,frame_end):
# カレントフレームの設定
bpy.context.scene.frame_set( t )
#グローバル座標への変換マトリクス
# Matrix()としておかないと matrix_world への参照状態でlistに入る
matrix_world = Matrix(active_obj.matrix_world)
matrix_list.append(matrix_world)
return (matrix_list)
# 軌道のデータからオブジェクトを掃引
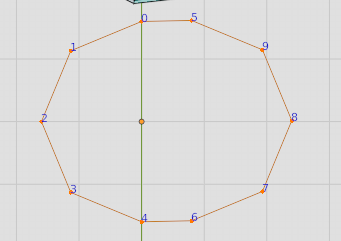
def create_trail(matrix_list, target, name):
vertices = target.data.vertices
point_num = len(vertices)
line_num = len(matrix_list)-1
edges = [list(e.vertices) for e in target.data.edges]
edges_num = len(edges)
new_verts = []
new_faces = []
UV_list = []
# メッシュを作成するためのデータの計算
for i, matrix in enumerate(matrix_list):
# 頂点の追加
for j in range(point_num):
p2 = matrix @ vertices[j].co
new_verts.append(p2)
# 面の追加
for k,l in enumerate(edges):
if i != 0:
# 面のIDの作成
p1 = l[0] +(i-1)*point_num
p2 = l[1] +(i-1)*point_num
p3 = l[0] +i*point_num
p4 = l[1] +i*point_num
new_faces.append([p1,p2,p4,p3])
# UVの作成
u1 = k/edges_num
u2 = (k +1)/edges_num
##UVは左下スタートなので左上スタートに補正
v1 = 1 -(i-1)/line_num
v2 = 1 -i/line_num
# 座標の設定
UV_list.append(Vector([u1, v1]))
UV_list.append(Vector([u2, v1]))
UV_list.append(Vector([u2, v2]))
UV_list.append(Vector([u1, v2]))
# データからオブジェクトの作成
obj = add_mesh_from_data(name,new_verts,new_faces)
# UVの設定
uv = obj.data.uv_layers.new(name="grid_uv")
for i,p in enumerate(uv.data):
p.uv = UV_list[i]
scene = bpy.context.scene
# 選択されているオブジェクトを取得
selected_objects = bpy.context.selected_objects
active_obj = bpy.context.active_object
# オブジェクトの軌道を取得
mat_list = get_matrix_all_flame(active_obj)
# アクティブなオブジェクト以外のオブジェクトを掃引
for target in selected_objects:
if target == active_obj: continue
create_trail(mat_list, target, "trail")
断面にする平面を選択後 動きを使いたいオブジェクトを選択して実行してください。
スクリプトでは頂点IDの順にグリッド状にUVを並べる仕様にしていますが
頂点IDはメッシュの並び順になっていないことが多いので
作成されたUVは必ずしも扱いやすいものでないかもしれません
ここは改良が必要ですね。