概要
WEBサーバとして、「Apache」をインストールします。
構築する環境は、前回構築したVMware
目次
インストール手順
Apacheのインストール
実行コマンド
# yum install httpd
Apacheの起動
実行コマンド
# systemctl start httpd
起動確認
Activeがrunningになっていることを確認する
実行コマンド
# systemctl status httpd
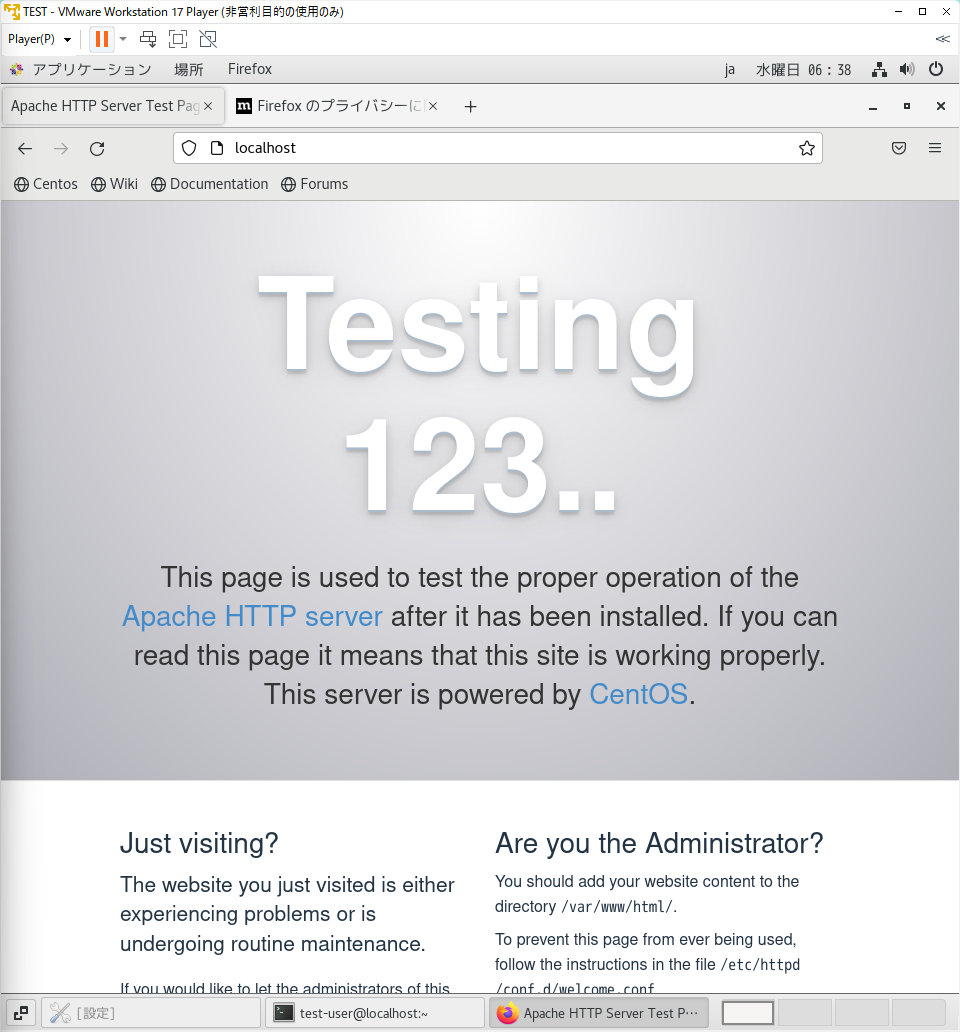
仮想マシン上の確認
WEBブラウザでURLにlocalhostと入力する
下記画面が表示されればOK
ホストマシンからWEBページを閲覧する
仮想マシンのIPアドレスを確認
実行コマンド
# ifconfig
FWの設定確認
WEBブラウザのURLに仮想マシンのIPアドレスを入力し検索します。
下記のようになった場合はFWの設定不足です。
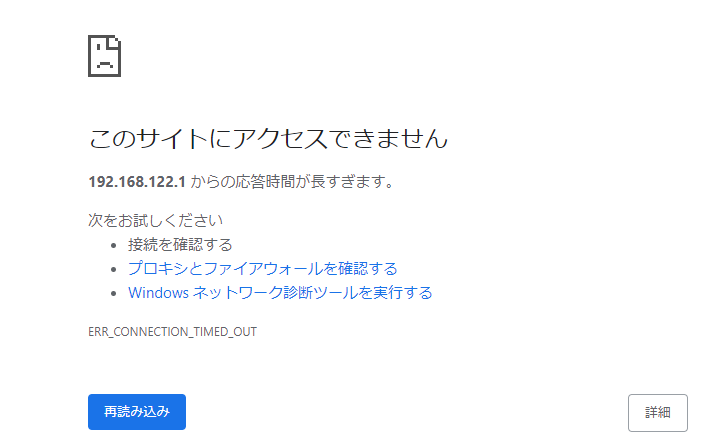
仮想マシンで下記コマンドを実行し、FW設定でhttp通信が解放されていないことを確認します。
実行コマンド
# firewall-cmd --list-all
public (active)
  target: default
  icmp-block-inversion: no
  interfaces: ens33
  sources:
  services: dhcpv6-client ssh
  ports:
  protocols:
  masquerade: no
  forward-ports:
  source-ports:
  icmp-blocks:
  rich rules:
#
FWの設定変更
http通信が行えるようにFWの設定を変更します。
実行コマンドは上から、httpの設定追加、リロード、一覧表示
実行コマンド
# firewall-cmd --add-service=http --permanent

# firewall-cmd --reload

# firewall-cmd --list-all
public (active)
  target: default
  icmp-block-inversion: no
  interfaces: ens33
  sources:
  services: dhcpv6-client http ssh
  ports:
  protocols:
  masquerade: no
  forward-ports:
  source-ports:
  icmp-blocks:
  rich rules:
#
サービスにhttpが追加されました。
もし、上記設定でも駄目だった場合はポートの許可設定も行います。
実行コマンドは上から、80/tcpの設定追加、リロード、一覧表示
実行コマンド
# firewall-cmd --add-port=80/tcp --permanent

# firewall-cmd --list-all
public (active)
  target: default
  icmp-block-inversion: no
  interfaces: ens33
  sources:
  services: dhcpv6-client http ssh
  ports:
  protocols:
  masquerade: no
  forward-ports:
  source-ports:
  icmp-blocks:
  rich rules:
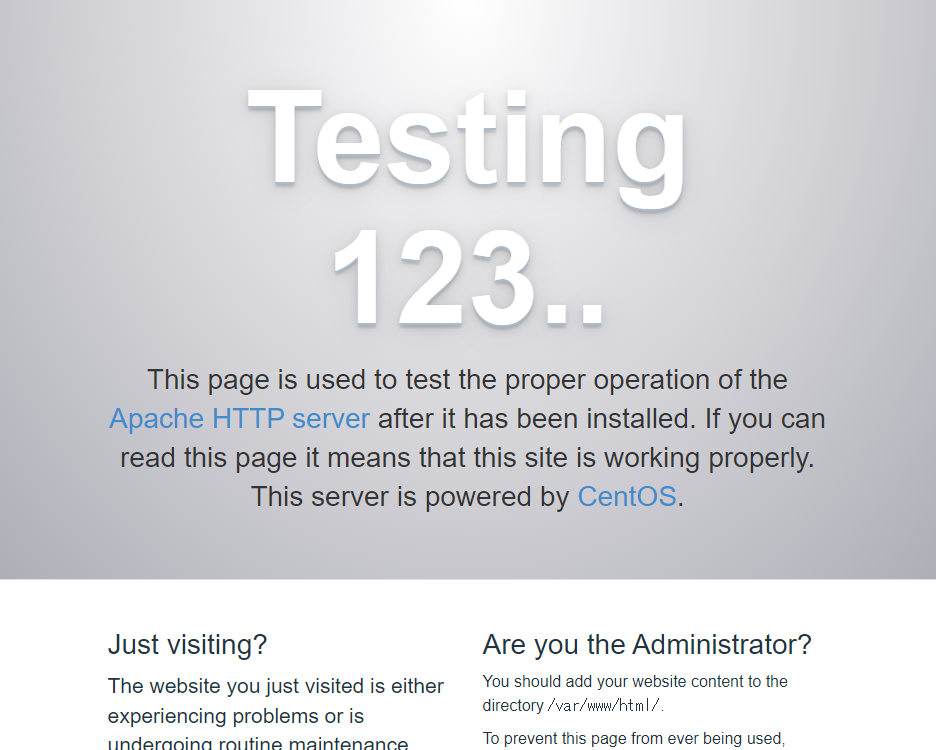
ホストマシンのWEBブラウザからも仮想マシンと同じような画面が表示されればOKです。
)