Go 言語で 毎日定時に天気予報を通知する LINE BOT を作ってみました。
毎朝6時に天気情報を通知してくれるBOTです。

出来上がった BOT は実生活に役立つと思うのでぜひご覧いただければ幸いです!
なお、今回の実装したアプリは下記で公開しています。
GitHub - yuki0920/weather_line_bot_sample
本記事で扱う内容
- Go Modules による依存管理
- package の分割
- Web API(JSON 形式)へのリクエストとレスポンスのパース
- Heroku への Go アプリケーションのデプロイ
- Heroku での定期タスク実行
- testing パッケージによるテスト
LINE Developers の設定
以下の手順に沿って LINE BOT 開発の準備を進めましょう。
チャネルの作成
参考: LINE Developers コンソールでチャネルを作成する | LINE Developers
チャネル作成は プロダクト -> Messaging API から行います。
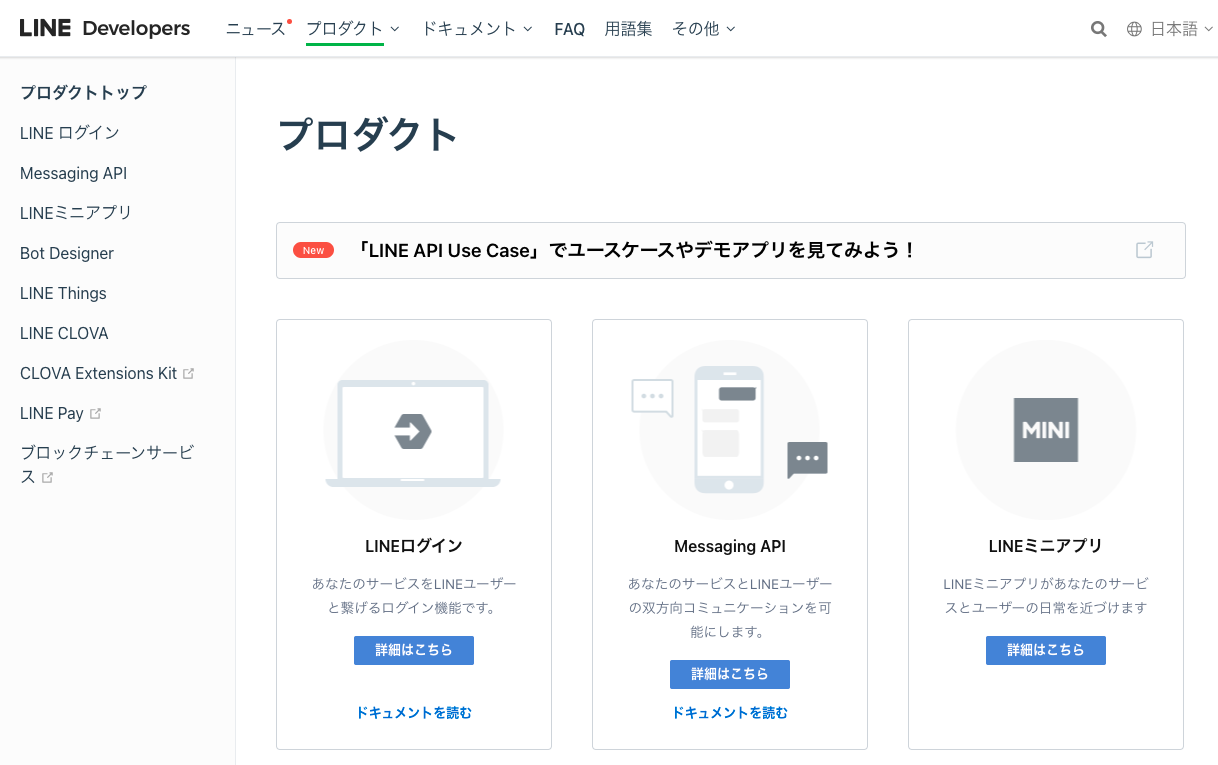
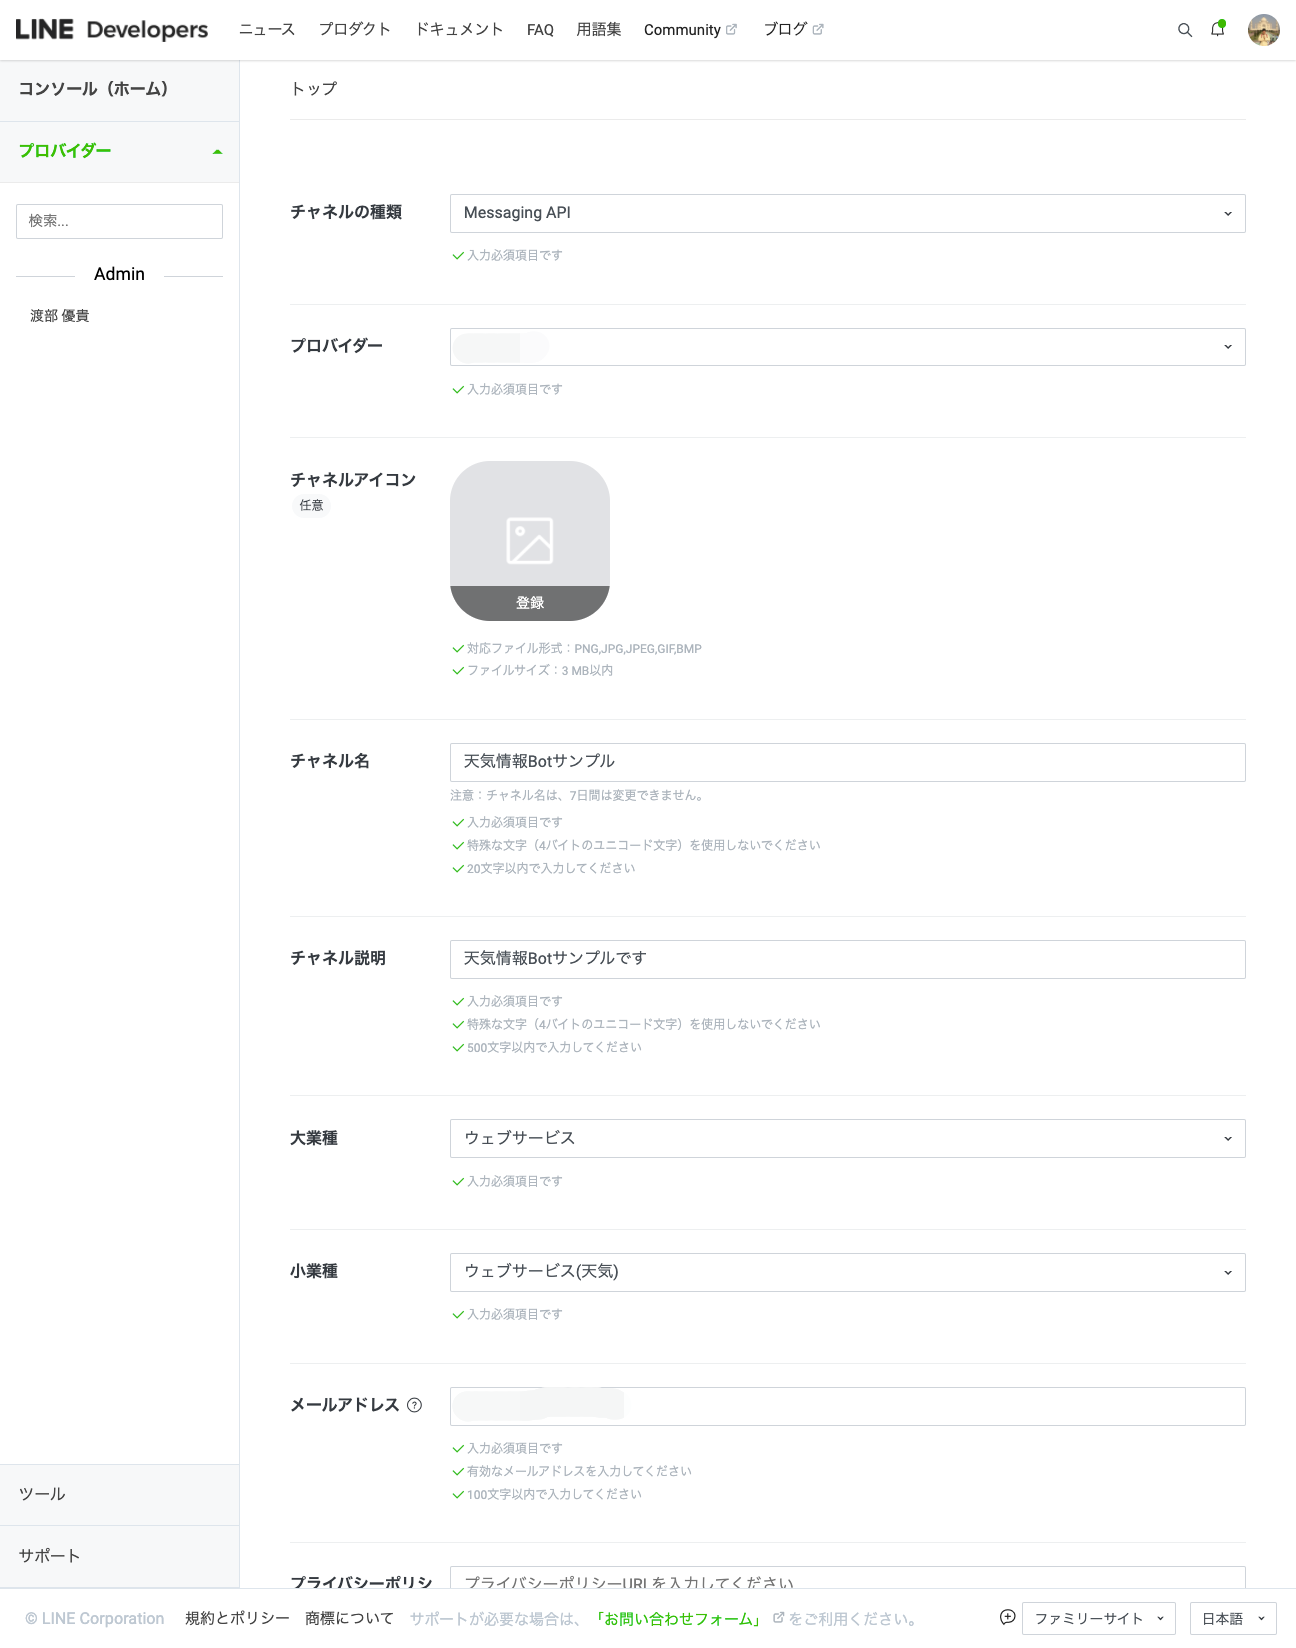
チャネルの作成の、入力時の画面です。
Messaging API の準備
チャネルシークレットの取得
作成したアプリの チャネル基本設定 から、チャネルシークレットを控えておきます。
チャネルシークレットは、 のちほど LINE_BOT_CHANNEL_SECRETとして、アプリケーションで参照します。

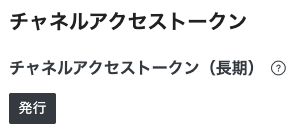
チャネルアクセストークンの取得
次に、作成したアプリの Messaging API 設定 から、 チャネルアクセストークン の 発行 ボタンを押し、チャネルアクセストークンを取得します。
チャネルアクセストークンは、 のちほど LINE_BOT_CHANNEL_TOKENとして、アプリケーションで参照します。

友達登録
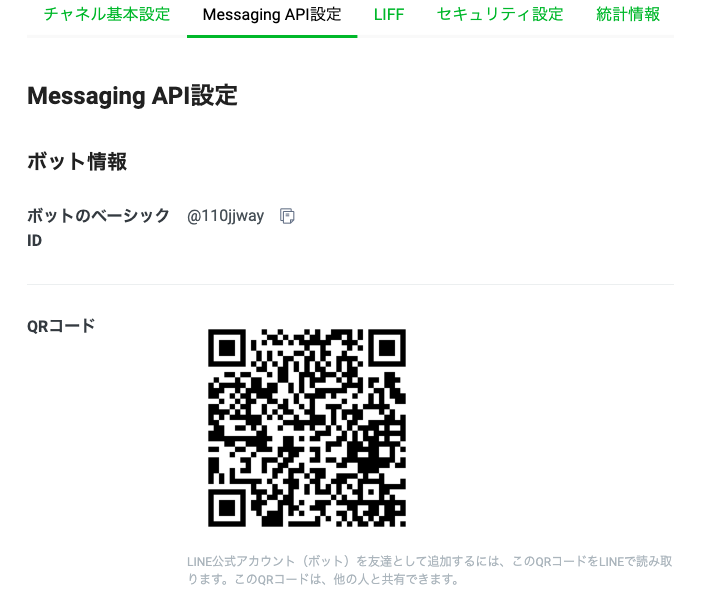
Messaging API 設定 の QR コードから、友達登録しておきましょう。
動作確認時に、正常にメッセージを送れているいるかを確認する際に利用します。
※下記の QR コードは今回作成した BOT の QR コードなので、登録する必要はありません。
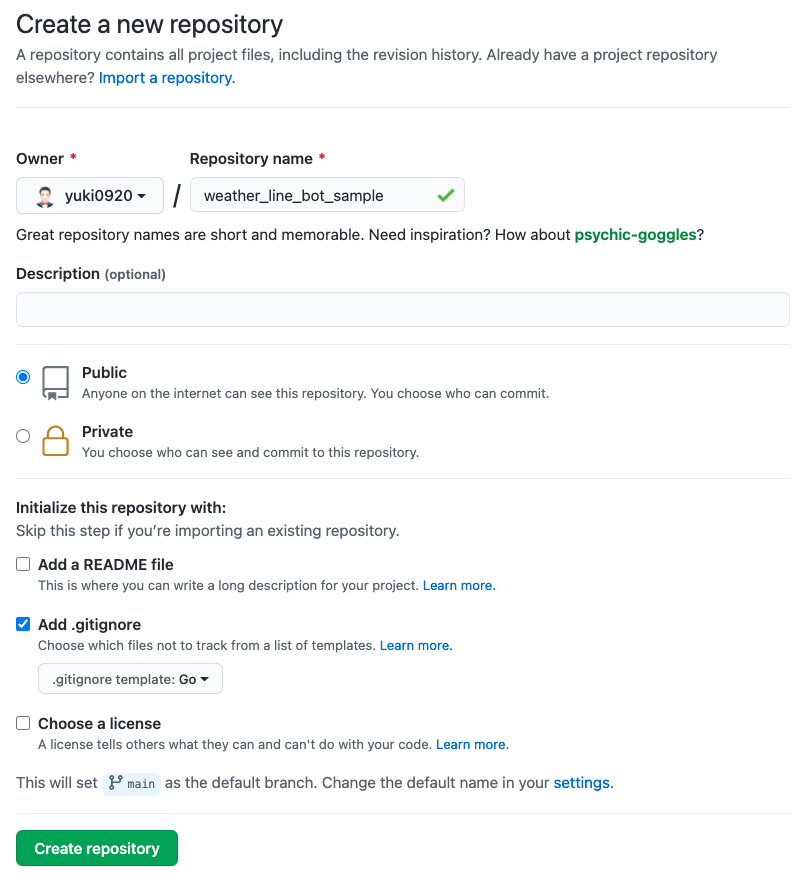
GitHub リポジトリ作成
Add .gitignore にチェックを入れ、Go を選択しリポジトリを作成します。
Go 実装: Hello, world!のメッセージ配信
ディレクトリ構造
まずはじめに、アプリケーションの最終的なのディレクトリ構造を記載します。
$ tree
.
├── go.mod
├── go.sum
├── main.go
└── weather
    └── weather.go

1 directory, 4 files
作業前の準備
「GitHub リポジトリ作成」で作成したリポジトリを git pull したあとに、リポジトリに移動しましょう。
(Go 学習者の方なら、ghq を利用してgo getでリポジトリをダウンロードする方も多いかとは思いますが。)
$ git pull git@github.com:yuki0920/weather_line_bot_sample.git
$ pwd
/Users/yuki.watanabe/ghq/github.com/yuki0920/weather_line_bot_sample
go.mod の作成/依存パッケージのインストール
作成したリポジトリに移動し、Go Modules を利用して依存パッケージを管理できるようにします。
Go の慣習に則って、 go mod init github.com/<ユーザー名>/<リポジトリ名> で初期化します。
次に、利用する SDK である line-bot-sdk-go をインストールします。
$ go mod init github.com/yuki0920/weather_line_bot_sample
go: creating new go.mod: module github.com/yuki0920/weather_line_bot_sample
go: to add module requirements and sums:
	go mod tidy

$ go get github.com/line/line-bot-sdk-go/linebot
go get: added github.com/line/line-bot-sdk-go v7.8.0+incompatible
初期化時に生成された go.modに、先程インストールしたパッケージのバージョンが記載されています。
module github.com/yuki0920/weather_line_bot_sample

go 1.16

require github.com/line/line-bot-sdk-go v7.8.0+incompatible // indirect
Commit: Add go.mod & go.sum 👈 各ステップごとの Commit のリンクです
参考: Go 言語の依存パッケージ管理ツール Modules の使い方 | MMM 公式ブログ
LINE BOT でメッセージを配信する
下記のように main.go を作成してください。
func main() {
	// LINE Botクライアント生成する
	// BOT にはチャネルシークレットとチャネルトークンを環境変数から読み込み引数に渡す
	bot, err := linebot.New(
		os.Getenv("LINE_BOT_CHANNEL_SECRET"),
		os.Getenv("LINE_BOT_CHANNEL_TOKEN"),
	)
	// エラーに値があればログに出力し終了する
	if err != nil {
		log.Fatal(err)
	}
	// weatherパッケージパッケージから天気情報の文字列をを取得する
	result, err := weather.GetWeather()
	// エラーに値があればログに出力し終了する
	if err != nil {
		log.Fatal(err)
	}
	// テキストメッセージを生成する
	message := linebot.NewTextMessage(result)
	// テキストメッセージを友達登録しているユーザー全員に配信する
	if _, err := bot.BroadcastMessage(message).Do(); err != nil {
		log.Fatal(err)
	}
}
Commit: Add initial message
参考: Messaging API リファレンス | LINE Developers
Heroku アプリケーションの作成
ここからいくつかの Heroku の操作は CUI と GUI の 2 パターンで解説します。
CUI
Heroku CLIを利用します。
heroku create <アプリ名>で Heroku アプリケーションを作成します。
$ heroku create go-weather-line-bot-sample
参考: CLI からのアプリの作成 | Heroku Dev Center
GUI
アプリ作成の、入力時のサンプルです。
私の場合アプリ名は go-weather-line-bot-sampleとしました。

参考: Heroku アプリケーションの作成 単元 | Salesforce Trailhead
環境変数の設定(チャネルシークレット & チャネルアクセストークンの設定)
「Messaging API の準備」で取得した環境変数を設定します。
CUI
heroku config:set <環境変数名> <値>でで環境変数を設定します。
$ heroku config:set LINE_BOT_CHANNEL_SECRET <チャネルシークレット>
$ heroku config:set LINE_BOT_CHANNEL_TOKEN <チャネルトークン>
参考: 設定と環境設定 | Heroku Dev Center
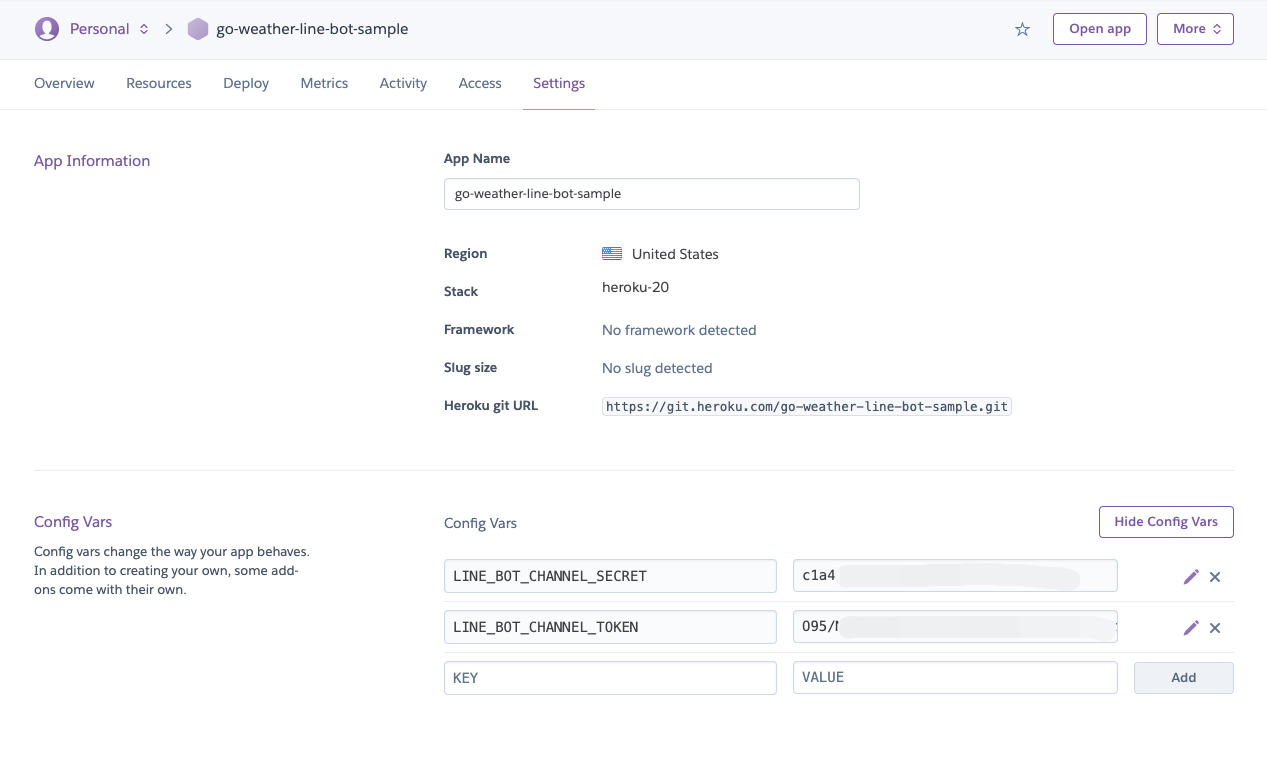
GUI
Settings Config Vars より Reveal Vars を押すことで設定できます。
まず、KEY に LINE_BOT_CHANNEL_SECRET, VALUE に取得したチャネルシークレットを入力し、ADD します。
次に、LINE_BOT_CHANNEL_TOKEN, VALUE に取得したチャネルアクセストークンを入力し、ADD します。
入力時のサンプルです。
デプロイする
heroku git:remote -a <Herokuのアプリ名> でリモートリポジトリを登録しましょう。
$ heroku git:remote -a go-weather-line-bot-sample
# リモートリポジトリを確認
$ git remote -v
heroku	https://git.heroku.com/go-weather-line-bot-sample.git (fetch)
heroku	https://git.heroku.com/go-weather-line-bot-sample.git (push)
origin	ssh://git@github.com/yuki0920/weather_line_bot_sample.git (fetch)
origin	ssh://git@github.com/yuki0920/weather_line_bot_sample.git (push)
次に、 GitHub への push と Heroku への push をします。
※ GitHub への push は必須ではないですが、念のため。
$ git push origin main
$ git push heroku main
Enumerating objects: 10, done.
Counting objects: 100% (10/10), done.
Delta compression using up to 8 threads
Compressing objects: 100% (9/9), done.
Writing objects: 100% (10/10), 1.99 KiB | 1017.00 KiB/s, done.
Total 10 (delta 1), reused 3 (delta 0), pack-reused 0
remote: Compressing source files... done.
remote: Building source:
remote:
remote: -----> Building on the Heroku-20 stack
remote: -----> Determining which buildpack to use for this app
remote: -----> Go app detected
remote: -----> Fetching jq... done
remote: -----> Fetching stdlib.sh.v8... done
remote: ----->
remote:        Detected go modules via go.mod
remote: ----->
remote:        Detected Module Name: github.com/yuki0920/weather_line_bot_sample
remote: ----->
remote:  !!    The go.mod file for this project does not specify a Go version
remote:  !!
remote:  !!    Defaulting to go1.12.17
remote:  !!
remote:  !!    For more details see: https://devcenter.heroku.com/articles/go-apps-with-modules#build-configuration
remote:  !!
remote: -----> New Go Version, clearing old cache
remote: -----> Installing go1.12.17
remote: -----> Fetching go1.12.17.linux-amd64.tar.gz... done
remote: -----> Determining packages to install
remote:
remote:        Detected the following main packages to install:
remote:        		github.com/yuki0920/weather_line_bot_sample
remote:
remote: -----> Running: go install -v -tags heroku github.com/yuki0920/weather_line_bot_sample
remote: github.com/line/line-bot-sdk-go/linebot
remote: github.com/yuki0920/weather_line_bot_sample
remote:
remote:        Installed the following binaries:
remote:        		./bin/weather_line_bot_sample
remote:
remote:        Created a Procfile with the following entries:
remote:        		web: bin/weather_line_bot_sample
remote:
remote:        If these entries look incomplete or incorrect please create a Procfile with the required entries.
remote:        See https://devcenter.heroku.com/articles/procfile for more details about Procfiles
remote:
remote: -----> Discovering process types
remote:        Procfile declares types -> web
remote:
remote: -----> Compressing...
remote:        Done: 3.5M
remote: -----> Launching...
remote:        Released v5
remote:        https://go-weather-line-bot-sample.herokuapp.com/ deployed to Heroku
remote:
remote: Verifying deploy... done.
To https://git.heroku.com/go-weather-line-bot-sample.git
 * [new branch]      main -> main
中段に The go.mod file for this project does not specify a Go versionという文言が出ていますね。
これは、go のバージョンをバージョンを伝達できていないので、次項で解決します。
同じく中段のInstalled the following binariesに注目です!
push しただけで、実行可能なバイナリファイルが生成されました。
./bin/weather_line_bot_sampleを実行するだけでアプリケーションが起動する、ということです。
とっても簡単ですね。
Heroku 用のコメント追加
go.mod に Heroku 用のコメントを追加します。
このコメントを追加しないと、Heroku に go のバージョンをバージョンを伝達できません。
diff --git a/go.mod b/go.mod
index 4e0e5a9..e91563e 100644
--- a/go.mod
+++ b/go.mod
@@ -1,5 +1,6 @@
 module github.com/yuki0920/weather_line_bot_sample

+// +heroku goVersion go1.16
 go 1.16

 require github.com/line/line-bot-sdk-go v7.8.0+incompatible // indirect
Commit: Add heroku goVersion comment
Heroku アプリを実行する
それでは、デプロイ時に生成されたバイナリファイルを実行します。
CLI から
heroku run ./bin/<バイナリファイル名> で実行可能です。
$ heroku run ./bin/weather_line_bot_sample
Running ./bin/weather_line_bot_sample on ⬢ go-weather-line-bot-sample... up, run.1089 (Free)
コンソールから
Heroku の画面右上のMoreからRun consoleをクリックしてください。
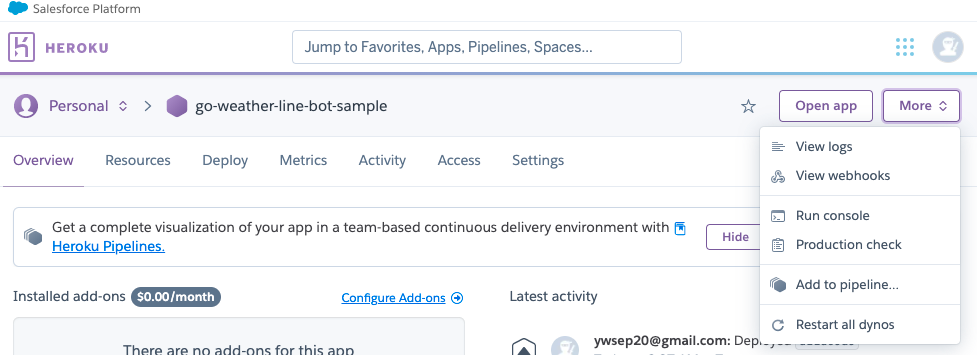
コンソール画面が起動するので、./bin/<Herokuのアプリ名>を入力し、Runを押してください。
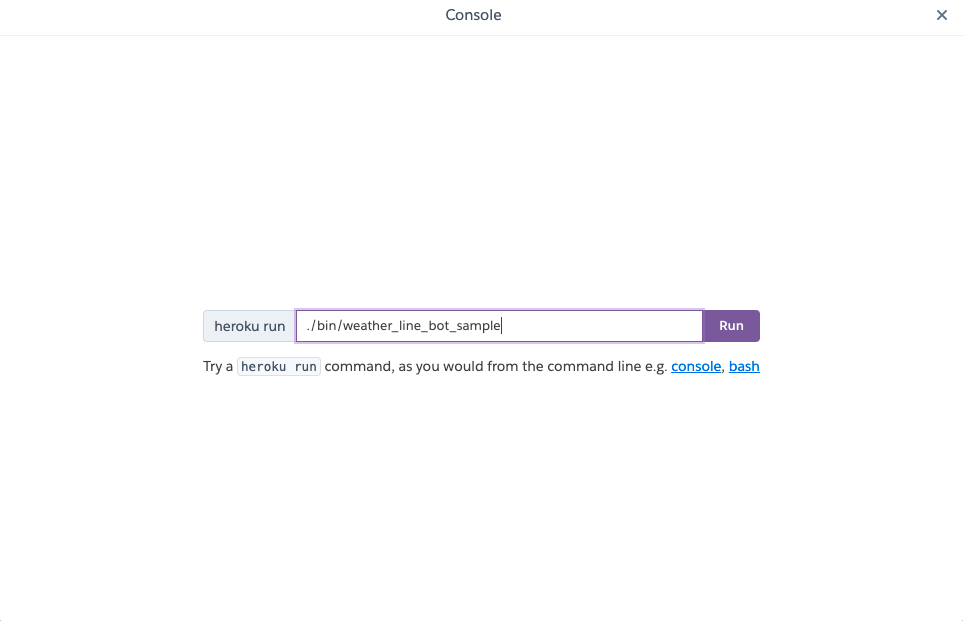
実行後に、コンソール画面にエラーが出力されず、左下にProcess exitedが出力されれば、実行完了です。
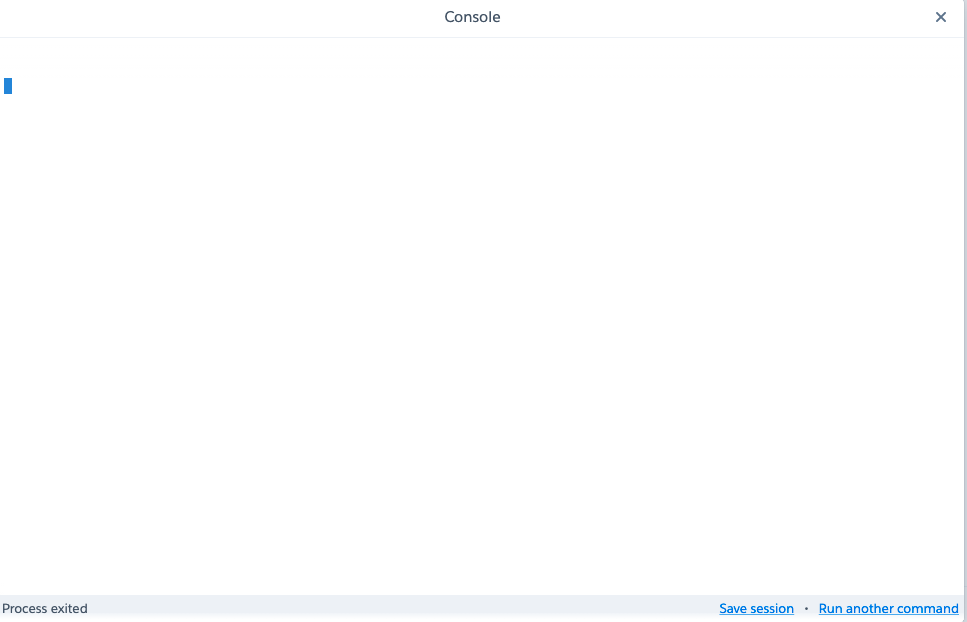
自分宛てにhello, worldのメッセージが届いていれば無事成功です。

天気情報の取得と配信をする
LINE による hello, world のメッセージ配信ができたので、 hello, world をリアルな天気情報に置き換えていきます。
使用する API について
気象庁公開の JSON 形式のデータを利用します。
なかでも、東京都の API である https://www.jma.go.jp/bosai/forecast/data/overview_forecast/130000.json にリクエストを送信します。
天気情報の取得と標準出力(ターミナル)への出力
mkdir weather
touch weather/weather.go
cd ./weather
下記のように、main パッケージを定義します。実装の説明はコメントを参照ください。
ここでは、go run によって動作確認したいため、pakcage mainとしていますが、のちのちpackage weatherに変換します。
(よくよく考えると、ここはweatherではなくmodelsのようなディレクトリ名にしておいたほうが、変更に耐えやすかったかなと思います。)
package weather

import (
	"encoding/json"
	"fmt"
	"io"
	"net/http"
)

// レスポンスの形式に合わせて struct を定義する
type Weather struct {
	Area     string `json:"targetArea"`
	HeadLine string `json:"headlineText"`
	Body     string `json:"text"`
}

func GetWeather() (str string, err error) {
	body, err := httpGetBody("https://www.jma.go.jp/bosai/forecast/data/overview_forecast/130000.json")
	if err != nil {
		// エラーを呼び出し元へ委譲する
		return str, err
	}
	weather, err := formatWeather(body)
	if err != nil {
		// エラーを呼び出し元へ委譲する
		return str, err
	}

	result := weather.ToS()

	return result, nil
}

func httpGetBody(url string) ([]byte, error) {
	// HTTPリクエストを発行しレスポンスを取得する
	response, err := http.Get(url)
	if err != nil {
		// エラーをラップして返す
		err = fmt.Errorf("Get Http Error: %s", err)
		return nil, err
	}
	// レスポンスボディを読み込む
	body, err := io.ReadAll(response.Body)
	if err != nil {
		// エラーをラップして返す
		err = fmt.Errorf("IO Read Error:: %s", err)
		return nil, err
	}
	// 読み込み終わったらレスポンスボディを閉じる
	defer response.Body.Close()

	return body, nil
}

func formatWeather(body []byte) (*Weather, error) {
	weather := new(Weather)
	if err := json.Unmarshal(body, weather); err != nil {
		// エラーをラップして返す
		err = fmt.Errorf("JSON Unmarshal error: %s", err)
		return nil, err
	}
	return weather, nil
}

func (w *Weather) ToS() string {
	area := fmt.Sprintf("%sの天気です。\n", w.Area)
	head := fmt.Sprintf("%s\n", w.HeadLine)
	body := fmt.Sprintf("%s\n", w.Body)
	result := area + head + body

	return result
}
go run weather.goによって main 関数を実行して、下記のように天気情報が出力されれば成功です。
$ pwd
/Users/yuki.watanabe/ghq/github.com/yuki0920/weather_line_bot_sample/weather
$ go run weather.go
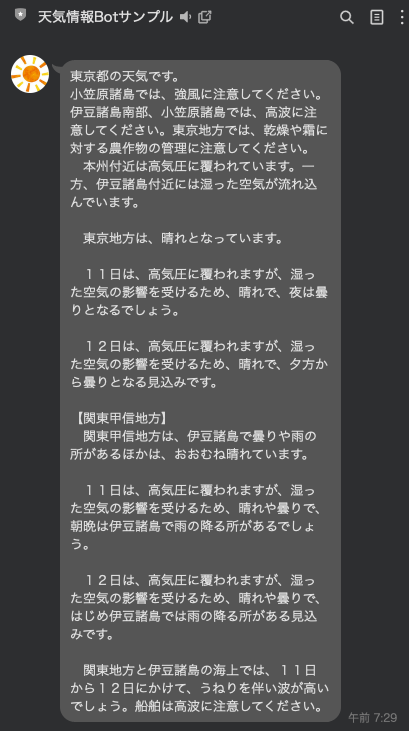
東京都の天気です。
小笠原諸島では、強風に注意してください。伊豆諸島南部、小笠原諸島では、高波に注意してください。東京地方では、乾燥や霜に対する農作物の管理に注意してください。
本州付近は高気圧に覆われています。一方、伊豆諸島付近には湿った空気が流れ込んでいます。
東京地方は、晴れとなっています。
11日は、高気圧に覆われますが、湿った空気の影響を受けるため、晴れで、夜は曇りとなるでしょう。
12日は、高気圧に覆われますが、湿った空気の影響を受けるため、晴れで、夕方から曇りとなる見込みです。
【関東甲信地方】
関東甲信地方は、伊豆諸島で曇りや雨の所があるほかは、おおむね晴れています。
11日は、高気圧に覆われますが、湿った空気の影響を受けるため、晴れや曇りで、朝晩は伊豆諸島で雨の降る所があるでしょう。
12日は、高気圧に覆われますが、湿った空気の影響を受けるため、晴れや曇りで、はじめ伊豆諸島では雨の降る所がある見込みです。
関東地方と伊豆諸島の海上では、11日から12日にかけて、うねりを伴い波が高いでしょう。船舶は高波に注意してください。
Commit: Add weather.go
LINE に天気情報を配信する
これまでに、天気情報を取得して、ターミナルへ出力できるようにしました。
次に、この天気情報を LINE に配信できるようにします。
weather/weather.goの下記の点を修正をします。
-
package mainをpackage weatherに修正する -
func main()を 削除する
diff は下記のようになります。
$ git diff
diff --git a/weather/weather.go b/weather/weather.go
index 3bb8ca1..9319fd1 100644
--- a/weather/weather.go
+++ b/weather/weather.go
@@ -1,4 +1,4 @@
-package main
+package weather

 import (
        "encoding/json"
@@ -15,11 +15,6 @@ type Weather struct {
        Body     string `json:"text"`
 }

-func main() {
-       result := GetWeather()
-       fmt.Println(result)
-}
-
 func GetWeather() string {
        jsonStr := httpGetStr("https://www.jma.go.jp/bosai/forecast/data/overview_forecast/130000.json")
        weather := formatWeather(jsonStr)
Commit: Rename package & func
次に、main.go に移動し、下記の点を修正します。
-
weatherパッケージをimportに追加する - LINE BOT から配信するテキストメッセージを
hello, worldから、先程追加した天気情報に変更する
diff は下記のようになります。
diff --git a/main.go b/main.go
index 4cba44c..a881b42 100644
--- a/main.go
+++ b/main.go
@@ -5,6 +5,7 @@ import (
        "os"

        "github.com/line/line-bot-sdk-go/linebot"
+       "github.com/yuki0920/weather_line_bot_sample/weather"
 )

 func main() {
@@ -18,8 +19,10 @@ func main() {
        if err != nil {
                log.Fatal(err)
        }
+       // weatherパッケージパッケージから天気情報の文字列をを取得する
+       result := weather.GetWeather()
        // テキストメッセージを生成する
-       message := linebot.NewTextMessage("hello, world")
+       message := linebot.NewTextMessage(result)
        // テキストメッセージを友達登録しているユーザー全員に配信する
        if _, err := bot.BroadcastMessage(message).Do(); err != nil {
                log.Fatal(err)
Commit: Use weather package
デプロイ & 動作確認
それでは、デプロイしましょう。
# githubへpushする
$ git push origin main
# herokuへpushする(ログは省略)
$ git push heroku main
デプロイに成功したら、「Heroku アプリを実行する」の手順と同様に、./bin/<リポジトリ名>を実行しましょう。
$ heroku run ./bin/weather_line_bot_sample
Running ./bin/weather_line_bot_sample on ⬢ go-weather-line-bot-sample... up, run.1089 (Free)
無事、LINE Bot よりメッセージが届いていれば成功です!
参考: GitHub - heroku/heroku-buildpack-go: Heroku Go Buildpack
毎日の定期実行を設定する
CLI でスケジューラーのアドオンを追加します。
$ heroku addons:create scheduler
Creating scheduler on ⬢ go-weather-line-bot-sample... free
 To manage scheduled jobs run:
 heroku addons:open scheduler

Created scheduler-objective-53631
Use heroku addons:docs scheduler to view documentation

$ heroku addons:open scheduler
Opening https://addons-sso.heroku.com/apps/2e75ef40-a75f-4c29-8d05-e9b616aeb800/addons/c54271dd-46c6-4f12-847f-f0cb56daa6a7...
ブラウザでスケジューラの設定画面が開くので、
Add Jobから、 Schedule と Run Command を設定し、 Save Job します。
- Schedule は Every day at(毎日) 9:00 PM UTC(日本時間では 6:00 AM) を入力する
- Run Command は
./bin/<アプリ名>を入力する
設定した時間に天気予報のメッセージが届けば成功です。
参考: Heroku Scheduler | Heroku Dev Center
追記: リファクタリング & テスト
記事執筆後、テストコードの書き方について学習し、実装したので記載します。
まず、weather パッケージの GetWeather関数からメソッドを分離するリファクタリングを実施します。
diff --git a/weather/weather.go b/weather/weather.go
index 9319fd1..eae9cf4 100644
--- a/weather/weather.go
+++ b/weather/weather.go
@@ -18,11 +18,7 @@ type Weather struct {
 func GetWeather() string {
        jsonStr := httpGetStr("https://www.jma.go.jp/bosai/forecast/data/overview_forecast/130000.json")
        weather := formatWeather(jsonStr)
-
-       area := fmt.Sprintf("%sの天気です。\n", weather.Area)
-       head := fmt.Sprintf("%s\n", weather.HeadLine)
-       body := fmt.Sprintf("%s\n", weather.Body)
-       result := area + head + body
+       result := weather.ToS()

        return result
 }
@@ -50,3 +46,12 @@ func formatWeather(str string) *Weather {
        }
        return weather
 }
+
+func (w *Weather) ToS() string {
+       area := fmt.Sprintf("%sの天気です。\n", w.Area)
+       head := fmt.Sprintf("%s\n", w.HeadLine)
+       body := fmt.Sprintf("%s\n", w.Body)
+       result := area + head + body
+
+       return result
+}
Commit: Extract ToS method
次に、weather_test.goを作成し、下記のように実装します。
testingパッケージのExamplesという機能を利用しています。
Output以降のコメントをテストコードの期待値として定義できます。
package weather

import (
	"fmt"
)

func ExampleToS() {
	w := new(Weather)
	w.Area = "テスト地方"
	w.HeadLine = "一日良い天気です。"
	w.Body = "傘を持ち歩く必要はないでしょう。"

	fmt.Println(w.ToS())
	// Output: テスト地方の天気です。
	// 一日良い天気です。
	// 傘を持ち歩く必要はないでしょう。
}
Commit: Add test for ToS
go testでテストを実行すると、OKと出力されていることがわかります。
$ pwd
/Users/yuki.watanabe/ghq/github.com/yuki0920/weather_line_bot_sample/weather
$ go test
PASS
ok      github.com/yuki0920/weather_line_bot_sample/weather     0.070s
失敗時は下記のように、実際の出力値とがgotとして、Outputの値がwantとして出力されます。
$ go test
--- FAIL: ExampleToS (0.00s)
got:
テスト地方の天気です。
一日良い天気です。
傘
want:
テスト地方の天気です。
一日良い天気です。
傘を持ち歩く必要はないでしょう。
FAIL
exit status 1
FAIL    github.com/yuki0920/weather_line_bot_sample/weather     0.299s
補足: web プロセス再起動による不定期実行の停止
Heroku にデプロイ後に、Resource の画面に web bin/<アプリ名>の設定がありますので、こちらの設定を OFF にしてください。
ON/OFF の見分けをつけづらいので下記画像を参考にしてください。
| ON | OFF |
|---|---|
 |
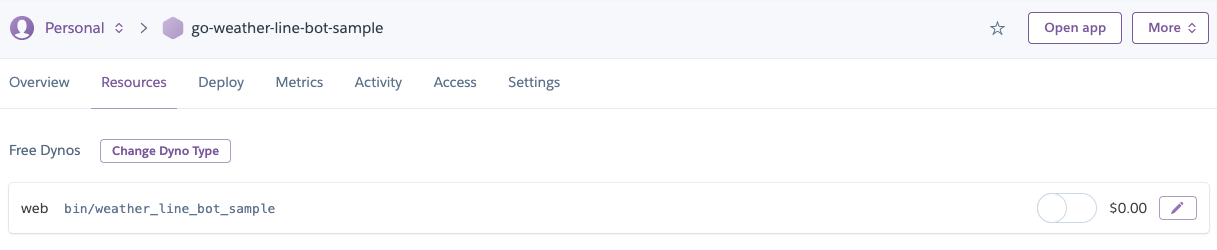 |
この設定は、dyno 起動時にコマンドを設定してwebプロセスを起動するかどうかの設定です。
dyno が不定期で再起動するため、定期スケジューリングとはことなる予測不可能なタイミングでbin/<アプリ名>が実行され LINE に通知が来てしまいます。
この再起動時に実行されるコマンドの無効化をしている、というわけです。
dyno は永続的なものではなく、アプリとシステム全体の健全性を維持するため 1 日に 1 回以上再起動されます。
Heroku Dynos - ライフサイクル | Heroku
うまくデプロイできない場合
- 手順については公式ドキュメントとして、Heroku でサンプルボットを作成する | LINE Developers や line-bot-sdk-java/sample-spring-boot-echo at master · line/line-bot-sdk-java · GitHub にも詳しく記載がありますので、ご確認ください
- 設定と環境設定 | Heroku Dev Center を参考に LINE で取得したチャネルシークレットとチャネルアクセストークンが、Heroku の環境変数に反映されているかご確認ください
- チャネルを友達登録しているかご確認ください
さいごに
お読みいただきありがとうございました。
少しでも役に立った、いいね、と思っていただいたら「LGTM」していただけると嬉しいです。