Xamarin.Formsというのはiosとandroidの両方共通で使えるもの。
HelloWorld
Labelは文字列を表示する
HorizontalOptionsフィールドは横の位置を表し、VerticalOptionsフィールドは縦位置を表す。
Textフィールドは表示するテキストを表す。
<?xml version="1.0" encoding="utf-8" ?>
<ContentPage xmlns="http://xamarin.com/schemas/2014/forms"
xmlns:x="http://schemas.microsoft.com/winfx/2009/xaml"
xmlns:d="http://xamarin.com/schemas/2014/forms/design"
xmlns:mc="http://schemas.openxmlformats.org/markup-compatibility/2006"
mc:Ignorable="d"
x:Class="App5.MainPage">
<StackLayout>
<!-- Place new controls here -->
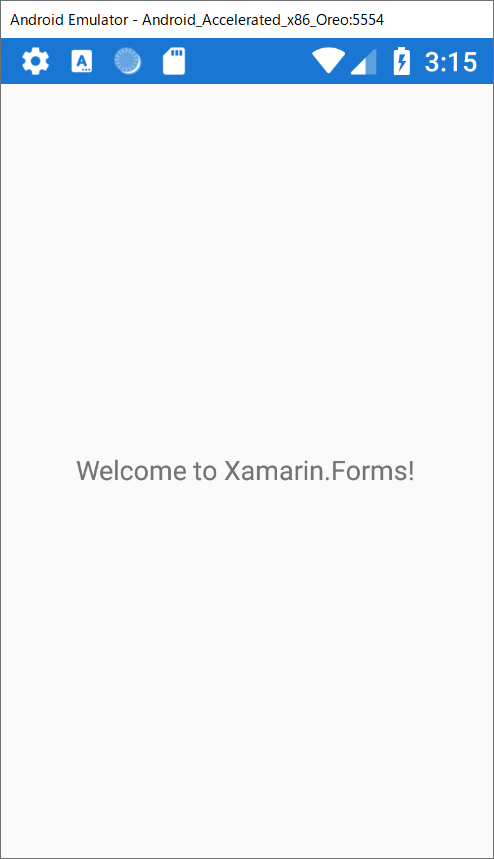
<Label Text="Welcome to Xamarin.Forms!"
HorizontalOptions="Center"
VerticalOptions="CenterAndExpand" />
</StackLayout>
</ContentPage>
InitializeComponentでxaml側を描画している。
using System.ComponentModel;
using Xamarin.Forms;

namespace App5
{
    // Learn more about making custom code visible in the Xamarin.Forms previewer
    // by visiting https://aka.ms/xamarinforms-previewer
    [DesignTimeVisible(false)]
    public partial class MainPage : ContentPage
    {
        public MainPage()
        {
            InitializeComponent();
        }
    }
}
実行結果
Binding
ちっとBindingは欲しいし、適当にやってみようか。ということでBindingできるか検証。
<?xml version="1.0" encoding="utf-8" ?>
<ContentPage xmlns="http://xamarin.com/schemas/2014/forms"
             xmlns:x="http://schemas.microsoft.com/winfx/2009/xaml"
             xmlns:d="http://xamarin.com/schemas/2014/forms/design"
             xmlns:mc="http://schemas.openxmlformats.org/markup-compatibility/2006"
             mc:Ignorable="d"
             x:Class="App5.MainPage">
    <StackLayout>
        <!-- Place new controls here -->
        <Label Text="{Binding Name}"
           HorizontalOptions="Center"
           VerticalOptions="CenterAndExpand" />
    </StackLayout>
</ContentPage>
WPFと同じようにINotifyPropertyChangedを実装して、登録を行う。
ただし、DataContextがないのでBindingContextというそれっぽいやつにBindingを行う。
using System.ComponentModel;
using Xamarin.Forms;

namespace App5
{
    // Learn more about making custom code visible in the Xamarin.Forms previewer
    // by visiting https://aka.ms/xamarinforms-previewer
    [DesignTimeVisible(false)]
    public partial class MainPage : ContentPage
    {
        private MainVM MyVM = new MainVM();
        public MainPage()
        {
            InitializeComponent();
            BindingContext = MyVM;
        }
    }

    public class MainVM : INotifyPropertyChanged
    {
        public event PropertyChangedEventHandler PropertyChanged;

        private string _Name = "HelloWorld";

        public string Name
        {
            get => _Name;
            set
            {
                _Name = value;
                PropertyChanged?.Invoke(this, new PropertyChangedEventArgs(nameof(Name)));
            }
        }
    }
}
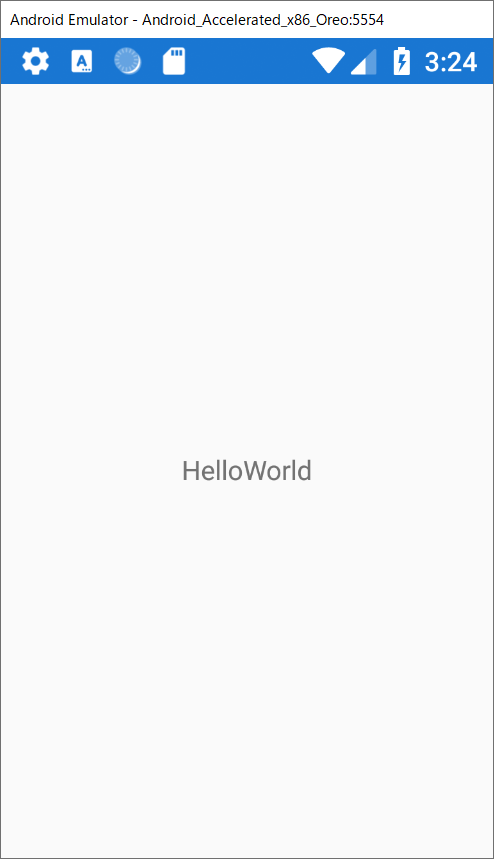
実行結果
Binding本当にできているのか?
表示時はできたが、はたして本当にできているのか不安なのでボタンをクリックしてViewModelを変更することによってxamlが変更されるかどうかを確かめる。
<?xml version="1.0" encoding="utf-8" ?>
<ContentPage xmlns="http://xamarin.com/schemas/2014/forms"
             xmlns:x="http://schemas.microsoft.com/winfx/2009/xaml"
             xmlns:d="http://xamarin.com/schemas/2014/forms/design"
             xmlns:mc="http://schemas.openxmlformats.org/markup-compatibility/2006"
             mc:Ignorable="d"
             x:Class="App5.MainPage">
    <StackLayout>
        <!-- Place new controls here -->
        <StackLayout HorizontalOptions="Center"
           VerticalOptions="CenterAndExpand"
            Orientation="Vertical">
            <Label Text="{Binding Name}" />
            <Button Text="ボタン" Clicked="Button_Clicked"></Button>
        </StackLayout>

    </StackLayout>
</ContentPage>
using System.ComponentModel;
using Xamarin.Forms;

namespace App5
{
    // Learn more about making custom code visible in the Xamarin.Forms previewer
    // by visiting https://aka.ms/xamarinforms-previewer
    [DesignTimeVisible(false)]
    public partial class MainPage : ContentPage
    {
        private MainVM MyVM = new MainVM();
        public MainPage()
        {
            InitializeComponent();
            BindingContext = MyVM;
        }

        private void Button_Clicked(object sender, System.EventArgs e)
        {
            MyVM.Name = "HelloWorld2";
        }
    }

    public class MainVM : INotifyPropertyChanged
    {
        public event PropertyChangedEventHandler PropertyChanged;

        private string _Name = "HelloWorld";

        public string Name
        {
            get => _Name;
            set
            {
                _Name = value;
                PropertyChanged?.Invoke(this, new PropertyChangedEventArgs(nameof(Name)));
            }
        }
    }
}
ボタンをクリックしてHelloWorldがHelloWorld2になっていれば成功。
実行結果
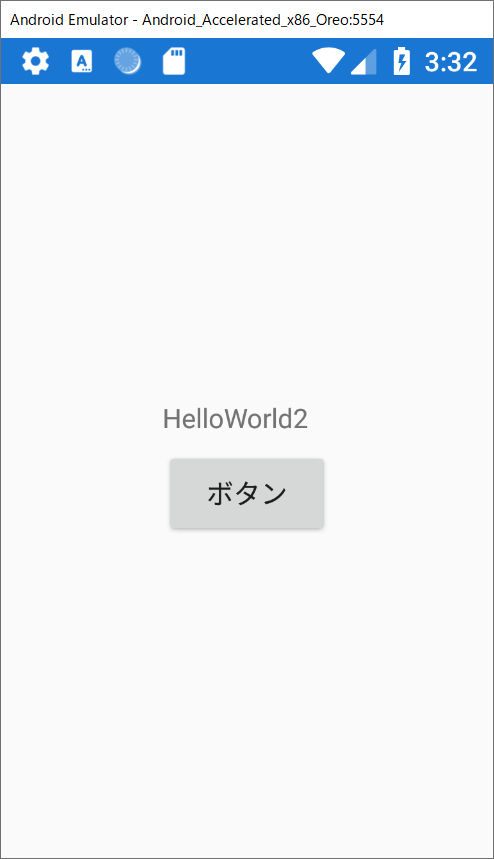
きちんとなっている。
ListView
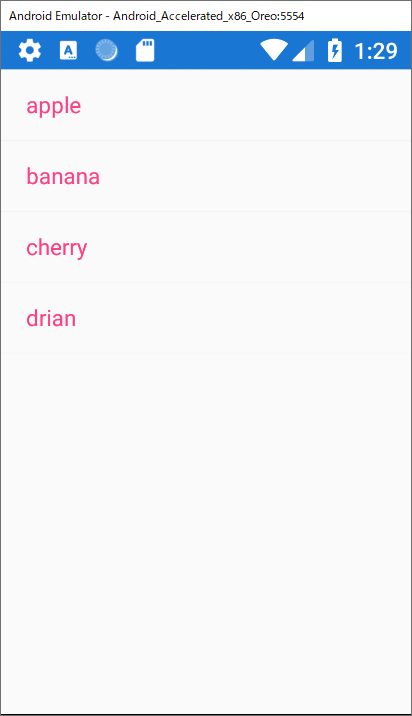
stringのリストを表示
ItemSourceにリストを入れる。
<?xml version="1.0" encoding="utf-8" ?>
<ContentPage xmlns="http://xamarin.com/schemas/2014/forms"
             xmlns:x="http://schemas.microsoft.com/winfx/2009/xaml"
             xmlns:d="http://xamarin.com/schemas/2014/forms/design"
             xmlns:mc="http://schemas.openxmlformats.org/markup-compatibility/2006"
             mc:Ignorable="d"
             x:Class="App4.MainPage">
    <StackLayout>
        <!-- Place new controls here -->
        <ListView ItemsSource="{Binding Fruits}">
        </ListView>
    </StackLayout>
</ContentPage>
VMクラスにリストを入れる。
public class MainVM:INotifyPropertyChanged
{
    private ObservableCollection<string> _Fruits = new ObservableCollection<string>()
    {
        "apple",
        "banana",
        "cherry",
        "drian"
    };

    public ObservableCollection<string> Fruits
    {
        get => _Fruits;
        set
        {
            _Fruits = value;
            PropertyChanged?.Invoke(this, new PropertyChangedEventArgs(nameof(Fruits)));
        }
    }

    public event PropertyChangedEventHandler PropertyChanged;
}
実行結果
Converterを使ってクラスで特定のフィールドを表示
<?xml version="1.0" encoding="utf-8" ?>
<ContentPage xmlns="http://xamarin.com/schemas/2014/forms"
             xmlns:x="http://schemas.microsoft.com/winfx/2009/xaml"
             xmlns:d="http://xamarin.com/schemas/2014/forms/design"
             xmlns:mc="http://schemas.openxmlformats.org/markup-compatibility/2006"
             xmlns:local="clr-namespace:App4"
             mc:Ignorable="d"
             x:Class="App4.MainPage">
    <ContentPage.Resources>
        <ResourceDictionary>
            <local:FruitToStringConverter x:Key="FruitToStringConverter" />
        </ResourceDictionary>
    </ContentPage.Resources>
    <StackLayout>
        <ListView ItemsSource="{Binding Fruits, Mode=OneWay, Converter={StaticResource FruitToStringConverter}}">
        </ListView>
    </StackLayout>
</ContentPage>
コンバータークラスを作成
Convertはソースからxaml側へ
ConvertBackはxamlからソース側へ。
ConvertBackは今回使わないのでExceptionで残しておく。
public class FruitToStringConverter : IValueConverter
{
    public object Convert(object value, Type targetType, object parameter, CultureInfo culture)
    {
        var json = JsonConvert.SerializeObject(value);
        return JsonConvert.DeserializeObject<List<Fruit>>(json).Select(x => x.Name);
    }

    public object ConvertBack(object value, Type targetType, object parameter, CultureInfo culture)
    {
        throw new Exception("エラーです。");
    }
}
実行結果は上のstringのリスト表示と同じ。
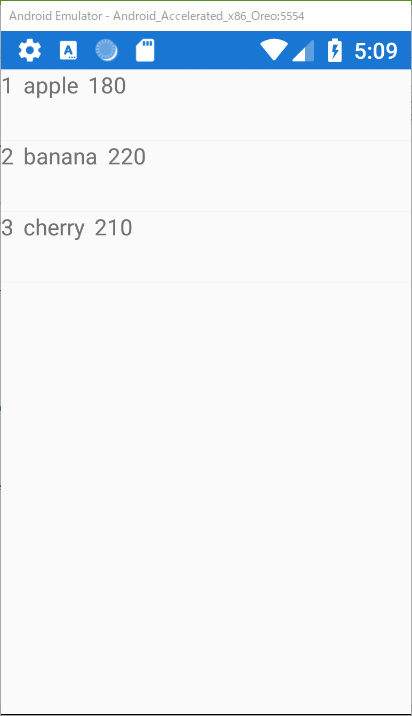
ViewCellを使ってクラスの複数フィールドを表示
ViewCell直下ではListの中のクラスのFruitのフィールド名をBindingできる。
<?xml version="1.0" encoding="utf-8" ?>
<ContentPage xmlns="http://xamarin.com/schemas/2014/forms"
             xmlns:x="http://schemas.microsoft.com/winfx/2009/xaml"
             xmlns:d="http://xamarin.com/schemas/2014/forms/design"
             xmlns:mc="http://schemas.openxmlformats.org/markup-compatibility/2006"
             xmlns:local="clr-namespace:App4"
             mc:Ignorable="d"
             x:Class="App4.MainPage">
    <ContentPage.Resources>
        <ResourceDictionary>
            <local:FruitToStringConverter x:Key="FruitToStringConverter" />
        </ResourceDictionary>
    </ContentPage.Resources>
    <StackLayout>
        <ListView ItemsSource="{Binding Fruits, Mode=OneWay}">
            <ListView.ItemTemplate>
                <DataTemplate>
                    <ViewCell Height="150">
                        <StackLayout Orientation="Horizontal">
                            <Label Text="{Binding Id}"></Label>
                            <Label Text="{Binding Name}"></Label>
                            <Label Text="{Binding Price}"></Label>
                        </StackLayout>
                    </ViewCell>
                </DataTemplate>
            </ListView.ItemTemplate>
        </ListView>
    </StackLayout>
</ContentPage>
VMクラス再掲
public class MainVM:INotifyPropertyChanged
{
    private ObservableCollection<Fruit> _Fruits = new ObservableCollection<Fruit>()
    {
        new Fruit(){Id = 1, Name = "apple", Number = 6, Price = 180},
        new Fruit(){Id = 2, Name = "banana", Number = 7, Price = 220},
        new Fruit(){Id = 3, Name = "cherry", Number = 5, Price = 210}
    };

    public ObservableCollection<Fruit> Fruits
    {
        get => _Fruits;
        set
        {
            _Fruits = value;
            PropertyChanged?.Invoke(this, new PropertyChangedEventArgs(nameof(Fruits)));
        }
    }

    public event PropertyChangedEventHandler PropertyChanged;
}
実行結果
ページ遷移
NavigationPageによる遷移
MainPageをNavigationPageに変える。
public App()
{
    InitializeComponent();

    MainPage = new NavigationPage(new MainPage());
}
MainPageの他に、Page1,Page2を作り遷移していく
<?xml version="1.0" encoding="utf-8" ?>
<ContentPage xmlns="http://xamarin.com/schemas/2014/forms"
             xmlns:x="http://schemas.microsoft.com/winfx/2009/xaml"
             xmlns:d="http://xamarin.com/schemas/2014/forms/design"
             xmlns:mc="http://schemas.openxmlformats.org/markup-compatibility/2006"
             xmlns:local="clr-namespace:App4"
             mc:Ignorable="d"
             x:Class="App4.MainPage">
    <StackLayout>
        <Button Text="Page1へ" Clicked="Button_Clicked"></Button>
    </StackLayout>
</ContentPage>
Navigation.PushAsync(Page, true)でPageに遷移する。第2引数はアニメーションのありなし。
public partial class MainPage : ContentPage
{
    private MainVM MyVM = new MainVM();

    public MainPage()
    {
        InitializeComponent();
        BindingContext = MyVM;
    }

    private void Button_Clicked(object sender, EventArgs e)
    {
        Navigation.PushAsync(new Page1(), true);
    }
}
<?xml version="1.0" encoding="utf-8" ?>
<ContentPage xmlns="http://xamarin.com/schemas/2014/forms"
             xmlns:x="http://schemas.microsoft.com/winfx/2009/xaml"
             xmlns:d="http://xamarin.com/schemas/2014/forms/design"
             xmlns:mc="http://schemas.openxmlformats.org/markup-compatibility/2006"
             mc:Ignorable="d"
             x:Class="App4.Page1">
    <ContentPage.Content>
        <StackLayout Orientation="Vertical">
            <Button Text="Mainへ" Clicked="Button_Clicked"></Button>
            <Button Text="Page2へ" Clicked="Button_Clicked_1"></Button>
        </StackLayout>
    </ContentPage.Content>
</ContentPage>
using System;
using Xamarin.Forms;
using Xamarin.Forms.Xaml;

namespace App4
{
    [XamlCompilation(XamlCompilationOptions.Compile)]
    public partial class Page1 : ContentPage
    {
        public Page1()
        {
            InitializeComponent();
        }

        private void Button_Clicked(object sender, EventArgs e)
        {
            Navigation.PopToRootAsync();
        }

        private void Button_Clicked_1(object sender, EventArgs e)
        {
            Navigation.PushAsync(new Page2(), true);
        }
    }
}
<?xml version="1.0" encoding="utf-8" ?>
<ContentPage xmlns="http://xamarin.com/schemas/2014/forms"
             xmlns:x="http://schemas.microsoft.com/winfx/2009/xaml"
             xmlns:d="http://xamarin.com/schemas/2014/forms/design"
             xmlns:mc="http://schemas.openxmlformats.org/markup-compatibility/2006"
             mc:Ignorable="d"
             x:Class="App4.Page2">
    <ContentPage.Content>
        <StackLayout Orientation="Vertical">
            <Button Text="Mainへ" Clicked="Button_Clicked"></Button>
            <Button Text="Page1へ" Clicked="Button_Clicked_1"></Button>
        </StackLayout>
    </ContentPage.Content>
</ContentPage>
using System;
using System.Collections.Generic;
using System.Linq;
using System.Text;
using System.Threading.Tasks;

using Xamarin.Forms;
using Xamarin.Forms.Xaml;

namespace App4
{
    [XamlCompilation(XamlCompilationOptions.Compile)]
    public partial class Page2 : ContentPage
    {
        public Page2()
        {
            InitializeComponent();
        }

        private void Button_Clicked(object sender, EventArgs e)
        {
            Navigation.PopToRootAsync();
        }

        private void Button_Clicked_1(object sender, EventArgs e)
        {
            Navigation.PushAsync(new Page1(), true);
        }
    }
}
実行結果
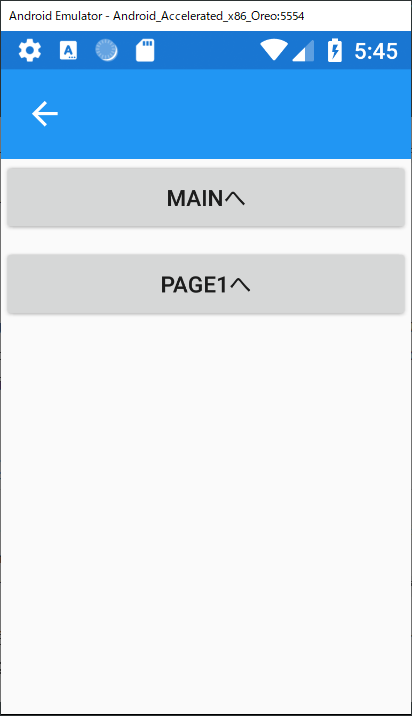
上の青いところが出てしまう。
Android実機デバッグ
以下の記事が参考になる。
https://tech-blog.cloud-config.jp/2017-06-06-execute-xamarin-helloworld-with-android-device/