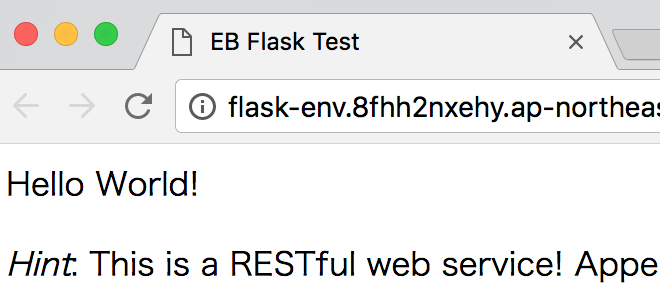
Anacondaがインストールされていると公式ドキュメントどおりにやると上手くいかなかったので、公式ドキュメントを参考にどうやったらデプロイ出来たか残しておきます。
(公式ドキュメント
https://docs.aws.amazon.com/ja_jp/elasticbeanstalk/latest/dg/create-deploy-python-flask.html)
1. 仮想環境の作成・アクティブ化
一番ハマったのがここです。
これ以外はドキュメントどおりで大丈夫でした。
Anaconda(conda)がインストールされている場合virtualenv で仮想環境を作らず condaで作って下さい。
作成
~$ conda create -n eb-virt python=2.7
アクティブ化
~$ source activate eb-virt
プロンプトが
(eb-virt)~$ のように変わればOKです
2. Flaskのインストール
ここからは公式ドキュメントどおりです。
(eb-virt)~$ pip install flask==0.10.1
Flaskがインストールされたことを確認
(eb-virt)~$ pip freeze
certifi==2018.1.18
Flask==0.10.1
itsdangerous==0.24
Jinja2==2.10
MarkupSafe==1.0
Werkzeug==0.14.1
3. Flaskアプリケーション作成
3.1. ディレクトリ作成
(eb-virt) ~$ mkdir eb-flask
(eb-virt) ~$ cd eb-flask
3.2. applicatin.pyの作成
from flask import Flask

# print a nice greeting.
def say_hello(username = "World"):
    return '<p>Hello %s!</p>\n' % username

# some bits of text for the page.
header_text = '''
    <html>\n<head> <title>EB Flask Test</title> </head>\n<body>'''
instructions = '''
    <p><em>Hint</em>: This is a RESTful web service! Append a username
    to the URL (for example: <code>/Thelonious</code>) to say hello to
    someone specific.</p>\n'''
home_link = '<p><a href="/">Back</a></p>\n'
footer_text = '</body>\n</html>'

# EB looks for an 'application' callable by default.
application = Flask(__name__)

# add a rule for the index page.
application.add_url_rule('/', 'index', (lambda: header_text +
    say_hello() + instructions + footer_text))

# add a rule when the page is accessed with a name appended to the site
# URL.
application.add_url_rule('/<username>', 'hello', (lambda username:
    header_text + say_hello(username) + home_link + footer_text))

# run the app.
if __name__ == "__main__":
    # Setting debug to True enables debug output. This line should be
    # removed before deploying a production app.
    application.debug = True
    application.run()
4. ローカルでアプリケーション起動
4.1 起動
(eb-virt) ~/eb-flask$ python application.py
 * Running on http://127.0.0.1:5000/ (Press CTRL+C to quit)
 * Restarting with stat
 * Debugger is active!
 * Debugger PIN: 971-947-057
4.2 確認
ブラウザで↑に表示されたアドレスを開く。
僕の場合は http://127.0.0.1:5000/でした。

4.3 停止
Ctrl-C でアプリケーション停止
5. Elastic Beanstalkへのデプロイ準備
5.1 requirements.txt作成
(eb-virt) ~/eb-flask$ pip freeze > requirements.txt
5.2 仮想環境を非アクティブする
これ以降デプロイ作業には必要ないので仮想環境を非アクティブします。
(eb-virt) ~/eb-flask$ source deactivate
6. Elastic Beanstalkへデプロイ
いよいよ、デプロイします。
ディレクトリ構成は現在この様になっていると思います。
~/eb-flask/
|-- application.py
|-- requirements.txt
6.1 eb init コマンドで EB CLI リポジトリを初期化
~/eb-flask$ eb init -p python2.7 flask-tutorial
Application flask-tutorial has been created.
ここではpython2.7を選択肢ましたが、他にも使えるのでこちらを参考にして下さい。
(https://docs.aws.amazon.com/ja_jp/elasticbeanstalk/latest/dg/concepts.platforms.html#concepts.platforms.python)
リージョンを指定します。
Select a default region
1) us-east-1 : US East (N. Virginia)
2) us-west-1 : US West (N. California)
3) us-west-2 : US West (Oregon)
4) eu-west-1 : EU (Ireland)
5) eu-central-1 : EU (Frankfurt)
6) ap-south-1 : Asia Pacific (Mumbai)
7) ap-southeast-1 : Asia Pacific (Singapore)
8) ap-southeast-2 : Asia Pacific (Sydney)
9) ap-northeast-1 : Asia Pacific (Tokyo)
10) ap-northeast-2 : Asia Pacific (Seoul)
11) sa-east-1 : South America (Sao Paulo)
12) cn-north-1 : China (Beijing)
13) us-east-2 : US East (Ohio)
14) ca-central-1 : Canada (Central)
15) eu-west-2 : EU (London)
(default is 3):
僕は9のTokyoを選びました。
6.2 デフォルトのキーペアを設定(オプショナル)
~/eb-flask$ eb init
Do you want to set up SSH for your instances?
(y/n): y
Select a keypair.
1) my-keypair
2) [ Create new KeyPair ]
注意
プロンプトが表示されないか設定を後で変更する必要がない場合は、eb init -i を実行するそうです。
6.3 デプロイ
ここはちょっと時間かかります。
~/eb-flask$ eb create flask-env
6.4 確認
デプロイしたアプリケーションをブラウザで開きます。
~/eb-flask$ eb open

7. ファイルを修正して再デプロイ
せっかくなのでapplication.py を変更して再度デプロイしてみましょう。
7.1 ファイル変更

username = "Hoge"
としました。
7.2 デプロイ
~/eb-flask$ eb deploy
7.3 確認

Hogeに変わりました。
8. 終わりに
以上です。
AWSリソースの終了や削除は公式ドキュメントを参考にして下さい。
https://docs.aws.amazon.com/ja_jp/elasticbeanstalk/latest/dg/create-deploy-python-flask.html