はじめに
過去に kintone の貼付ファイルで保管した JPEG画像内の Exif情報から GPS値を抜き出せないかとの相談がありました。その時は kintone の貼付ファイルを一旦 AWS の S3 に保管して、Lambda の Python プログラムで解析後、kintoneに反映する方法をお答えしました。
しかしながら、シンプルに kintone の JavaScript カスタマイズだけで対応できないかと考え調査した結果、以外と簡単に Exif情報を取得し kintone のレコードに保管できることを確認できました。
JPEG画像のExif情報について
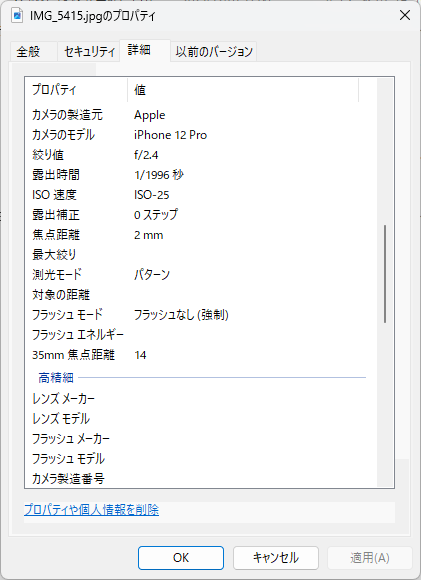
Exif(エグジフ)情報とはスマートフォンやデジカメなどで撮影した画像ファイルに付与された撮影や位置などの情報です。スマートフォンなどで撮影した JPEG画像を Windows の画面でプロパティ表示すると、以下のように確認できます。
Exif情報は画像ファイルの指定位置にバイナリーデータで記録されているので、Pythonなどのバイナリーデータを処理しやすい言語ではわりと簡単に取り出すことが可能です。しかしながら、kintone カスタマイズのJavaScriptで処理する場合、結構面倒なんですね。どう面倒なのかは以下のQiita記事などを参照いただければ。
[基礎編]JavaScriptでバイナリデータを扱ってみる
https://qiita.com/megadreams14/items/dded3cf770010bb8ff08
そこで、簡単に処理できる都合の良いライブラリィがないか探したところ、以下の Exif.js を見つけました。
Exif.js
https://github.com/exif-js/exif-js
サンプルを見ると Imageオブジェクトから簡単に Exif情報を引き出せそうですので、今回はこちらを試してみることにしました。
JavaScriptライブラリィExif.jsを試す
Exif.jsについて
Exif.js は Imageオブジェクトから Exif情報を取得します。以下のExif.js GitHub のサンプルコードのようにImageオブジェクトから簡単に情報を引き出せます。
    var img1 = document.getElementById("img1");
    EXIF.getData(img1, function() {
        var make = EXIF.getTag(this, "Make");
        var model = EXIF.getTag(this, "Model");
        var makeAndModel = document.getElementById("makeAndModel");
        makeAndModel.innerHTML = `${make} ${model}`;
    });
HTMLファイルで Exif.js を試してみる
上記を参考に、アップロードした JPEG画像ファイルの Exif情報をコンソールに表示する JavaScriptプログラムを HTMLファイルに書いて、試験しました。添付ファイルは FileReader() で Imageオブジェクトに変換し、Exif情報を取得しています。
<input type="file" id="target">
<script src="https://cdn.jsdelivr.net/npm/exif-js"></script>
<script>
const target = document.getElementById('target');
target.addEventListener('change', async (e) => {

    // 選択した画像ファイルの処理
    const file = await e.target.files[0];
    const reader = await new FileReader();
    reader.onloadend = async function () {

        const image = await new Image();
        image.src = await reader.result;

        image.onload = async function () {

            // 読み込んだ画像ファイルの処理
            await EXIF.getData(image, async function () {
                console.log(EXIF.getAllTags(this));
            });

        };
    };

    await reader.readAsDataURL(file);
});
</script>
</html>
実際 SONY α6600 で撮影した JPEGファイルの全ての Exif情報を取得した結果が以下です。
SONY α6600 で撮影したJPEGファイルの例
{
	"ImageDescription": "                               ",
	"Make": "SONY",
	"Model": "ILCE-6600",
	"Orientation": 6,
	"XResolution": 350,
	"YResolution": 350,
	"ResolutionUnit": 2,
	"Software": "ILCE-6600 v1.10",
	"DateTime": "2023:01:28 10:21:18",
	"YCbCrPositioning": 2,
	"ExifIFDPointer": 364,
	"undefined": "E 16-70mm F4 ZA OSS",
	"ExposureTime": 0.004,
	"FNumber": 8,
	"ExposureProgram": "Normal program",
	"ISOSpeedRatings": 100,
	"ExifVersion": "0231",
	"DateTimeOriginal": "2023:01:28 10:21:18",
	"DateTimeDigitized": "2023:01:28 10:21:18",
	"ComponentsConfiguration": "YCbCr",
	"CompressedBitsPerPixel": 2,
	"BrightnessValue": 9.70859375,
	"ExposureBias": 0,
	"MaxApertureValue": 4,
	"MeteringMode": "Pattern",
	"LightSource": "Unknown",
	"Flash": "Flash did not fire, compulsory flash mode",
	"FocalLength": 70,
	"MakerNote": [
		83,
		(長いので省略)
	],
	"FlashpixVersion": "0100",
	"ColorSpace": 1,
	"PixelXDimension": 6000,
	"PixelYDimension": 4000,
	"InteroperabilityIFDPointer": 38778,
	"FileSource": "DSC",
	"SceneType": "Directly photographed",
	"CustomRendered": "Normal process",
	"ExposureMode": 0,
	"WhiteBalance": "Auto white balance",
	"DigitalZoomRation": 1,
	"FocalLengthIn35mmFilm": 105,
	"SceneCaptureType": "Standard",
	"Contrast": "Normal",
	"Saturation": "Normal",
	"Sharpness": "Normal",
	"thumbnail": {
		"Compression": 6,
		"undefined": "2023:01:28 10:21:18",
		"Orientation": 6,
		"XResolution": 72,
		"YResolution": 72,
		"ResolutionUnit": 2,
		"JpegIFOffset": 39070,
		"JpegIFByteCount": 7532,
		"YCbCrPositioning": 2,
		"blob": {}
	}
}
さらに、iPhpne 12 Pro で試した結果が以下です。
iPhone12 Pro で撮影したJPEGファイルの例
{
	"Make": "Apple",
	"Model": "iPhone 12 Pro",
	"Orientation": 1,
	"XResolution": 72,
	"YResolution": 72,
	"ResolutionUnit": 2,
	"Software": "15.4.1",
	"DateTime": "2022:05:19 12:08:16",
	"undefined": 4.552015844774917,
	"YCbCrPositioning": 1,
	"ExifIFDPointer": 236,
	"GPSInfoIFDPointer": 2262,
	"ExposureTime": 0.000501002004008016,
	"FNumber": 2.4,
	"ExposureProgram": "Normal program",
	"ISOSpeedRatings": 25,
	"ExifVersion": "0232",
	"DateTimeOriginal": "2022:05:19 12:08:16",
	"DateTimeDigitized": "2022:05:19 12:08:16",
	"ComponentsConfiguration": "YCbCr",
	"ShutterSpeedValue": 10.962901772303995,
	"ApertureValue": 2.5260688112781806,
	"BrightnessValue": 10.816505669886602,
	"ExposureBias": 0,
	"MeteringMode": "Pattern",
	"Flash": "Flash did not fire, compulsory flash mode",
	"FocalLength": 1.54,
	"SubjectArea": [
		2013,
		1511,
		2322,
		1392
	],
	"MakerNote": [
		65,
		(長いので省略)
	],
	"SubsecTimeOriginal": "751",
	"SubsecTimeDigitized": "751",
	"FlashpixVersion": "0100",
	"ColorSpace": 65535,
	"PixelXDimension": 4032,
	"PixelYDimension": 3024,
	"SensingMethod": "One-chip color area sensor",
	"SceneType": "Directly photographed",
	"ExposureMode": 0,
	"WhiteBalance": "Auto white balance",
	"DigitalZoomRation": 1.0271739130434783,
	"FocalLengthIn35mmFilm": 14,
	"SceneCaptureType": "Standard",
	"GPSLatitudeRef": "N",
	"GPSLatitude": [
		33,
		31,
		2.59
	],
	"GPSLongitudeRef": "E",
	"GPSLongitude": [
		133,
		48,
		11.77
	],
	"GPSAltitudeRef": 0,
	"GPSAltitude": 7.591430676913359,
	"GPSSpeedRef": "K",
	"GPSSpeed": 0,
	"GPSImgDirectionRef": "T",
	"GPSImgDirection": 142.5424499696786,
	"GPSDestBearingRef": "T",
	"GPSDestBearing": 142.5424499696786,
	"thumbnail": {}
}
kintoneで Exif.js を試す場合を想定
kintone のJPEG画像貼付ファイルで実装する場合、貼付ファイル取得して Imageオブジェクトに変換する必要があります。
kintone のJPEG画像の貼付ファイルは、レコード中の貼付ファイル fileKey があれば、fetch() で blob バイナリーデータとして取得できます。その後取得した blob を Fileオブジェクトに変換、更に FileReader() で Imageオブジェクトに変換することで、Exif.js で Exif情報を取得できそうです。
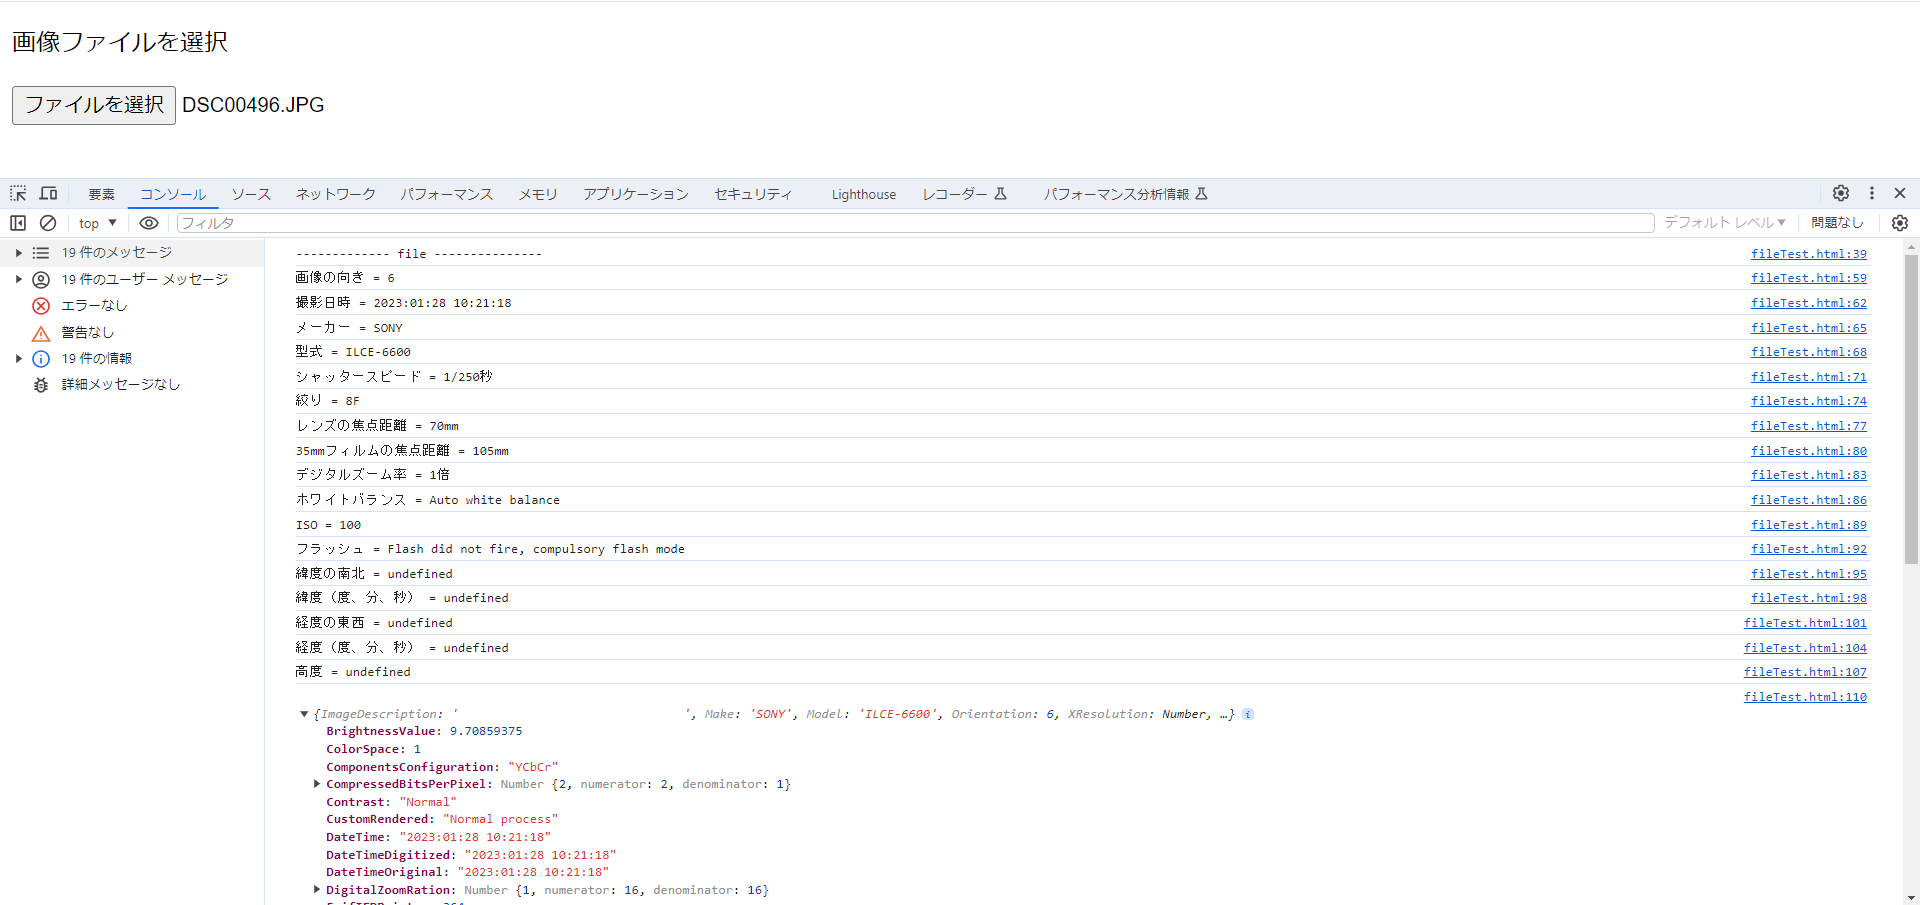
実際 kintone のカスタマイズ JavaScript に含める前に、先に試したHTMLファイルで Fileオブジェクトを blob に変換し、blob からファイルのオブジェクト、Imageオブジェクトへと変換、問題なく Exif情報を取得できることを確認しました。
    // 選択した画像ファイルの処理
    const file = await e.target.files[0];

    // ファイルを一旦Blobに変換(kintoneは添付ファイル用の試験を追加)
    const blob = await new Blob([file], { type: file.type });
    const file2 = await new File([blob], file.name, { type: blob.type });

    const reader = await new FileReader();
    reader.onloadend = async function () {
        ///省略///
    };

    await reader.readAsDataURL(file2);
以下は、実際にデバッグモードで確認したブラウザの表示です。
実際に試した試験コードはこちらです。
<!DOCTYPE html>
<html lang="ja">
<head>
    <meta charset="UTF-8">
    <script src="https://cdn.jsdelivr.net/npm/exif-js"></script>
    <title>EXIF Sample</title>
</head>
<body>
    <p>画像ファイルを選択</p>
    <input type="file" id="target">
</body>

<script>
    const target = document.getElementById('target');
    target.addEventListener('change', async (e) => {

        // ************************************************************************
        console.log("------------- file ---------------");

        // 選択された画像ファイルの処理
        const file = await e.target.files[0];

        const blob = await new Blob([file], { type: file.type });
        const file2 = await new File([blob], file.name, { type: blob.type });

        const reader = await new FileReader();
        reader.onloadend = async function () {

            const image = await new Image();
            image.src = await reader.result;

            image.onload = async function () {

                // 読み込んだ画像ファイルの処理
                await EXIF.getData(image, async function () {

                    const orientation = EXIF.getTag(this, 'Orientation');
                    console.log(`画像の向き = ${orientation}`);

                    const dateTime = EXIF.getTag(this, 'DateTime');
                    console.log(`撮影日時 = ${dateTime}`);

                    const make = EXIF.getTag(this, 'Make');
                    console.log(`メーカー = ${make}`);

                    const model = EXIF.getTag(this, 'Model');
                    console.log(`型式 = ${model}`);

                    const exposureTime = EXIF.getTag(this, 'ExposureTime');
                    console.log(`シャッタースピード = 1/${1 / exposureTime}秒`);

                    const fNumber = EXIF.getTag(this, 'FNumber');
                    console.log(`絞り = ${fNumber}F`);

                    const focalLength = EXIF.getTag(this, 'FocalLength');
                    console.log(`レンズの焦点距離 = ${focalLength}mm`);

                    const focalLengthIn35mmFilm = EXIF.getTag(this, 'FocalLengthIn35mmFilm');
                    console.log(`35mmフィルムの焦点距離 = ${focalLengthIn35mmFilm}mm`);

                    const digitalZoomRation = EXIF.getTag(this, 'DigitalZoomRation');
                    console.log(`デジタルズーム率 = ${digitalZoomRation}倍`);

                    const whiteBalance = EXIF.getTag(this, 'WhiteBalance');
                    console.log(`ホワイトバランス = ${whiteBalance}`);

                    const iso = EXIF.getTag(this, 'ISOSpeedRatings');
                    console.log(`ISO = ${iso}`);

                    const flash = EXIF.getTag(this, 'Flash');
                    console.log(`フラッシュ = ${flash}`);

                    const gpsLatitudeRef = EXIF.getTag(this, 'GPSLatitudeRef');
                    console.log(`緯度の南北 = ${gpsLatitudeRef}`);

                    const gpsLatitude = EXIF.getTag(this, 'GPSLatitude');
                    console.log(`緯度(度、分、秒) = ${gpsLatitude}`);

                    const gpsLongitudeRef = EXIF.getTag(this, 'GPSLongitudeRef');
                    console.log(`経度の東西 = ${gpsLongitudeRef}`);

                    const gpsLongitude = EXIF.getTag(this, 'GPSLongitude');
                    console.log(`経度(度、分、秒) = ${gpsLongitude}`);

                    const gpsAltitude = EXIF.getTag(this, 'GPSAltitude');
                    console.log(`高度 = ${gpsAltitude}`);

                    // すべての情報
                    console.log(EXIF.getAllTags(this));
                });

            };
        };
        await reader.readAsDataURL(file2);
    });
</script>
</html>
Exif情報を取得する kintone アプリの作成
実際に kintone アプリを作成して、先にHTMLで試験した結果を試してみました。
用意したkintoneアプリ
今回作成したアプリには以下のフィールドを用意しました。
| フィールドコード | フィールドタイプ | Exif情報タグ名 |
|---|---|---|
| JPEG画像ファイル | 添付ファイル | - |
| 画像の向き | 文字列(1行) | Orientation |
| 撮影日時 | 日時 | DateTime |
| メーカー | 文字列(1行) | Make |
| モデル | 文字列(1行) | Model |
| シャッタースピード | 数値 | ExposureTime |
| 絞り | 数値 | FNumber |
| レンズ焦点距離 | 数値 | FocalLength |
| _35mm換算 | 数値 | FocalLengthIn35mmFilm |
| デジタルズーム率 | 数値 | DigitalZoomRation |
| ホワイトバランス | 文字列(1行) | WhiteBalance |
| ISO | 数値 | ISOSpeedRatings |
| フラッシュ | 文字列(1行) | Flash |
| GPS緯度南北 | 文字列(1行) | GPSLatitudeRef |
| 緯度_時 | 数値 | GPSLatitude 配列[0] |
| 緯度_分 | 数値 | GPSLatitude 配列[1] |
| 緯度_秒 | 数値 | GPSLatitude 配列[2] |
| 緯度 | 数値 | GPSLatitude 変換値 |
| GPS経度東西 | 文字列(1行) | GPSLongitudeRef |
| 経度_時 | 数値 | GPSLongitude 配列[0] |
| 経度_分 | 数値 | GPSLongitude 配列[1] |
| 経度_秒 | 数値 | GPSLongitude 配列[2] |
| 経度 | GPSLongitude 変換値 | |
| GPS高度 | 数値 | GPSAltitude |
| 取得データ | 文字列(複数行) | 全てのタグデータ |
JavaScriptカスタマイズ
kintone カスタマイズ JavaScript プログラムでは、submit.success イベント内で以下を実装しました。
1. レコードの fileKey で添付ファイル JPEG画像を blob で取得
2. 取得した blob を Fileオブジェクトに変換
3. FileReader() で Imageオブジェクトに変換
4. Exif情報を取得
5. kintone レコードの更新
上記 1.~2.の処理は以下です。
        const record = event.record;

        // 添付ファイルを取得
        const fileKey = record.JPEG画像ファイル.value[0].fileKey;
        const fileName = record.JPEG画像ファイル.value[0].name;
        const headers = { 'X-Requested-With': 'XMLHttpRequest' };
        const resp = await fetch('/k/v1/file.json?fileKey='+fileKey, { method: 'GET', headers });
        const blob = await resp.blob();
        const file = new File([blob], fileName, { type: blob.type });
上記 3.~5.の処理は以下です。
        const reader = new FileReader();
        reader.onloadend = async function () {

            // Fileをimageに変換
            const image = new Image();
            image.src = reader.result;
            image.onload = async function () {

                // EXIF情報の取得
                await EXIF.getData(image, async function () {

                    /// EXIF情報を取得しkintoneレコード更新用データ作成(表示省略)

                    // レコードの更新
                    let appId;
                    if (event.type.indexOf('mobile') < 0) {
                        appId = kintone.app.getId();
                    }else{
                        appId = kintone.mobile.app.getId();
                    }
                    const body = {
                        app: appId,
                        id: event.record.$id.value,
                        record: updateRecord
                    };
                    try {
                        await kintone.api(kintone.api.url('/k/v1/record.json', true), 'PUT', body);
                    } catch (error) {
                        console.log(error);
                    }
                    location.reload();
                    return;
                });
            };
        };
        reader.readAsDataURL(file);
実際のコード
(function() {
	"use strict";

    // SUBMIT後イベント
    const SuccessEvent = ["app.record.create.submit.success", "mobile.record.create.submit.success",
        "app.record.edit.submit.success","mobile.app.record.edit.submit.success"];
	kintone.events.on(SuccessEvent, async function(event) {
        const record = event.record;

        // 添付ファイルを取得
        const fileKey = record.JPEG画像ファイル.value[0].fileKey;
        const fileName = record.JPEG画像ファイル.value[0].name;
        const headers = { 'X-Requested-With': 'XMLHttpRequest' };
        const resp = await fetch('/k/v1/file.json?fileKey='+fileKey, { method: 'GET', headers });
        const blob = await resp.blob();
        const file = new File([blob], fileName, { type: blob.type });

        const reader = new FileReader();
        reader.onloadend = async function () {

            // Fileをimageに変換
            const image = new Image();
            image.src = reader.result;
            image.onload = async function () {

                // EXIF情報の取得
                await EXIF.getData(image, async function () {

                    let updateRecord = {
                        画像の向き        : { value : EXIF.getTag(this, 'Orientation') },
                        撮影日時          : { value : null },
                        メーカー          : { value : EXIF.getTag(this, 'Make') },
                        モデル            : { value : EXIF.getTag(this, 'Model') },
                        シャッタースピード : { value : (1 / EXIF.getTag(this, 'ExposureTime')) },
                        絞り              : { value : EXIF.getTag(this, 'FNumber') },
                        レンズ焦点距離     : { value : EXIF.getTag(this, 'FocalLength') },
                        _35mm換算         : { value : EXIF.getTag(this, 'FocalLengthIn35mmFilm') },
                        デジタルズーム率   : { value : EXIF.getTag(this, 'DigitalZoomRation') },
                        ホワイトバランス   : { value : EXIF.getTag(this, 'WhiteBalance') },
                        ISO               : { value : EXIF.getTag(this, 'ISOSpeedRatings') },
                        フラッシュ         : { value : EXIF.getTag(this, 'Flash') },
                        取得データ         : { value : JSON.stringify(EXIF.getAllTags(this), null , "\t") },
                        GPS緯度南北        : { value : EXIF.getTag(this, 'GPSLatitudeRef') },
                        GPS経度東西        : { value : EXIF.getTag(this, 'GPSLongitudeRef') },
                        GPS高度            : { value : EXIF.getTag(this, 'GPSAltitude') },
                        緯度_時            : { value : null },
                        緯度_分            : { value : null },
                        緯度_秒            : { value : null },
                        緯度               : { value : null },
                        経度_時            : { value : null },
                        経度_分            : { value : null },
                        経度_秒            : { value : null },
                        経度               : { value : null }
                    };
                    if(EXIF.getTag(this, 'DateTime') != undefined){
                        updateRecord.撮影日時.value = convertJstToUTCDateTime(EXIF.getTag(this, 'DateTime').replace(':', '-').replace(':', '-'));
                    }

                    if(EXIF.getTag(this, 'GPSLatitude') != undefined){
                        const latitude = EXIF.getTag(this, 'GPSLatitude');
                        if(latitude.length > 2){
                            updateRecord.緯度_時.value = latitude[0];
                            updateRecord.緯度_分.value = latitude[1];
                            updateRecord.緯度_秒.value = latitude[2];
                            updateRecord.緯度.value = convertDMS2DD(latitude[0], latitude[1], latitude[2], EXIF.getTag(this, 'GPSLatitudeRef'))
                        }
                    }
                    if(EXIF.getTag(this, 'GPSLongitude') != undefined){
                        const longitude = EXIF.getTag(this, 'GPSLongitude');
                        if(longitude.length > 2){
                            updateRecord.経度_時.value = longitude[0];
                            updateRecord.経度_分.value = longitude[1];
                            updateRecord.経度_秒.value = longitude[2];
                            updateRecord.経度.value = convertDMS2DD( longitude[0],  longitude[1],  longitude[2], EXIF.getTag(this, 'GPSLongitudeRef'))
                        }
                    }

                    // レコードの更新
                    let appId;
                    if (event.type.indexOf('mobile') < 0) {
                        appId = kintone.app.getId();
                    }else{
                        appId = kintone.mobile.app.getId();
                    }
                    const body = {
                        app: appId,
                        id: event.record.$id.value,
                        record: updateRecord
                    };
                    try {
                        await kintone.api(kintone.api.url('/k/v1/record.json', true), 'PUT', body);
                    } catch (error) {
                        console.log(error);
                    }
                    location.reload();
                    return;
                });
            };
        };
        reader.readAsDataURL(file);
    });

    // JST日時をUTCに変換
    function convertJstToUTCDateTime(dateTime) {
        const dt = new Date(dateTime);
        const year = dt.getUTCFullYear();
        const month = (dt.getUTCMonth() + 1).toString().padStart(2, '0');
        const day = dt.getUTCDate().toString().padStart(2, '0');
        const hours = dt.getUTCHours().toString().padStart(2, '0');
        const minutes = dt.getUTCMinutes().toString().padStart(2, '0');
        const seconds = dt.getUTCSeconds().toString().padStart(2, '0');
        return year+'-'+month+'-'+day+'T'+hours+':'+minutes+':'+seconds+'Z';
    }

    // GPS座標をDSMから度に変換
    function convertDMS2DD(degrees, minutes, seconds, direction) {
        var dd = degrees + minutes/60 + seconds/3600;
        if (direction == "S" || direction == "W") {
            dd = dd * -1;
        }
        return dd;
    }

})();
試験結果
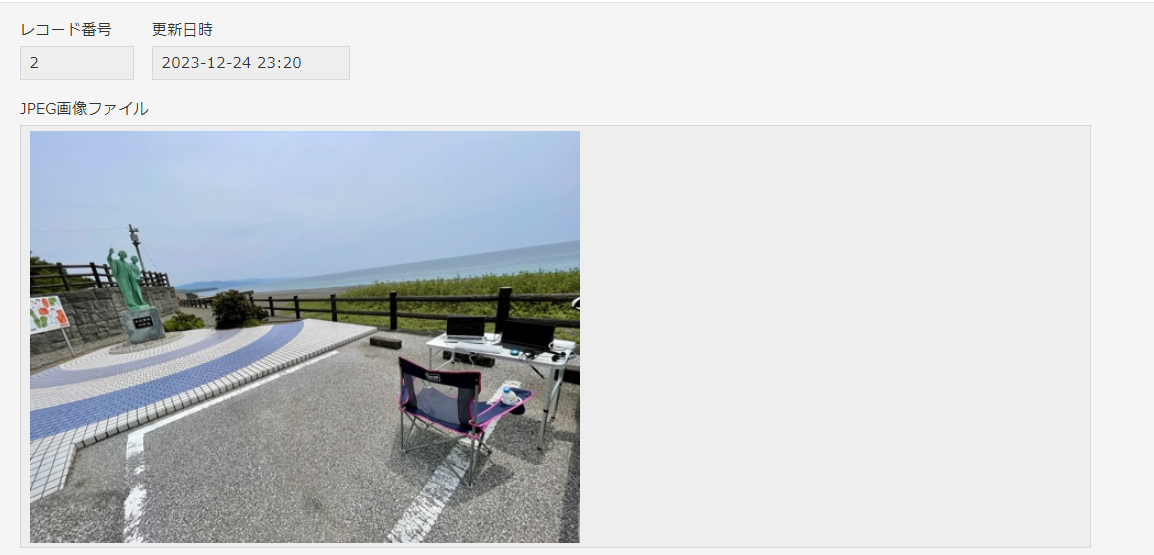
kintone で実際にアプリを作成して、試験した結果は以下です。
iPhone 12 Pro 撮影画像での試験結果
GPS情報も含め、ほぼ全てのExif情報を取得できました。
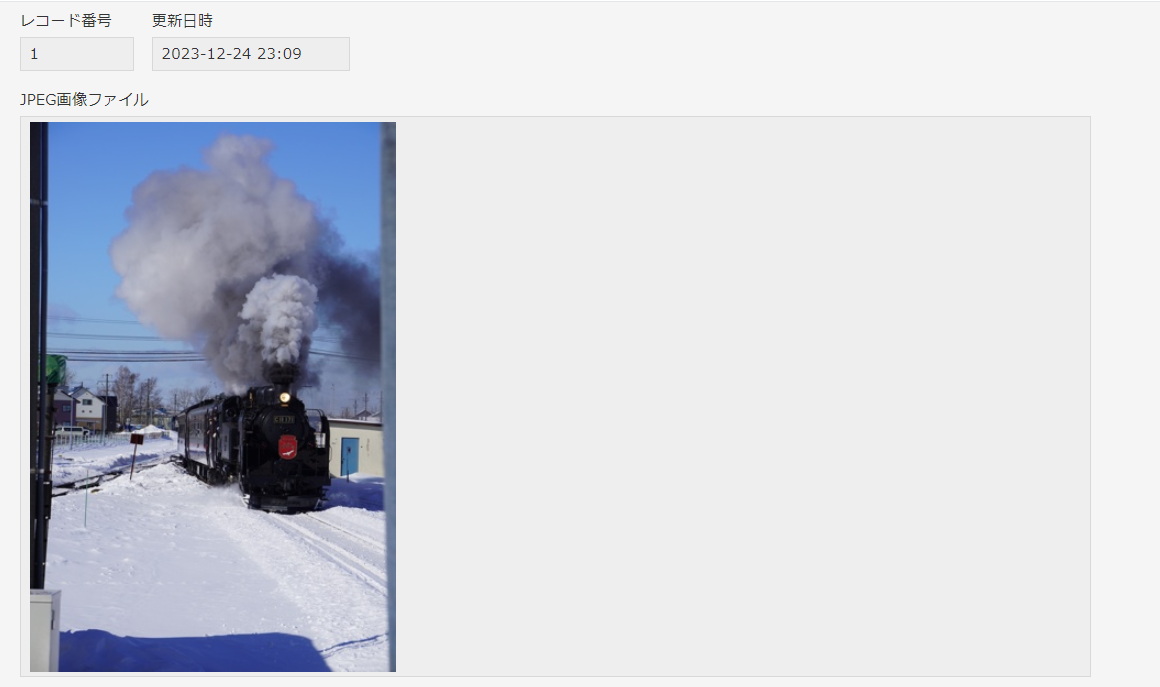
SONY α6600 撮影画像での試験結果
本体に GPS を持たないため、GPS情報は欠落しています。
まとめ
kintone の JavaScriptカスタマイズだけで、アプリ添付ファイルに保管したJPEG画像のExif情報を取得し、GPSなどの情報をレコードに保管できることを確認できました。
参考情報
FILEFORMATドキュメンテーション 画像ファイルEXIF
https://docs.fileformat.com/ja/image/exif/
JPEGのExif情報をとっかかりにバイナリデータと戯れる
https://beyondjapan.com/blog/2016/11/start-binary-reading-with-jpeg-exif/
GitHub exif-js/exif-js
https://github.com/exif-js/exif-js
【Javascript】BlobとFileの相互変換
https://open-code.tech/post-1630/
【JavaScript】canvasに入力画像を描画する
https://everykalax.hateblo.jp/entry/2022/04/11/154057
File: File() コンストラクター
https://developer.mozilla.org/ja/docs/Web/API/File/File


