はじめに
kintone プラグインを最短で作るための自己メモです。
kintone プラグイン作成手順(Windows)
1. node.js をインストール
2. コマンドプロンプトを管理者権限で開き以下の作業実施
1). npx @kintone/create-plugin プラグイン名
C:\work>npx @kintone/create-plugin hello-kintone-plugin


kintoneプラグインのプロジェクトを作成するために、いくつかの質問に答えてください :)
では、はじめましょう!


? プラグインの英語名を入力してください [1-64文字] hello-kintone-plugin
? プラグインの説明を入力してください [1-200文字] hello-kintone-plugin
? 日本語をサポートしますか? Yes
? プラグインの日本語名を入力してください [1-64文字] (省略可)
? プラグインの日本語の説明を入力してください [1-200文字] (省略可)
? 中国語をサポートしますか? No
? プラグインの英語のWebサイトURLを入力してください (省略可)
? プラグインの日本語のWebサイトURLを入力してください (省略可)
? モバイルページをサポートしますか? Yes
? @kintone/plugin-uploaderを使いますか? Yes
依存ライブラリをインストールします

added 519 packages, and audited 520 packages in 57s

144 packages are looking for funding
  run `npm fund` for details

found 0 vulnerabilities


Success! Created hello-kintone-plugin at hello-kintone-plugin

npm start

  ファイルの変更を監視してプラグインのzipを自動的に作成するプロセスを起動します
  その後、@kintone/plugin-uploaderにより、プラグインのzipは自動的にアップロードされます

npm run build

  プラグインのzipを作成します

npm run lint

  ESLintを使ってJavaScriptのソースコードをチェックします

まずは次のコマンドを実行してください
その後、あなたのkintone環境の情報を入力してください

  cd hello-kintone-plugin
  npm start

kintoneプラグイン開発をはじめましょう!
開発に関する情報はcybozu developer network:

  https://cybozu.dev/ja/
2). cd プラグイン名
3). npm start
C:\work>cd hello-kintone-plugin

C:\work>\hello-kintone-plugin>npm start

> hello-kintone-plugin@0.1.0 start
> node scripts/npm-start.js


> hello-kintone-plugin@0.1.0 develop
> npm run build -- --watch


> hello-kintone-plugin@0.1.0 upload
> kintone-plugin-uploader dist/plugin.zip --watch --waiting-dialog-ms 3000


> hello-kintone-plugin@0.1.0 build
> kintone-plugin-packer --ppk private.ppk --out dist/plugin.zip src --watch

Succeeded: dist/plugin.zip
? kintoneのベースURLを入力してください (https://example.cybozu.com): https://自身の環境.cybozu.com
? ログイン名を入力してください: ログイン名
? パスワードを入力してください: [hidden]
Open https://<自身の環境>.cybozu.com/login?saml=off
Trying to log in...
Navigate to https://<自身の環境>.cybozu.com/k/admin/system/plugin/
Trying to upload dist/plugin.zip
dist/plugin.zip をアップロードしました!
^C^Cバッチ ジョブを終了しますか (Y/N)? Y
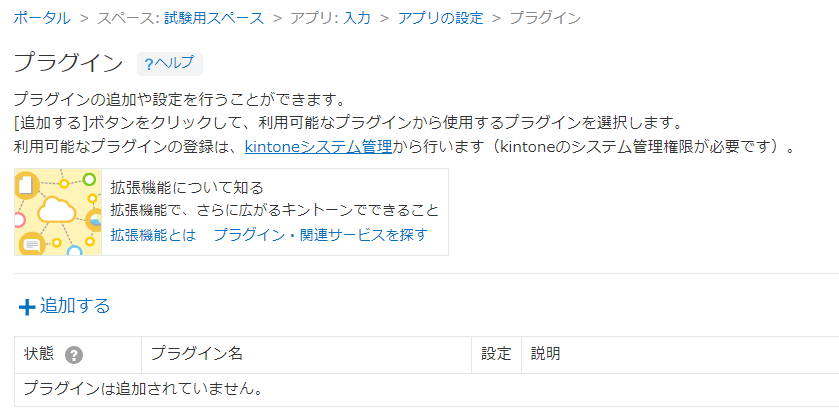
3. 完成したプラグインを確認
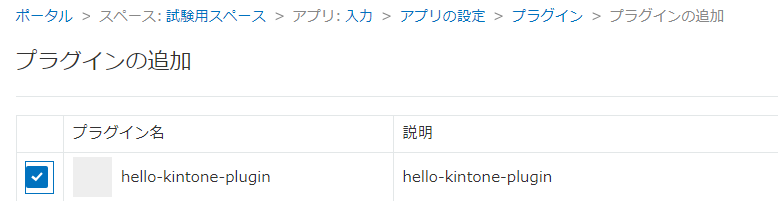
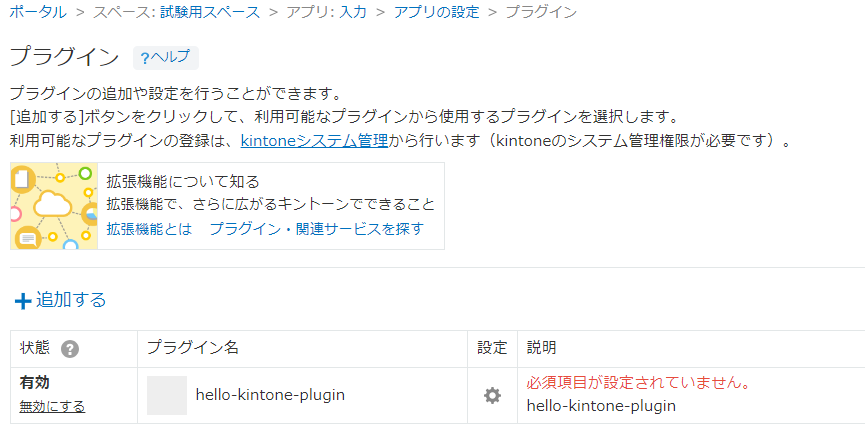
1). プラグインの確認

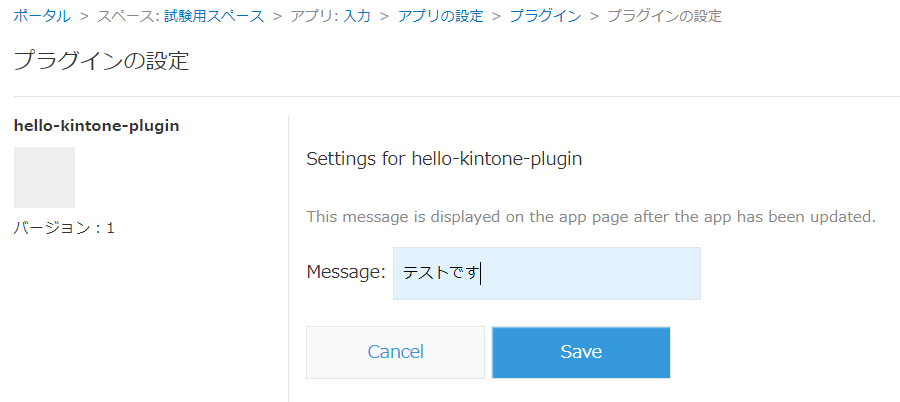
3). プラグインの設定
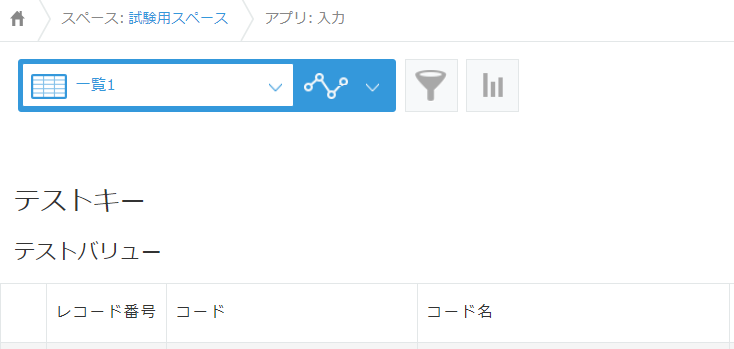
4). プラグインの実行結果
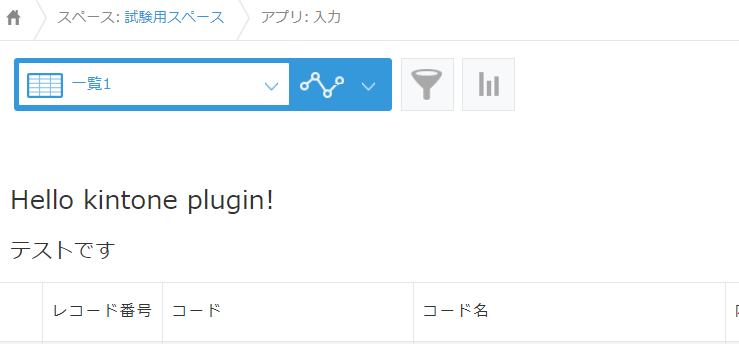
4. プラグインのカスタマイズ
Key-Value を保管、表示するように変更。
1). マニフェストを編集
C:\work\hello-kintone-plugin\src\manifest.json
{
  "manifest_version": 1,
  "version": 1,
  "type": "APP",
  "desktop": {
    "js": [
      "https://js.cybozu.com/jquery/3.3.1/jquery.min.js",
      "js/desktop.js"
    ],
    "css": [
      "css/51-modern-default.css",
      "css/desktop.css"
    ]
  },
  "icon": "image/icon.png",
  "config": {
    "html": "html/config.html",
    "js": [
      "https://js.cybozu.com/jquery/3.3.1/jquery.min.js",
      "js/config.js"
    ],
    "css": [
      "css/51-modern-default.css",
      "css/config.css"
    ],
    "required_params": [
      "key"
    ]
  },
  "name": {
    "en": "hello-kintone-plugin",
    "ja": "hello-kintone-plugin"
  },
  "description": {
    "en": "hello-kintone-plugin",
    "ja": "hello-kintone-plugin"
  },
  "mobile": {
    "js": [
      "https://js.cybozu.com/jquery/3.3.1/jquery.min.js",
      "js/mobile.js"
    ],
    "css": [
      "css/mobile.css"
    ]
  }
}
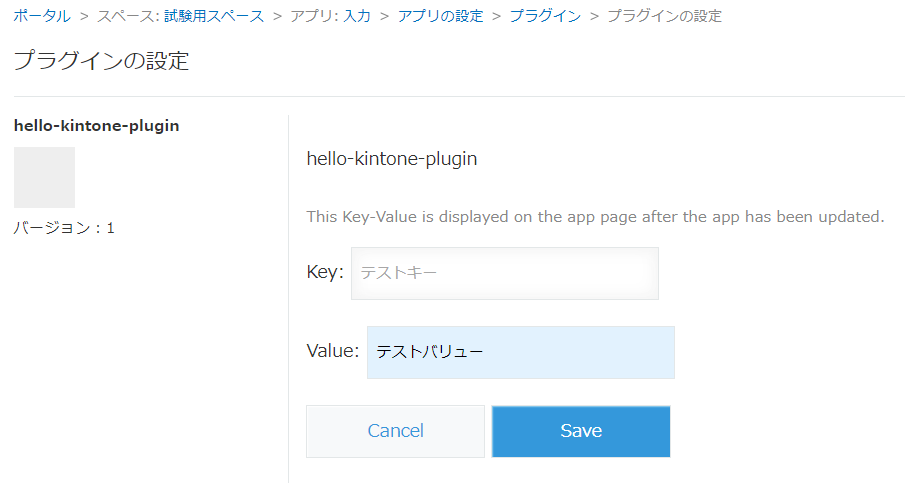
2). 設定画面を編集
C:\work\hello-kintone-plugin\src\html\config.html
<section class="settings">
  <h2 class="settings-heading">hello-kintone-plugin</h2>
  <p class="kintoneplugin-desc">This Key-Value is displayed on the app page after the app has been updated.</p>
  <form class="js-submit-settings">
    <p class="kintoneplugin-row">
      <label for="key">
        Key:
        <input type="text" class="js-text-key kintoneplugin-input-text">
      </label>
    </p>
    <p class="kintoneplugin-row">
      <label for="value">
        Value:
        <input type="text" class="js-text-value kintoneplugin-input-text">
      </label>
    </p>
    <p class="kintoneplugin-row">
        <button type="button" class="js-cancel-button kintoneplugin-button-dialog-cancel">Cancel</button>
        <button class="kintoneplugin-button-dialog-ok">Save</button>
    </p>
  </form>
</section>
3). 設定画面の処理を編集
C:\work\hello-kintone-plugin\src\js\config.js
jQuery.noConflict();

(function($, PLUGIN_ID) {
  'use strict';

  var $form = $('.js-submit-settings');
  var $cancelButton = $('.js-cancel-button');
  var $key = $('.js-text-key');
  var $value = $('.js-text-value');
  if (!($form.length > 0 && $cancelButton.length > 0 && $key.length > 0)) {
    throw new Error('Required elements do not exist.');
  }
  var config = kintone.plugin.app.getConfig(PLUGIN_ID);

  if (config.key) {
    $key.val(config.key);
  }
  if (config.value) {
    $value.val(config.value);
  }
  $form.on('submit', function(e) {
    e.preventDefault();
    let json = {
      key : $key.val(),
      value : $value.val(),
    };
    kintone.plugin.app.setConfig(json, function() {
      alert('The plug-in settings have been saved. Please update the app!');
      window.location.href = '../../flow?app=' + kintone.app.getId();
    });
  });
  $cancelButton.on('click', function() {
    window.location.href = '../../' + kintone.app.getId() + '/plugin/';
  });
})(jQuery, kintone.$PLUGIN_ID);
4). kintoneアプリの処理を編集(PC)
C:\work\hello-kintone-plugin\src\js\desktop.js
jQuery.noConflict();

(function($, PLUGIN_ID) {
  'use strict';

  kintone.events.on('app.record.index.show', function() {
    var config = kintone.plugin.app.getConfig(PLUGIN_ID);

    var spaceElement = kintone.app.getHeaderSpaceElement();
    if (spaceElement === null) {
      throw new Error('The header element is unavailable on this page');
    }
    var fragment = document.createDocumentFragment();
    var headingEl = document.createElement('h3');
    var messageEl = document.createElement('p');

    messageEl.classList.add('plugin-space-message');
    messageEl.textContent = config.value;
    headingEl.classList.add('plugin-space-heading');
    headingEl.textContent = config.key;

    fragment.appendChild(headingEl);
    fragment.appendChild(messageEl);
    spaceElement.appendChild(fragment);
  });
})(jQuery, kintone.$PLUGIN_ID);
5). kintoneアプリの処理を編集(モバイル)
C:\work\hello-kintone-plugin\src\js\mobile.js
jQuery.noConflict();

(function($, PLUGIN_ID) {
  'use strict';

  kintone.events.on('mobile.app.record.index.show', function() {
    var config = kintone.plugin.app.getConfig(PLUGIN_ID);

    var spaceElement = kintone.mobile.app.getHeaderSpaceElement();
    if (spaceElement === null) {
      throw new Error('The header element is unavailable on this page');
    }
    var fragment = document.createDocumentFragment();
    var headingEl = document.createElement('h3');
    var messageEl = document.createElement('p');

    messageEl.classList.add('plugin-space-message');
    messageEl.textContent = config.value;
    headingEl.classList.add('plugin-space-heading');
    headingEl.textContent = config.key;

    fragment.appendChild(headingEl);
    fragment.appendChild(messageEl);
    spaceElement.appendChild(fragment);
  });
})(jQuery, kintone.$PLUGIN_ID);
6). npm start
プラグインを作成し kintone にアップロード。
プラグインの設定画面
アプリの画面
参考情報
cybozu developer network プラグイン開発
https://cybozu.dev/ja/kintone/tips/development/plugins/development-plugin/
kintoneプラグイン開発をはじめよう① 開発環境を用意する
https://qiita.com/asami_/items/724e4f2bef9b0ce8e28c
kintoneプラグイン開発をはじめよう②設定画面の作り方
https://qiita.com/asami_/items/698f48441e16d0fed8c4
kintoneプラグインにAPIトークンを秘匿して、JSカスタマイズから利用する
https://qiita.com/the_red/items/fe166efaf98ce165c411