概要
上記記事の続きで、プロジェクトはそのまま使用しています。
扱う内容は、
- 選択中のレイヤー名の取得
- レイヤー種別の判断
- レイヤー名の変更
です。
選択中のレイヤー名の取得
プロジェクト内の main.js 内の showLayerNames() を改変していきます。
// 変更前の初期状態
function showLayerNames() {
    const app = require("photoshop").app;
    const allLayers = app.activeDocument.layers;
    const allLayerNames = allLayers.map(layer => layer.name);
    const sortedNames = allLayerNames.sort((a, b) => a < b ? -1 : a > b ? 1 : 0);
    document.getElementById("layers").innerHTML = `
      <ul>${
        sortedNames.map(name => `<li>${name}</li>`).join("")
      }</ul>`;
}
UXPには app.activeDocument.activeLayers があります。(ExtendScript時代には無かったらしい)
// 変更後
function showLayerNames() {
    const app = require("photoshop").app;
    // const allLayers = app.activeDocument.layers;
    // const allLayerNames = allLayers.map(layer => layer.name);
    // const sortedNames = allLayerNames.sort((a, b) => a < b ? -1 : a > b ? 1 : 0);
    const activeLayers = app.activeDocument.activeLayers;
    const allActiveLayerNames = activeLayers.map(layer => layer.name);
    const sortedNames = allActiveLayerNames.sort((a, b) => a < b ? -1 : a > b ? 1 : 0);
    document.getElementById("layers").innerHTML = `
      <ul>${
        sortedNames.map(name => `<li>${name}</li>`).join("")
      }</ul>`;
}
Load&Watch でプラグインを読み込んでいる場合、ソースコードを保存したタイミングで反映されていると思います。
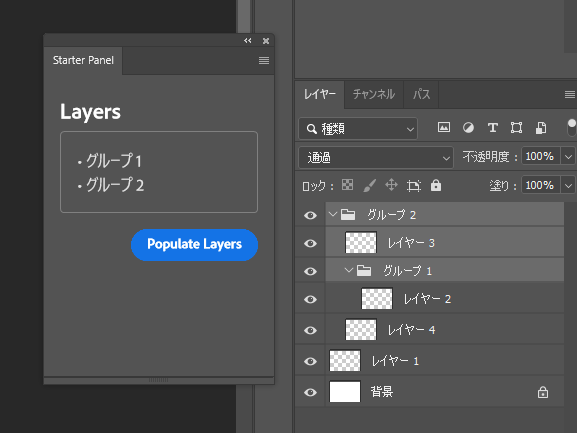
Populate Layers ボタンを押して、選択中のレイヤーが表示されることを確認できます。

レイヤー種別の判断
レイヤー種別は、Layer.kind と constants.LayerKind を評価することで分類できます。
// 変更後: layerGroupだけを選別する
function showLayerNames() {
    const app = require("photoshop").app;
    const constants = require("photoshop").constants; // 忘れずに追加

    const activeLayers = app.activeDocument.activeLayers;

    const layerGroups = activeLayers.filter(layer => layer.kind === constants.LayerKind.GROUP);
    const layerGroupNames = layerGroups.map(layer => layer.name);

    document.getElementById("layers").innerHTML = `
      <ul>${
        layerGroupNames.map(name => `<li>${name}</li>`).join("")
      }</ul>`;
}
レイヤー名の変更
ボタンの追加
プログラム側の処理を記述する前に、実行用のボタンを用意します。
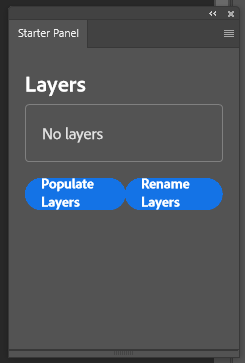
index.html に、btnRename を追記してください。
  <footer>
    <sp-button id="btnPopulate">Populate Layers</sp-button>
    <sp-button id="btnRename">Rename Layers</sp-button>
  </footer>
executeAsModal
レイヤー名の変更など、Photoshopの状態を更新する処理は、core.executeAsModal を介して実行する必要があります。
参考:Modal Execution in an Async World: executeAsModal - Adobe Developer
// サンプルコード
function renameLayerNames() {
  const core = require("photoshop").core;
  return core.executeAsModal(() => {
      // Write権限があるスコープ
      const app = window.require("photoshop").app;
      app.activeDocument. ... // 任意の処理を続ける
    },
    {
      // 時間がかかる場合はプログレスバーのウィンドウが表示される(らしい)
      commandName: "Any Command Name", // ウィンドウの名前

    }
  );
}
スクリプトの実装
以上を踏まえて main.js に追記。
// 選択中のレイヤーがグループの場合、名前の先頭に'g'をつける
function renameLayers() {
  const core = require("photoshop").core;

  core.executeAsModal(() => {
    const app = require("photoshop").app;
    const constants = require("photoshop").constants;

    const activeLayers = app.activeDocument.activeLayers;
    activeLayers.forEach(layer => {
      if (layer.kind === constants.LayerKind.GROUP) {
        layer.name = "g" + layer.name; // レイヤーグループの場合は、'g'を付与
      }
    })
  }, { commandName: "Rename layers", })
}

// ボタンとrenameLayersの接続
document.getElementById("btnRename").addEventListener("click", renameLayers);
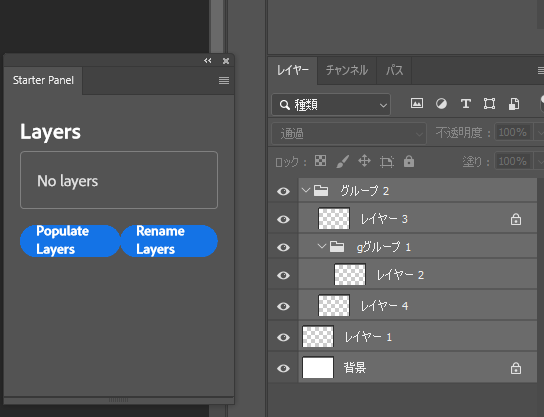
すべてのレイヤーを選択して、Rename Layers ボタンを押すと、

レイヤーグループにだけ、gの接頭文字をつけることができました。

余談/メモ
- async/await で非同期にしたほうがいい?
- ドキュメントのGetting Startedだと同期処理で書かれていた
- Chrome Developer Tools の開き方


