Advent Calendar 初挑戦です。
問題
Electronでアプリケーションを作成するときに、とてもめんどくさいのは、環境設定の実装ではないでしょうか。
自分用のアプリケーションなら、ソースべた書きで対処してる人がほとんどでしょう。(自分がそうなだけ)
しかし、色んな人が使うアプリケーションとなるとそうはいきません。
ネイティブアプリのような環境設定をしたい。。。。という願いがふつふつと湧き出たので、これを期にモジュール作成をしてみました。
electron-preference
使い方
npmでインストールできます。
$ npm install --save electron-preference
設定項目の定義ファイルを設置します。jsonで書きます。
[
  {
    "name":"Tab1",
    "items":[
    {
      "name":"checkbox1",
      "text":"checkbox1",
      "description":"Please check if you are lucky!",
      "type":"checkbox",
      "default":"true"
    },
    {
      "name":"text1",
      "text": "first name",
      "description":"Your First Name",
      "type": "text",
      "default":"takuya"
    },
    {
      "name":"text2",
      "text":"last name",
      "description":"Your Last Name",
      "type": "text",
      "default":"takahashi"
    }]
  },{
    "name":"Tab2",
    "items":[
      {
        "name":"birthday",
        "type":"date",
        "default":"1992-12-20"
      }
    ]
  }
]
そして、ソースコードにて設定ファイルをロードして、デフォ値を作成し、
main.js
const preference = require('electron-preference');
preference.load('path/to/preference.json');
show()すると、Windowが現れます。
preference.show();
ここまでをmain.jsに全て書くと、こんな感じ。
'use strict';

var electron = require('electron');
var app = electron.app;
var BrowserWindow = electron.BrowserWindow;
var preference = require('electron-preference');

var mainWindow = null;

app.on('window-all-closed', function() {
  if (process.platform != 'darwin')
    app.quit();
});

app.on('ready', function() {

  mainWindow = new BrowserWindow({width: 800, height: 600});
  mainWindow.loadURL('file://' + __dirname + '/index.html');
  preference.load(__dirname + '/preference.json');
  preference.show();

  mainWindow.on('closed', function() {
    mainWindow = null;
  });
});
すると、こんなに素敵な環境設定画面が!!
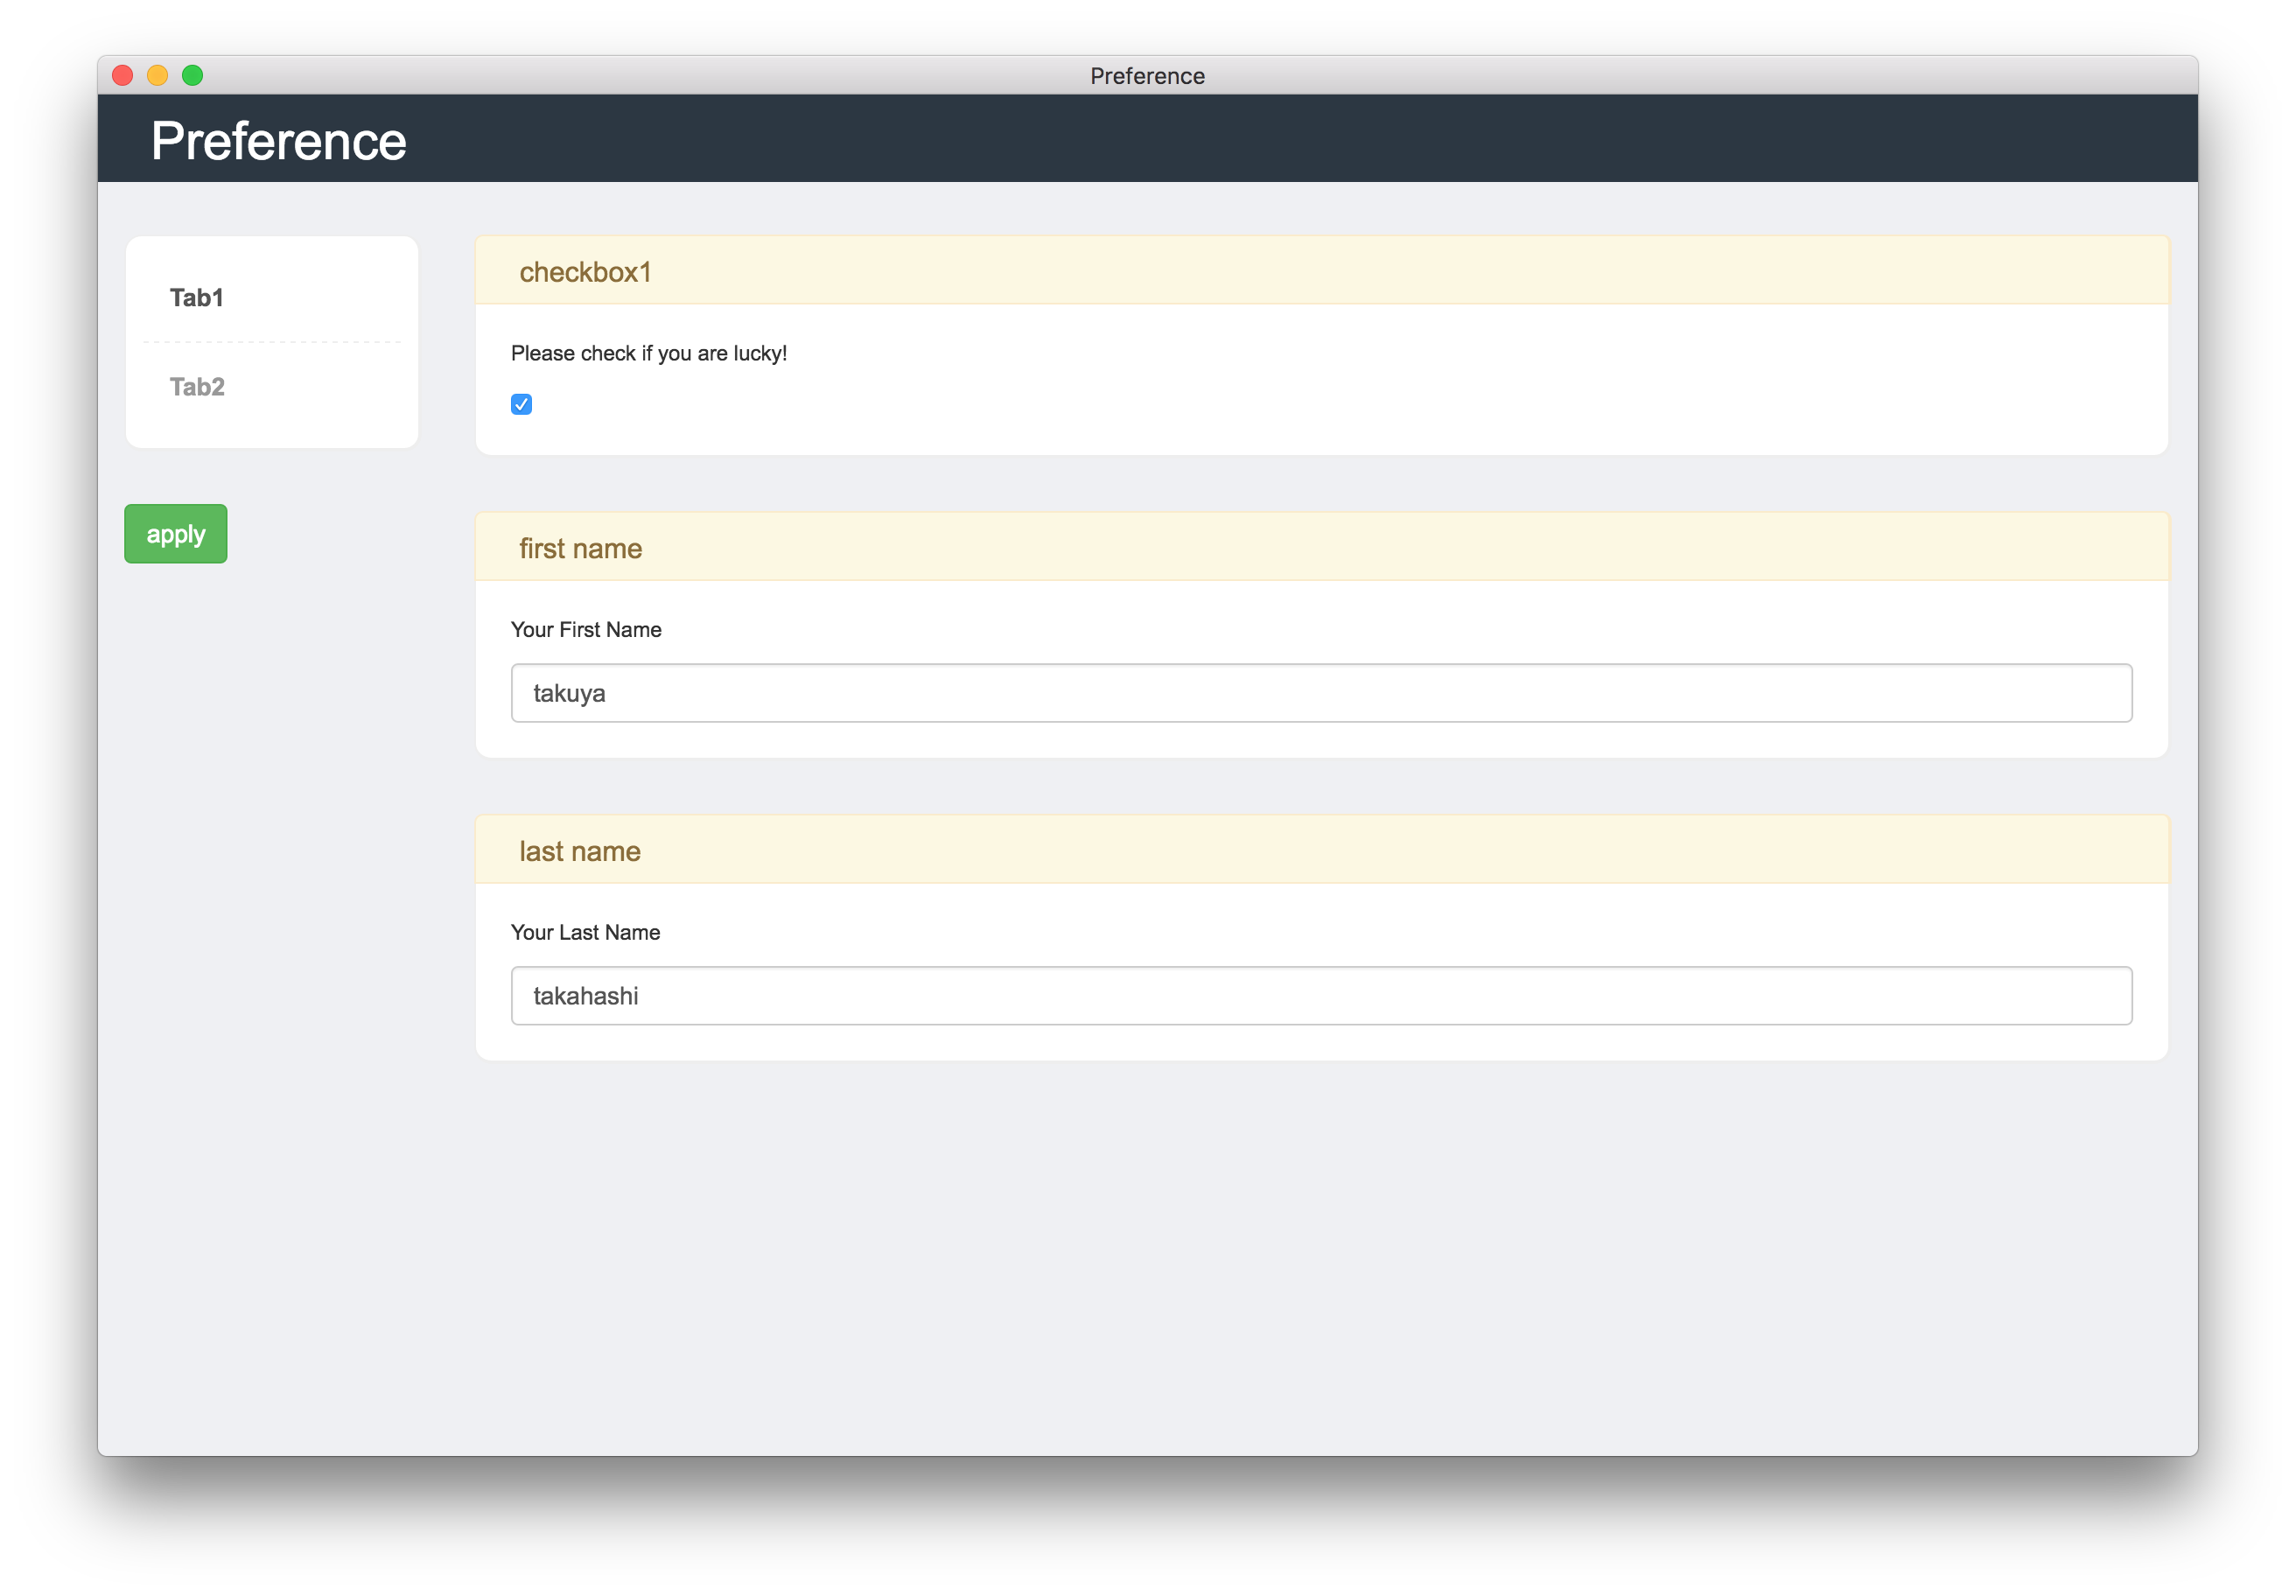
Bootstrap Admin Theme v3 を使用させてもらってます。
apply して、保存したデータへはこうやってアクセスできます。
preference.get(function(data){
  // type your code
  console.log(data.Tab1.checkbox1); // true
});
かんたん!便利!
おわりに
冬休みの課題として取り組んだんですが、良いボリュームでなかなかいいものができました。
htmlのviewとして、react.jsを採用しました。単純に書いてみたかったから。
reactの、stateを親だけで持つ考えは、子の状態がスッキリしてわかりやすいですね!
Electronでちょちょっとアプリを作りたい人は是非使ってみてください!