概要
リモートデスクトップ環境の構築手順です。いろいろハマったので、手順をまとめました。
環境
- サーバ側
- XUbuntu 18.04.1 LTS
- xfce 4.12
- Gufw Firewall 18.04.0
- X11VNC Server 0.9.13-3
- クライアント側
- UltraVNC 1.2.2.2
サーバ側(XUbuntu)の設定
ソフトのインストール
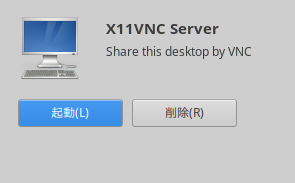
X11VNC Server
「ソフトウェア」から「X11VNC Server」をインストールする。
(sodo apt install x11vncでもOK)
ファイアウォールの設定アプリ
$ sudo apt install gufwコマンドでインストールする。
http://gufw.org/
X11VNC Serverの設定
-
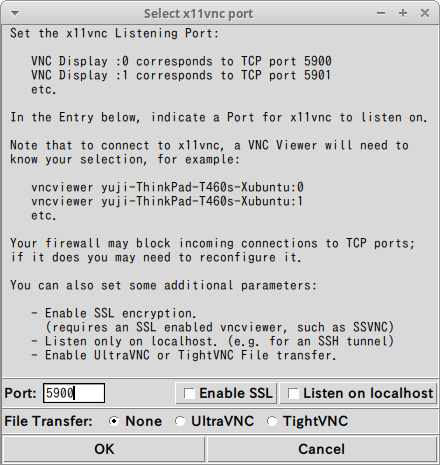
X11VNC Serverを起動する
-
Portに5900を入力して(最初から入力されている)、OKボタンを押す
-
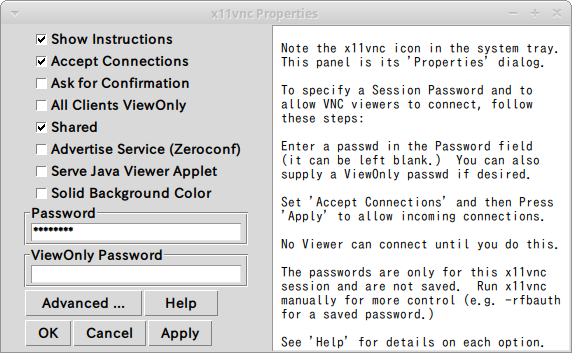
以下の操作を行い、OKボタンを押す。
- 「Accept Connections」にチェックを入れる
- 「Shared」にチェックを入れる
- 「Password」を入力する
Accept Connections:
Toggles whether VNC viewers are allowed to connect or not. It corresponds
to the "-R unlock" and "-R lock" remote-control commands.
Shared:
Toggles whether multiple simultaneous viewer connections are allowed
or not. It corresponds to the "-R sh
Password:
Lets you set the session password viewers may use to gain full access
to the display. This will only work if x11vnc was started with the
-gui icon or -gui tray mode.
4. x11vncがポート番号5900で起動していることを確認する。
$ netstat -ap | grep 5900
(一部のプロセスが識別されますが, 所有していないプロセスの情報は
表示されません。それら全てを見るにはルートになる必要があります.)
tcp        0      0 0.0.0.0:5900            0.0.0.0:*               LISTEN      6730/x11vnc
tcp6       0      0 [::]:5900               [::]:*                  LISTEN      6730/x11vnc
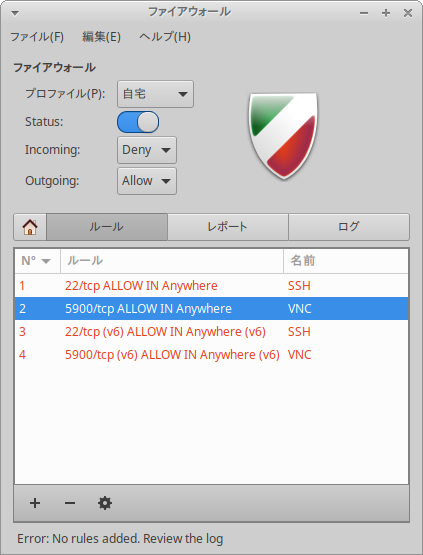
ファイアウォールの設定
- gufwを起動する
- ルールタブに移動する
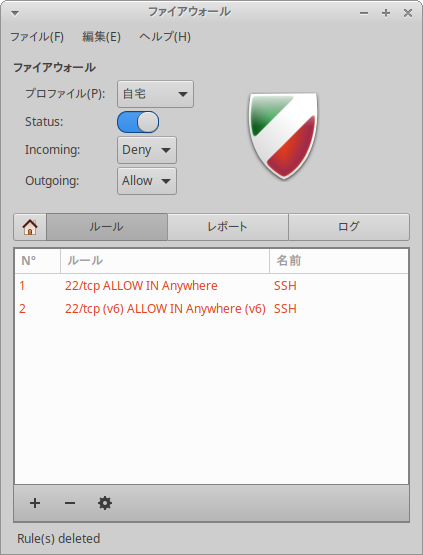
3. 「+」ボタンを押す
4. 「VNC Filter」に「vnc」と入力し、「追加」ボタンを押す。
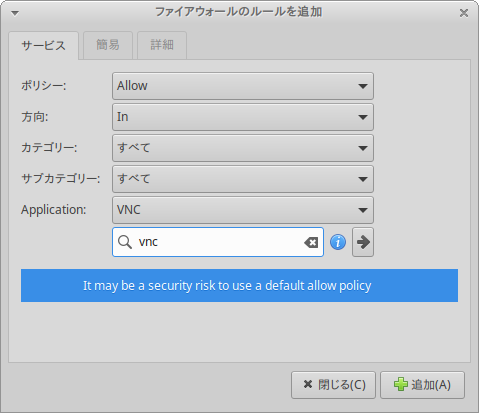
5. → 「ルール」に追加される
クライアント側(Windows)の設定
UltraVNCのインストール
VNCのViewerはいろいろありますが、今回はUltraVNCを使いました。
https://forest.watch.impress.co.jp/library/software/ultravnc/
UltraVNCの設定
- UltraVNCを起動
- 「VNC Server」に「server-host:0」と入力する。
-
sever-hostはサーバのホスト名 -
:0はVNCのディスプレイ番号0
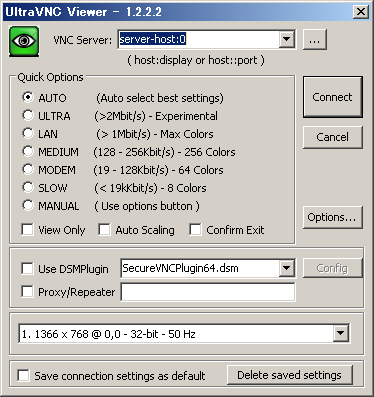
-
- 「Connect」ボタンを押す
- パスワードダイアログに、X11VNC Serverで設定したパスワードを入力し、「login」ボタンを押す。
- → リモートデスクトップ完了
その他
X11VNCのログファイルの場所
$HOME/.x11vnc.log.server-host\:5900
参考サイト