はじめに
高速な経路計画アルゴリズムとして知られるRRT(Rapidly Exploring Random Tree)を実装してみたのでそのメモ
RRTってなんだ?
RRTはA*やダイクストラ法などと同じ経路計画(探索)アルゴリズムの一つで、一般的な経路計画アルゴリズムが保証するような最適性についての保証はないものの、高次元空間で高速に経路が生成できるアルゴリズムです。
RRTにはいろいろな派生系がありますが、今回は一番最初に提案された最もシンプルなアルゴリズムをPythonで実装したので、その結果をお見せします。
アルゴリズム
Wikipediaや元論文をみると、アルゴリズムは非常に簡潔で単純なものになっていて、次のようなものです。
- 初期姿勢(コンフィギュレーション)$q_{init}$を決める
- グラフ$G$を$q_{init}$で初期化する
- 以下を$K$回繰り返す。$K$はツリーの頂点数
- ランダム姿勢$q_{rand}$を生成する
- $G$にある頂点の中で、$q_{rand}$に一番近い頂点$q_{near}$を探す
- $q_{near}$と$q_{rand}$を結ぶ直線上で、長さ$\Delta q$以下の$q_{near}$よりの点を$q_{new}$として選択する
- $G$に頂点$q_{new}$を追加する
- $q_{near}$と$q_{new}$の間を結ぶ
ランダムに点を選んで、作ってあるグラフ上から一番距離的に近い点を探して、線を引っ張るをひたすらやるだけって感じです。
実装
今回はPythonでやってみました
MIN_X = 0
MAX_X = 100
MIN_Y = 0
MAX_Y = 100

def generate_random_configuration():
  random_x = random.uniform(MIN_X, MAX_X)
  random_y = random.uniform(MIN_Y, MAX_Y)
  return q.Configuration(random_x, random_y)


def find_nearest_vertex(graph, target_q):
  return graph.find_nearest(target_q)


def new_configuration(q_near, q_rand, delta_q):
  orientation_vector = q_rand.position() - q_near.position()
  if delta_q < np.linalg.norm(orientation_vector):
    normalized_vector = orientation_vector / np.linalg.norm(orientation_vector)
    new_position = q_near.position() + normalized_vector * delta_q
  else:
    new_position = q_near.position() + orientation_vector
  return q.Configuration(new_position[0], new_position[1])


def build_rrt(q_init, vertices_num, delta_q):
  """
  @param q_init root of tree
  @param vertices_num number of vertices in tree
  @param delta_q incremental distance
  @return rapidly exploring random tree
  """
  rrt = FastTree(q_init)
  for i in range(vertices_num):
    q_rand = generate_random_configuration()
    q_near = find_nearest_vertex(rrt, q_rand)
    q_new = new_configuration(q_near, q_rand, delta_q)
    q_near.connect(q_new) # Add vertex q_new and create edge
    rrt.add_node(q_new)

  return rrt
本当に素直に実装すれば動く感じです。複雑な要素は殆ど無いですし、時間測っていないですが、理解さえすれば30分-1時間くらいで作れちゃうと思います。
GitHubにも上げましたので詳細はそちらを見てください
改善
実装の中で、素直にやると一つ問題が有ります。ツリー内で一番距離の近い点$q_{near}$の探索が、次のような実装だと$O(N^2)$で計算量が増えて行くので、$K=1000$くらいになってくると時間がかかってしまうという問題です。
  def find_nearest(self, target_q):
    nearest = self.root
    min_distance = nearest.distance_between(target_q)
    for node in nearest.connected_nodes():
      sub_tree = Tree(node)
      candidate = sub_tree.find_nearest(target_q)
      distance = candidate.distance_between(target_q)
      if distance < min_distance:
        nearest = candidate
        min_distance = distance
    return nearest
そこで、最近傍探索を効率的に行うためのツリー構造の一つにkd木というのがあり、もし時間がかかって辛かったら、これをRRTの構築に合わせて使えば、$\log(N)$のオーダーで探索できます。
今回GitHubにはkd木を使ったバージョンを上げてあります
結果
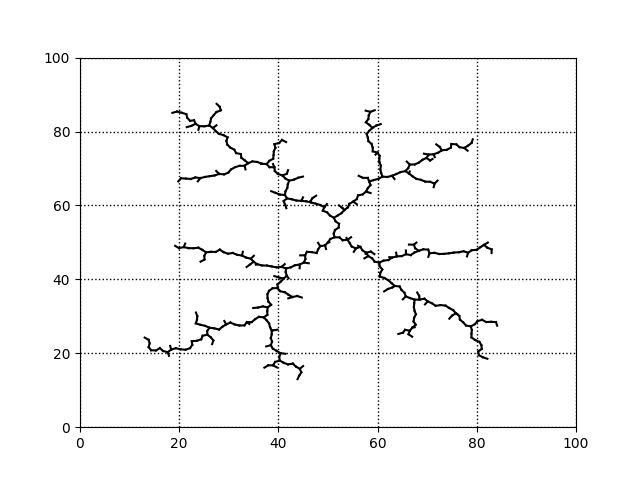
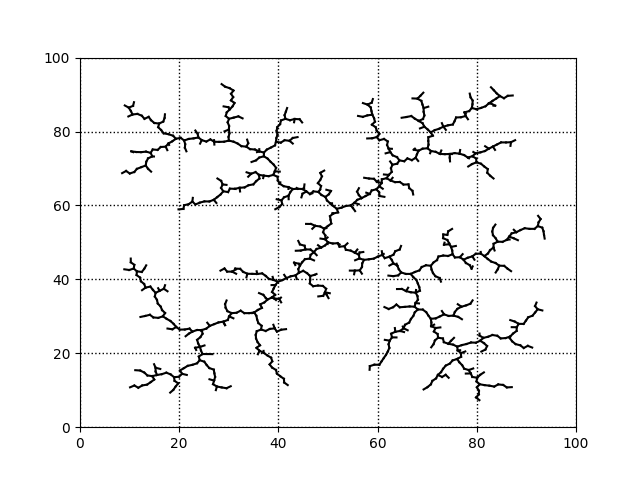
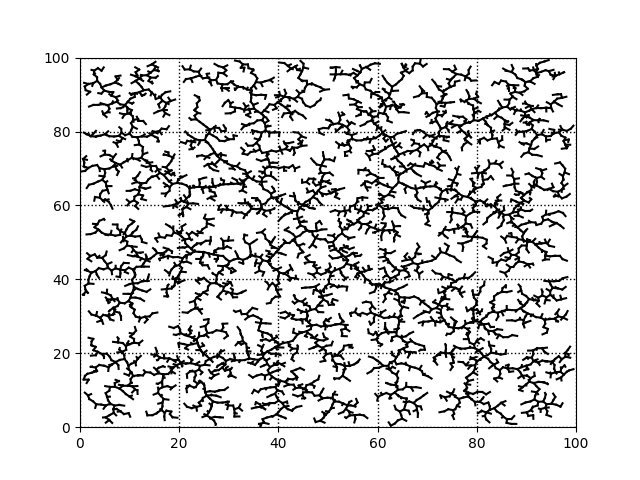
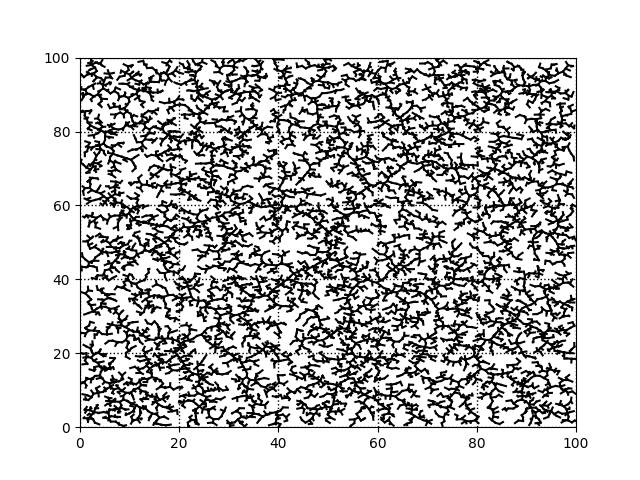
論文にあるものと同じ設定、100x100のエリアで$\Delta q=1$として、頂点数$K$を500、1000、5000、10000としたときのツリーを載せておきます
頂点数500、まだなんだかあまり埋まってないし、広がってない
頂点数1000、やっとまんべんなく広がった
頂点数5000、かなり埋まった
頂点数10000、ぎちぎちすぎて木


