概要
nuxt.js × three.js × ammo.js の開発に関するメモ。
外部OBJファイル等をloadしてsceneにaddしてから、それに対して、
物理演算(自由落下と当たり判定)を物理エンジンを使って加えられるかの実験メモ。
結論から言うと、今回は失敗します。
成功版はこちら
nuxt.js × three.js × ammo.js でSpeedPizzaを作った時のメモ(成功)
はじめに
3Dのpizzaサイト(?)を作ることになった。
とりあえずthree.jsを使って、ついでにammo.jsも使って、3D物理エンジンをいじってみよう。
そんでベースは、最近もっぱらnuxt.js。(筆者はts苦手なのでjs使いますよ。)
ということで、nuxt.js × three.js × ammo.jsで開発することにする。
前提
全体的に基本的な情報は書いてないです。
筆者はnuxt.jsとthree.jsに関しては色々触ってきましたが、
ammo.jsというか、物理エンジンは全く触ったことがないです。
バージョン
- node.js : v12.19.0
- npm : v6.14.8
環境構築
- nuxt.jsの環境構築は、スキップ。
- three.jsは、npmでインストール。
- ammo.js は、wasm(WebAssemblyファイル)を持ってきてstatic/js/に置いて、config内に外部読み込みを記載。
それで、できたpackage.jsonとnuxt.config.jsは参考程度に以下に記載。
package.json
{
  "name": "speed_pizza",
  "version": "1.0.0",
  "private": true,
  "scripts": {
    "analyze": "nuxt build --analyze",
    "dev": "cross-env NODE_ENV=development nodemon server/index.js --watch server",
    "pro": "cross-env NODE_ENV=production node server/index.js",
    "build:dev": "cross-env NODE_ENV=development nuxt build",
    "build:prod": "cross-env NODE_ENV=production nuxt build",
    "generate": "nuxt generate",
  },
  "dependencies": {
    "core-js": "^3.6.5",
    "cross-env": "^7.0.2",
    "dotenv": "^8.2.0",
    "express": "^4.17.1",
    "nuxt": "^2.14.6",
    "three": "^0.123.0",
    "vue": "^2.6.12",
  },
  "devDependencies": {
    "@nuxtjs/style-resources": "^1.0.0",
    "@nuxtjs/stylelint-module": "^4.0.0",
    "node-sass": "^5.0.0",
    "nodemon": "^2.0.6",
    "nuxt-svg-loader": "^1.2.0",
    "sass-loader": "^10.1.0",
  }
}
nuxt.config.js
module.exports = {
  srcDir: './src/',
  globalName: 'speedpizzaapp',
  env: {
    NODE_ENV: process.env.NODE_ENV,
  },
  html: {
    prefix: 'og: http://ogp.me/ns#',
    lang: 'ja',
  },
  head: {
    title:
      process.env.NODE_ENV === 'production'
        ? 'SpeedPizza(3D)'
        : '【開発】SpeedPizza(3D)',
    meta: [
      { charset: 'utf-8' },
      {
        hid: 'description',
        name: 'description',
        content:
          'SpeedPizza is the first service in Japan that enables you to produce the world\'s number one popular dish, pizza, as a virtual 3D object from your smartphone at any time.'
      },
      { hid: 'keywords', name: 'keywords', content: '' },
      { 'http-equiv': 'X-UA-Compatible', content: 'IE=edge' },
      {
        name: 'viewport',
        content:
          'width=device-width, initial-scale=1.0, maximum-scale=1.0, user-scalable=no',
      },
      { name: 'format-detection', content: 'telephone=no' },
      {
        property: 'og:description',
        content:
          'SpeedPizza is the first service in Japan that enables you to produce the world\'s number one popular dish, pizza, as a virtual 3D object from your smartphone at any time.',
      },
      { property: 'og:type', content: 'website' },
      { property: 'og:locale', content: 'ja_JP' },
      { name: 'twitter:card', content: 'summary_large_image' },
      { name: 'twitter:creator', content: '' },
      {
        name: 'twitter:text:description',
        content:
          'SpeedPizza is the first service in Japan that enables you to produce the world\'s number one popular dish, pizza, as a virtual 3D object from your smartphone at any time.',
      },
    ],
    link: [
      { rel: 'icon', type: 'image/x-icon', href: '/image/favicon.ico' },
      { rel: 'preconnect', href: 'https://fonts.gstatic.com' },
      {
        rel: 'stylesheet',
        href:
          'https://fonts.googleapis.com/css2?family=Montserrat:ital,wght@0,300;0,500;0,600;0,700;1,600&display=swap',
      },
      {
        rel: 'stylesheet',
        href:
          'https://fonts.googleapis.com/css2?family=Noto+Sans+JP:wght@100;300;400;500;700;900&display=swap',
      },
      {
        rel: 'stylesheet',
        href:
          'https://fonts.googleapis.com/css2?family=Roboto:wght@100;300;400;500;700;900&display=swap',
      },
    ],
    // 全体で読み込ませたくない場合は、対象のpage内のheadで読み込ませよう
    script: [
      {
        src: '/js/ammo.wasm.js',
        type: 'text/javascript',
      },
    ],
  },
  server: {
    port: 8000,
  },
  publicPath: './',
  css: [{ src: '@/assets/sass/style.scss', lang: 'scss' }],
  components: true,
  modules: [
    '@nuxtjs/style-resources',
    'nuxt-svg-loader',
  ],
  styleResources: {
    scss: ['@/assets/sass/_variables.scss', '@/assets/sass/_mixin.scss'],
  },
  build: {
    transpile: ['three'],
    babel: {
      presets({ isServer }) {
        return [
          [
            '@nuxt/babel-preset-app',
            isServer
              ? {
                  targets: { node: 'current' },
                }
              : {
                  targets: { browsers: 'last 2 versions, ie >= 11' },
                  useBuiltIns: 'usage',
                  corejs: 3,
                },
          ],
        ];
      },
    },
    extend(config, ctx) {
      config.node = {
        fs: 'empty',
      };
      config.module.rules.push({
        test: /\.(ogg|mp3|wav|mpe?g)$/i,
        loader: 'file-loader',
        options: {
          name: '[path][name].[ext]',
        },
      });
    },
    terser: {
      terserOptions: {
        compress: {
          drop_console: process.env.NODE_ENV === 'production',
        },
      },
    },
  },
  rules: {
    'no-console': process.env.NODE_ENV === 'production' ? 'error' : 'off',
    'no-debugger': process.env.NODE_ENV === 'production' ? 'error' : 'off',
  },
  telemetry: false,
  render: {
    compressor: false,
  },
};
three.jsを使う時に筆者がよくやること
three.jsなどで、3D周りをゴニョゴニョする際は、jsでのソース量がエグくなりがちなので、
canvasごと、component化しておいて、表示させたいページでそのcomponentを読み込むようにさせておく。
three.jsを使うときのCanvasComponentの基本ソース
<template>
  <canvas ref="canvas"></canvas>
</template>

<script type="module">
import * as THREE from 'three';
import { OBJLoader } from 'three/examples/jsm/loaders/OBJLoader.js';
import { MTLLoader } from 'three/examples/jsm/loaders/MTLLoader.js';
import { TrackballControls } from 'three/examples/jsm/controls/TrackballControls.js';

export default {
  props: {},
  data() {
    return {
      canvas: null,
      renderer: null,
      controls: null,
      scene: null,
      camera: null,
      clock: null,
    };
  },
  async mounted() {
    await this.initCanvas();
    this.animation();
  },
  methods: {
    async initCanvas() {
      console.log('init canvas');

      // Firefox,SafariでcreateImageBitmapが使えない時のTips
      if (
        !('createImageBitmap' in window) ||
        /Firefox/.test(navigator.userAgent) === true
      ) {
        window.createImageBitmap = async function (blob) {
          return await new Promise((resolve, reject) => {
            const img = document.createElement('img');
            img.addEventListener('load', function () {
              resolve(this);
            });
            img.src = URL.createObjectURL(blob);
          });
        };
      }

      this.clock = new THREE.Clock();
      this.canvas = this.$refs.canvas;

      // renderer 値は適当だよ、都度変えてね
      this.renderer = new THREE.WebGLRenderer({
        antialias: true,
        canvas: this.canvas,
        autoClear: true,
      });
      this.renderer.physicallyCorrectLights = true;
      this.renderer.setPixelRatio(this.windowPixelRatio());
      this.renderer.setSize(window.innerWidth, window.innerHeight);
      this.renderer.toneMapping = THREE.LinearToneMapping;
      this.renderer.toneMappingExposure = 1.0;
      this.renderer.outputEncoding = THREE.sRGBEncoding;

      // scene
      this.scene = new THREE.Scene();

      // camera 値は適当だよ、都度変えてね
      this.camera = new THREE.PerspectiveCamera(
        58.715406782360475,
        window.innerWidth / window.innerHeight,
        0.1,
        10000
      );
      this.camera.aspect = window.innerWidth / window.innerHeight;
      this.camera.rotation.order = 'YXZ';
      this.camera.position.x = 0;
      this.camera.position.y = 200;
      this.camera.position.z = 190;
      this.camera.rotation.x = 0;
      this.camera.rotation.y = 0;
      this.camera.rotation.z = 0;
      this.camera.up.x = 0;
      this.camera.up.y = 1;
      this.camera.up.z = 0;
      this.camera.updateProjectionMatrix();

      // controller
      this.controls = new TrackballControls(
        this.camera,
        this.renderer.domElement
      );

      // light 値は適当だよ、都度変えてね
      const dirLi = new THREE.DirectionalLight(0, 0.8);
      dirLi.color = { r: 0.95, g: 1.0, b: 0.85 };
      dirLi.position.set(0, 0, 100);
      this.scene.add(dirLi);

      const amLi = new THREE.AmbientLight(0, 2.8);
      amLi.color = { r: 0.95, g: 1.0, b: 0.85 };
      this.scene.add(amLi);

      // loadObjects
      // 後述

      // resize
      this.onWindowResize();
      window.addEventListener('resize', this.onWindowResize, false);

      // rendering
      this.render();
    },
    animation() {
      // animationがある場合は、frame animationになるようにrenderをループで呼び出す。1回renderingするだけの場合は呼び出さなくていい。
      this.render();
      requestAnimationFrame(this.animation);
    },
    render() {
      if (!this.renderer.autoClear) {
        this.renderer.clear();
      }
      if (this.controls) {
        this.controls.update();
      }
      this.renderer.render(this.scene, this.camera);
      if (this.clock) {
        const delta = this.clock.getDelta();
      }
    },
    windowPixelRatio() {
      // 本来はwindowのpixelRatioを返すのが正しい、というか解像度が上がって綺麗に見える。(特にiOS/MacのRetinaディスプレイ)
      // return window.devicePixelRatio;
      // でも、筆者はあえて1を固定で返してます。理由としては、renderingが重くなるから。iOSのSafariとか重いとクラッシュしちゃう。。。
      return 1;
    },
    onWindowResize() {
      if (this.controls) {
        this.controls.handleResize();
      }
      this.camera.aspect = window.innerWidth / window.innerHeight;
      this.camera.updateProjectionMatrix();
      this.renderer.setPixelRatio(this.windowPixelRatio());
      this.renderer.setSize(window.innerWidth, window.innerHeight);
      this.renderer.render(this.scene, this.camera);
    },
  },
};
</script>

<style lang="scss" scoped>
canvas {
  display: inline-block;
  height: 100%;
  width: 100%;
}
</style>
obj,mtl,textureファイルをloadしてobjectをsceneにadd
- 読み込ませるobj,mtl,textureファイルは、static/data/〜など静的ファイル内に置く
- three.jsにあるobj,mtl,textureのloadをmethod化(loadModel関数)
- initCanvas内で、loadModel関数を呼んで、sceneにadd
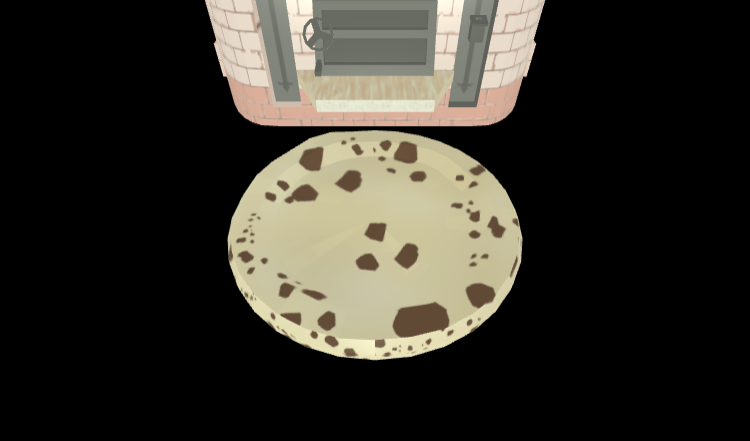
- とりあえず、pizza生地とピザ窯とトッピングのパイナップルのモデルを表示させてみた
loadしたobjectをsceneにaddするソース
<script type="module">

... 略

export default {

... 略

  methods: {
    async initCanvas() {

... 略

      // loadObjects

      // pizza 値は適当だよ、都度変えてね
      const pizza = await this.loadModel(
        'base/dough_napoli.obj',
        'base/dough_napoli.mtl',
        'base/tex_dough_napoli.png'
      );
      pizza.traverse((node) => {
        if (node.isMesh) {
          node.scale.x = 100;
          node.scale.y = 100;
          node.scale.z = 100;
        }
      });
      pizza.position.set(0, 0, 0);
      this.scene.add(pizza);

      // oven 値は適当だよ、都度変えてね
      const oven = await this.loadModel(
        'oven/stone_oven.obj',
        'oven/stone_oven.mtl',
        'oven/tex_stoneoven.png'
      );
      oven.traverse((node) => {
        if (node.isMesh) {
          node.material.roughness = 1;
          node.material.metalness = 0;
          node.material.needsUpdate = true;
          node.scale.x = 150;
          node.scale.y = 150;
          node.scale.z = 150;
        }
      });
      oven.position.set(0, 0, -500);
      this.scene.add(oven);

      // topping 値は適当だよ、都度変えてね
      const topping = await this.loadModel(
        'toppings/pineapple/pineapple.obj',
        'toppings/pineapple/pineapple.mtl',
        'toppings/colortex.png'
      );
      topping.traverse((node) => {
        if (node.isMesh) {
          node.scale.x = 300;
          node.scale.y = 300;
          node.scale.z = 300;
        }
      });
      topping.position.set(0, 500, 0);
      this.scene.add(topping);

... 略

    },

... 略

    async loadModel(obj, mtl, tex) {
      const base = this.$root.context.base;
      const path = base + 'data/models/obj/';
      const materials = await new MTLLoader().setPath(path).loadAsync(mtl);
      materials.preload();
      const object = await new OBJLoader()
        .setMaterials(materials)
        .setPath(path)
        .loadAsync(obj);
      const texture = await new THREE.TextureLoader()
        .setPath(path)
        .loadAsync(tex);
      object.traverse((node) => {
        if (node.isMesh) {
          node.castShadow = true;
          node.receiveShadow = true;
          node.material.map = texture;
          node.material.needsUpdate = true;
        }
      });
      return object;
    },
  },
};
</script>
物理エンジン(ammo.js)を加えてみる
さて、ここからが本題。ammo.jsをどう使っていくのか、、、
PhysicsWorldのinit
まずは、読み込んだammo.jsを使えるようにする。
mounted()の中で、initCanvas()を実行する前にやっておこう。
次に、PhysicsWorld(物理エンジンの世界)を作る。
これもmethod化(initPhysics)しておいて、initCanvasの前で実行しておく。
<script type="module">

... 略

export default {

... 略

  data() {
    return {
      canvas: null,
      renderer: null,
      controls: null,
      scene: null,
      camera: null,
      clock: null,
      physicsWorld: null,
      transformAux1: null,
      softBodyHelpers: null,
      rigidBodies: [],
      softBodies: [],
    };
  },
  async mounted() {
    // 読み込んだammo.jsを使えるようにする
    Ammo = await Ammo();
    // physics world(物理演算の世界)を作る
    this.initPhysics();
    await this.initCanvas();
    this.animation();
  },
  methods: {
    initPhysics() {
      const gravityConstant = -200;
      const collisionConfiguration = new Ammo.btSoftBodyRigidBodyCollisionConfiguration();
      const dispatcher = new Ammo.btCollisionDispatcher(collisionConfiguration);
      const broadPhase = new Ammo.btDbvtBroadphase();
      const solver = new Ammo.btSequentialImpulseConstraintSolver();
      const softBodySolver = new Ammo.btDefaultSoftBodySolver();
      this.physicsWorld = new Ammo.btSoftRigidDynamicsWorld(
        dispatcher,
        broadPhase,
        solver,
        collisionConfiguration,
        softBodySolver
      );
      this.physicsWorld.setGravity(new Ammo.btVector3(0, gravityConstant, 0));
      this.physicsWorld
        .getWorldInfo()
        .set_m_gravity(new Ammo.btVector3(0, gravityConstant, 0));
      this.transformAux1 = new Ammo.btTransform();
      this.softBodyHelpers = new Ammo.btSoftBodyHelpers();
    },

... 略

  },
};
</script>
addしたobjectからshape→bodyを作成してPhysicsWorldに追加
ここからは、筆者の解釈が入ってくるので、誤っていたらご指摘いただきたい。
ammo.jsでは、shape(形)を作って、そこに色々な設定(位置や回転、スケールなど)を行ってbody(物体)を作り、それをPhysicsWorldに追加する必要があると認識している。
そのshapeを作る際に、単純な球や直方体などは、ammo.jsの用意している関数で作成できるが、外部ファイルで読み込んだモデルに関しては、そうはいかない。
そこで、makeShape関数によって、読み込んだobjectのgeometryからshapeを形成することにした。
そして、そのshapeを使って、bodyを作成、physics Worldに追加をcreateRigidBody関数で行っている。
<script type="module">

... 略

export default {

... 略

  methods: {
    async initCanvas() {

... 略

      // loadObjects

      // pizza 値は適当だよ、都度変えてね
      const pizza = await this.loadModel(
        'base/dough_napoli.obj',
        'base/dough_napoli.mtl',
        'base/tex_dough_napoli.png'
      );
      pizza.traverse((node) => {
        if (node.isMesh) {
          node.scale.x = 100;
          node.scale.y = 100;
          node.scale.z = 100;
        }
      });
      pizza.position.set(0, 0, 0);
      const pizzaShape = this.makeShape(pizza.children[0]);
      const pizzaPos = pizza.position;
      const pizzaQuat = pizza.children[0].quaternion;
      this.createRigidBody(pizza, pizzaShape, 0, pizzaPos, pizzaQuat);
      this.scene.add(pizza);

... 略


      // topping 値は適当だよ、都度変えてね
      const topping = await this.loadModel(
        'toppings/pineapple/pineapple.obj',
        'toppings/pineapple/pineapple.mtl',
        'toppings/colortex.png'
      );
      topping.traverse((node) => {
        if (node.isMesh) {
          node.scale.x = 300;
          node.scale.y = 300;
          node.scale.z = 300;
        }
      });
      topping.position.set(0, 500, 0);
      const toppingShape = this.makeShape(topping.children[0]);
      const toppingPos = topping.position;
      const toppingQuat = topping.children[0].quaternion;
      this.createRigidBody(topping, toppingShape, 15, toppingPos, toppingQuat);
      this.scene.add(topping);

... 略

    },

... 略

    makeShape(mesh) {
      const triangleMesh = new Ammo.btTriangleMesh(true, true);
      triangleMesh.setScaling(
        new Ammo.btVector3(mesh.scale.x, mesh.scale.y, mesh.scale.z)
      );
      const geometry = mesh.geometry;
      if (geometry instanceof THREE.BufferGeometry) {
        const vertexPositionArray = geometry.attributes.position.array;
        for (let i = 0; i * 3 < geometry.attributes.position.count; i++) {
          triangleMesh.addTriangle(
            new Ammo.btVector3(
              vertexPositionArray[i * 9],
              vertexPositionArray[i * 9 + 1],
              vertexPositionArray[i * 9 + 2]
            ),
            new Ammo.btVector3(
              vertexPositionArray[i * 9 + 3],
              vertexPositionArray[i * 9 + 4],
              vertexPositionArray[i * 9 + 5]
            ),
            new Ammo.btVector3(
              vertexPositionArray[i * 9 + 6],
              vertexPositionArray[i * 9 + 7],
              vertexPositionArray[i * 9 + 8]
            ),
            false
          );
        }
      } else if (geometry instanceof THREE.Geometry) {
        for (let i = 0; i < geometry.faces.length; i++) {
          const face = geometry.faces[i];
          if (face instanceof THREE.Face3) {
            const vec1 = new Ammo.btVector3(0, 0, 0);
            const vec2 = new Ammo.btVector3(0, 0, 0);
            const vec3 = new Ammo.btVector3(0, 0, 0);

            vec1.setX(face[0].x);
            vec1.setY(face[0].y);
            vec1.setZ(face[0].z);

            vec2.setX(face[1].x);
            vec2.setY(face[1].y);
            vec2.setZ(face[1].z);

            vec3.setX(face[2].x);
            vec3.setY(face[2].y);
            vec3.setZ(face[2].z);

            triangleMesh.addTriangle(vec1, vec2, vec3, true);
          }
        }
      }
      const shape = new Ammo.btBvhTriangleMeshShape(triangleMesh, true, true);
      return shape;
    },
    createRigidBody(threeObject, physicsShape, mass, pos, quat) {
      physicsShape.setMargin(0.05);
      const transform = new Ammo.btTransform();
      transform.setIdentity();
      transform.setOrigin(new Ammo.btVector3(pos.x, pos.y, pos.z));
      transform.setRotation(
        new Ammo.btQuaternion(quat.x, quat.y, quat.z, quat.w)
      );
      const motionState = new Ammo.btDefaultMotionState(transform);
      const localInertia = new Ammo.btVector3(0, 0, 0);
      physicsShape.calculateLocalInertia(mass, localInertia);
      const rbInfo = new Ammo.btRigidBodyConstructionInfo(
        mass,
        motionState,
        physicsShape,
        localInertia
      );
      const body = new Ammo.btRigidBody(rbInfo);
      threeObject.userData.physicsBody = body;
      this.rigidBodies.push(threeObject);
      body.setActivationState(4);
      this.physicsWorld.addRigidBody(body);
      return body;
    },
  },
};
</script>
renderの中で、PhysicsWorldの状態をupdateする
これで終わりではなく、renderingする際に、PhysicsWorldの状態を常にupdateする必要がある。
render関数はアニメーション用にループで呼ばれるようになるので、updatePhysics関数をこの中で呼んであげる。
<script type="module">

... 略

export default {

... 略

    render() {

... 略

      if (this.clock) {
        const delta = this.clock.getDelta();
        this.updatePhysics(delta);
      }
    },

... 略

    updatePhysics(deltaTime) {
      this.physicsWorld.stepSimulation(deltaTime, 10);
      for (let i = 0; i < this.rigidBodies.length; i++) {
        const objThree = this.rigidBodies[i];
        const objPhys = objThree.userData.physicsBody;
        const ms = objPhys.getMotionState();
        if (ms) {
          ms.getWorldTransform(this.transformAux1);
          const p = this.transformAux1.getOrigin();
          const q = this.transformAux1.getRotation();
          objThree.position.set(p.x(), p.y(), p.z());
          objThree.quaternion.set(q.x(), q.y(), q.z(), q.w());
        }
      }
    },
  },
};
</script>
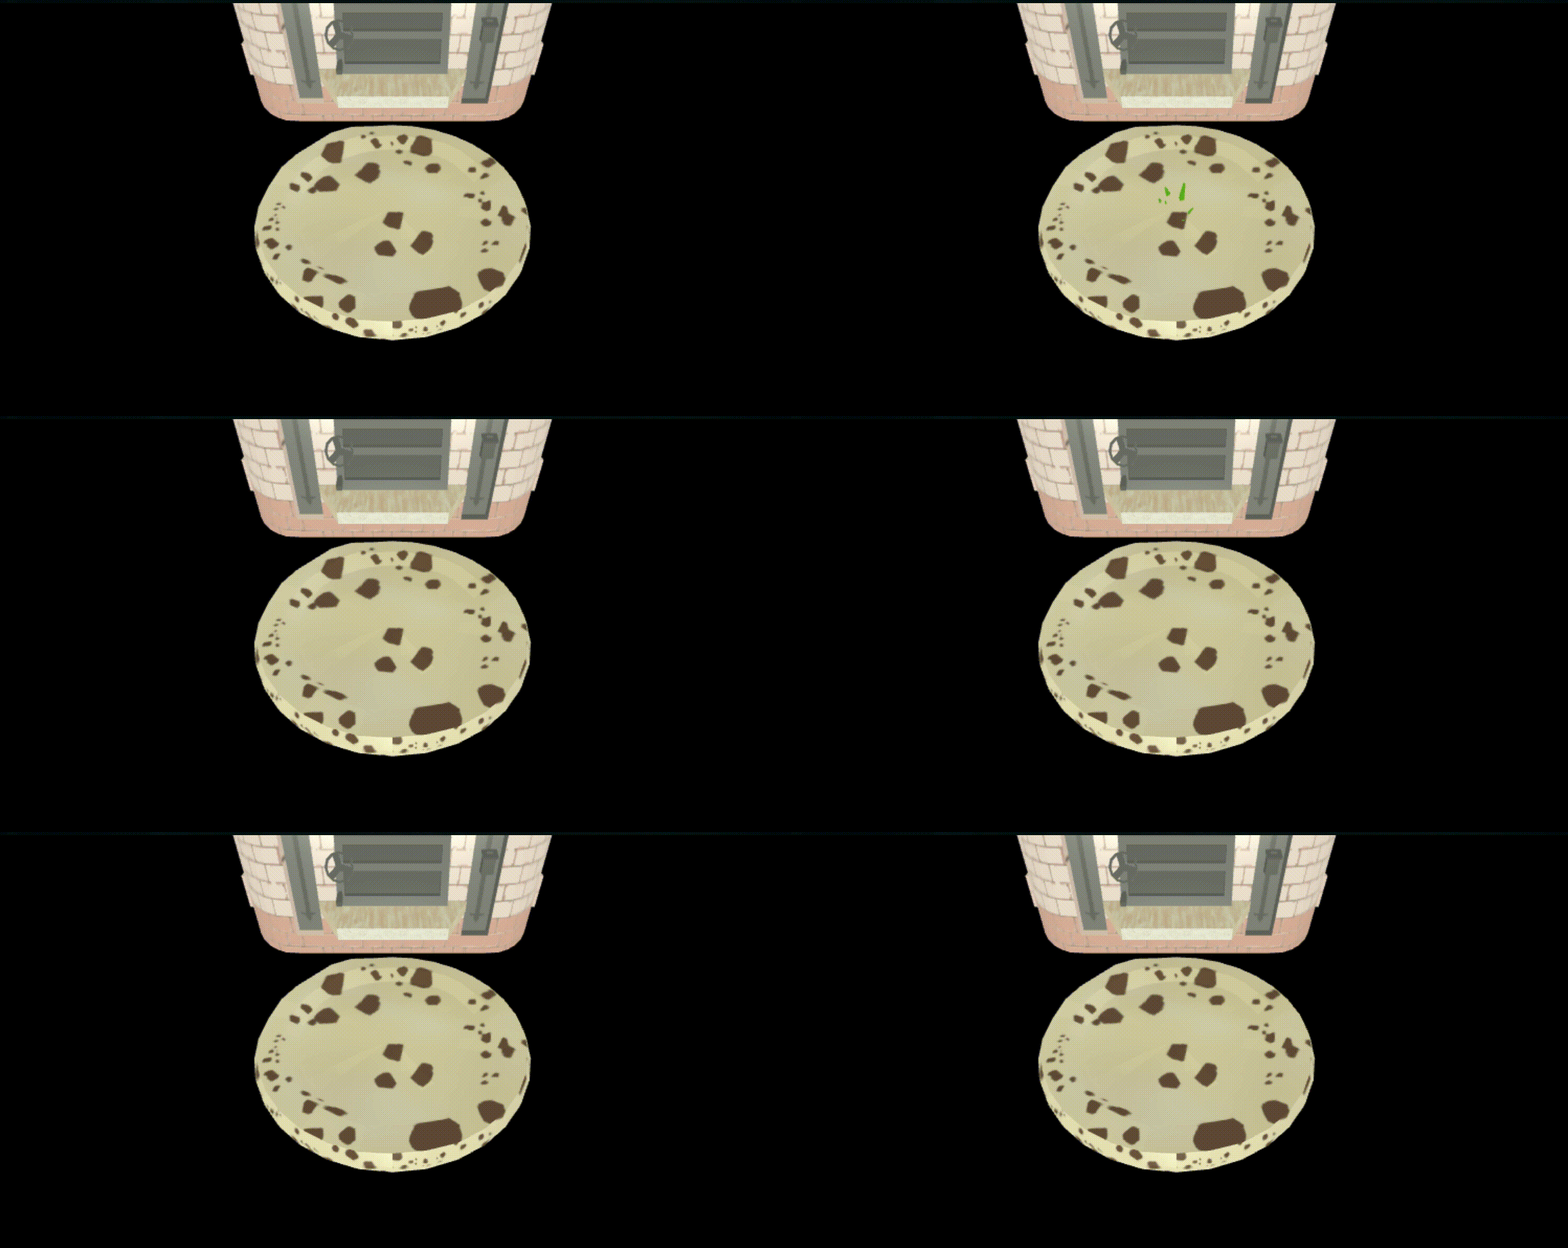
さて、これでできたはず、見てみよう。
通り抜けた
まとめ
うまくいったこと
loadしたobjectを自由落下させる
うまくいかなかったこと
loadしたobjectどうしの当たり判定(コリジョン設定)
次回
objectどうしの当たり判定を改善していく。
ちなみに
エイプリルフールのネタ企画だったので、
これはこれで面白いということで、この時点でサービス公開した、、、orz

