はじめに
以前の記事、Azure Boardsを利用した一人スクラムを紹介しました。今回は、なんちゃって一人ワークフローと題して、Azure Boardsで、デプロイ用のPBIを新規作成したら自動でAzureリソースがデプロイされる仕組みを実装してみましたので紹介します。
一人ワークフローの構成
仕組みを実装する為の構成は以下の通りです。AzureリソースをデプロイはGitHub Actionsを利用します。GitHub Actionsの動作にはLogic Appを利用し、そしてAzure DevOpsのService hook(Web Hooks)は、Azure BoardsでProduct Backlog Item(PBI)が作成されるとLogic Appを動作させるよう利用します。
本構成を見て、なぜLogic Appを挟むのか疑問に思われた方もいらっしゃると思います。それはAzure DevOpsのWeb Hooksでは、GitHub Actionsを動作させる形式で連携ができない為です。(あくまで私が個人調査した結果の為、もしやり方見つけられた方いらっしゃいましたらコメントいただけると幸いです。)

各種設定
以降で、上記で紹介した各種サービスの設定について解説していきます。本内容は以下を前提として進めてまいります。
前提
- 利用可能なAzureサブスクリプションを持っている
- Azure DevOPsのPJが作成済みである
- GitHubのリポジトリが作成済みである
Azure DevOps Service hook
Azure DevOpsのService hooksを設定していきます。
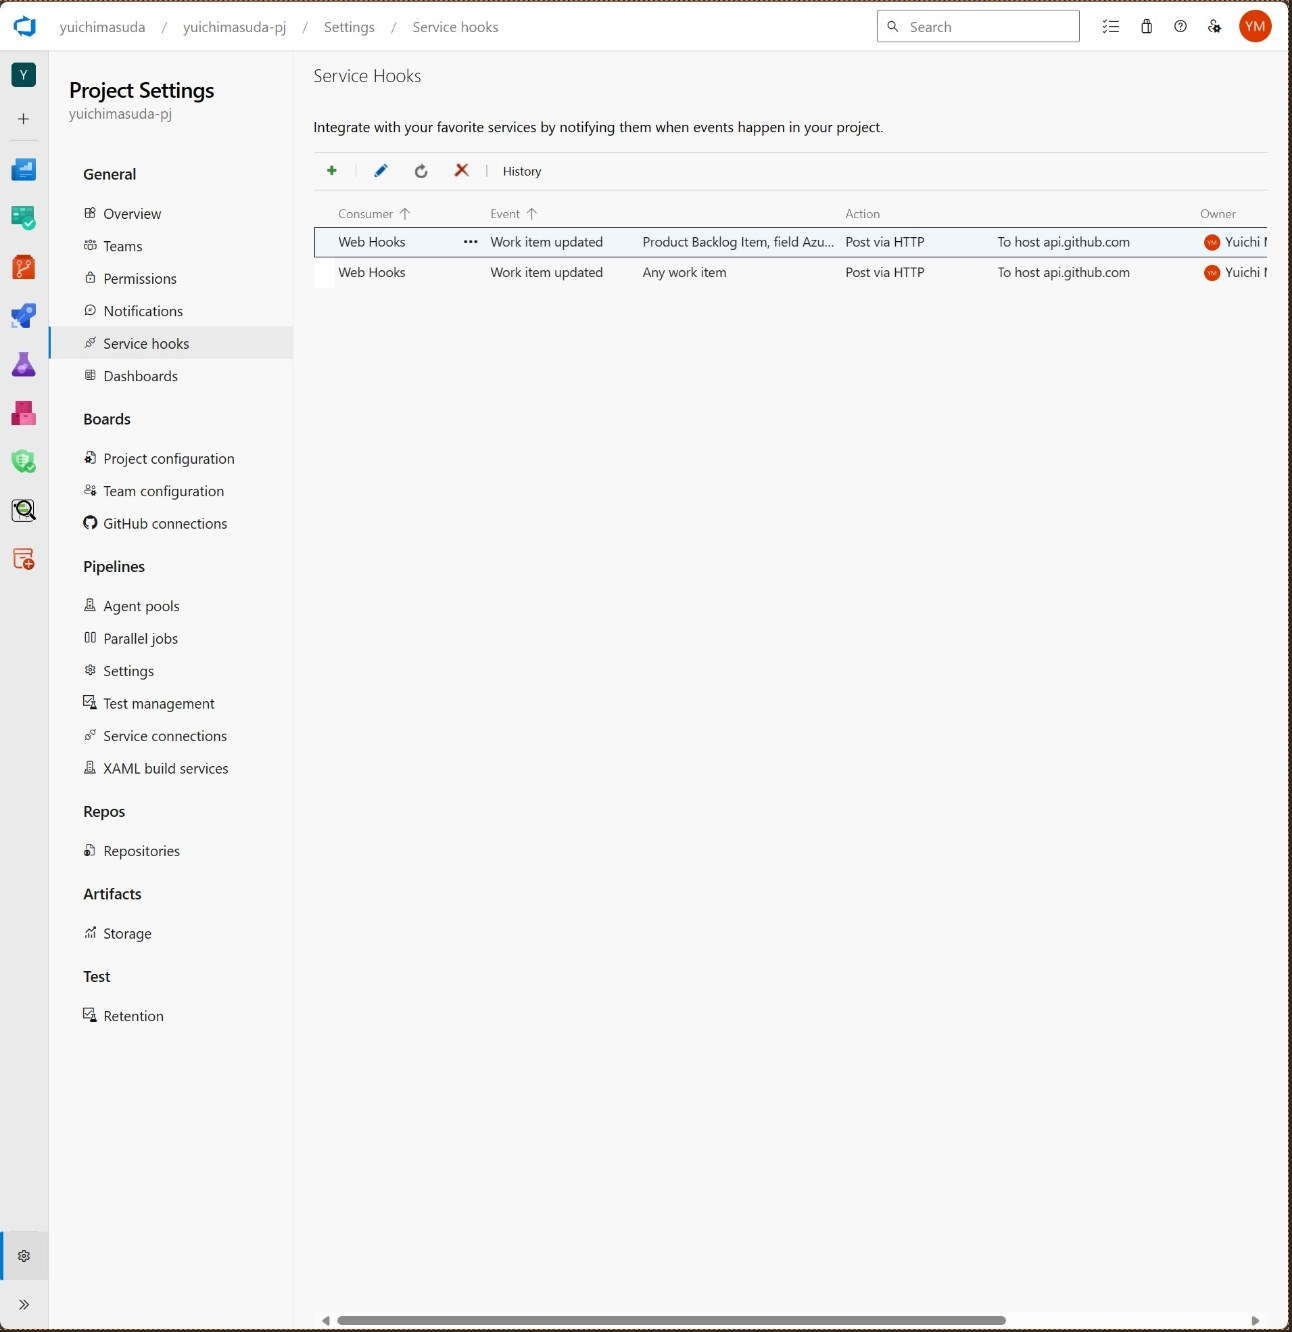
Azure DevOpsの対象PJを選択した画面の左下に"Project settings"があるので選択すると、メニューに"Service hooks"があるので選択、続けて追加を意味する"+"アイコンを選択します。
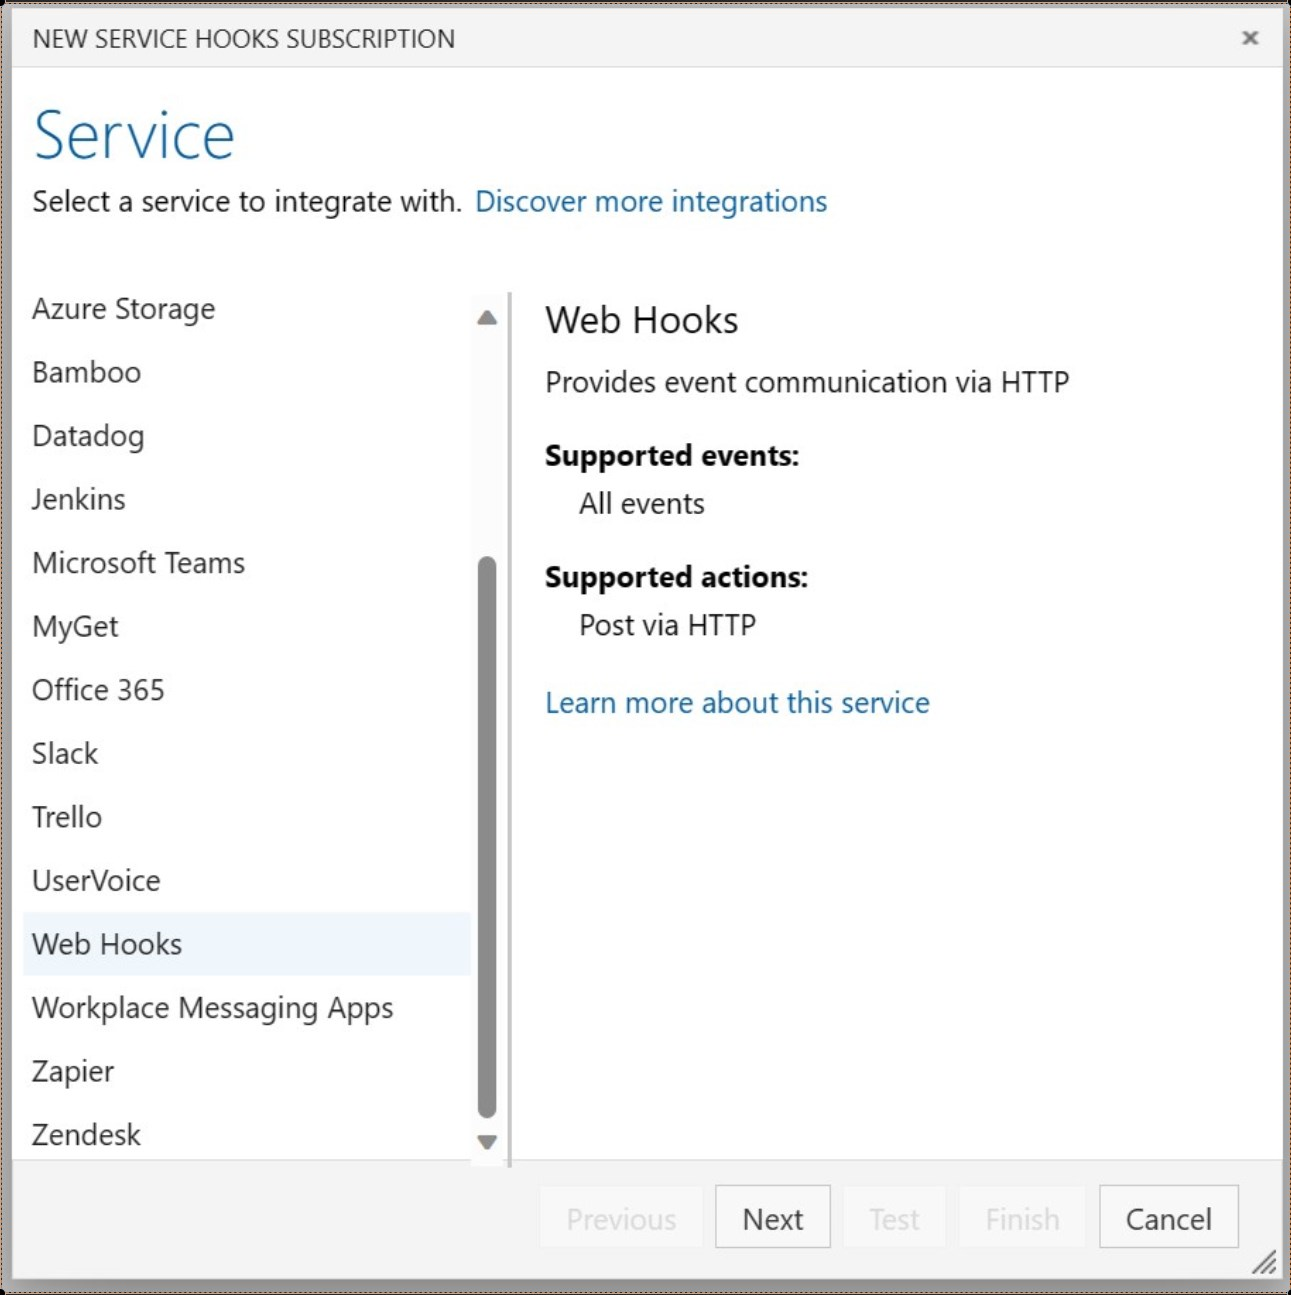
左メニューに選択可能なサービスの一覧が表示されるので"Web Hooks"、"Next"の順に選択します。
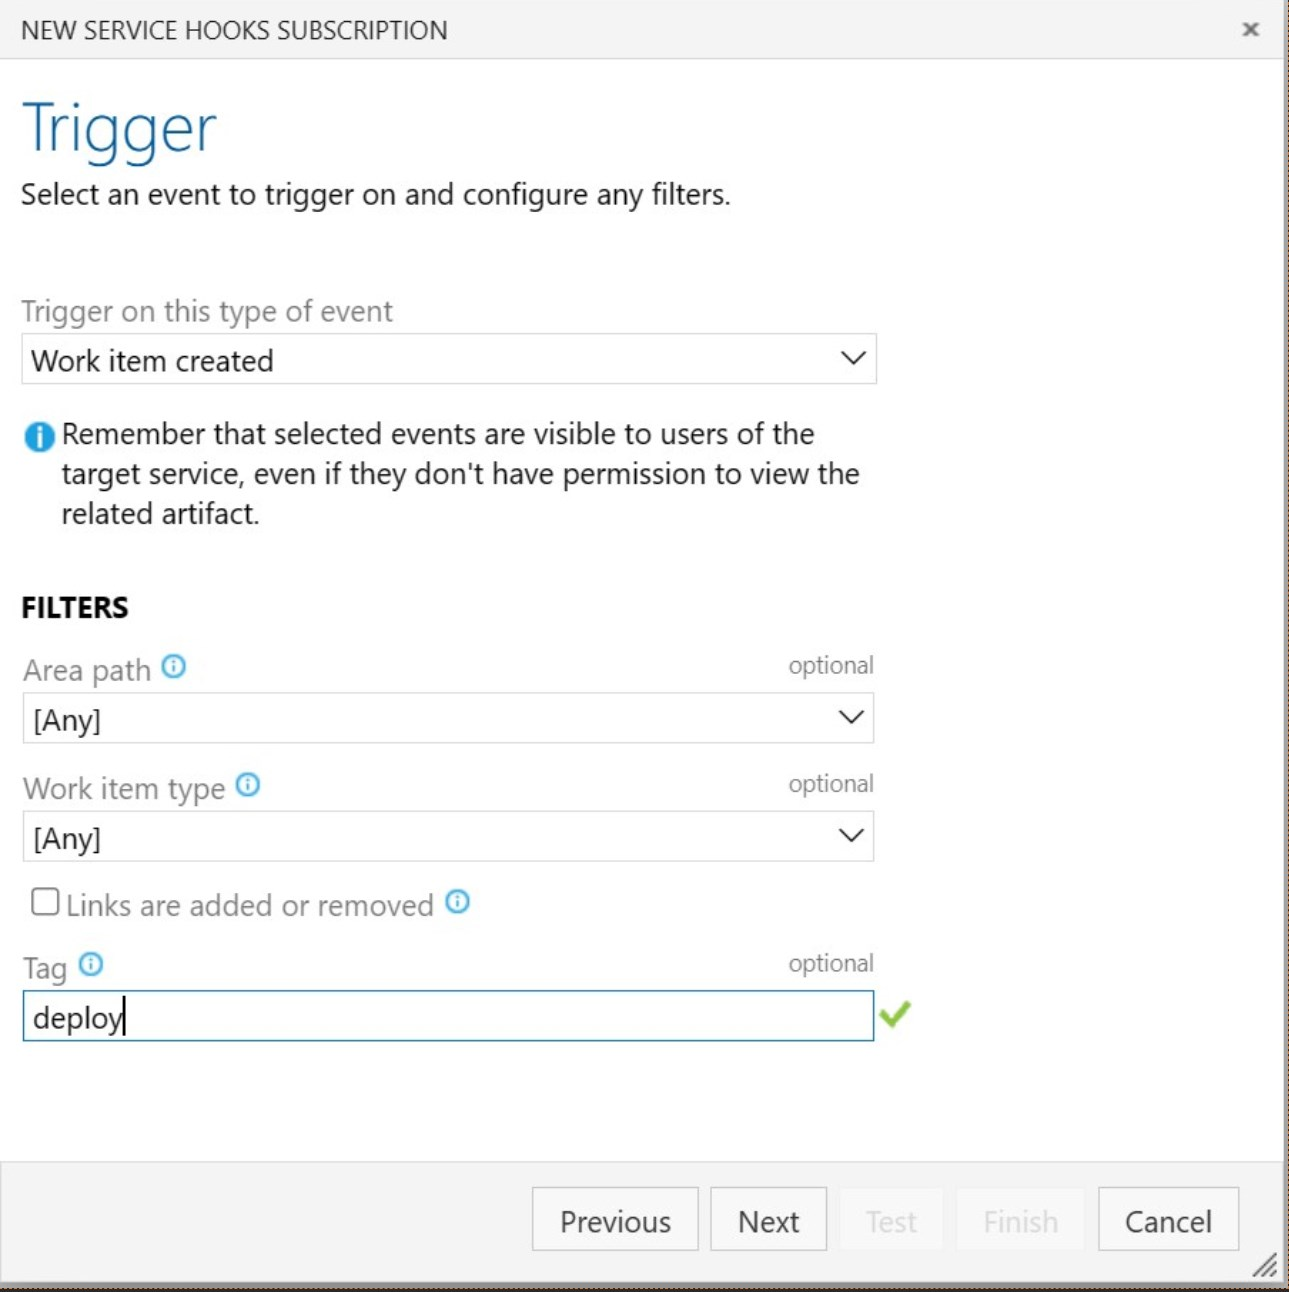
このService hookが動作するトリガ条件を設定する画面が表示されるので、"Trriger on this type of event"にPBIが作成されたらを意味する"Work item created"を選択します。併せて、ある条件のPBIのみトリガとする為"Tag"に"deploy"を設定する事で、PBIのTagに"deploy"が設定されたチケットが作成された場合のみ条件とさせます。設定したら"Next"ボタンを選択します。
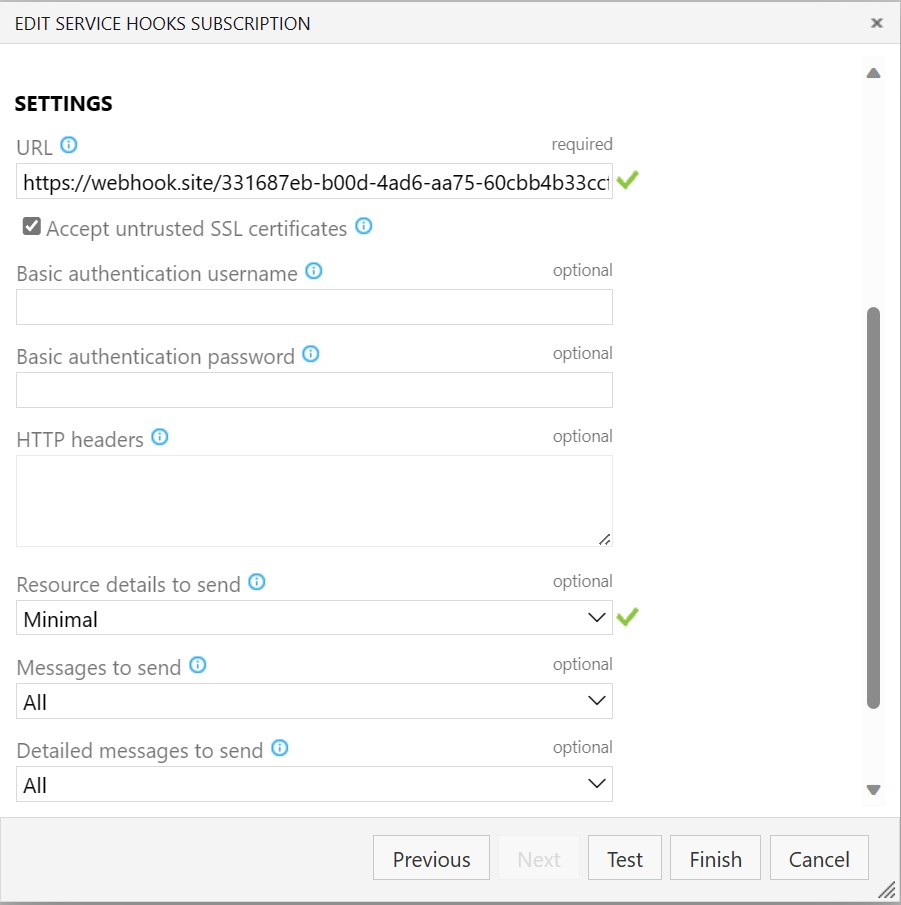
トリガ後のWeb Hook動作に関する設定画面が表示されます。この時点では、まだLogic Appの設定が完了していない為URLは設定できない状態となりますが、一旦ダミーのWeb HookのURLをwebhook.site等のWebHookツールを利用して設定します。併せて"Resource details to send"の設定を"Minimal"にして、"Test"ボタンを選択します。
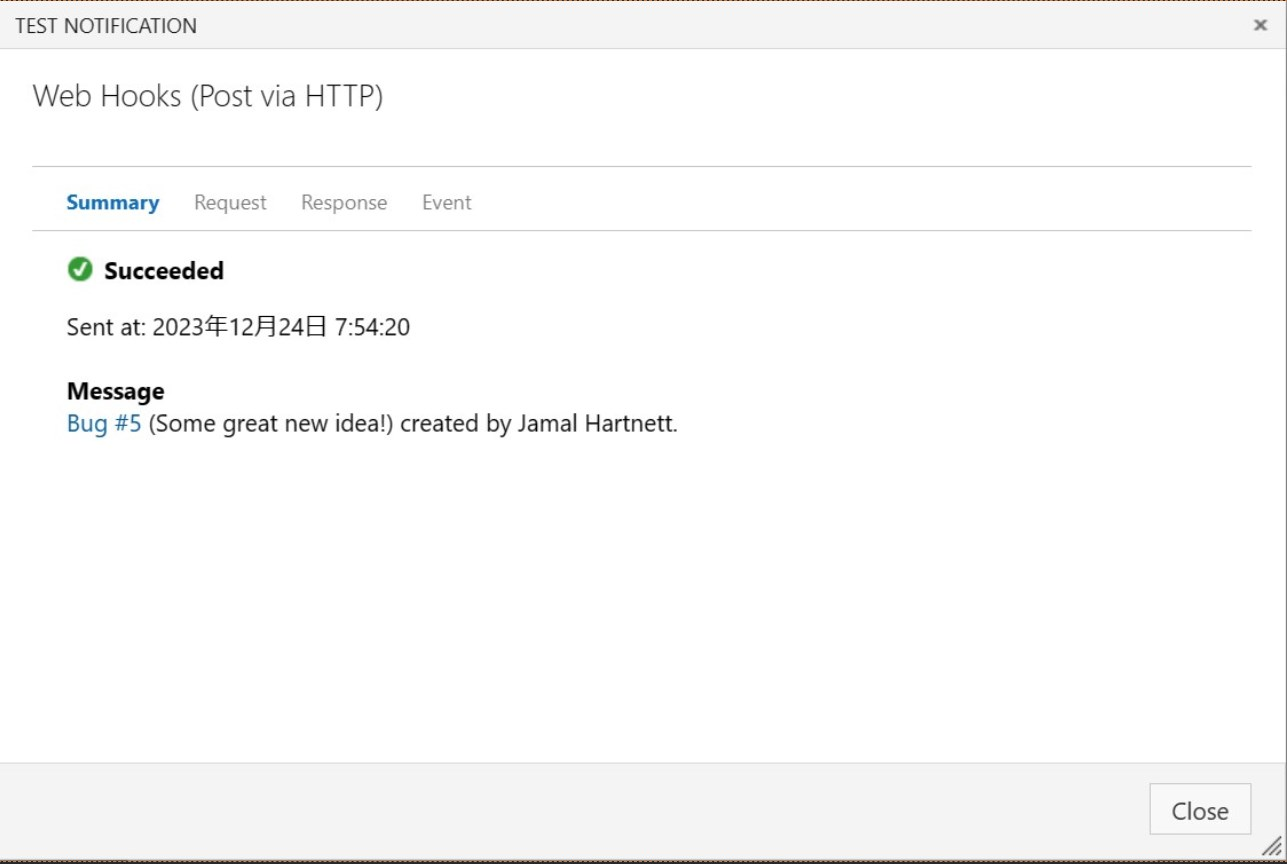
URLが正しければ、以下の様にTestはSucceededとなります。この結果が表じれたら"Request"タブを選択します。
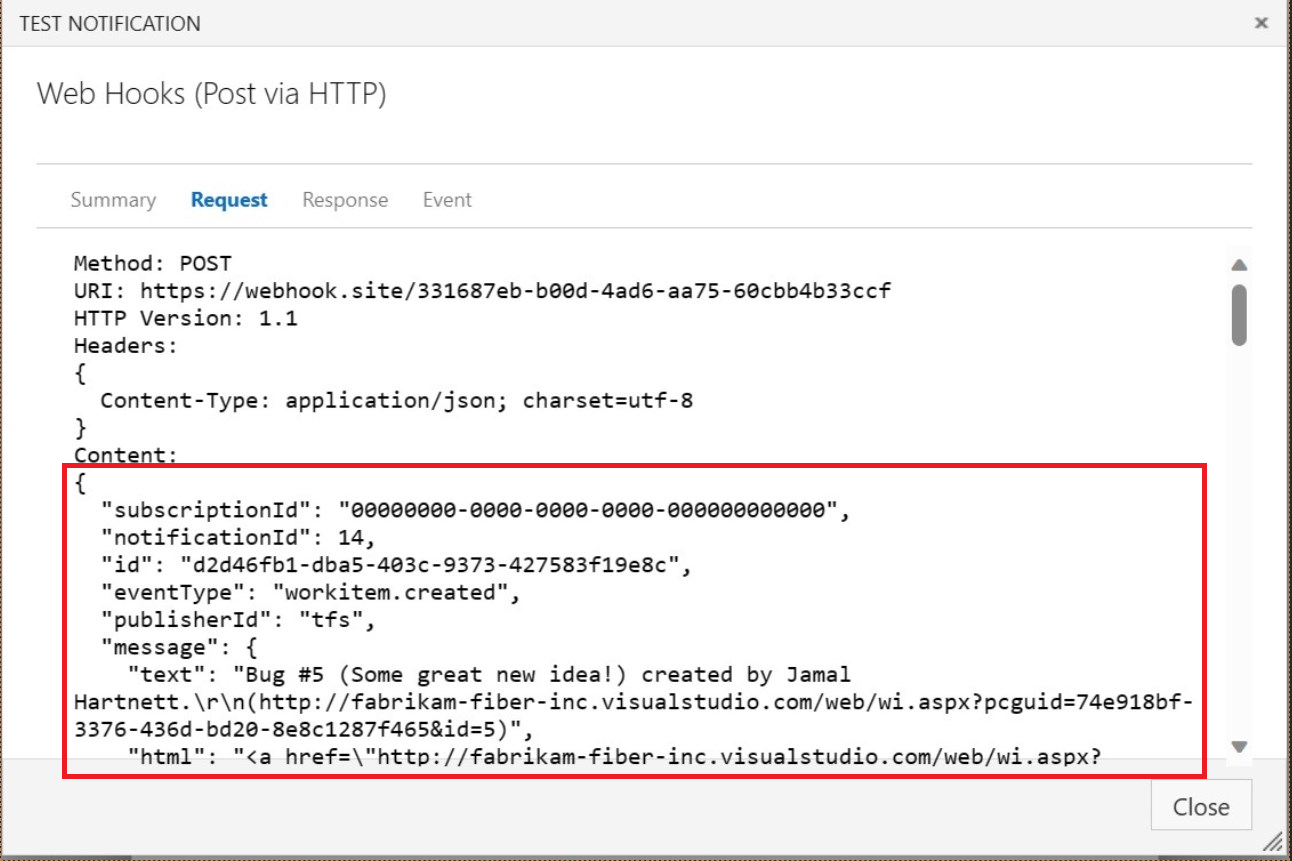
実際にWeb Hooksとして送信するRequestの内容が表示されるので、"Content:"内の内容をコピーしておきます。(後程Logic Appの設定の際に使用します。)
以上が、Azure DevOpsのService hookの設定となります。
Logic App
次にLogic Appの設定をしていきます。
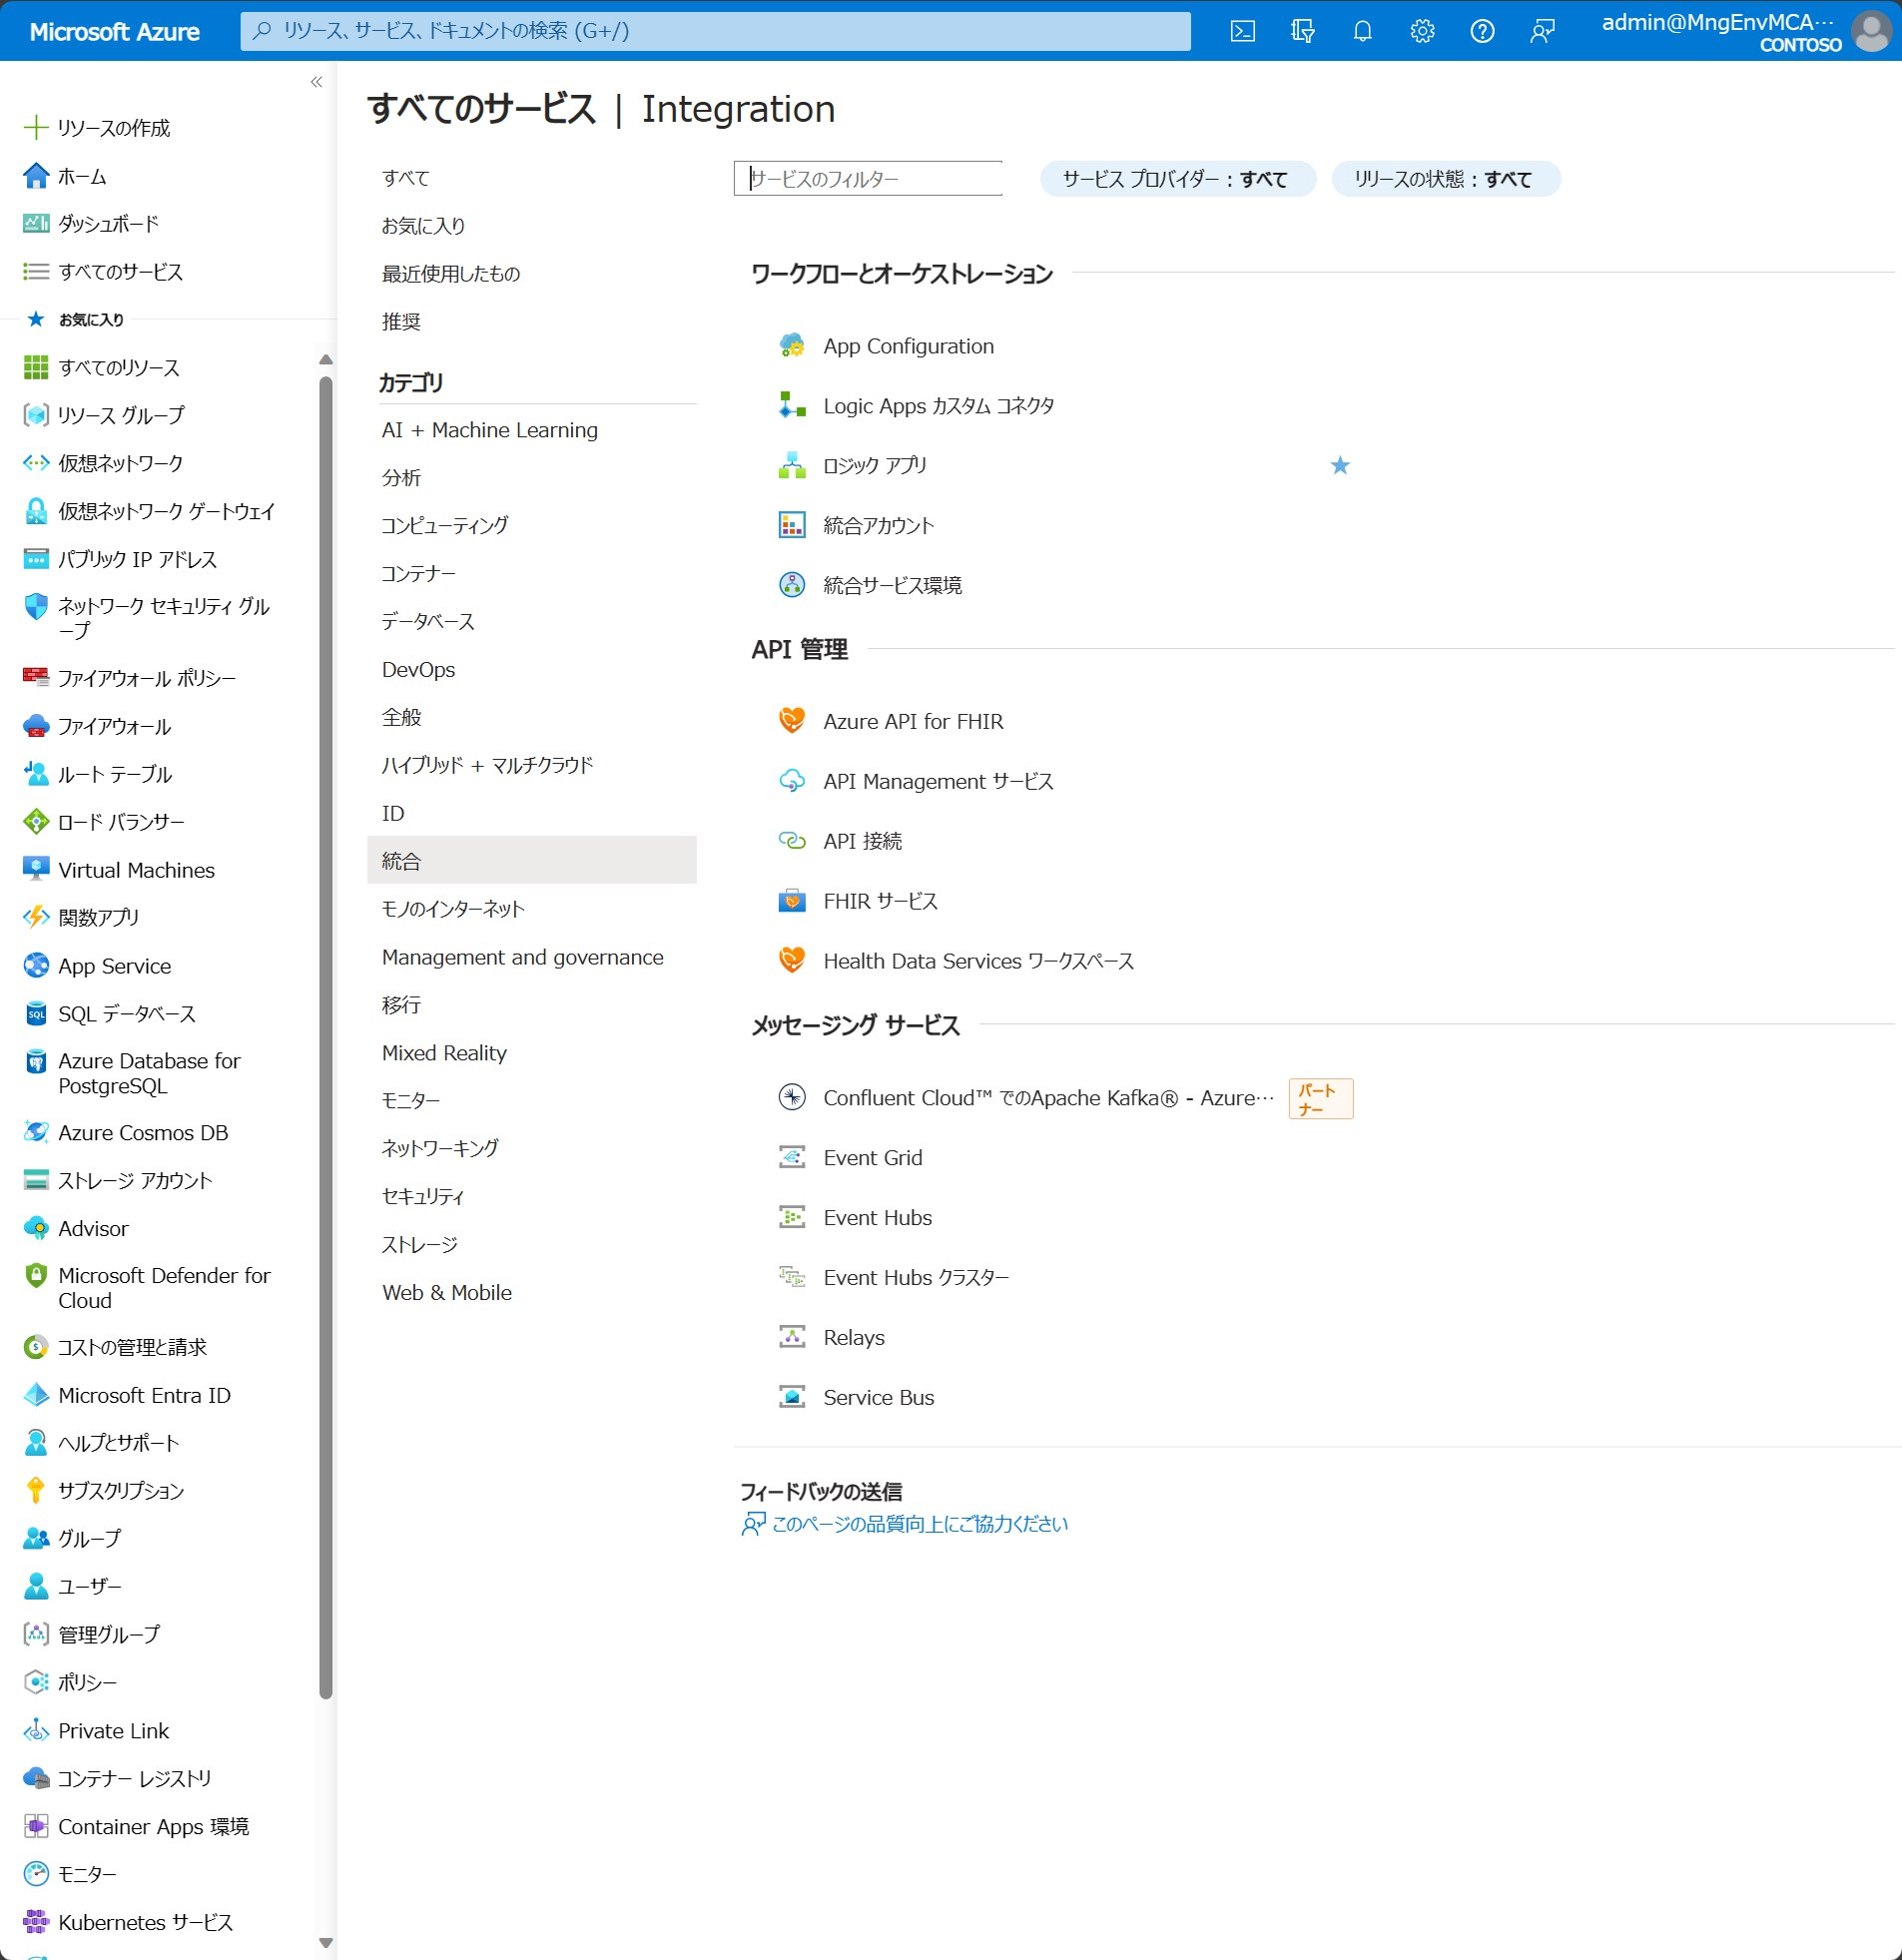
まずLogic Appを作成していきます。"すべてのサービス>統合>ロジック アプリ"の順に選択します。Logic Appの画面が表示されるので"+ 追加"を選択します。
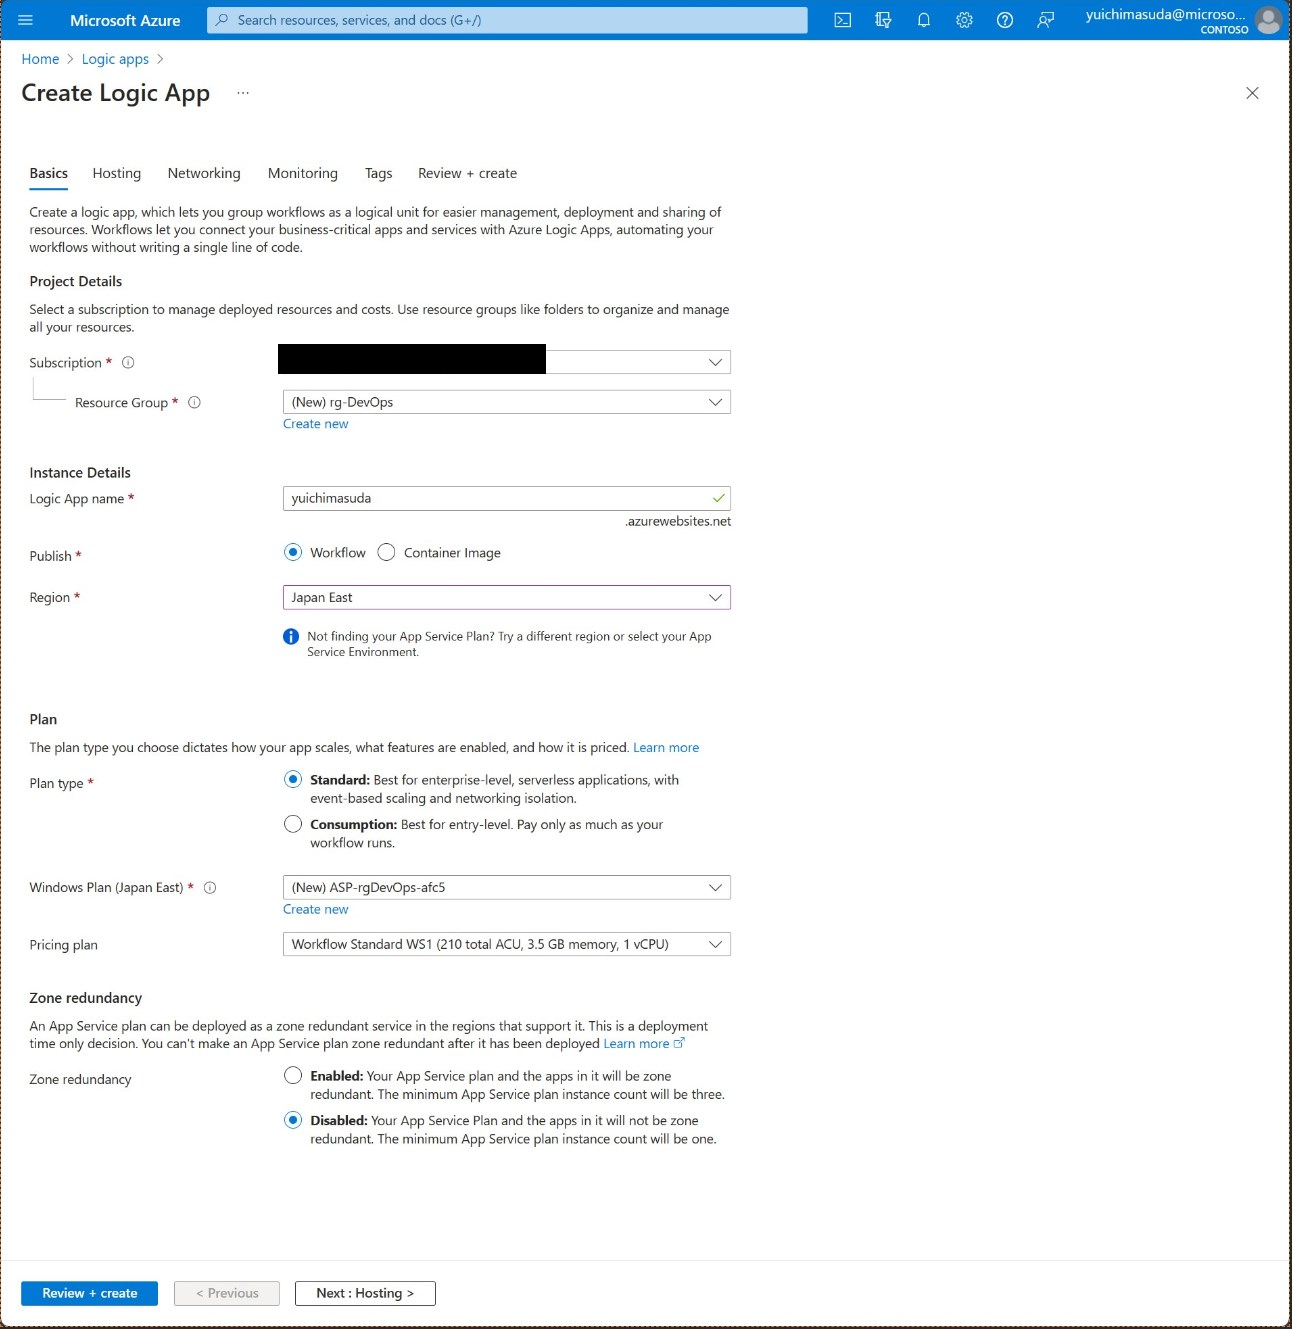
Logic Appの設定画面となります。"Basics"画面で任意のリソースグループ名、Logic App名、リージョンを設定し、後は以下の画面の用に設定して、"Review+create"を選択するとLogic Appが作成されます。
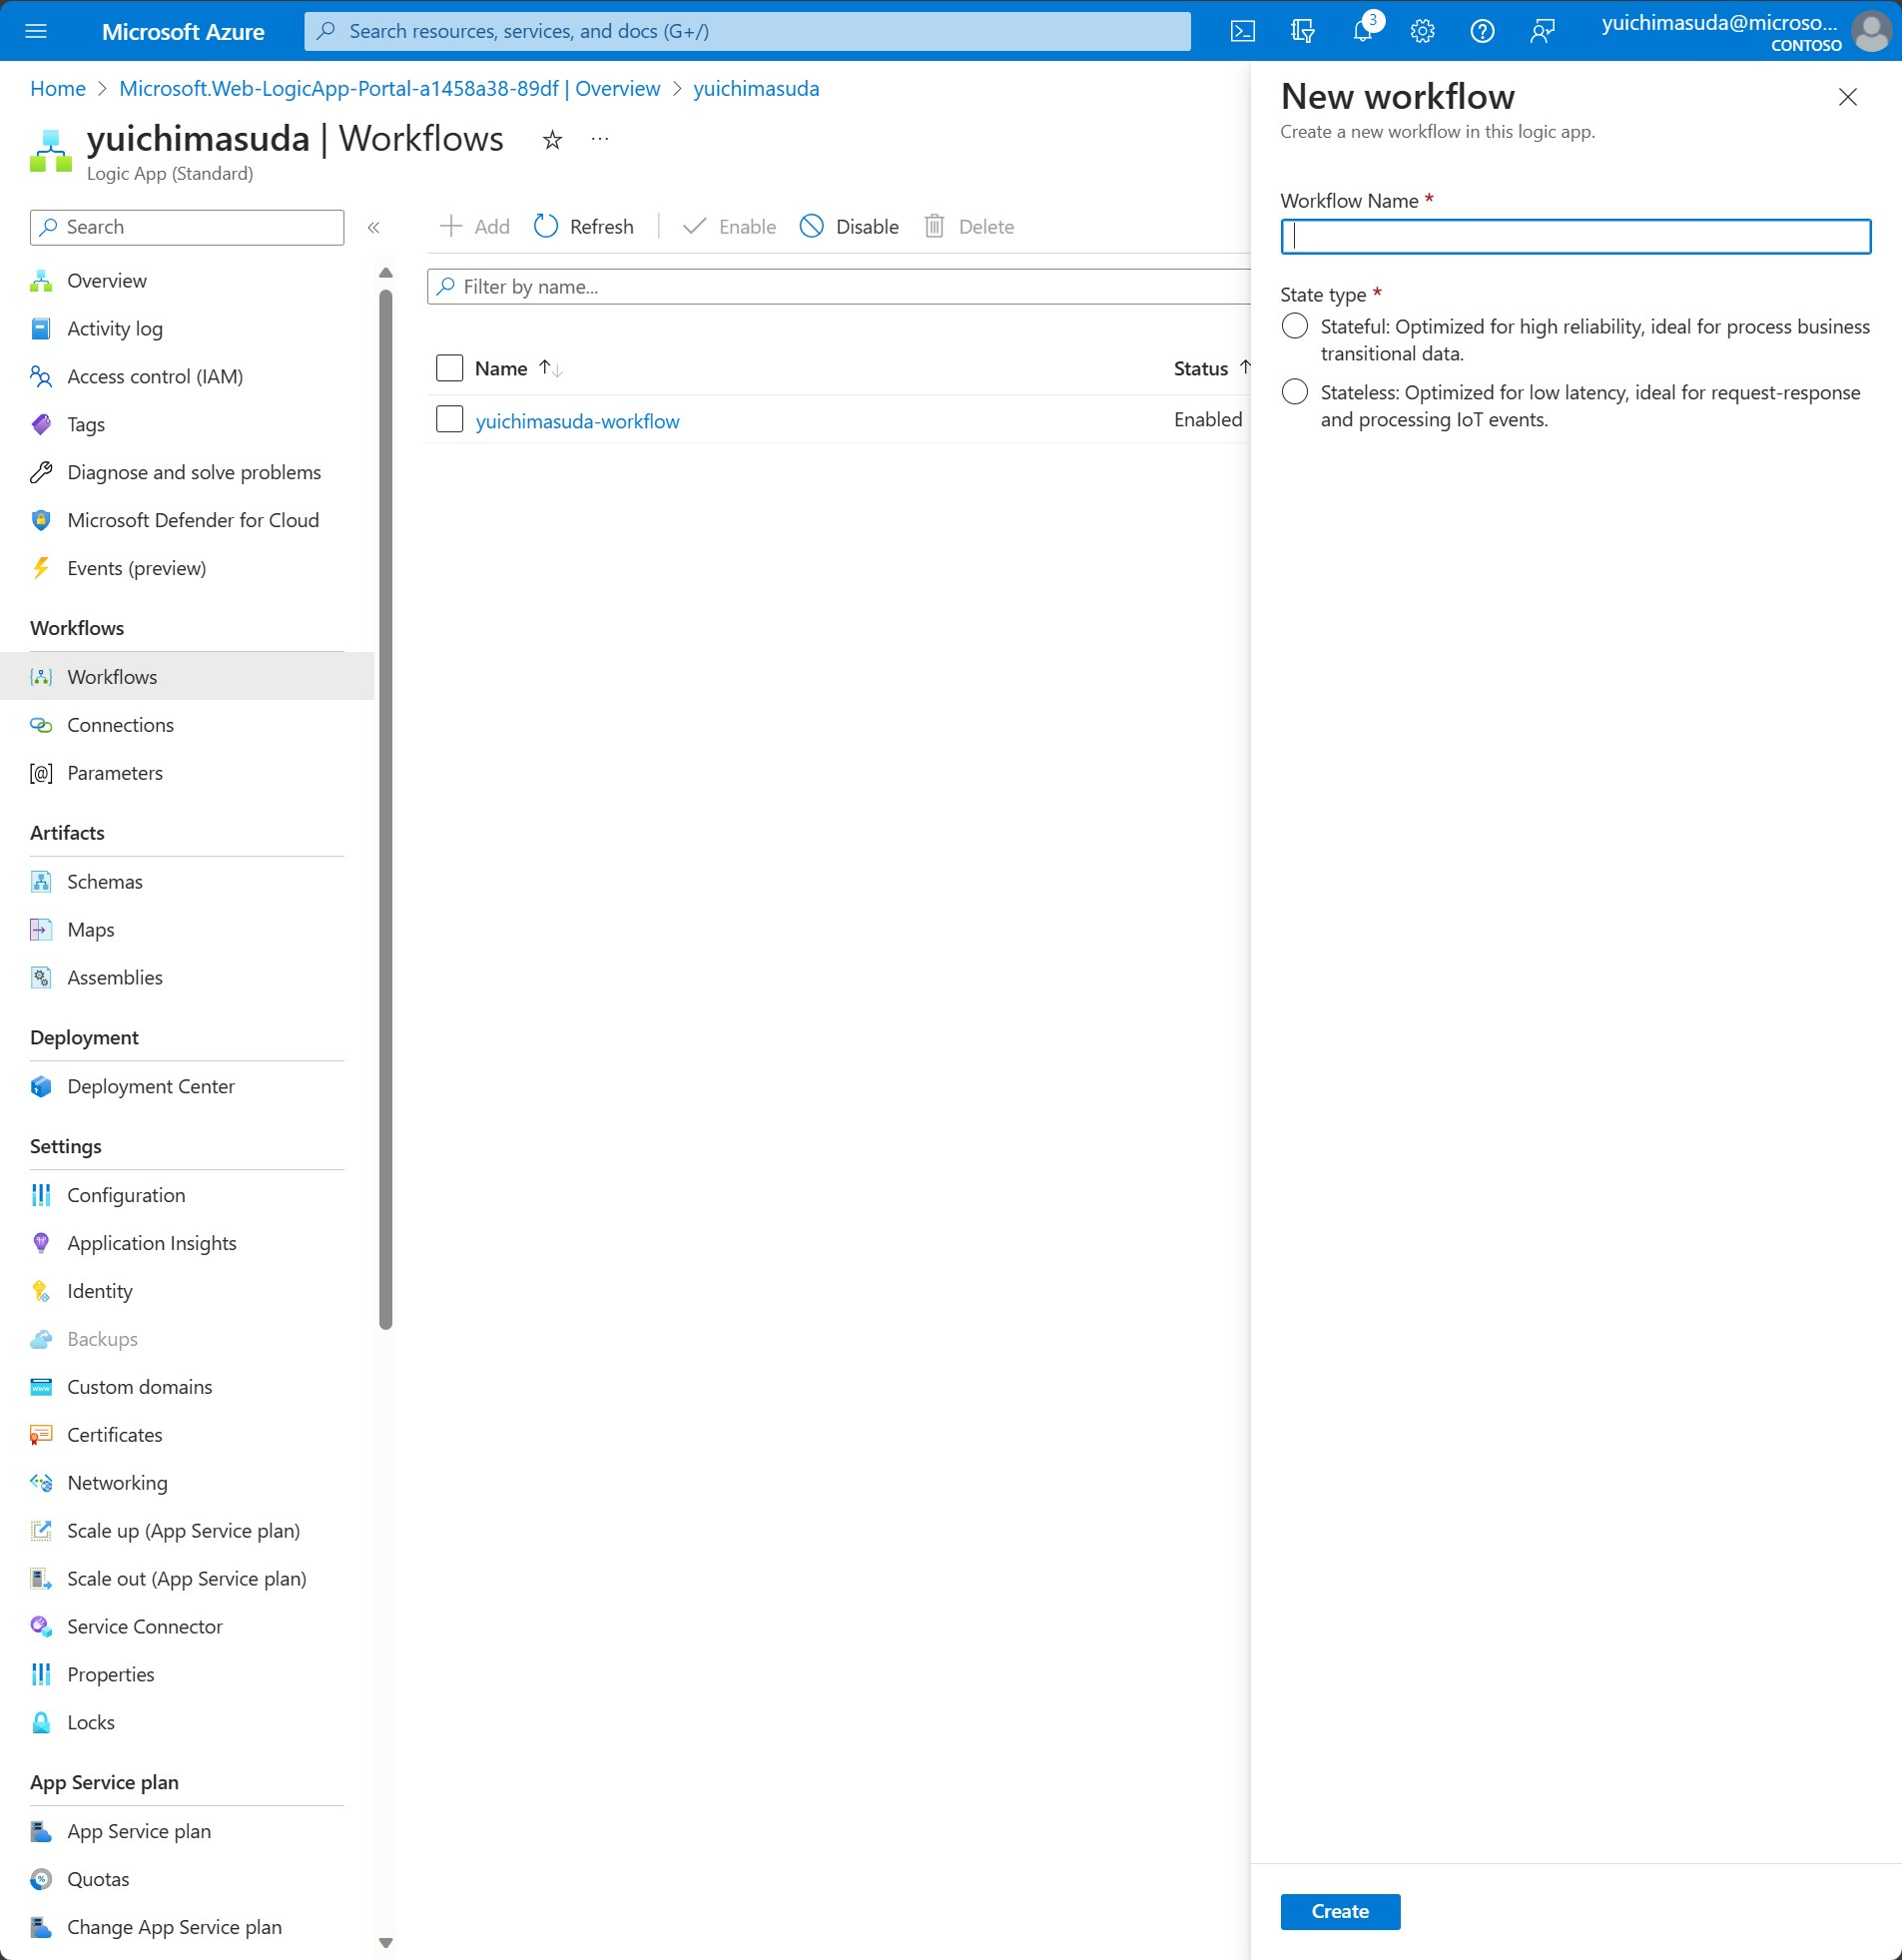
作成されたLogic App、"workflows"、"+ Add"の順に選択するとLogic Appに定義するWorkflowの設定画面が右に表示されます。任意のWorkflow名、"State type"を"Stateless"に設定して"Create"ボタンを選択します。
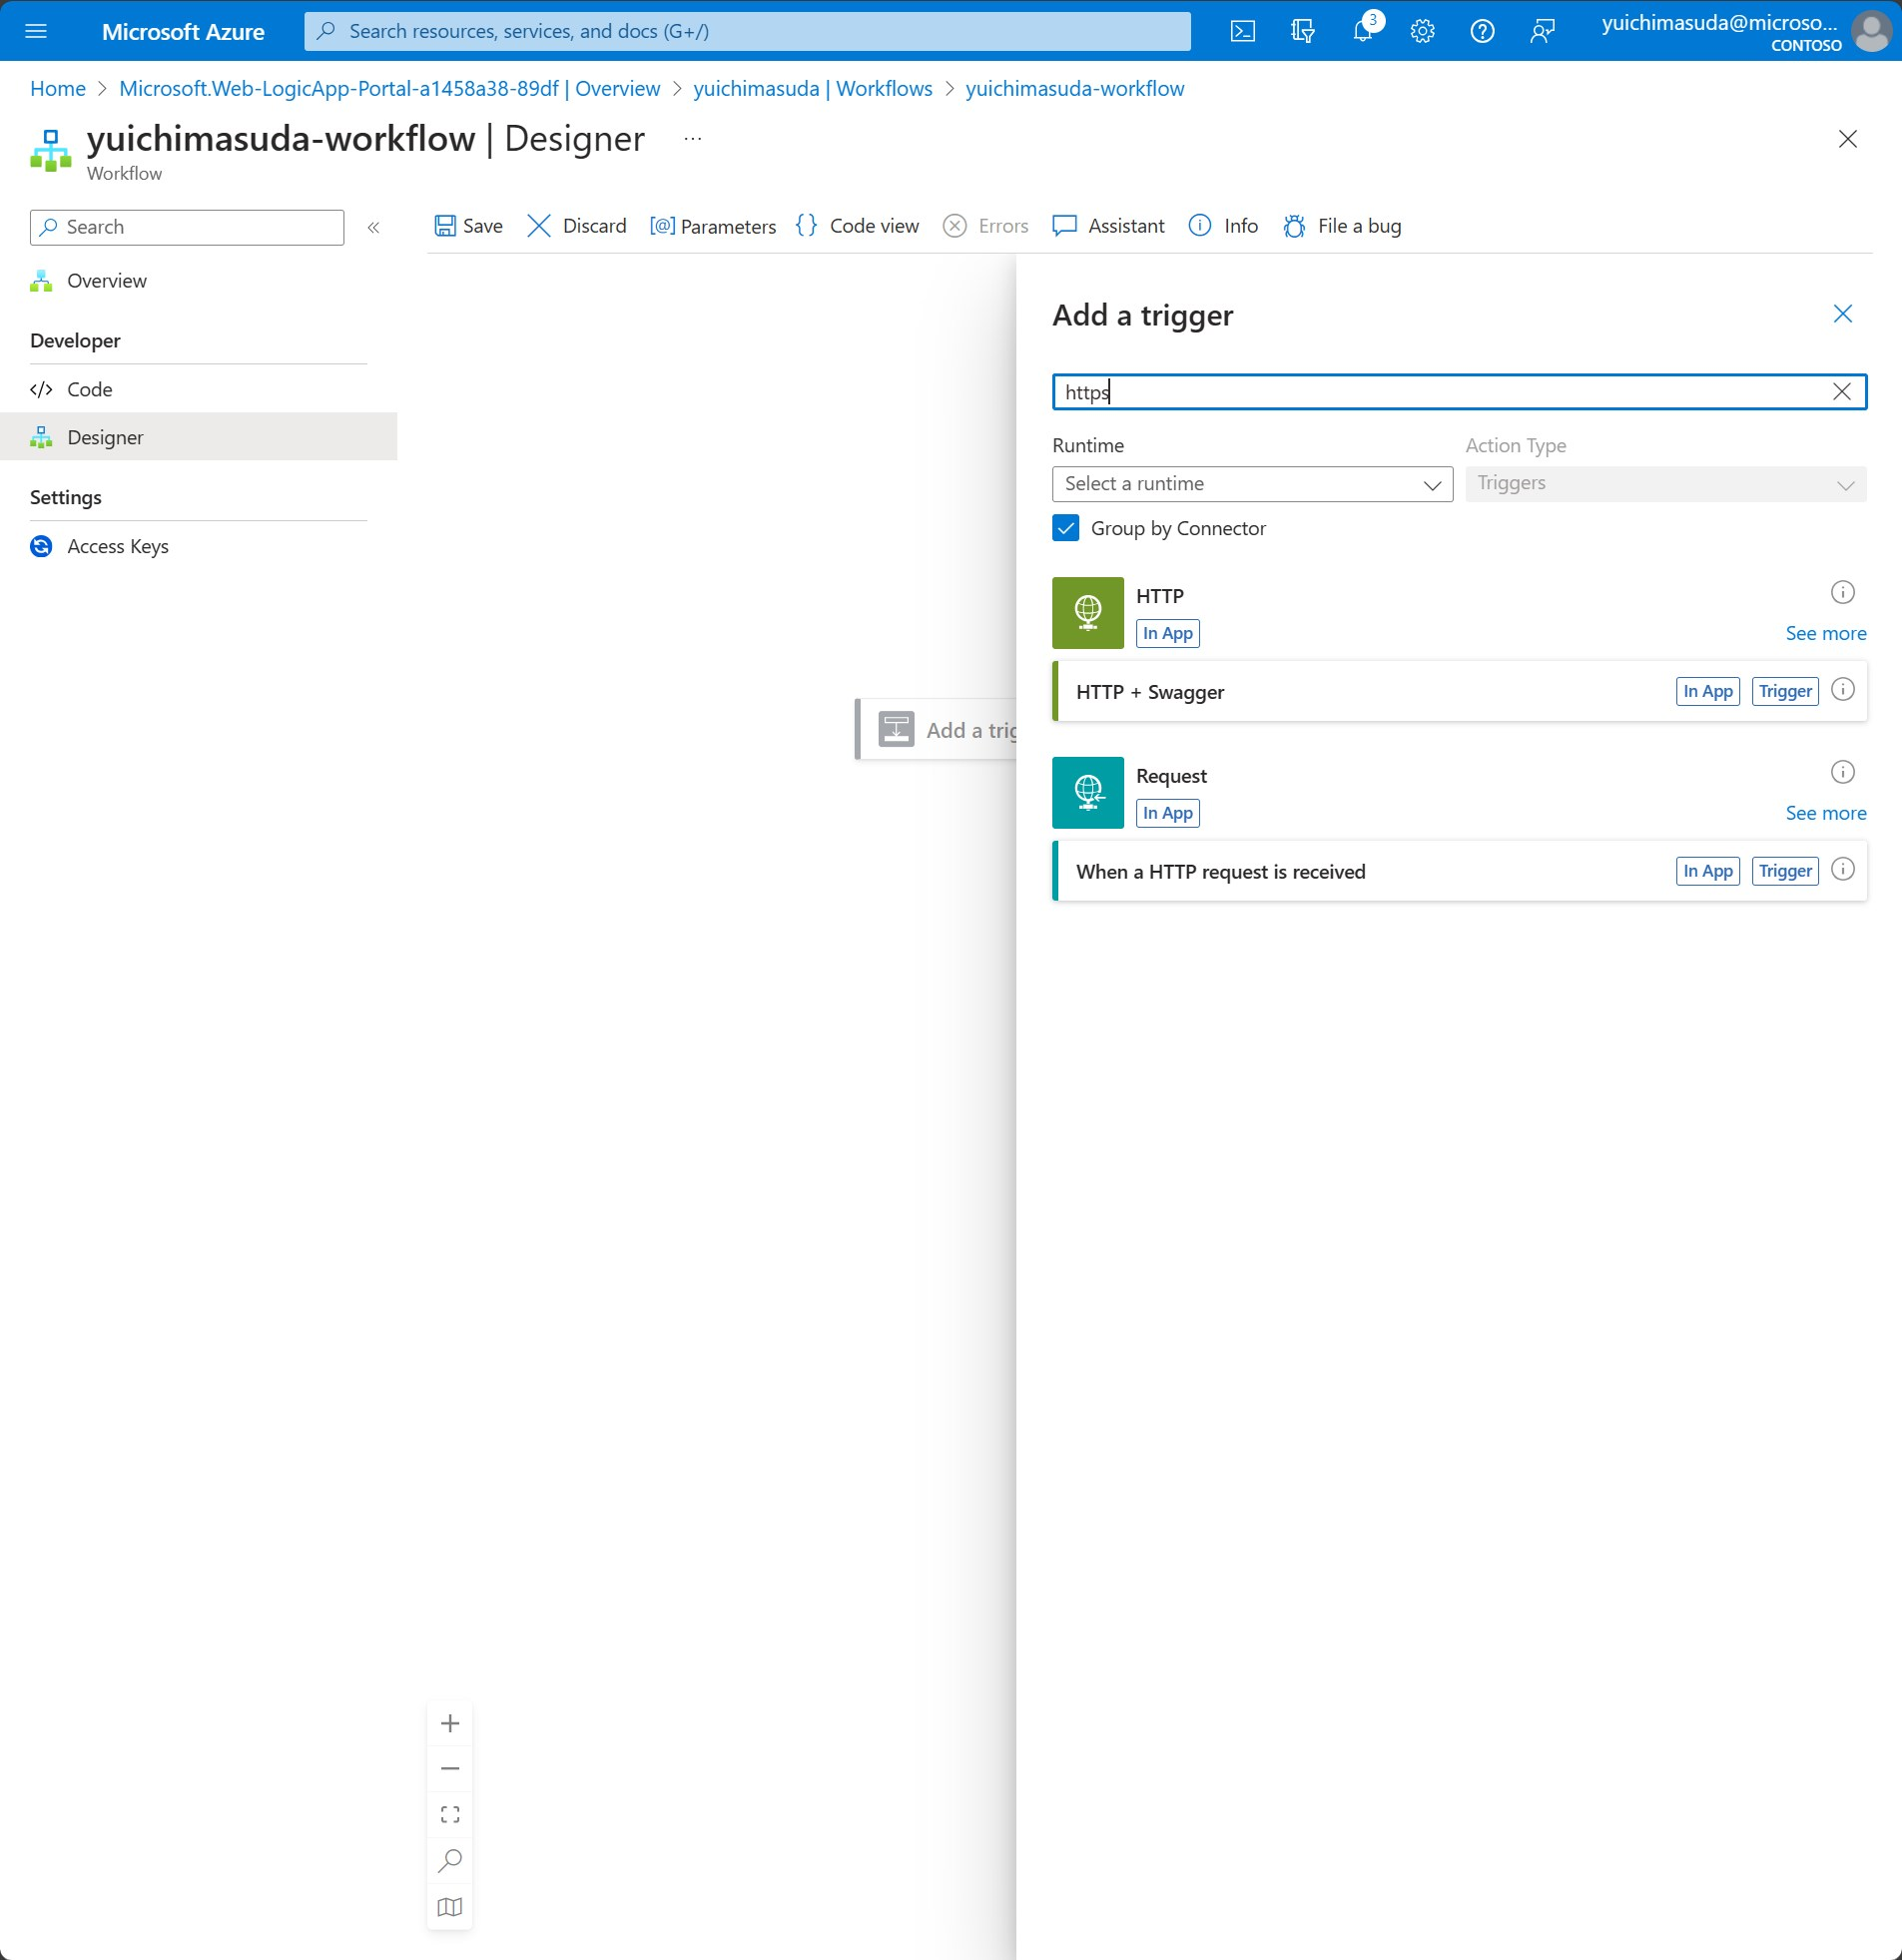
作成されたWorkflow、デザイナー、"Add a trigger"の順に選択すると、トリガー設定画面が表示されるので、検索バーに"https"と入力します。候補として"When a HTTP request is received"が表示されるので選択します。
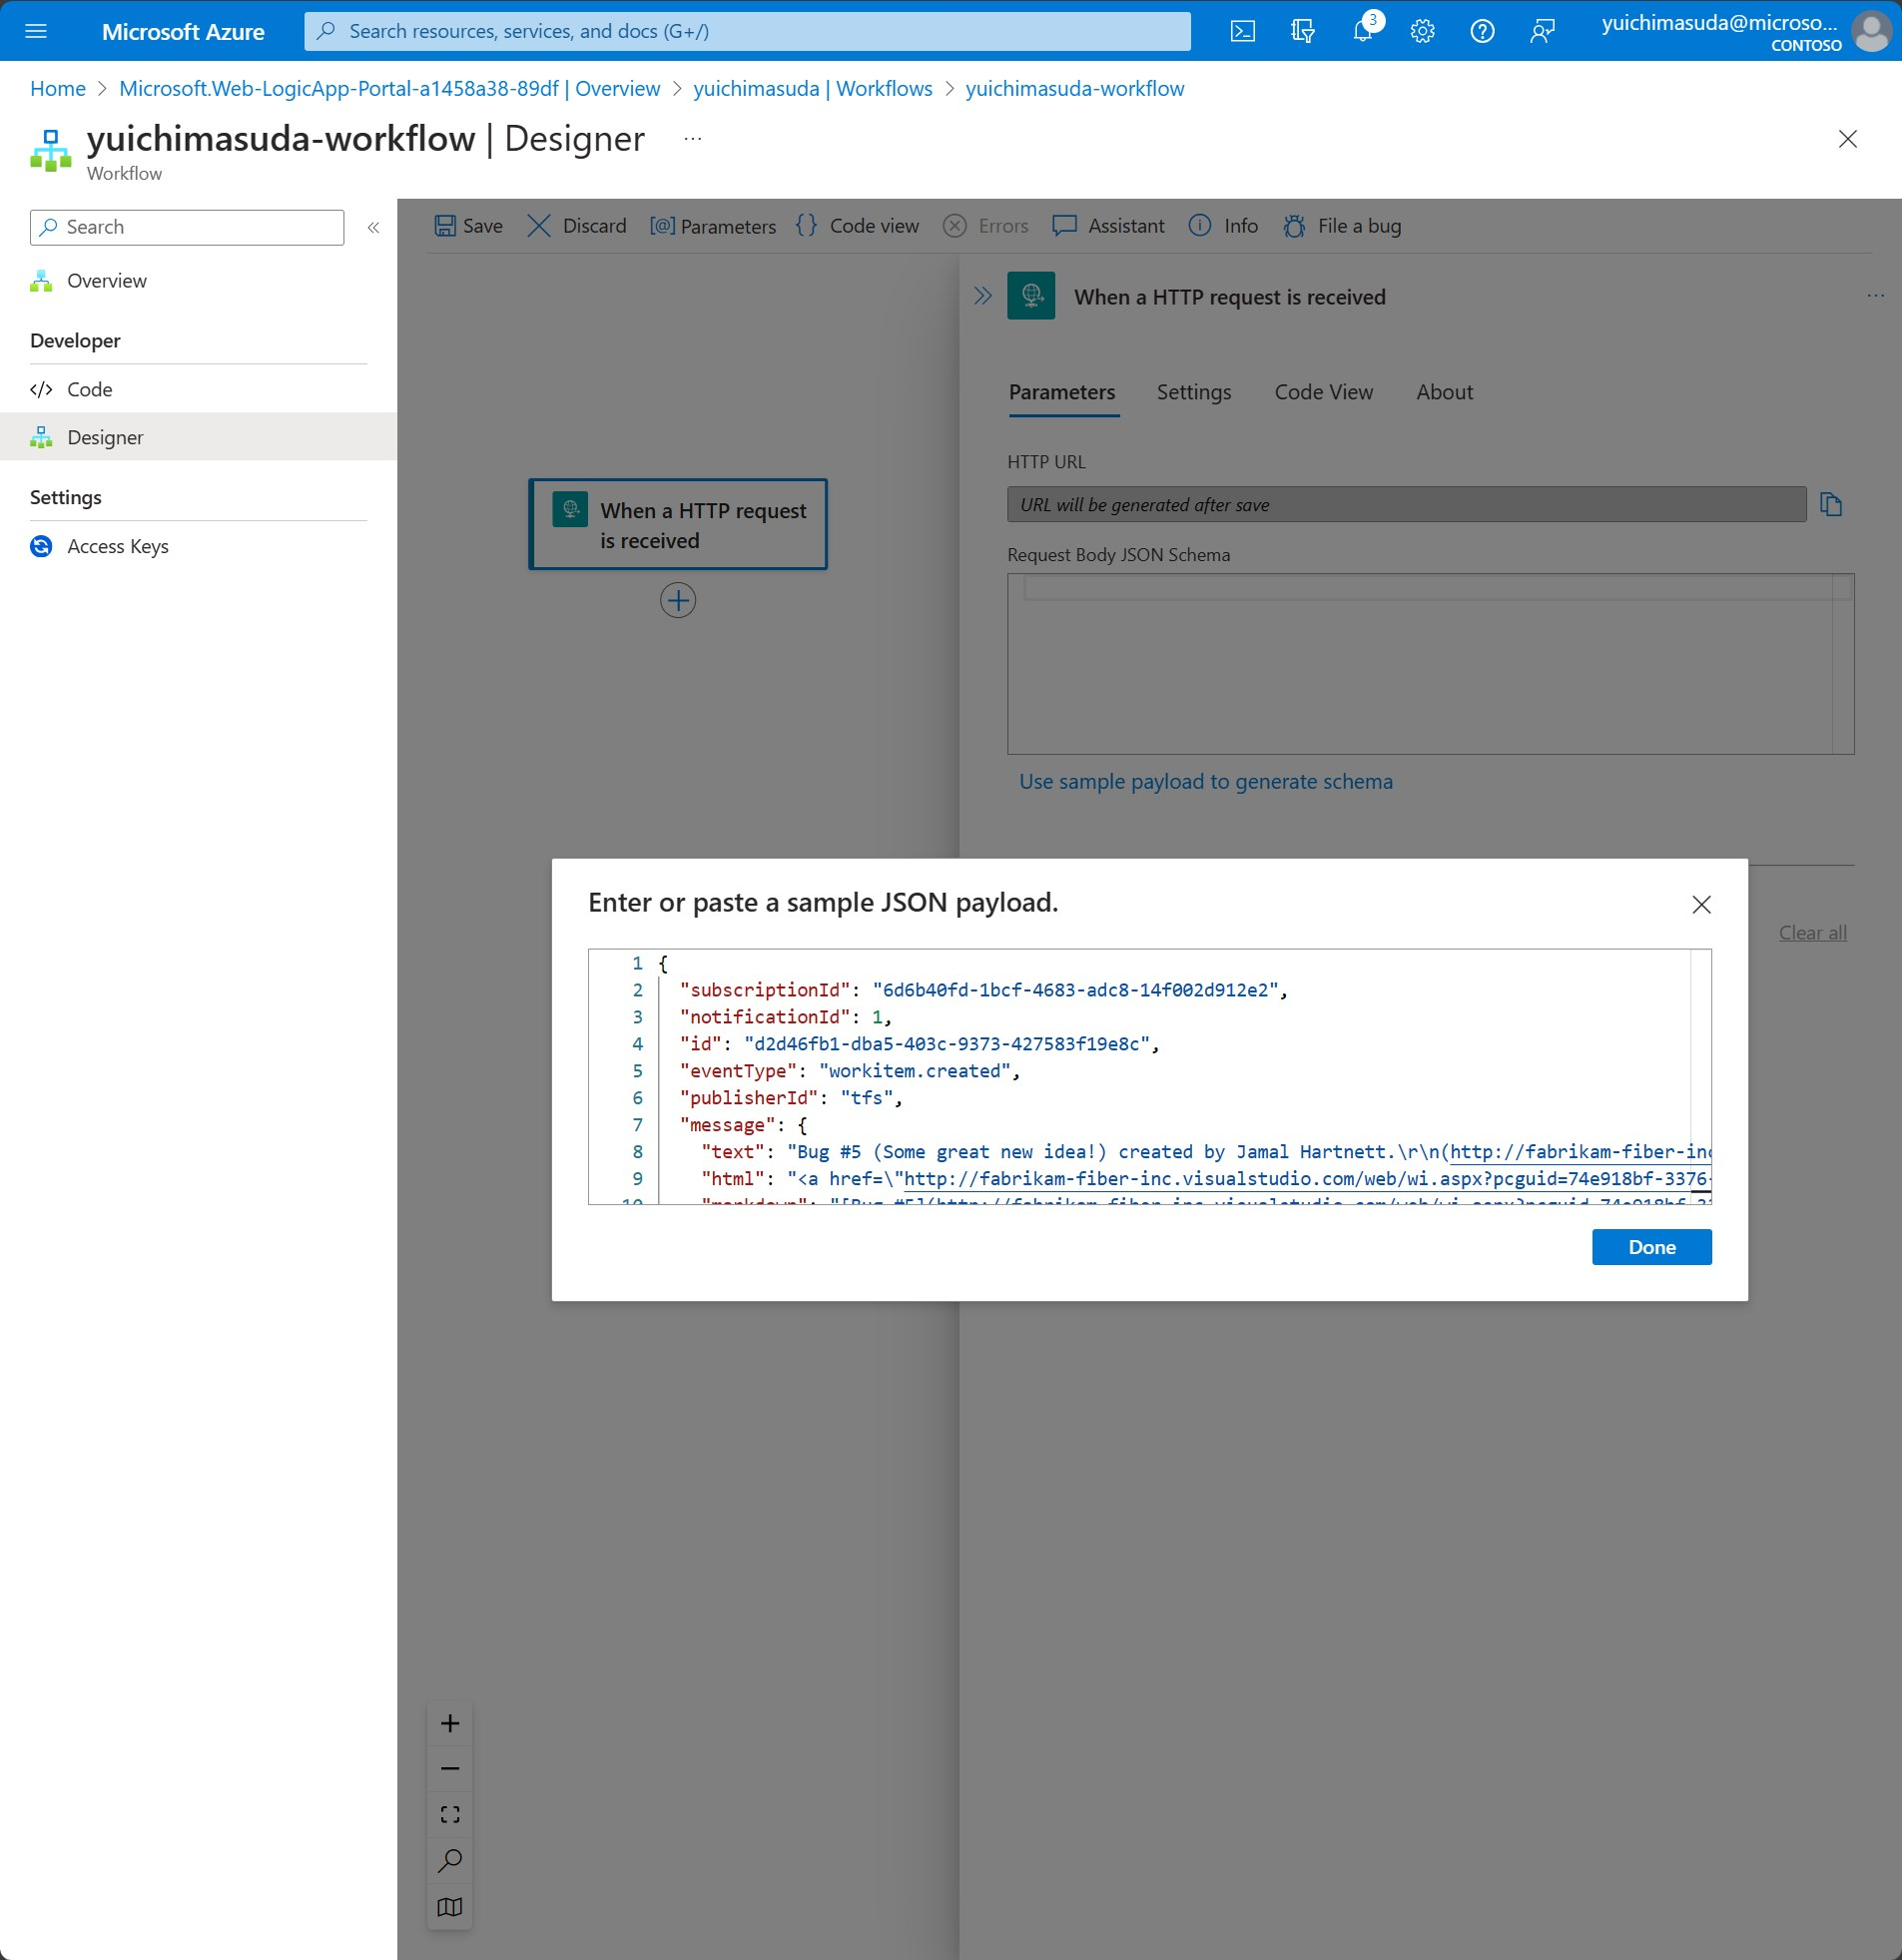
受信するHTTPの設定画面が表示されます。HTTP URLはトリガ作成後に自動で生成される為設定は不要で、ここでは"Request Body JSON Schema"に受信するHTTPのBody形式を記載します。"Use sample payload to generate schema"と表記されているリンクを選択すると、sampleのJSON payloadを記載する画面が表示されるので、先程AzureDevOpsのwebhookでテスト時にコピーしたContet:の中身をペーストし"Done"ボタンを選択します。
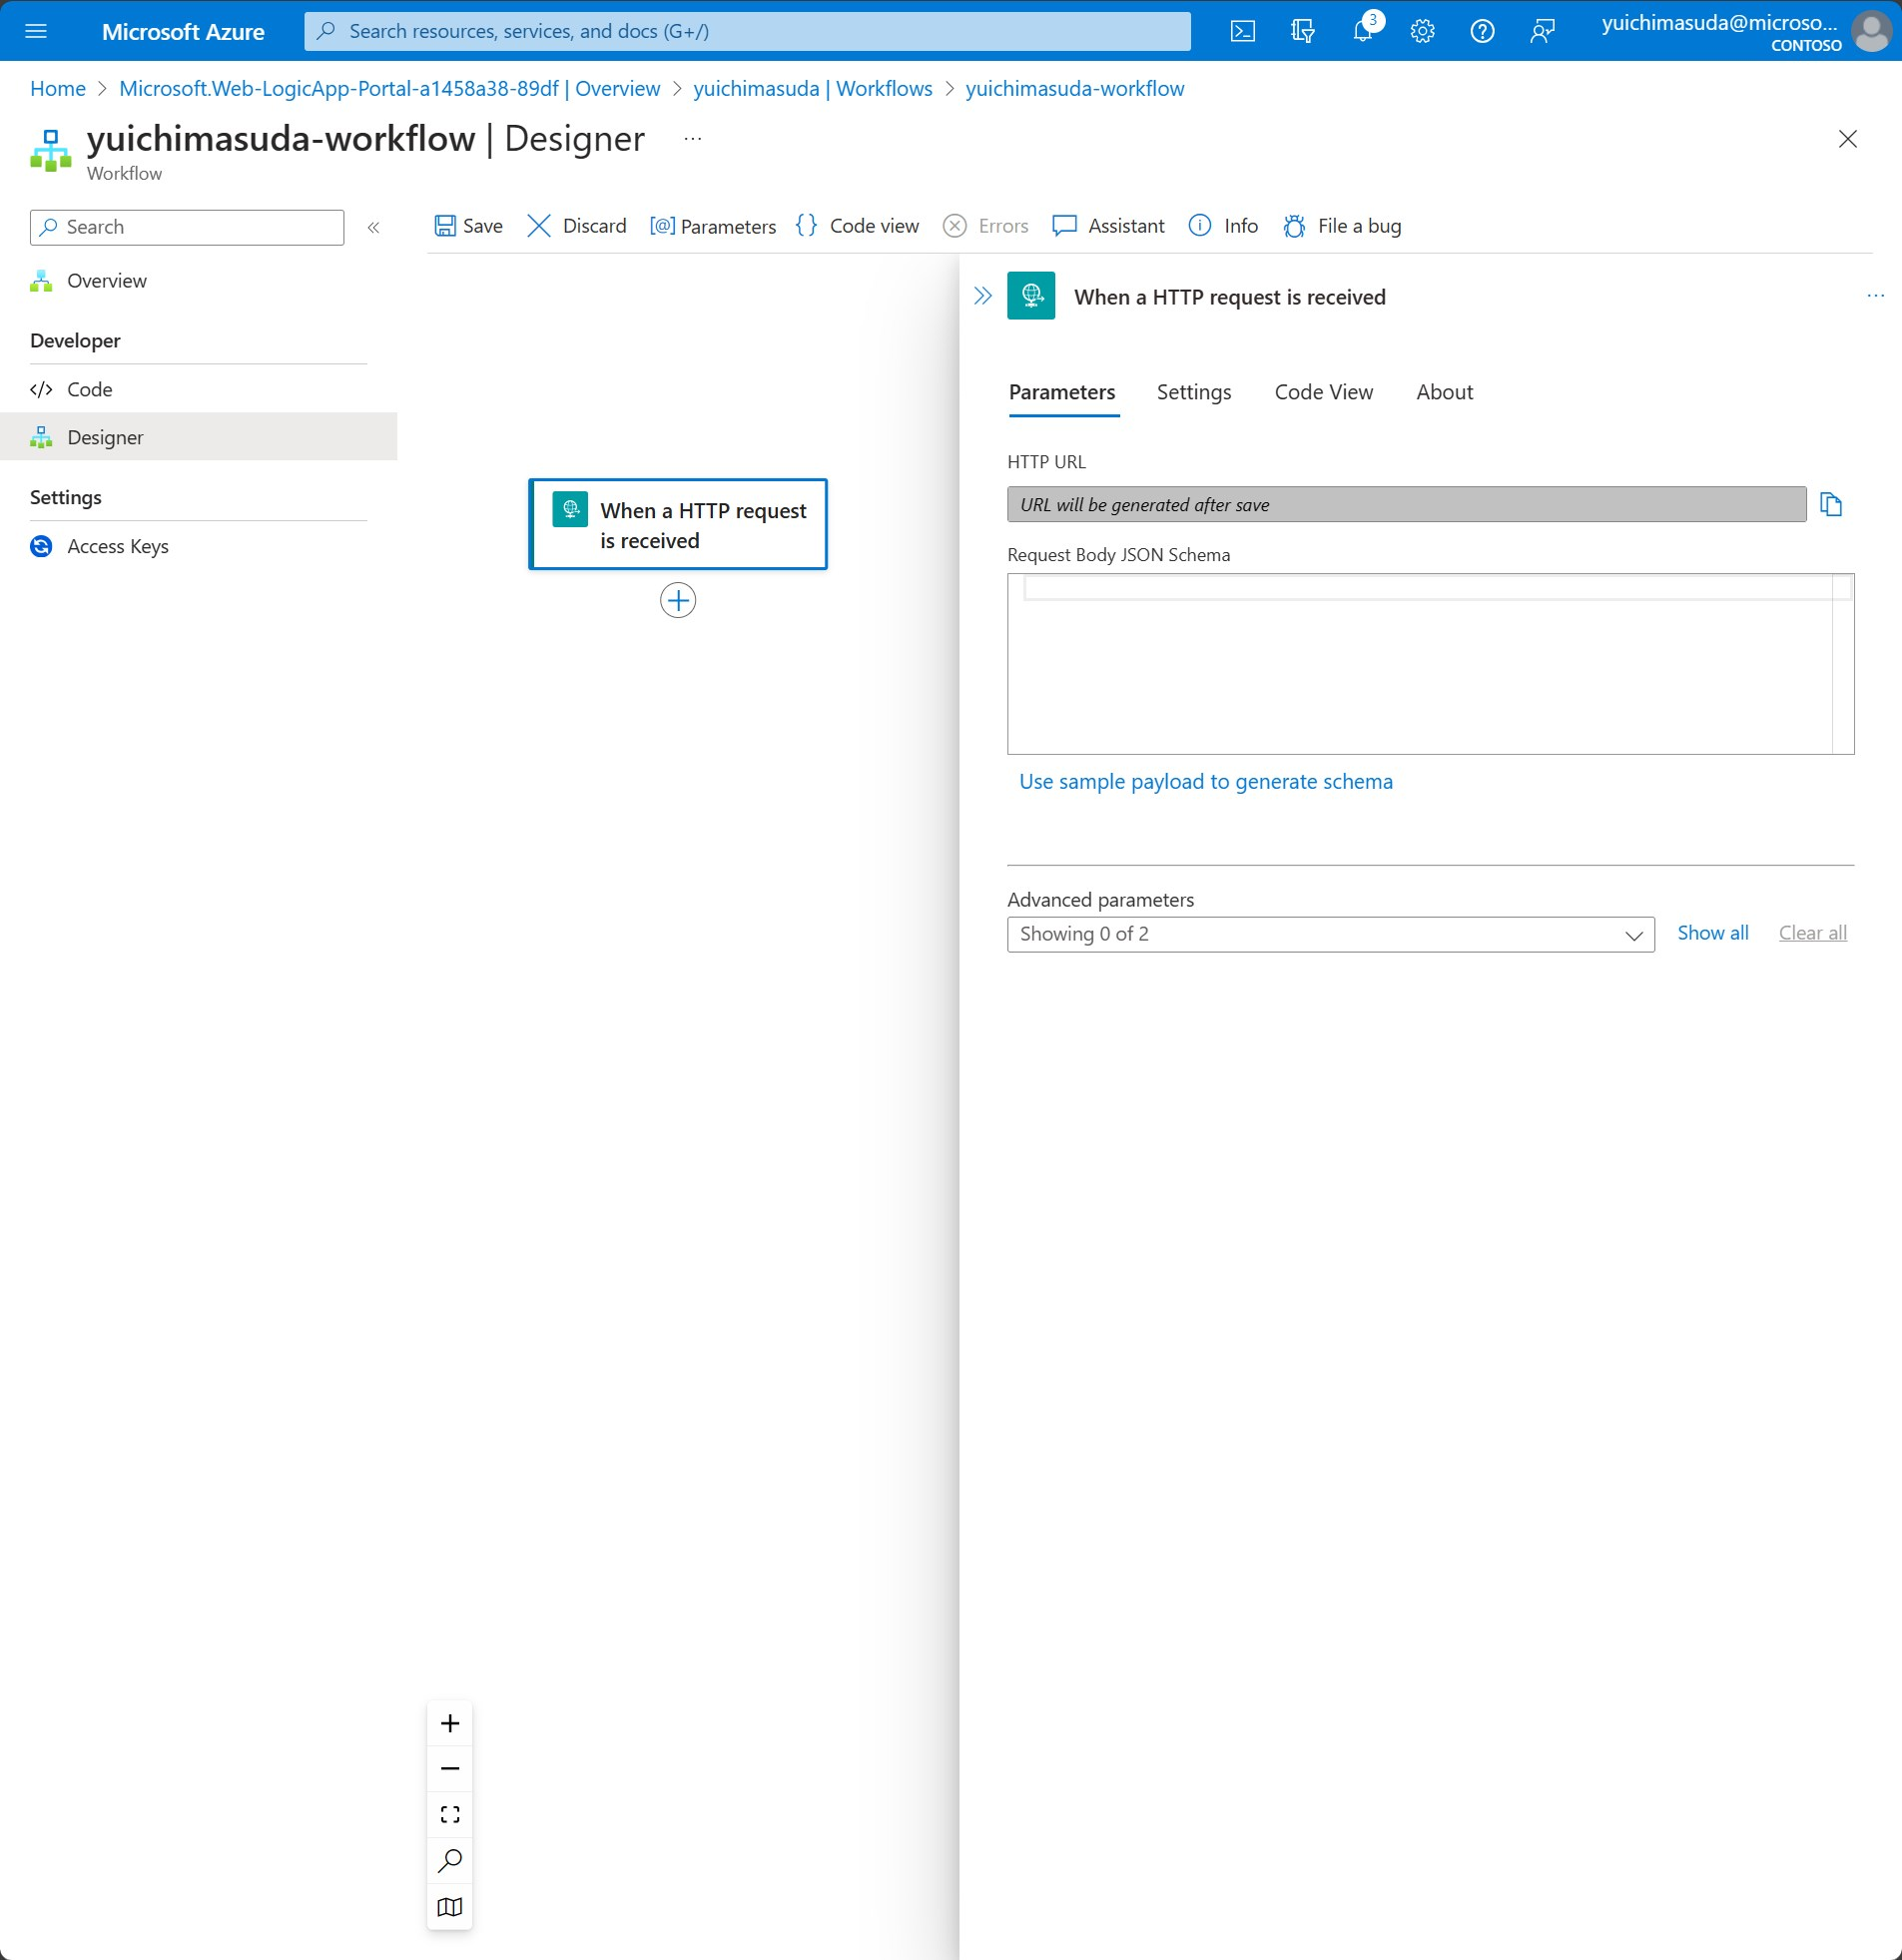
貼り付けたサンプルの内容をインプットにBODYの形式が反映されます。
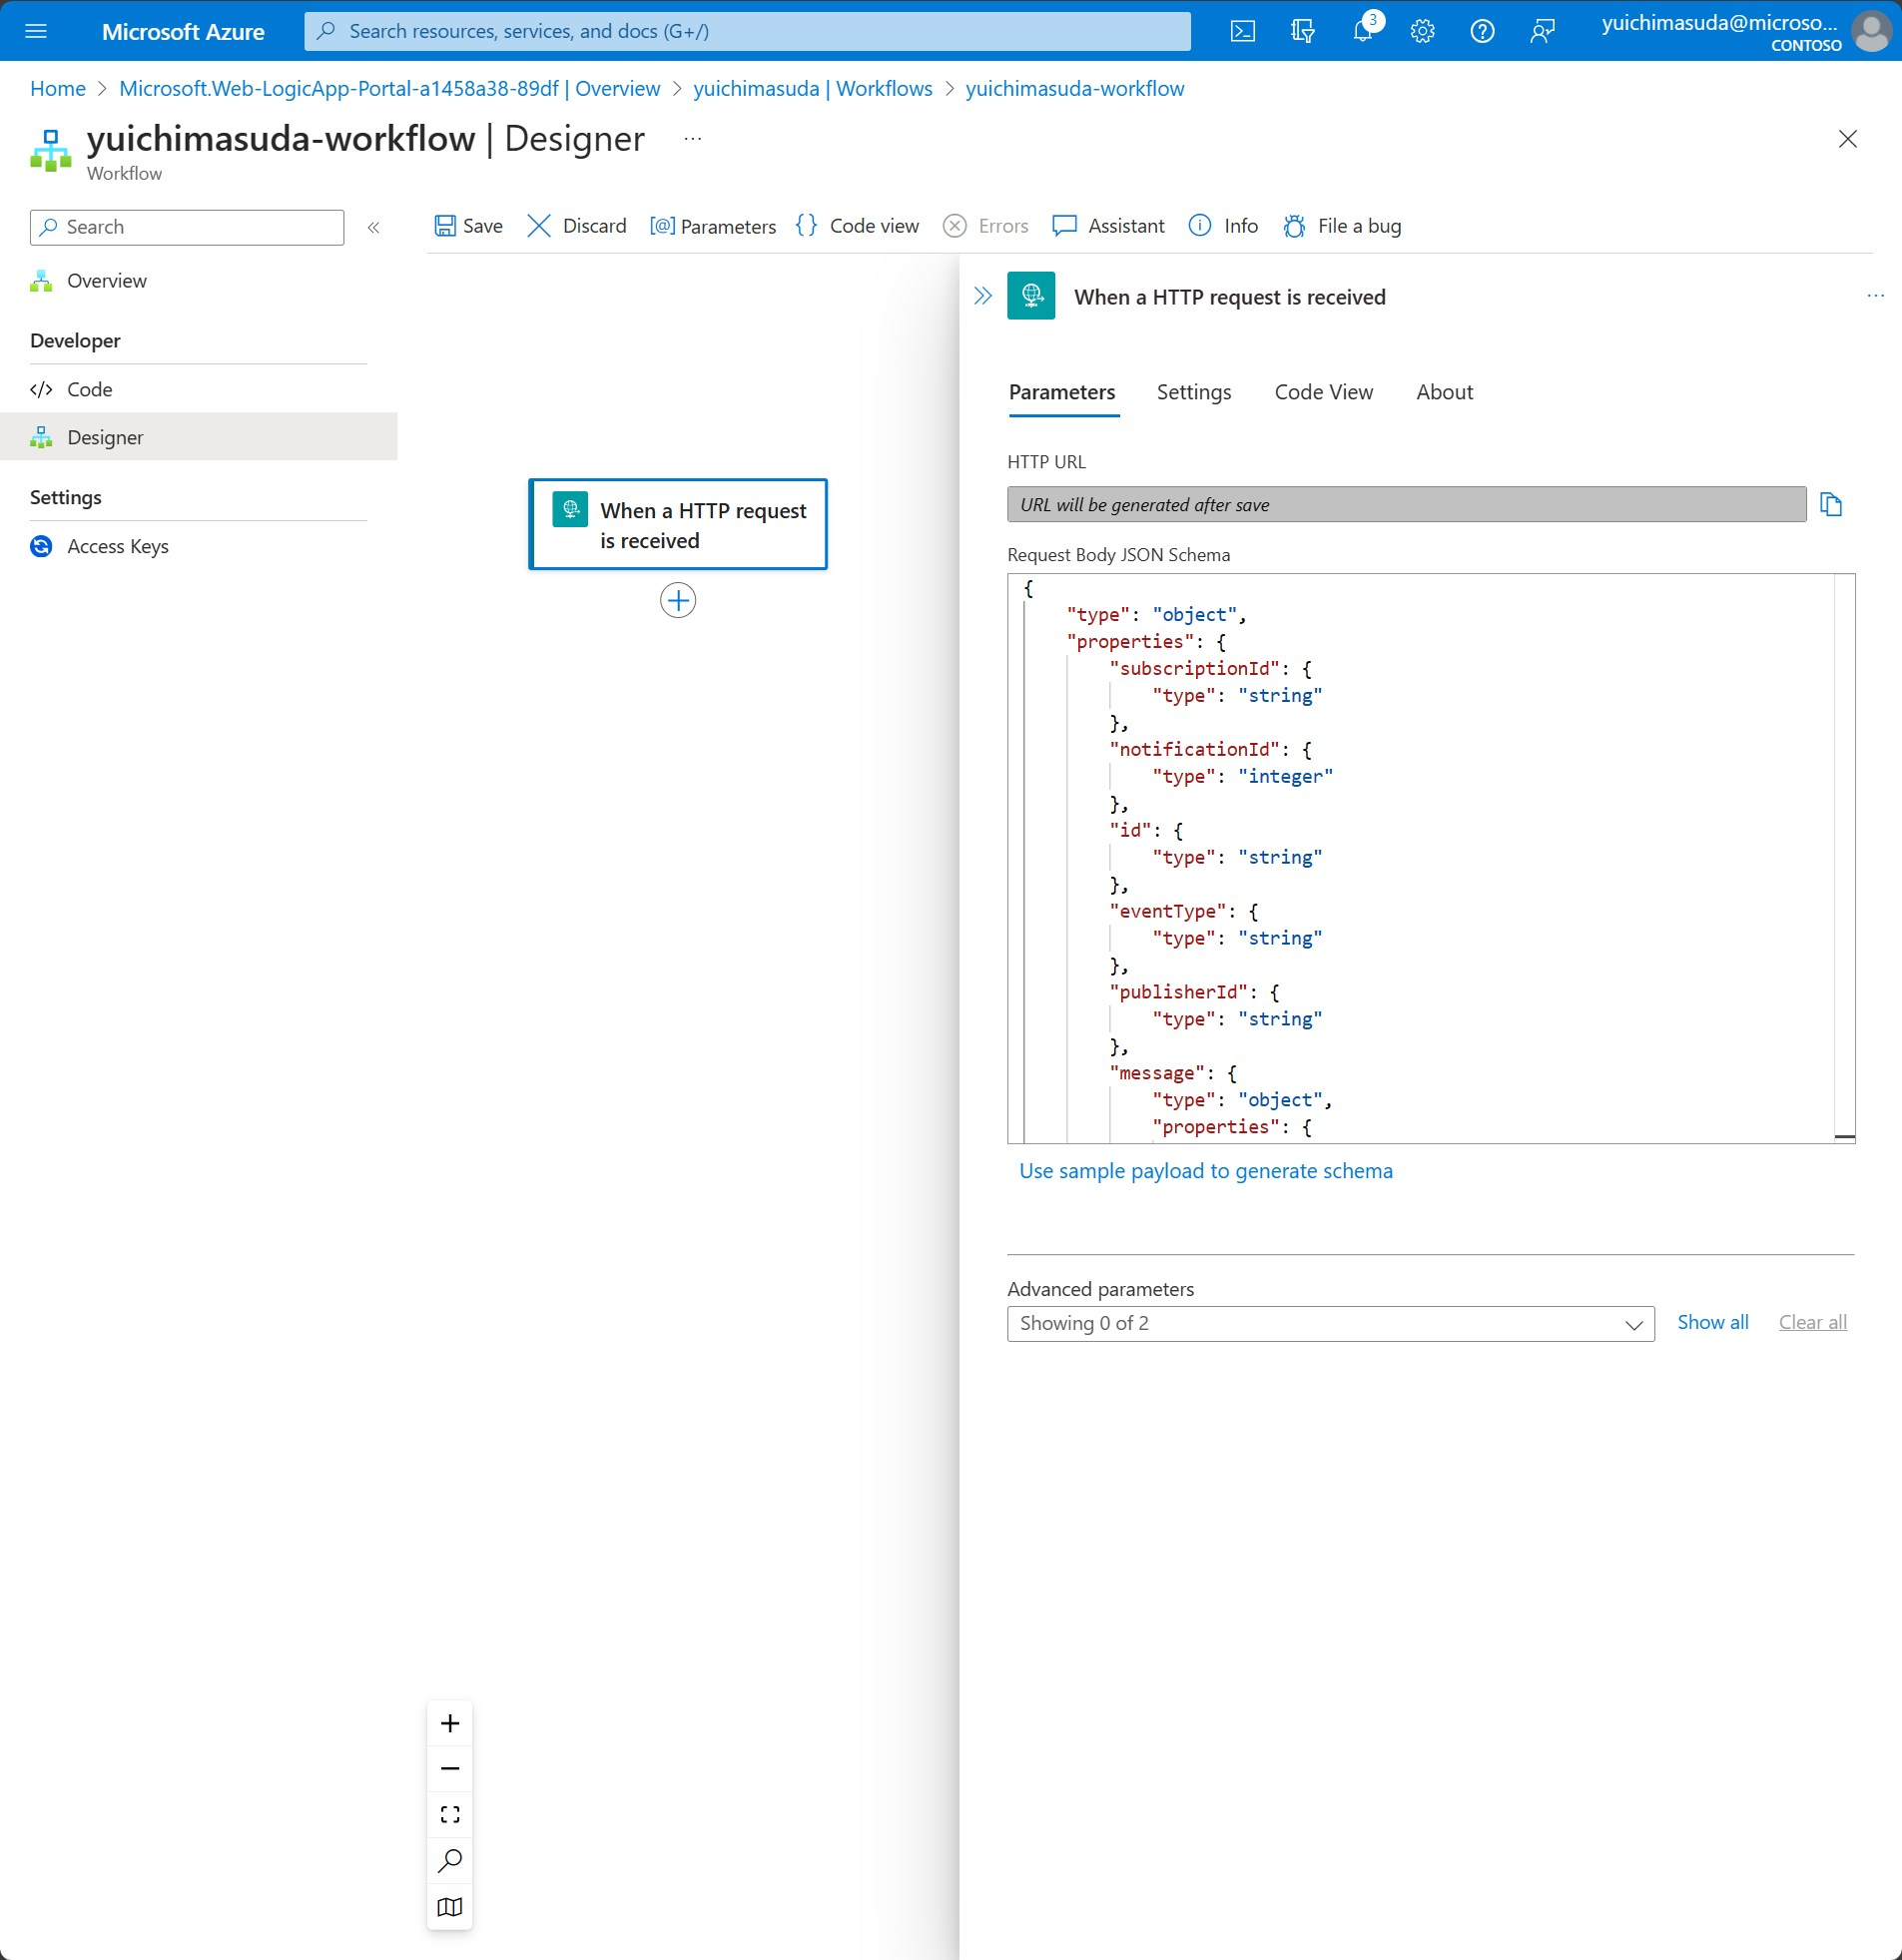
以上、Logic Appのトリガの設定は完了です。トリガを作成した時点でURLが生成されるので、Azure DevOpsのWeb Hook作成時に設定したダミーのURLを、Logic Appが生成したURLに置換しておいてください。
続けて、Logic Appのトリガ後のアクションを定義していきます。
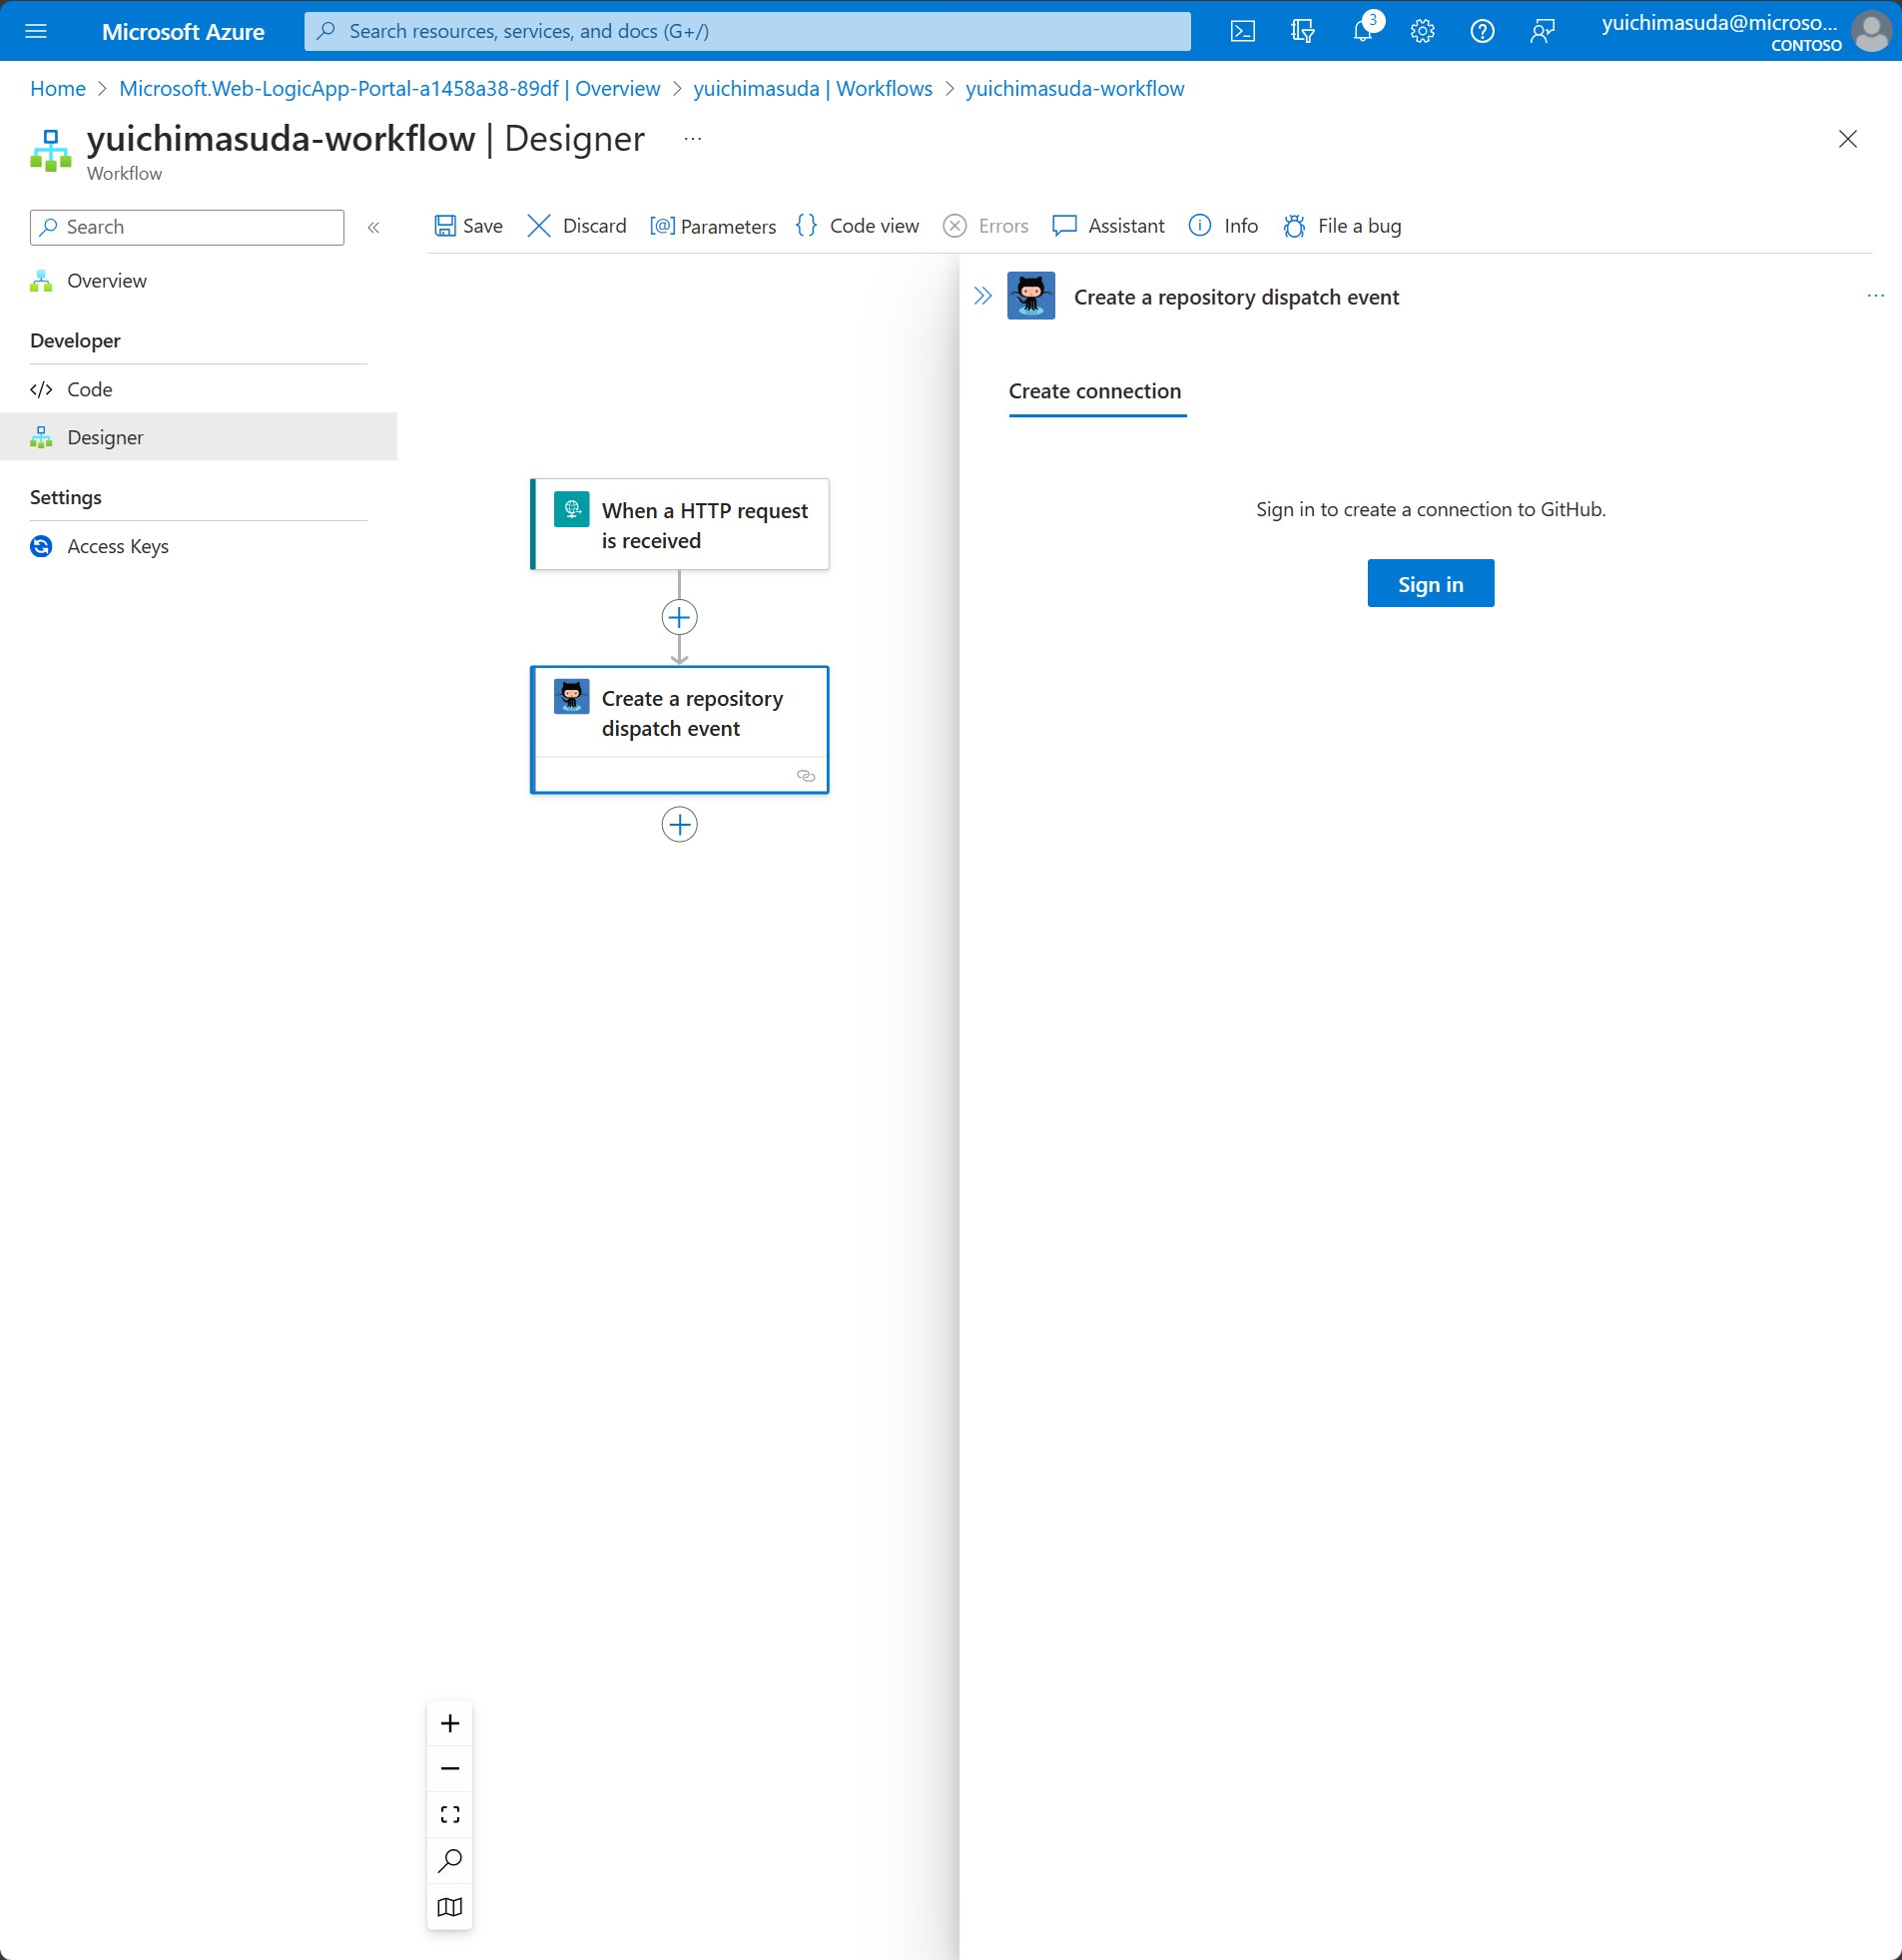
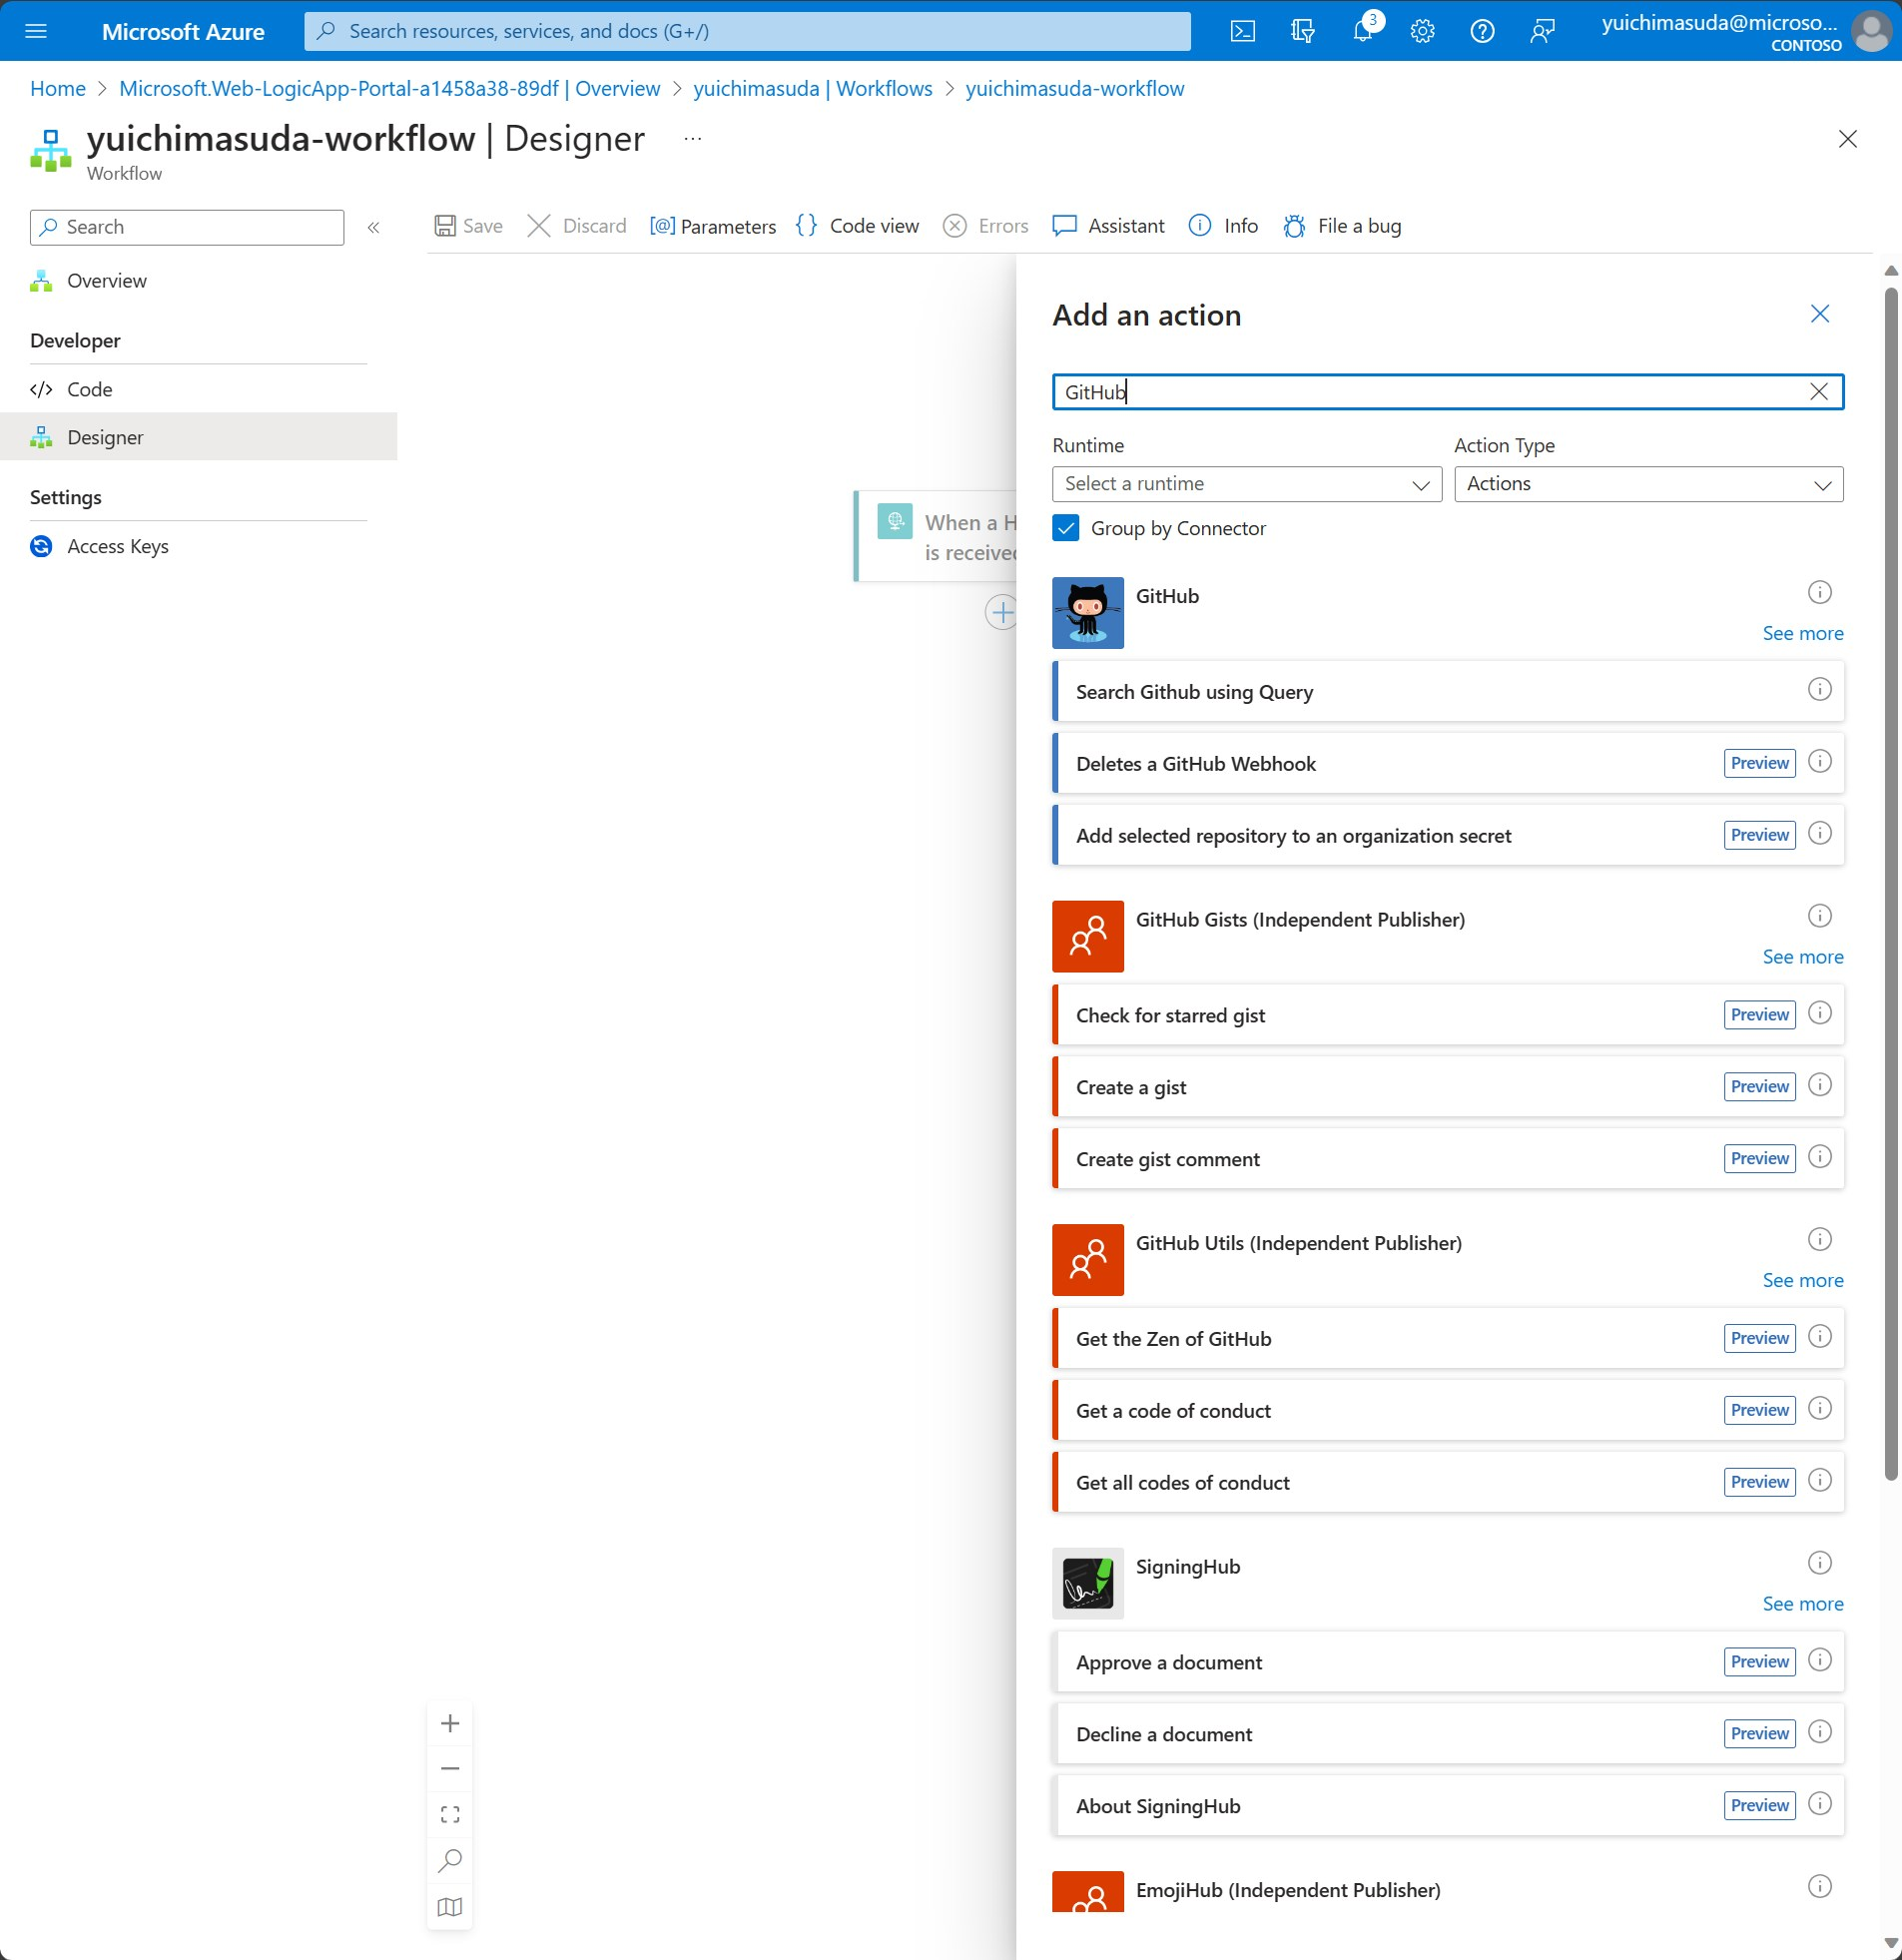
"Add an action"アイコンがトリガ作成後に表示されるので選択すると右にアクションとして利用するサービスの一覧が表示されます。検索バーに"GitHub"と入力するとGitHubに関するサービスが表示されます。続けて"GitHub"の"See more"を選択しGitHubのサービス一覧を表示させます。
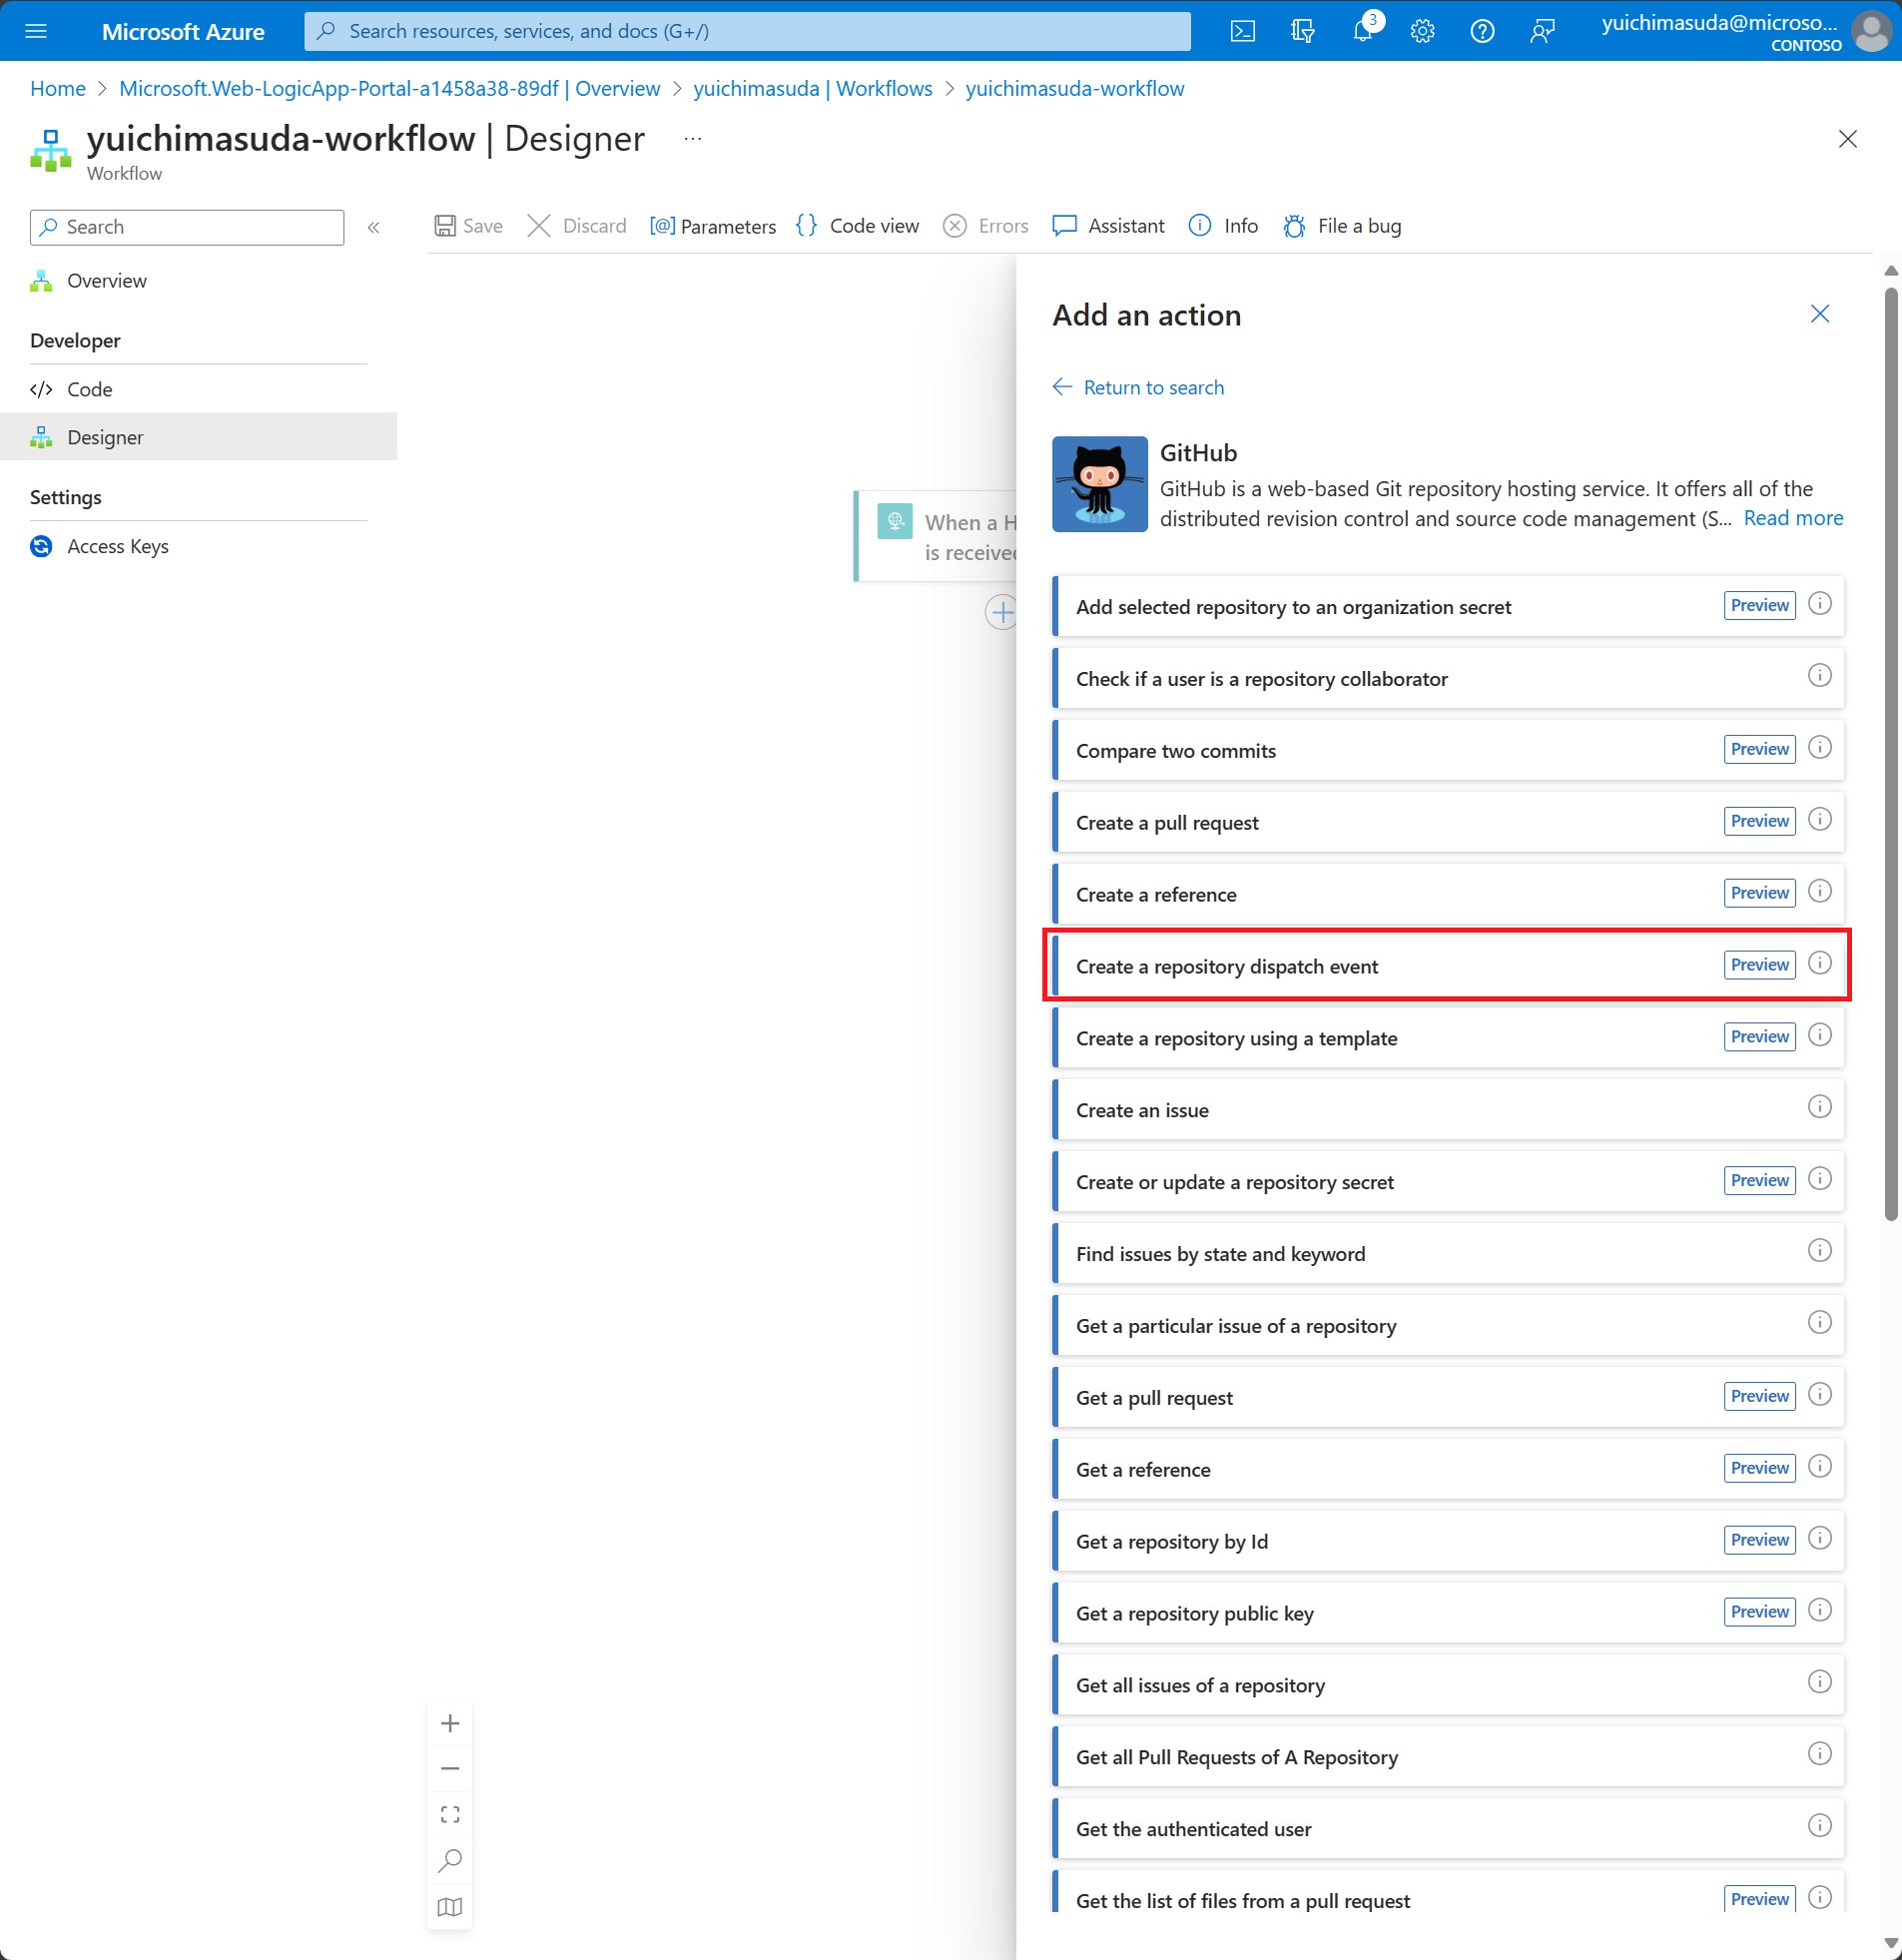
"Create a repository dispatch event"を選択します。
無事認証が成功すると、"Create a repository dispatch event"の設定画面が表示されます。GitHub Actionsを動作させるリポジトリと所有者の情報を設定します。また、GitHub Actionsに連携するBODYの情報も以下画面の様に設定します。
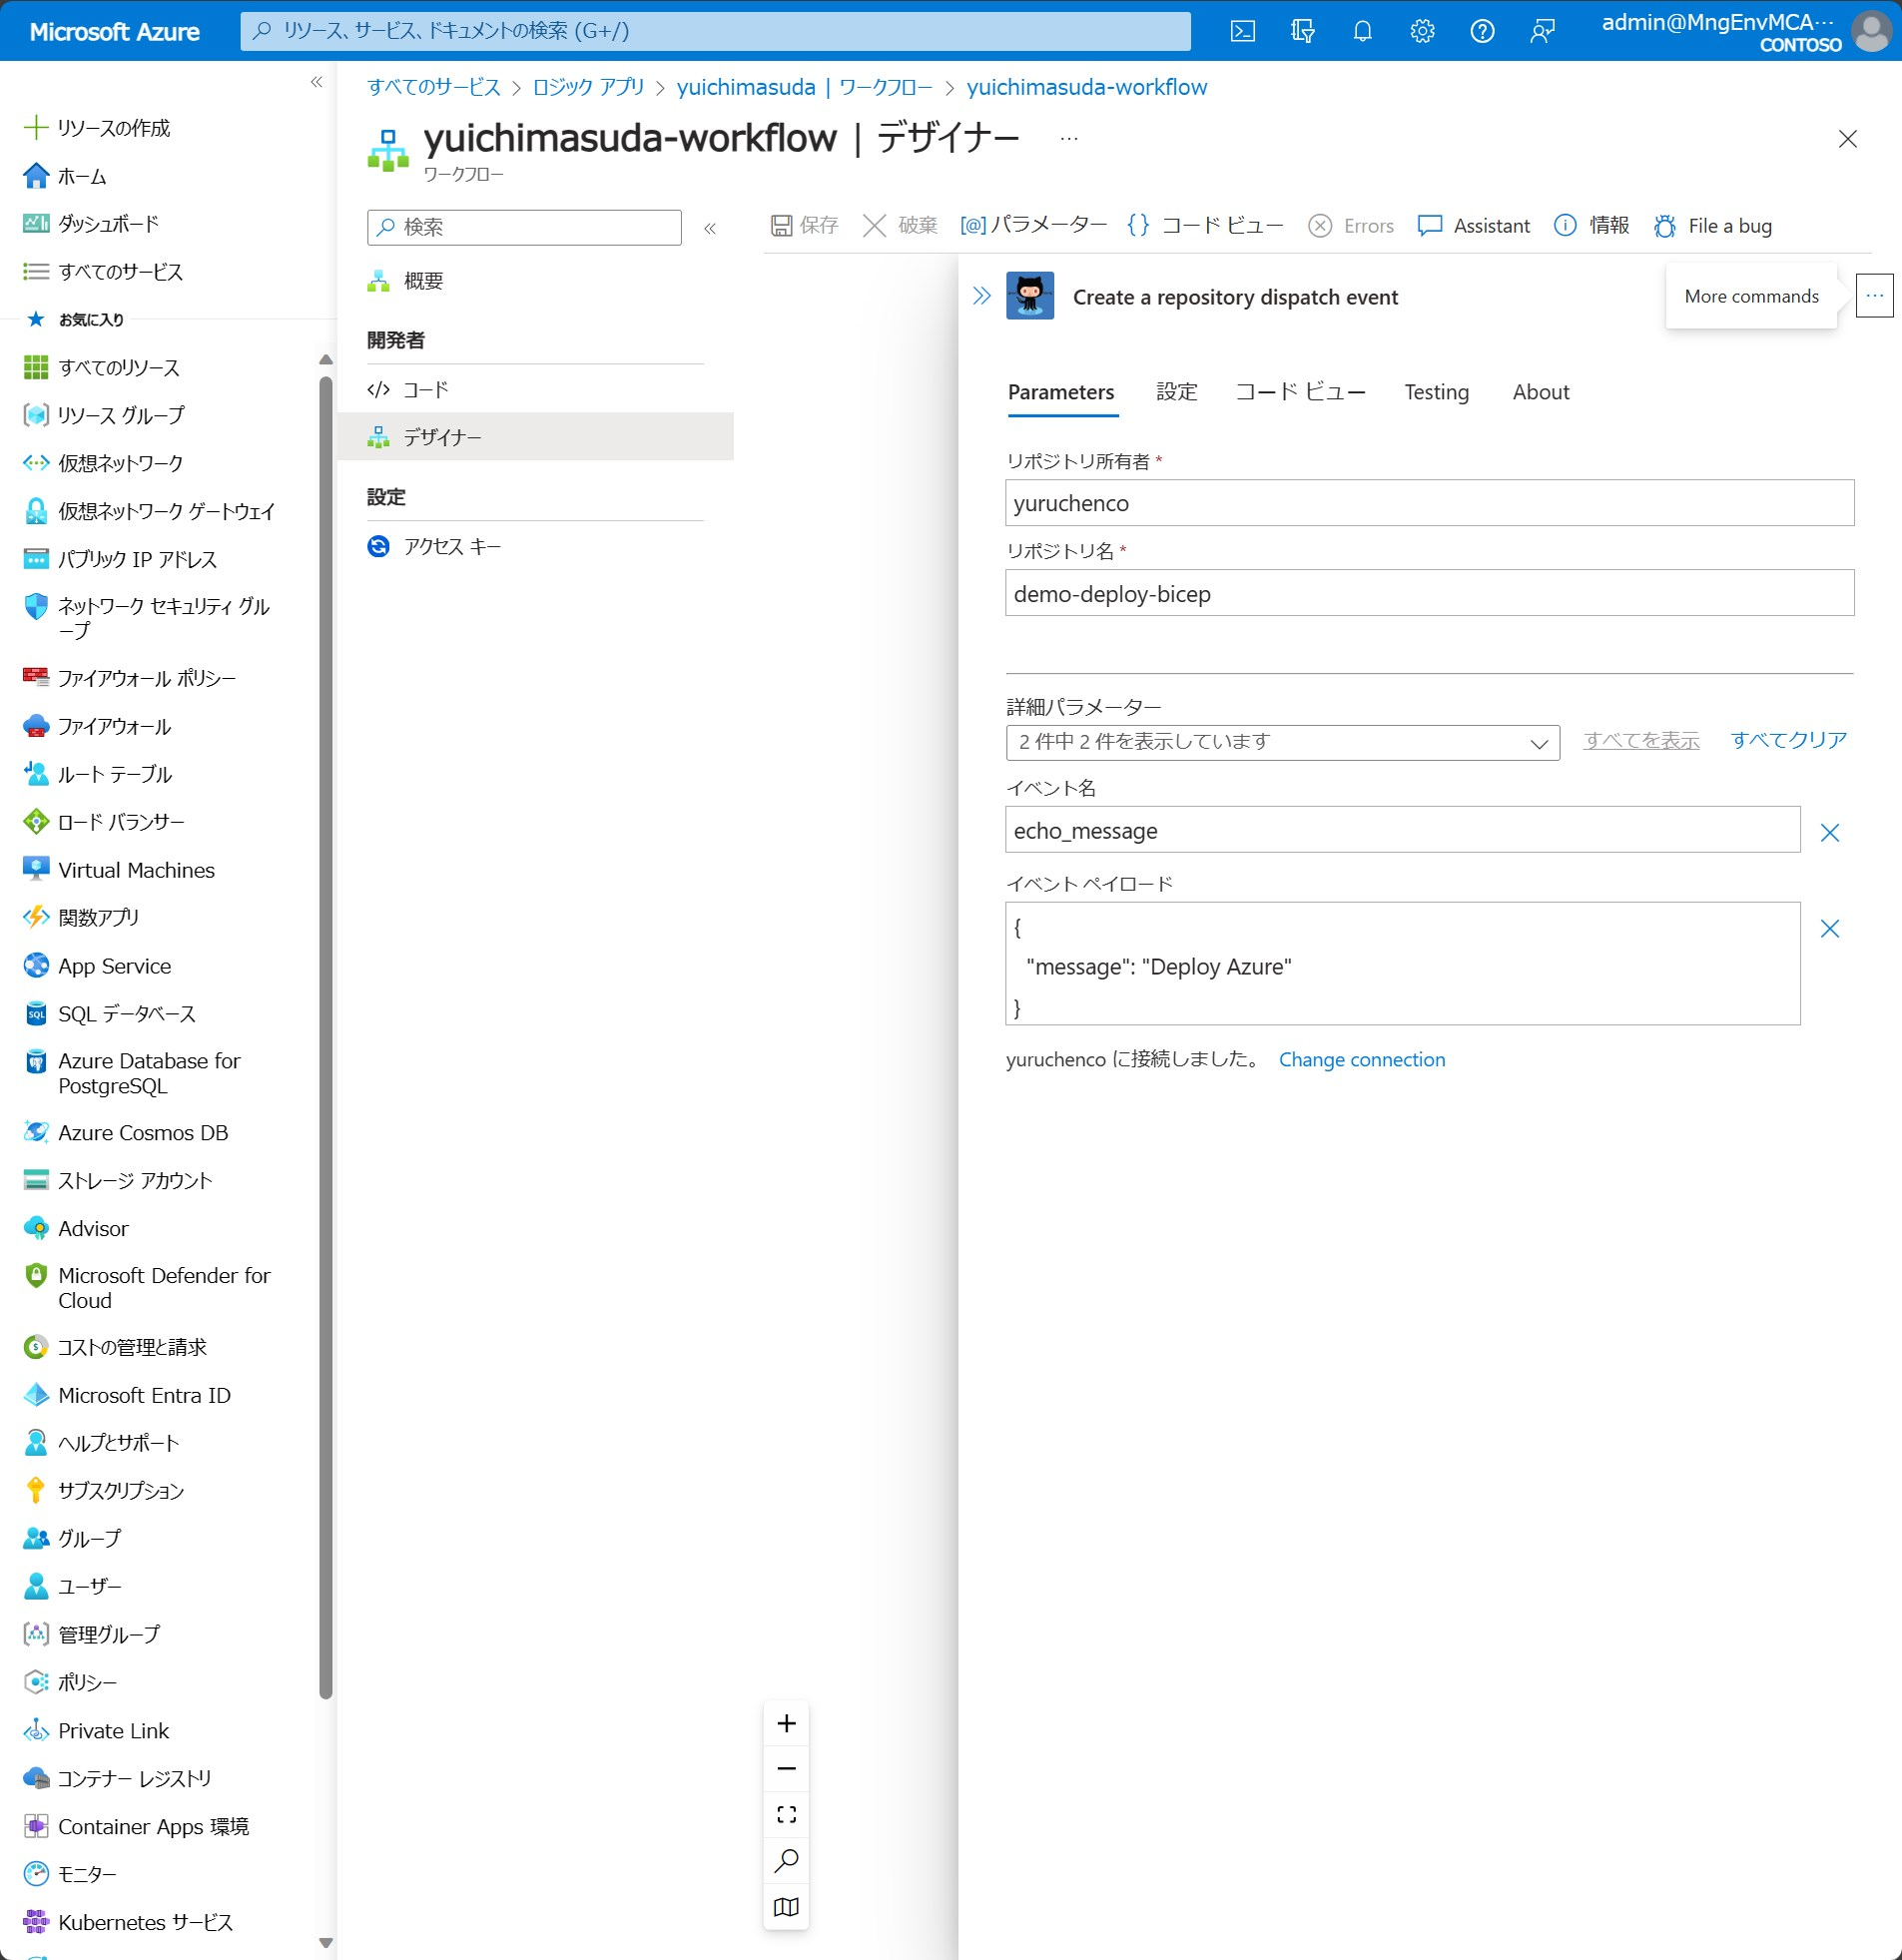
以上でLogic Appの設定は完了となります。
GitHub Actions
GitHub Actionsの設定をします。
まずGitHub ActionsからAzureへ接続する為、シークレット情報をGitHub側に設定します。
今回は、対象のリソースグループにAzureリソースをデプロイする前提とし、デプロイ先リソースグループ向けの"共同作成者"ロールを持つ資格情報を生成し、そのシークレットをGitHubに設定していきます。※他にもアプリの登録から設定する等、他にも方法はあります。
スコープをリソースグループexampleRGに共同作成者権限を持つ資格情報を作成するコマンドを実行します。
az ad sp create-for-rbac --name myApp --role contributor --scopes /subscriptions/(SubscriptionID)/resourceGroups/exampleRG --sdk-auth
出力結果が以下の様に表示されます。
※clientID,clientSecret,subscriptionID,tenantIDはマスキングしています。
{
  "clientId": "xxxxxxxx-xxxx-xxxx-xxxx-xxxxxxxxxxxx",
  "clientSecret": "xxxxxxxxxxxxxxxxxxxxxxxxxxxxxxxxxxxxxxxx",
  "subscriptionId": "xxxxxxxx-xxxx-xxxx-xxxx-xxxxxxxxxxxx",
  "tenantId": "xxxxxxxx-xxxx-xxxx-xxxx-xxxxxxxxxxxx",
  "activeDirectoryEndpointUrl": "https://login.microsoftonline.com",
  "resourceManagerEndpointUrl": "https://management.azure.com/",
  "activeDirectoryGraphResourceId": "https://graph.windows.net/",
  "sqlManagementEndpointUrl": "https://management.core.windows.net:8443/",
  "galleryEndpointUrl": "https://gallery.azure.com/",
  "managementEndpointUrl": "https://management.core.windows.net/"
}
上記情報をGitHub側に設定していきます。
GitHubのrepositoryの画面でSettings > Secrets and variables > Actionsの順に選択します。
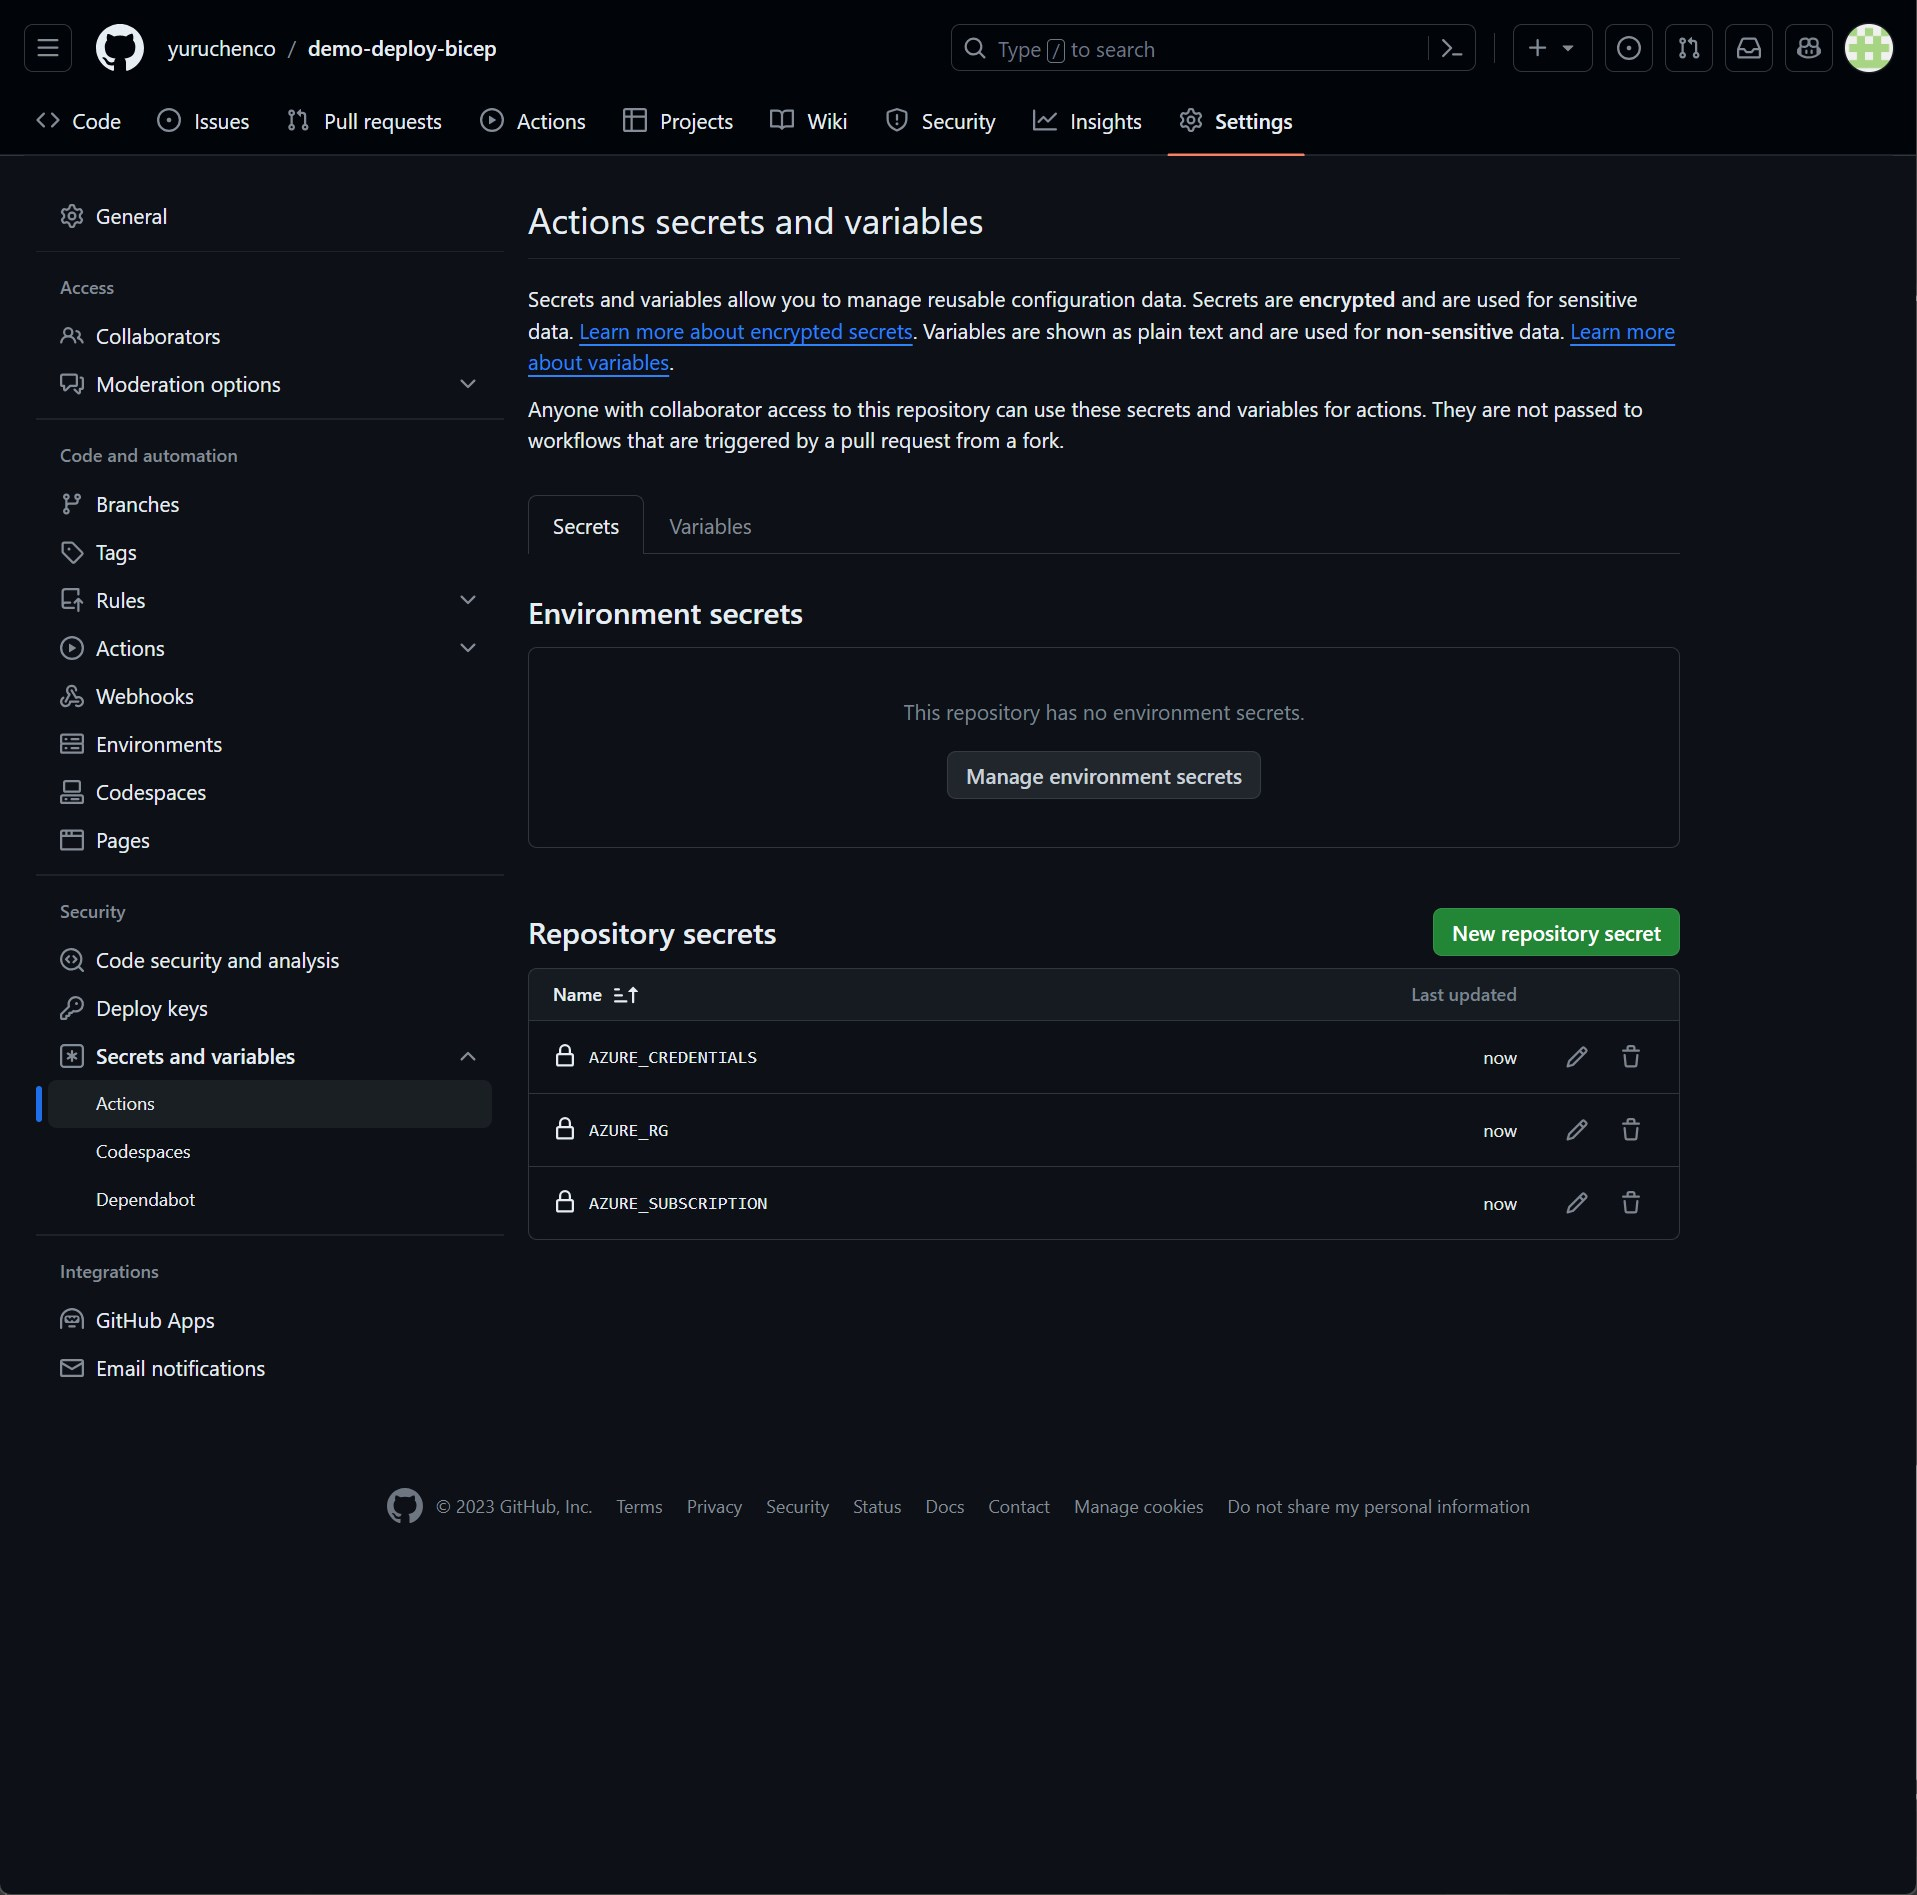
"New repositry secret"ボタンを選択すると、シークレット登録画面が表示されるので、NameとSecretを設定します。
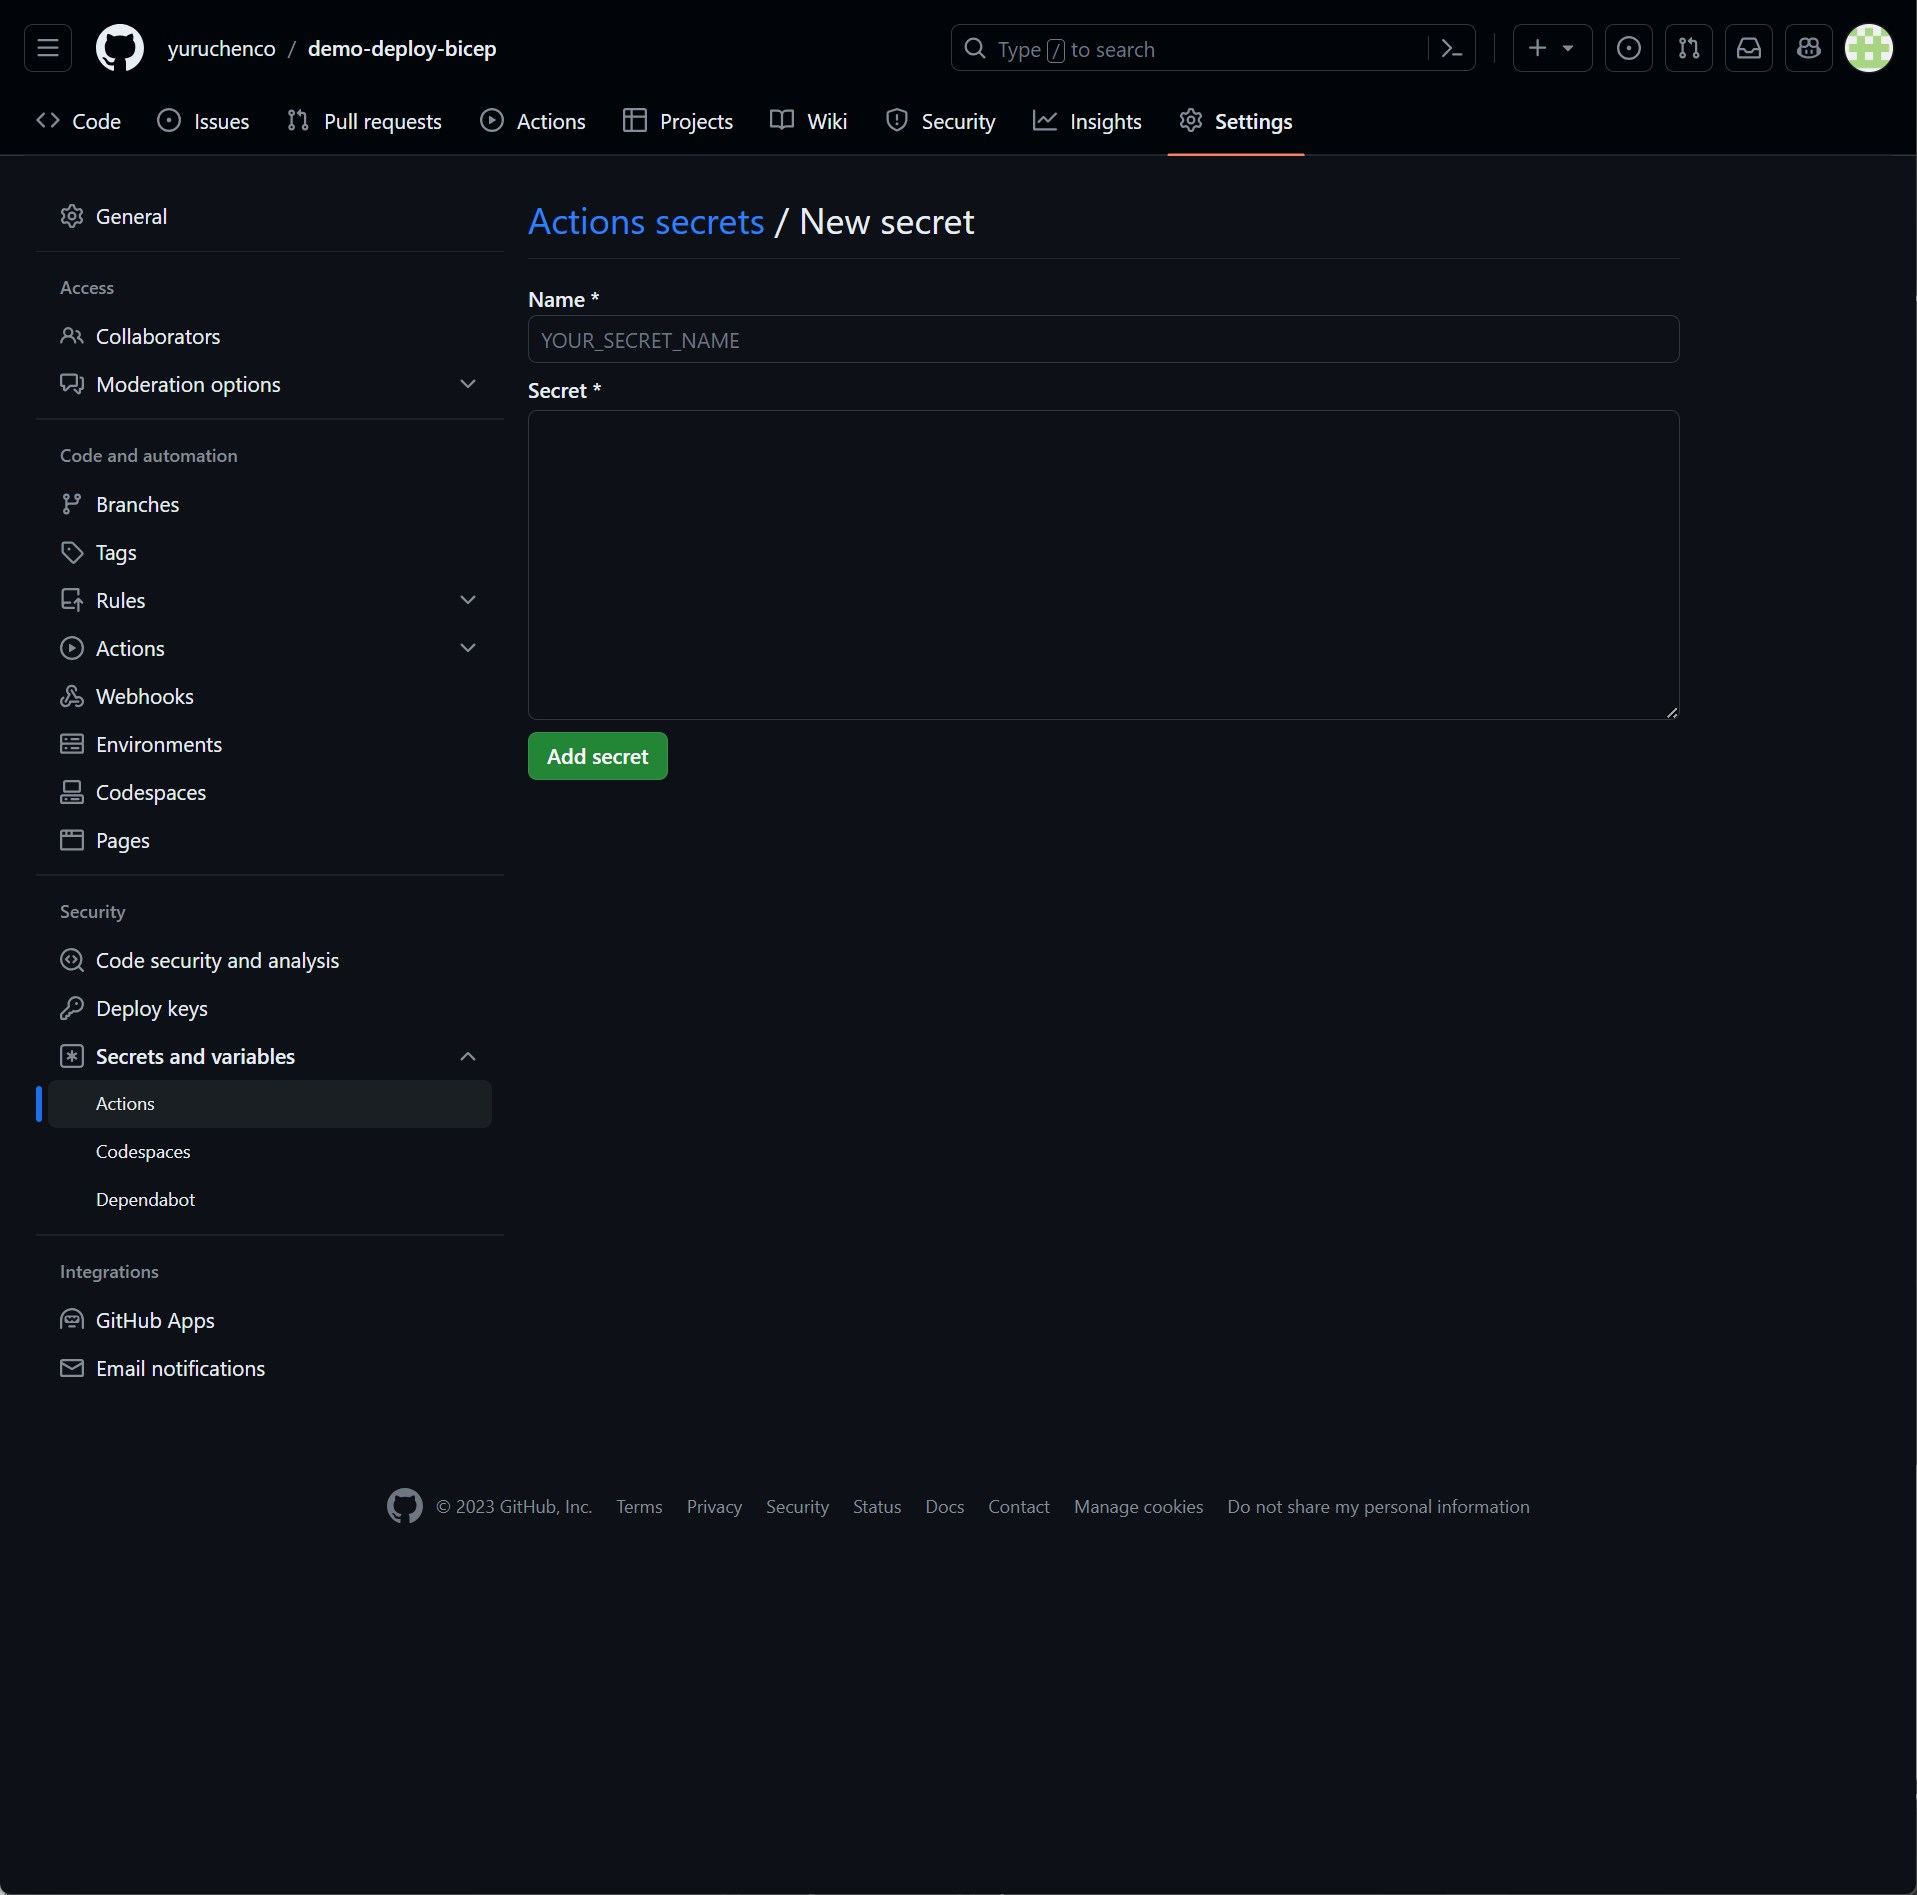
登録するシークレットNameは、以下の3つです。
"AZURE_CREDENTIALS"
{
  "clientId": "xxxxxxxx-xxxx-xxxx-xxxx-xxxxxxxxxxxx",
  "clientSecret": "xxxxxxxxxxxxxxxxxxxxxxxxxxxxxxxxxxxxxxxx",
  "subscriptionId": "xxxxxxxx-xxxx-xxxx-xxxx-xxxxxxxxxxxx",
  "tenantId": "xxxxxxxx-xxxx-xxxx-xxxx-xxxxxxxxxxxx"
}
"AZURE_EG"
exampleRG
"AZURE_SUBSCRIPTION"
(SubscriptionID)
###GitHub Action ワークフローのコード
以下は、GitHub Action ワークフローのコードとなります。
AzureリソースをデプロイするIaCコード(Bicep)も含むソースも参考にしてください。
記載内容の詳細は省きますが、repository_dispatchをトリガに、メッセージを出力するジョブ、Azureリソースをデプロイするジョブを定義しています。デプロイするジョブの中で、先程設定した各種シークレットを使用しています。
実際にデプロイ時に使用されるファイルは、"./01_network_demo/main-network_1.bicep"となります。
name: Repository Dispatch Workflow
on:
  repository_dispatch:
    types: [echo_message]
jobs:
  echo_message:
    runs-on: ubuntu-latest
    steps:
      - name: Echo Message
        run: echo "${{ github.event.client_payload.message }}"
  build-and-deploy:
    needs: echo_message
    runs-on: ubuntu-latest
    steps:
      # Checkout code
    - name: Checkout code
      uses: actions/checkout@main

      # Log into Azure
    - name: Log into Azure
      uses: azure/login@v1
      with:
        creds: ${{ secrets.AZURE_CREDENTIALS }}

      # Deploy Bicep file
    - name: Deploy Bicep file
      uses: azure/arm-deploy@v1
      with:
        subscriptionId: ${{ secrets.AZURE_SUBSCRIPTION }}
        resourceGroupName: ${{ secrets.AZURE_RG }}
        template: ./01_network_demo/main-network_1.bicep
        failOnStdErr: false
        # parameters: > # Uncomment and use if you have parameters to pass
        #   parameter1=value1
        #   parameter2=value2
AzureリソースをデプロイするBicepコード
参考に、デプロイされるファイルの内容も以下に記載します。
今回はVnetとBastionをデプロイするコードを定義しています。
//Parameters
@description('Location for all resources')
param location string = resourceGroup().location

@description('Enviroment name')
param enviroment string = 'poc'

@description('Specifies whether creating the hubVnet resource or not.')
param hubVnetEnabled bool = true

@description('Specifies whether creating the spokeVnet resource or not.')
param spokeVnetEnabled bool = true

@description('Specifies whether creating the bastion resource or not.')
param bastionEnabled bool = true


//Variables
//hub vNET resource naming variables
var VNET_HUB_NAME = 'vnet-hub-${enviroment}'
var VNET_HUB_ADDRESS_SPACE = '192.168.0.0/16'
var BASTION_HUB_SUBNET_NAME = 'AzureBastionSubnet'
var BASTION_HUB_SUBNET_ADDRESS_PREFIX = '192.168.1.0/26'
var GW_HUB_SUBNET_NAME = 'GatewaySubnet'
var GW_HUB_SUBNET_ADDRESS_PREFIX = '192.168.2.0/27'

//spoke vNET resource naming variables
var VNET_SPOKE_NAME = 'vnet-spoke-${enviroment}'
var VNET_SPOKE_ADDRESS_SPACE = '172.16.0.0/16'
var VM_SPOKE_SUBNET_NAME = 'VmSubnet'
var VM_SPOKE_SUBNET_ADDRESS_PREFIX = '172.16.0.0/22'

//hub vNET & spoke vNET peering variables
var VNET_HUB_TO_SPOKE_PEERING = '${VNET_HUB_NAME}-to-${VNET_SPOKE_NAME}'
var VNET_SPOKE_TO_HUB_PEERING = '${VNET_SPOKE_NAME}-to-${VNET_HUB_NAME}'

//NSG VM SPOKE SUBNET inbound rules variables
var NSG_VM_SPOKE_SUBNET_INBOUND_NAME = 'nsg_inbound-${VM_SPOKE_SUBNET_NAME}'
var NSG_DEFAULT_VM_SPOKE_SUBNET_RULES = loadJsonContent('./default-rule-spoke-nsg.json', 'DefaultRules')

// Azure Bastion variables
var BASTION_NAME = 'bastion-${enviroment}'
var BASTION_IF_NAME = 'bastionipconf-${enviroment}'
var BASTION_SKU = 'Standard'
var BASTION_PIP_NAME = 'bastionpip-${enviroment}'
var BASTION_PIP_SKU = 'Standard'
var BASTION_PIP_ALLOCATION_METHOD = 'Static'

//Resources

// Deploy Hub vNET
resource hubVnet 'Microsoft.Network/virtualNetworks@2021-08-01' = if (hubVnetEnabled) {
  name: VNET_HUB_NAME
  location: location
  properties: {
    addressSpace: {
      addressPrefixes: [
        VNET_HUB_ADDRESS_SPACE
      ]
    }
    subnets: [
      {
        name: BASTION_HUB_SUBNET_NAME
        properties: {
          addressPrefix: BASTION_HUB_SUBNET_ADDRESS_PREFIX
          serviceEndpoints: [
            {
              service: 'Microsoft.AzureActiveDirectory'
            }
          ]
        }
      }
      {
        name: GW_HUB_SUBNET_NAME
        properties: {
          addressPrefix: GW_HUB_SUBNET_ADDRESS_PREFIX
          serviceEndpoints: [
            {
              service: 'Microsoft.AzureActiveDirectory'
            }
          ]
        }
      }
    ]
  }
}


//Deploy Spoke vNET
resource spokeVnet 'Microsoft.Network/virtualNetworks@2021-08-01' = if (spokeVnetEnabled) {
  name: VNET_SPOKE_NAME
  location: location
  properties: {
    addressSpace: {
      addressPrefixes: [
        VNET_SPOKE_ADDRESS_SPACE
      ]
    }
    subnets: [
      {
        name: VM_SPOKE_SUBNET_NAME
        properties: {
          addressPrefix: VM_SPOKE_SUBNET_ADDRESS_PREFIX
          serviceEndpoints: [
            {
              service: 'Microsoft.AzureActiveDirectory'
            }
          ]
          networkSecurityGroup: {
            id: nsginboundspoke.id
          }
        }
      }
    ]
  }
}

// Deploy NSG for spokeVnet
resource nsginboundspoke 'Microsoft.Network/networkSecurityGroups@2021-08-01' = {
  name: NSG_VM_SPOKE_SUBNET_INBOUND_NAME
  location: location
  properties: {
    securityRules: NSG_DEFAULT_VM_SPOKE_SUBNET_RULES
  }
}

//Deploy Hub vNET to Spoke vNET peering
resource hubVnetToSpokeVnetPeering 'Microsoft.Network/virtualNetworks/virtualNetworkPeerings@2021-08-01' = if (hubVnetEnabled && spokeVnetEnabled) {
  name: VNET_HUB_TO_SPOKE_PEERING
  parent: hubVnet
  properties: {
    remoteVirtualNetwork: {
      id: spokeVnet.id
    }
    allowVirtualNetworkAccess: true
    allowForwardedTraffic: false
    allowGatewayTransit: false
    useRemoteGateways: false
  }
}

//Deploy Spoke vNET to Hub vNET peering
resource spokeVnetToHubVnetPeering 'Microsoft.Network/virtualNetworks/virtualNetworkPeerings@2021-08-01' = if (hubVnetEnabled && spokeVnetEnabled) {
  name: VNET_SPOKE_TO_HUB_PEERING
  parent: spokeVnet
  properties: {
    remoteVirtualNetwork: {
      id: hubVnet.id
    }
    allowVirtualNetworkAccess: true
    allowForwardedTraffic: false
    allowGatewayTransit: false
    useRemoteGateways: false
  }
}


// Deploy public IP for Azure Bastion
resource bastionPip 'Microsoft.Network/publicIPAddresses@2020-05-01' = {
  name: BASTION_PIP_NAME
  location: location
  sku: {
    name: BASTION_PIP_SKU
  }
  properties: {
    publicIPAllocationMethod: BASTION_PIP_ALLOCATION_METHOD
  }
}

//Deploy Azure Bastion
resource bastion 'Microsoft.Network/bastionHosts@2021-08-01' = if (bastionEnabled) {
  name: BASTION_NAME
  location: location
  sku: {
    name: BASTION_SKU
  }
  properties: {
    ipConfigurations: [
      {
        name: BASTION_IF_NAME
        properties: {
          subnet: {
            id: hubVnet.properties.subnets[0].id
          }
          publicIPAddress: {
            id: bastionPip.id
          }
        }
      }
    ]
  }
}
動作検証
実際に動作検証します。
新規にTagに"deploy"を設定したPBIを作成します。
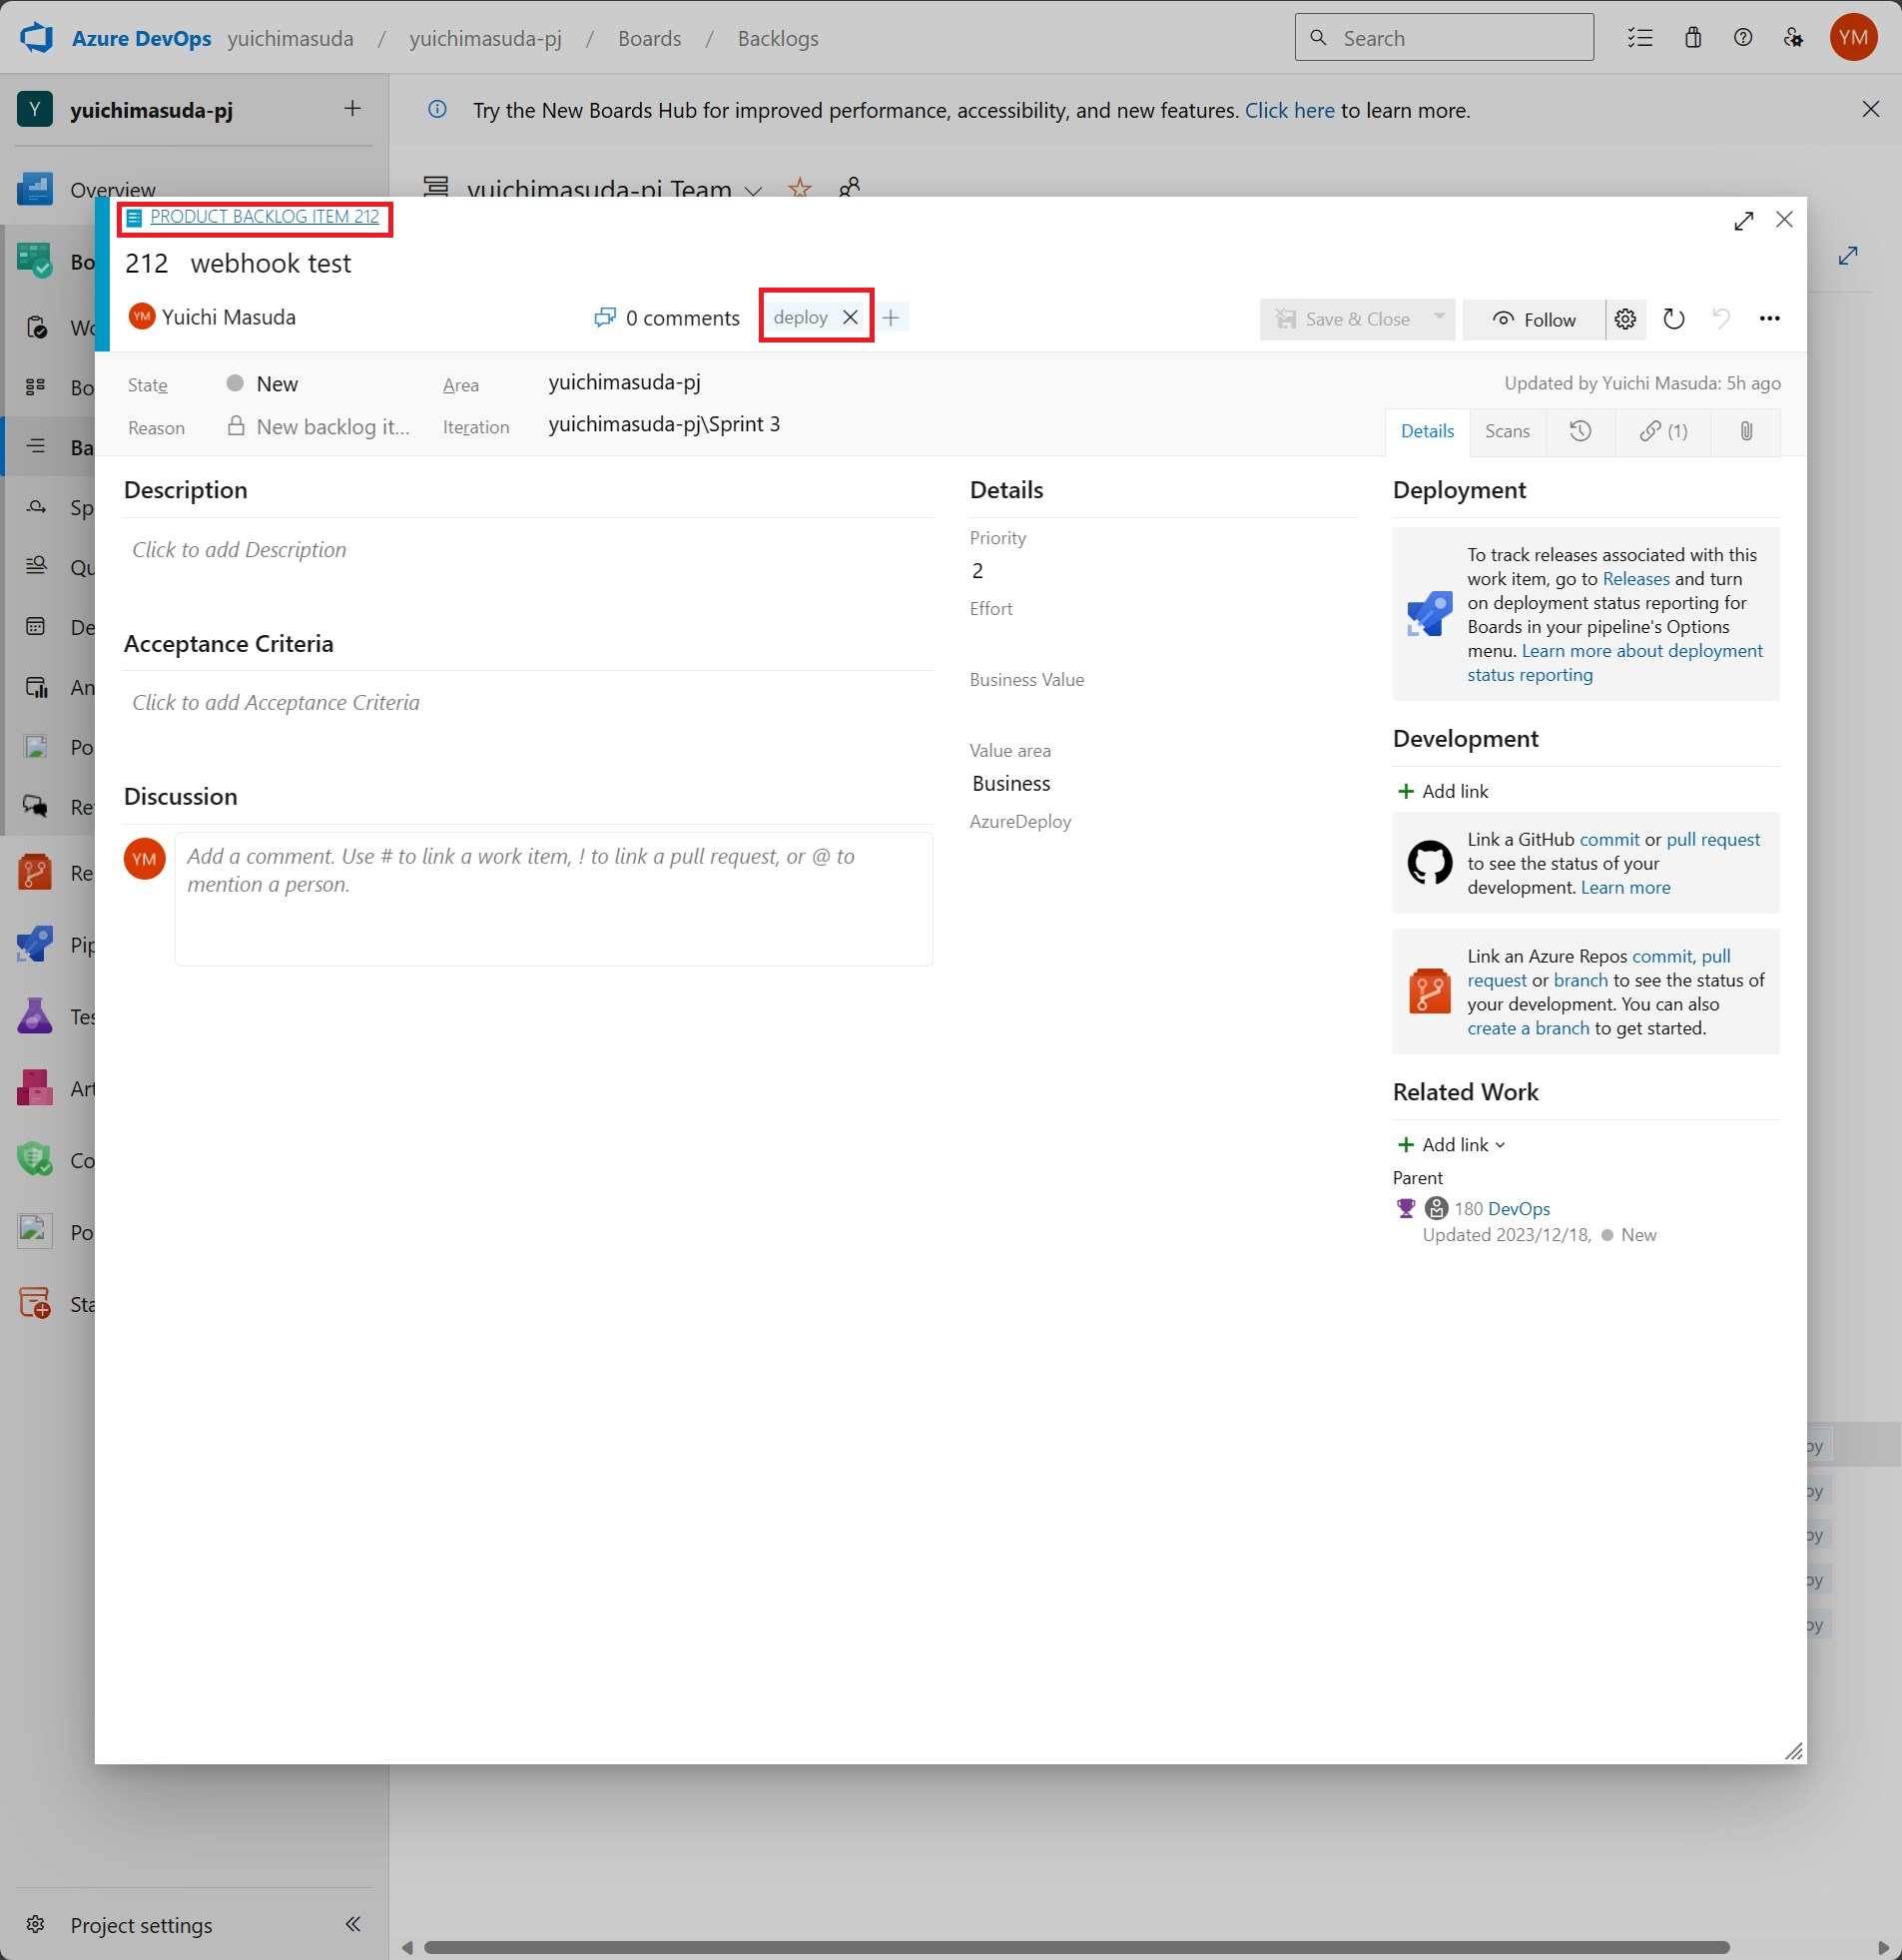
作成後に、Service hookの設定画面にある"History"を選択すると、Service hookの実行履歴を確認できます。無事にService hookが動作成功したことが確認できました。
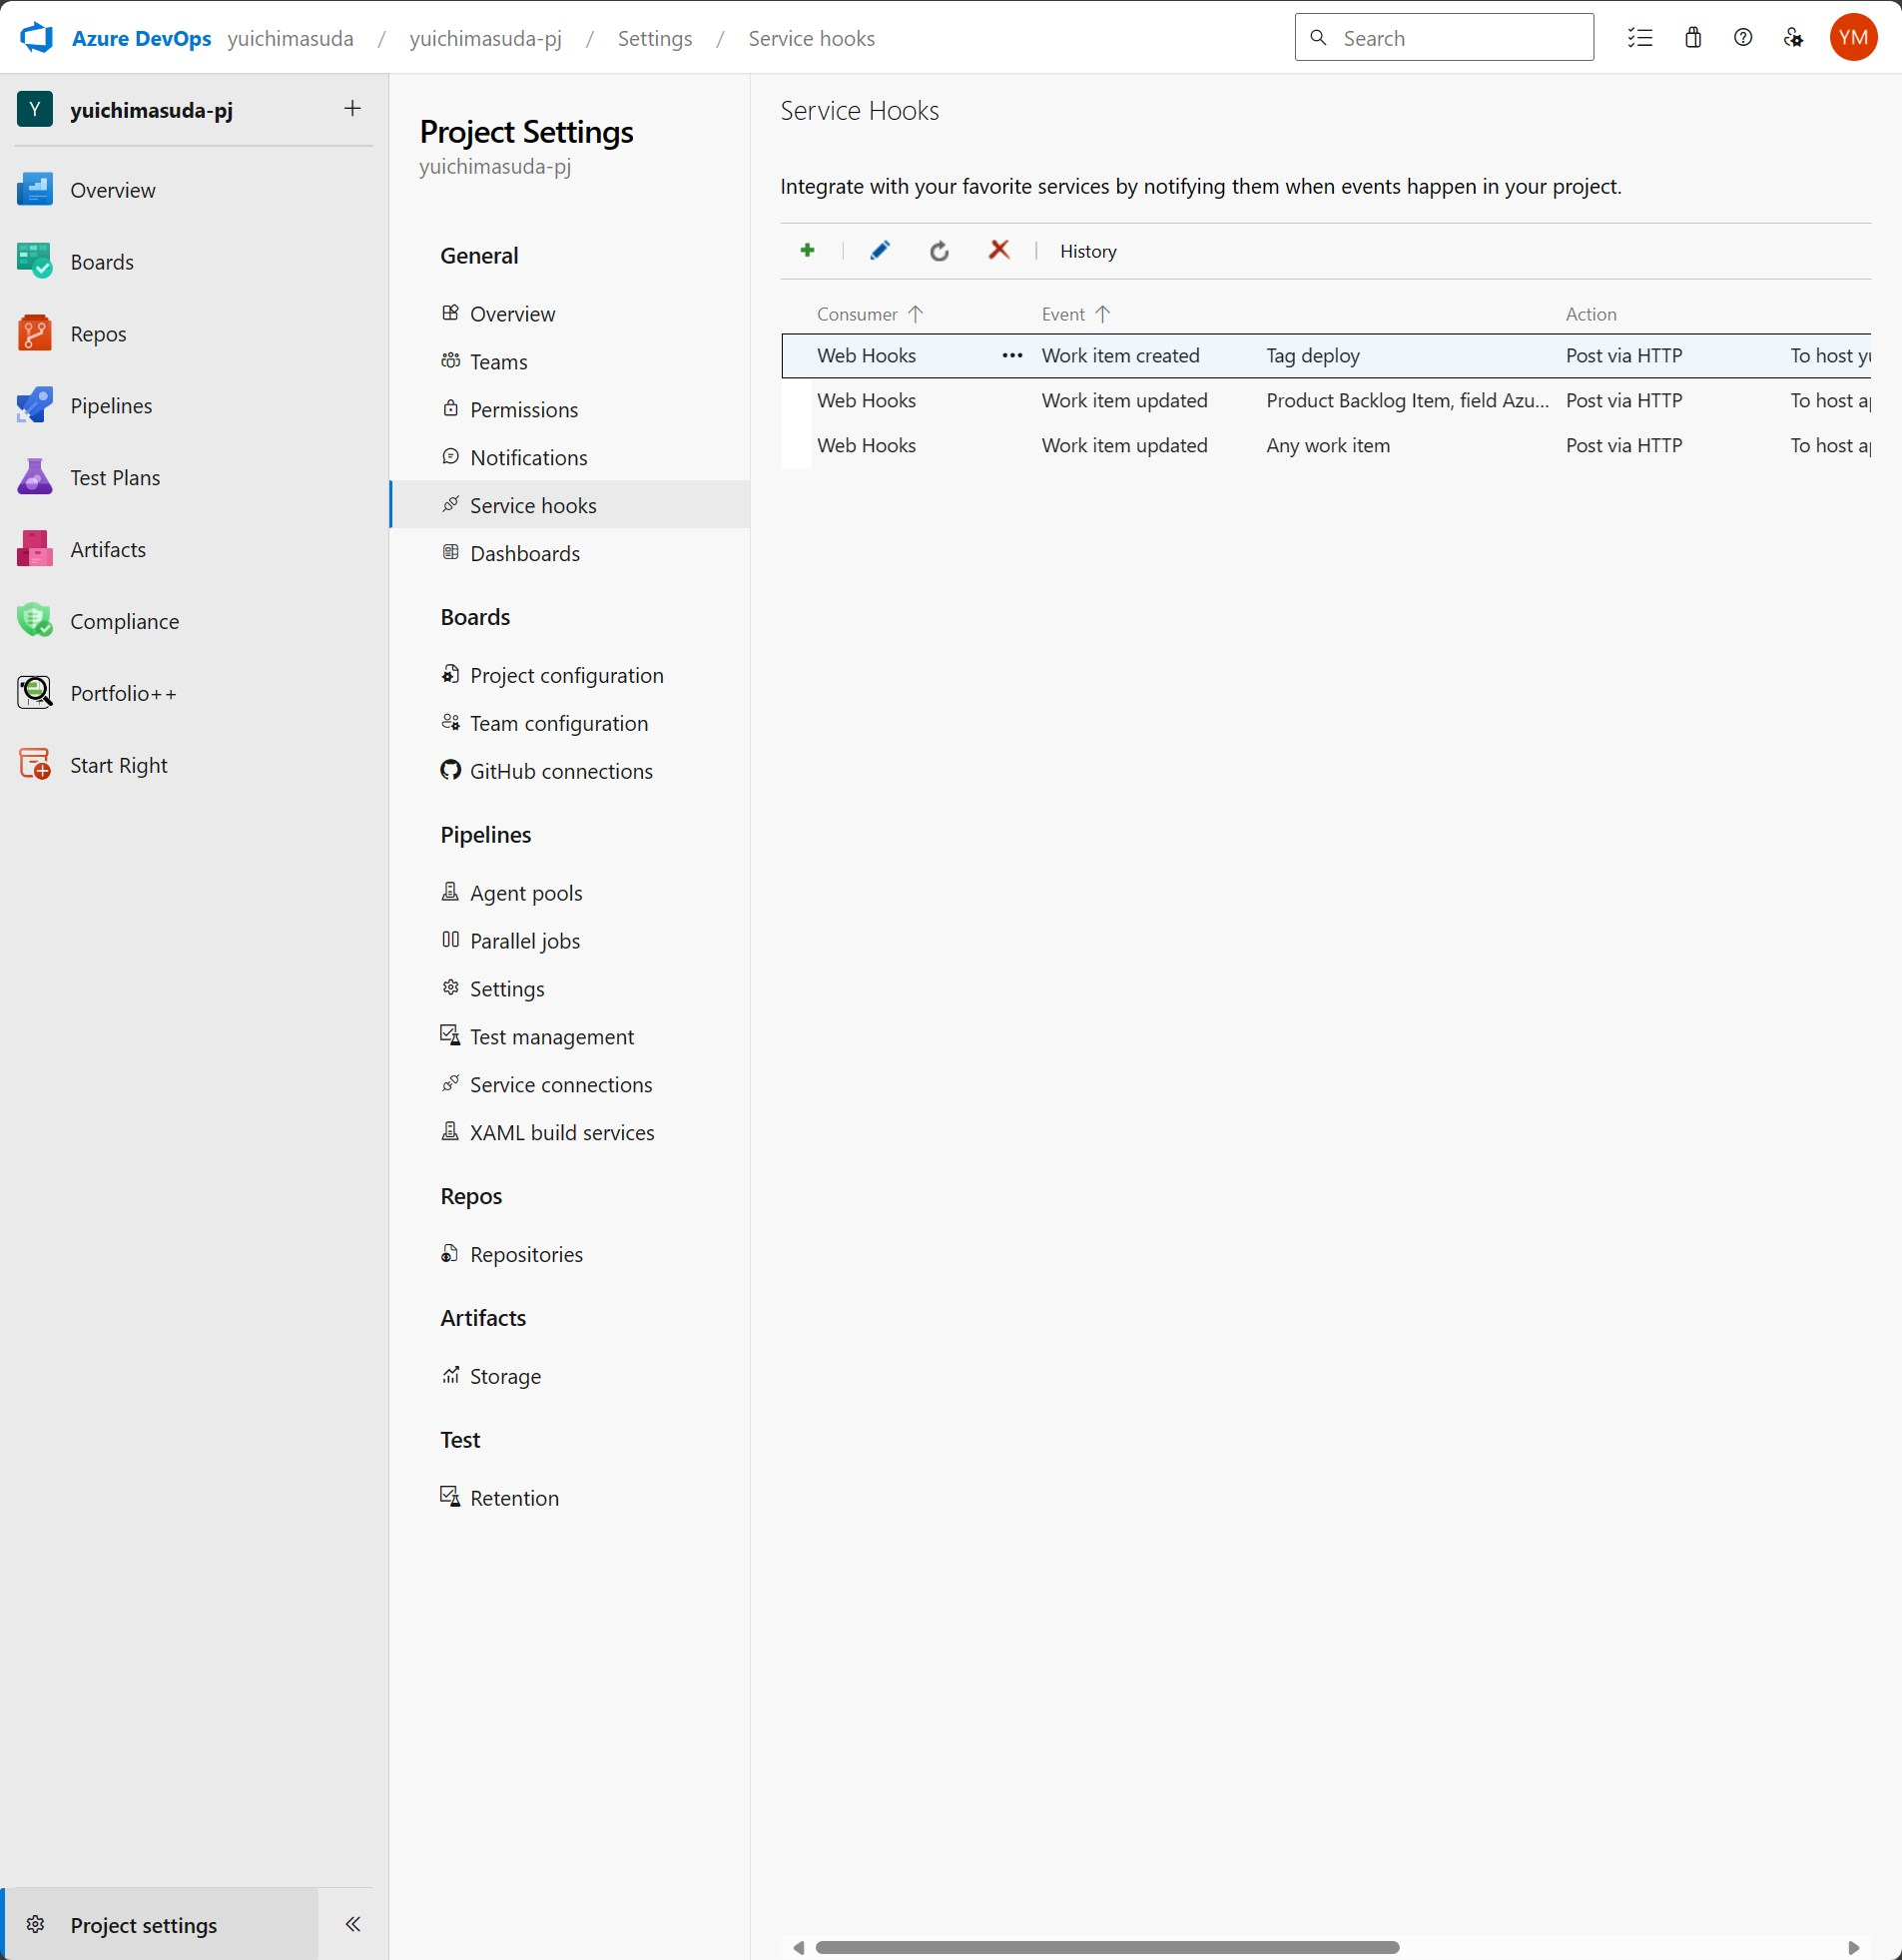
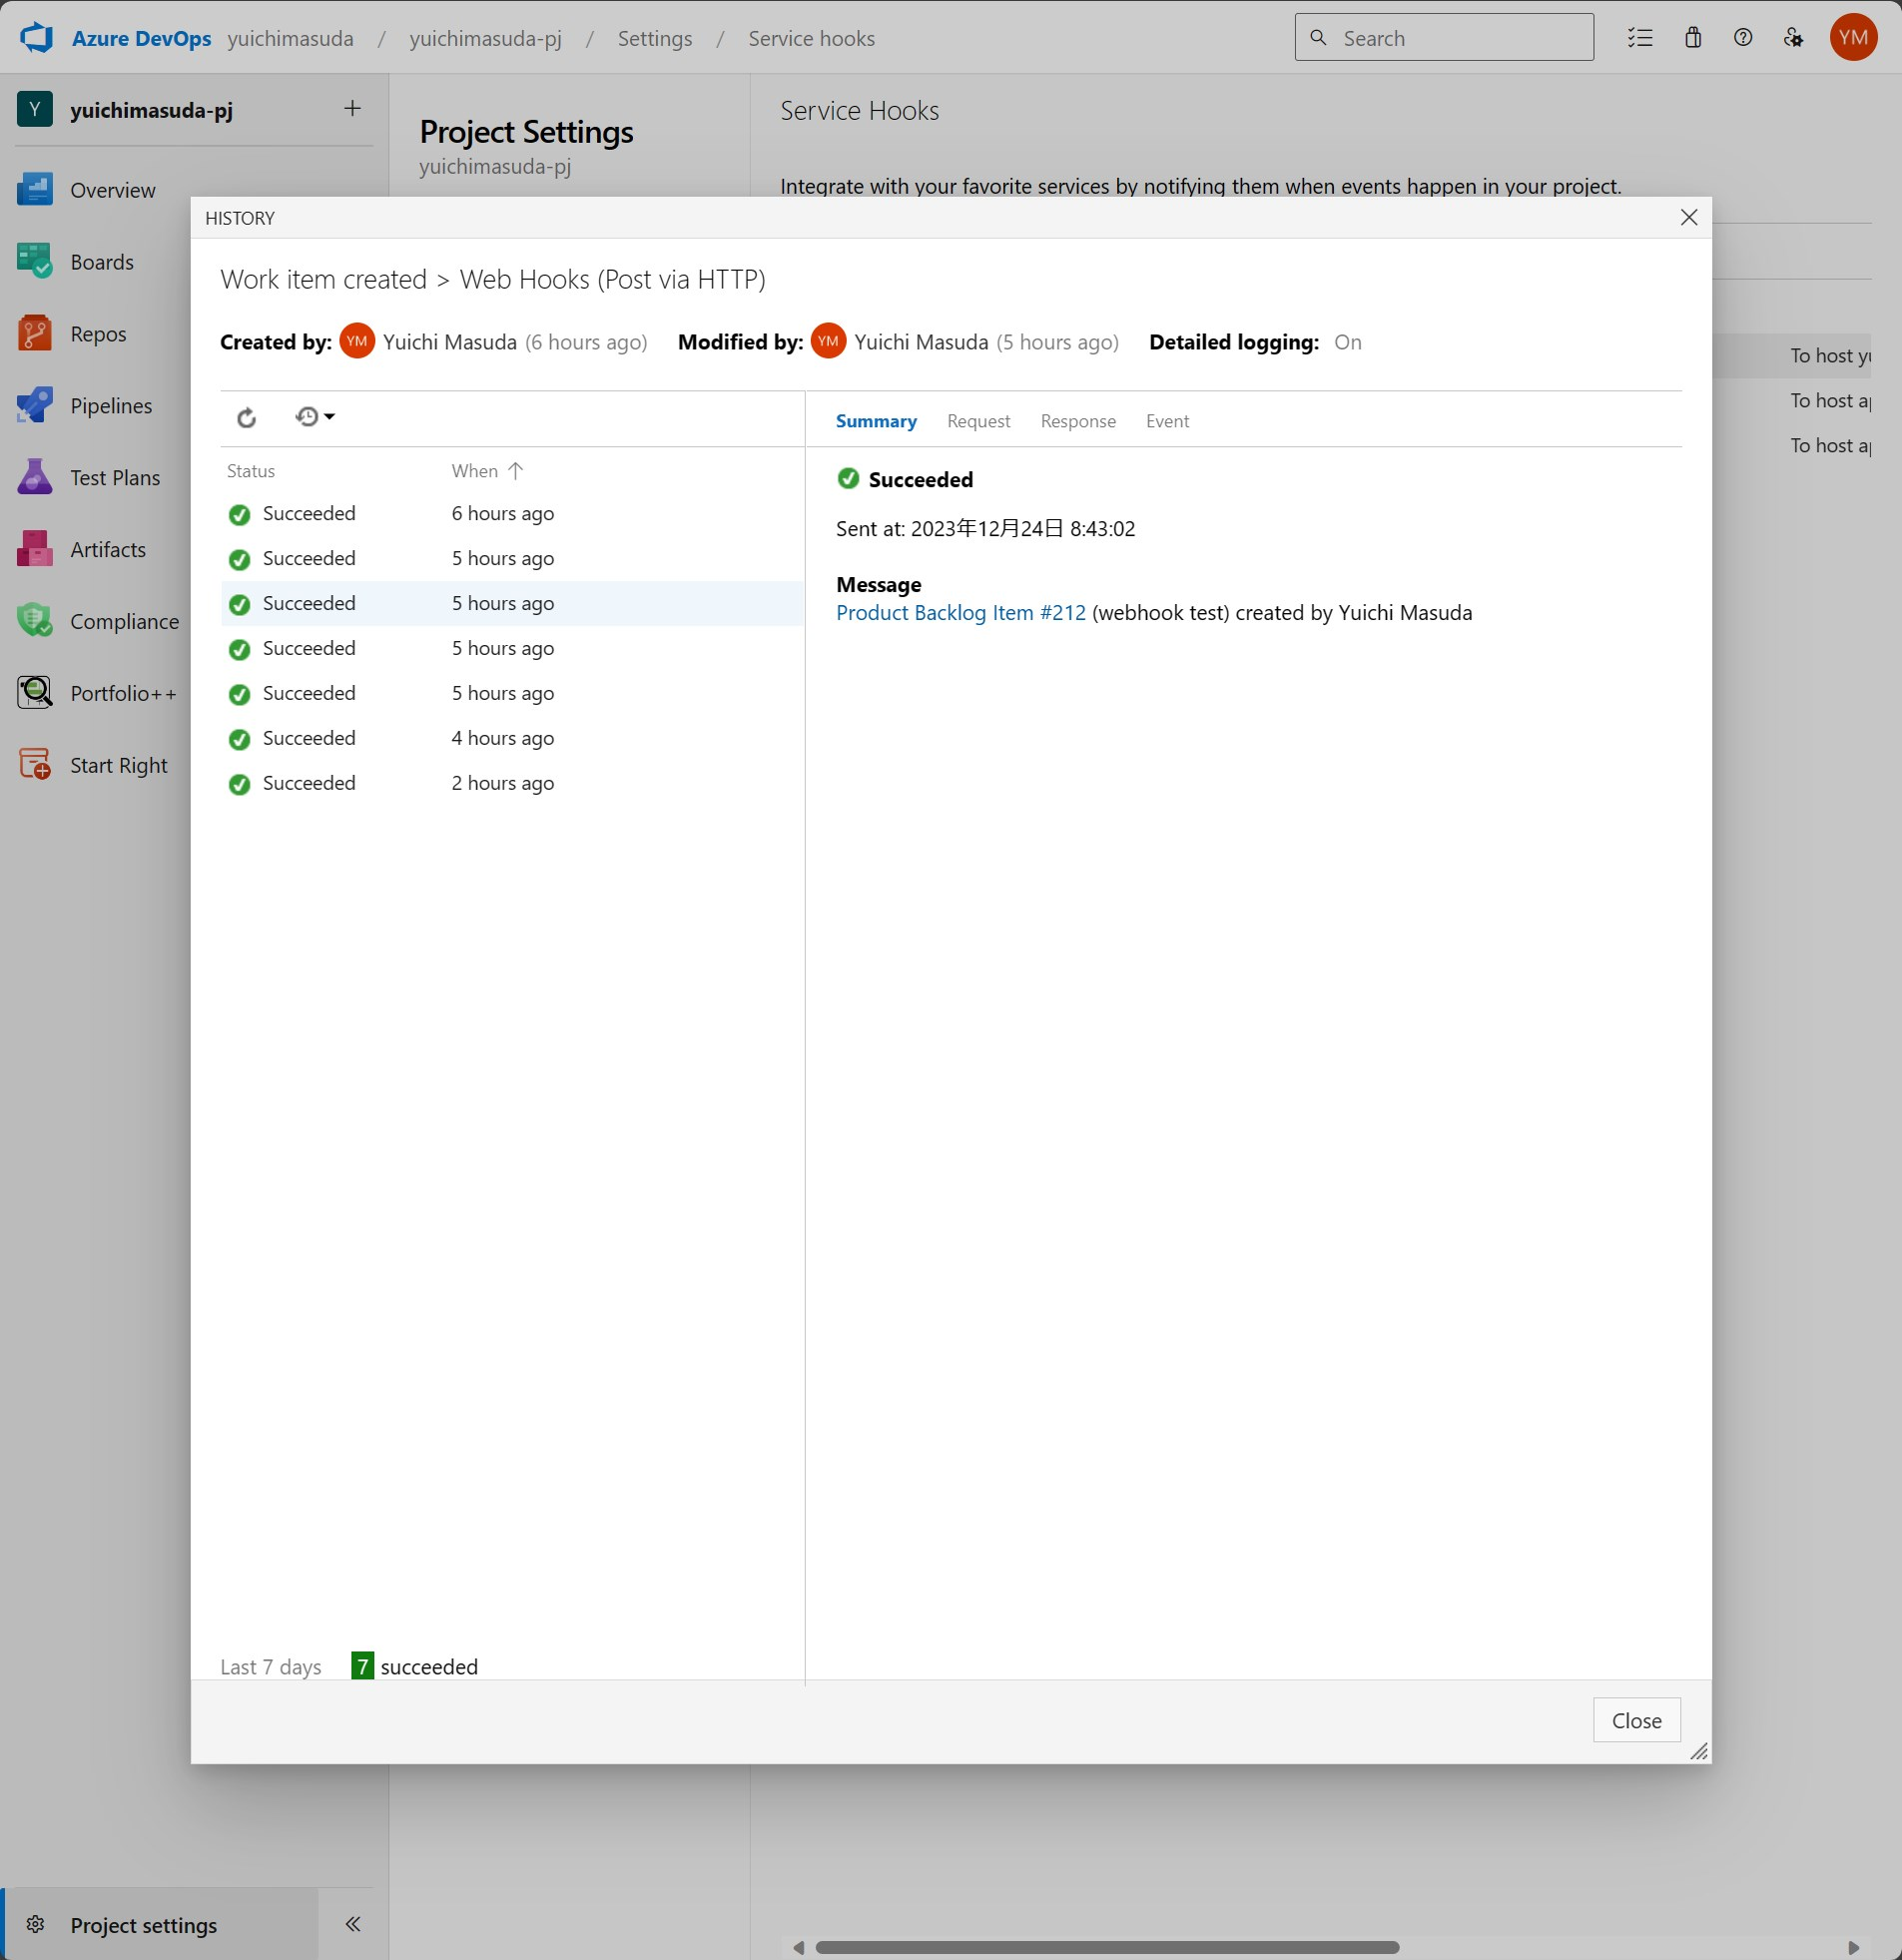
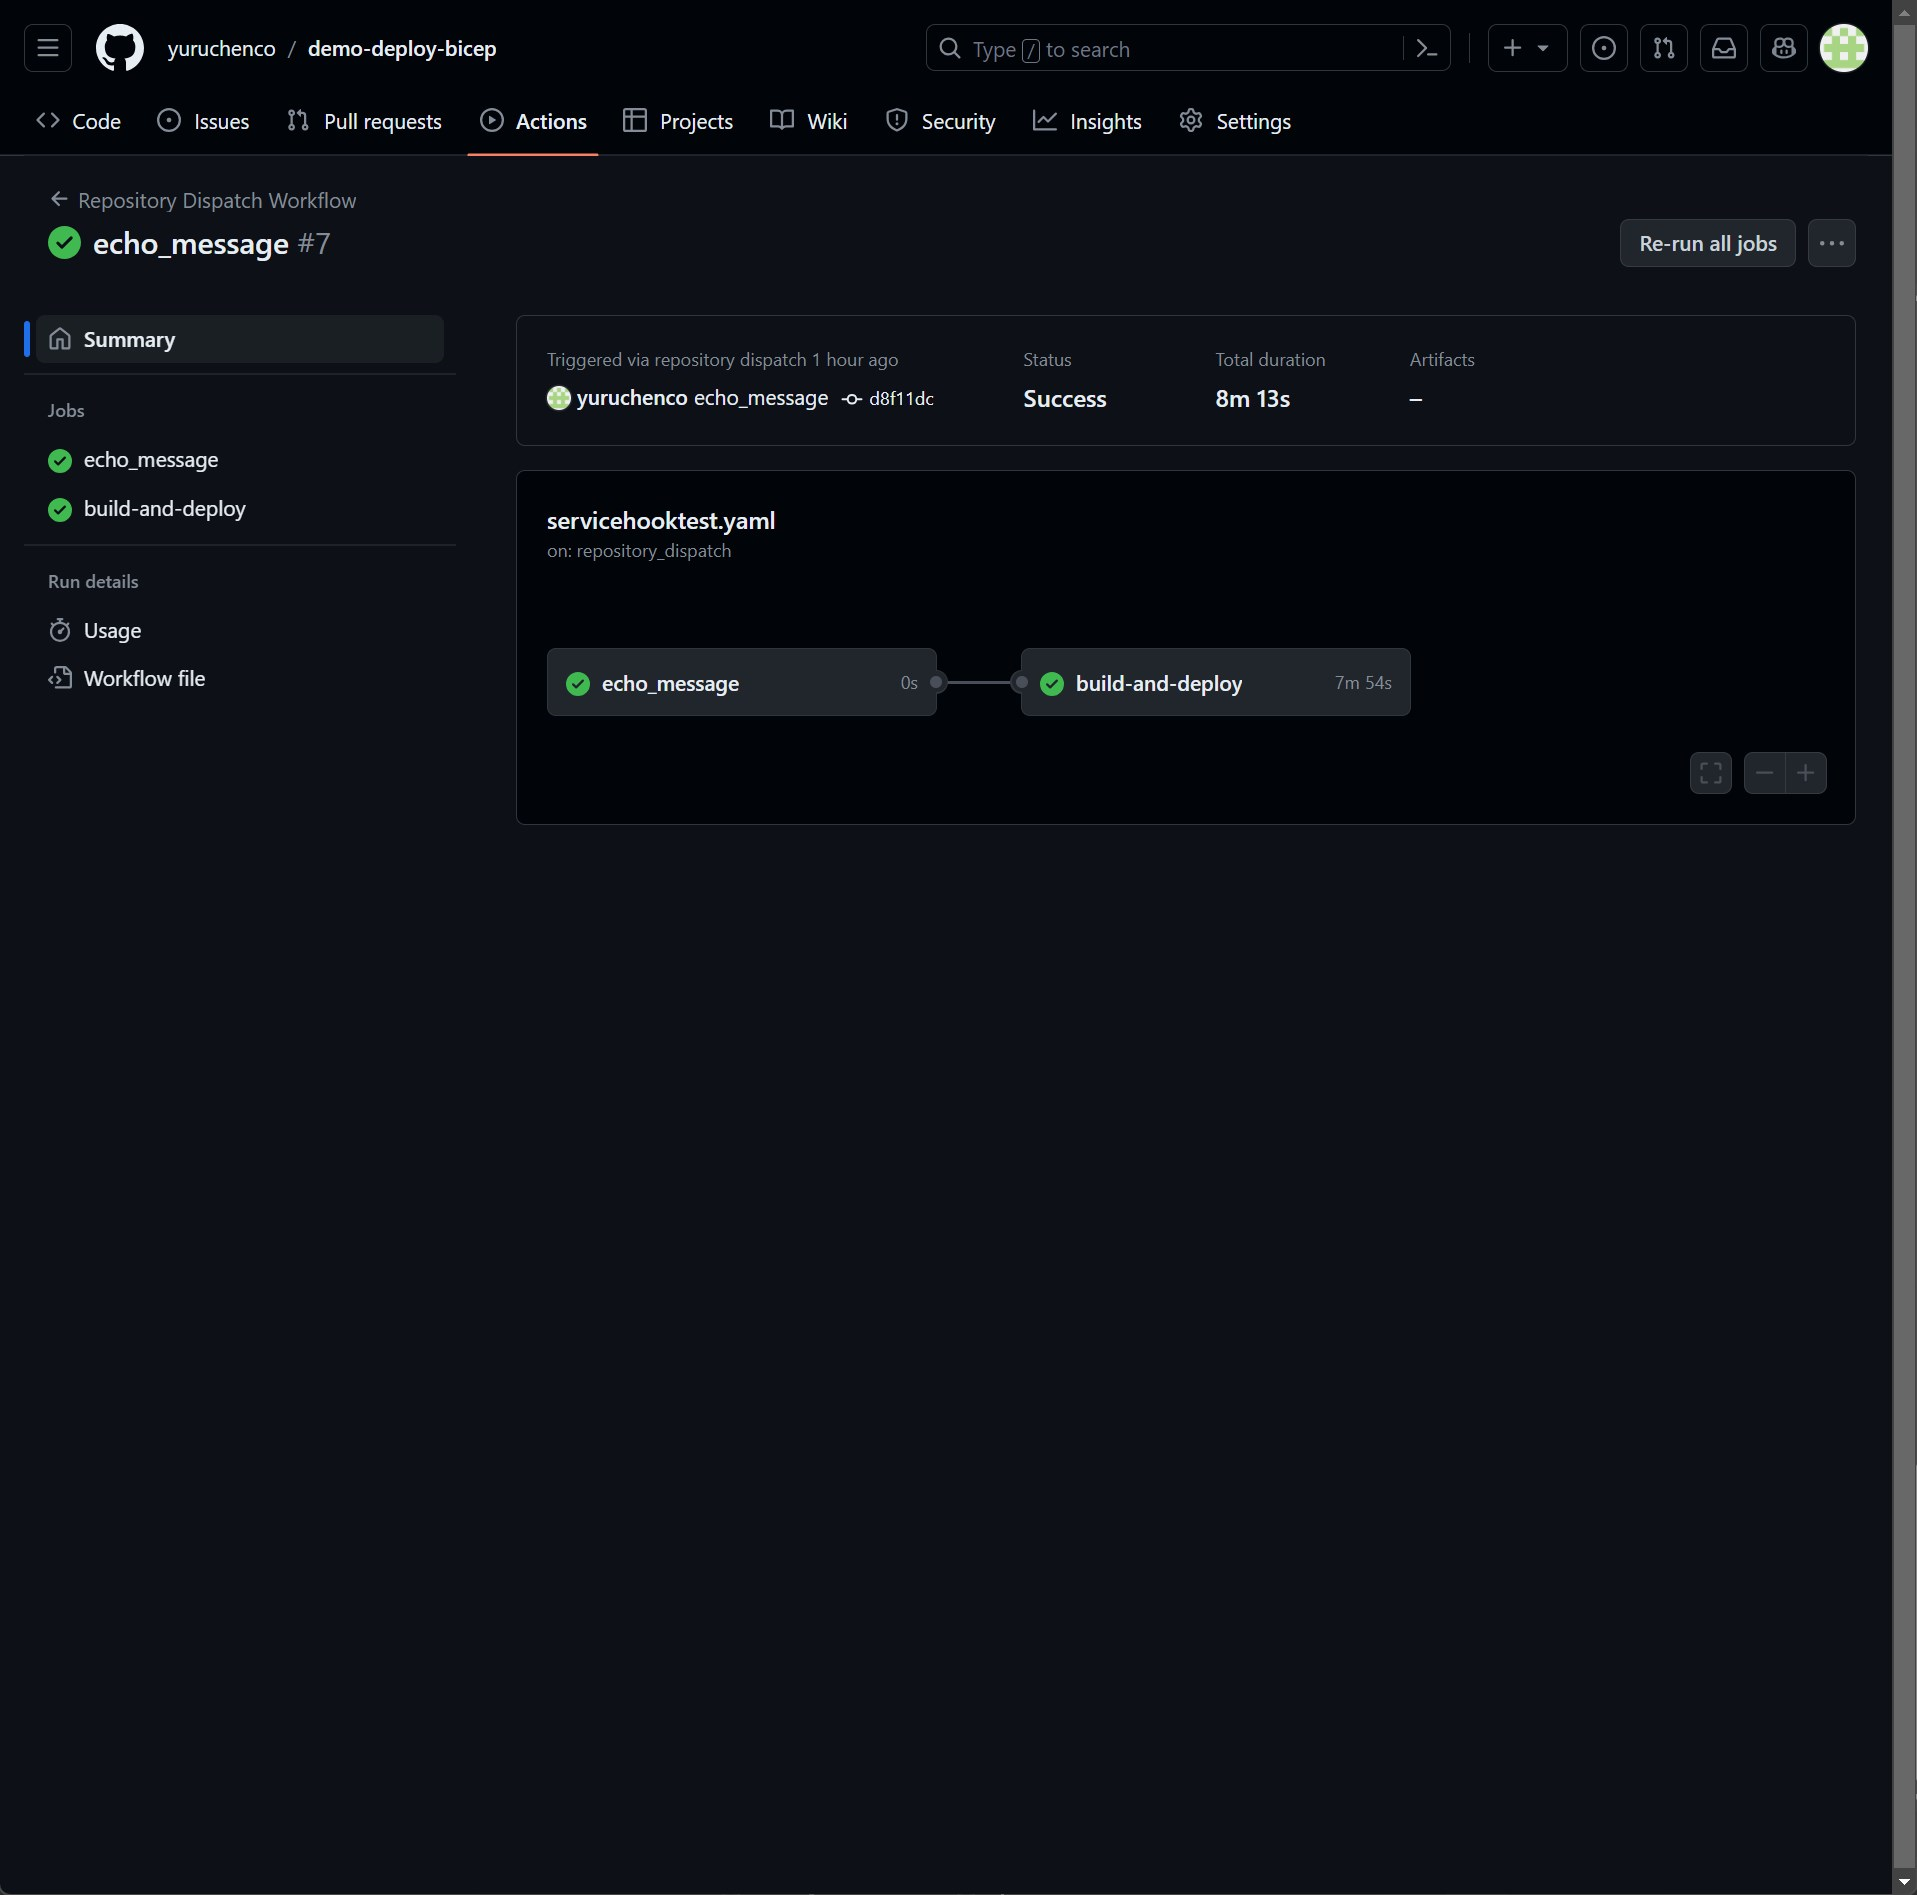
GitHub Action画面からも実行履歴を確認すると、正常に二つのジョブが完了している事が確認できました。
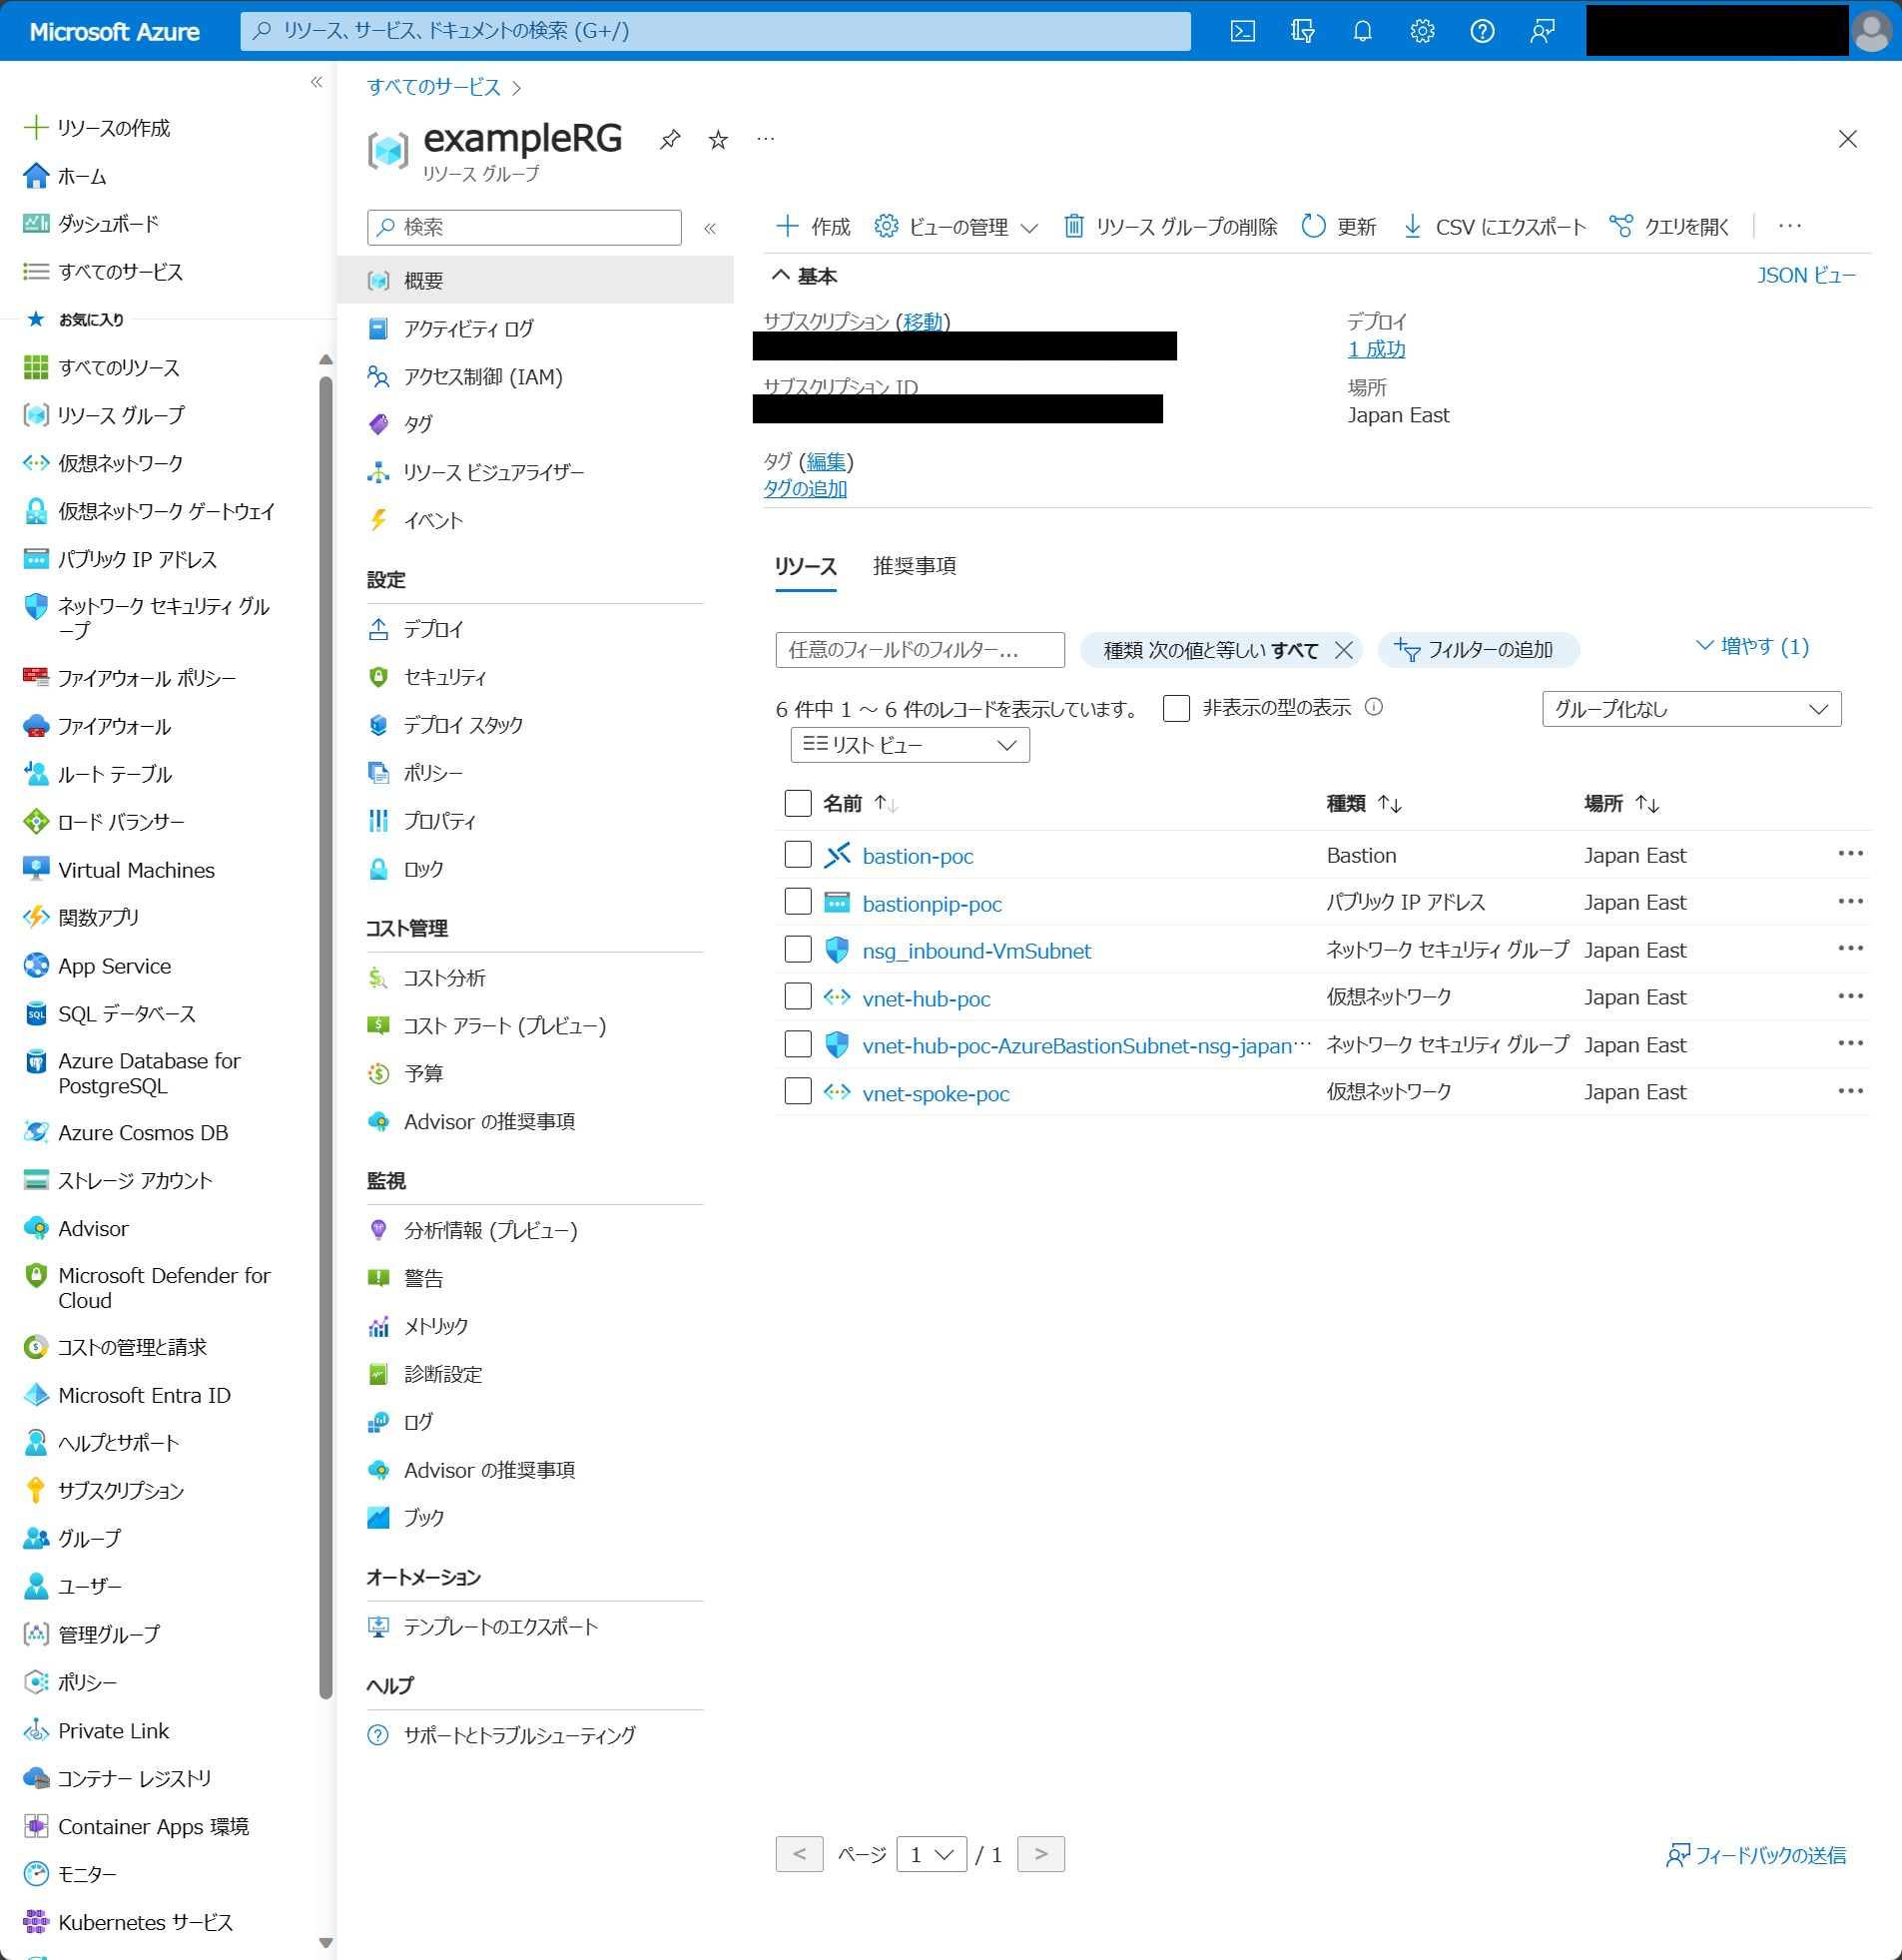
Azure Portal上からも無事にリソースがデプロイされている事が確認できました。
おわりに
今回は、Azure Boardsのアイテムの作成をトリガに、Azureリソースがデプロイする仕組みの紹介をしました。今回はアイテムの作成をトリガにしましたが、他にもトリガにする条件があったり、デプロイもGitHub ActionではなくAzure pipelineを利用したり方法は複数あります。残念ながらAzure DevOpsのWeb Hooksから直接GitHub Actions、及びAzure Pipelineを動作させる方法は未発見ですが。。。本情報が皆様のAzureDevOpsのワークフロー活用の一助になれば幸いです。
参考
Azure Logic Apps のワークフローに対する受信 HTTP 呼び出しを受け取り、応答する
GitHub Actions の repository_dispatch イベントを使ってリポジトリ間でリリースイベントを伝播させる
