flutter勉強のためにcodelabs(https://codelabs.developers.google.com/codelabs/flutter)
をやっていたのですが、こちらで作成するチャットアプリのメッセージが腹持ちだったため、apiで管理することができるようにしました。
サーバー側はbeegoとgormで作成してます。
参考: https://qiita.com/yufuku/items/dff8597e00fc0bdc6864
今回作成したflutterコード: https://github.com/fu-yuta/flutter_friendly_chat/tree/chat_api_access
環境
$ flutter doctor -v
[✓] Flutter (Channel stable, 2.5.3, on macOS 11.2.3 20D91 darwin-x64, locale ja-JP)
    • Flutter version 2.5.3 at /usr/local/flutter
    • Upstream repository https://github.com/flutter/flutter.git
    • Framework revision 18116933e7 (7 weeks ago), 2021-10-15 10:46:35 -0700
    • Engine revision d3ea636dc5
    • Dart version 2.14.4

[✓] Android toolchain - develop for Android devices (Android SDK version 31.0.0)
    • Android SDK at /Users/fukusakoyuuta/Library/Android/sdk
    • Platform android-31, build-tools 31.0.0
    • Java binary at: /Applications/Android Studio.app/Contents/jre/Contents/Home/bin/java
    • Java version OpenJDK Runtime Environment (build 11.0.10+0-b96-7281165)
    • All Android licenses accepted.

[✓] Xcode - develop for iOS and macOS
    • Xcode at /Applications/Xcode.app/Contents/Developer
    • Xcode 12.5.1, Build version 12E507
    • CocoaPods version 1.11.2

[✓] Chrome - develop for the web
    • Chrome at /Applications/Google Chrome.app/Contents/MacOS/Google Chrome

[✓] Android Studio (version 2020.3)
    • Android Studio at /Applications/Android Studio.app/Contents
    • Flutter plugin can be installed from:
      🔨 https://plugins.jetbrains.com/plugin/9212-flutter
    • Dart plugin can be installed from:
      🔨 https://plugins.jetbrains.com/plugin/6351-dart
    • Java version OpenJDK Runtime Environment (build 11.0.10+0-b96-7281165)

[✓] VS Code (version 1.62.3)
    • VS Code at /Applications/Visual Studio Code.app/Contents
    • Flutter extension version 3.29.0
サーバー側の情報
サーバー側は下記操作を実装してます。
・メッセージの全検索 ( GET http://127.0.0.1:8080/v1/chat )
・メッセージの単一検索 ( GET http://127.0.0.1:8080/v1/chat/:id )(今回は使用しない)
・メッセージの保存 ( POST http://127.0.0.1:8080/v1/chat )
・メッセージの更新 ( PUT http://127.0.0.1:8080/v1/chat/:id )
・メッセージの削除 ( DELETE http://127.0.0.1:8080/v1/chat/:id )
詳しくは下記サーバー側のコードを確認してみてください。
https://github.com/fu-yuta/go_friendly_chat
サーバーを起動して
http://127.0.0.1:8080/swagger/
にアクセスすると簡単にapiリクエストを試せます。
実装
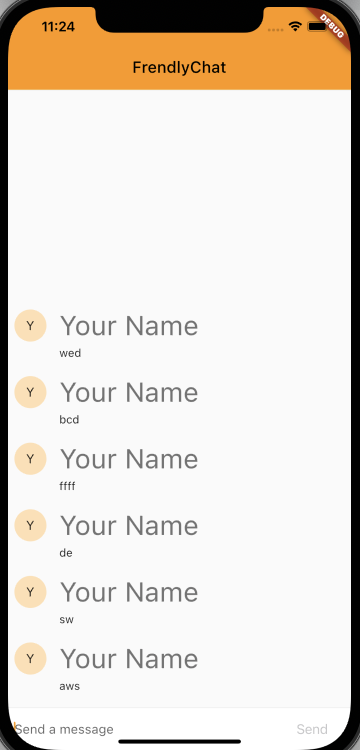
メッセージの全検索
画面が描画されたタイミングで、メッセージを取得して表示しようと思います。
まず、lib/model/chat.dartを作成し、レスポンスを受け取るためのクラスをを定義します。
class ChatResponse {
  final int id;
  final String userName;
  final String message;

  ChatResponse.fromJson(Map<String, dynamic> json)
    : id = json['id'],
    userName = json['user_name'],
    message = json['message'];
}
fromJson(Map<String, dynamic> json)を定義することでレスポンス(json)をデコードできるようにします。
view側の_ChatScreenStateにリクエストメソッドを作成し、画面の作成時のそのメソッドを呼び出します。
import 'package:friendly_chat/model/chat.dart';
import 'package:http/http.dart' as http;
import 'dart:convert';

.... other code ....

class _ChatScreenState extends State<ChatScreen> with TickerProviderStateMixin {
 final String chatUri = 'http://127.0.0.1:8080/v1/chat/'; //エンドポイントの定義

 // 画面が作成される時に実行する
 @override
   void initState() {
    super.initState();
    _getAllChatsRequester();
  }

.... other code ....
  // GETするリクエストメソッド
  void _getAllChatsRequester() async {
    Map<String, String> headers = {
      "Content-Type": "application/json",
    };

    final response = await http.get(Uri.parse(chatUri), headers: headers);

    if (response.statusCode == 200) {
      Map<String, dynamic> decoded = json.decode(response.body);
      _messages.clear();
      if (decoded['chats'] != null) {
        for (var item in decoded['chats']) {
          var chatResponse = ChatResponse.fromJson(item);
          _handleSubmitted(chatResponse.message, chatResponse.id);
        }
      }
    } else {
      throw Exception('Get All Chats Fail');
    }
  }
}
受け取ったレスポンスをjsonでデコードして、codelabsの中で作成した_handleSubmittedで画面を更新している。
_hundlleSubmittedの中でChatMessage()Widgetを作成しているがメッセージのidを持てるように変更している。
class ChatMessage extends StatelessWidget {
  String _name = 'Your Name';

  ChatMessage({
    required this.text,
    required this.animationController,
    required this.id,
    Key? key,
  }) : super(key: key);
  final text;
  final AnimationController animationController;
  final int id;
ここまでで、サーバー側で保存されているメッセージが取得されてテーブルに表示されるはずです。
ちなみに、chatUriをhttp://127.0.0.1:8080/v1/chat/としていますが、AndroidだとエラーUnhandled Exception: SocketException: OS Error: Connection refusedになります。
Androidの場合はlocalhostが10.0.2.2となるみたいなので、http://10.0.2.2:8080/v1/chat/を設定してください。
メッセージの保存
送信ボタンを押下した時にメッセージをサーバー側に保存するようにします。
まず、レスポンスと同じようにlib/model/chat.dartを内に、リクエストのパラメータを定義するクラスを作ります。
class ChatRequest {
  final String userName;
  final String message;

  ChatRequest({
    this.userName = "Your Name",
    this.message = "",
  });

  Map<String, dynamic> toJson() => {
    'message': message,
    'user_name': userName,
  };
}
toJson()はjsonにエンコードするための前処理です(Map作成)。
次にGETと同じようにメッセージをPOSTするメソッドを_ChatScreenState内に作成します。
  void _postChatRequester(String text) async {
    Map<String, String> headers = {
      "Content-Type": "application/json",
    };

    var request = ChatRequest(userName: "Your Name", message: text);

    final response = await http.post(Uri.parse(chatUri),
        body: json.encode(request.toJson()), headers: headers);

    if (response.statusCode == 200) {
      Map<String, dynamic> decoded = json.decode(response.body);
      var chatResponse = ChatResponse.fromJson(decoded);
      _handleSubmitted(chatResponse.message, chatResponse.id);
    } else {
      throw Exception('Post Chats Fail');
    }
  }
POSTメソッドでは保存に成功したメッセージがレスポンスで返ってくるのでGETと同じように、_handleSubmittedを呼び出します。
最後に、_buildTextComposerの中で、_handleSubmittedを呼んでいる箇所を_postChatRequesterに置き換えます。
 Widget _buildTextComposer() {
  .... other code ....
         Container(
              margin: const EdgeInsets.symmetric(horizontal: 4.0),
              child: Theme.of(context).platform == TargetPlatform.iOS
                  ? CupertinoButton(
                      child: const Text("Send"),
                      onPressed: _isComposing
                          ? () => _postChatRequester(_textController.text) // New
                          : null,
                    )
                  : IconButton(
                      icon: const Icon(Icons.send),
                      onPressed: _isComposing
                          ? () => _postChatRequester(_textController.text) // New
                          : null,
                    ),
            ),
 }
これで、メッセージの保存は完了です。
メッセージの削除
メッセージの横に、削除ボタンを作成してそれを押すとメッセージが削除されるようにします。
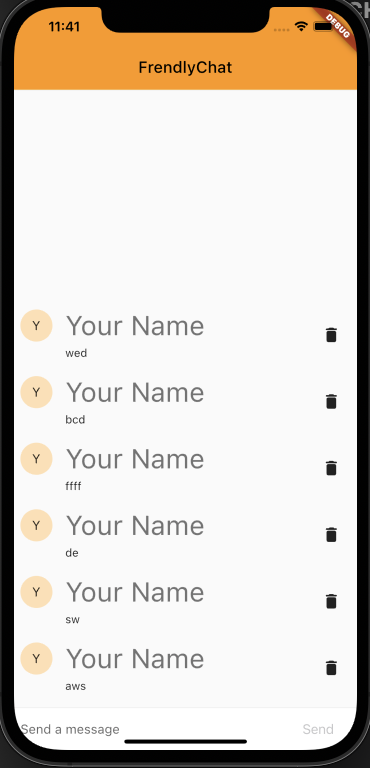
まずは、削除ボタンを設置します。
_ChatScreenStateのListView.builderのitemBuilderを下記のように変更します。
child: ListView.builder(
  padding: const EdgeInsets.all(8.0),
  reverse: true,
  // itemBuilder: (_, index) => _messages[index], Old
  itemBuilder: (_, index) {
      return Container(
      child: Row(
          children: [
          _messages[index],
          IconButton(
              onPressed: () => _deleteChatRequster(index),
              icon: Icon(Icons.delete_rounded)),
          ],
      ),
      );
  },
  itemCount: _messages.length,
),
_messagesの中身をそのままListViewで並べていたのをRowで括って削除用のIconButtonを追加しています。
次に、_ChatScreenStateに削除のリクエストを送るためのメソッドを作成します。
IconButtonが押された時に呼んでいる_deleteChatRequster(index)です。
  void _deleteChatRequster(int index) async {
    var deleteMessage = _messages[index];
    var deleteUri = Uri.parse(chatUri + deleteMessage.id.toString());

    Map<String, String> headers = {
      "Content-Type": "application/json",
    };

    final response = await http.delete(deleteUri, headers: headers);

    if (response.statusCode == 200) {
      setState(() {
        _messages.removeAt(index);
      });
    } else {
      throw Exception('Delete Chats Fail');
    }
  }
これで、削除の実装は終わりです。
もし、レイアウトでエラー(RenderFlex children have non-zero flex but incoming width constraints are unbounded.)になったら、ChatMessageのSizeTransitionをExpandedでwrapしてみてください。
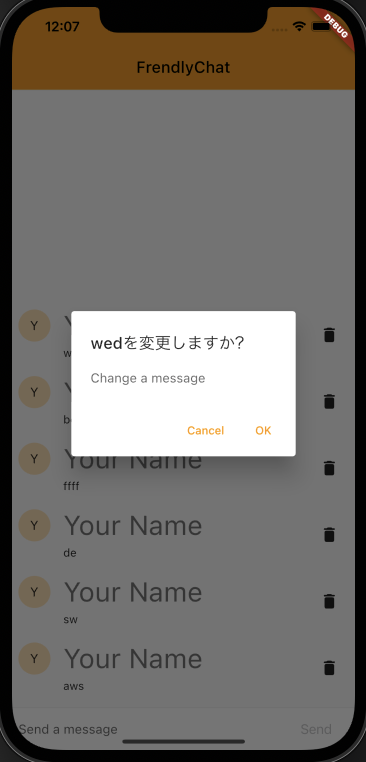
メッセージの更新
最後にメッセージの更新を作成します。
方針としてはメッセージを表示しているWidgetをTapしたらダイアログを出して更新しようと思います。
まず、ダイアログの表示部分を作りたいと思います。
削除の時と同じく、_ChatScreenStateのListView.builderのitemBuilderを変更します。
child: ListView.builder(
    padding: const EdgeInsets.all(8.0),
    reverse: true,
    itemBuilder: (_, index) {
        return Container(
        child: Row(
            children: [
            Expanded(
                child: InkWell(
                child: _messages[index],
                onTap: () {
                    showDialog(
                    context: context,
                    builder: (_) {
                        return AlertDialog(
                        title: Text("${_messages[index].text}を変更しますか?"),
                        content: TextField(
                            controller: _updateTextController,
                            decoration:
                                const InputDecoration.collapsed(hintText: "Change a message"),
                            focusNode: _updateFocusNode,
                        ),
                        actions: [
                            TextButton(
                            onPressed: () => Navigator.pop(context),
                            child: Text("Cancel")
                            ),
                            TextButton(
                            onPressed: () => {
                                _updateChatRequester(index, _updateTextController.text),
                                Navigator.pop(context)
                            },
                            child: Text("OK")
                            ),
                        ],
                        );
                    });
                },
                ),
            ),
            IconButton(
                onPressed: () => _deleteChatRequster(index),
                icon: Icon(Icons.delete_rounded)),
            ],
        ),
);
_messages[index]をTapできるようにInkWellでwrapします。
次にonTap()でダイアログを表示する処理を書いてます。
ダイアログの中身はTextFieldとOKボタンとキャンセルボタンを配置しています。
TextFieldを同じ画面で複数使用するためにはTextEditingController()とFocusNode()を分けないといけなそうだったので追加します。
class _ChatScreenState extends State<ChatScreen> with TickerProviderStateMixin {
  final _textController = TextEditingController();
  final _updateTextController = TextEditingController(); // New
  final FocusNode _focusNode = FocusNode();
  final FocusNode _updateFocusNode = FocusNode(); // New
他のリクエストと同じように、ダイアログのOKボタンを押した時にメッセージの更新をするリクエストメソッド(_updateChatRequester)とリクエストに使用するクラスUpdateChatRequestを作成する。
class UpdateChatRequest {
  final String message;

  UpdateChatRequest({
    this.message = "",
  });

  Map<String, dynamic> toJson() => {
    'message': message,
  };
}
  void _updateChatRequester(int index, String text) async {
    var updateMessage = _messages[index];
    var updateUri = Uri.parse(chatUri + updateMessage.id.toString());

    Map<String, String> headers = {
      "Content-Type": "application/json",
    };

    var request = UpdateChatRequest(message: text);

    final response = await http.put(updateUri, body: json.encode(request.toJson()), headers: headers);

    if (response.statusCode == 200) {
      Map<String, dynamic> decoded = json.decode(response.body);
      var chatResponse = ChatResponse.fromJson(decoded);
      _updateTextController.clear();

      setState(() {
        // _messages[index].text = chatResponse.messageだと再描画されない?
        _messages.removeAt(index);
        _handleSubmitted(chatResponse.message, chatResponse.id, index: index);
      });
    } else {
      throw Exception('Update Chats Fail');
    }
  }
_handleSubmittedを配列の途中にChatMessageをinsertできるように引数を渡せるように変更しています。(void _handleSubmitted(String text, int id, {int index = 0}))
これで、メッセージ更新も完了です。
実際に、更新できることを確認してみてください。
おわりに
今回は、flutterのcodelabsのチャットアプリをapiで操作できるように変更してみました。
開発中に色々と課題を感じたので、引き続き改善を続けたいと思います。