概要
Xcodeをvimのキーバインドで利用するため、XVim2をインストールする。
https://github.com/XVimProject/XVim2
手順
1. 証明書の作成
READMEのINSTALL.1にあるリンク「 You can read the instructions for how to do this and...」の通り実行する。
https://github.com/XVimProject/XVim2/blob/master/SIGNING_Xcode.md
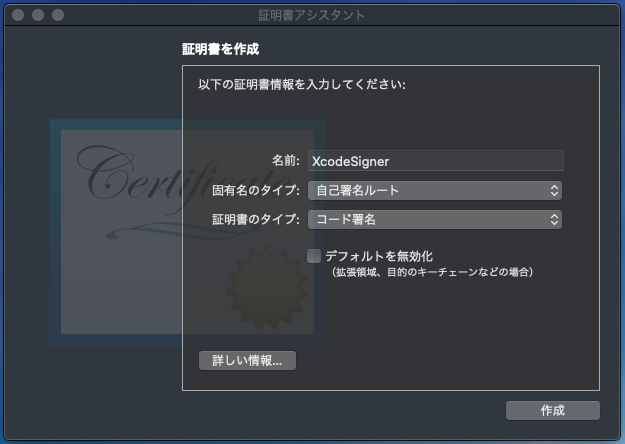
キーチェーンアクセスを開き、メニューバーから「証明書アシスタント > 証明書を作成」を選択する。

以下の通り入力する。
コマンドラインから署名を実行する。(時間がかかるので放置。その後、ログインパスワードの入力を何度か求められる。)
sudo codesign -f -s XcodeSigner /Applications/Xcode.app
2. Xvim2リポジトリのclone
git clone https://github.com/XVimProject/XVim2.git
3. ブランチ切り替え
Xcodeのバージョンに合わせたブランチに切り替える。
ブランチのリストは以下の通り。
https://github.com/XVimProject/XVim2#branches-and-releases
※ 2020.10.24時点ではmasterブランチがXcode12に対応しているので、Xcode12を利用しているのであれば切り替える必要は無い。
ここで、以下の結果が空の場合はREADMEの手順通り設定を行う。「/Applications/Xcode.app/Contents/Developer」というようにパスが表示されれば問題無い。
xcode-select -p
4. make実行
cloneしてきたXVim2のディレクトリ内でmakeを実行する。
cd XVim2
make
5. Xcode起動
Xcodeを起動すると、以下のダイアログが表示されるので、「Load Bundle」を選択する。
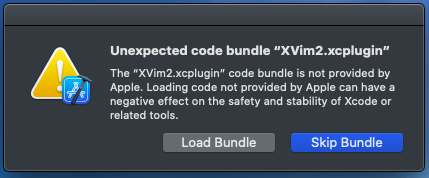
※ 間違えて「Skip Bundle」を選択した場合は、Xcodeを閉じた上で以下のコマンドを実行する。(Xcode 12.0.1の場合のコマンド。最後のバージョンの指定はXcodeに合わせる。)
defaults delete com.apple.dt.Xcode DVTPlugInManagerNonApplePlugIns-Xcode-12.0.1
6. Xcode再起動
Xcodeを一度閉じて、再起動する。
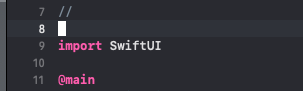
成功すると、以下のようにカーソルがブロック型となり、Vimのキーバインドで操作が可能となる。