自宅のMacbookProが逝った後、経済的(Mac高い)理由によりWindows機になったので趣味で遊べる開発環境を作り直してみました。
構成
- CentOS7 (Vagrant + VirtualBox)
- ruby 2.4.2
- rails 5.1.4
- [docker] mysql 5.7
- [docker] neo4j 3.3.1
最初はRailsもdockerに乗せようかとも思いましたが、アプリケーションは手元で動かしたい人なので、rbenvを使ってrubyを入れるようにしました。
なのでdockerではミドルウェアのみを動かす形にしてみました。
neo4jは趣味です。
利用ツール
Windowsに復帰してから日も浅いのでどれがいいとか言えない部分もありますが、今のところ以下のツールを使ってます。
開発環境作り
1. vagrantのインストール&初期設定
以下よりDLしてインストールを行う。
Virtualbox
https://www.virtualbox.org/wiki/Downloads
Vagrant
https://www.vagrantup.com/downloads.html
boxを追加し、vagrantを初期化する。
# ディレクトリの場所はお好みで
% mkdir workspace/centos7
% cd workspace/centos7

% vagrant box add centos/7
% vagrant box list
centos/7        (virtualbox, 1710.01)
% vagrant init centos7
syncさせるディレクトリを予め作成しておく。
% mkdir -p workspace/vagrant_synced
作成されたVagrantfileを変更する。
Vagrant.configure("2") do |config|
  config.vm.box = "centos/7"

  # Rails
  config.vm.network "forwarded_port", guest: 3000, host: 3000
  # MySQL
  config.vm.network "forwarded_port", guest: 3306, host: 3306
  # Neo4j
  config.vm.network "forwarded_port", guest: 7474, host: 7474
  config.vm.network "forwarded_port", guest: 7687, host: 7687

  # ip address
  config.vm.network "private_network", ip: "192.168.33.10"

  # syncディレクトリを設定
  config.vm.synced_folder "C:/Users/xxxxxx/workspace/vagrant_synced", "/home/vagrant/workspace"

  config.vm.provider "virtualbox" do |vb|
    # 仮想マシンのメモリは4GBに増やしておく
    vb.memory = "4096"
  end
end
最初メモリが足りずにneo4jが立ち上がらなかったので、4G割り当てるようにしました。
書き終わったらvagrantを起動させます。
% pwd
/c/Users/pluto/workspace/centos7

% vagrant up
Bringing machine 'default' up with 'virtualbox' provider...
Vagrantfileに指定したIP(192.168.33.10)にSSH接続を行う。
認証鍵は .vagrantディレクトリ配下にあるprivate_keyを利用します。
2.以降はSSH接続したCentOS上での作業になります。
2. CentOS7の初期セットアップ
必要な初期設定とライブラリのインストール等を行います。
[vagrant@localhost ~]# yum check-update
[vagrant@localhost ~]# sudo yum update

# git, zsh, vimをインストールする
[vagrant@localhost ~]# sudo yum install git zsh vim-enhanced

# zshを利用するように変更
[vagrant@localhost ~]# usermod -s /bin/zsh vagrant

# rails環境作成で必要になるライブラリをインストールする
[vagrant@localhost ~]# sudo yum install -y openssl-devel readline-devel zlib-devel libxml2-devel libxslt-devel libyaml-devel mysql-devel
.zshrcを設定します(設定内容はお好みで)
# 文字コードはUTF-8
export LANG=ja_JP.UTF-8

#
# 補完
#
autoload -Uz compinit
compinit

# 補完候補表示時にbeep音を鳴らさない
setopt nolistbeep

# 候補が多い場合は詰めて表示
setopt list_packed

# コマンドラインの引数でも補完を有効にする(--prefix=/userなど)
setopt magic_equal_subst

# 大文字小文字を区別しない(大文字を入力した場合は区別する)
zstyle ':completion:*' matcher-list 'm:{a-z}={A-Z}'

# cd -<tab>で以前移動したディレクトリを表示
setopt auto_pushd

# auto_pushdで重複するディレクトリは記録しない
setopt pushd_ignore_dups

#
# 履歴
#
HISTFILE=~/.zsh_history

# メモリ上に保存される件数(検索できる件数)
HISTSIZE=1000

# ファイルに保存される件数
SAVEHIST=1000

# rootは履歴を残さないようにする
if [ $UID = 0 ]; then
  unset HISTFILE
  SAVEHIST=0
fi

# 直前と同じコマンドの場合は履歴に追加しない
setopt hist_ignore_dups

# 重複するコマンドは古い方を削除する
setopt hist_ignore_all_dups

#
# 色
#
autoload Uz colors
colors

# プロンプト
PROMPT="[%{${fg[green]}%}%n%{${reset_color}%}@%m]# "
RPROMPT="%{${fg[blue]}%}[%d]%{${reset_color}%}"

# ls
export LSCOLORS=gxfxcxdxbxegedabagacag
export LS_COLORS='di=36;40:ln=35;40:so=32;40:pi=33;40:ex=31;40:bd=34;46:cd=34;43:su=30;41:sg=30;46:tw=30;42:ow=30;46'

# vim
alias vi='vim'

# 補完候補もLS_COLORSに合わせて色が付くようにする
zstyle ':completion:*:default' list-colors ${(s.:.)LS_COLORS}

# lsがカラー表示になるようエイリアスを設定
alias ls='ls -F --color'
.vimrcを設定(設定内容はお好みで)
"文字コードをUFT-8に設定
set fenc=utf-8
"" バックアップファイルを作らない
set nobackup
" スワップファイルを作らない
set noswapfile
" 編集中のファイルが変更されたら自動で読み直す
set autoread
" 行番号を表示
set number
" 現在の行を強調表示
set cursorline
" インデントはスマートインデント
set smartindent
" シンタックスハイライトを有効に
syntax on
gitの初期設定を行う
[vagrant@localhost]# git config --global user.name "yudedako"
[vagrant@localhost]# git config --global user.email "pluto.club+git@gmail.com"
3. Githubへ接続できるようにする
秘密鍵を共有する config.ssh.forward_agent では何故かうまくいかなかったので、Githubへ接続するための鍵を新しく作成することにします。
[vagrant@localhost .ssh]$ pwd
/home/vagrant/.ssh
[vagrant@localhost ~]$ ssh-keygen
Generating public/private rsa key pair.
Enter file in which to save the key (/home/vagrant/.ssh/id_rsa): github_rsa
(以下略)
作成した証明書をgithub.comで登録してから接続を確認する。
[vagrant@localhost]# ssh -T git@github.com -i ~/.ssh/github_rsa
Hi yudedako! You've successfully authenticated, but GitHub does not provide shell access.
4. Dockerのインストール
何故か公式に載っているやり方でうまく行かなかったので、オライリー本に書いてあるやり方でインストールしました。
[vagrant@localhost]# curl https://get.docker.com > /tmp/install.sh
[vagrant@localhost]# chmod +x /tmp/install.sh
[vagrant@localhost]# /tmp/install.sh
[vagrant@localhost]# sudo usermod -aG docker vagrant
docker-composeもインストールする。
こちらは公式に書かれていた方法ですんなり入りました。
https://docs.docker.com/compose/install/#install-compose
[vagrant@localhost]# sudo curl -L https://github.com/docker/compose/releases/download/1.16.1/docker-compose-`uname -s`-`uname -m` -o /usr/local/bin/docker-compose
[vagrant@localhost]# sudo chmod +x /usr/local/bin/docker-compose
[vagrant@localhost]# mkdir -p ~/.zsh/completion
[vagrant@localhost]# curl -L https://raw.githubusercontent.com/docker/compose/1.16.1/contrib/completion/zsh/_docker-compose > ~/.zsh/completion/_docker-compose
.zshrcに以下を追記する。
# docker compose
fpath=(~/.zsh/completion $fpath)
autoload -Uz compinit && compinit -i
ブート時にdocker daemonが立ち上がるようにsystemdに登録する。
[vagrant@localhost]# sudo systemctl enable docker
Created symlink from /etc/systemd/system/multi-user.target.wants/docker.service to /usr/lib/systemd/system/docker.service.
シェルを再起動して動作を確認する。
[vagrant@localhost]# exec $SHELL -l
[vagrant@localhost]# docker version
Client:
 Version:      17.11.0-ce
 API version:  1.34
 Go version:   go1.8.3
 Git commit:   1caf76c
 Built:        Mon Nov 20 18:35:47 2017
 OS/Arch:      linux/amd64
Cannot connect to the Docker daemon at unix:///var/run/docker.sock. Is the docker daemon running?
[vagrant@localhost]# docker-compose version
docker-compose version 1.16.1, build 6d1ac21
docker-py version: 2.5.1
CPython version: 2.7.13
OpenSSL version: OpenSSL 1.0.1t  3 May 2016
5. Rubyをインストール
rbenvをインストールします。
[vagrant@localhost]# git clone https://github.com/rbenv/rbenv.git ~/.rbenv
[vagrant@localhost]# cd ~/.rbenv && src/configure && make -C src
[vagrant@localhost]# echo 'export PATH="$HOME/.rbenv/bin:$PATH"' >> ~/.zshrc
[vagrant@localhost]# ~/.rbenv/bin/rbenv init
[vagrant@localhost]# echo 'eval "$(rbenv init -)"' >> ~/.zshrc

[vagrant@localhost]# source .zshrc
[vagrant@localhost]# rbenv -v
rbenv 1.1.1-28-gb943955
次にruby-buildをインストールします。
[vagrant@localhost]# git clone https://github.com/rbenv/ruby-build.git ~/.rbenv/plugins/ruby-build
[vagrant@localhost]# sudo ~/.rbenv/plugins/ruby-build/install.sh
rbenvを使ってrubyをインストールします。
[vagrant@localhost]# rbenv install 2.4.2

[vagrant@localhost]# rbenv rehash
[vagrant@localhost]# rbenv versions
  2.4.2
[vagrant@localhost]# rbenv global 2.4.2
[vagrant@localhost]# ruby -v
ruby 2.4.2p198 (2017-09-14 revision 59899) [x86_64-linux]

# irb立ち上げて日本語が使えることも確認しておく
[vagrant@localhost]# irb
irb(main):001:0> hoge = 'ああ'
=> "ああ"
ついでにbundlerもインストールしておく。
[vagrant@localhost]# gem install bundler --no-ri --no-rdoc
Fetching: bundler-1.16.0.gem (100%)
Successfully installed bundler-1.16.0
1 gem installed
[vagrant@localhost]# rbenv rehash
[vagrant@localhost]# bundle -v
Bundler version 1.16.0
6. mysql, neo4jをインストールする。
docker-composeでインストールする。
version: "2"
services:
  datastore:
    image: busybox
    volumes:
      - ./docker/mysql/volumes:/var/lib/mysql
  db:
    build:
      context: .
      dockerfile: ./docker/mysql/Dockerfile
    ports:
      - "3306:3306"
    volumes_from:
      - datastore
    depends_on:
      - datastore
    environment:
      MYSQL_ROOT_PASSWORD: root2@Password
      TZ: "Asia/Tokyo"
  graphdb:
    build:
      context: .
      dockerfile: ./docker/neo4j/Dockerfile
    ports:
      - "7474:7474"
      - "7687:7687"
    volumes:
      - "./docker/neo4j/volumes/data:/data"
      - "./docker/neo4j/volumes/logs:/logs"
projectフォルダ内にdockerディレクトリを用意して、それぞれのDockerfileを設定する。
### docker/mysql/Dockerfile

FROM mysql:5.7

ENV LC_ALL ja_JP.UTF-8

ADD ./docker/mysql/charset.cnf /etc/mysql/conf.d/charset.cnf
[mysqld]
character-set-server=utf8mb4
collation-server=utf8mb4_general_ci
[client]
default-character-set=utf8mb4
### docker/neo4j/Dockerfile

FROM neo4j:3.3

ADD ./docker/neo4j/neo4j.conf /var/lib/neo4j/conf/neo4j.conf
# To have Bolt accept non-local connections, uncomment this line:
dbms.connector.bolt.address=0.0.0.0:7687
neo4jの設定は管理サイトのログイン時に発生した以下エラーに対する対応のためです。
ServiceUnavailable: WebSocket connection failure. Due to security constraints in your web browser, the reason for the failure is not available to this Neo4j Driver. Please use your browsers development console to determine the root cause of the failure. Common reasons include the database being unavailable, using the wrong connection URL or temporary network problems. If you have enabled encryption, ensure your browser is configured to trust the certificate Neo4j is configured to use. WebSocket `readyState` is: 3
自分の場合は、上記設定をconfファイルに追加して、port:7687を開放(vagrant側も)したらログイン出来るようになりました。
dockerを立ち上げて動作確認します。
[vagrant@localhost]# docker-compose up -d
MySQLはGUIクライアントからの接続で確認します。
neo4jは管理サイトにアクセス出来るかで確認する。
http://localhost:7474/browser/
7. Railsのインストールから初期設定を行う
最後はRailsのインストール、および初期設定です。
とりあえずwelcomeページが見れることをゴールとします。
bundle install用と作業用のディレクトリを作成してからGemfileを生成します。
# bundle install 用のディレクトリを作成する
[vagrant@localhost]# pwd
/home/vagrant
[vagrant@localhost]# mkdir -p src/bundles

# 作業用のディレクトリを作成する
[vagrant@localhost]# mkdir -p workspace/rails-projects/TestApp
[vagrant@localhost]# cd workspace/rails-projects/TestApp

# Gemfileを生成する
[vagrant@localhost]# bundle init
Writing new Gemfile to /home/vagrant/workspace/rails-projects/TestApp/Gemfile
bundle install用のディレクトリを共有ディレクトリの外に別で作成したのは、nokogiriのインストールで発生したエラーの対応のためです。
https://dev.classmethod.jp/server-side/ruby-on-rails/tips_ruby-on-railsbundle-install_text-file-busy-error/
以下に発生したエラー内容を書き残しておきます。
************************************************************************
IMPORTANT NOTICE:

Building Nokogiri with a packaged version of libxml2-2.9.5.

Team Nokogiri will keep on doing their best to provide security
updates in a timely manner, but if this is a concern for you and want
to use the system library instead; abort this installation process and
reinstall nokogiri as follows:

    gem install nokogiri -- --use-system-libraries
        [--with-xml2-config=/path/to/xml2-config]
        [--with-xslt-config=/path/to/xslt-config]

If you are using Bundler, tell it to use the option:

    bundle config build.nokogiri --use-system-libraries
    bundle install

Note, however, that nokogiri is not fully compatible with arbitrary
versions of libxml2 provided by OS/package vendors.
************************************************************************
ここに書かれた方法を行いましたがこれだけでは解決しませんでした。
ただし、実行後にエラー内容が変わったので、ひょっとしたらpathの変更だけでなく下記作業も必要かもしれません。
[vagrant@localhost]# gem install nokogiri -- --use-system-libraries
[vagrant@localhost]# bundle config build.nokogiri --use-system-libraries
[vagrant@localhost]# bundle install
実行後は以下のエラーメッセージが表示されるようになりました。
Fetching nokogiri 1.8.1
Installing nokogiri 1.8.1 with native extensions
Gem::Ext::BuildError: ERROR: Failed to build gem native extension.

    current directory: /home/vagrant/workspace/rails-projects/TestApp/vendor/bundle/ruby/2.4.0/gems/nokogiri-1.8.1/ext/nokogiri
/home/vagrant/.rbenv/versions/2.4.2/bin/ruby -r ./siteconf20171215-22255-mhbmye.rb extconf.rb --use-system-libraries
checking if the C compiler accepts ... yes
Building nokogiri using system libraries.
WARNING: libxml2 version 2.9.3 or later is highly recommended, but proceeding anyway.
checking for xmlParseDoc() in libxml/parser.h... yes
checking for xsltParseStylesheetDoc() in libxslt/xslt.h... yes
checking for exsltFuncRegister() in libexslt/exslt.h... yes
checking for xmlHasFeature()... yes
checking for xmlFirstElementChild()... yes
checking for xmlRelaxNGSetParserStructuredErrors()... yes
checking for xmlRelaxNGSetParserStructuredErrors()... yes
checking for xmlRelaxNGSetValidStructuredErrors()... yes
checking for xmlSchemaSetValidStructuredErrors()... yes
checking for xmlSchemaSetParserStructuredErrors()... yes
creating Makefile

Text file busy @ unlink_internal - ./siteconf20171215-22255-mhbmye.rb

Gem files will remain installed in /home/vagrant/workspace/rails-projects/TestApp/vendor/bundle/ruby/2.4.0/gems/nokogiri-1.8.1 for
inspection.
Results logged to
/home/vagrant/workspace/rails-projects/TestApp/vendor/bundle/ruby/2.4.0/extensions/x86_64-linux/2.4.0-static/nokogiri-1.8.1/gem_make.out

An error occurred while installing nokogiri (1.8.1), and Bundler cannot continue.
Make sure that `gem install nokogiri -v '1.8.1'` succeeds before bundling.
ここからが続きです。
生成されたGemfileを開き gem "rails" のコメントを外して bundle install を実行します。
[vagrant@localhost]# bundle install --path /home/vagrant/src/bundles/TestApp
rails newします。
この際に dbにmysqlを指定し、bundle install や test unit はインストールしないようにします。
[vagrant@localhost]# bundle exec rails new -d mysql -T -B .
Gemfileが既にある状態なので、途中の上書き確認についてはyesを選択します。
bundle install を実行前にGemfileを編集します。
自分が行ったのは以下の3点です(細かい部分はお好みで)
- 不要なgem(coffee-rails, turbolinksなど)をコメント化
- debug用のgemを追加(pry, better_errors, hirbなど)を追加
- neo4j Gemを追加
修正が終わったら bundle install を叩いてGemをインストールします。
インストールし終わったらrakeコマンドでdbを作成します。
叩く前に database.ymlにpasswordとhostを設定します。
default: &default
  adapter: mysql2
  encoding: utf8
  pool: <%= ENV.fetch("RAILS_MAX_THREADS") { 5 } %>
  username: root
  password: root2@Password
  host: 0.0.0.0

development:
  <<: *default
  database: TestApp_development

test:
  <<: *default
  database: TestApp_test
なお、hostを 0.0.0.0 でなく localhost としてしまうとvagrant上のmysql.sockを探しにいってしまって以下のようなエラーが出るので注意が必要です。
[vagrant@localhost]# bin/rake db:create
# <Mysql2::Error: Can't connect to local MySQL server through socket '/var/lib/mysql/mysql.sock' (2)>
Couldn't create database for {"adapter"=>"mysql2", "encoding"=>"utf8", "pool"=>5, "username"=>"root", "password"=>"root2@Password", "host"=>"localhost", "database"=>"TestApp_development"}, {:charset=>"utf8"}
(If you set the charset manually, make sure you have a matching collation)
Created database 'TestApp_development'
# <Mysql2::Error: Can't connect to local MySQL server through socket '/var/lib/mysql/mysql.sock' (2)>
Couldn't create database for {"adapter"=>"mysql2", "encoding"=>"utf8", "pool"=>5, "username"=>"root", "password"=>"root2@Password", "host"=>"localhost", "database"=>"TestApp_test"}, {:charset=>"utf8"}
(If you set the charset manually, make sure you have a matching collation)
Created database 'TestApp_test'
修正後は無事に作成できました。
[vagrant@localhost]# bin/rake db:create
Created database 'TestApp_development'
Created database 'TestApp_test'
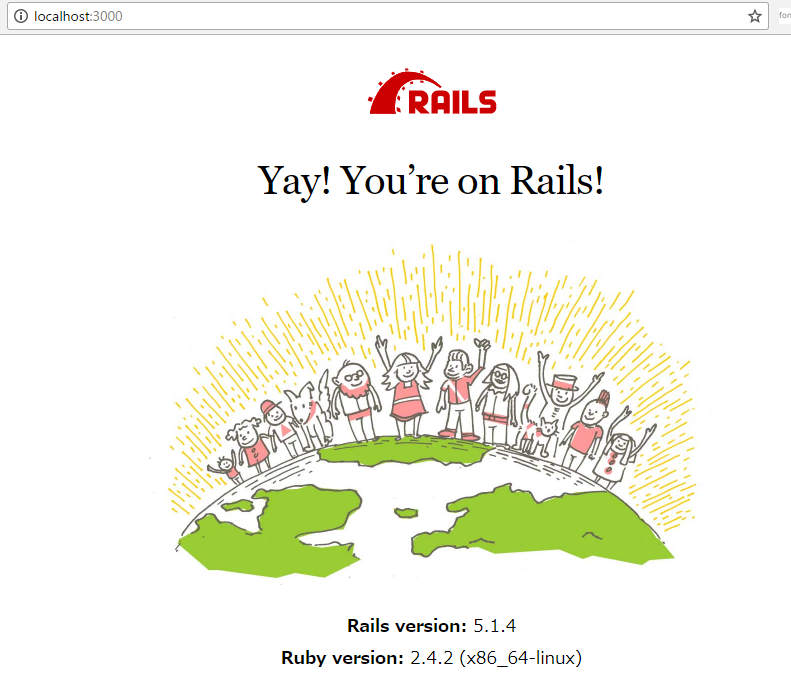
DB生成後はPumaを立ち上げ、ブラウザから localhost:3000 にアクセスしてみます。
[vagrant@localhost]# bin/rails s
=> Booting Puma
=> Rails 5.1.4 application starting in development
=> Run `rails server -h` for more startup options
Puma starting in single mode...
* Version 3.11.0 (ruby 2.4.2-p198), codename: Love Song
* Min threads: 5, max threads: 5
* Environment: development
* Listening on tcp://0.0.0.0:3000
以下のwebcomeページが表示されればOK。
最後にこの時点の状態をgitに保存しておく事にします。
dockerでvolumesに指定したディレクトリは管理から外すようにしたいので、.gitignoreに以下を追加しました。
/docker/mysql/volumes/*
/docker/neo4j/volumes/*
gitを初期化してfirst commitまで行います。
[vagrant@localhost]# git init
[vagrant@localhost]# git add .
[vagrant@localhost]# git commit -m "first commit."
何だかんだ半日くらいかかった・・
ruby系の情報は、だいたいMac前提で出てくるので調べるのが思ったより大変。
特に入門というか入り口の記事。逆に深い方だとLinuxばっかになるんだよね・・
まぁ今更感のある開発環境作り記事ですが、Rubyに興味があるWindowsユーザーに少しでも役立てばいいな。