Spring4勉強会 第四回
第一回は環境構築から簡単な値の受け渡しまで
第二回は色々なFORMとの連携
第三回はValidatorの実装と日本語対応
そして今回はいよいよORマッパーMyBatisとの連携。DBです。
Springの入門はこれで終わろうと思ってます。
INDEXは以下
- MyBatisとは
- 環境構築
- 解説1
- 簡単なサンプル
- 解説2
- 機能の追加
- 解説3
- 練習問題
です。
MyBatisとは
![]()
MyBatis
MyBatis はカスタム SQL、ストアドプロシージャ、高度なマッピング処理に対応した優れた永続化フレームワークです。 MyBatisを使うことで、直接 JDBC を扱うコードを書いたり、クエリ引数やクエリ結果を手動で設定する必要がほとんどなくなります。 MyBatis の設定やデータベースレコードと Java オブジェクトの関連付けは、XML またはアノテーションを使って行うことができます。
※↑本家引用
要はORマッパです。
しかし、今回使うのは、もう一つ
![]()
MyBatis-Spring
MyBatis-Spring とは?
MyBatis-Spring によって MyBatis と Spring をシームレスに連携させることができます。このライブラリを使えば、MyBatis のステートメントを Spring のトランザクション内で実行することもできますし、Mapper や SqlSession の生成、他の Bean への注入、MyBatis の例外から Spring の DataAccessException への変換、さらには MyBatis や Spring, MyBatis-Spring に依存しないコードでアプリケーションを構築することも可能になります。
※↑本家引用
そして今回サンプルでは、XMLベースのmapperを使用します。
環境構築
環境構築はpom.xmlとmvc-config.xmlを修正します。
まずはpomから…
1. pom.xmlの修正
以下の依存性を追記してください。
<spring-jdbc.version>4.0.6.RELEASE</spring-jdbc.version>
<!-- MyBatis -->
<MyBatis.version>3.3.0</MyBatis.version>
<!-- MyBatis Spring -->
<MyBatis.Spring.version>1.2.2</MyBatis.Spring.version>
<!-- Connector-J -->
<MySqlConnector.version>5.1.34</MySqlConnector.version>
<!-- CommonsDbcp -->
<CommonsDbcp.version>2.1</CommonsDbcp.version>


<!-- MyBatis -->
<dependency>
    <groupId>org.mybatis</groupId>
    <artifactId>mybatis</artifactId>
    <version>${MyBatis.version}</version>
</dependency>
<!-- MyBatis Spring -->
<dependency>
    <groupId>org.mybatis</groupId>
    <artifactId>mybatis-spring</artifactId>
    <version>${MyBatis.Spring.version}</version>
</dependency>
<!-- MySqlConnector -->
<dependency>
    <groupId>mysql</groupId>
    <artifactId>mysql-connector-java</artifactId>
    <version>${MySqlConnector.version}</version>
</dependency>
<!-- Commons-dbcp -->
<dependency>
    <groupId>org.apache.commons</groupId>
    <artifactId>commons-dbcp2</artifactId>
    <version>${CommonsDbcp.version}</version>
</dependency>
<!-- Spring JDBC -->
<dependency>
    <groupId>org.springframework</groupId>
    <artifactId>spring-jdbc</artifactId>
    <version>${spring-jdbc.version}</version>
</dependency>
書き終わったら、Maven Installを実行してください。
2. mvc-config.xmlの修正
今回が最後なので、今までのも込みでフルでのせます。
<?xml version="1.0" encoding="UTF-8"?>

<beans xmlns="http://www.springframework.org/schema/beans"
	xmlns:xsi="http://www.w3.org/2001/XMLSchema-instance" xmlns:context="http://www.springframework.org/schema/context"
	xmlns:mvc="http://www.springframework.org/schema/mvc" xmlns:tx="http://www.springframework.org/schema/tx"
	xmlns:util="http://www.springframework.org/schema/util"
	xsi:schemaLocation="
        http://www.springframework.org/schema/mvc http://www.springframework.org/schema/mvc/spring-mvc-3.0.xsd
        http://www.springframework.org/schema/beans http://www.springframework.org/schema/beans/spring-beans-3.0.xsd
        http://www.springframework.org/schema/context http://www.springframework.org/schema/context/spring-context-3.0.xsd
        http://www.springframework.org/schema/tx http://www.springframework.org/schema/tx/spring-tx-3.0.xsd
        http://www.springframework.org/schema/util http://www.springframework.org/schema/util/spring-util-3.0.xsd">
	<context:component-scan base-package="jp.co.kenshu" />
	<mvc:annotation-driven />
	<bean id="messageSource" class="org.springframework.context.support.ReloadableResourceBundleMessageSource">
	   <property name="basename" value="classpath:ValidatorMessages" />
	</bean>
	<bean
		class="org.springframework.web.servlet.view.InternalResourceViewResolver">
		<!-- Example: a logical view name of 'showMessage' is mapped to '/WEB-INF/jsp/showMessage.jsp' -->
		<property name="prefix" value="/WEB-INF/view/" />
		<property name="suffix" value=".jsp" />
	</bean>
	<!-- DataSource -->
	<bean id="dataSource" class="org.apache.commons.dbcp2.BasicDataSource">
		<property name="driverClassName" value="com.mysql.jdbc.Driver" />
		<property name="url" value="jdbc:mysql://localhost/test" />
		<property name="username" value="【MySqlのUSER】" />
		<property name="password" value="【MySqlのPASSWORD】" />
	</bean>
	<bean id="sqlSessionFactory" class="org.mybatis.spring.SqlSessionFactoryBean">
		<property name="dataSource" ref="dataSource" />
	</bean>
	<bean class="org.mybatis.spring.mapper.MapperScannerConfigurer">
		<property name="basePackage" value="jp.co.kenshu.mapper" />
		<property name="sqlSessionFactoryBeanName" value="sqlSessionFactory" />
	</bean>
	<bean class="org.mybatis.spring.mapper.MapperScannerConfigurer">
		<property name="basePackage" value="jp.co.kenshu.mapper" />
	</bean>
	<bean id="transactionManager"
		class="org.springframework.jdbc.datasource.DataSourceTransactionManager">
		<property name="dataSource" ref="dataSource" />
	</bean>
</beans>
完了です。
MySqlの設定は各自でユーザーとパスワードが異なるので当てはめてください!!
解説1
今回pomに設定したライブラリは四つです。
- Mybatis
導入であったようにORMです。
- MyBatis-Spring
導入であったように、Springと連携したMyBatisです。
- mysql-connector-java
お馴染みのMySqlのJDBCドライバーです。
余談ですが、5.1.34にしたので、setBlobが使えます。今回Servletも3系なので、@MultipartConfigと組み合わせて手軽に画像が扱えます。
- commons-dbcp
データベースのコネクション・プーリングを扱うライブラリです
- Spring JDBC
SpringでJDBCを扱うライブラリです。
簡単なサンプル
さっそく作って動かしてみましょう。
今回は以下のような簡単なサンプルです。
DBから取得したnameを表示するだけです。
まずはMysqlを立ち上げ、以下の環境を作成してください。
1. DB/TABLEの作成
use test
CREATE TABLE test (id int(11) PRIMARY KEY AUTO_INCREMENT,name varchar(255) NOT NULL);
※適当にinsertしといてください。
次からSpringに戻ります。Eclipseです。
2. TestControllerの作成
「jp.co.kenshu.controller」下に「TestController.java」を作成し、以下としてください。
package jp.co.kenshu.controller;
import jp.co.kenshu.dto.test.TestDto;
import jp.co.kenshu.service.TestService;
import org.springframework.beans.factory.annotation.Autowired;
import org.springframework.stereotype.Controller;
import org.springframework.ui.Model;
import org.springframework.web.bind.annotation.RequestMapping;
import org.springframework.web.bind.annotation.RequestMethod;
@Controller
public class TestController {
@Autowired
private TestService testService;
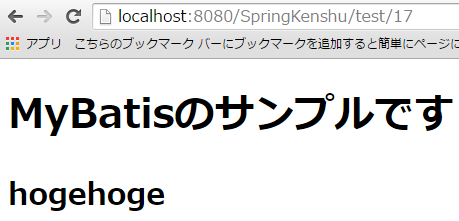
@RequestMapping(value = "/test/{id}", method = RequestMethod.GET)
public String test(Model model, @PathVariable int id) {
TestDto test = testService.getTest(id);
model.addAttribute("message", "MyBatisのサンプルです");
model.addAttribute("test", test);
return "test";
}
}
今はまだ赤くて良いです。
3. JSPの作成
「WEB-INF/view」下にtest.jspを作成して、以下のようにしてください。
<!DOCTYPE html>
<%@ page language="java" contentType="text/html; charset=UTF-8" pageEncoding="UTF-8"%>
<html>
	<head>
		<meta charset="utf-8">
		<title>Welcome</title>
	</head>
	<body>
	       <h1>${message}</h1>
		<h2>${test.name}</h2>
	</body>
</html>
4. TestService.javaの作成
「jp.co.kenshu.service」下に「TestService.java」を作成し、以下のようにしてください。
package jp.co.kenshu.service;

import jp.co.kenshu.dto.test.TestDto;
import jp.co.kenshu.entity.Test;
import jp.co.kenshu.mapper.TestMapper;
import org.springframework.beans.BeanUtils;
import org.springframework.beans.factory.annotation.Autowired;
import org.springframework.stereotype.Service;

@Service
public class TestService {

	@Autowired
	private TestMapper testMapper;

	public TestDto getTest(Integer id) {
		TestDto dto = new TestDto();
		Test entity = testMapper.getTest(id);
		BeanUtils.copyProperties(entity, dto);
		return dto;
	}

}
5. TestMapper.javaの作成
「jp.co.kenshu.mapper」下にTestMapper.javaを作成してください。
package jp.co.kenshu.mapper;

import jp.co.kenshu.entity.Test;

public interface TestMapper {
	Test getTest(int id);
}
6. TestMapper.xmlの作成
「jp.co.kenshu.mapper」下に「TestMapper.xml」を以下のように作成してください。
<?xml version="1.0" encoding="UTF-8" ?>
<!DOCTYPE mapper PUBLIC "-//mybatis.org//DTD Mapper 3.0//EN"
"http://mybatis.org/dtd/mybatis-3-mapper.dtd">
<mapper namespace="jp.co.kenshu.mapper.TestMapper">
	<resultMap id="TestResult" type="jp.co.kenshu.entity.Test">
		<result column="id" property="id" />
		<result column="name" property="name" />
	</resultMap>
	<select id="getTest" resultMap="TestResult" parameterType="int">
		select id, name
		from test
		where id = #{id}
	</select>
</mapper>
7. Test.java(entity)の作成
「jp.co.kenshu.entity」下に「Test.java」を作成する
package jp.co.kenshu.entity;

import lombok.Data;

@Data
public class Test {
	private Integer id;
	private String name;
}
8. TestDto.javaの作成
「jp.co.kenshu.dto.test」下に「TestDto.java」を作成
package jp.co.kenshu.dto.test;

import lombok.Data;

@Data

public class TestDto {
	private Integer id;
	private String name;
}
これで準備が整いました。
動かしてみましょう。
http://localhost:8080/SpringKenshu/test/1にアクセス!!
※MySqlにIDが1のユーザーがinsertされていないと動きませんので、あしからず。
解説2
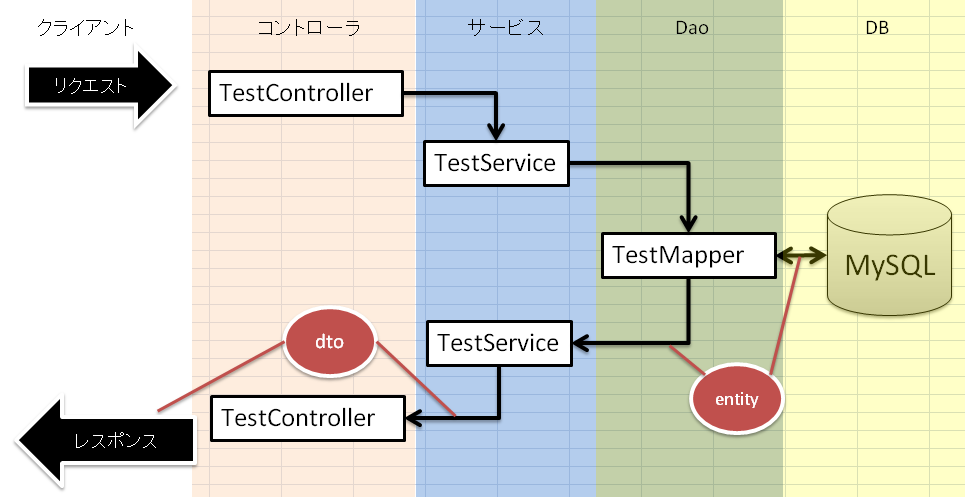
全体像はこんな感じです。
ControllerからService経由でDaoを呼び、select結果がentityに詰められて返却されます。
それを画面表示用にDtoに詰めて、JSPのテンプレートにバインドされて表示される(今回の画面キャプチャ的にはnameが「hogehoge」)。
※今回はJSPの解説は省きます。
【Controller】
@Controller
public class TestController {

	@Autowired
	private TestService testService;

	@RequestMapping(value = "/test/{id}", method = RequestMethod.GET)
	public String test(Model model, @PathVariable int id) {
		TestDto test = testService.getTest(id);
		model.addAttribute("message", "MyBatisのサンプルです");
		model.addAttribute("test", test);
		return "test";
	}
}
コントローラで目を引くのは、まずこれだと思います。
@Autowired
private TestService testService;
これは***「DI」***と呼ばれる技術が使われています。
DIとは「Dependency Injection」の略であり、「依存性の注入」と訳されます。
DIを使うと、プログラム中でnew(インスタンス化)することなく、インターフェースを使って実クラスをインスタンス化します
簡単に言ってしまうと、**外部(DIコンテナ)からインスタンスを注入(生成)する。xmlにその設定を記述する。**となります。
ここのサイトが個人的にはイメージしやすいと思います。
アノテーションベースでDI機能を使うために事前にmvc-config.xmlには以下の設定を記述してます。
<context:component-scan base-package="jp.co.kenshu" />
<mvc:annotation-driven />
そして今回はTestServiceのインスタンスをDIを使って注入しているため、
testメソッドの中で
TestDto test = testService.getTest(1);
上記のように記述してもNullPointerExceptionは発生しません。
また、今回は@AutowiredでServiceに依存性を注入するには、TestServiceにも「@Service」というアノテーションをつけておくという規約があります。
それは後述で。
Controllerは単純な処理しかしてません。
TestDto test = testService.getTest(id);
でService経由で取得したDBセレクト情報をTestDtoという入れ物に詰めてあげて、
※「セレクト情報」とは、select id, name from test where id = 1;の取得結果です。
model.addAttribute("test", test);
のように、結果を"test"というkey値でmodelにAttributeしてるだけです。
なお、今回はURLが以下のような記述がされています。
@RequestMapping(value = "/test/dto/{id}", method = RequestMethod.GET)
これの「{id}」はURLに変数としてidを指定しています。
つまり、
http://localhost:8080/SpringKenshu/test/17/
は
http://localhost:8080/SpringKenshu/test/?id=17
と同義になります。
あとは
public String testDto(Model model, @PathVariable int id) {
の
@PathVariable int id
でintのidに挿入されます。
【Service】
@Service
public class TestService {

	@Autowired
	private TestMapper testMapper;

	public TestDto getTest(Integer id) {
		TestDto dto = new TestDto();
		Test entity = testMapper.getTest(id);
		BeanUtils.copyProperties(entity, dto);
		return dto;
	}
}
Serviceで行っていることはMapper(Dao)経由で取得したentityを
BeanUtils.copyProperties(entity, dto);
を使ってTestDtoに詰め替えてreturnしているだけです。
また、Mapperを使う際に
@Autowired
private TestMapper testMapper;
によって、インターフェースを使って実クラスをインスタンス化しています。
【Mapper(Dao)とmvc-config.xml】
public interface TestMapper {
	Test getTest(int id);
}
TestMapper.javaはinterfaceです。
mvc-configに以下の記述があるおかげで、
<!-- どこのパッケージをmapperとして認識するかの設定 -->
<bean class="org.mybatis.spring.mapper.MapperScannerConfigurer">
	<property name="basePackage" value="jp.co.kenshu.mapper" />
</bean>
mapperパッケージ下をMyBatisのORM機能が使えるDaoとして認識してくれます。
TestMapprer.javaは、
Test getTest(int id);
メソッドがコールされた際に、同じパッケージにあるTestMapper.xmlを利用します。
TestMapper.xmlは今回以下となっており、
<?xml version="1.0" encoding="UTF-8" ?>
<!DOCTYPE mapper PUBLIC "-//mybatis.org//DTD Mapper 3.0//EN"
"http://mybatis.org/dtd/mybatis-3-mapper.dtd">
<mapper namespace="jp.co.kenshu.mapper.TestMapper">
	<resultMap id="TestResult" type="jp.co.kenshu.entity.Test">
		<result column="id" property="id" />
		<result column="name" property="name" />
	</resultMap>
	<select id="getTest" resultMap="TestResult" parameterType="int">
		select id, name
		from test
		where id = #{id}
	</select>
</mapper>
TestMapper.javaの「getTest」が呼ばれた際に、上記xmlの
<select id="getTest" resultMap="TestResult" parameterType="int">
		select id, name
		from test
		where id = #{id}
</select>
が呼ばれます。
「id="getTest"」に注目してください。TestMapper.javaのgetTestはxmlのこのIDと紐いて処理が行われる仕組みになってます。
ではTestMapper.xmlの記述を見ていきましょう。
まず
<mapper namespace="jp.co.kenshu.mapper.TestMapper">
でTestMapper.javaファイルと紐付けています。
次に実際にDBにアクセスしている記述を見ると、
<select id="getTest" resultMap="TestResult" parameterType="int">
	select id, name
	from test
	where id = #{id}
</select>
パラメータとしてint型を一つ受け取るとよ~ってのを以下の記述で指定しています。
parameterType="int"
今回はMapper.javaの「Test getTest(int id);」で指定しているintのidが渡ってきます。
渡ってきたidは
select id, name
from test
where id = #{id}
の「#{id}」にバインドされます。
結果として、Serviceから
testMapper.getTest(3);
とした場合、最終的には
select id, name from test where id = 3
というSQLが発行されます。
そして、selectした結果をどこに格納するのか??というのを
resultMap="TestResult"
で指定しています。
この「TestResult」は以下の記述
<resultMap id="TestResult" type="jp.co.kenshu.entity.Test">
	<result column="id" property="id" />
	<result column="name" property="name" />
</resultMap>
にある、
id="TestResult"
と紐づいています。
resultMapはその名の通り、**DBアクセス結果を何にどうマッピングするか??**を設定する記述です。
「何に」は
type="jp.co.kenshu.entity.Test"
で指定したクラスが該当します。今回はentityであるTest.javaがそれになります。
<result column="id" property="id" />
この記述は、タグで取得された情報をtypeのどのフィールドにマッピングするかを指定しています。
↑の記述だと、
select id, name from test where id = #{id}
した結果取得された「id」情報をTestエンティティのidプロパティに詰めるって動きをしています。
以上で、select結果をTestentityに詰めて返却するという一連の流れができました!!
機能の追加
あとは色々なDBアクセスを使ってみるだけです!!
- 全件取得
- whereにオブジェクトを渡す
- update
- insert
- delete
- 結合
こんな感じですかね??一つ一つやってみましょう。
1. 全件取得
ばっくり説明すると、ControllerがService・Mapper経由で取得したTestDtoのListをJSPに渡す。
JSPは渡されたListを<c:foreach>で回すということをします。
簡単すぎるものは作りながら解説いれていきますね。
まずはコントローラに以下のメソッドを追加してください。
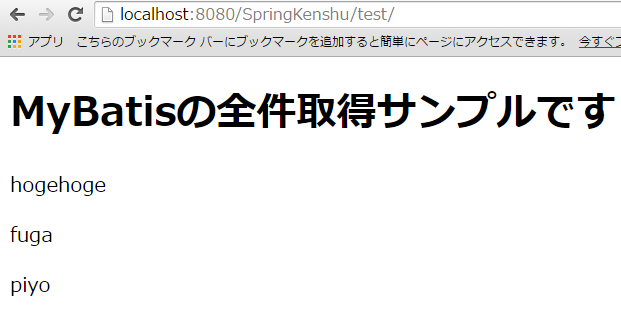
@RequestMapping(value = "/test/", method = RequestMethod.GET)
public String testAll(Model model) {
	List<TestDto> tests = testService.getTestAll();
	model.addAttribute("message", "MyBatisの全件取得サンプルです");
	model.addAttribute("tests", tests);
	return "testAll";
}
今回は「/test」で試せます。
serviceから取得したTestDtoの集まり(List)を、modelにaddしているだけです。
続いてJSPの作成
<!DOCTYPE html>

<%@ page language="java" contentType="text/html; charset=UTF-8" pageEncoding="UTF-8"%>
<%@ taglib uri="http://java.sun.com/jsp/jstl/core" prefix="c" %>
<html>
	<head>
		<meta charset="utf-8">
		<title>Welcome</title>
	</head>
	<body>
	       <h1>${message}</h1>
        <c:forEach items="${tests}" var="test">
            <p><c:out value="${test.name}"></c:out></p>
        </c:forEach>
	</body>
</html>
Controllerから渡された${tests}を<c:foreach>で回してます。
回す際に、var="test"としているので、${test}がTestDtoになります。
結果的に、${test.name}としているため、画面上には「test.getName()」した結果が表示されています。
次にServiceです。
以下のメソッドを二つ追記してください。
public List<TestDto> getTestAll() {
	List<Test> testList = testMapper.getTestAll();
	List<TestDto> resultList = convertToDto(testList);
	return resultList;
}

private List<TestDto> convertToDto(List<Test> testList) {
	List<TestDto> resultList = new LinkedList<>();
	for (Test entity : testList) {
		TestDto dto = new TestDto();
		BeanUtils.copyProperties(entity, dto);
		resultList.add(dto);
	}
	return resultList;
}
getTestAllでmapperから取得した結果をListに詰めています。
この段階ではTestはentityです。
画面に表示するために、Dtoに詰めてますが、今回はBeanUtils.copyPropertiesが簡単には使えません。
リストに詰められたentityをDtoに詰めなおすという作業を行う必要があります。
その作業をconvertToDtoメソッドで行っています。
あとはDaoの仕事を書くだけですので、
TestMapper.javaに以下のメソッドを追記してください。
List<Test> getTestAll();
Mapperに追加しただけだと意味がないので、xmlにも追記します。
TestMapper.xmlに以下を追記してください。
<select id="getTestAll" resultMap="TestResult">
	select id, name
	from test;
</select>
「getTestAll」がjavaの「getTestAll()」と紐づいていることがわかります。
注目して欲しいのは戻り値です。今回は「Listで返すという記述が見当たらない」ことです。
TestMapper.javaではListを受け取る記述を書いてます。
List<Test> getTestAll();
これだけでMyBatisの方でよしなにやってくれちゃいます。
コレクションのタイプのみ、
<select id="getTestAll" resultMap="TestResult">
の
resultMap="TestResult"
で指定していますので、
<resultMap id="TestResult" type="jp.co.kenshu.entity.Test">
	<result column="id" property="id" />
	<result column="name" property="name" />
</resultMap>
が適用されます。今回は**type="jp.co.kenshu.entity.Test"**ですね。
これで準備は完了です。
http://localhost:8080/SpringKenshu/test/
にアクセスしてみましょう。
全件取得できましたか??
2. whereにオブジェクトを渡す
最初のサンプルでは、where句にidというint値を渡していました。
where id = #{id}
オブジェクトを渡し、そのプロパティから取得したint値を渡すにはどうしたら良いでしょうか??
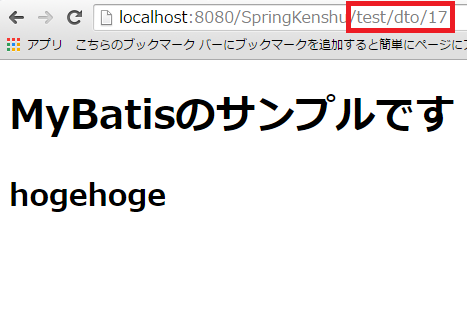
ここで作成するサンプルは最初に作った画面と見た目は変わりません。
URLは異なっているので、以下のような画面になります。
早速作っていきましょう。
まずはControllerから。以下のメソッドを追加してください。
@RequestMapping(value = "/test/dto/{id}", method = RequestMethod.GET)
public String testDto(Model model, @PathVariable int id) {
	TestDto dto = new TestDto();
	dto.setId(id);
	TestDto test = testService.getTestByDto(dto);
	model.addAttribute("message", "MyBatisのサンプルです");
	model.addAttribute("test", test);
	return "test";
}
今回は**/test/dto/{id}となっておりますので、/test/dto/2とかでアクセスするメソッドですね。
{id}で渡されたパラメータを@PathVariable int id**により、変数idで受けています。
次に
TestDto dto = new TestDto();
dto.setId(id);
で渡されたidをDtoに詰めてます。
そして
TestDto test = testService.getTestByDto(dto);
とし、serviceのgetTestByDtoメソッドにdtoを引数として渡しています。
続いて、Service。
以下のメソッドをTestServiceに追加してください。
public TestDto getTestByDto(TestDto dto) {
	Test entity = testMapper.getTestByDto(dto);
	BeanUtils.copyProperties(entity, dto);
	return dto;
}
引数がdtoになっただけです。
では最後にMapper。
TestMapper.javaに以下を追加
Test getTestByDto(TestDto dto);
TestMapper.xmlに以下を追加
<select id="getTestByDto" resultMap="TestResult">
    select id, name
    from test
    where id = #{id}
</select>
parameterTypeが見当たらないですね。
今回もよしなにやってくれてます。
TestMapper.javaのほうで
Test getTestByDto(TestDto dto);
としているため、dtoだと解釈されているのだと思います。
#{id}はdtoのプロパティなので、それが読みとられています。
準備完了です。
では、http://localhost:8080/SpringKenshu/test/dto/1
※id=1の人がinsertされていればいけます。
3. Insertサンプル
次にInsertのサンプルをつくってみましょう。
一件挿入のサンプルです。最初にGETで入力画面を表示し、Controllerに情報を送信します。
Controllerは受け取ったnameをDBに挿入し、完了後、全件取得画面にリダイレクトします。
イメージは以下のような感じです。
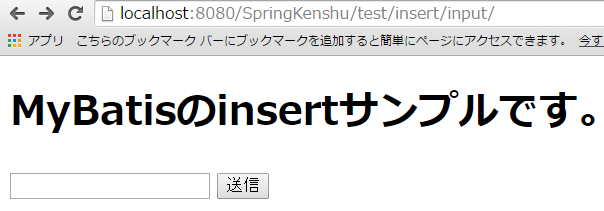
ここで入力した名前が送信されます。
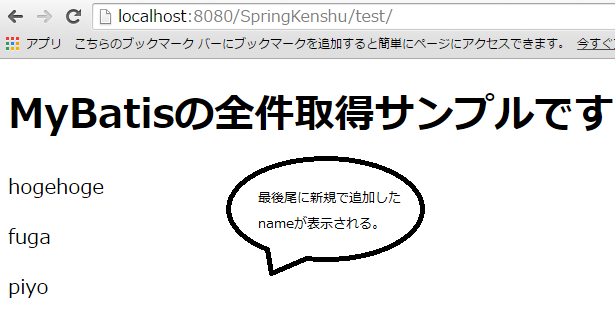
登録が完了すると全件取得の画面(/test/)にリダイレクトしてます。
さっそく作成してみましょう。
まずはControllerです。
TestControllerに以下を追加
@RequestMapping(value = "/test/insert/input/", method = RequestMethod.GET)
public String testInsert(Model model) {
	TestForm form = new TestForm();
	model.addAttribute("testForm", form);
	model.addAttribute("message", "MyBatisのinsertサンプルです。");
	return "testInsert";
}

@RequestMapping(value = "/test/insert/input/", method = RequestMethod.POST)
public String testInsert(@ModelAttribute TestForm form, Model model) {
	int count = testService.insertTest(form.getName());
	Logger.getLogger(TestController.class).log(Level.INFO, "挿入件数は" + count + "件です。");
	return "redirect:/test/";
}
GETが今回の入り口画面です。
JSPでmodelAttributeの設定がform:formにしてあるので、modelに渡す必要があります。
testInsert.jspにforwardしてます。
ではtestInsert.jspを作成してください。
<!DOCTYPE html>
<%@ page language="java" contentType="text/html; charset=UTF-8"
	pageEncoding="UTF-8"%>
<%@ taglib prefix="form" uri="http://www.springframework.org/tags/form"%>
<html>
<head>
<meta charset="utf-8">
<title>Welcome</title>
</head>
<body>
	<h1>${message}</h1>
	<form:form modelAttribute="testForm">
		<form:input path="name" />
		<input type="submit">
	</form:form>
</body>
</html>
testFormがform発行時に渡されます。テキストボックスの値は「id」という名前でTestForm.javaにバインドされます。
Formのアクション先が省略してあるので、今表示されてるURLに対してリクエストされます。
なので、/test/insert/input/に対して、今回はPOSTが発行されます。
TestControllerのPOSTを見てみましょう。
@RequestMapping(value = "/test/insert/input/", method = RequestMethod.POST)
public String testInsert(@ModelAttribute TestForm form, Model model) {
	int count = testService.insertTest(form.getName());
	Logger.getLogger(TestController.class).log(Level.INFO, "挿入件数は" + count + "件です。");
	return "redirect:/test/";
}
Serviceを呼んで、insert成功した件数をlogに吐き出してるだけですね。
ただ、最後に
return "redirect:/test/";
としてます。
SpringMVCでredirectする場合は、「redirect:」と書いて、その後に遷移先を書くだけです。
今回は「/test/」としているので、@RequestMappingのvalueに「/test/」と記述されてるControllerメソッドが呼ばれるわけです。
続いてServiceです。
TestService.javaに以下を追記してください。
public int insertTest(String name) {
	int count = testMapper.insertTest(name);
	return count;
}
MapperのinsertTestメソッドにnameを渡し、戻り値をそのままreturnしてるだけですね。
ではTestMapper.javaに以下を追加してください。
int insertTest(String name);
追加したらTestMapper.xmlに以下を追加
<insert id="insertTest" parameterType="String">
	insert into test(name) values (#{name})
</insert>
非常に単純です。parameterTypeにStringを指定し、受け取ったパラメータを#{name}で参照しているだけです。
idはauto_incrementなので指定しなくても自動採番されます。
こう書くだけで挿入成功件数が取得できます。
ではアクセスしてみましょう。
http://localhost:8080/SpringKenshu/test/insert/input/
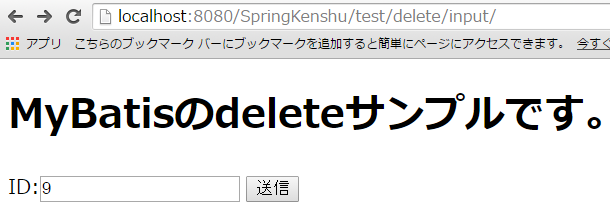
4. deleteのサンプル
次はdeleteです。さくさく行きましょう。
deketeは「insert」の文字列がdeleteになっただけです。
ただし、input画面で入力するのはIDです。
あと、全件取得画面でIDも表示させておくと削除の動作確認がしやすかったので、
testAll.jspを以下に修正しました。
<c:forEach items="${tests}" var="test">
    <p><c:out value="${test.id}"></c:out> : <c:out value="${test.name}"></c:out></p>
</c:forEach>
deleteの入り口画面としては、こんな感じ
submitすると…
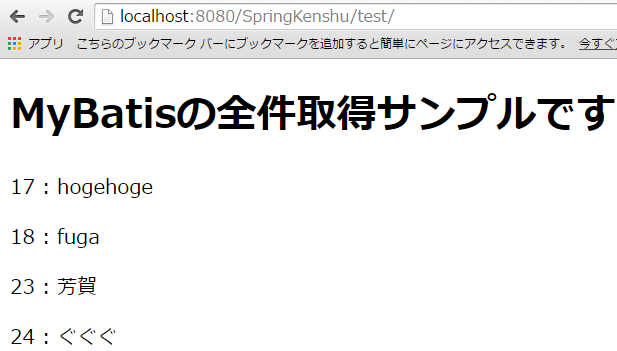
※IDも表示されてますね。
さっそく作っていきましょう。
まずはJSPです。testDelete.jspを作成
<!DOCTYPE html>
<%@ page language="java" contentType="text/html; charset=UTF-8"
	pageEncoding="UTF-8"%>
<%@ taglib prefix="form" uri="http://www.springframework.org/tags/form"%>
<html>
<head>
<meta charset="utf-8">
<title>Welcome</title>
</head>
<body>
	<h1>${message}</h1>
	<form:form modelAttribute="testForm">
		ID:<form:input path="id" />
		<input type="submit">
	</form:form>
</body>
</html>
次にControllerです。TestController.javaに以下を追加
@RequestMapping(value = "/test/delete/input/", method = RequestMethod.GET)
public String testDelete(Model model) {
	TestForm form = new TestForm();
	model.addAttribute("testForm", form);
	model.addAttribute("message", "MyBatisのdeleteサンプルです。");
	return "testDelete";
}

@RequestMapping(value = "/test/delete/input/", method = RequestMethod.POST)
public String testDelete(@ModelAttribute TestForm form, Model model) {
	int count = testService.deleteTest(form.getId());
	Logger.getLogger(TestController.class).log(Level.INFO, "削除件数は" + count + "件です。");
	return "redirect:/test/";
}
今回は「/test/delete/input/」でアクセス出来ますね。
INSERTとほとんど変わりません。
Serviceに行きます。
TestService.javaに以下を追記
public int deleteTest(int id) {
	int count = testMapper.deleteTest(id);
	return count;
}
idを引数に受取、testMapperのdeleteTestをコールしてます。
ではMapperにいきましょう。
TestMapper.javaに以下を追加
int deleteTest(int id);
そしたらTestMapper.xmlに以下を追加しましょう。
<delete id="deleteTest" parameterType="int">
	delete from test where id = #{id}
</delete>
これで準備完了です。
http://localhost:8080/SpringKenshu/test/delete/input/にアクセスしてみよう。
5. updateのサンプル
最後はupdateのサンプルです。
更新の処理を追加するために、まずtestAll.jspにリンクを追加しました。
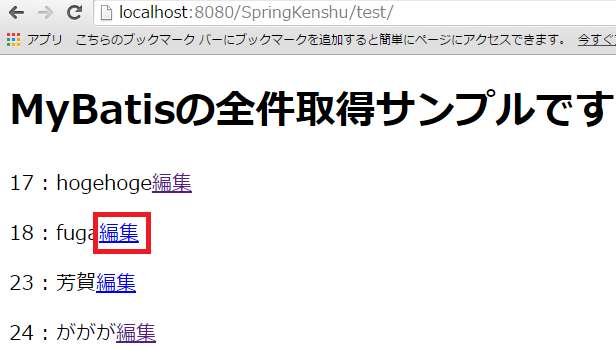
「編集」リンクです。
これを押すと、
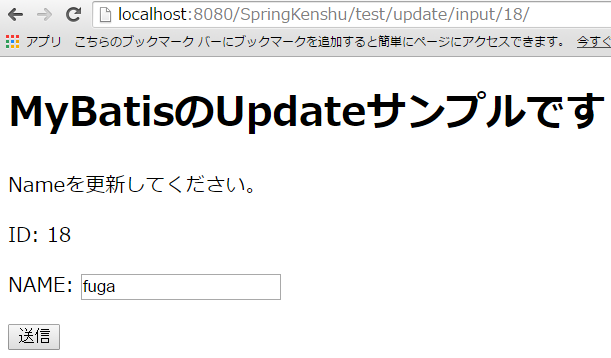
こんな感じで編集したいtestの画面に遷移します。
nameだけが更新可能なので、名前をテキストボックスにしました。
今回はこのfugaさんをhogehogehogeさんに変えてみます。IDは18ですよ。
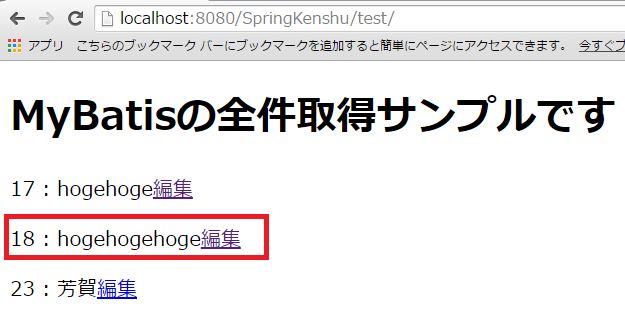
変わりましたね!!
※今回も更新が完了したらtestAllにリダイレクトしてます。
では作っていきましょう。
まずはtestAll.jspの改良です。
<c:forEach items="${tests}" var="test">
    <p><c:out value="${test.id}"></c:out> : <c:out value="${test.name}"></c:out><ahref="${pageContext.request.contextPath}/test/update/input/${test.id}/">編集</a></p>
</c:forEach>
aタグを追加しただけです。
<ahref="${pageContext.request.contextPath}/test/update/input/${test.id}/">編集</a>
更新したいtestのidをURLベースのクエリパラメータとして渡してます。
次にtestUpdate.jspを作成します。
<!DOCTYPE html>
<%@ page language="java" contentType="text/html; charset=UTF-8"
	pageEncoding="UTF-8"%>
<%@ taglib prefix="form" uri="http://www.springframework.org/tags/form"%>
<html>
<head>
<meta charset="utf-8">
<title>Welcome</title>
</head>
<body>
	<h1>${message}</h1>
	Nameを更新してください。
	<form:form modelAttribute="testForm">
	    <p>ID: ${test.id}</p>
		<p>NAME: <form:input path="name"/></p>
		<input type="submit">
	</form:form>
</body>
</html>
all画面で選択したIDをもとに、Controllerで対象testの一件分データをDBから取得してます。
取得した情報をmodelAttributeしてます。
そして、formをsubmitすると、「/test/update/input/{id}/」のPOSTメソッドに処理が移ります。
ではTestControllerに以下を追記しましょう。
@RequestMapping(value = "/test/update/input/{id}/", method = RequestMethod.GET)
public String testUpdate(Model model, @PathVariable int id) {
	TestDto test = testService.getTest(id);
	model.addAttribute("message", "MyBatisのUpdateサンプルです");
	model.addAttribute("test", test);
	TestForm form = new TestForm();
	form.setId(test.getId());
	form.setName(test.getName());
	model.addAttribute("testForm", form);
	return "testUpdate";
}

@RequestMapping(value = "/test/update/input/{id}/", method = RequestMethod.POST)
public String testUpdate(Model model, @ModelAttribute TestForm form) {
	TestDto dto = new TestDto();
	BeanUtils.copyProperties(form, dto);
	int count = testService.updateTest(dto);
	Logger.getLogger(TestController.class).log(Level.INFO, "更新件数は" + count + "件です。");
	return "redirect:/test/";
}
Formから受けとった情報をDtoにコピーし、TestServiceのupdateTestメソッドに渡してます。
処理が完了したらtestAllにリダイレクトです。
TestServiceに以下を追記しましょう。
public int updateTest(TestDto dto) {
	int count = testMapper.updateTest(dto);
	return count;
}
更新件数をreturnしてますね。
TestMapper.javaに以下を追記しましょう。
int updateTest(TestDto dto);
追記したら、例によってTestMapper.xmlに以下を追記してください。
<update id="updateTest">
    update test set name = #{name} where id = #{id}
</update>
Updateも非常に簡単です。基本的にはinsert、deleteと構文は変わりません。
TestMapper.javaで定義されている、TestDtoに応じて、#{}が展開されるイメージです。
以上でお仕舞いです。
今後は何かトピックがあったら追加していきます。
Rooとか。Transactionとか、色々考えてます。
備忘
載せたかったけど、書くのが億劫だったので、とりあえず簡単に載せたい事項
LIKE検索
<!-- String文字をそのまま渡す場合、${value}と書く。これはStringクラスのvalue(プロパティ)を渡すって解釈になるらしい -->
<!-- #は展開された文字列が「''」で括られる。$は文字列をそのまま渡す -->
<select id="getTestLike" resultMap="TestResult">
	select id, name from test
	where name like '%${value}%'
</select>
CDATA
!-- Dtoから検索するときは、そのままプロパティ名を渡せる -->
<!-- CDATAはマークアップではなく、「純粋な文字列」として扱わせるときに使います。「>」はタグ文字なので。 -->
<select id="getTestLikeDto" resultMap="TestResult">
<![CDATA[
	select id, name from test
	where name like '%${name}%'
	and id > 17
]]>
ちょっとLIKE検索の話も混じってるけど、
Stringを渡す時と違って、
'%${name}%'
nameを渡してる。オブジェトがパラメータだとプロパティをそのまま渡せる
<![CDATA[
]]>
これは、XMLの機構。XML中に「>」や「<」などのXMLに普段使うような文字列は「純粋に文字列」として記述しないとXMLの構文扱いされる。
なので、文字列扱いするためにこれを指定する。
Mapper.xmlの「parameterType」の省略
ハンズオンの例ではtestMapper.xmlに「parameterType」を指定している記述もあるが、これは書かなくても動作します。
公式ドキュメントによると、parameterTypeはMapper.javaの方で指定した引数の型を参照するため、自動で導出するみたいです。
なのであってもなくても良いらしい。
https://mybatis.github.io/mybatis-3/ja/sqlmap-xml.html
Mapper.xmlの配置について
今回のサンプルではMapperのjavaファイルとxmlファイルを同じ階層に配置してます。
しかし、javaファイルとリソースであるxmlを同じ階層に置くのは好ましくありません。
では、どうするか、今回、「mvc-config.xml」には以下のような記述がされています。
<!-- どこのパッケージをmapperとして認識するかの設定 -->
<bean class="org.mybatis.spring.mapper.MapperScannerConfigurer">
	<property name="basePackage" value="jp.co.kenshu.mapper" />
</bean>
これはsrcフォルダに限った話ではないので、resourceに同じ階層を掘ればxmlだけresource↓の「jp.co.kenshu.mapper」に配置することもできます。
これでjavaとxmlを混在させないで実現できます。