StripeでSolutions Architectをしてる北爪です。
今日12/2に4歳の息子が、チョコが出てくるアドベントカレンダー二日目を開けていたので、JP_Stripes Advent Calendar 2023二日目を開けたいと思います。
ノーコードで決済を可能にするStripeのPaymentlink、ローコードのStripe Checkout, アプリに組み込めるStripe Web Elementsにて配送先住所に加えて、配送先電話番号を収集し、出力する方法を解説します。
特に、クロネコヤマトB2クラウドのフォーマット配送先の電話番号が必須項目です。
Payment Linkにて収集する
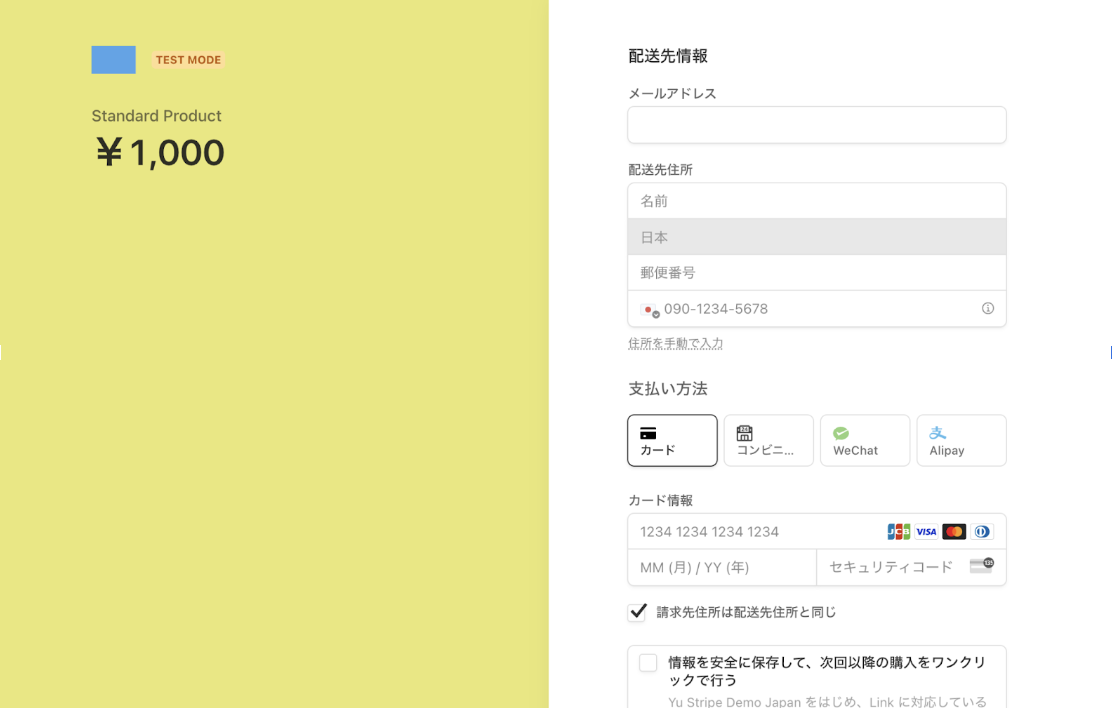
作成したPaymentLinkは以下のようになり、住所と電話番号のフォームが追加されます。
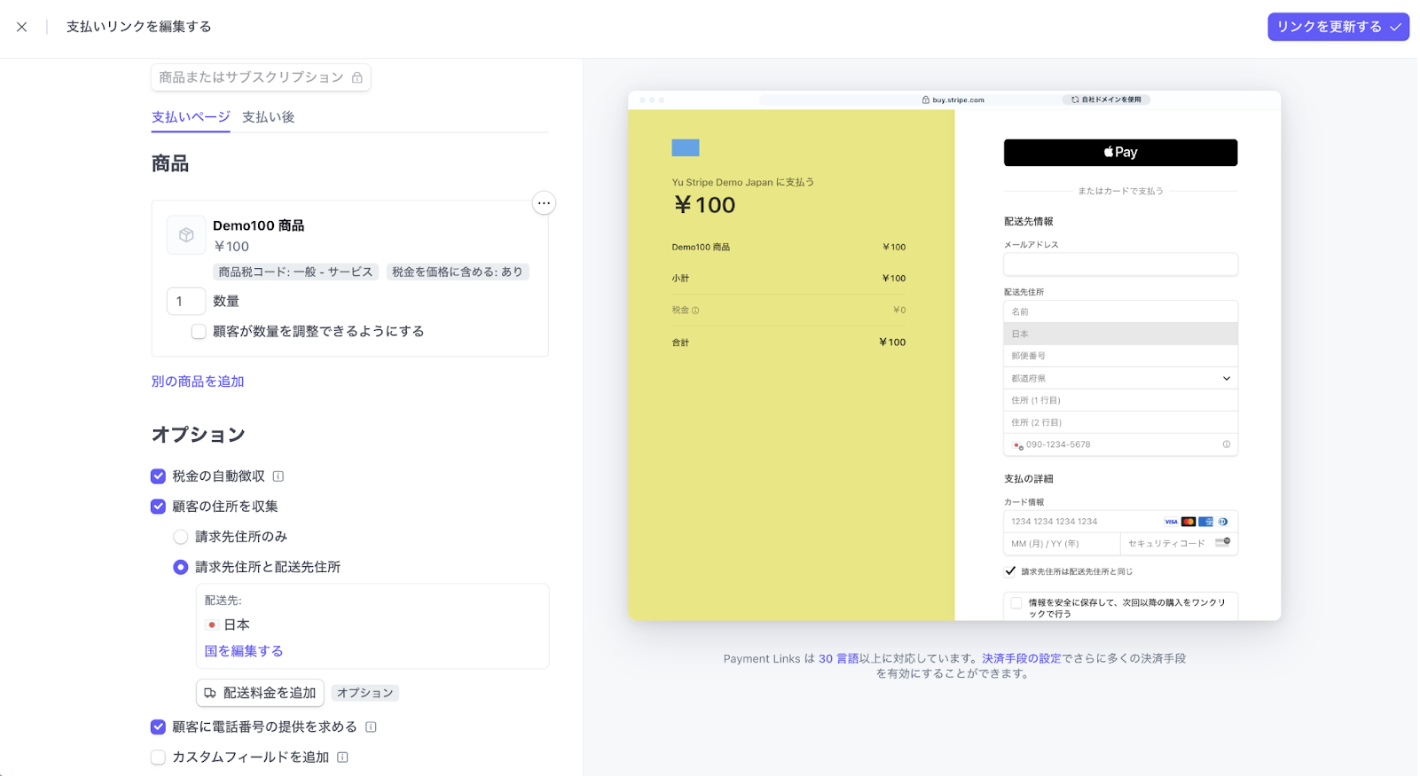
Dashboardでの設定
配送用の住所と電話番号の提供を求めるにチェックをいれます。これだけです。
Stripe Payment Link - APIからの制御
配送先と電話番号の提供を求めるために、
shipping_address_collection[allowed_countries][0]"="JP" に加えて、
phone_number_collect.enabled: true を設定します。
curl -X POST "https://api.stripe.com/v1/payment_links" \
  -u 'REPLACE_WITH_YOUR_SECRET_KEY':  \
  -d "line_items[0][price]"="price_1NivuuEzgtKktpOy1RpsT0US" \
  -d "line_items[0][quantity]"=1 \
  -d "shipping_address_collection[allowed_countries][0]"="JP" \
  -d "phone_number_collection[enabled]"="true"
Stripe Checkoutにて収集する
APIにて、配送先と電話番号の提供を求めるために、
shipping_address_collection[allowed_countries][0]"="JP" に加えて、phone_number_collect.enabled: true を設定します。
curl -X POST "https://api.stripe.com/v1/checkout/sessions" \
  -u 'REPLACE_WITH_YOUR_SECRET_KEY':  \
  -d "success_url"="https://example.com/back" \
  -d "line_items[0][price_data][unit_amount]"=1099 \
  -d "line_items[0][price_data][currency]"="eur" \
  -d "line_items[0][price_data][product_data][name]"="test product" \
  -d "line_items[0][quantity]"=1 \
  -d "mode"="payment" \
  -d "shipping_address_collection[allowed_countries][0]"="JP" \
  -d "phone_number_collection[enabled]"="true"
Stripe Elementで収集する
Address Elementを使って収集します。以下にReactのサンプルコードを示します。
 <AddressElement options={{mode: 'shipping', allowedCountries: ['JP'], fields: { phone: 'always'}}} />
 <PaymentElement options={paymentElementOptions}/>
決済データを出力する
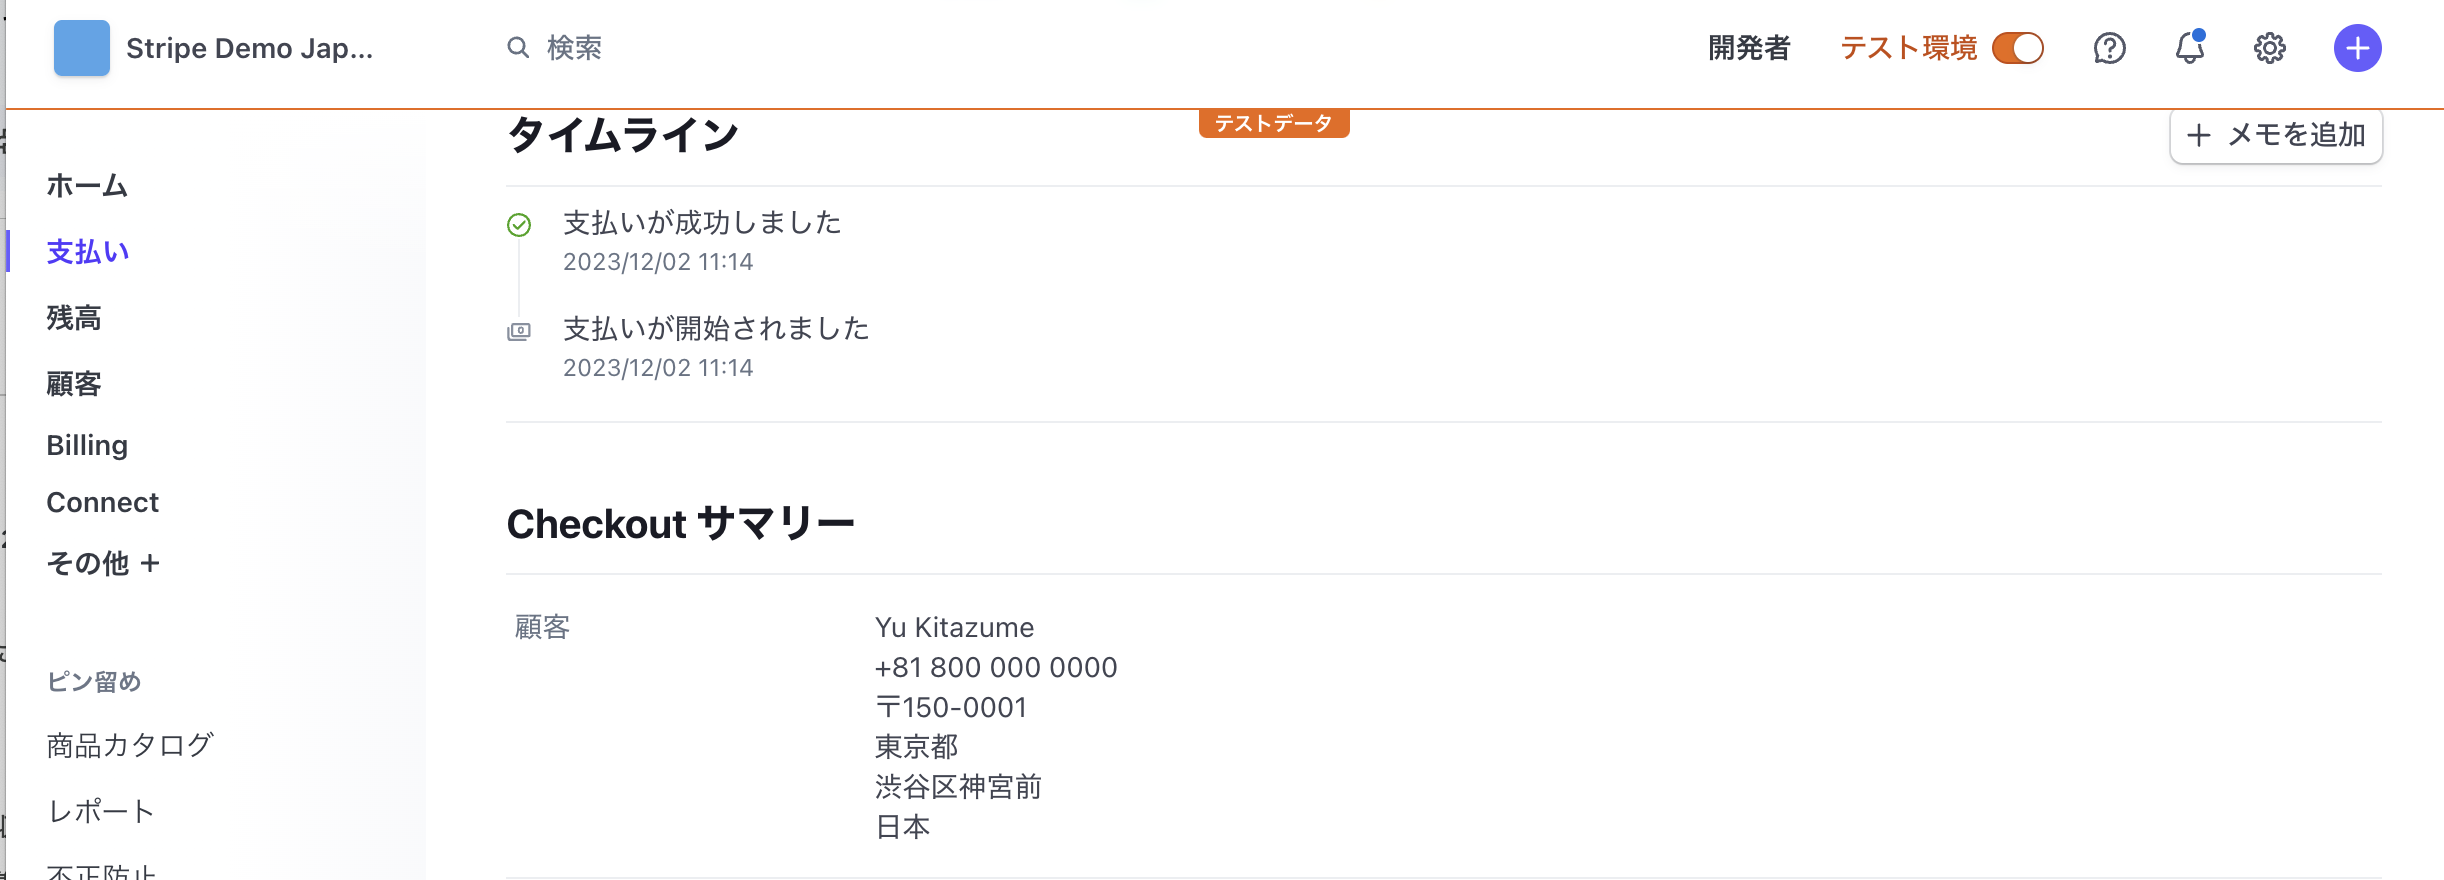
dashboardでの表示
クロネコヤマトB2クラウドの出力フォーマットは以下になります。
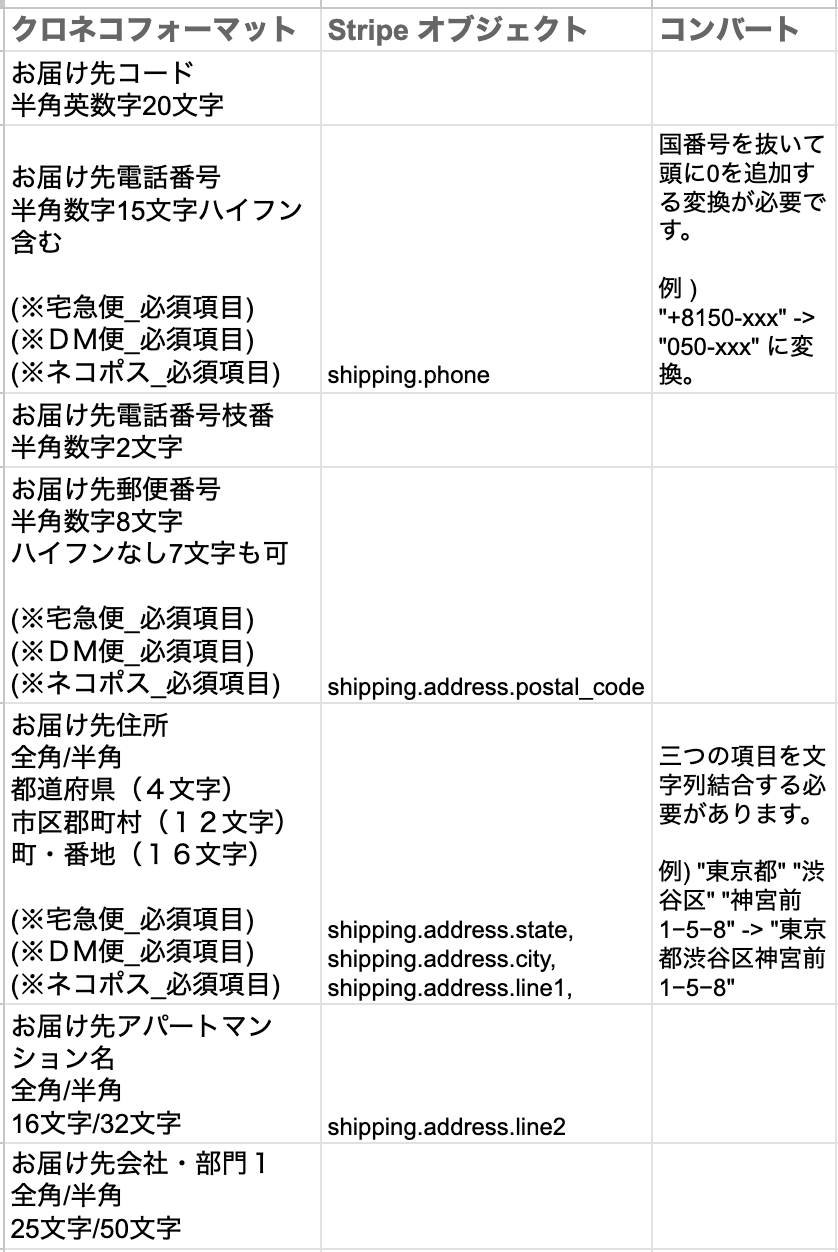
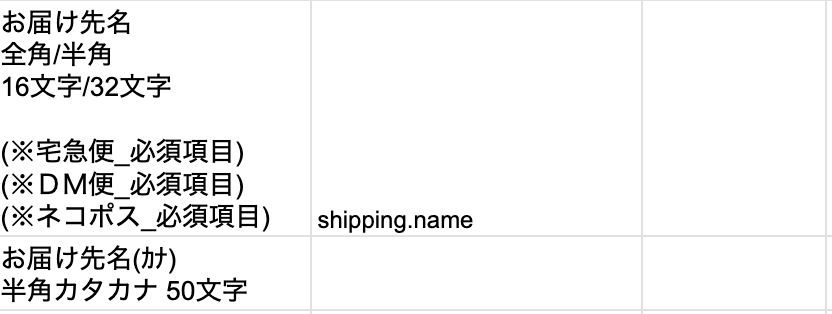
購入者が登録した住所は PaymentIntent ObjectをWebhookもしくは APIから取得することで得られます。
Webhookの場合は payment_intent.succeeded のeventを、APIでは GET /payment_intents or GET /payment_intents/${payment_intent_id} で取得します。
 "object": {
    "id": "pi_3NmriAEzgtKktpOy0EVRGpI3",
    "object": "payment_intent",
    ....(超略)
    "shipping": {
      "address": {
        "city": "渋谷区",
        "country": "JP",
        "line1": "神宮前1−5−8",
        "line2": "神宮前タワービルディング22F",
        "postal_code": "150-0001",
        "state": "東京都"
      },
      "carrier": null,
      "name": "Stripe Japan",
      "phone": "+815017439855",
      "tracking_number": null
    },
 }
あとはCSVなどに変換して、連携します。
Stripe Sigmaを使ってCSVで落とす
shipping_phone はcustomer tableにありますので、Stripe Sigmaを使えば、CSVで手に入ります。
select
  *
from
  charges
  join customers on customers.id = charges.customer_id
where
  charges.created > date('2023-12-02')
order by
  charges.created desc
