はじめに
今回React.jsを使用してUnityのシーンの中にあるカメラを動かしていこうと思います。

環境
Unity 2019 4.29 LTS (私がただ好きなバージョンです。)
React 18.2.0
node 16.17.1
Unity側
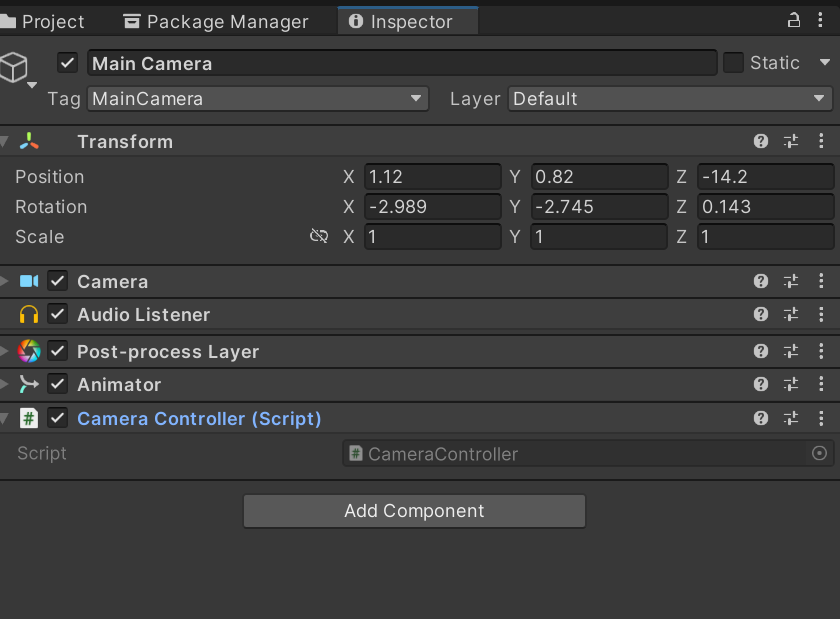
まず、Assetから新規でC#スクリプトファイルを作成します。

スクリプトを以下のような感じで書きます。
using System.Collections;
using System.Collections.Generic;
using UnityEngine;

public class CameraController : MonoBehaviour
{
    void Update()
    {
        if (Input.GetKey(KeyCode.RightArrow))
        {
            MoveRight(1);
        }
        else if (Input.GetKey(KeyCode.LeftArrow))
        {
            MoveLeft(1);
        }
        else if (Input.GetKey(KeyCode.UpArrow))
        {
            MoveUp(1);
        }
        else if (Input.GetKey(KeyCode.DownArrow))
        {
            MoveDown(1);
        }
    }
    public void MoveRight(int position)
    {
        this.gameObject.transform.position += new Vector3(position, 0, 0);
    }
    public void MoveLeft(int position)
    {
        this.gameObject.transform.position -= new Vector3(position, 0, 0);
    }
    public void MoveUp(int position)
    {
        this.gameObject.transform.position += new Vector3(0, position, 0);
    }
    public void MoveDown(int position)
    {
        this.gameObject.transform.position -= new Vector3(0, position, 0);
    }
    public void SetPosition(int x, int y, int z)
    {
        this.gameObject.transform.position = new Vector3(x, y, z);
    }
}
何をしているのか
このコードはUnity内でのシーンでMain Cameraを動かすためのコードです。
ざっくりいうと、Main Cameraを動かしています。
ここでは、キーボードの矢印を使用して移動できるように書いています。
また、Web上にReactで上下左右のボタンを出し、押した時に移動するようにもなります。
WebGLでビルドする
Add Open Sceneでビルドしたいシーンを選択すしてBuildをクリックします。

React側
react appを作成
$ npx create-react-app unity-to-web
$ npm run build
$ npm start
スクリプトを以下のような感じで書きます。
import React, { useEffect, useState } from "react";

function UnityComponent() {
  const [position] = useState(1);

  useEffect(() => {
    const script = document.createElement("script");

    script.src = "/Build/UnityLoader.js";
    script.onload = () => {
      if (typeof window.UnityLoader !== "undefined") {
        window.UnityInstance = window.UnityLoader.instantiate(
          "unityContainer",
          "/Build/Downloads.json",
          {
            onProgress: (progress) => {
              console.log(`Loading progress: ${progress}`);
            },
            Module: {
              onRuntimeInitialized: () => {
                console.log("Unity runtime initialized.");
              },
            },
          }
        );
      } else {
        console.error("UnityLoader is not defined");
      }
    };

    document.body.appendChild(script);
  }, []);

  const moveCamera = (direction) => {
    if (typeof window.UnityInstance !== "undefined") {
      window.UnityInstance.SendMessage(
        "Main Camera",
        `Move${direction.charAt(0).toUpperCase() + direction.slice(1)}`,
        position
      );
    } else {
      console.error("UnityInstance is not defined");
    }
  };

  return (
    <div>
      <h1>ReactでUnityのシーンの中のカメラを動かす</h1>
      <div id="unityContainer" style={{ width: "960px", height: "600px" }} />
      <div
        style={{
          display: "flex",
          flexDirection: "column",
          alignItems: "center",
        }}
      >
        <button onClick={() => moveCamera("up")}>Move Up</button>
        <div style={{ display: "flex", flexDirection: "row" }}>
          <button onClick={() => moveCamera("left")}>Move Left</button>
          <button onClick={() => moveCamera("right")}>Move Right</button>
        </div>
        <button onClick={() => moveCamera("down")}>Move Down</button>
      </div>
    </div>
  );
}

export default UnityComponent;
何をしているのか
ReactのuseStateフックを使用して新しいpositionという名前の状態変数を作成し、初期値を1にします。
positionの値が一度設定された後で変更されることがないため、配列の分割代入を使用し、positionのみを取得するようにします。
const [position] = useState(1);
script.src = "/Build/UnityLoader.js";で、作成したスクリプト要素のsrc属性にUnityのローダースクリプトのパスを設定します。
UnityLoader.jsは、JavaScriptからWebGLコンテンツと直接通信するためのAPIを提供します。これにより、JavaScriptからUnityのゲームオブジェクトや関数を操作することが可能になります。
script.onloadは、スクリプトが完全にロードされたときに実行されるイベントハンドラーです。
この中で、window.UnityLoader.instantiate関数を使用してUnityのゲームエンジンを初期化します。この関数は、UnityのゲームエンジンをWebページにロードし、指定したコンテナ(この場合は"unityContainer")に表示します。
window.UnityLoader.instantiate関数の第二引数には、ゲームのビルドデータのパス(この場合は"/Build/Downloads.json")を指定します。
* Unityのバージョンが2020年以降の場合、この辺りのやり方が異なるため、丁寧で神様のような公式ドキュメントを読んでみてください。
私は2019年バージョンと20年バージョンで、使用が変わっていたことに気が付かずにいました......
ずっとcreateUnityInstanceが未定義ですと怒られ続けました...
普通にUnityLoader.js内でgrepすれば良いだけの話だったんですけどね。
window.UnityLoader.instantiate関数の第三引数には、オプションを指定します。このオプションには、ゲームのロード進行状況を表示するonProgress関数と、ゲームエンジンが初期化されたときに実行されるonRuntimeInitialized関数が含まれています。
 useEffect(() => {
    const script = document.createElement("script");

    script.src = "/Build/UnityLoader.js";
    script.onload = () => {
      if (typeof window.UnityLoader !== "undefined") {
        window.UnityInstance = window.UnityLoader.instantiate(
          "unityContainer",
          "/Build/Downloads.json",
          {
            onProgress: (progress) => {
            },
            Module: {
              onRuntimeInitialized: () => {
              },
            },
          }
        );
      } else {
        console.error("UnityLoader is not defined");
      }
    };
2019.4バージョンのドキュメント
https://docs.unity3d.com/ja/2019.4/Manual/webgl-templates.html
ここからはUnityをReactで動かすためのコードになります。
 const moveCamera = (direction) => {
    if (typeof window.UnityInstance !== "undefined") {
      window.UnityInstance.SendMessage(
        "Main Camera",
        `Move${direction.charAt(0).toUpperCase() + direction.slice(1)}`,
        position
      );
    } else {
      console.error("UnityInstance is not defined");
    }
  };
moveCamera関数は、Unityのゲームエンジン内の特定のゲームオブジェクト(この場合は"Main Camera")にメッセージを送信して、その動作を制御します。
if (typeof window.UnityInstance !== "undefined")は、UnityInstanceが定義されているかどうかをチェックします。これは、Unityのゲームエンジンが正しくロードされ、初期化されていることを確認します。
window.UnityInstance.SendMessage関数は、Unityのゲームエンジン内の特定のゲームオブジェクトにメッセージを送信します。
第一引数は、メッセージを送信するゲームオブジェクトの名前("Main Camera")です。
第二引数は、ゲームオブジェクトに送信するメソッドの名前です。
第三引数は、メソッドに渡す値(position)です。
重いシーンでできない?
Main Cameraを移動するのにシーンが重くてできない?みたいなことが起き、成功できませんでした。
最後に
昨年のアドベントカレンダーでは、一回きりの切り札"ポエム"を発動してしまったので、今年は技術系の何かを書きました。
結論


